
You can now deploy YOLOv9 object detection models with Roboflow. You can upload and deploy your trained model weights to the cloud, where you will be able to access a scalable API on which you can depend for your projects.
You can also deploy your model to your edge device using Roboflow Inference, a high-performance computer vision inference server. Roboflow Inference runs on a variety of devices, from your own cloud servers to NVIDIA CUDA-enabled GPUs.
In this guide, we are going to walk through how to deploy YOLOv9 models with Roboflow. We will show how to deploy both on the cloud and on your edge device.
Without further ado, let’s get started!
Create, Upload, or Clone a Dataset
To get started, we need a dataset we can use to train a model to upload to Roboflow. For this guide, we will use a metal defect detection dataset available on Roboflow Universe. Roboflow Universe is a repository of over 250,000 publicly available computer vision datasets shared with the community for use in training vision models.
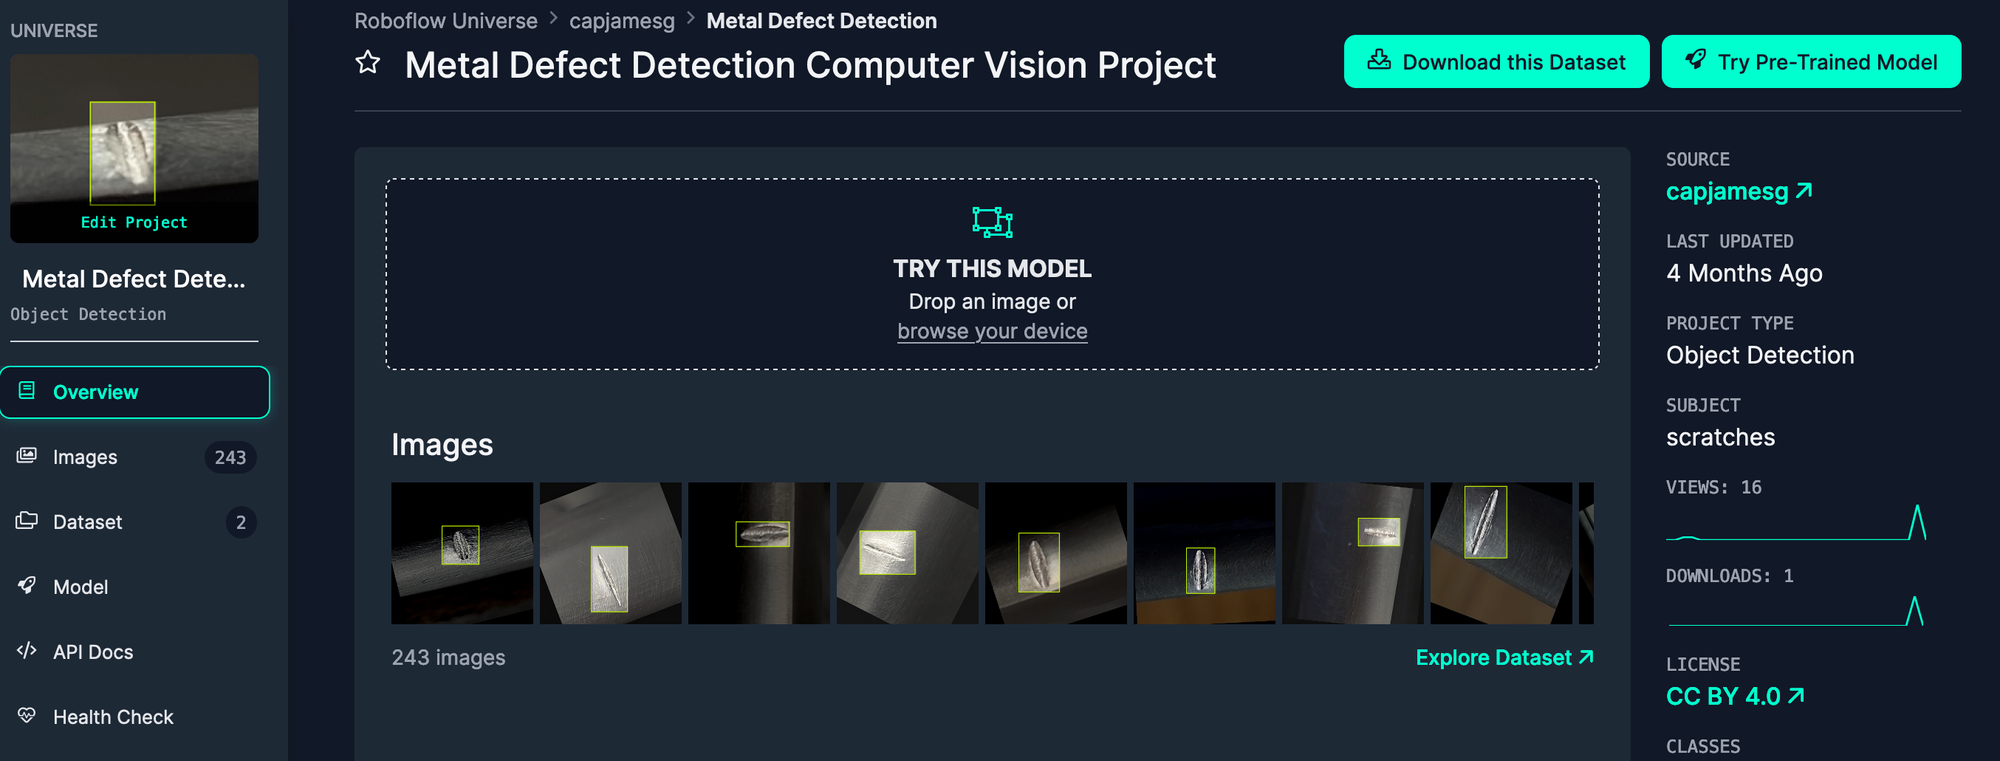
To use the dataset, open the metal defects dataset on Roboflow, then click “Download this Dataset”. A window will open that asks you to choose a format in which the dataset will be expected. For this guide, choose YOLOv8 PyTorch TXT. YOLOv9 uses the same dataset format as the YOLOv8 model.
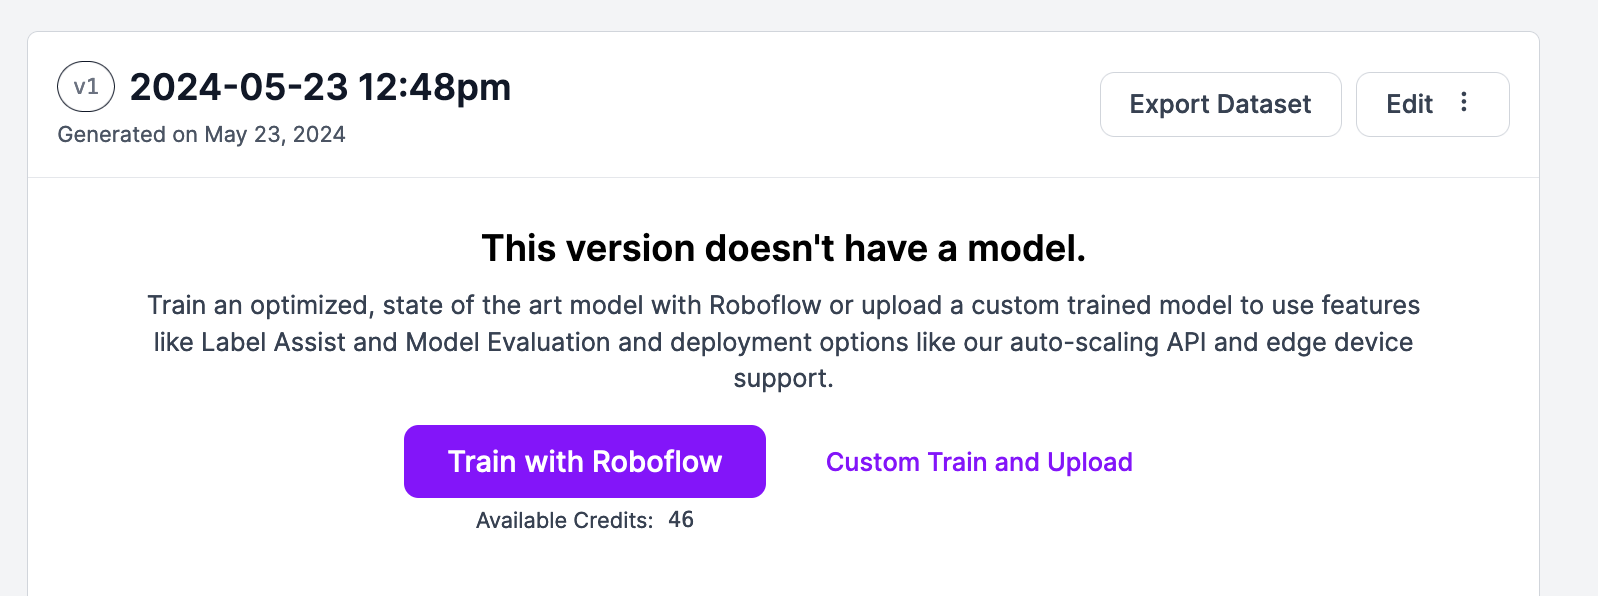
Next, open your Roboflow dashboard and click the "Create a Project" button to create a new Object Detection project.
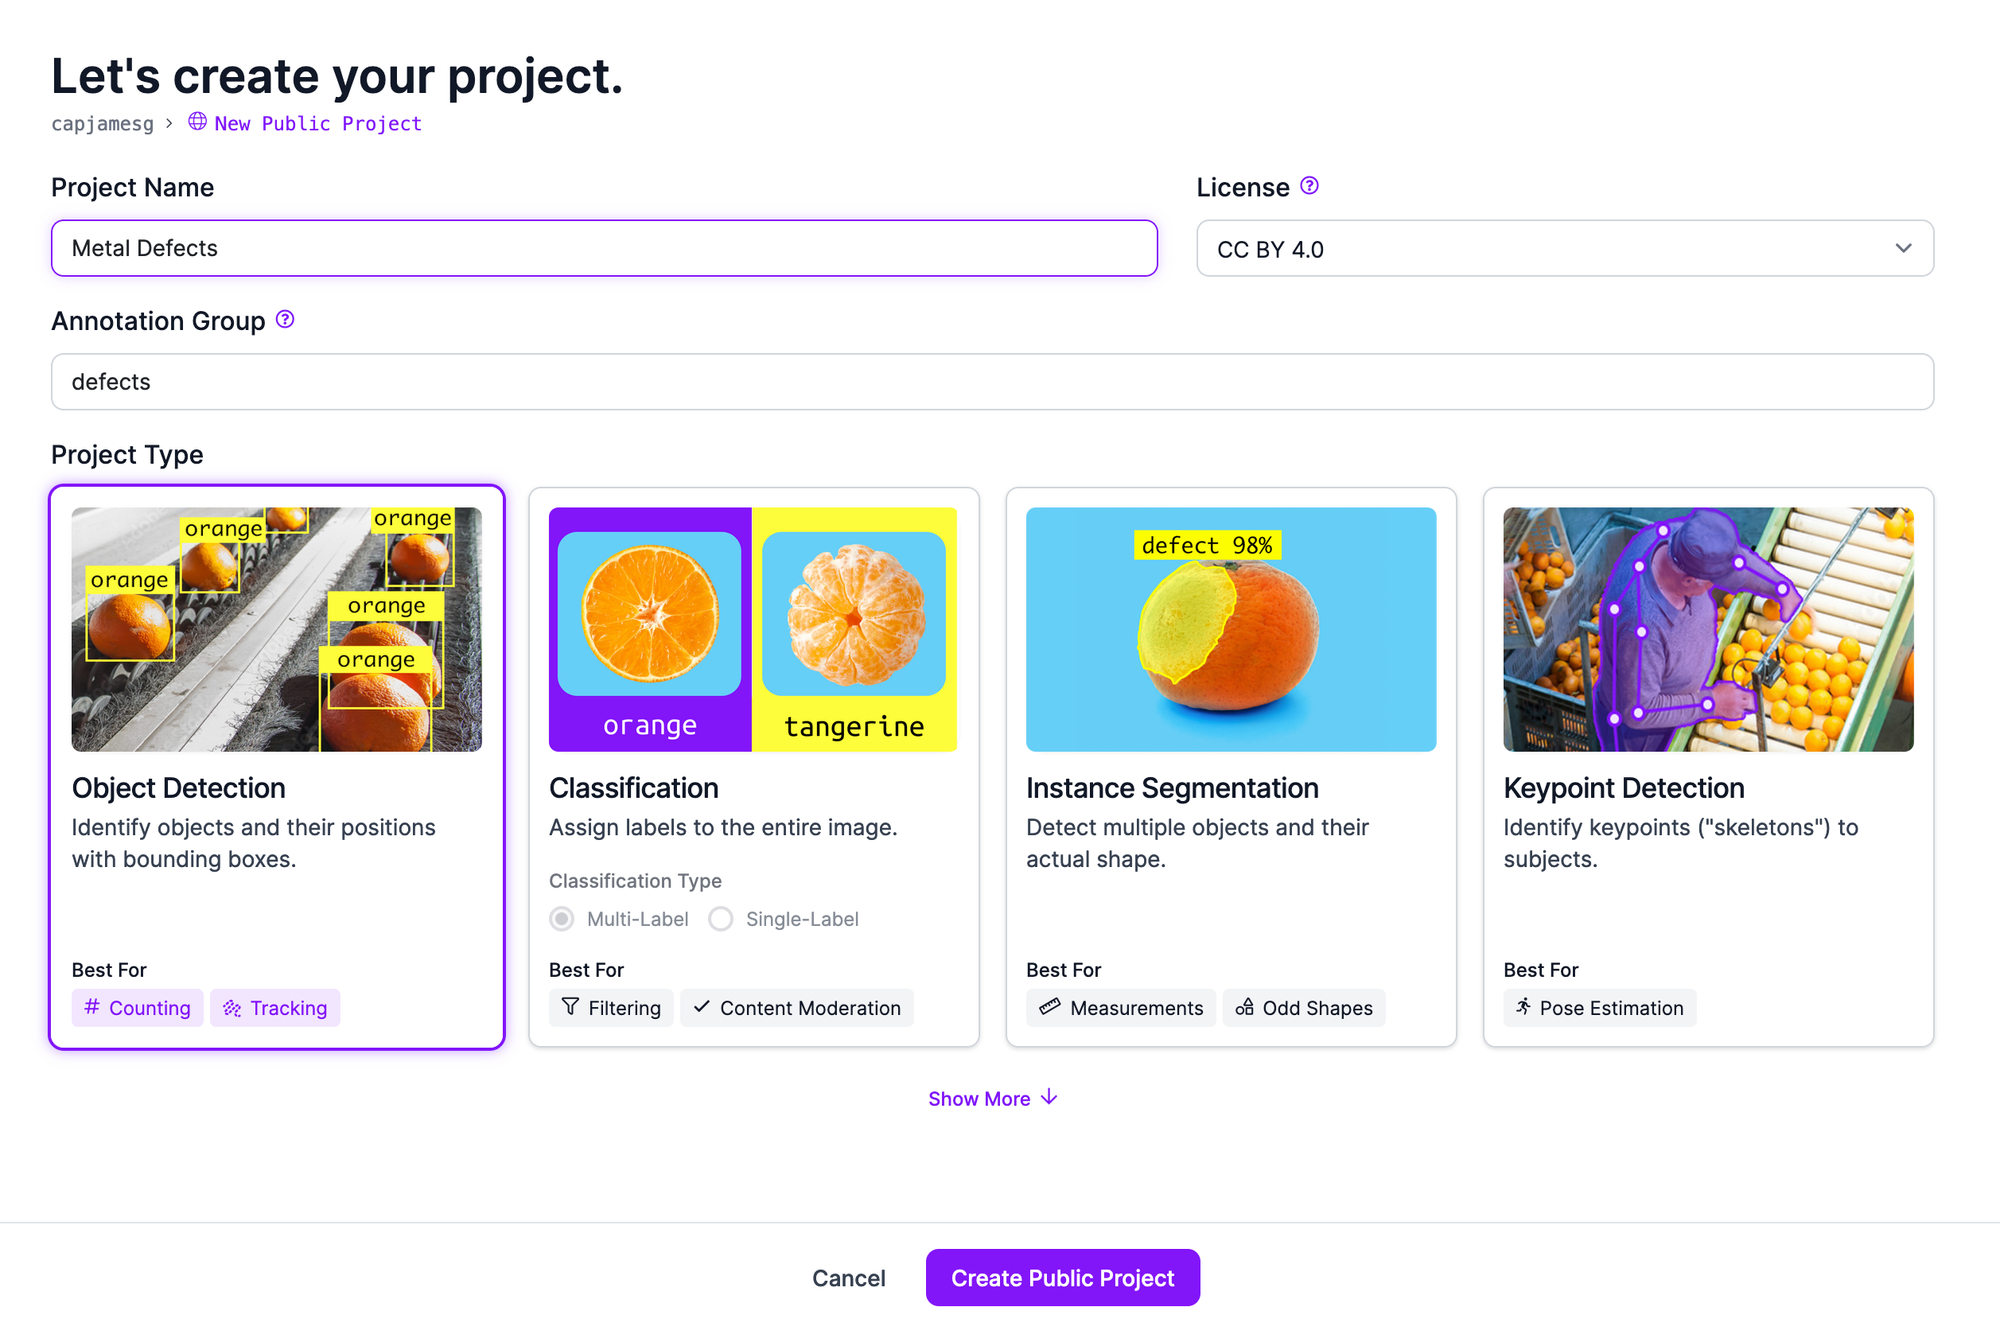
This is the project to which we will upload our model weights. If you already have a project with the dataset on which you want to train your model, you can skip this step.
With a project created, unzip your dataset and then drag it into the Roboflow dataset upload page:
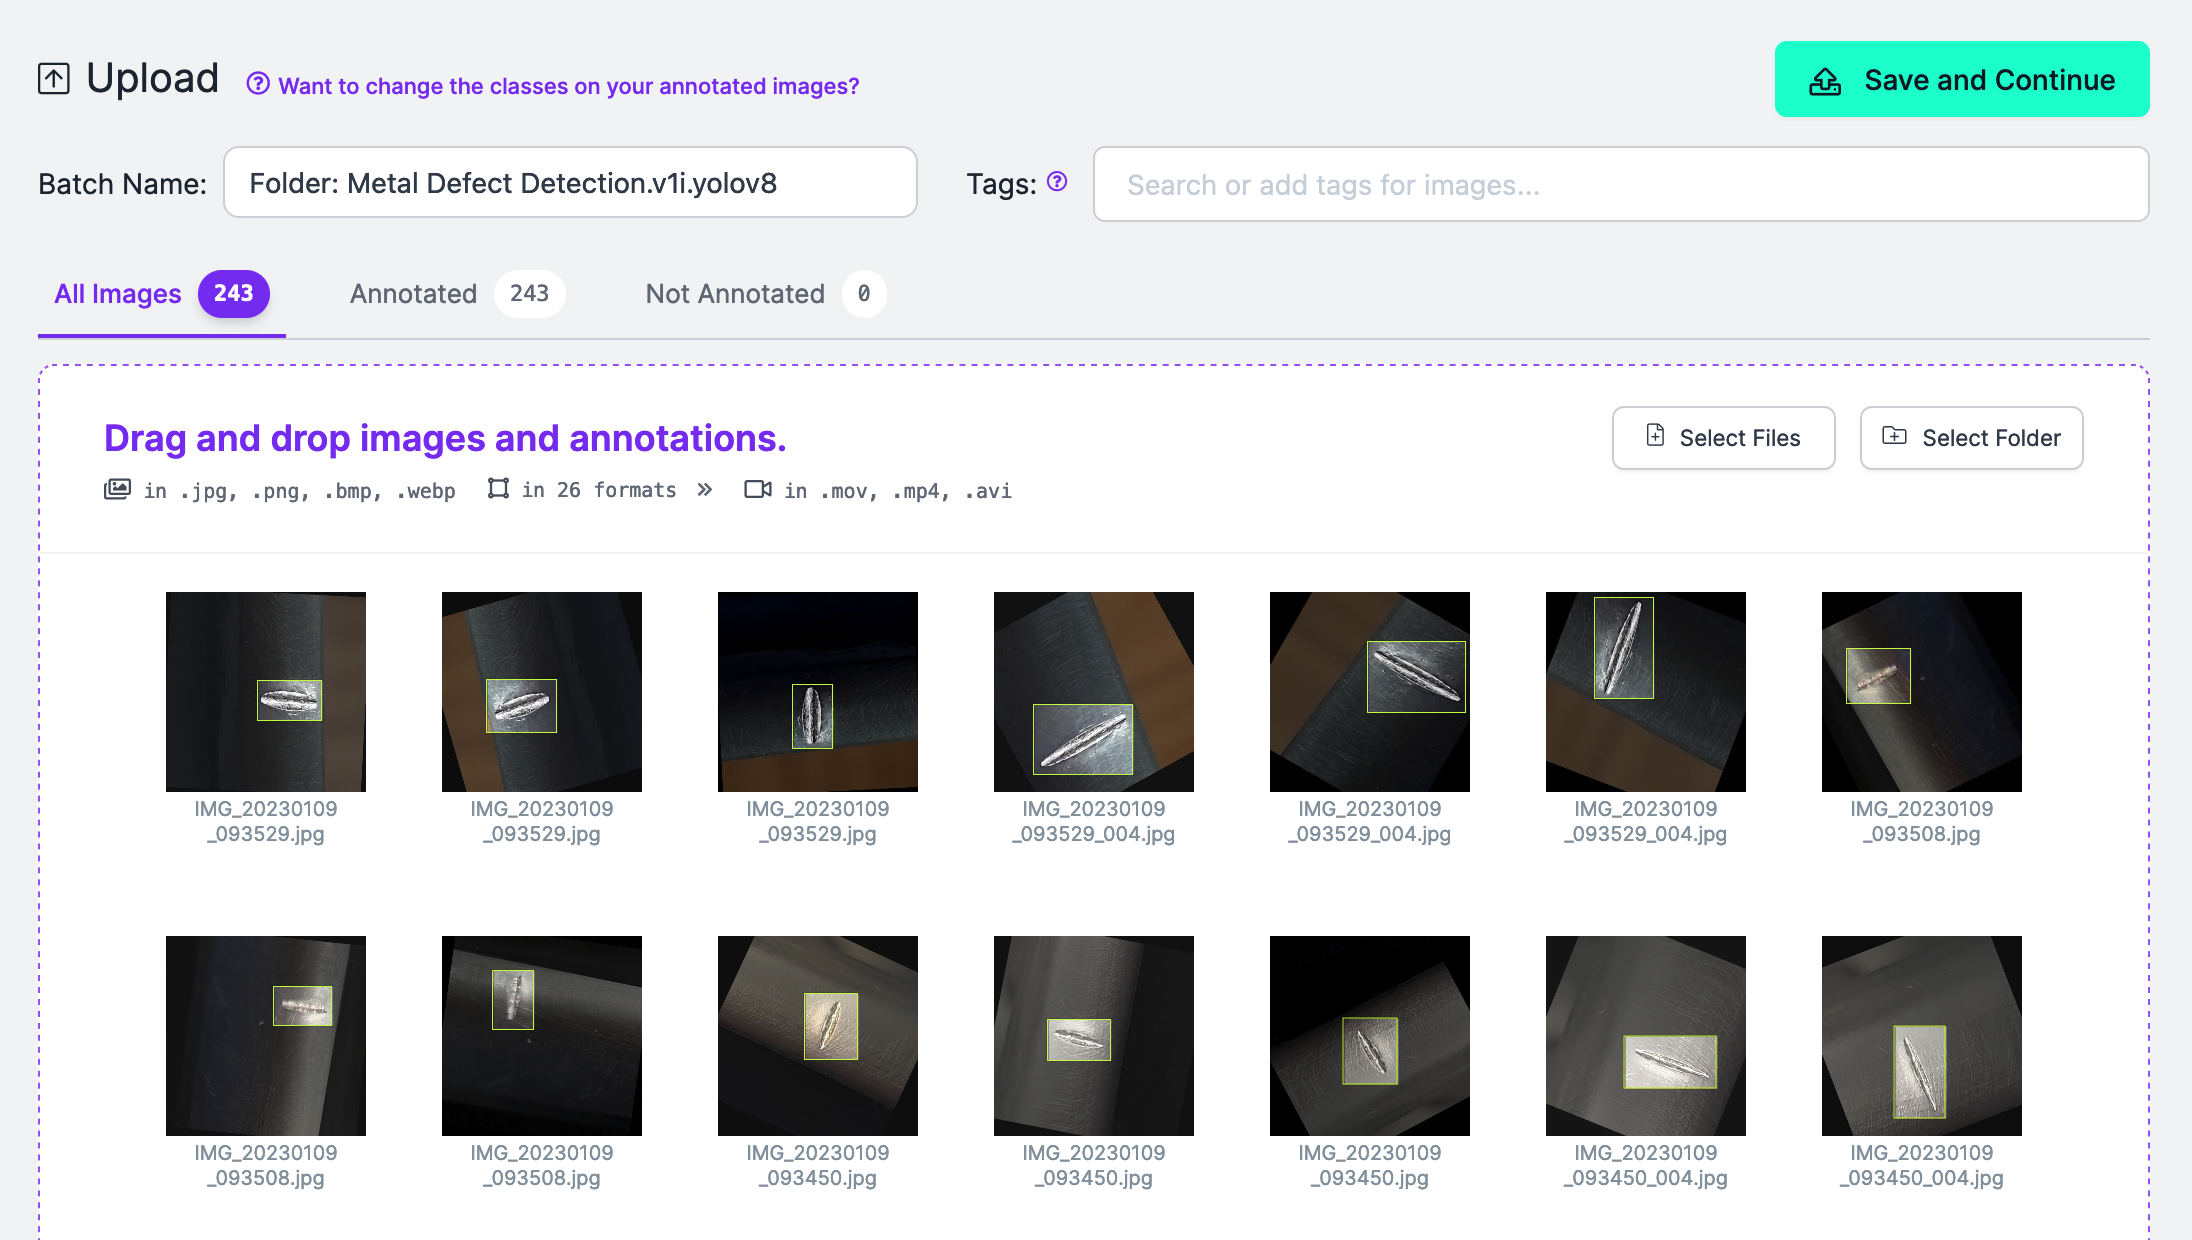
If your dataset is unlabelled, you can use Roboflow to annotate your dataset. The Roboflow annotation tool includes several utilities to help you label data quickly. For example, you can use our Segment Anything-powered label assist to click on an object of interest in an image and generate a polygon that will be converted to a bounding box for training.
Once you have labeled your dataset, click “Generate” in the left sidebar of your Roboflow dashboard. The Generate page allows you to create a dataset version. Versions are frozen in time, allowing you to keep track of changes to your dataset. You can train models using your dataset version.
On the dataset generation page, you can choose augmentations and preprocessing steps for your dataset. Read our guide on preprocessing and augmentation for more information on how to choose the right steps for your dataset.
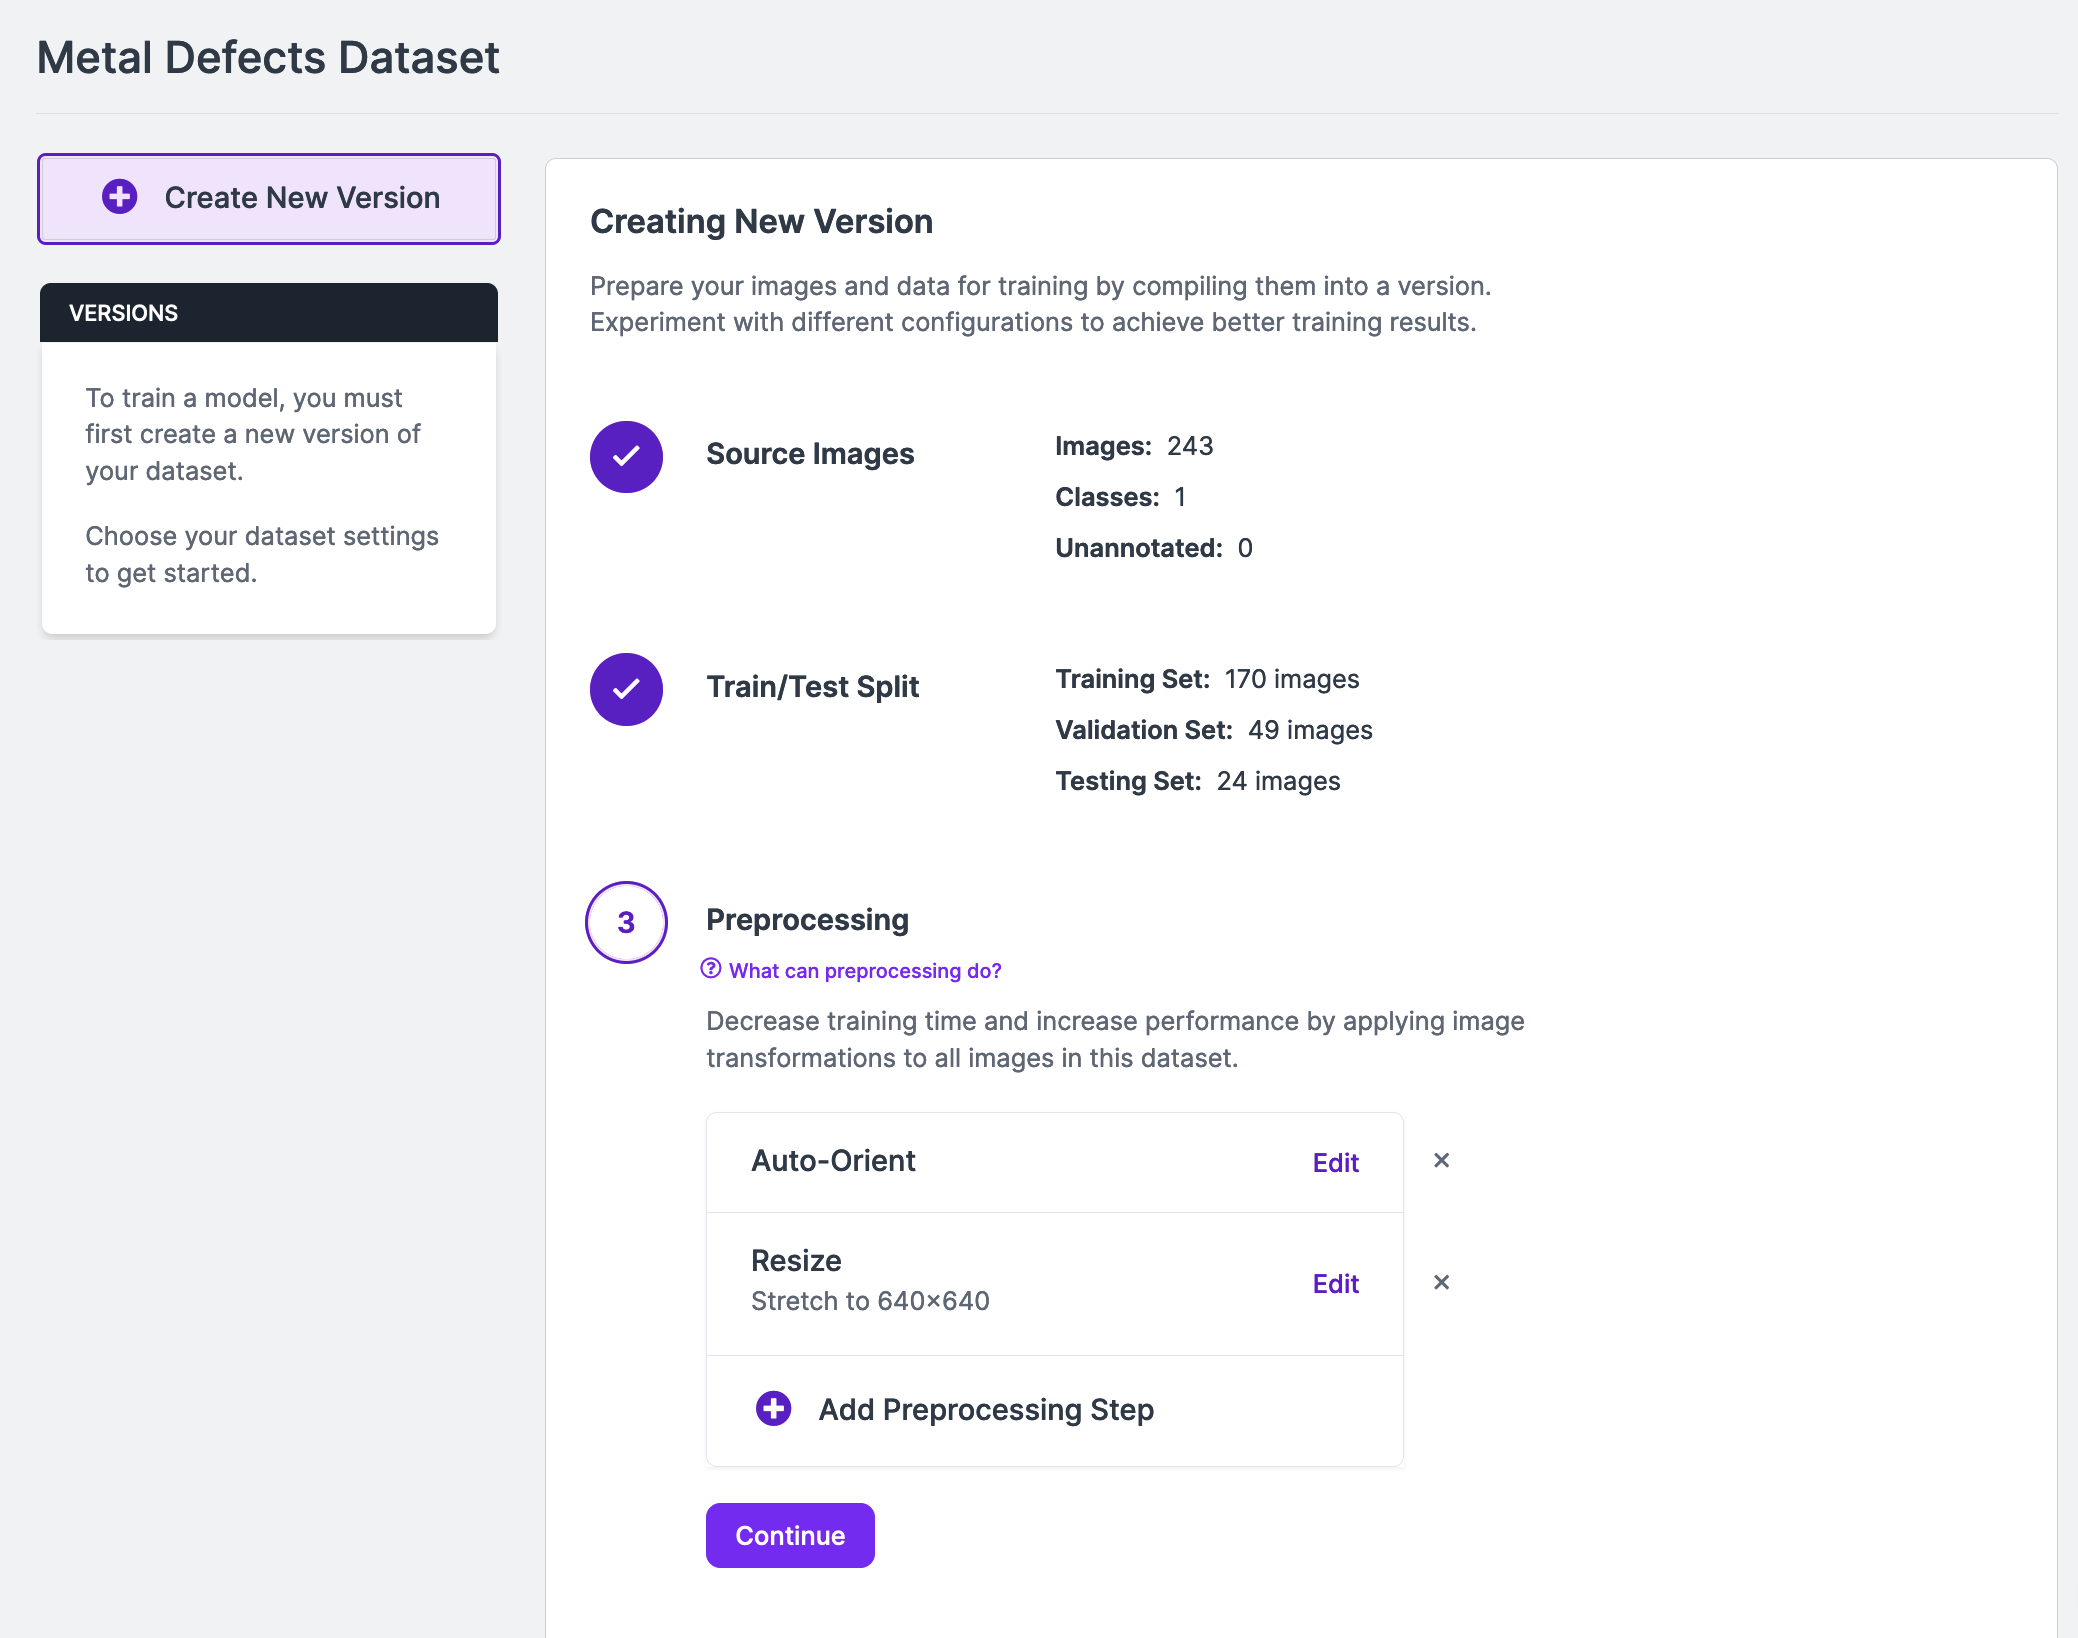
Click “Generate” at the bottom of the page once you have configured your version.
Once you have generated your dataset, you can start training your model.
Train a YOLOv9 Model
Using the Roboflow YOLOv9 training notebook, you can train your own YOLOv9 object detection model on your own hardware. You can then upload your model weights back to Roboflow for use in deploying in the cloud and on your devices with Roboflow Inference.
YOLOv9 training is not supported in Roboflow, so you will need to train your object detection model on your own hardware. We recommend using Google Colab, a free tool that provides capacity for training machine learning models in a notebook environment.
Open the Roboflow YOLOv9 training notebook. Then, go back to your Roboflow dataset and click “Get Snippet” in the “Custom Train & Deploy” section. This will give you a code snippet you can use to download your dataset for use in training.
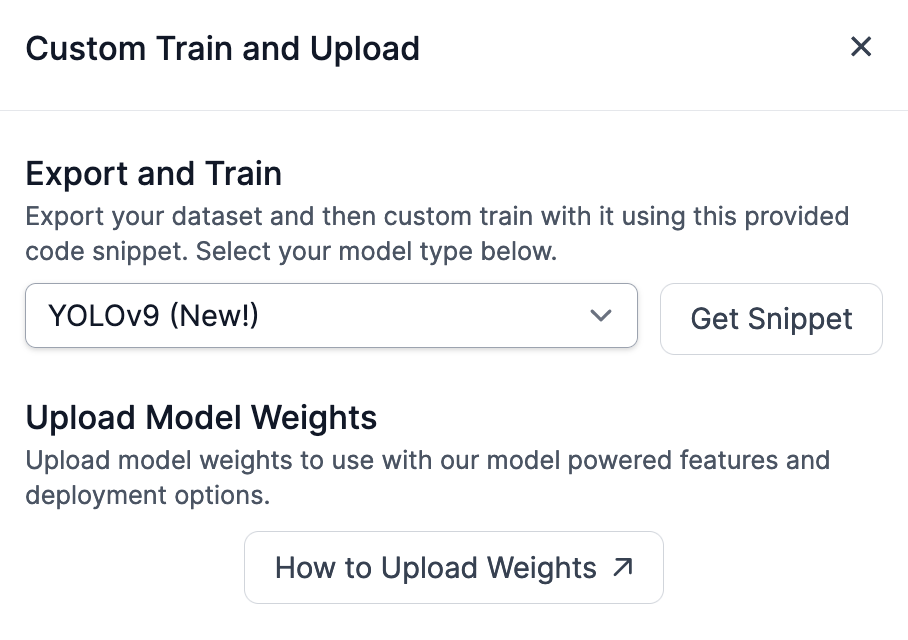
You can then use the code snippet that appears with the YOLOv9 custom training notebook to train your model. If you already have weights, you don't need to train a model. You can upload them to Roboflow following the steps in the next section.
Export and Upload Weights
With a YOLOv9 model trained, there is one task left before getting your model into production: model deployment.
You can use Roboflow Inference, an open source computer vision inference server, for this task. With Inference, you can reference your model in your application logic with a Python SDK, or run your model in a Docker container that you can deploy as a microservice. In this guide, we will show how to deploy your model with the Inference Python SDK.
To get started, you need to upload your model weights to Roboflow. This will make a cloud API available for your model, and allow you to bring your weights into a local Inference deployment. You will need a project in your Roboflow account to which you can upload your weights.
Create a new project in your Roboflow account, then upload your dataset. Click "Generate" in the sidebar to generate a dataset version. With a dataset version ready, you can upload your model weights.
To upload your model weights, run the code you copied from Roboflow earlier. This code will look something like this:
from roboflow import Roboflow

rf = Roboflow(api_key='YOUR_API_KEY')
project = rf.workspace('WORKSPACE').project('PROJECT')

version = project.version(1)
version.deploy(model_type="yolov9", model_path=f"{HOME}/yolov9/runs/train/exp")
Above, set your Roboflow model ID and API key.
When you run this code, your model weights will be uploaded to Roboflow.
It will take a few minutes for your weights to be processed, after which point a cloud API will be available for use in running your model in production.
Deploy Your Model
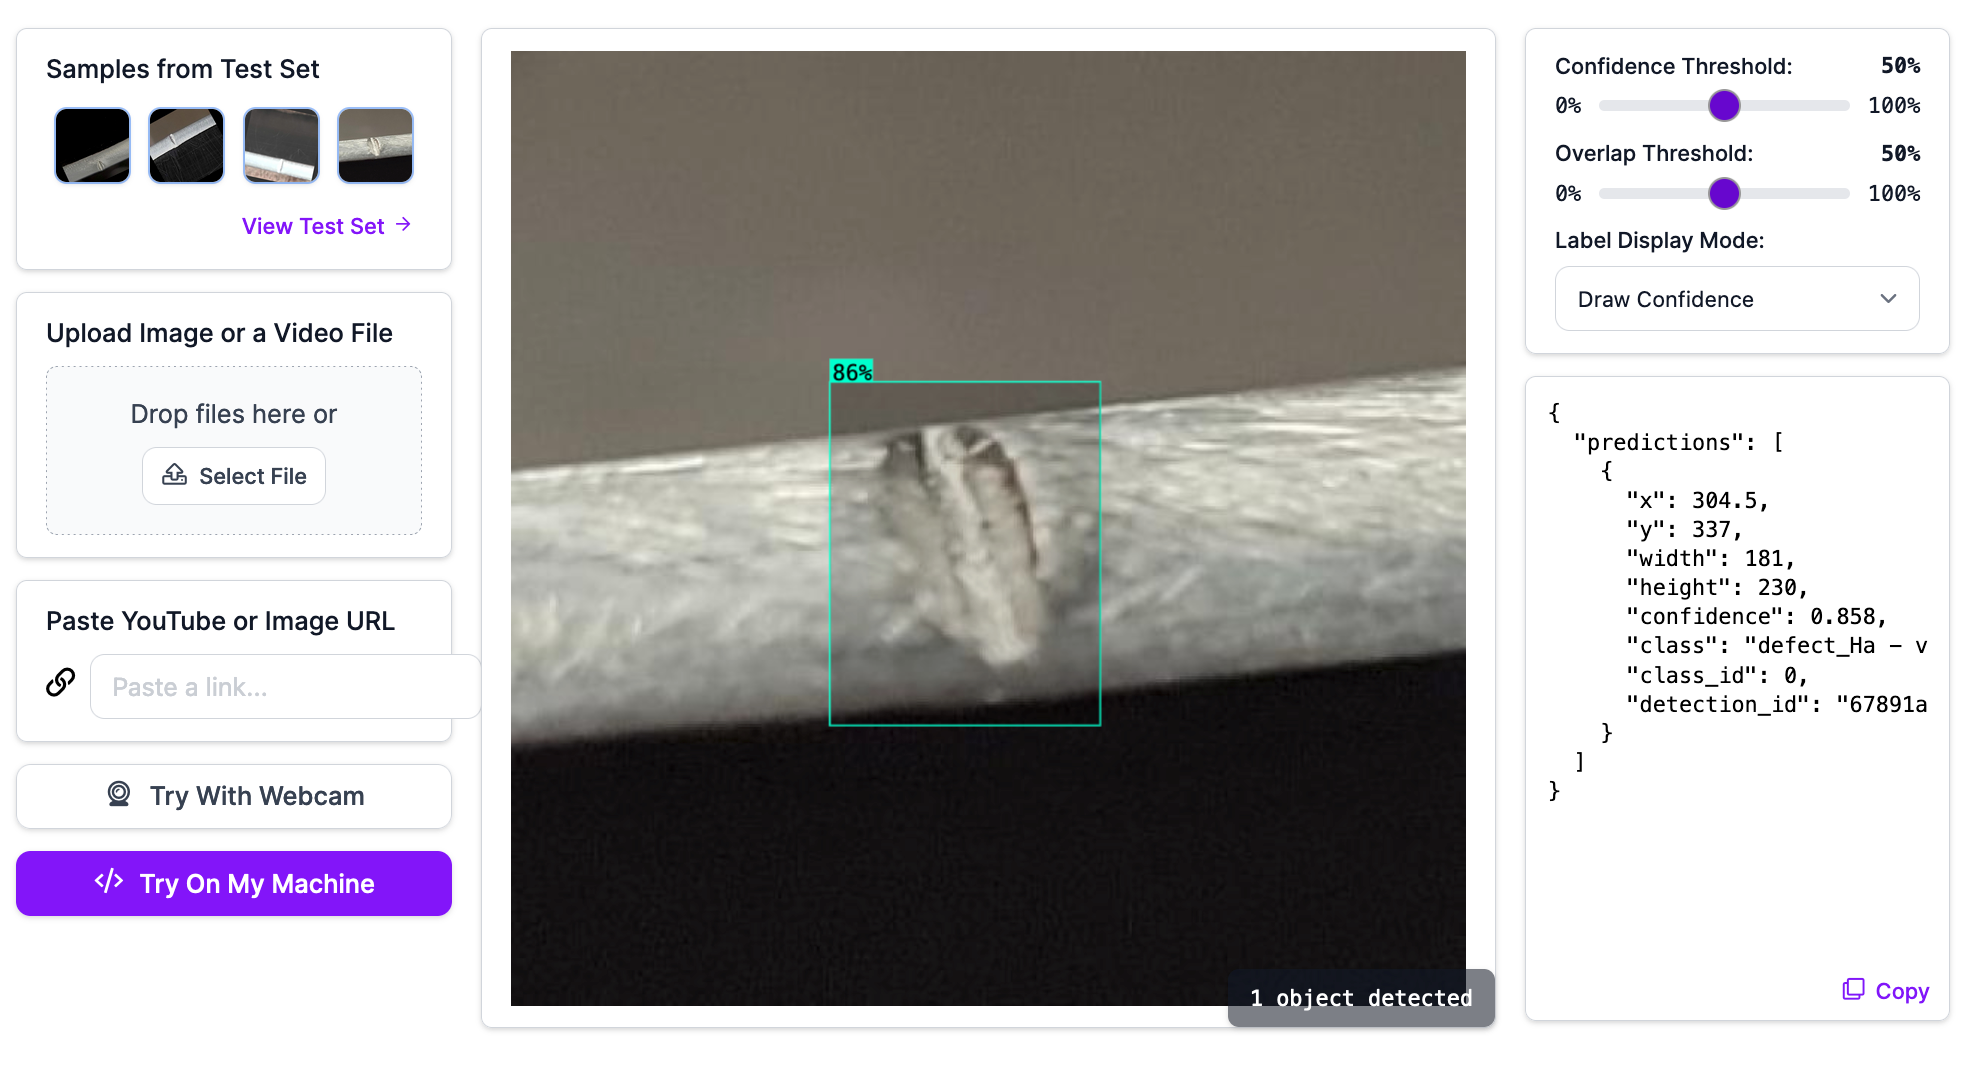
Once your model weights have been processed, you can test your model from the Roboflow web interface.
You can deploy your YOLOv9 model in the cloud or on your own hardware.
To deploy your model to your device, first install Inference and supervision:
pip install inference supervisionYou can then use the following code to run your model:
from inference import get_model
model = get_model(model_id="model-id/version", api_key="API_KEY")

image_paths = sv.list_files_with_extensions(
    directory=f"{dataset.location}/valid/images",
    extensions=['png', 'jpg', 'jpeg']
)
image_path = random.choice(image_paths)
image = cv2.imread(image_path)

result = model.infer(image, confidence=0.1)[0]
detections = sv.Detections.from_inference(result)

label_annotator = sv.LabelAnnotator(text_color=sv.Color.BLACK)
bounding_box_annotator = sv.BoundingBoxAnnotator()

annotated_image = image.copy()
annotated_image = bounding_box_annotator.annotate(scene=annotated_image, detections=detections)
annotated_image = label_annotator.annotate(scene=annotated_image, detections=detections)

sv.plot_image(annotated_image)
Above, set your Roboflow model ID and API key.
In the code above, we run our model on a random image in the valid set of our dataset. Here is an example output:
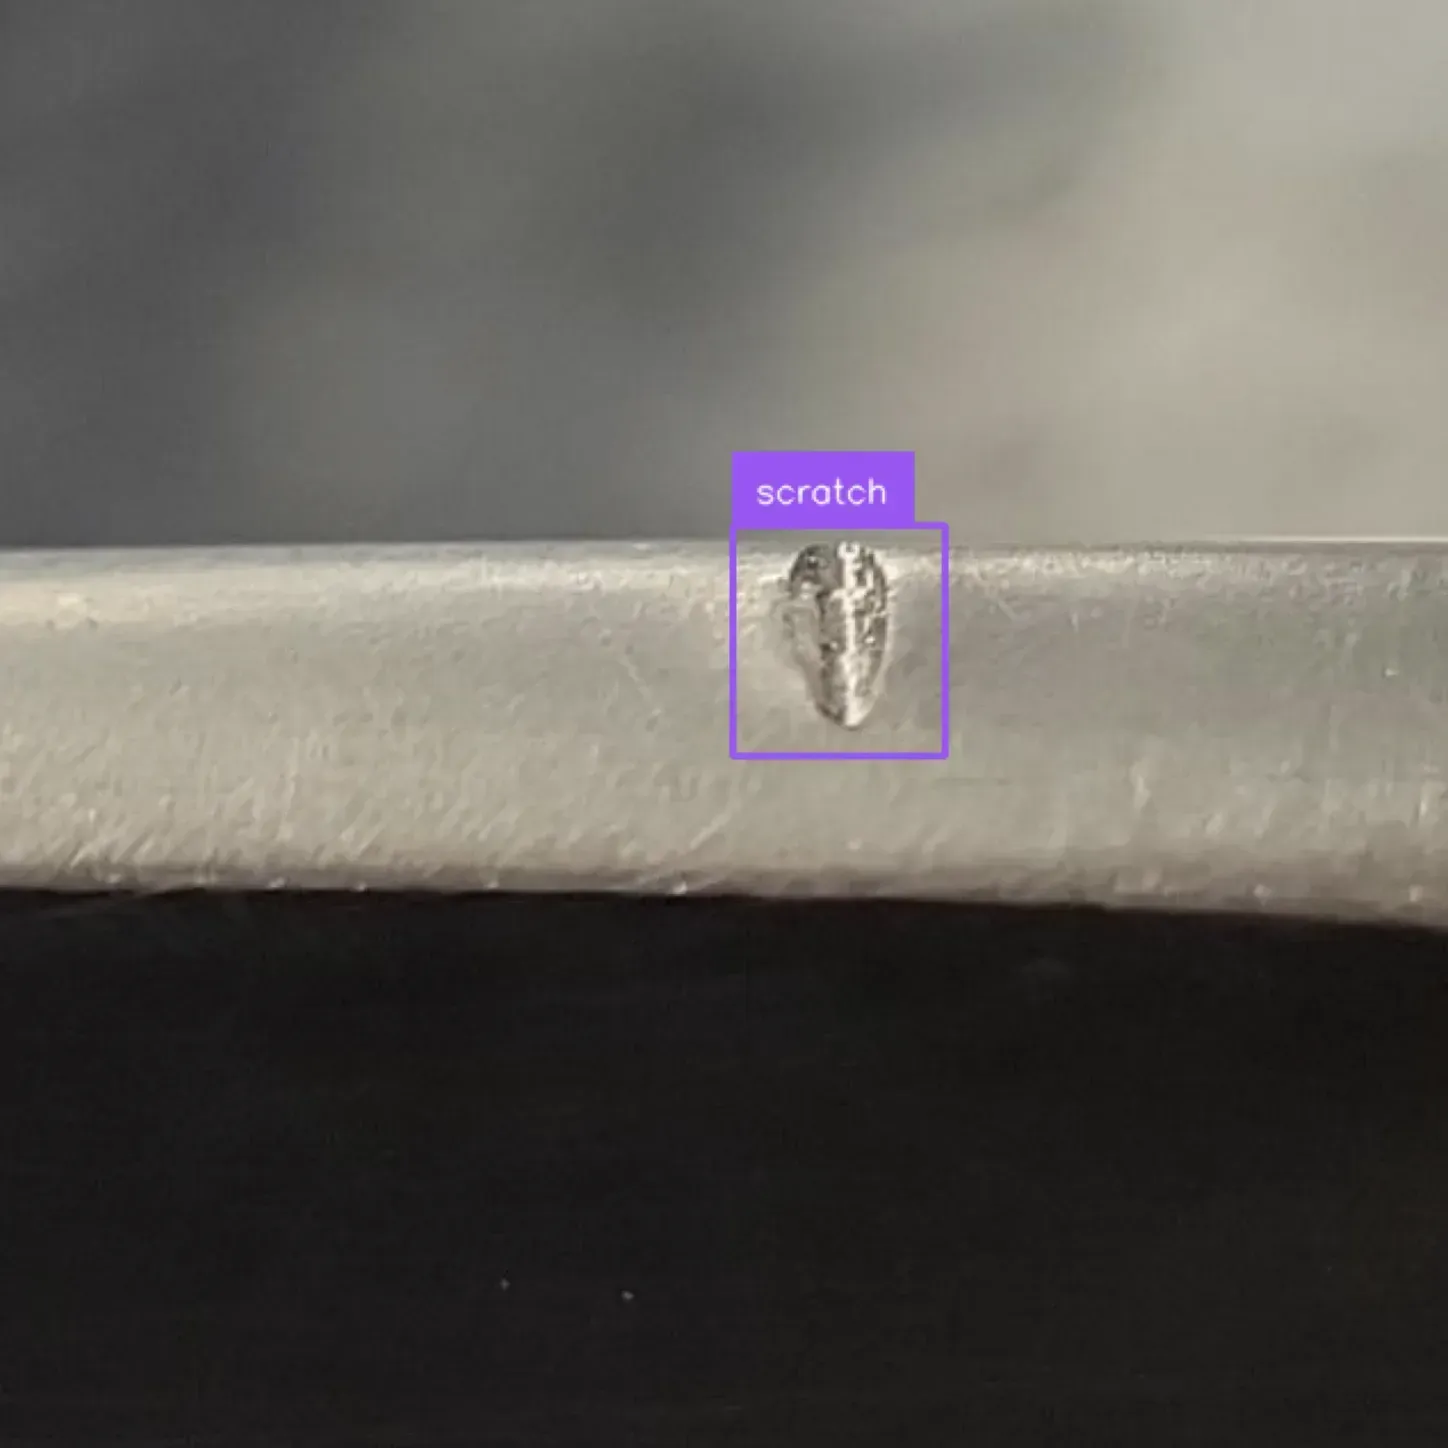
Our model is successfully running on our hardware.
You can use the InferencePipeline method to run your model on a video. Learn how to run your YOLOv9 model on a video stream.
Conclusion
You can deploy YOLOv9 object detection models to Roboflow. Deploying your model creates a cloud API you can query to run your model. Deploying your model to Roboflow also allows you to run your model with Roboflow Inference, a high-performance computer vision inference engine.
In this guide, we walked through how to deploy a YOLOv9 model with Roboflow. We created a Roboflow project with the dataset on which our model was to be trained, exported the dataset for training in a Google Colab notebook, then uploaded the trained model weights for deployment. We then ran the model on an image using Inference.
Cite this Post
Use the following entry to cite this post in your research:
James Gallagher. (May 23, 2024). Launch: Deploy YOLOv9 Models with Roboflow. Roboflow Blog: https://blog.roboflow.com/deploy-yolov9-models/