
Florence-2 is a lightweight model licensed under the MIT license. Although it has significantly fewer parameters than competing models like LLaVA 1.5, Florence-2 remains state-of-the-art due to the high-quality data it was trained on.
Florence-2 is capable of a variety of tasks, including visual question answering, captioning, image detection, and more. In this article, we will test Florence 2 on instance segmentation.
Instance segmentation happens when you combine both object detection with semantic segmentation. After detecting an object, we assign each pixel in the bounding box with a class. Therefore, by detecting an object and assigning the pixels inside the detection window we can classify objects on a higher degree of accuracy.
Use this Florence-2 for Instance Segmentation Colab Notebook to follow this tutorial.
Step 1: Set Up Colab Environment
First, set your Colab to use GPU with the following command.
!nvidia-smiNext, install the following libraries: transformers, einops, timm, Roboflow Supervision
!pip install -q transformers einops timm flash_attn
!pip install -q roboflow git+https://github.com/roboflow/supervision.git
Step 2: Importing Necessary Libraries
Import the following libraries to use the model and the annotators.
from transformers import AutoProcessor, AutoModelForCausalLM
import requests
from PIL import Image
import supervision as sv
Step 3: Load Florence-2
Get the model from the following checkpoint path. Ensure you have a Hugging Face access token to access the model.
Insert the token into the key area on the left.
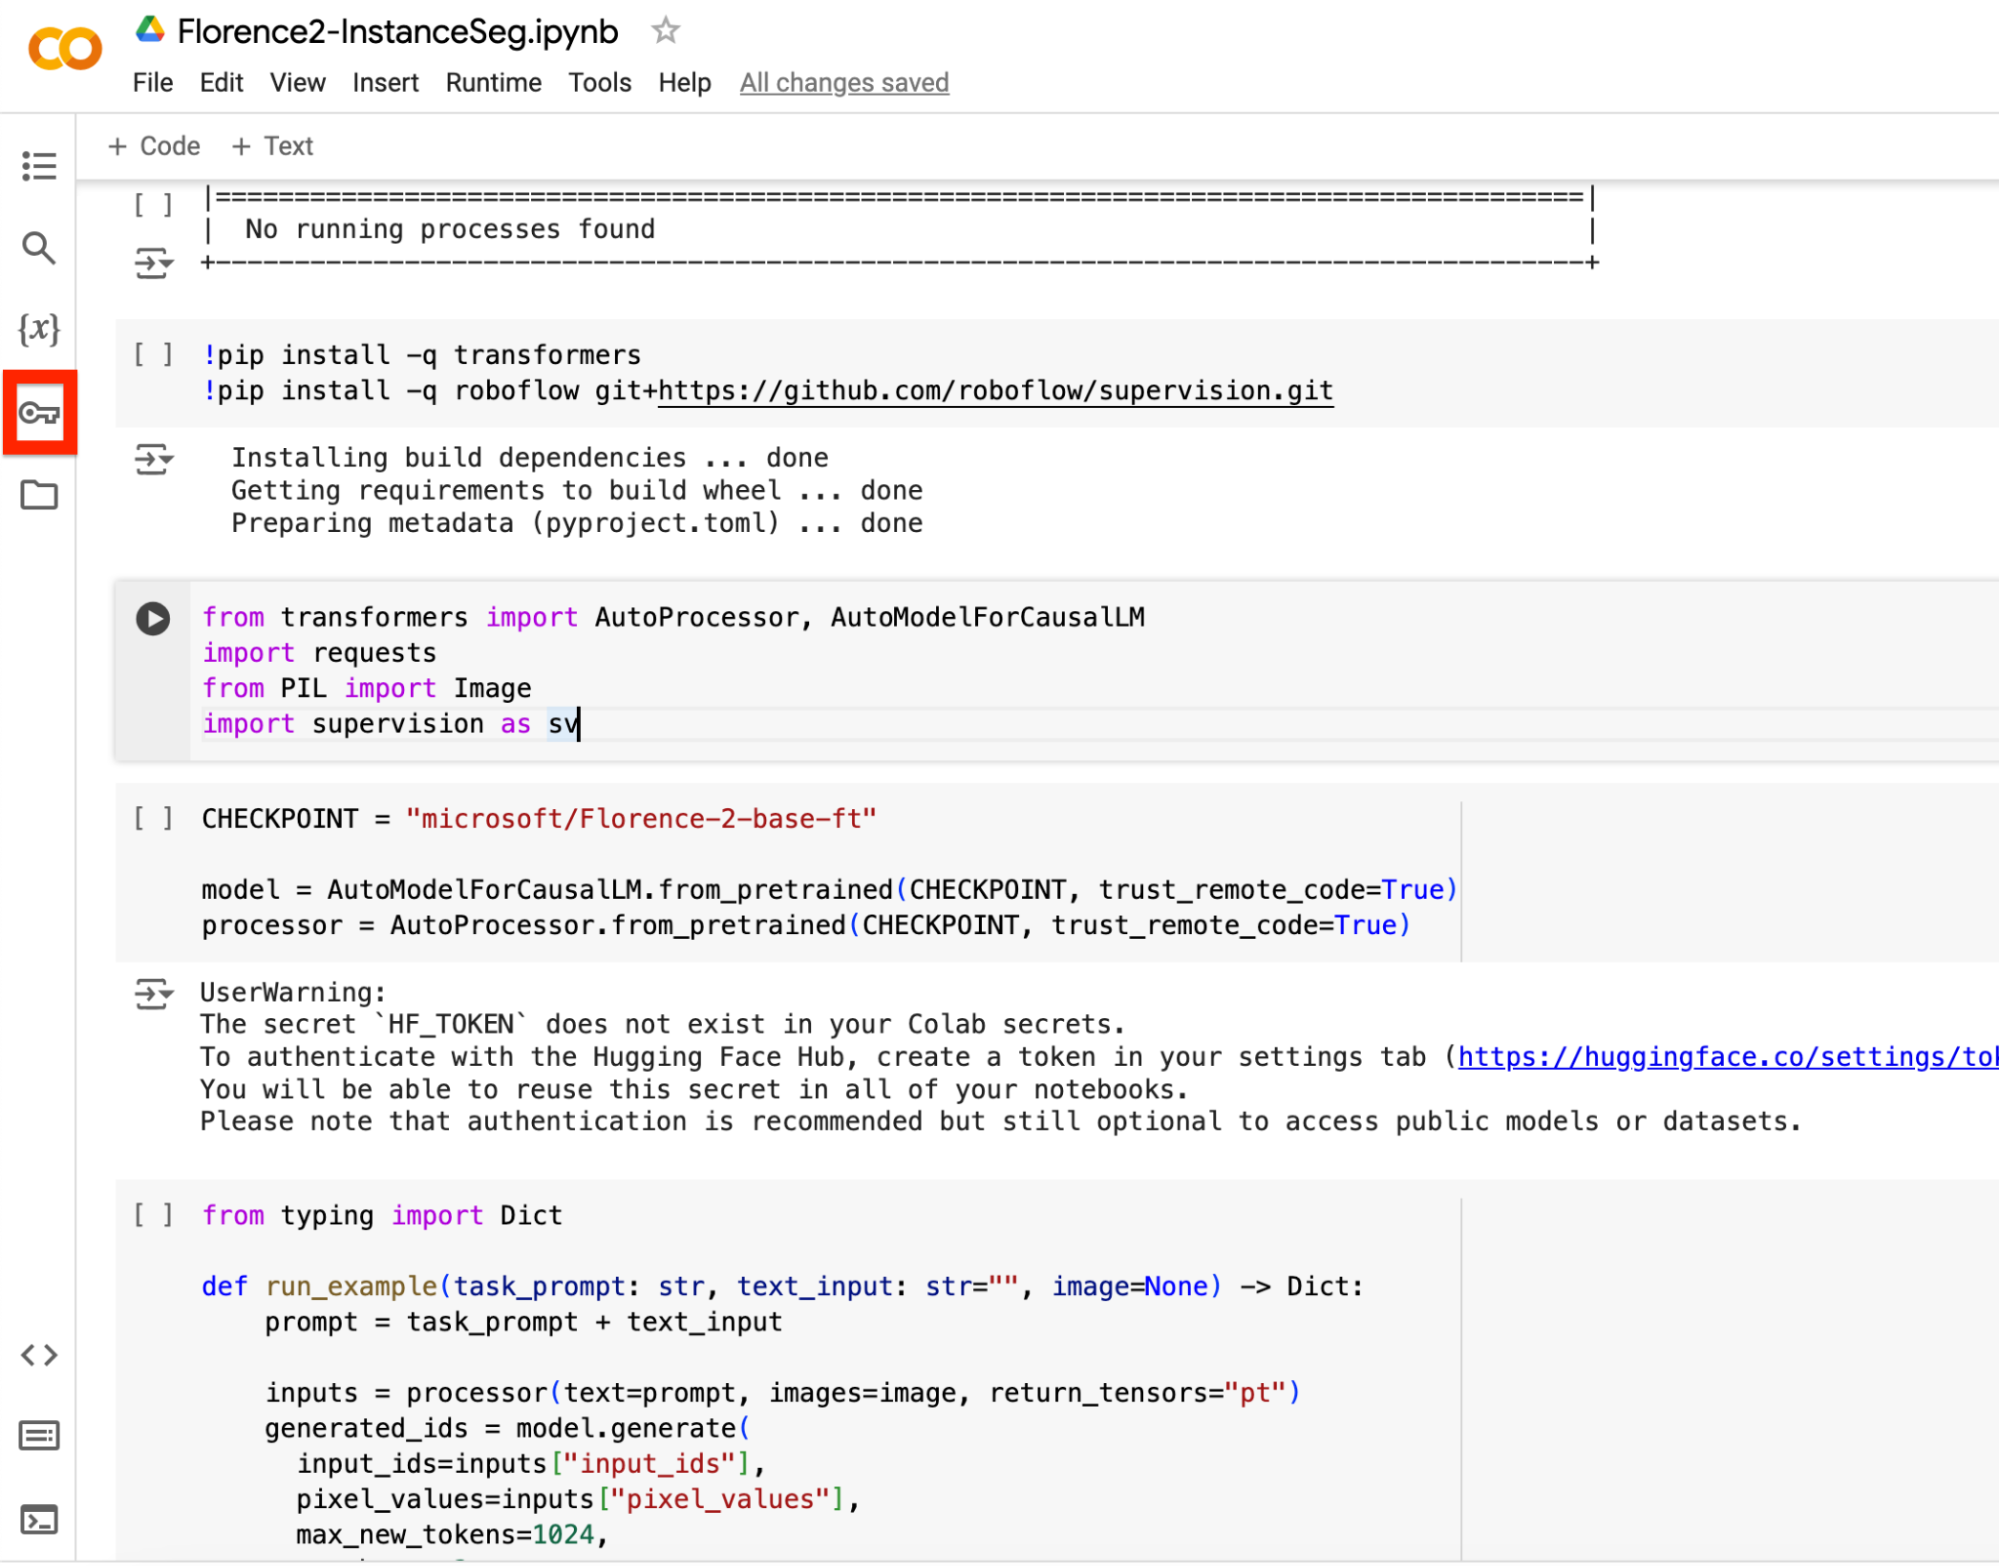
Use the code below to load the model and processor for the model.
CHECKPOINT = "microsoft/Florence-2-base-ft"

model = AutoModelForCausalLM.from_pretrained(CHECKPOINT, trust_remote_code=True)
processor = AutoProcessor.from_pretrained(CHECKPOINT, trust_remote_code=True)
Step 4: Create Segmentation Function
Create a function that generates the segmentations.
The function does the following:
- Adds the task prompt (what task we want to achieve; in our case it is segmentation) and text input (what we want to detect)
- Processes the prompt and image and prepares the data for the model
- Generate the predictions based off the prompt and image
- Decode the generated text
- Parses answer to produce final prediction
from typing import Dict

def run_example(task_prompt: str, text_input: str="", image=None) -> Dict:
   prompt = task_prompt + text_input

   inputs = processor(text=prompt, images=image, return_tensors="pt")
   generated_ids = model.generate(
     input_ids=inputs["input_ids"],
     pixel_values=inputs["pixel_values"],
     max_new_tokens=1024,
     num_beams=3
   )
   generated_text = processor.batch_decode(generated_ids, skip_special_tokens=False)[0]

   parsed_answer = processor.post_process_generation(generated_text, task=task_prompt, image_size=(image.width, image.height))

   return parsed_answer
Step 5: Visualize Predictions with Supervision
Create another function to generate the predictions on your specified image using Supervision.
- The first line defines the mask annotator we are using
- The function uses the mask annotator to annotate the specified image on the detections made by Florence-2.
mask_annotator = sv.MaskAnnotator(color_lookup=sv.ColorLookup.INDEX)
def annotate_seg(image, detections):
   annotated = mask_annotator.annotate(image, detections=detections)
   return annotated
Step 6: Use Florence-2 for Instance Segmentation
Now we can finally start predicting on images. Get the first image of a man holding a dog. See the image by running the code.
- The first line downloads the image
- Second image states the path where the image is located
- Third line opens the image
- Fourth line shows the image (use Google Colab to view the image)
!wget -q https://media.roboflow.com/notebooks/examples/dog.jpeg
dog_image_path = "dog.jpeg"
dog_image = Image.open(dog_image_path)
dog_image
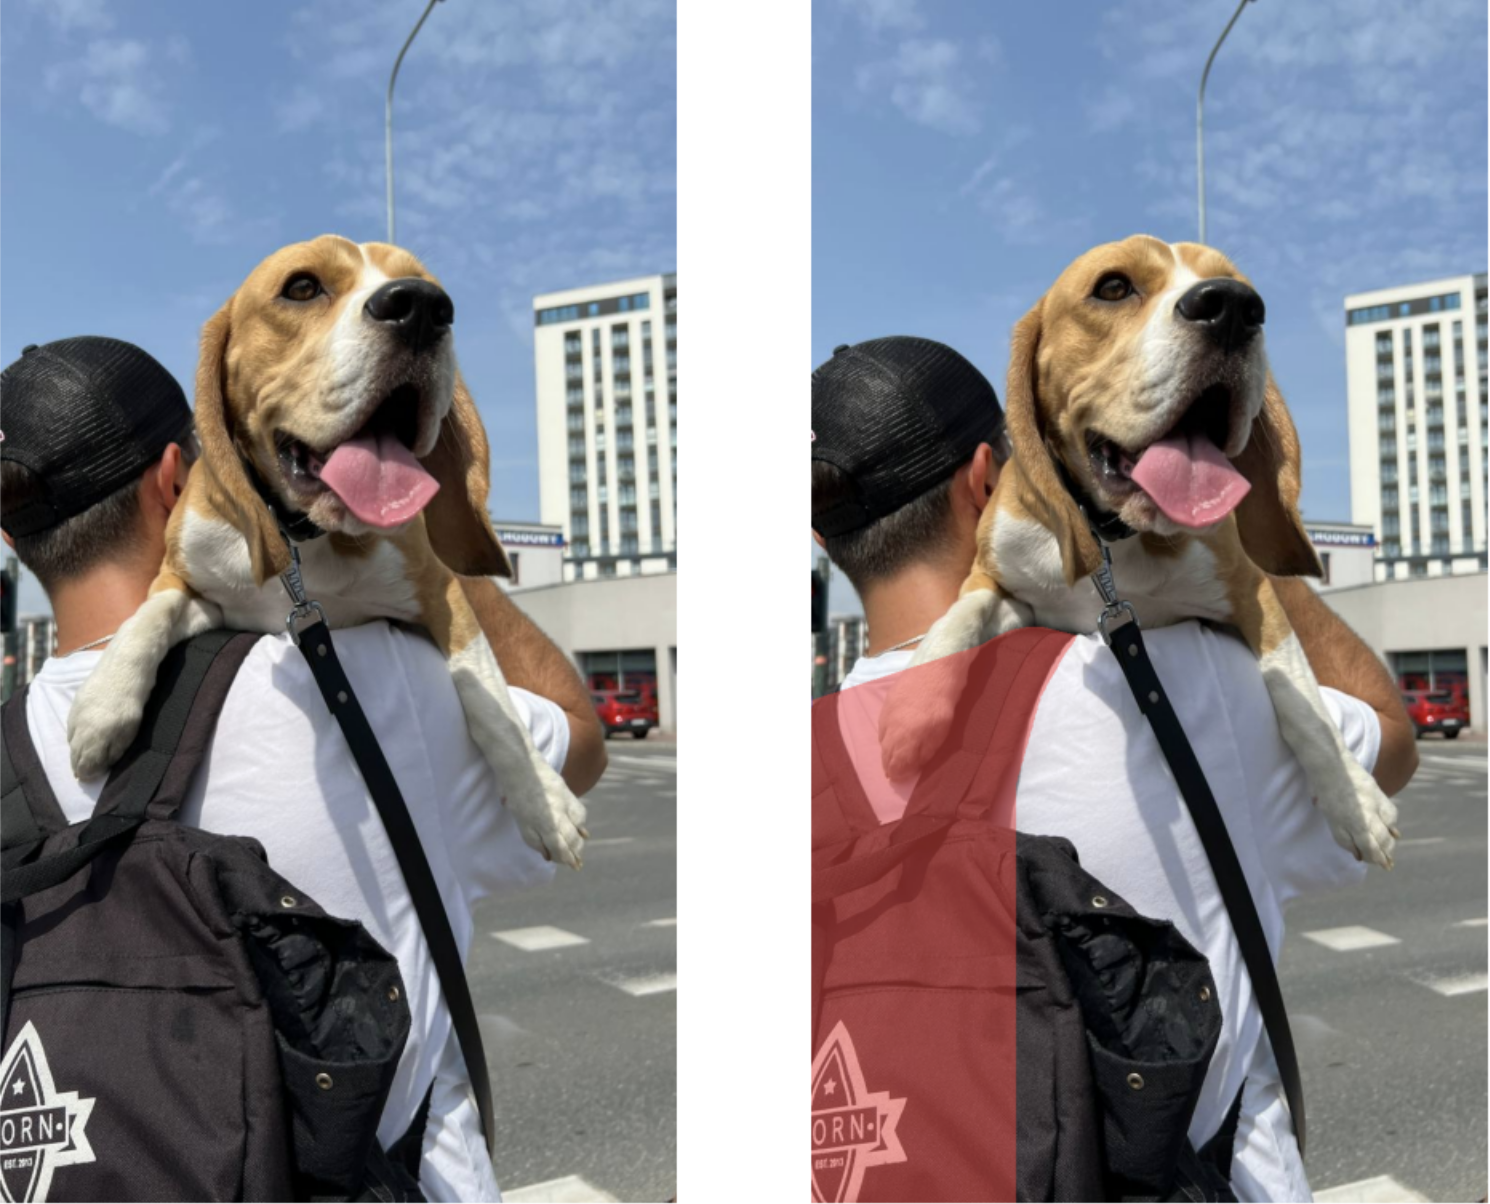
Next, insert what you want to detect in text_input. For the first image, we want to detect the backpack.
- The first line specifies what we want to segment
- The second line runs the functions which calls Florence-2, inputting the text_input, task (in our case it will be Segmentation) and image
text_input = "the backpack"
answer = run_example(task_prompt="<REFERRING_EXPRESSION_SEGMENTATION>", text_input=text_input, image=dog_image)
Here, we plot the original image and the prediction image side by side.
- The first line gets the detections from Florence-2 using Supervision
- The second line gets the annotated segments through the function
- The last few lines plots both images side by size
detections = sv.Detections.from_lmm(sv.LMM.FLORENCE_2, answer, resolution_wh=dog_image.size)
annotated_image = annotate_seg(dog_image.copy(), detections)
sv.plot_images_grid(
   images=[dog_image, annotated_image],
   grid_size=(1, 2),
   titles=['source image', 'segmented image']
)
To test another detection, we can change the text_input to something different to detect something else.
text_input="the dog"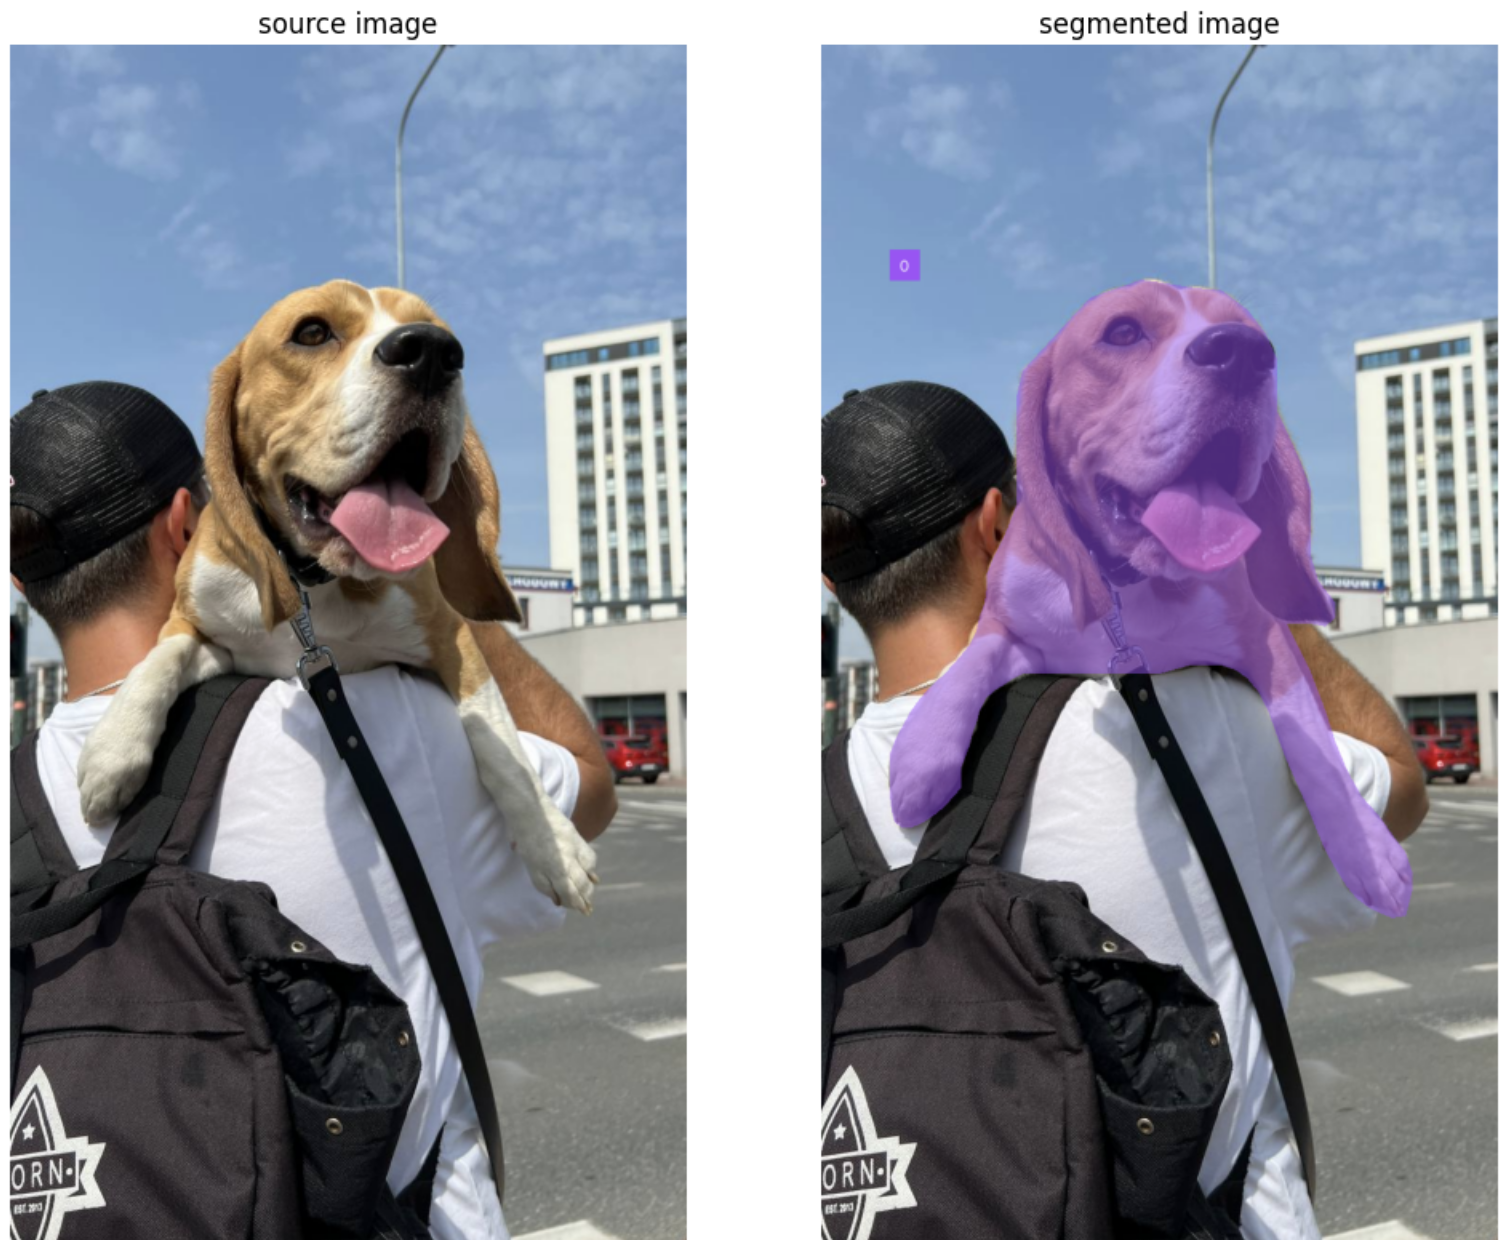
Step 7: Small Object Detection with Florence-2
Florence-2 also works with smaller objects. Take this example of a soccer pitch. In the image, the ball is small in the goal and easily blends in with the net.
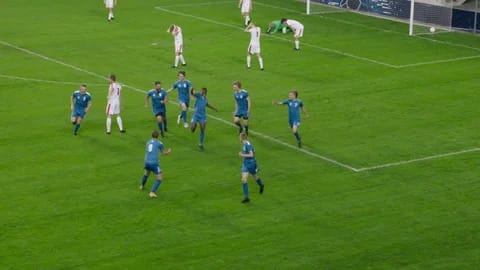
Using similar code from above, we can detect the ball:
!wget --no-check-certificate 'https://drive.google.com/uc?export=download&id=1LR84dxRJmmdLk60HJIZg4wSZ8ZO0fOV4' -O players.jpg
players_image_path = "/content/players.jpg"
players_image = Image.open(players_image_path)
players_image = players_image.convert("RGB")
players_image
text_input = "ball"
answer = run_example(task_prompt="<REFERRING_EXPRESSION_SEGMENTATION>", text_input=text_input, image=players_image)
detections = sv.Detections.from_lmm(sv.LMM.FLORENCE_2, answer, resolution_wh=players_image.size)
annotated_image = annotate_seg(players_image.copy(), detections)
sv.plot_images_grid(
   images=[players_image, annotated_image],
   grid_size=(1, 2),
   titles=['source image', 'segmented image']
)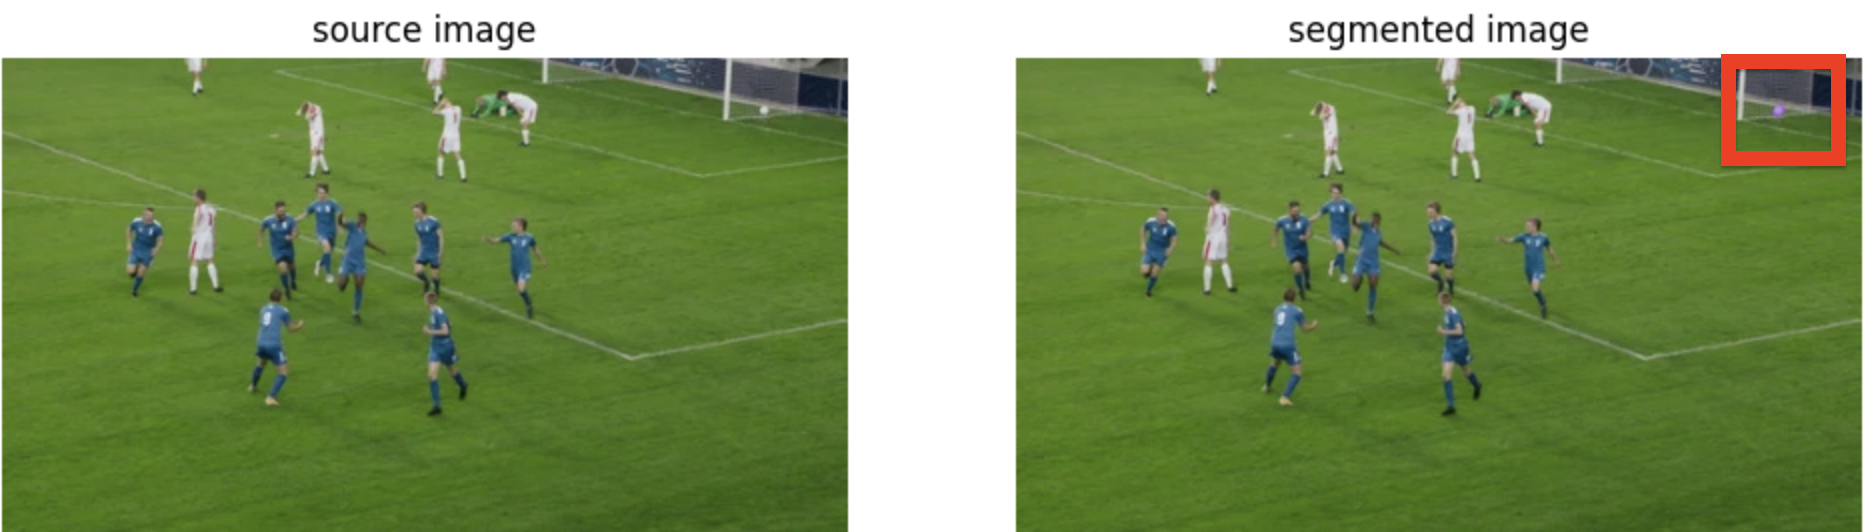
Although the detection is faint, we can still see the purple outline of the detection.
Conclusion
Overall, Florence-2 is incredibly useful and accurate for instance segmentation tasks. Through different text prompts, Florence-2 is able to detect various objects.
In this guide, you learned how to use Google Colab to run Florence-2 for instance segmentation tasks. You can use this guide to see if Florence-2 works for your instance segmentation use case or if your use case requires fine-tuning. See our blog post on fine-tuning Florence-2 for more information.
Cite this Post
Use the following entry to cite this post in your research:
Nathan Y.. (Jul 9, 2024). How to use Florence-2 for Instance Segmentation. Roboflow Blog: https://blog.roboflow.com/florence-2-instance-segmentation/