
Computer vision can measure exactly when and for how long a brand logo appears on screen in a video, which is useful for verifying sponsorship airtime requirements, quantifying advertising reach, or flagging unwanted brand placement. This guide walks through finding or training a logo detection model using Roboflow Universe and the Roboflow platform, running that model against video frames with the Roboflow Video Inference API, and using the supervision library to annotate predictions and calculate total on-screen time per logo.
With computer vision, you can detect brand logos in images or videos. A computer vision solution enables you to find when a brand is on screen in a video, and for how long the brand is on screen.
This information can be used by brands to quantify their reach, advertising providers and broadcasters to verify that sponsorship requirements for on screen time have been met, to ensure brand logos do not appear in specific scenes (i.e. when someone is smoking), and more.
In this guide, we are going to show how to detect brand logos in videos. We will demonstrate how to find pre-trained models for common logos (i.e. Pepsi), as well as how you can train a custom model to find any logo. We will show how to run the logo detection model on a video.
Here is an example of a logo detection model running on a video:
Without further ado, let’s get started!
Step #1: Train a Logo Detection Model
To detect brand logos in videos, you need an object detection model. Object detection models identify the location of objects of interest in an image or video. Object detection models return a bounding box which shows the position of an object in a frame.
If you are detecting a common logo, such as the Pepsi logo, we encourage you to explore logo detection datasets and pre-trained models on Roboflow Universe.
To detect a custom logo, you will need to train your own model. You can train your own model with a few dozen images featuring your logo, with annotations to teach a model where the logo is in each image.
Explore Pre-Trained Logo Detection Models
Note: There are a limited range of pre-trained logo detection models. You may not find the brand of interest unless the brand is popular.
Roboflow Universe is a community where more than 250,000 public datasets and 50,000 pre-trained models have been shared. You can use datasets on Universe as a starting point to train a model, or you can use a pre-trained model out of a box for your use case.
To explore pre-trained logo detection models, go to Roboflow Universe and search for the brand logo of interest.
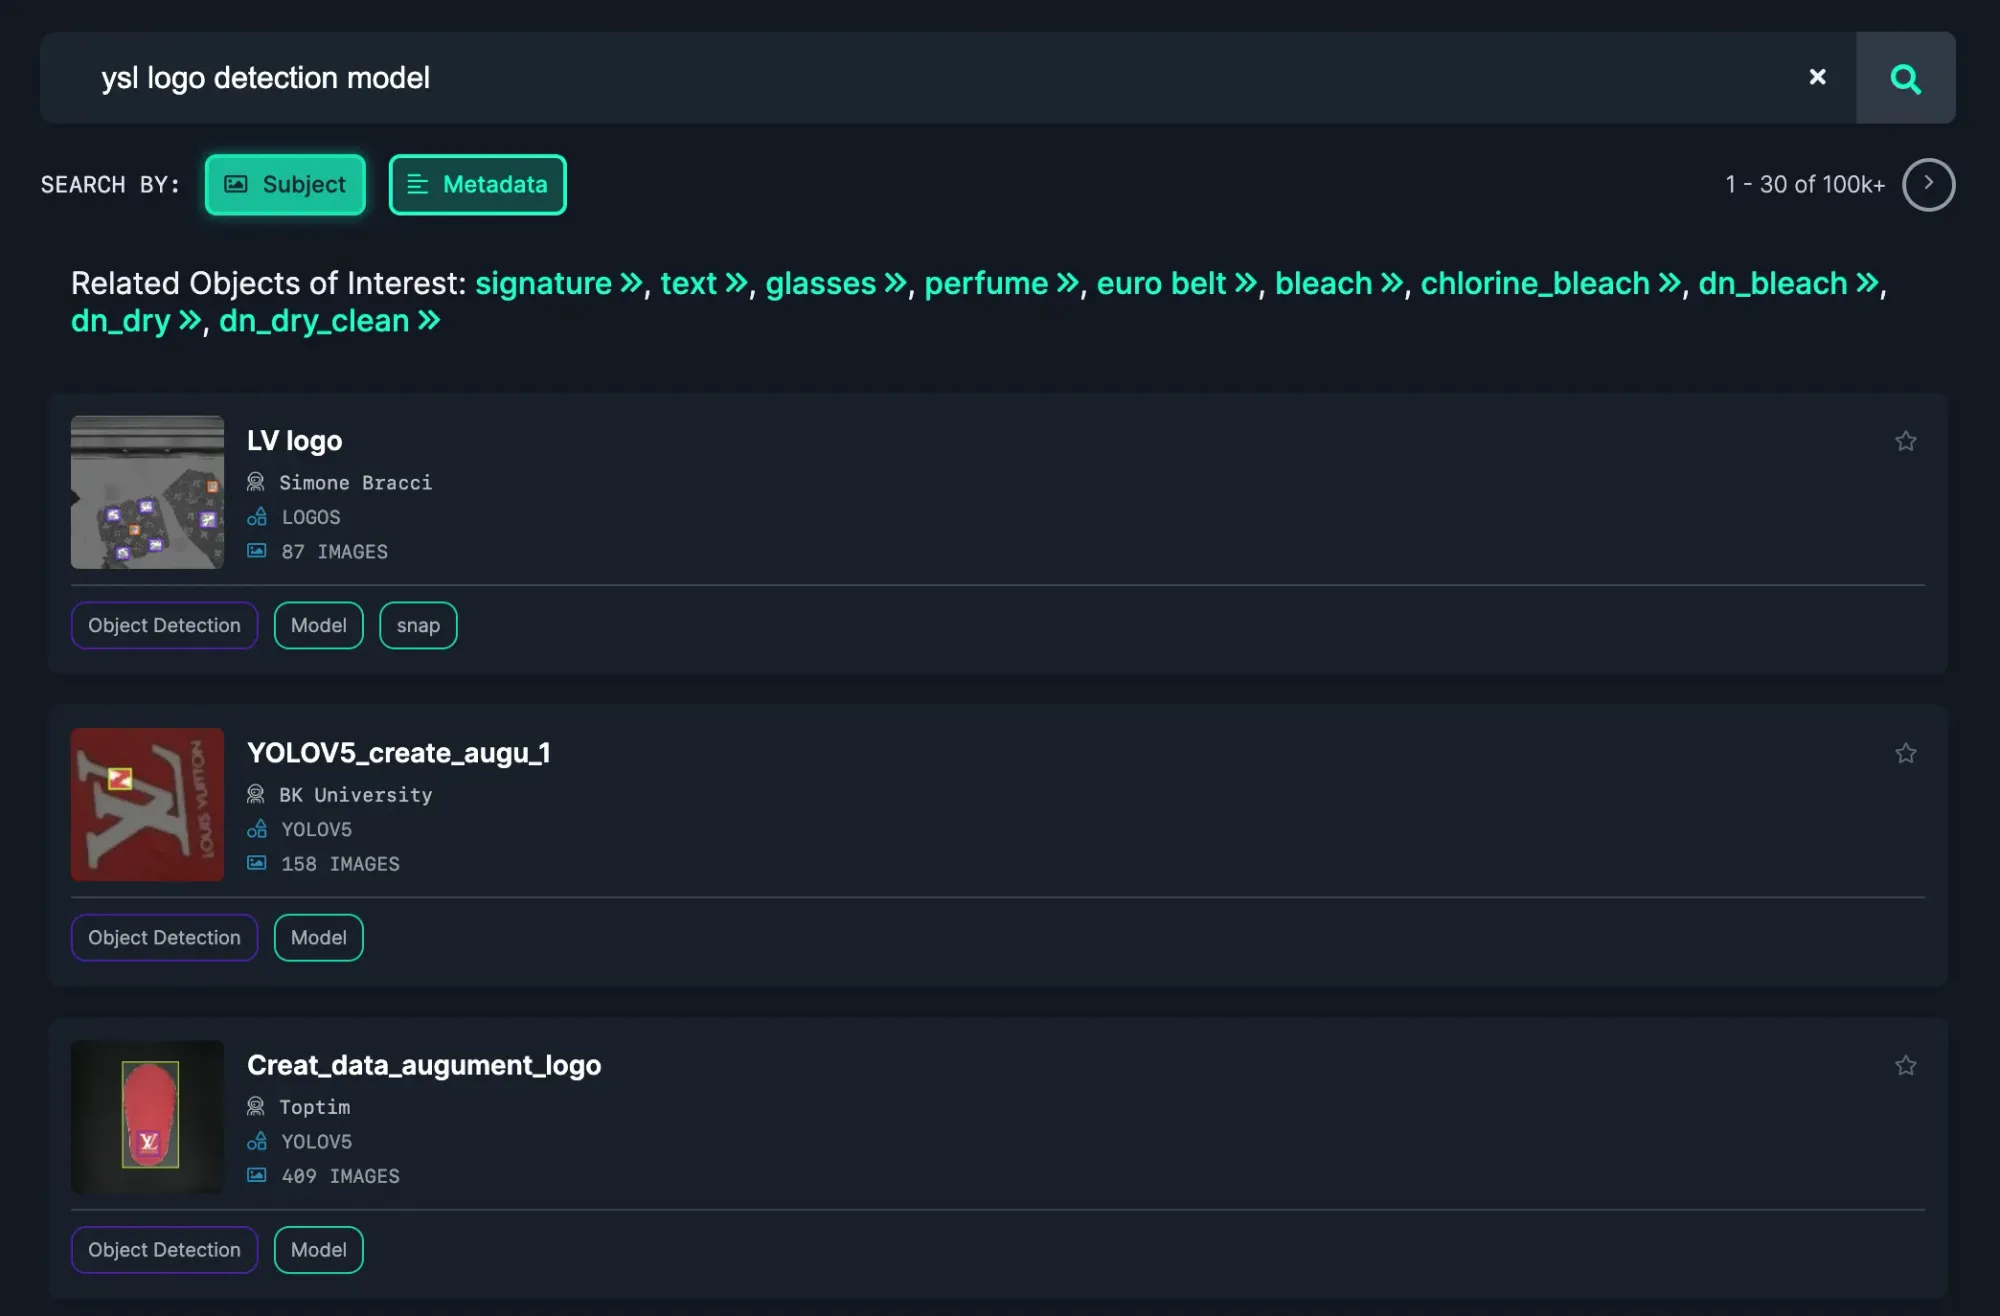
Add “model” to the end of your search query to search for pre-trained models.
Click "Metadata" to explore by project name.
Explore the options available on the search page. For example, there is a Pepsi logo detection model. To test a model, click on a model then click “Deploy” in the sidebar.
From this page, you can drag and drop an image on which to test the pre-trained model, or select a pre-loaded image from the model test dataset on the page:
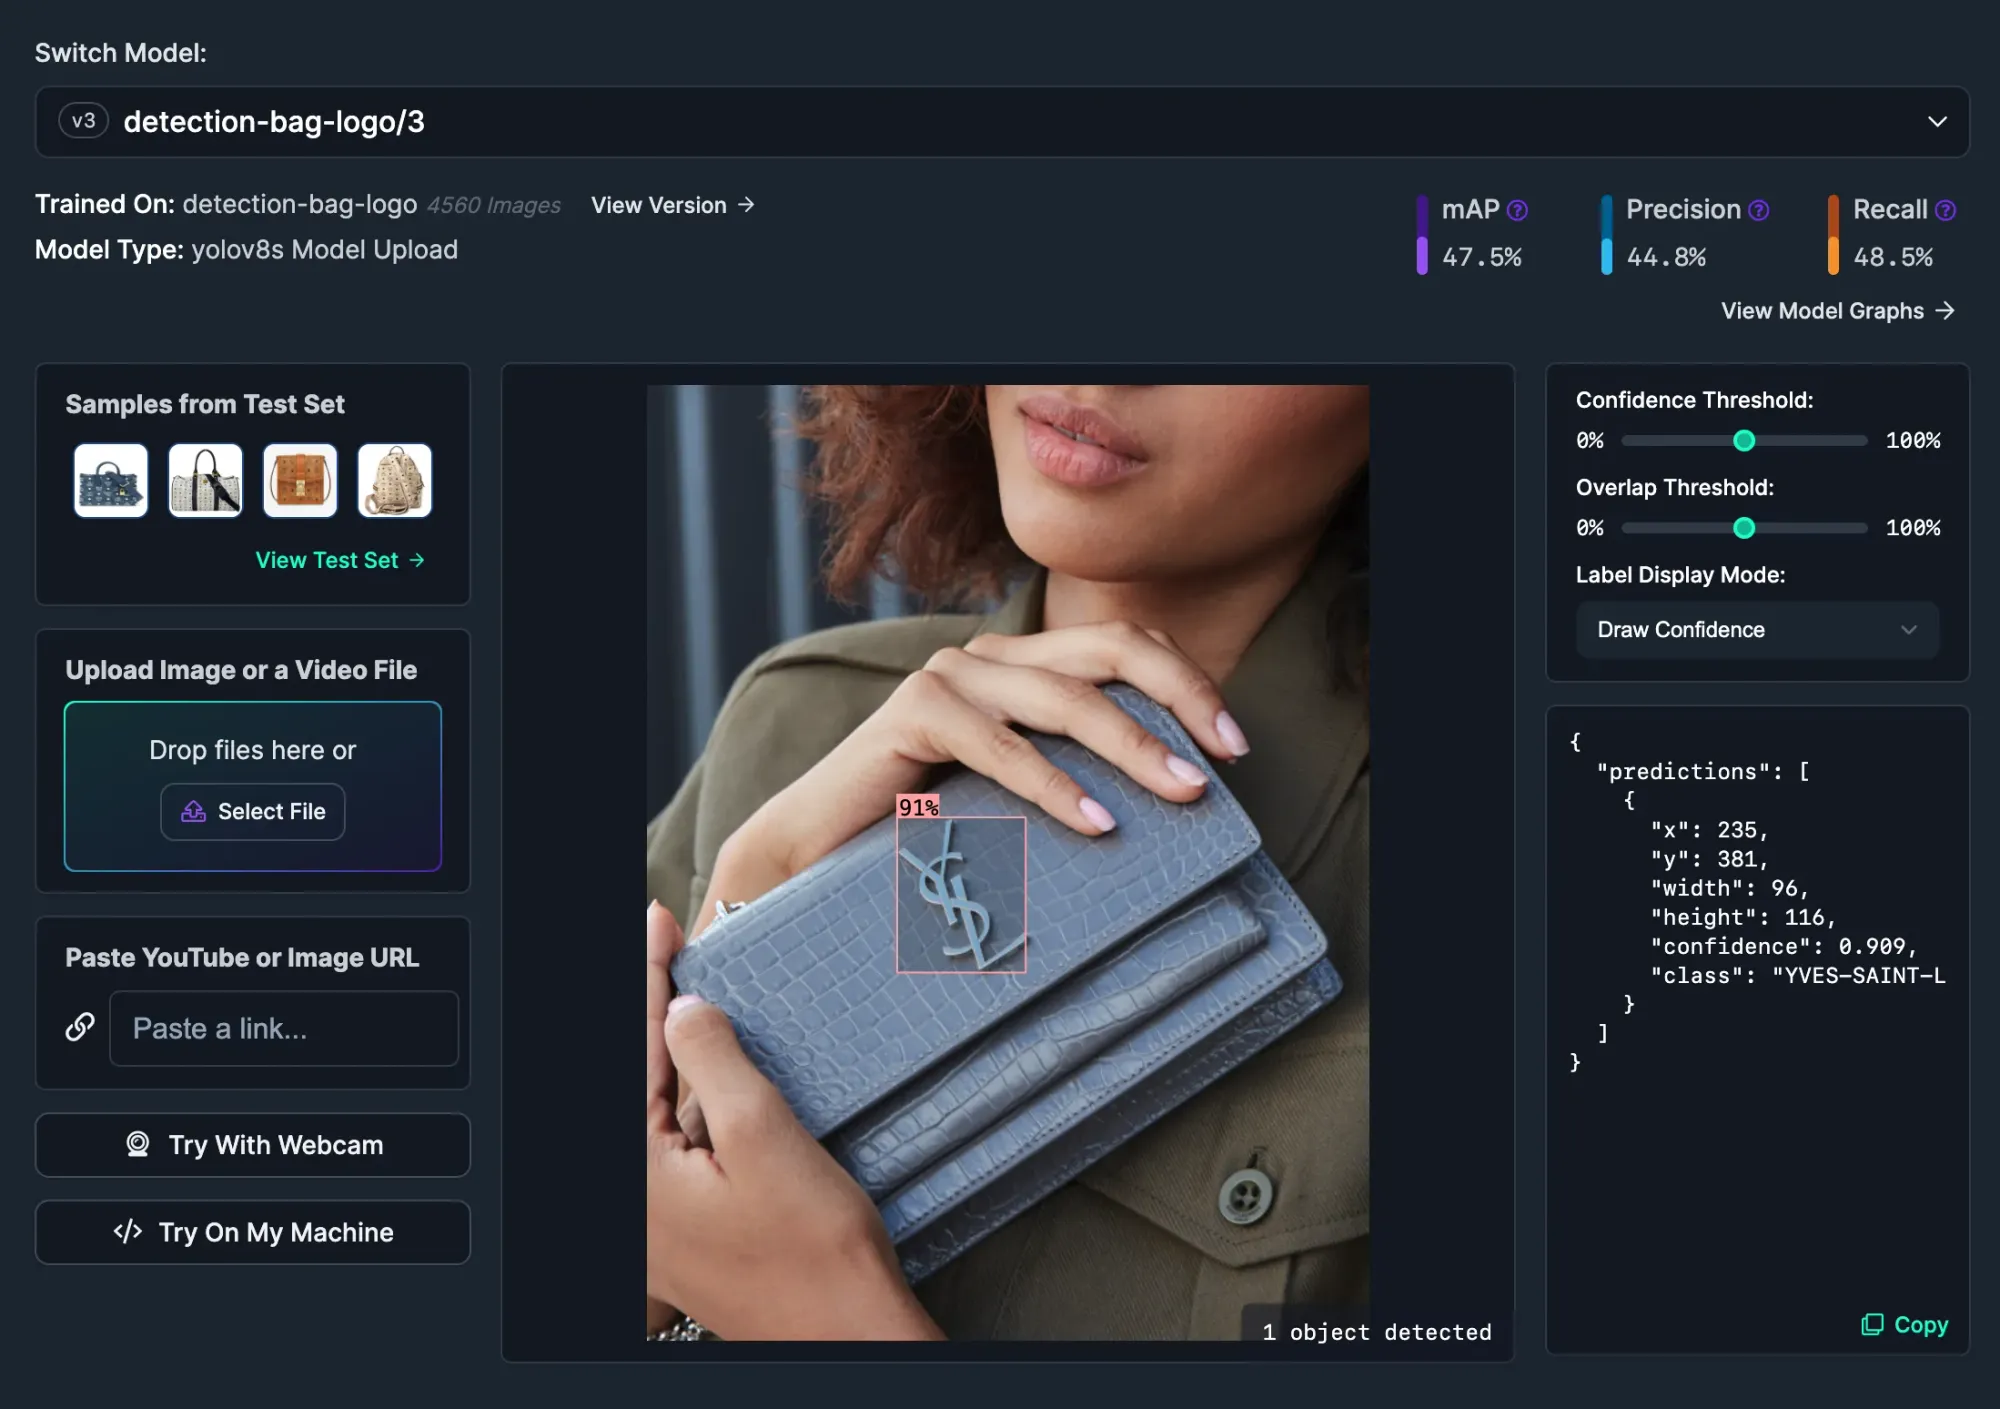
At the bottom of the Deploy page there are instructions on how to use the model in production. Every model has an infinitely-scalable REST API you can use to query the model with an image.
You can also deploy models to your own hardware on a range of devices, including:
- Raspberry Pi
- NVIDIA Jetson
- iOS Devices
- Snap Lenses
- And more
Learn more about deploying models with Roboflow.
Collect Data
To train a custom vision model, you will need a dataset featuring the logo(s) of interest. This dataset should contain at least a few dozen images that show your logo in different places. In this guide, we are going to build a Streamlit logo detector.
Sign up for a free Roboflow account, then create a new project in the Roboflow dashboard:
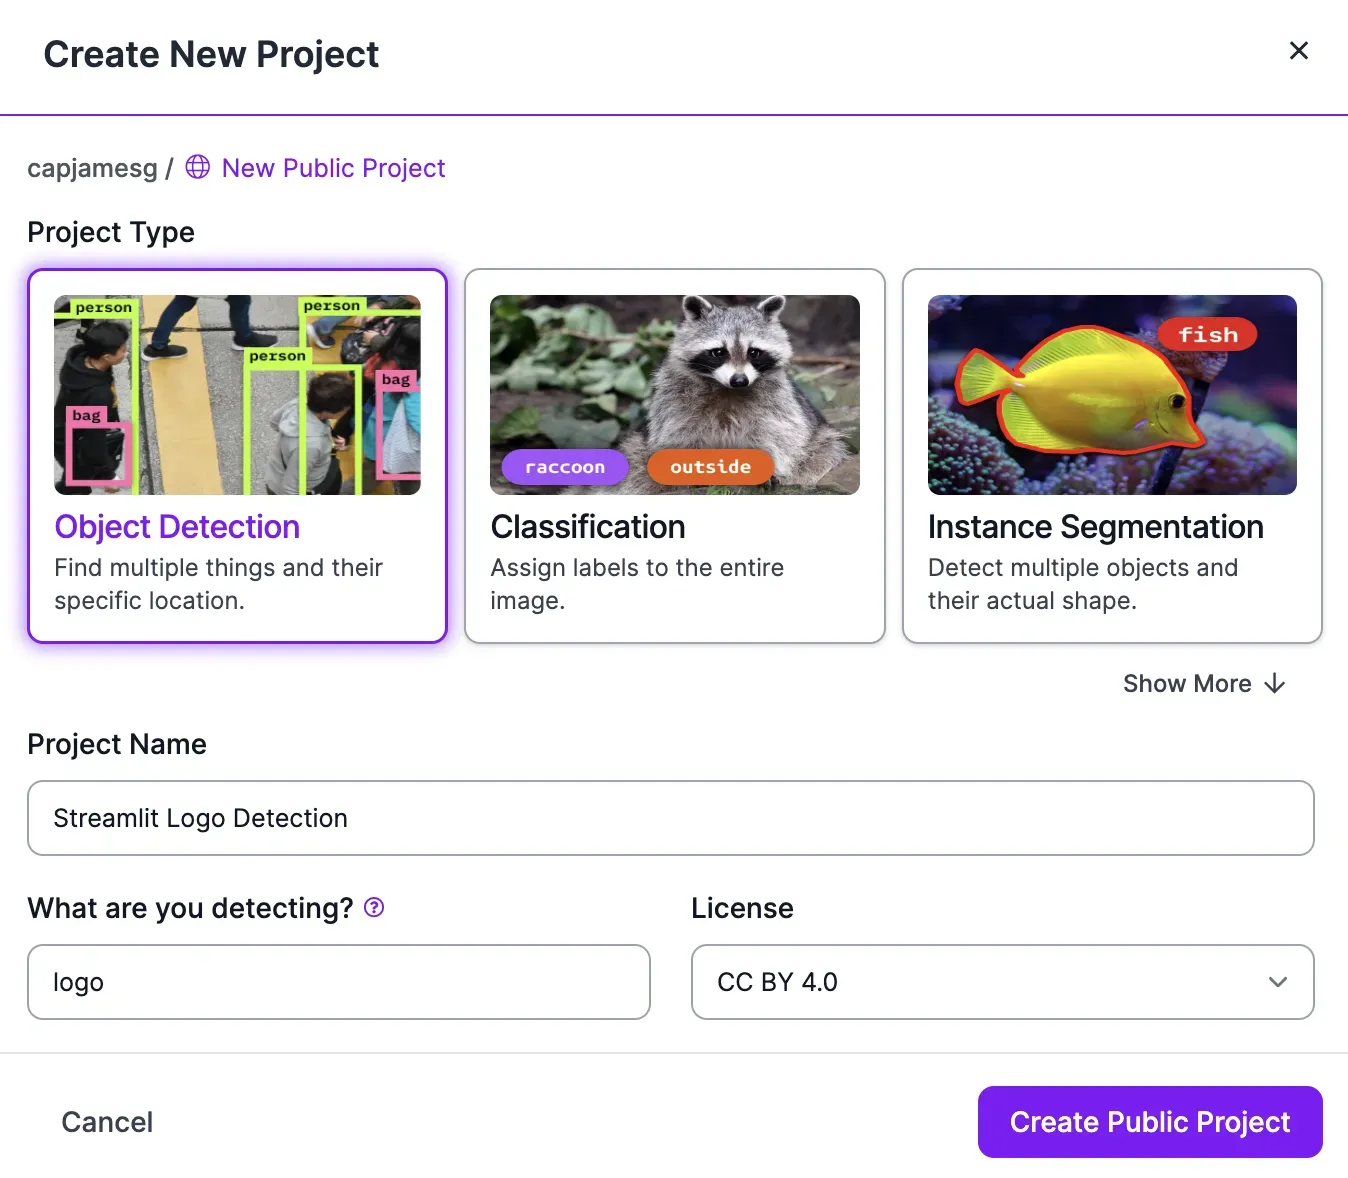
Select “Object Detection” as the task type for the model to create.
Next, upload all of your logo images:
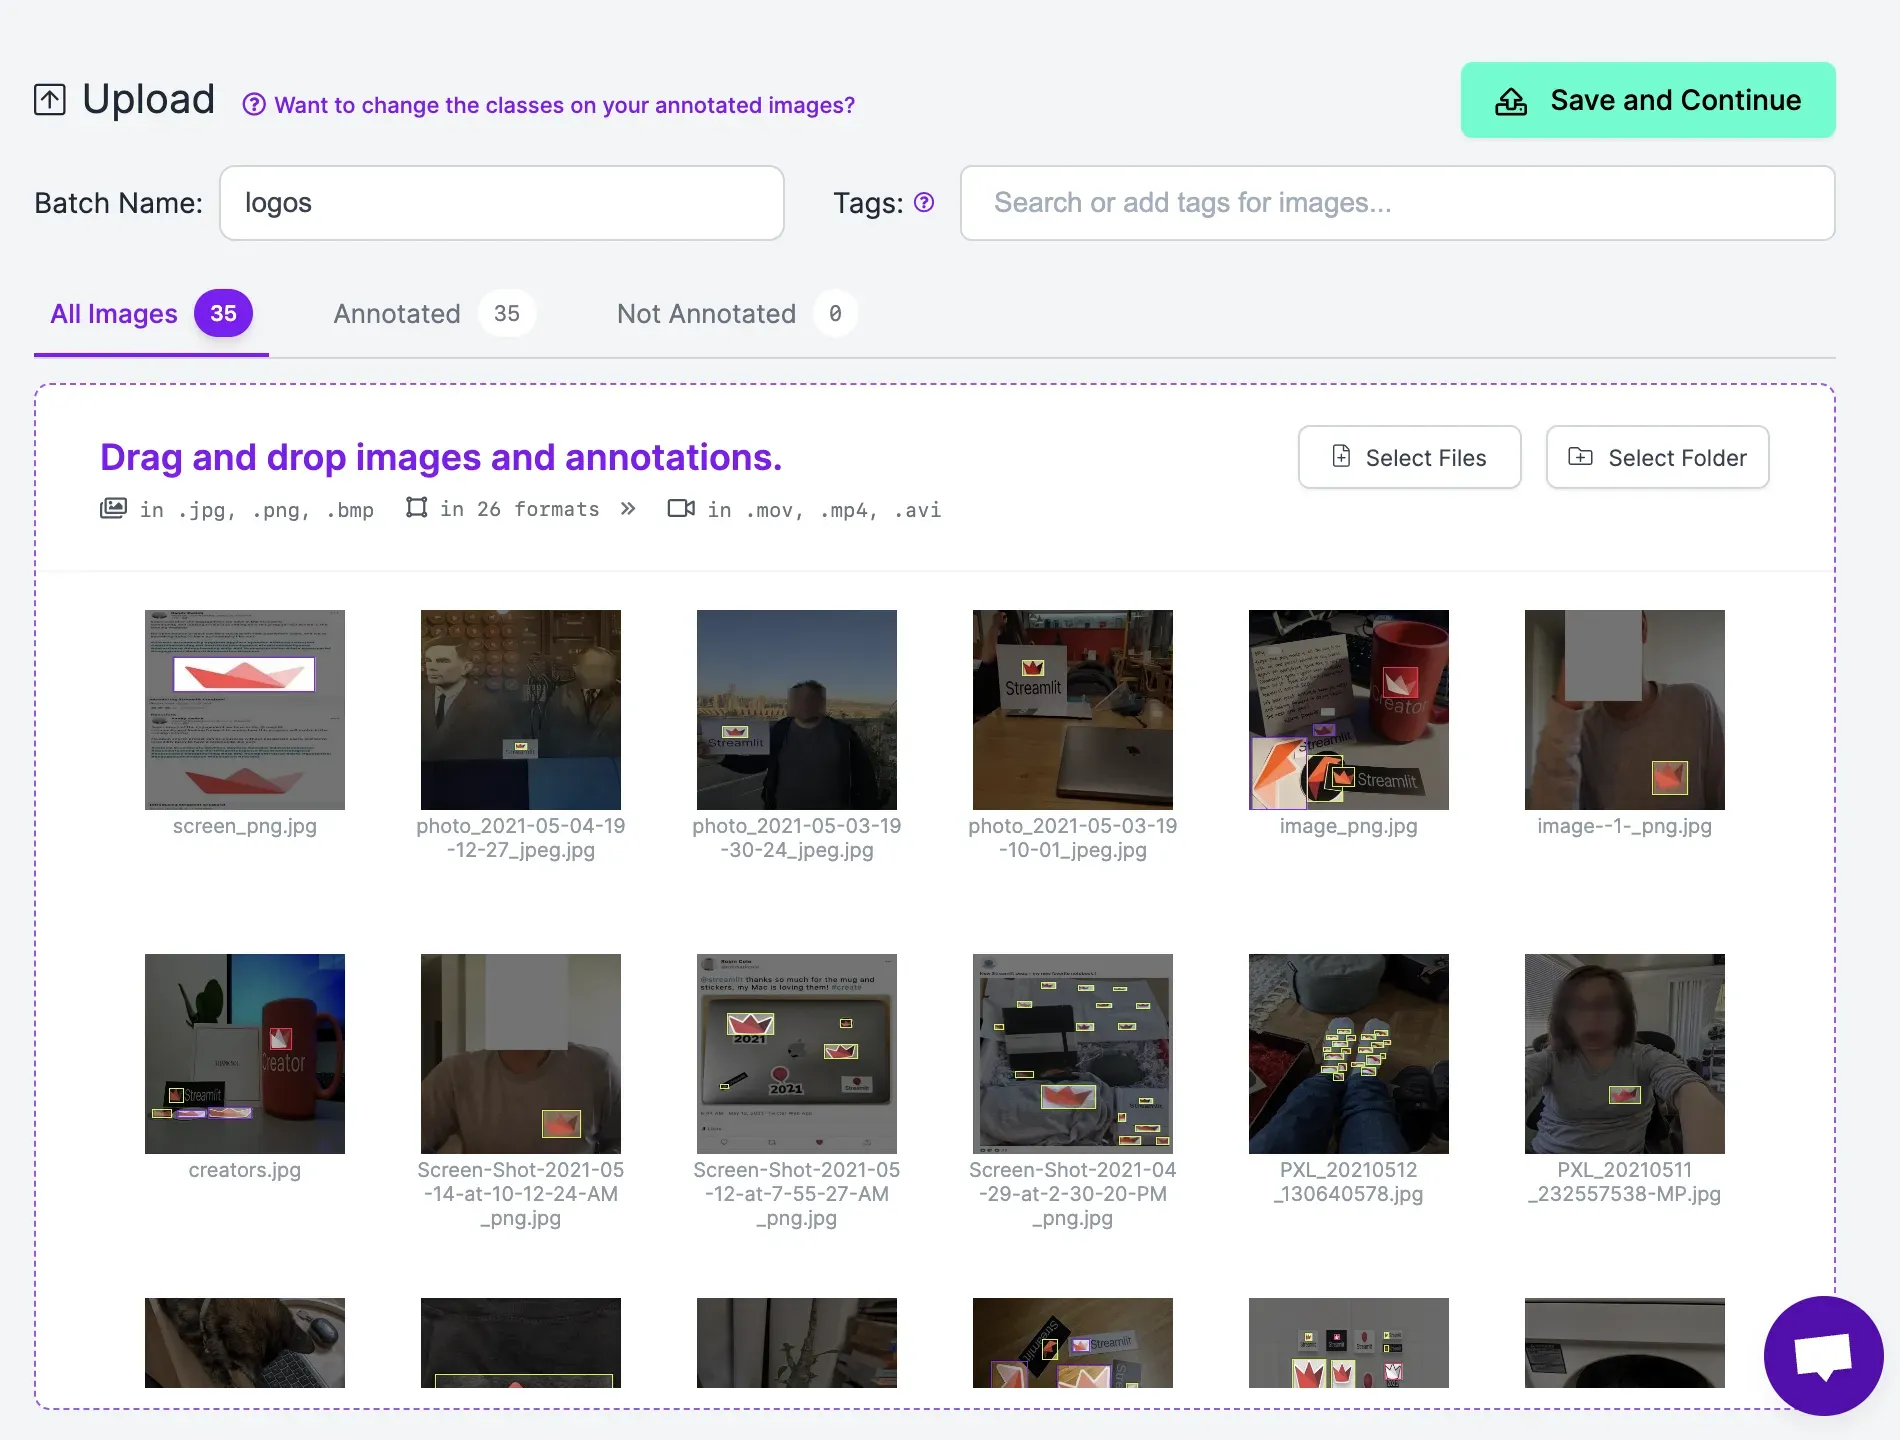
You should aim to upload 40-50 images for each logo that you want to identify.
Click “Save and Continue” to save your data in Roboflow.
Annotate Logos
Next, you need to annotate your images. Annotation, or labeling, involves drawing regions on an image that contain objects of interest. The resulting labels are used to train an object detection model.
Click “Annotate” in your project sidebar to view all of the images in your dataset. Then, click on an image to start annotating.
For object detection, we can annotate with a bounding box. Bounding boxes are boxes drawn around objects of interest. To draw a bounding box, press “b” on your keyboard or click the box tool in the right side panel:
Draw a bounding box around every logo in your dataset. When you have a trained model, you can use that trained model to auto-label logos using our Segment Anything-powered auto-labeling tool. This will allow you to quickly improve your model once you have a first version.
Learn more about the tools available in Roboflow Annotate.
Once you have labeled all of your data, click “Generate” in the sidebar to generate a project version. A page will appear in which you can generate a dataset. This dataset will be used to train your model.
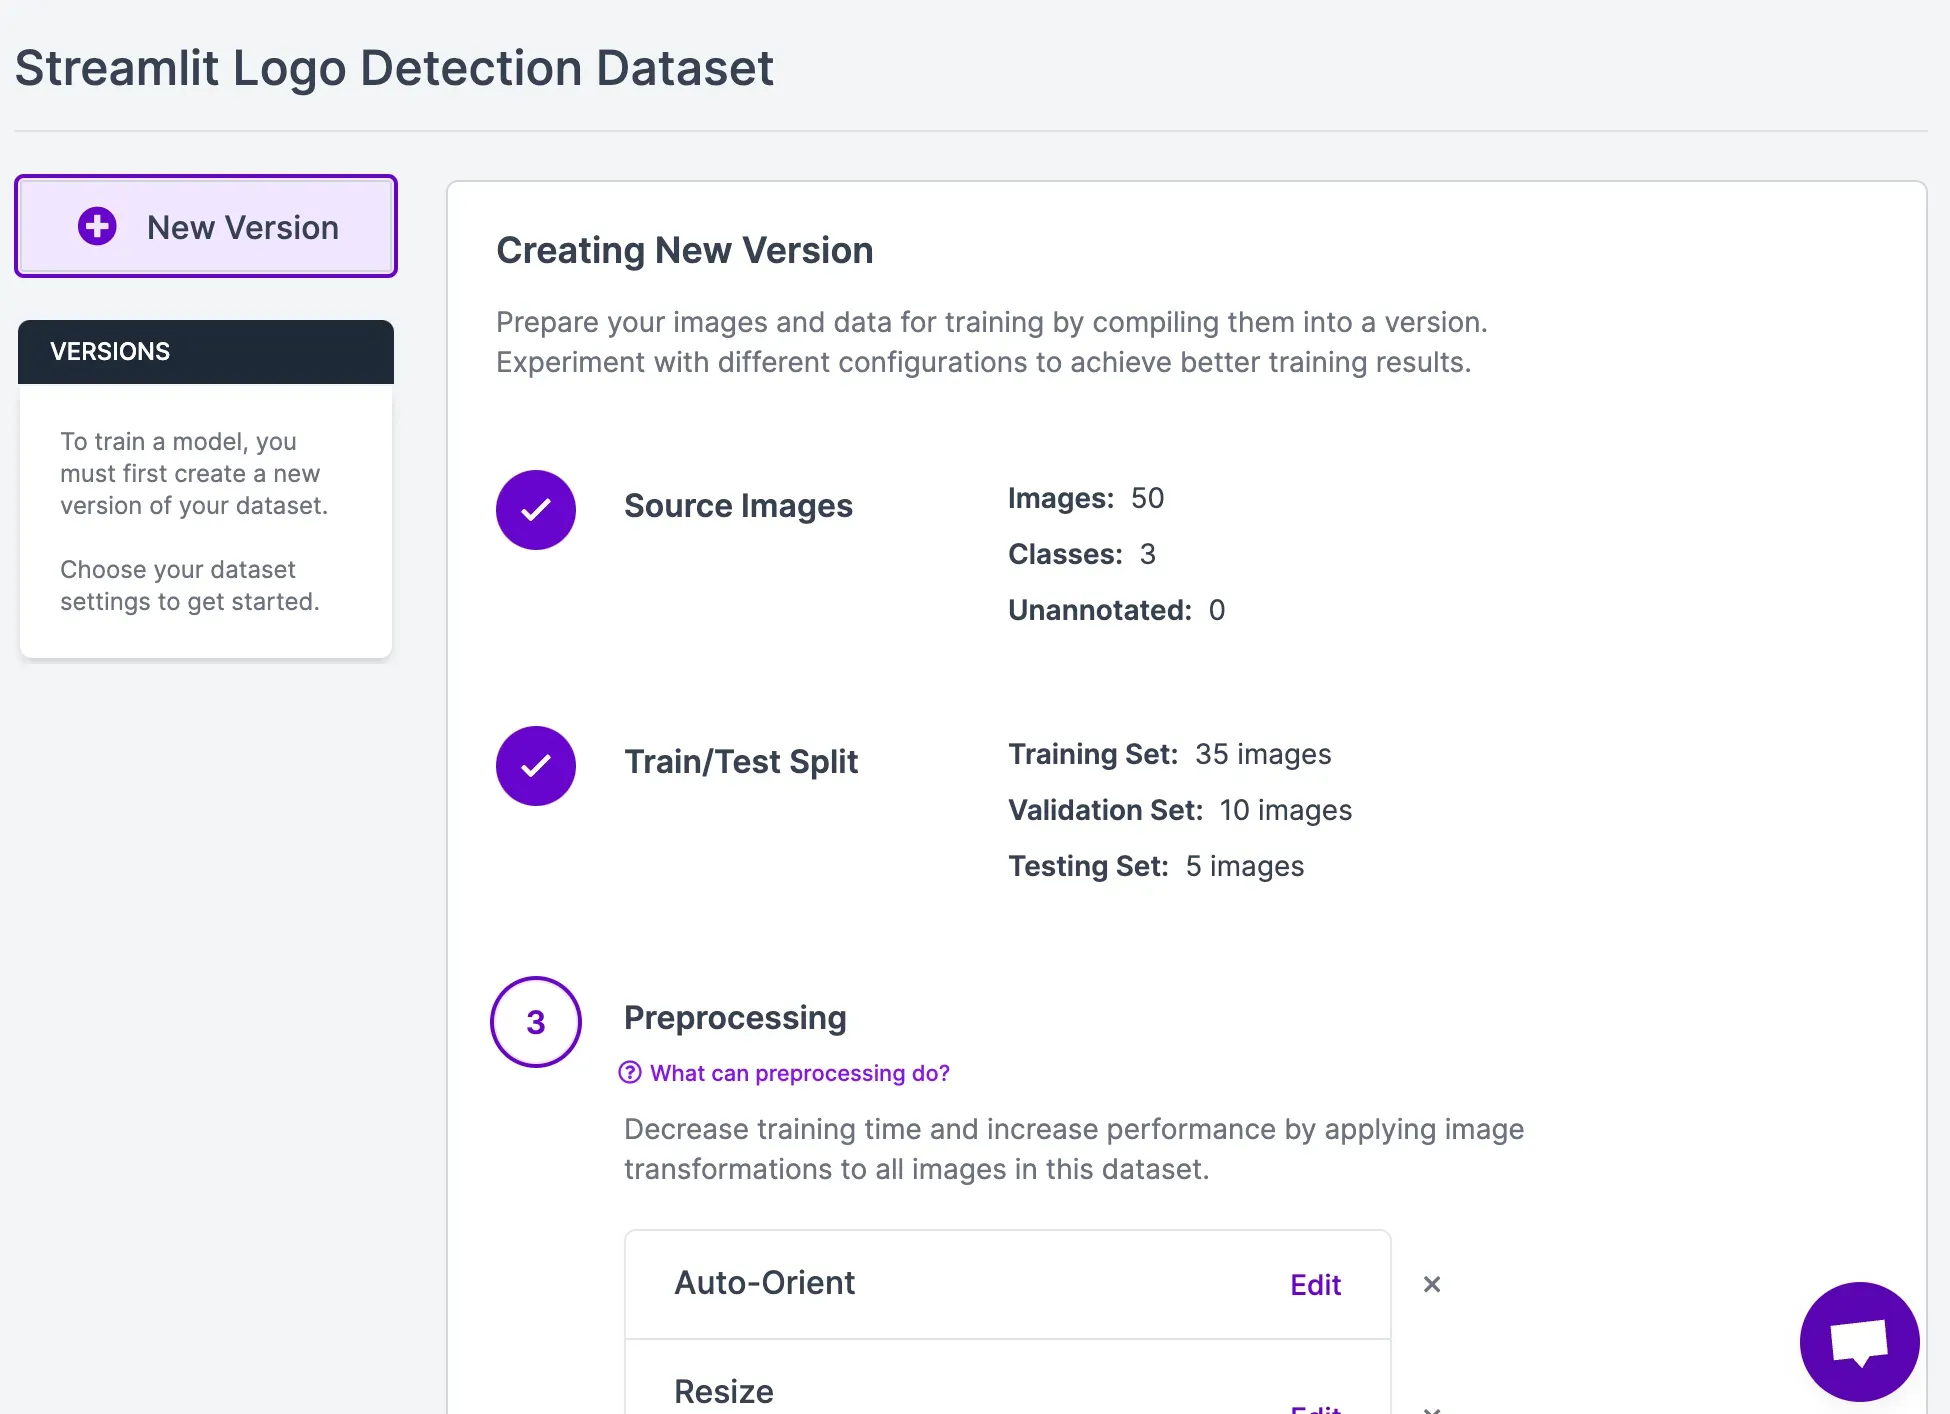
We recommend keeping all of the options at their defaults for your first model version. In a second model version, you may want to experiment with different augmentations.
Click “Create” at the bottom of the page to create your dataset version:
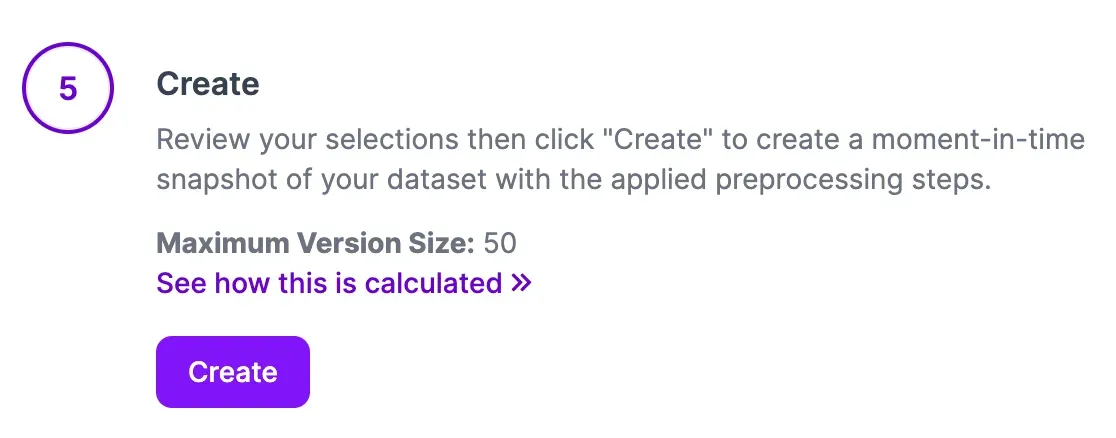
The amount of time it takes to generate a dataset depends on how many images are in your dataset. Once your dataset is ready, you can start to train a vision model.
Train an Object Detection Model
To train a model, click the “Train with Roboflow” button on the dataset page:
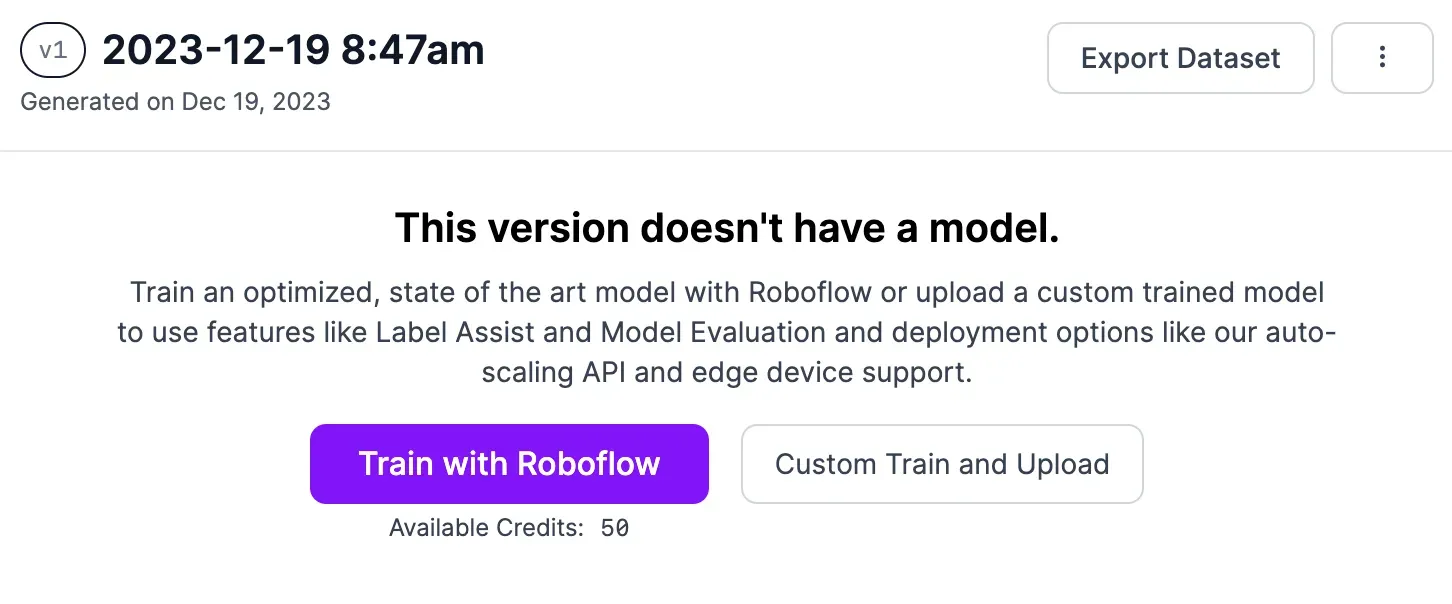
Follow the on-screen instructions to configure your model training job. We recommend using Fast training and training from the MS COCO checkpoint. When your training job starts, an estimate will appear that shows how long we think your training job will take to complete.
As your model trains, you can view graphs that shows model performance:
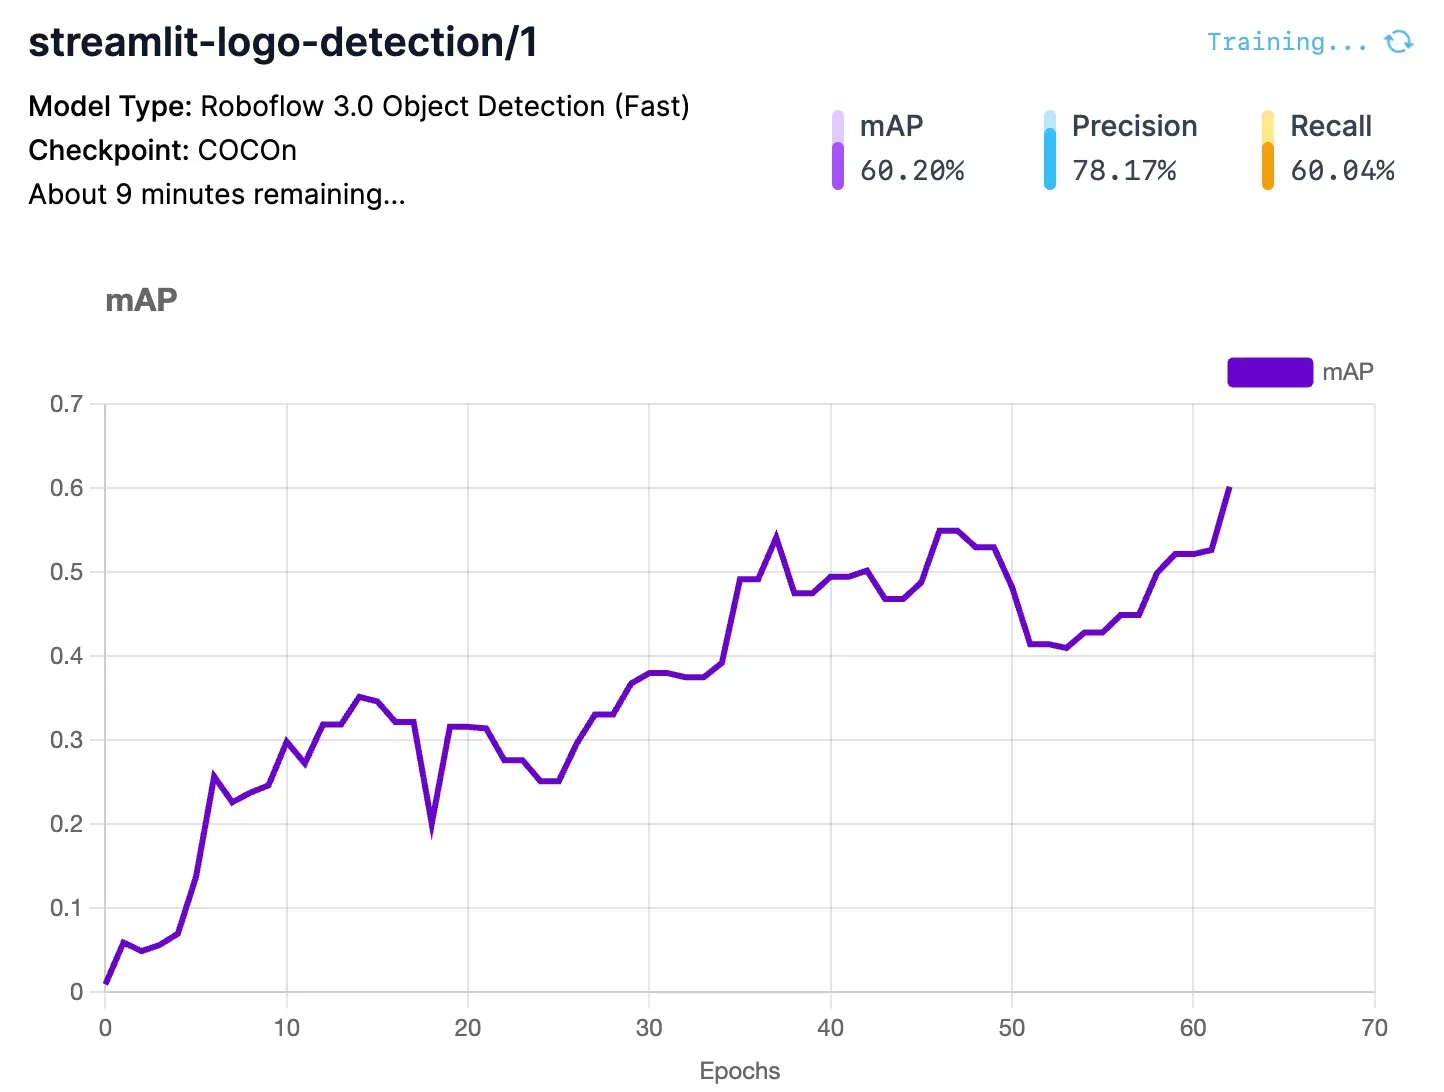
The main chart shows how your model Mean Average Precision (mAP) changes as your model trains. mAP is Mean Average Precision, a measure of model performance. In general, the higher the mAP number is, the better.
You will receive an email when your model is ready to deploy.
Step #2: Run a Logo Detection Model on a Video
With a logo detection model ready, you can run the model on a video. You can run your model on frames in a video using the Roboflow Video Inference API. This API is designed specifically for video inference.
With this API, you can specify a video to pass through a model, a model to run, and the frame rate at which you want to run your model. The API will run inference in the cloud and return a JSON file with inference predictions.
First, install the Roboflow Python package:
pip install roboflowCreate a new Python file and add the following code:
import json

import os
from roboflow import Roboflow
import numpy as np
import supervision as sv

PROJECT_NAME = "streamlit-logo-detection"
VIDEO_FILE = "video.mp4"

rf = Roboflow(api_key=os.environ["ROBOFLOW_API_KEY"])
project = rf.workspace().project(PROJECT_NAME)
model = project.version(1).model

job_id, signed_url, expire_time = model.predict_video(
    VIDEO_FILE,
    fps=5,
    prediction_type="batch-video",
)

results = model.poll_until_video_results(job_id)

with open("results.json", "w") as f:
    json.dump(results, f)

frame_offset = results["frame_offset"]
model_results = results[PROJECT_NAME]


def callback(scene: np.ndarray, index: int) -> np.ndarray:
    if index in frame_offset:
        detections = sv.Detections.from_inference(
            model_results[frame_offset.index(index)]
        )
    else:
        nearest = min(frame_offset, key=lambda x: abs(x - index))
        detections = sv.Detections.from_inference(
            model_results[frame_offset.index(nearest)]
        )

    bounding_box_annotator = sv.BoundingBoxAnnotator()
    label_annotator = sv.LabelAnnotator()

    labels = [
        model_results[frame_offset.index(index)]["class_name"]
        for _
        in detections.class_id
    ]

    annotated_image = bounding_box_annotator.annotate(
        scene=scene, detections=detections)
    annotated_image = label_annotator.annotate(
        scene=annotated_image, detections=detections, labels=labels)

    return annotated_image


sv.process_video(
    source_path=VIDEO_FILE,
    target_path="output.mp4",
    callback=callback,
)
Above, replace video.mp4 with the name of the file on which you want to run inference. You can also provide a URL to a video. Replace model_id with your Roboflow model ID. Learn how to retrieve your Roboflow Model ID.
Replace fps with the FPS at which you want to run your model. If you need to run inference on every frame, choose 1 FPS. For most applications, we recommend running inference every fifth frame. This will help reduce the cost associated with using the API.
When you first run this script, you will be asked to authenticate with Roboflow. This is an interactive process. An API token will then be saved on your system for use in future inferences.
Next, the script starts a video inference job on the Roboflow hosted cloud. When results are available, they will be saved in the “results” dictionary. We save this dictionary to a JSON file for later use.
Step #3: Analyze Model Results
The script above returns a JSON file with predictions. We can plot these predictions on a video using supervision, a Python library that provides utilities for working with vision models.
Let’s plot predictions on a video:
import json

import os
from roboflow import Roboflow
import numpy as np
import supervision as sv

PROJECT_NAME = "streamlit-logo-detection"

frame_offset = results["frame_offset"]
model_results = results[PROJECT_NAME]

with open("results.json", "r") as f:
    results = json.load(f.read())

def callback(scene: np.ndarray, index: int) -> np.ndarray:
    if index in frame_offset:
        detections = sv.Detections.from_inference(
            model_results[frame_offset.index(index)]
        )
    else:
        nearest = min(frame_offset, key=lambda x: abs(x - index))
        detections = sv.Detections.from_inference(
            model_results[frame_offset.index(nearest)]
        )

    bounding_box_annotator = sv.BoundingBoxAnnotator()
    label_annotator = sv.LabelAnnotator()

    labels = [
        model_results[frame_offset.index(index)]["class_name"]
        for _
        in detections.class_id
    ]

    annotated_image = bounding_box_annotator.annotate(
        scene=scene, detections=detections)
    annotated_image = label_annotator.annotate(
        scene=annotated_image, detections=detections, labels=labels)

    return annotated_image


sv.process_video(
    source_path=VIDEO_FILE,
    target_path="output.mp4",
    callback=callback,
)
This code will take our video inference predictions, plot them on every frame in the video, and save the results to a file. Above, replace PROJECT_NAME with the model ID associated with your project. Learn how to retrieve your Roboflow Model ID.
Here is a snippet of our model running on a video, where the logo has been overlaid on every frame in the video:
From here, you can analyze your model results.
For example, we count in how many frames a logo was present. You can calculate this using the following code:
with open("results.json", "r") as f:
    results = json.load(f)

frame_offset = results["frame_offset"]
model_results = results[PROJECT_NAME]

frames_with_logo = []

def callback(scene: np.ndarray, index: int) -> np.ndarray:
    if index in frame_offset:
        detections = sv.Detections.from_inference(
            model_results[frame_offset.index(index)]
        )
        predictions = model_results[frame_offset.index(index)]["predictions"]
    else:
        nearest = min(frame_offset, key=lambda x: abs(x - index))
        detections = sv.Detections.from_inference(
            model_results[frame_offset.index(nearest)]
        )
        predictions = model_results[frame_offset.index(nearest)]["predictions"]

    bounding_box_annotator = sv.BoundingBoxAnnotator()
    label_annotator = sv.LabelAnnotator()

    labels = [i["class"] for i in predictions]

    annotated_image = bounding_box_annotator.annotate(
        scene=scene, detections=detections)
    annotated_image = label_annotator.annotate(
        scene=annotated_image, detections=detections, labels=labels)

    if len(labels) > 0:
        frames_with_logo.append(index)

    return annotated_image

sv.process_video(
    source_path=VIDEO_FILE,
    target_path="output.mp4",
    callback=callback,
)
video_fps = sv.VideoInfo.from_video_path(VIDEO_FILE).fps

print(round(len(frames_with_logo) / video_fps, 2))
This code uses the FPS of the video to calculate for how many seconds the logo was on screen. The result is printed to the console.
We run inference on our video every five frames and our code always takes the predictions closest to the current frame. This means our code above doesn't measure exactly how many frames and seconds a logo is present. Rather, it gives an estimate based on our predictions and logic to retrieve the closest prediction to a given frame.
In the video above, our script reports that there is a logo present for 6.03 seconds.
You could also track information such as:
- How many unique scenes there are in which the logo appears;
- The average amount of time for which the logo is visible, and more.
Conclusion
You can use computer vision to identify brand logos in videos. To identify brand logos, you need a vision model that can identify the logo of interest. In this guide, we walked through how to use Roboflow to train a brand logo detection model.
We then used the Roboflow Video Inference API to detect brand logos in frames in a video. We used supervision to plot predictions, and Python to calculate for how long the logo was on screen.
You can use the guidance above as a starting point to build the video brand logo analytics solutions you need for your business.
Cite this Post
Use the following entry to cite this post in your research:
James Gallagher. (Dec 19, 2023). How to Detect Brand Logos in Videos. Roboflow Blog: https://blog.roboflow.com/how-to-detect-brand-logos-in-videos/