
YOLOv5 is an object detection model with an active deployment base, and Roboflow Inference provides a straightforward path to running it in production. This guide covers uploading a trained YOLOv5 model to Roboflow, then deploying it with the Inference SDK to run predictions on individual images and on live video streams using InferencePipeline, with support for custom callback functions via the Supervision library.
YOLOv5, released on June 25th, 2020, is a computer vision model that supports object detection. For example, you can train an object detection model to detect the location of wooden pallets in a manufacturing facility.
YOLOv5 has since been largely replaced with YOLOv8. With that said, YOLOv5 continues to have an active community with many models deployed in production. We recommend checking out how to detect objects with YOLOv8, but if you still need YOLOv5 we have you covered.
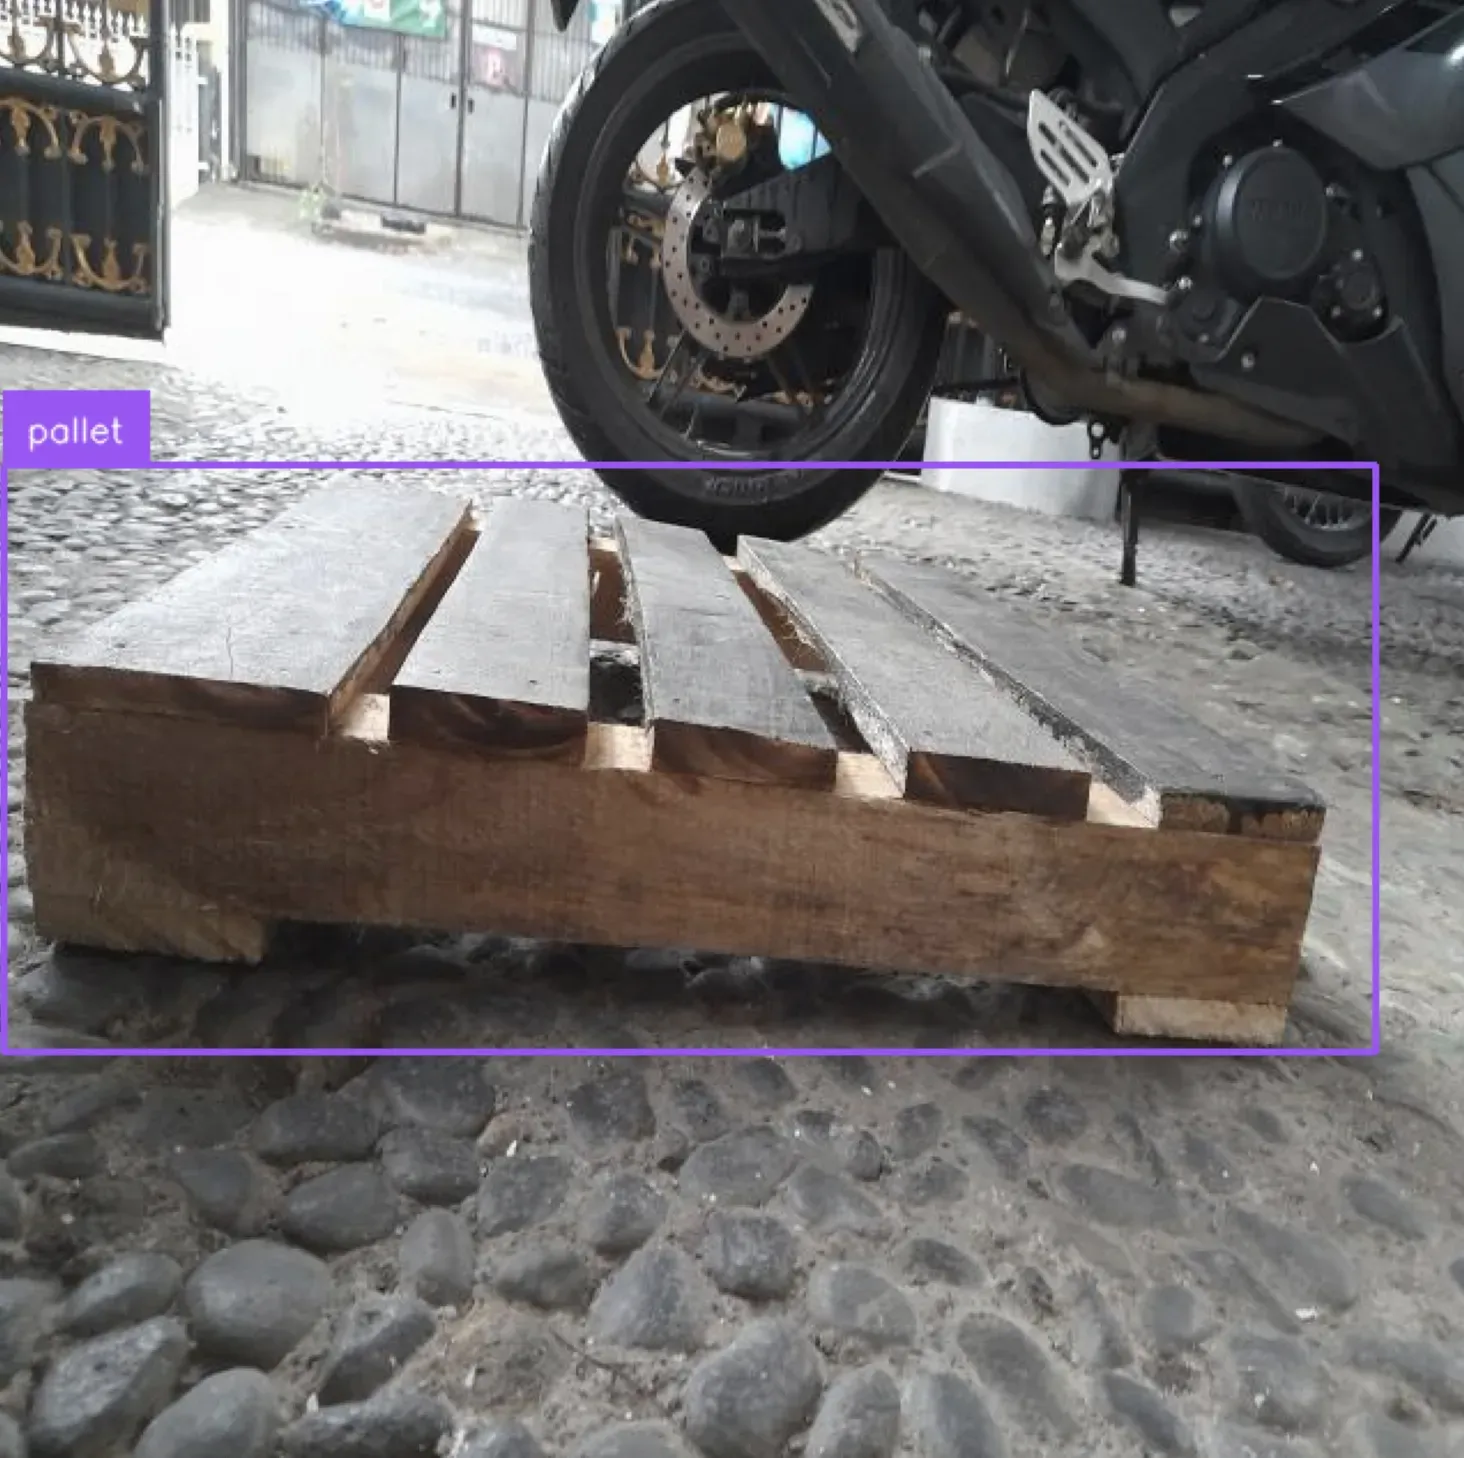
In this guide, we are going to walk through how to detect objects with YOLOv5. We will upload a YOLOv5 model to Roboflow, then deploy the model on a device with Inference. We will deploy the model on both images and a video stream. Here is an example of results from our model retrieved using Inference:

In the image above, our model successfully identifies the location of a wooden pallet.
Without further ado, let’s get started!
How to Detect Objects with YOLOv5
You can deploy YOLOv5 models for use in detecting objects using Roboflow Inference. Inference is a scalable inference server you can use to run computer vision models on your own hardware. Inference is trusted by enterprises around the world for deploying vision models.
You can deploy Inference as a HTTP microservice or integrate your model directly into Python code with the Inference SDK. For this guide, we will deploy Inference with the SDK.
Create a Model on Roboflow
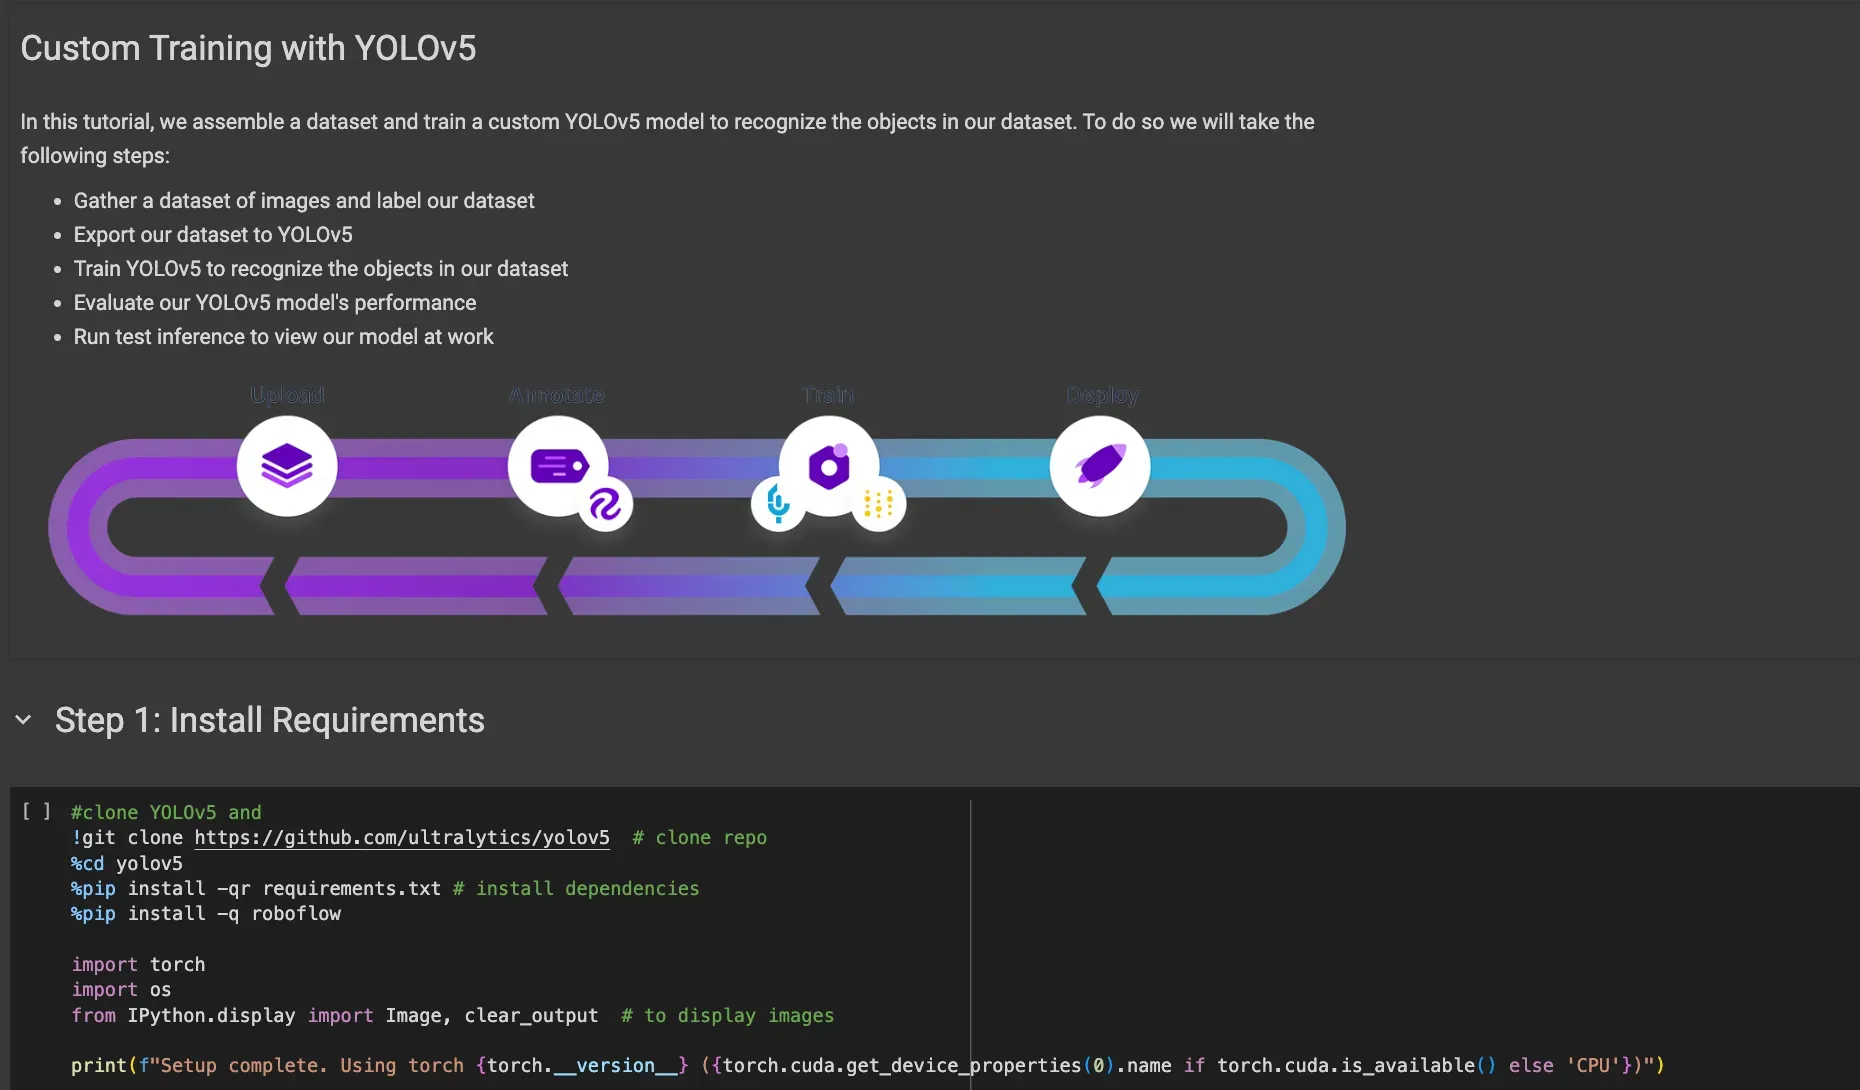
To start detecting objects, you need a YOLOv5 object detection model. You can train a model following the Roboflow YOLOv5 training notebook. This notebook provides everything you need to train your model.
To use our training notebook, and to deploy your model with Inference, you will need to create a project in Roboflow with all of the images you will use for model training. This allows you to create a version of your dataset, which is the state of your dataset at a particular moment. Creating dataset versions allows you to easily track dataset changes over time.
To create a project in Roboflow, create a Roboflow account, then click “Create New Project” on your Roboflow dashboard. Then, upload all of your images. If you have not annotated images for your project, you can annotate them using Roboflow Annotate.
Once you have annotated all of your images, go to the “Generate” tab on your Roboflow dataset page. This will allow you to generate a dataset version. You can start training a model on your own hardware with this snapshot. You can download your dataset in YOLOv5 format, so you don’t need to make any changes to the structure of your dataset to use it in model training.
With a dataset version ready in Roboflow, you can start training your YOLOv5 model using our YOLOv5 training notebook.
Next, you need to upload your model to Roboflow for use in deployment. To learn how to upload your model, refer to our model weight upload guide. Models uploaded to Roboflow can be downloaded to your machine for use in running the model.
Run Inference on an Image
Once you have a model on Roboflow, you can deploy it with Roboflow Inference. For this guide, we will be deploying a model that can identify the location of wooden pallets in logistics facilities.
To get started, install Inference:
pip install inferenceThen, create a new file and add the following code:
from inference import get_roboflow_model
import supervision as sv
import cv2

image_file = "image.jpeg"
image = cv2.imread(image_file)

model = get_roboflow_model(model_id="pallet-h7lkh/1")

results = model.infer(image)

detections = sv.Detections.from_roboflow(results[0].dict(by_alias=True, exclude_none=True))

bounding_box_annotator = sv.BoundingBoxAnnotator()
label_annotator = sv.LabelAnnotator()

annotated_image = bounding_box_annotator.annotate(
    scene=image, detections=detections)
annotated_image = label_annotator.annotate(
    scene=annotated_image, detections=detections)

sv.plot_image(annotated_image)
In this code, we load our model, then run inference on an image. When this code runs for the first time, your model weights – which are used to run your model – will be downloaded from Roboflow onto your hardware. This process will take a few moments. The weights downloaded to your computer will then be used to run your model.
Above, replace pallet-h7lkh/1 with your Roboflow model ID, or the model ID of any model on Roboflow Universe that you want to run. Learn how to find your Roboflow model ID.
Replace “API_KEY” with your Roboflow API key. This will be used to authenticate your system with Roboflow and retrieve the weights for your model. Learn how to retrieve your Roboflow API key.
Let’s run our script on the following image of a wooden pallet:
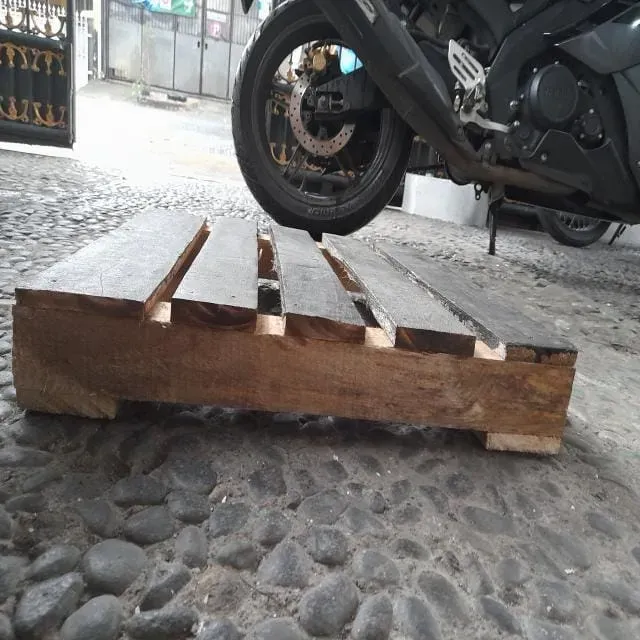
Our code returns:
Our model has successfully identified the location of the wooden pallet in the image.
Run Inference on a Video Stream
We can also run our YOLOv5 model on a video stream. This is ideal for deploying your model to a production facility where you need to run your model on live data.
You can run your model on frames from a webcam or an RTSP stream.
For this guide, let’s run inference on a webcam feed. To do so, create a new file and add the following code:
# Import the InferencePipeline object
from inference import InferencePipeline
# Import the built in render_boxes sink for visualizing results
from inference.core.interfaces.stream.sinks import render_boxes

# initialize a pipeline object
pipeline = InferencePipeline.init(
    model_id="pallet-h7lkh/1", # Roboflow model to use
    video_reference=0, # Path to video, device id (int, usually 0 for built in webcams), or RTSP stream url
    on_prediction=render_boxes, # Function to run after each prediction
)
pipeline.start()
pipeline.join()
This code uses the InferencePipeline feature in Roboflow Inference to handle video. Above, replace 0 with the ID of the camera from which you want to retrieve frames. Your default camera has the ID 0. You can also specify an RTSP stream URL instead of a video ID.
The render_boxes function will plot bounding boxes in real time. You can set your own callback function to write custom logic. The supervision Python package has a range of utilities you can use to write your own logic that handles predictions from your model. For example, you can track objects using the supervision ByteTrack implementation, smooth predictions over multiple frames using the supervision Smoother class, and more.
To learn about writing your own callback function, refer to the Inference documentation.
Conclusion
YOLOv5 is an object detection model. You can train a model to identify the location of objects in images using YOLOv5. In this guide, we walked through the steps to detect objects with YOLOv5 and deploy your model in production. We discussed training a model, uploading your model to Roboflow, then using Inference to deploy your model.
To learn more about YOLOv5, refer to our What is YOLOv5 guide.
Cite this Post
Use the following entry to cite this post in your research:
James Gallagher. (Mar 26, 2024). How to Detect Objects with YOLOv5. Roboflow Blog: https://blog.roboflow.com/how-to-detect-objects-with-yolov5/