
This tutorial covers two ways to run object detection with a YOLOv8 model: through Roboflow Inference, an open source inference server that exposes your model over HTTP, and through the native Ultralytics Python SDK. Both paths are demonstrated with a logistics model that detects forklifts and wood pallets. The guide also shows how to use the supervision library to plot predictions and filter results by class or bounding box properties.
YOLOv8, developed and maintained by Ultralytics, is a state-of-the-art computer vision model. You can use YOLOv8 for object detection, classification, and segmentation. The model introduces several architectural changes over its predecessor, YOLOv5.
You may be wondering: how can I detect objects with YOLOv8? How you use YOLOv8 depends on how you plan to deploy your model.
You can run YOLOv8 with the native Python SDK, which enables you to detect objects in a few lines of code once you have a model ready.
You can also run YOLOv8 through Roboflow Inference, a high-performance, open source, and scalable computer vision inference server. This server lets you detect objects using a YOLOv8 model and retrieve results over a HTTP connection.
In this guide, we are going to show how to detect objects with a YOLOv8 object detection model. We will use YOLOv8 through the native Ultralytics Python SDK and Roboflow Inference.
Below is an example of the result of a YOLOv8 model, showing detections for the objects "forklift" and "wood pallet, displayed on an image. We will show how to achieve a result like this with a logistics model in this guide.

Without further ado, let’s get started!
Preparation: Train a Model
To detect objects with YOLOv8, you need a model that has been trained to identify an object of interest. YOLOv8 comes with a model trained on the Microsoft COCO dataset out of the box. This model can identify 80 classes, ranging from people to cars. With that said, for more specialized objects, you will need to train your own model.
To train a YOLOv8 object detection model on your own data, check out our YOLOv8 training guide.
You can also train a YOLOv8 model using Roboflow, which provides an end-to-end solution with all the tools you need to train a model.
YOLOv8 models trained on Roboflow have an infinitely scalable API that you can use to call your model, or can be run on device through Roboflow Inference. Inference is a fast, open source server through which you can run vision models, including YOLOv8 object detection models.
How to Detect Objects with YOLOv8: Roboflow Inference
You can detect objects with YOLOv8 models using Roboflow Inference. Inference is an open source server through which you can run a range of state-of-the-art models, from fine-tuned models like YOLOv8 to foundation models like CLIP. You can run Inference on an edge device or on a separate device with more computational resources available.
Roboflow Inference offers a few ways to run a model, including:
- A Python SDK
- A HTTP interface
- A UDP interface
Inference is used by large enterprises in the Fortune 500 to run vision models.
For this guide, we will focus on using the Python SDK. To learn more about the interfaces available for Inference, refer to the Inference documentation.
Step #1: Create a Model on Roboflow
Before you run a YOLOv8 model, you need a trained model on Roboflow. If you have YOLOv8 model weights, you can upload them to Roboflow.
To learn how to upload model weights to Roboflow, refer to our upload model weights documentation.
If you do not have a YOLOv8 model, you can use the Roboflow platform to train one, without any code required during the training process.
Read our Getting Started guide to learn how to train a model on Roboflow. You can also use one of the thousands of pre-trained models on Roboflow Universe, a community where people openly share computer vision datasets and trained models.
We will be using a pre-trained logistics model in this section. This model has been trained to identify 20 different classes related to logistics, including shipping containers, forklifts, and people.
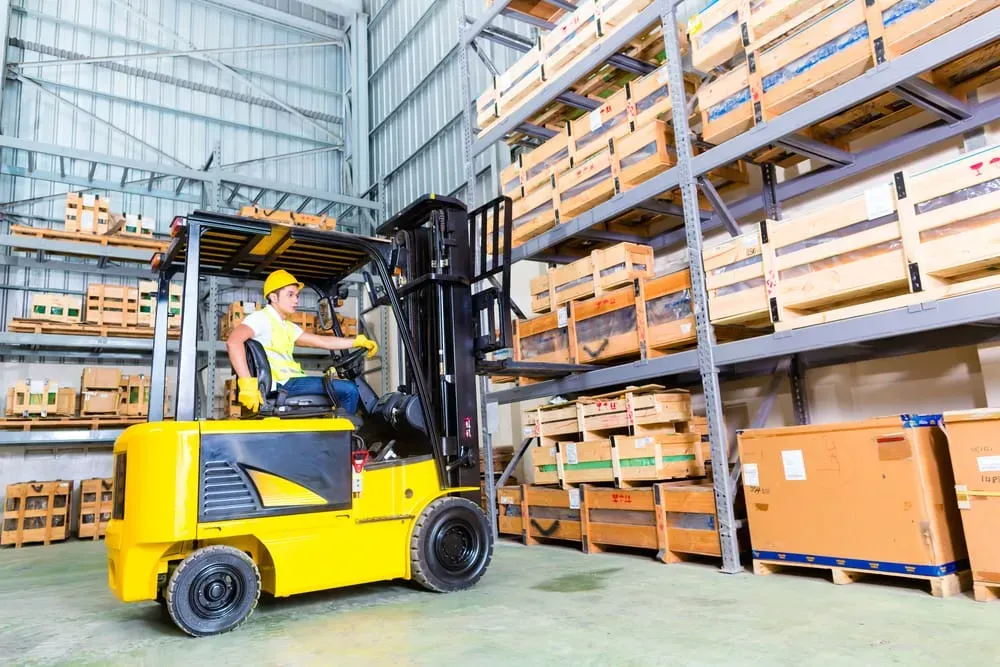
We'll run inference on this image to detect a forklift:
Step #2: Run Inference on an Image
To detect objects with YOLOv8 and Inference, you will need Docker installed. Follow the official Docker installation instructions to learn how to install Docker. Then, install the Inference package with the following command:
pip install inference inference-cliTo run an Inference server, run the following command:
inference startNext, create a new Python file and add the following code:
from inference_sdk import InferenceHTTPClient, InferenceConfiguration

custom_configuration = InferenceConfiguration(confidence_threshold=0.8)

CLIENT = InferenceHTTPClient(
    api_url="http://localhost:9001",
    api_key="API_KEY"
)
CLIENT.select_api_v0()

results = CLIENT.infer("forklift.jpg", model_id="logistics-sz9jr/2")

print(results)
Above, replace logistics-sz9jr/2 with your Roboflow model ID, or the model ID of any model on Roboflow Universe that you want to run. Learn how to find a model ID (also called a “project ID”).
Replace “API_KEY” with your Roboflow API key. This will be used to authenticate your system with Roboflow and retrieve the weights for your model. Learn how to retrieve your Roboflow API key.
Here are the results when we run the script on the forklift image from earlier:
{'time': 0.06251341699999813, 'image': {'width': 1000, 'height': 667}, 'predictions': [{'x': 301.0, 'y': 418.0, 'width': 398.0, 'height': 436.0, 'confidence': 0.8568924069404602, 'class': 'forklift', 'class_id': 4}, {'x': 858.0, 'y': 576.0, 'width': 216.0, 'height': 48.0, 'confidence': 0.7670190334320068, 'class': 'wood pallet', 'class_id': 19}]}You may be wondering: how can I see my model predictions on an image? That’s where supervision can help. supervision is a Python package maintained by Roboflow that provides utilities for working with computer vision models. You can use supervision to visualize model predictions on an image, filter predictions by confidence and class, and more.
To use supervision, first install the supervision Python package, as well as OpenCV (opencv-python), which we will use to load images:
pip install supervision opencv-pythonNext, add the following code to your script:
import supervision as sv
import cv2

detections = sv.Detections.from_inference(results)

image = cv2.imread("forklift.jpg")

bounding_box_annotator = sv.BoundingBoxAnnotator()
label_annotator = sv.LabelAnnotator()

labels = [
    detection["class"] for detection in results["predictions"]
]

annotated_image = bounding_box_annotator.annotate(
    scene=image, detections=detections)
annotated_image = label_annotator.annotate(
    scene=annotated_image, detections=detections, labels=labels)

sv.plot_image(annotated_image)
This script allows us to visualize predictions from our model on an image. Let’s run our code:
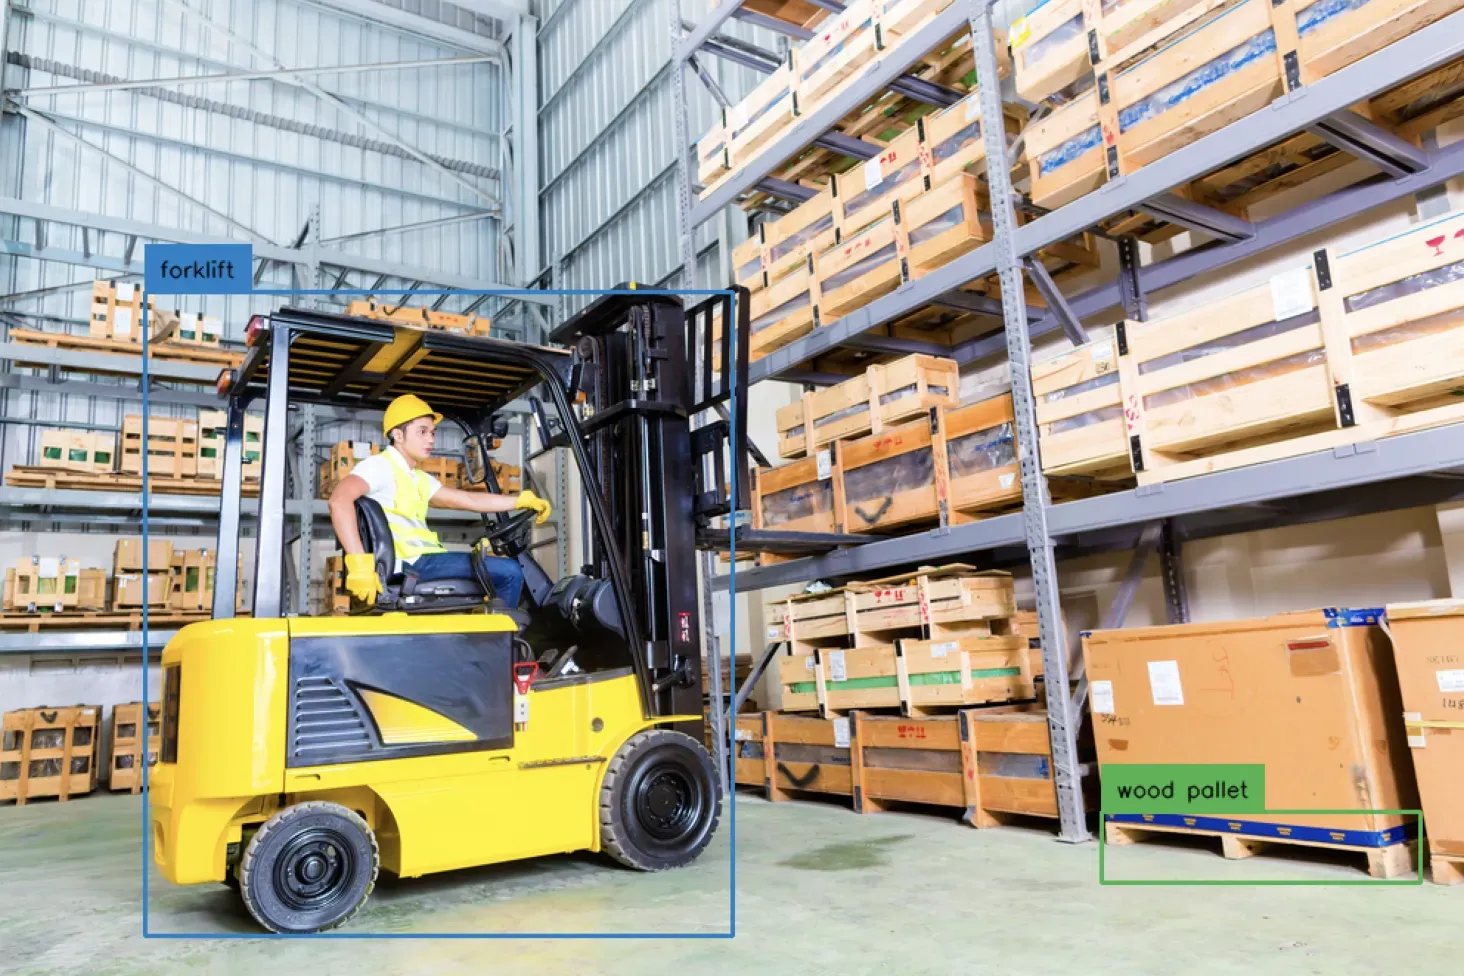
We have successfully identified a forklift and a wood pallet in our image.
You can filter out predictions using the supervision detections filtering API.
How to Detect Objects with YOLOv8: Python SDK
You can detect objects with a few lines of code using the Ultralytics Python SDK. This SDK implements YOLOv8 and enables you to run other models such as YOLOv5.
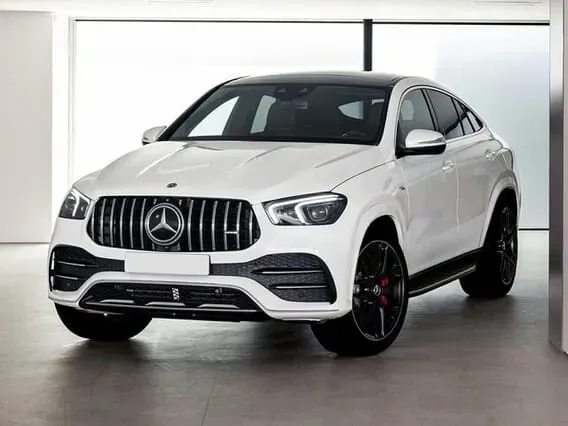
We will be using the default model trained on the Microsoft COCO dataset in this section, which can identify 80 objects. You can run any model you have trained, too. We will run a YOLOv8 model on this image:
To detect objects with the Ultralytics Python SDK, first install the Ultralytics Python package:
pip install "ultralytics<=8.3.40"With ultralytics installed, we can now create a script to use our model:
Create a new Python file and add the following code:
from ultralytics import YOLO

model = YOLO('yolov8s.pt')

results = model("car.jpg")

print(results[0].boxes)
In this code, we load the “yolov8s.pt” weights, which are the default weights from the model trained on the Microsoft COCO model. You can load your own weights by replacing “yolov8n.pt” if you already have model weights.
We detect objects in an image called “car.jpg”. Then, we print inference results to the console.
The output from the code itself contains a lot of information:
boxes: tensor([[4.1885e+01, 6.8851e+01, 5.2279e+02, 3.6028e+02, 5.2983e-01, 2.0000e+00],
        [4.8236e+01, 6.7880e+01, 5.2600e+02, 3.5878e+02, 4.5028e-01, 7.0000e+00]])
...
xywh: tensor([[282.3390, 214.5649, 480.9080, 291.4279],
        [287.1180, 213.3284, 477.7631, 290.8963]])
xywhn: tensor([[0.4971, 0.5037, 0.8467, 0.6841],
        [0.5055, 0.5008, 0.8411, 0.6829]])
xyxy: tensor([[ 41.8850,  68.8509, 522.7930, 360.2788],
        [ 48.2364,  67.8803, 525.9995, 358.7766]])
xyxyn: tensor([[0.0737, 0.1616, 0.9204, 0.8457],
        [0.0849, 0.1593, 0.9261, 0.8422]])
We can work with these bounding boxes effectively with the supervision package. Using supervision, we can visualize and manipulate the results from our model.
If you haven't already, install the supervision Python package:
pip install supervisionThen, add the following code to the script we started earlier:
import supervision as sv
import cv2

detections = sv.Detections.from_ultralytics(results[0])

image = cv2.imread("car.jpeg")

bounding_box_annotator = sv.BoundingBoxAnnotator()
label_annotator = sv.LabelAnnotator()

classes = model.names

labels = [
	f"{classes[class_id]} {confidence:0.2f}"
	for _, _, confidence, class_id, _
	in detections
]

annotated_image = bounding_box_annotator.annotate(
    scene=image, detections=detections)
annotated_image = label_annotator.annotate(
    scene=annotated_image, detections=detections, labels=labels)

sv.plot_image(annotated_image)

print(labels)
In this code, we load YOLOv8 our detections into an sv.Detections object. This is the standard format for working with supervision detections.
We use the BoundingBoxAnnotator to plot the bounding boxes returned by the model. Bounding boxes are the coordinates from an object detection model that correspond to the location of an object in an image. We then plot the image we used with our YOLOv8 model with predictions overlaid so we can see the results.
Our code now returns the following image:
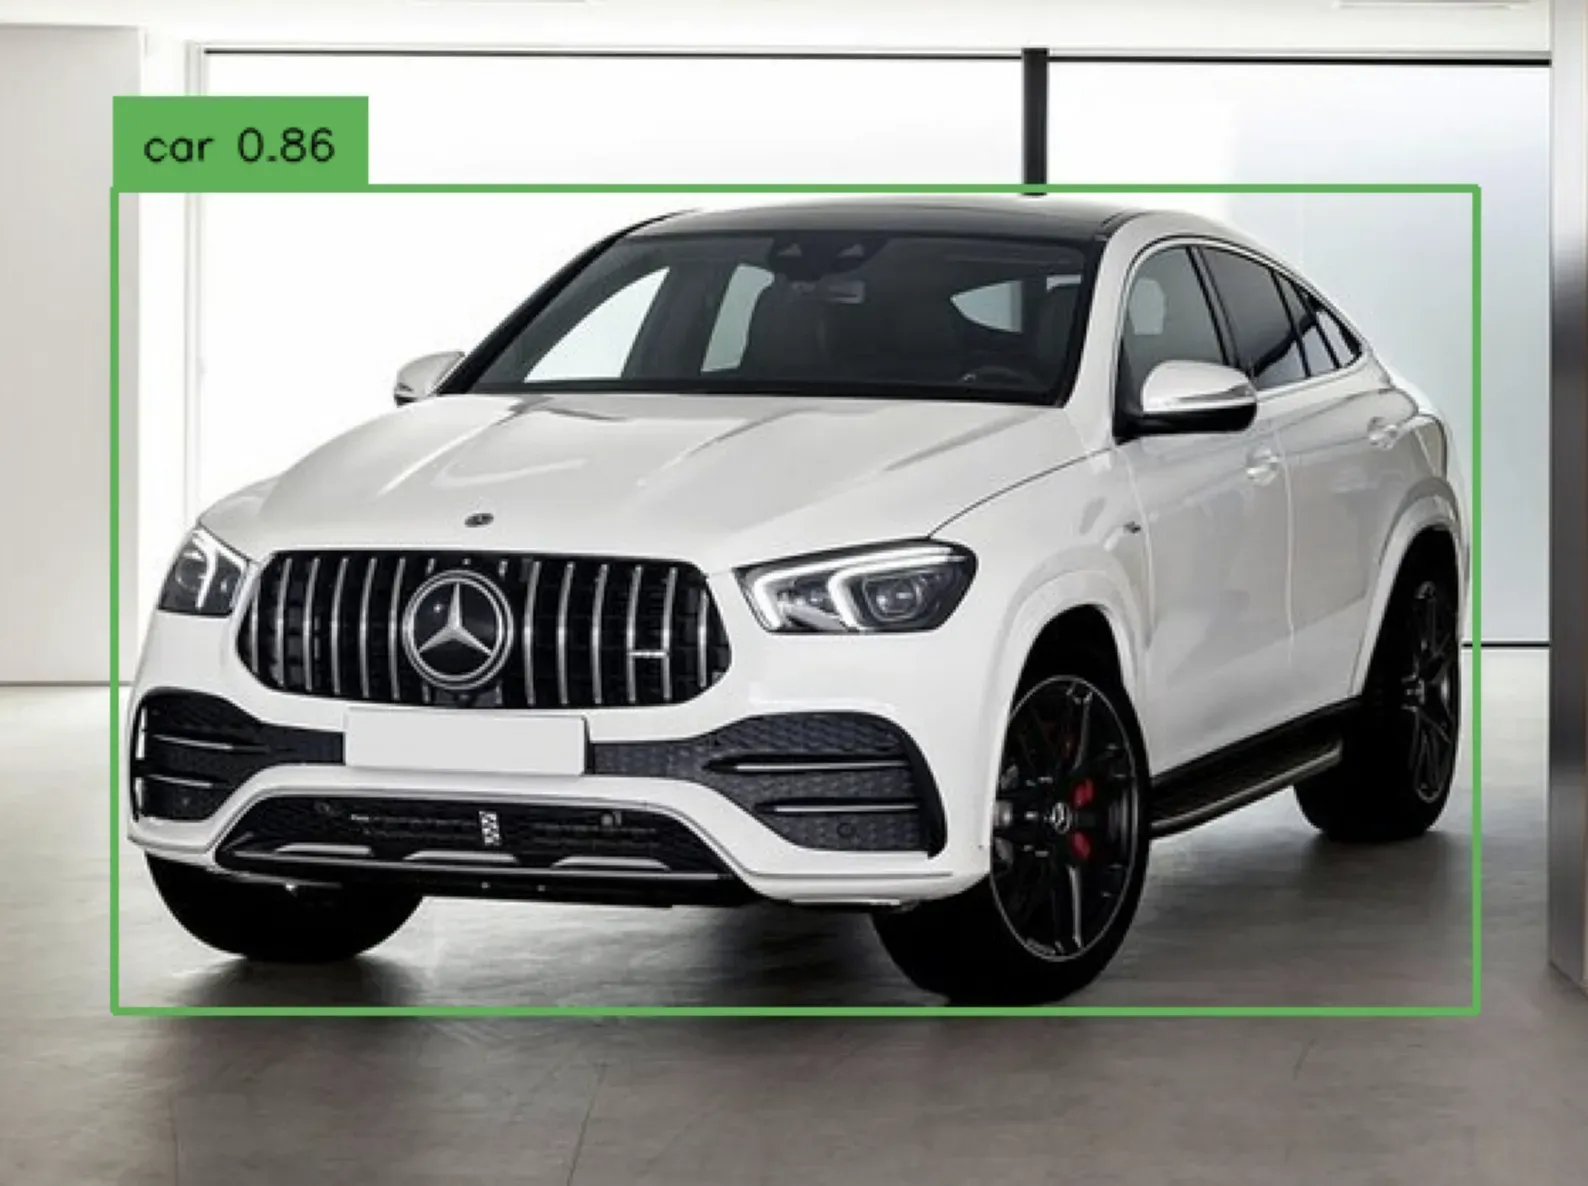
Our model identified the location of the car in the image.
Supervision contains a number of functions that may be helpful when working with your model, including the ability to:
- Filter predictions by class ID, box area, and more;
- Track objects in videos;
- Evaluate models, and more;
Refer to the supervision documentation to learn more.
Conclusion
In this guide, we showed how to use YOLOv8 to detect objects in images.
You can use Roboflow Inference to run one of thousands of pre-trained YOLOv8 object detection models that have been made available for use through Roboflow Universe. You can also run models you have trained by uploading them to Roboflow for use with Inference.
In addition, you can use the Ultralytics Python package which enables you to run inference on a model.
We also walked through how to plot predictions from your model. To learn more about processing predictions from your model – from filtering predictions to running model evaluations – check out the full supervision documentation.
Cite this Post
Use the following entry to cite this post in your research:
James Gallagher. (Dec 6, 2023). How to Detect Objects with YOLOv8. Roboflow Blog: https://blog.roboflow.com/how-to-detect-objects-with-yolov8/