
Gaming is one of the most popular pastimes in the world, offering exciting experiences and endless entertainment from the comfort of your home.
Using computer vision, we are able to analyze our inputs that otherwise would be difficult to track. For example, you could use computer vision to build an application that tracks how often you are pointing in the direction of a mob in a video.
In this tutorial, we will explore how to map user inputs for a mobile game using computer vision techniques. The specific game we will be using is Brawl Stars.
You will learn how to create a computer vision model using Roboflow, create a no-code workflow, and use the Roboflow InferencePipeline Python method to successfully run a computer vision system on a video. You will also learn the logic behind mapping direction between two detected objects.
Here is an example of our application working:
What we are building
Brawl stars is a game with three main buttons: movement (blue), attack (red), and special attack (yellow).
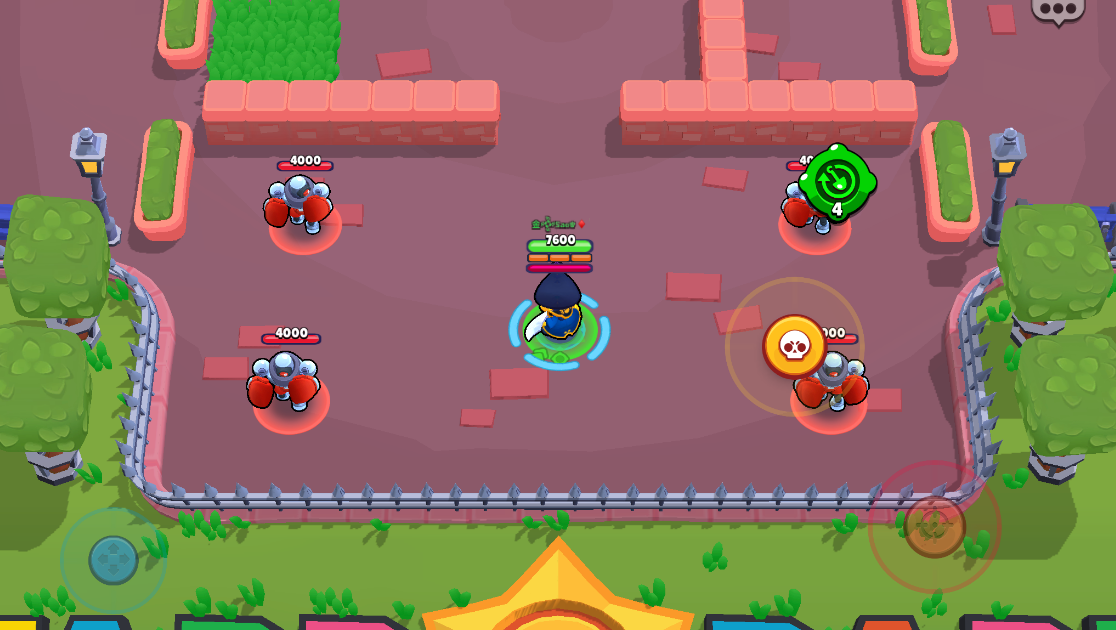
When your character is stagnant, all buttons are positioned directly above a similar, smaller button. However, if your character is moving, we can see there is a button underneath the larger movement button. This is the same for both the attack and special attack buttons.
This tutorial will guide you through how to:
1. Map each inner small button with its correlated larger button
2. Map the direction of button in order to see which direction they are moving
Let’s begin!
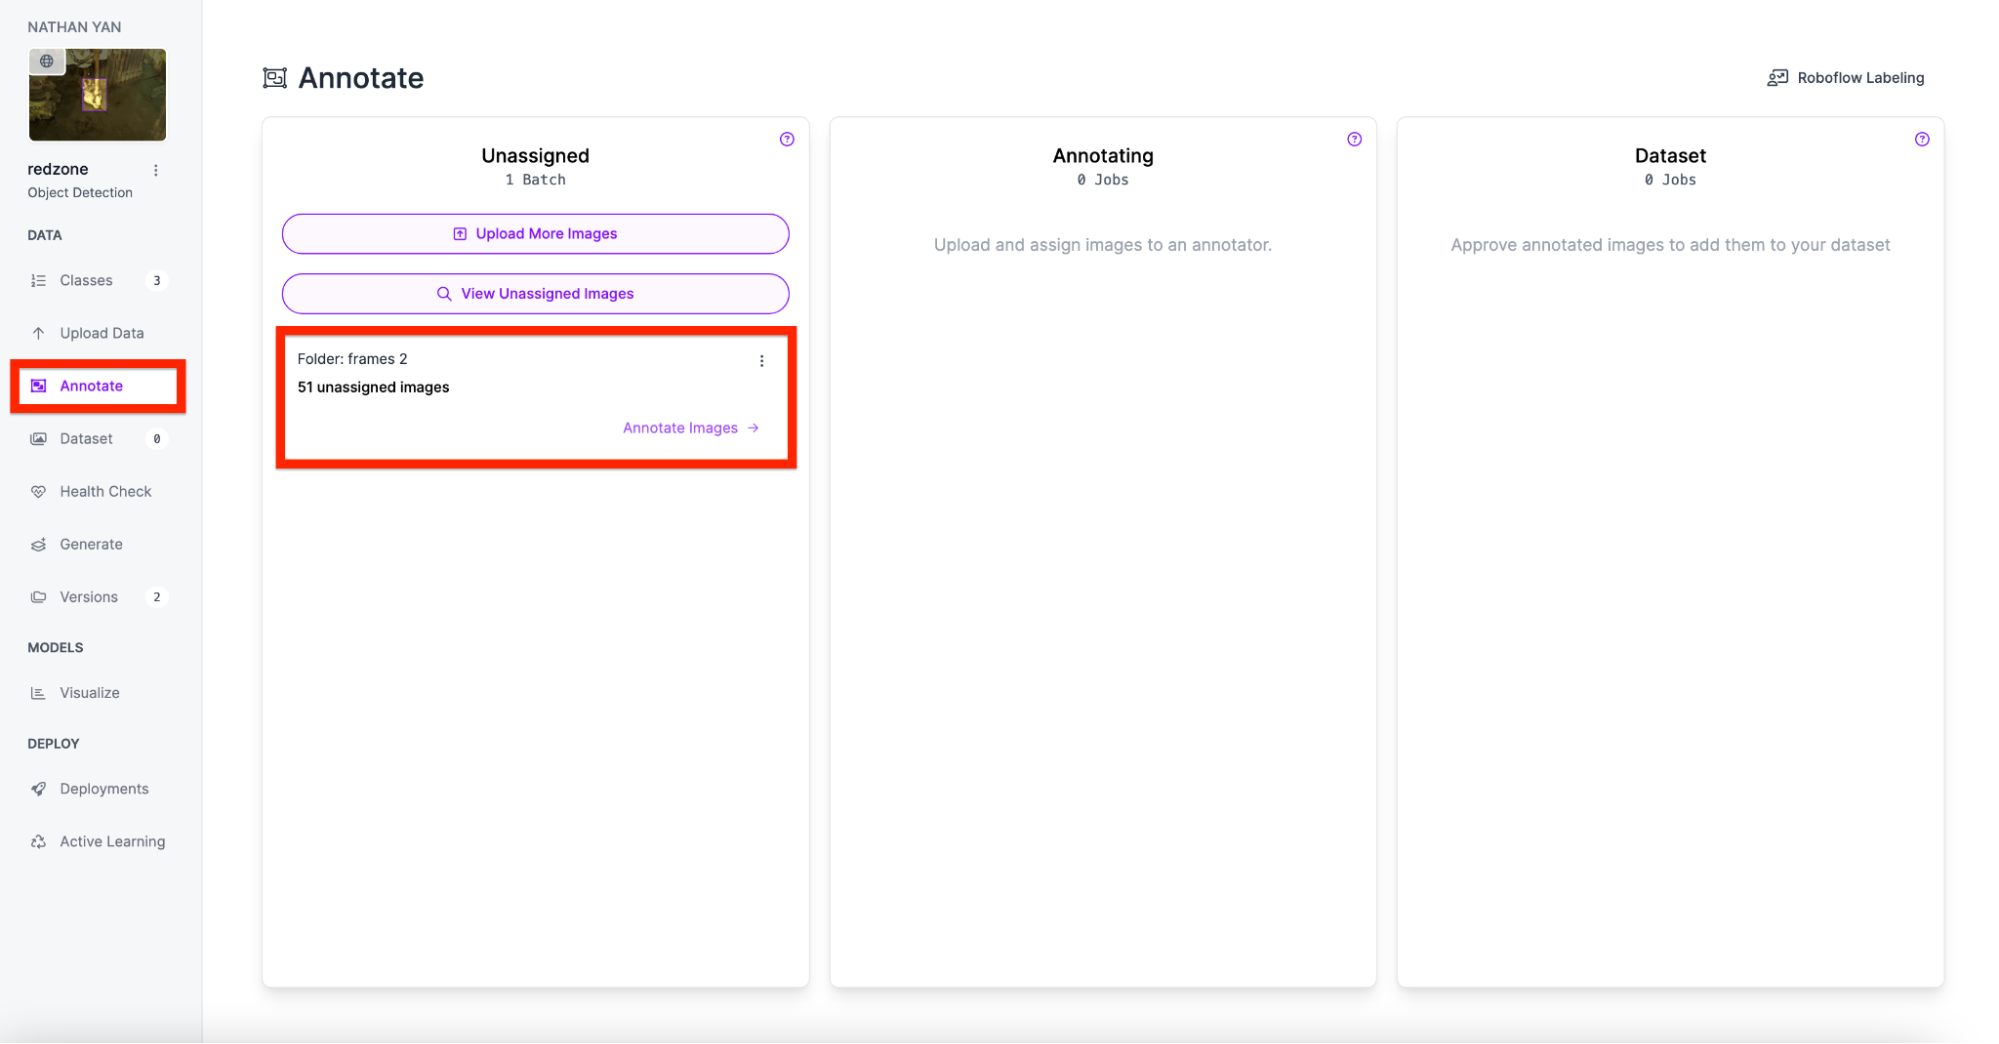
Step #1: Create a Roboflow model
First, sign up for Roboflow and create an account.
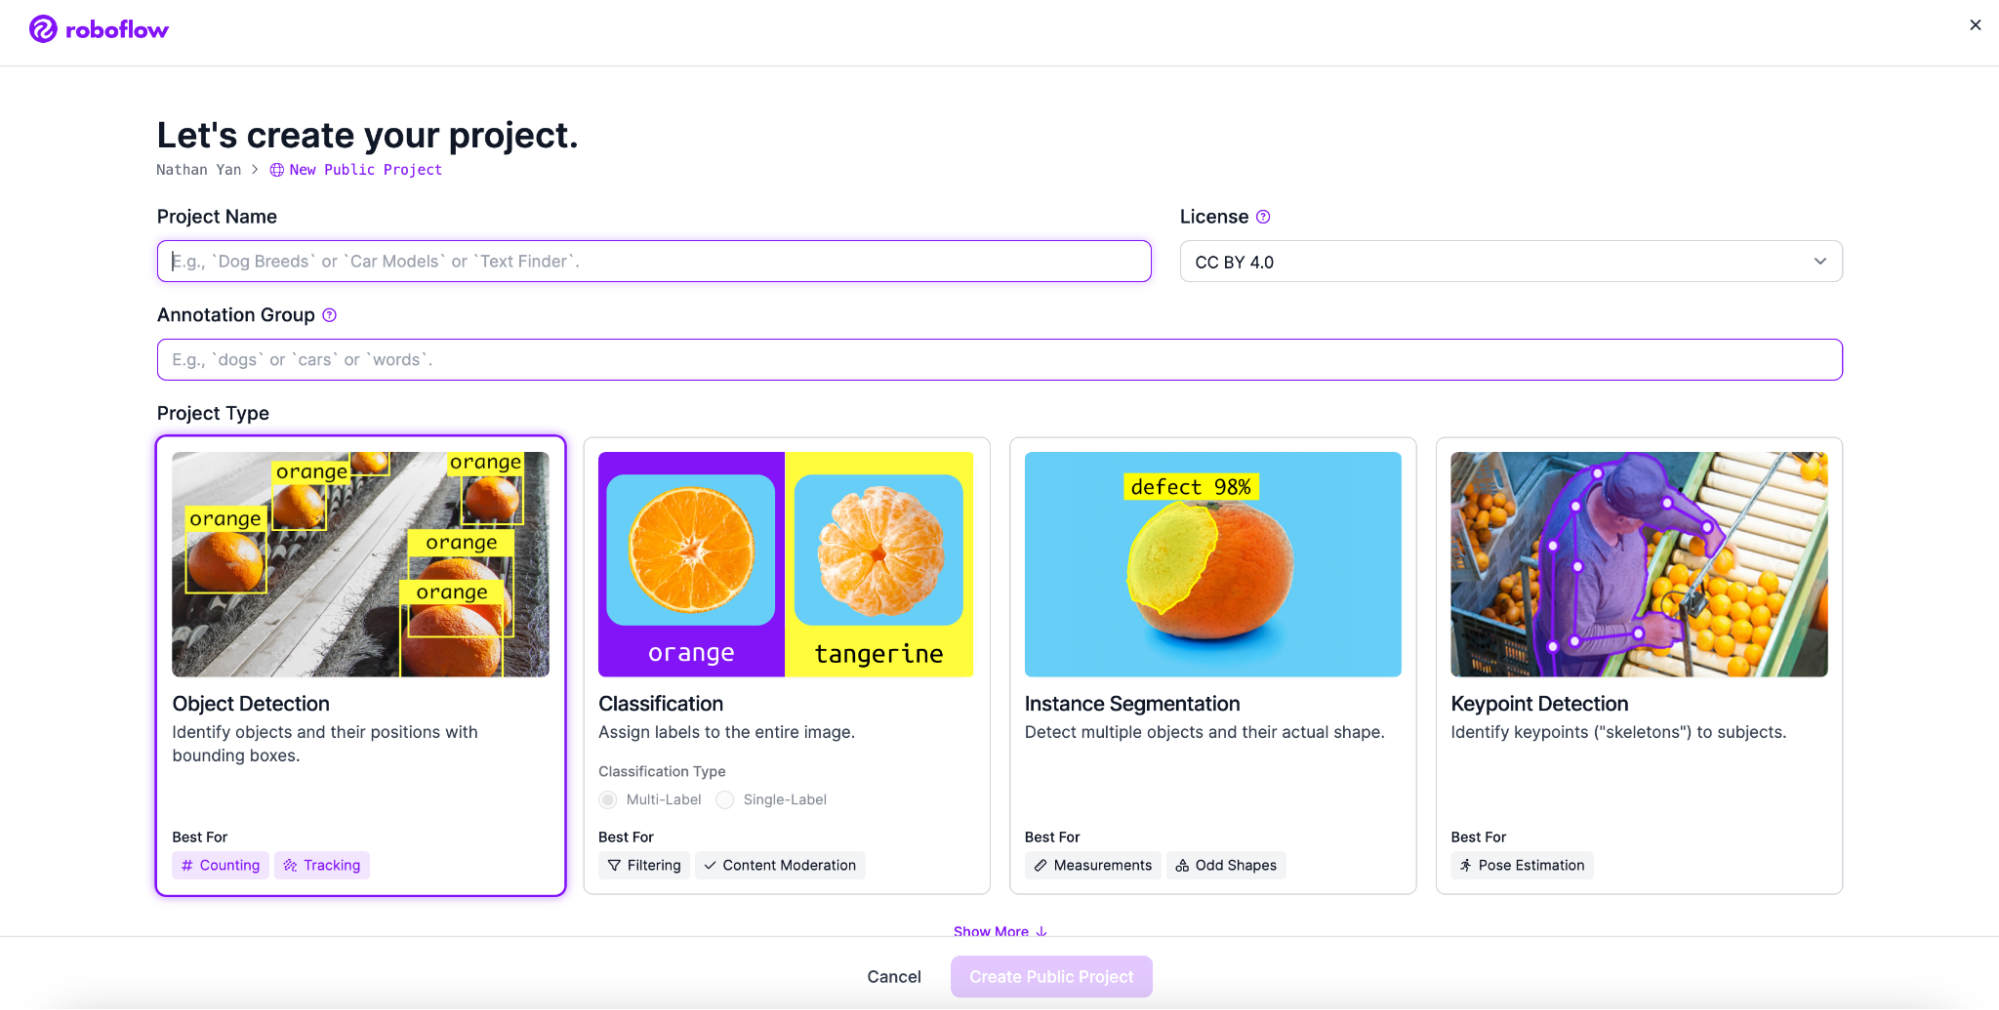
Next, go to workspaces and create a project. Customize the project name and annotation group to your choice. Make sure to make an object detection project.
Next, add your image. Use Roboflow Universe to find a suitable dataset.
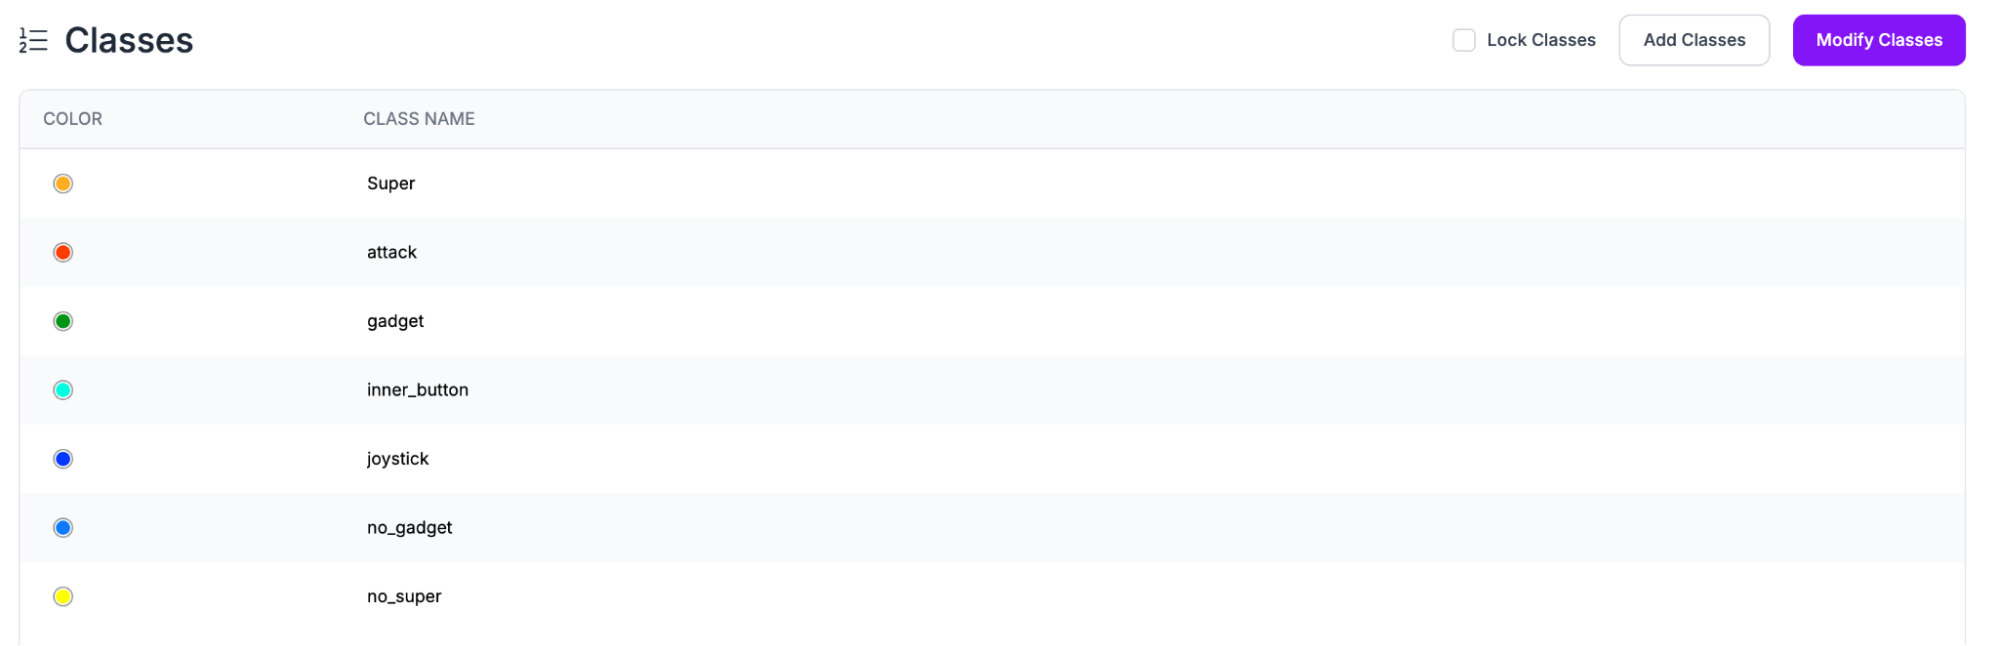
Then, add the classes you want your model to detect. Because we are mapping user inputs, we add 8 specific classes that the user can actually change within the game.
Next, start annotating your dataset. We recommend getting at least 50 annotated images before training your first model.
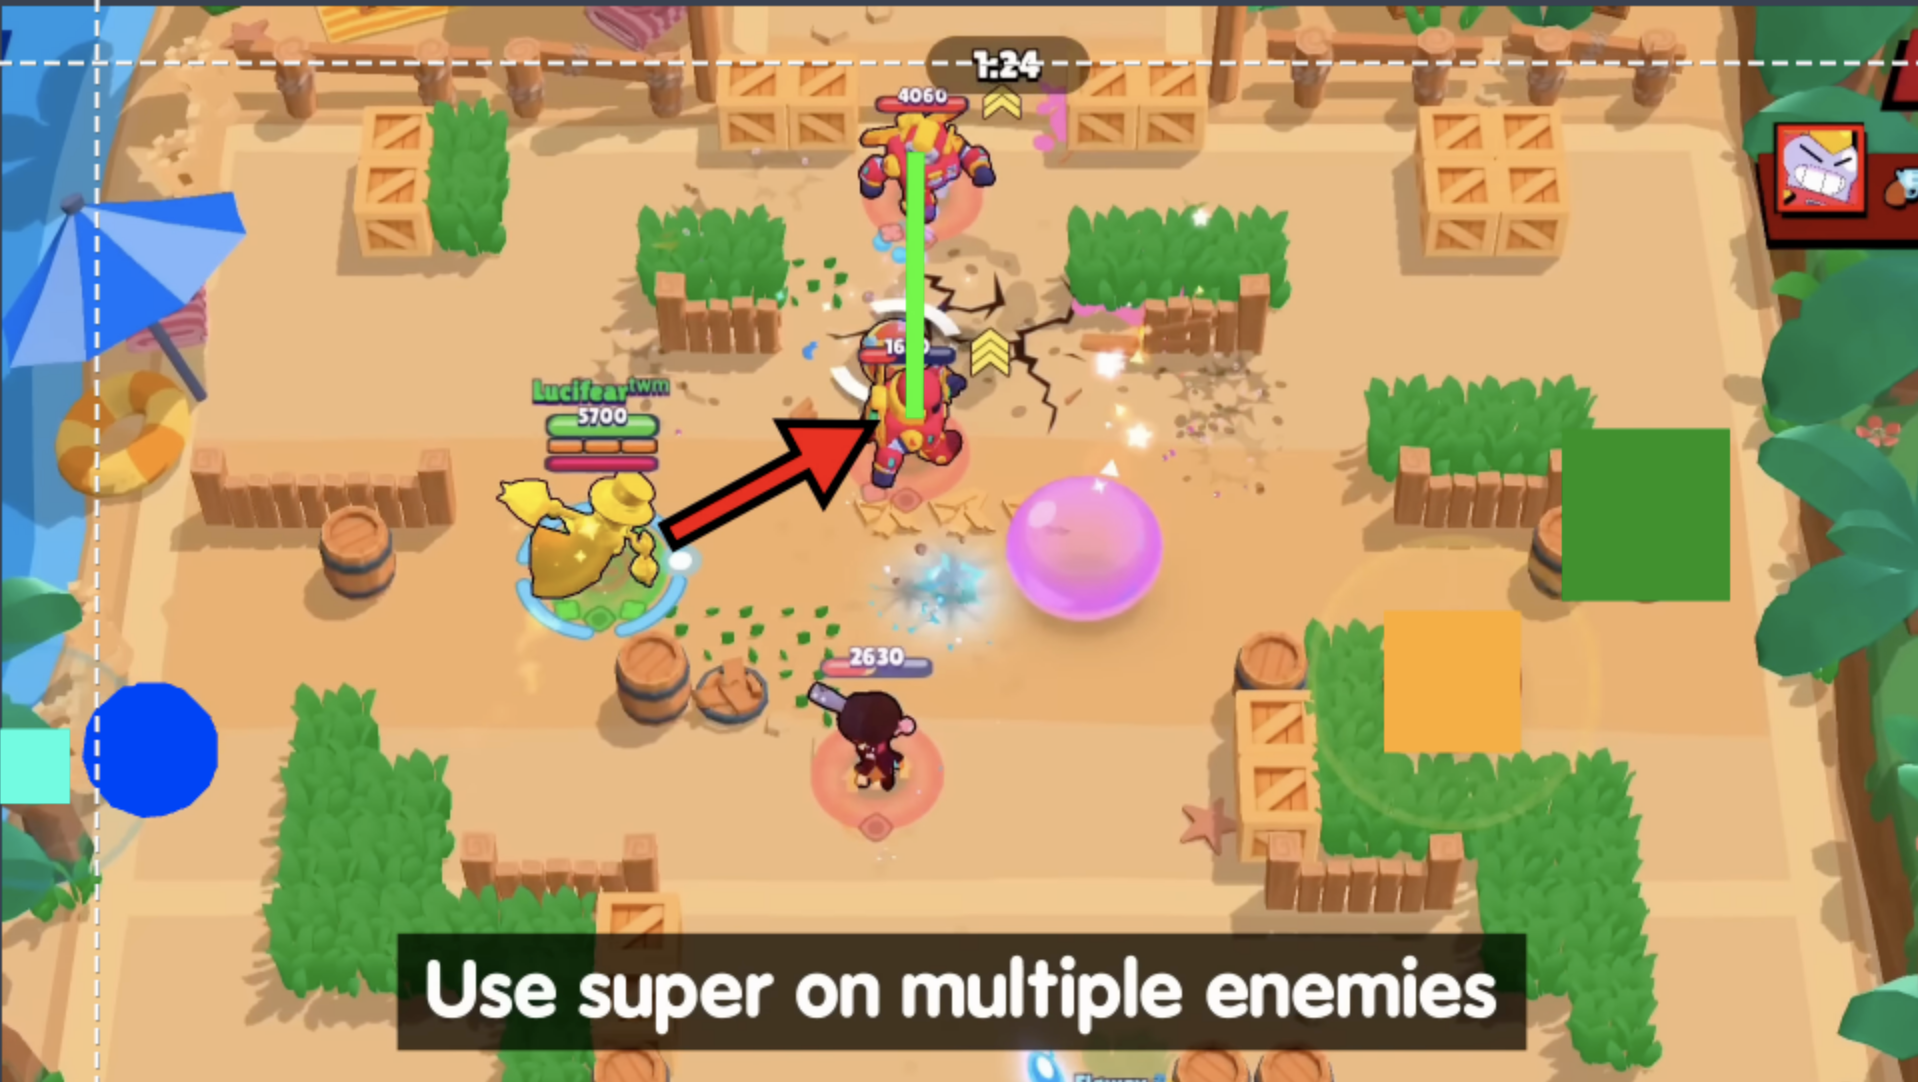
Draw the annotations using the bounding box feature in Roboflow. Repeat this step for each image. Make sure the key points are on each side of the weights. In the following image, I drew annotations on the movement button (blue and light blue), and attack button (yellow).
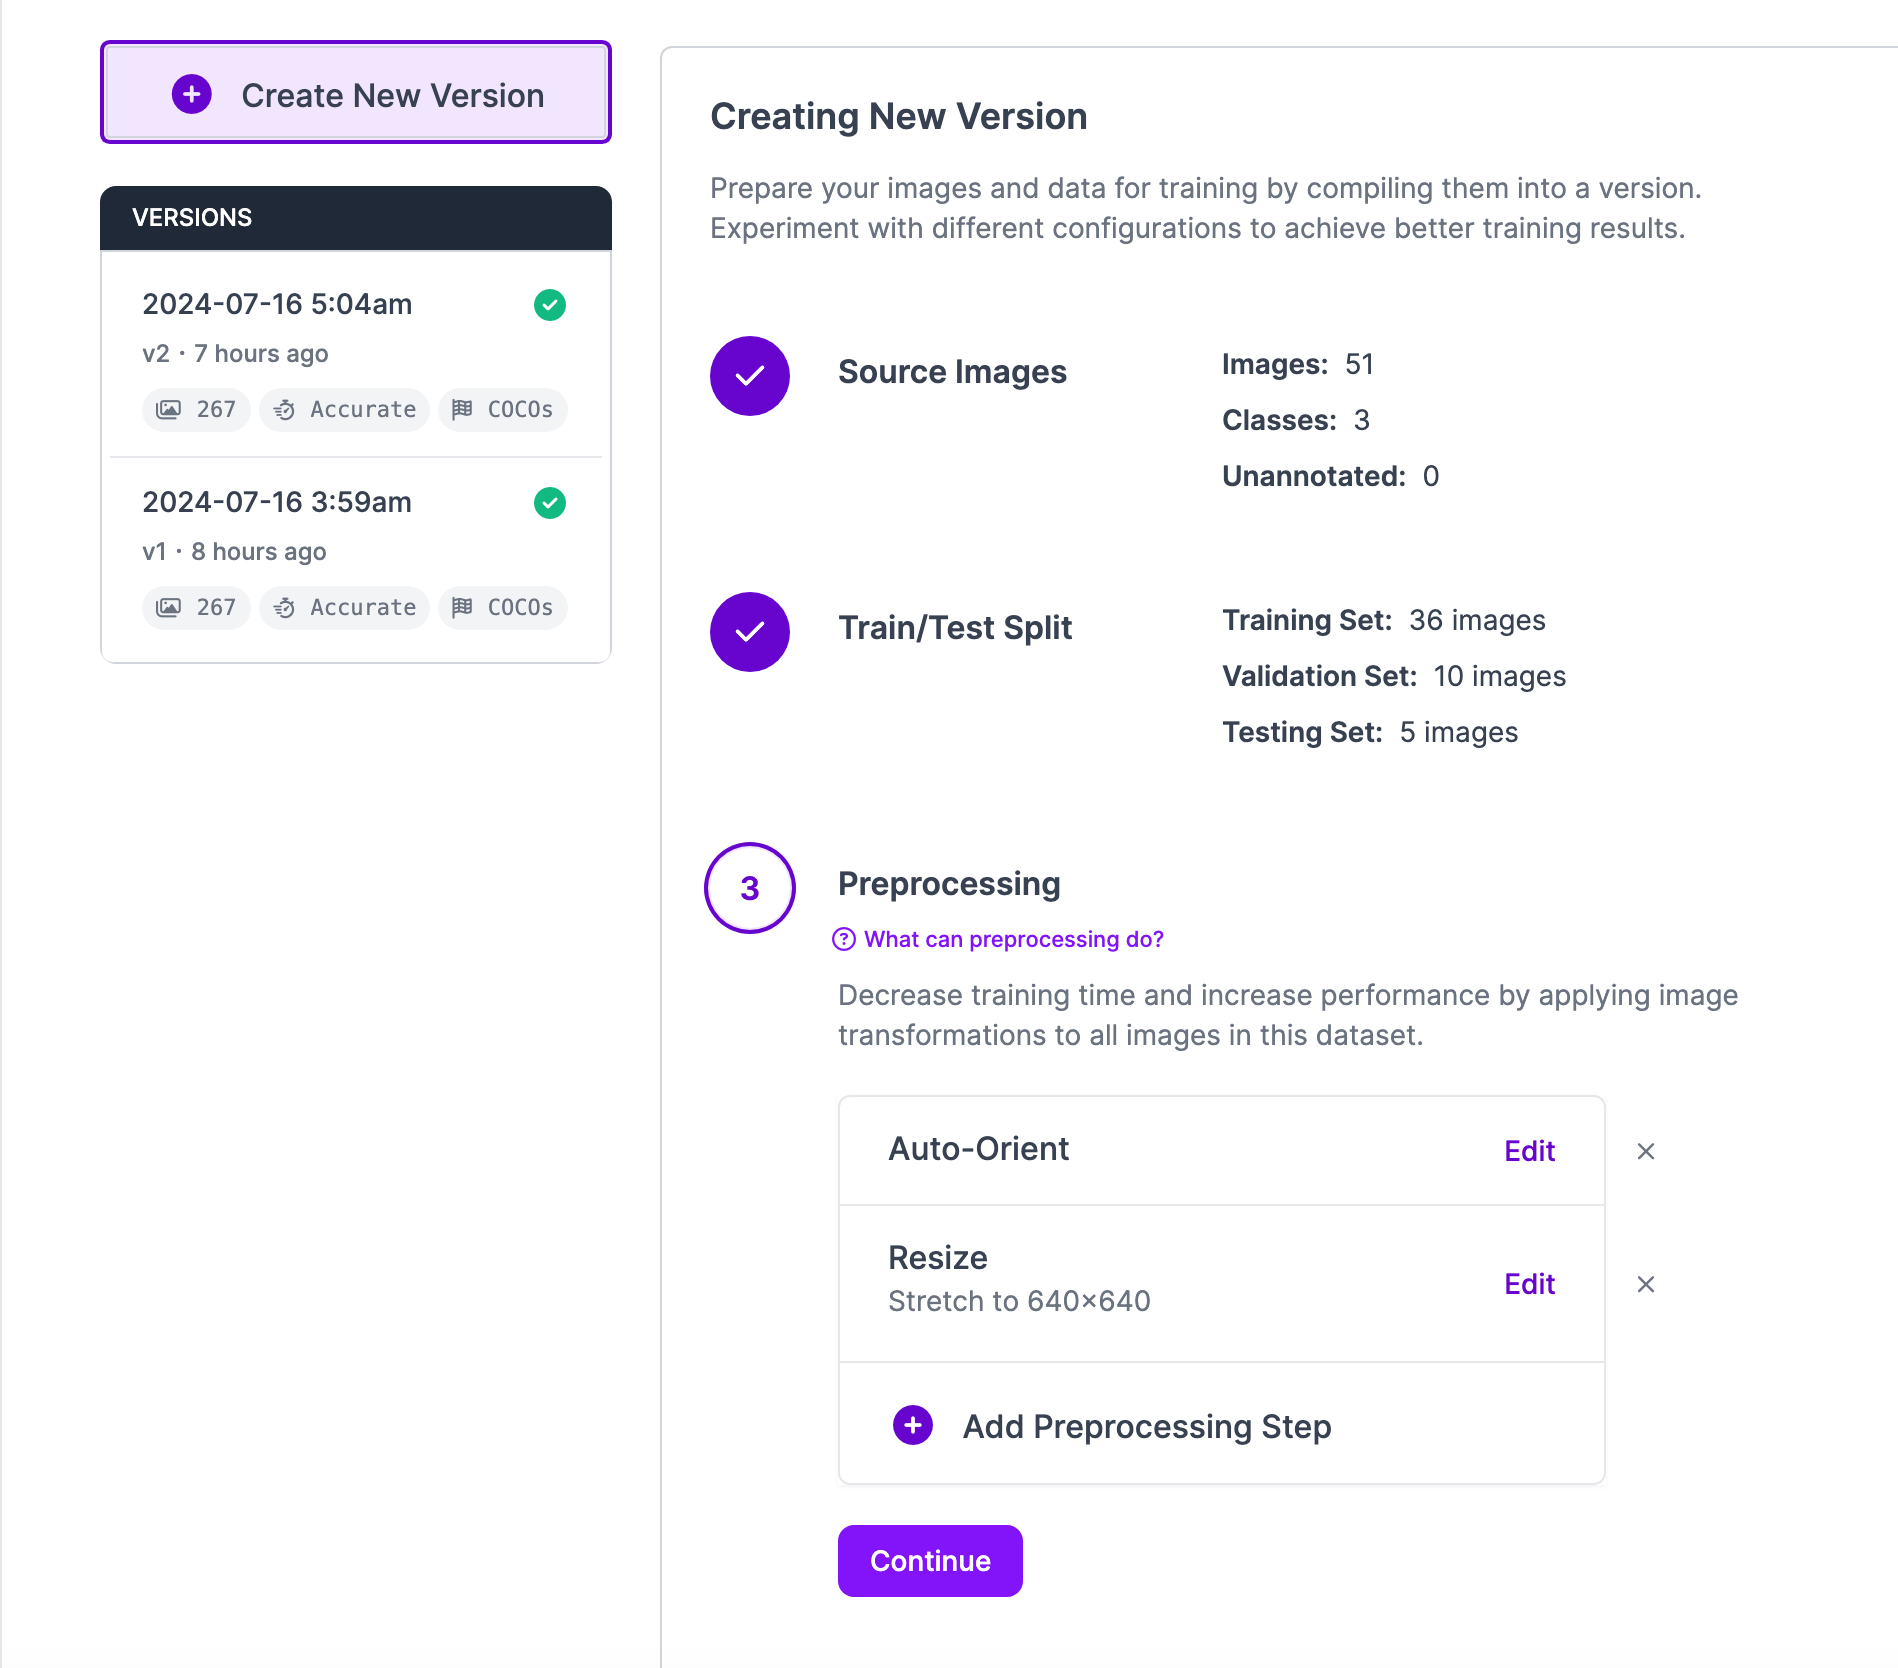
Finally, generate a dataset version of your labeled images. Each version is unique and associated with a trained model so you can iterate on augmentation and data experiments. To learn more about image preprocessing and augmentation, refer to our guide on image preprocessing and augmentation.
Step #2: Create a Workflow
Using the model we created, we can use Roboflow Workflows, a low-code tool for building computer vision applications.
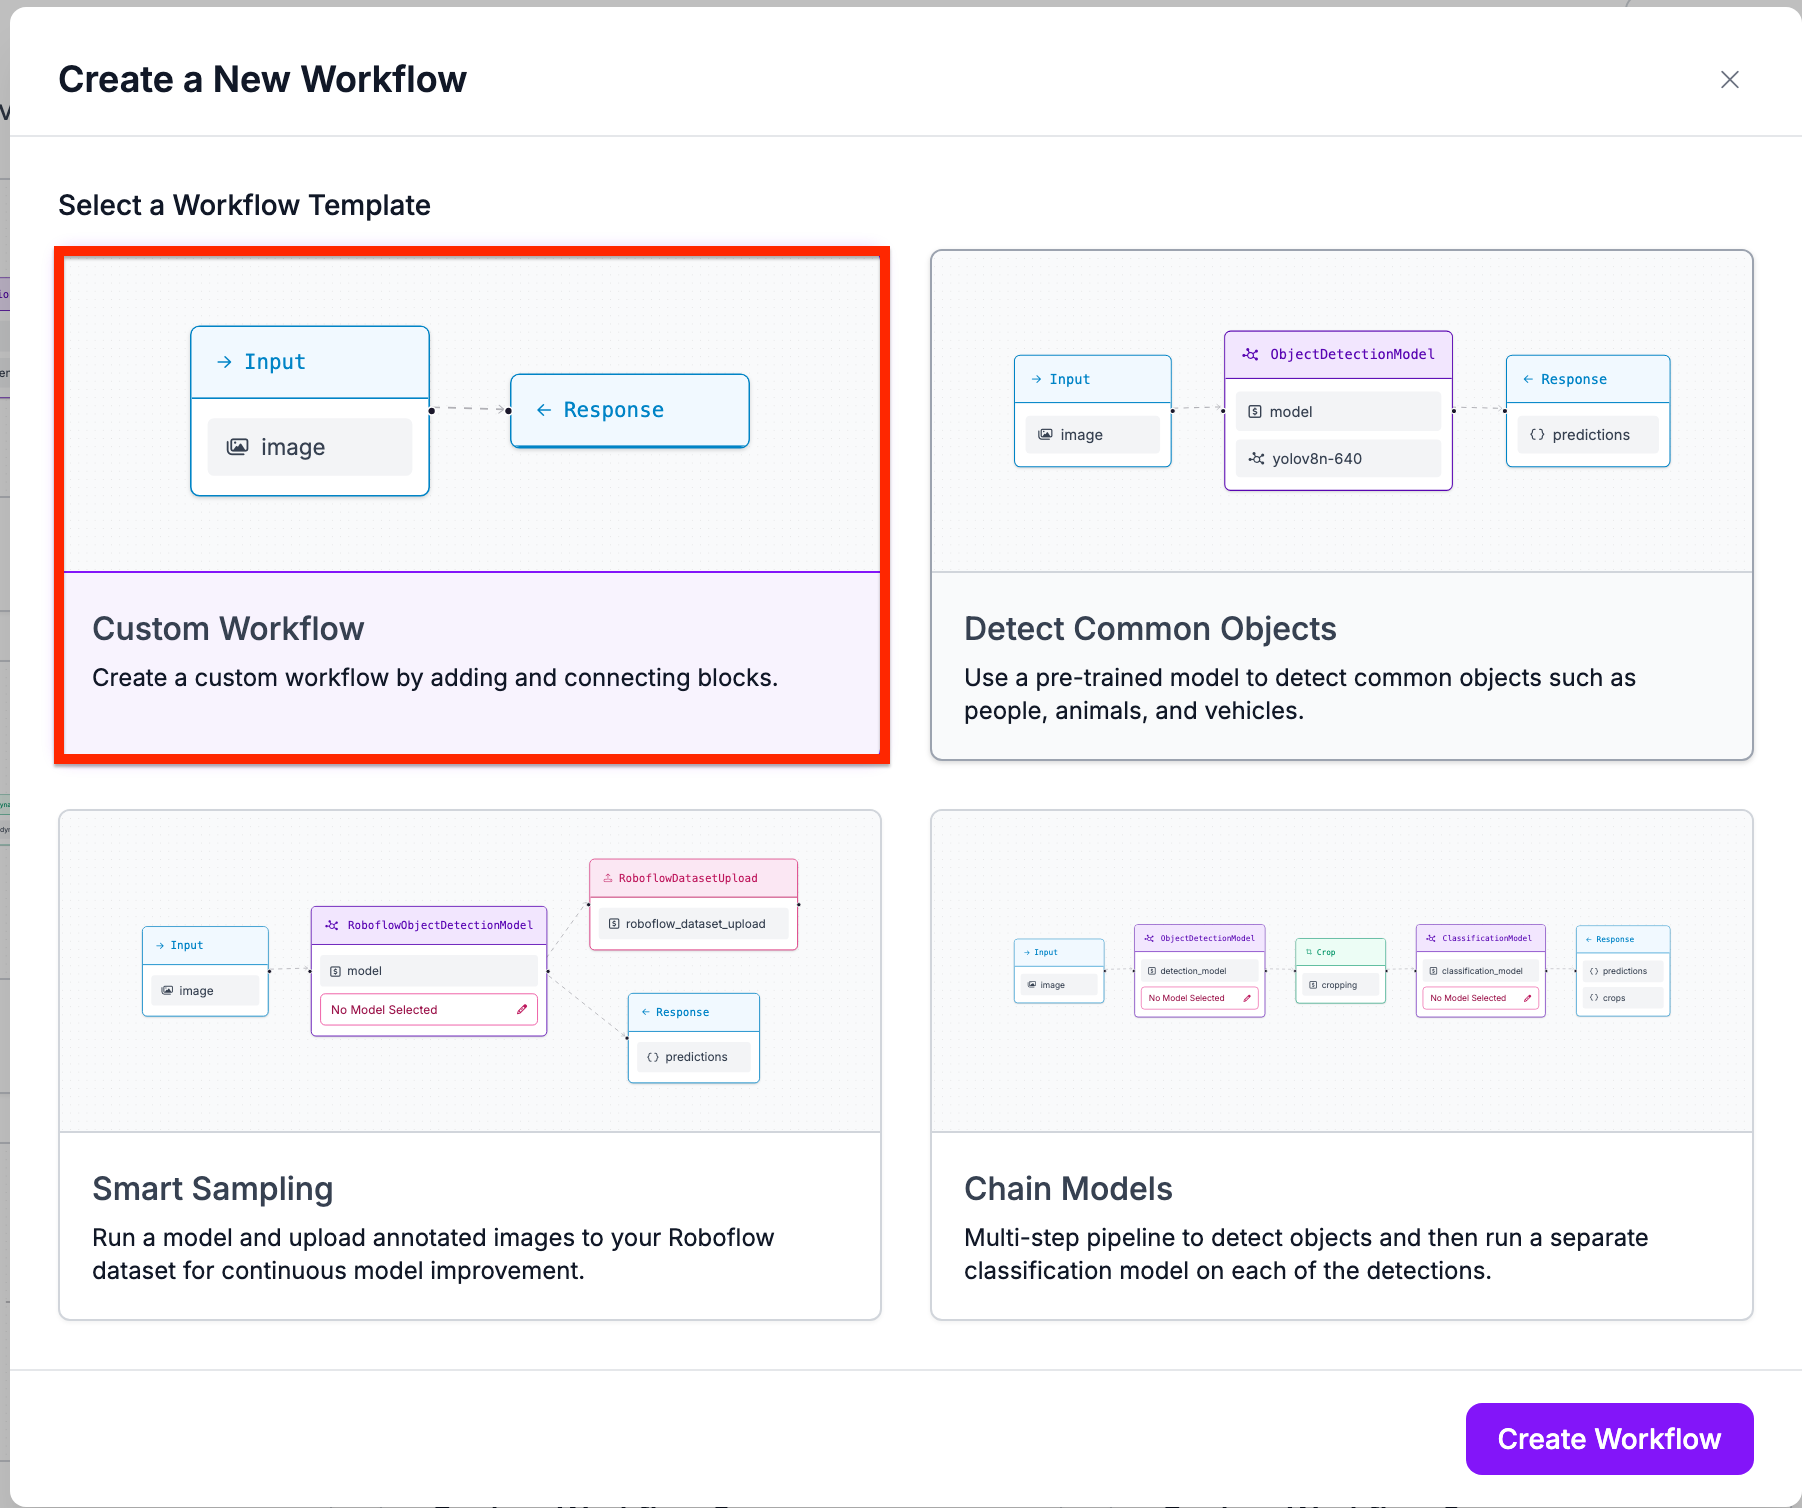
To start, navigate to the Workflows tab on your Roboflow dashboard and create a workflow.
On the Create a New Workflow window, choose “Custom Workflow”:
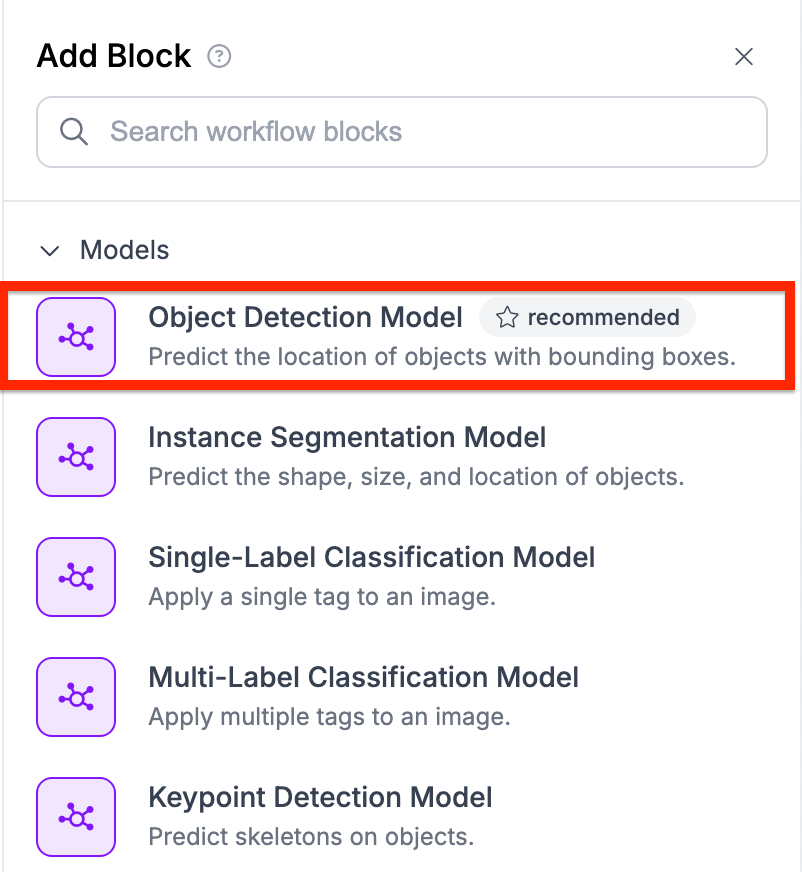
You will then be taken to the Workflows editor where you can configure your Workflow. From the Workflows editor, click “Add Block” in the top right corner and select the object detection model block from the sidebar:
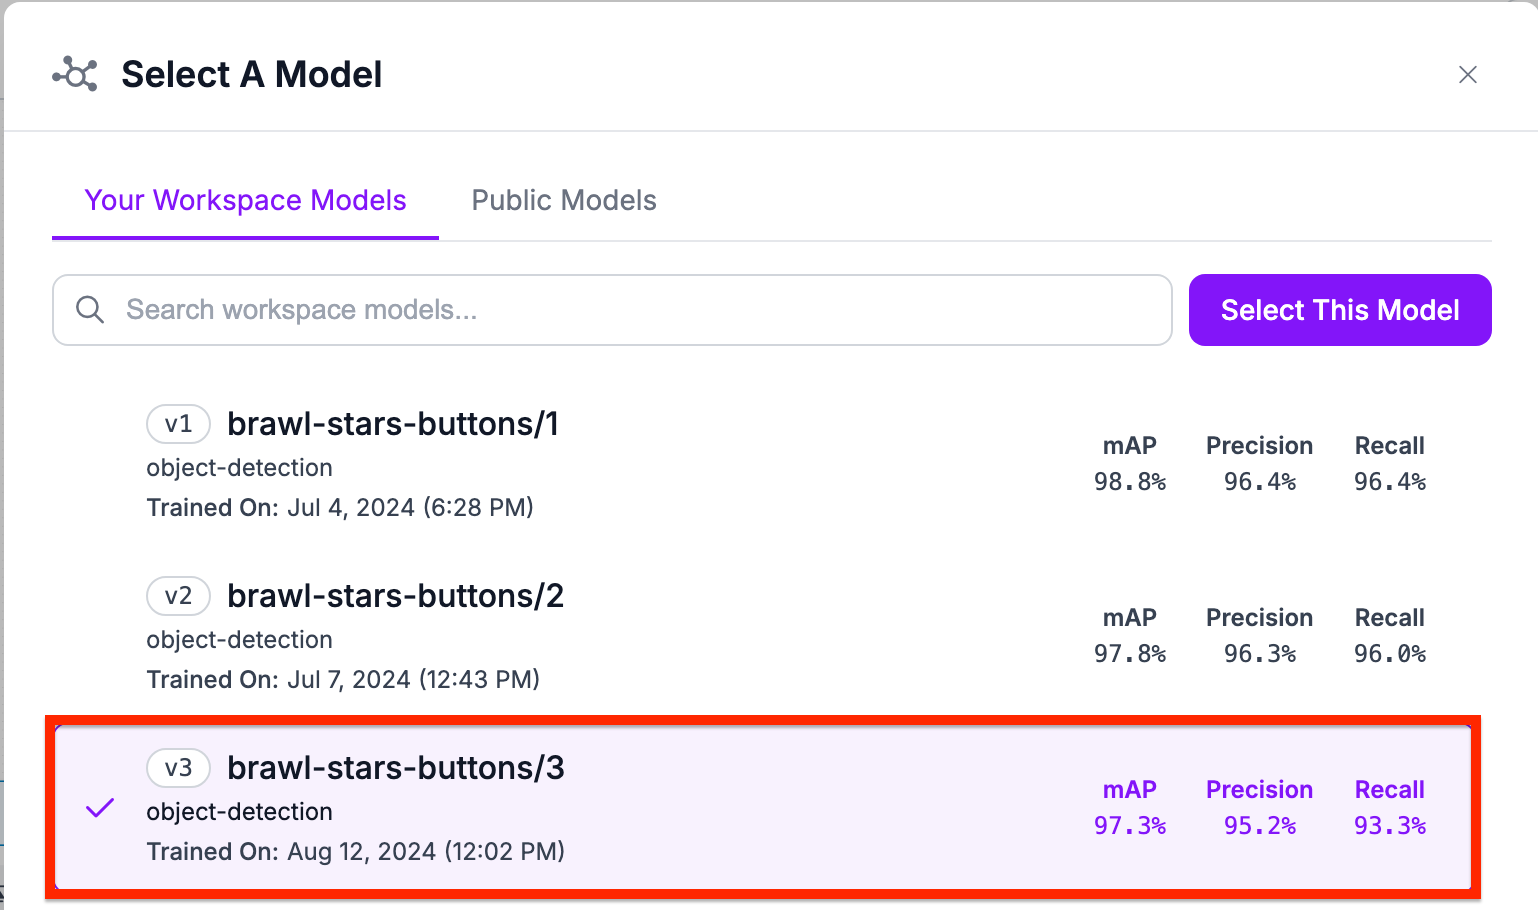
Select the model you want to use. For this guide, we will use brawl-stars-buttons/3:
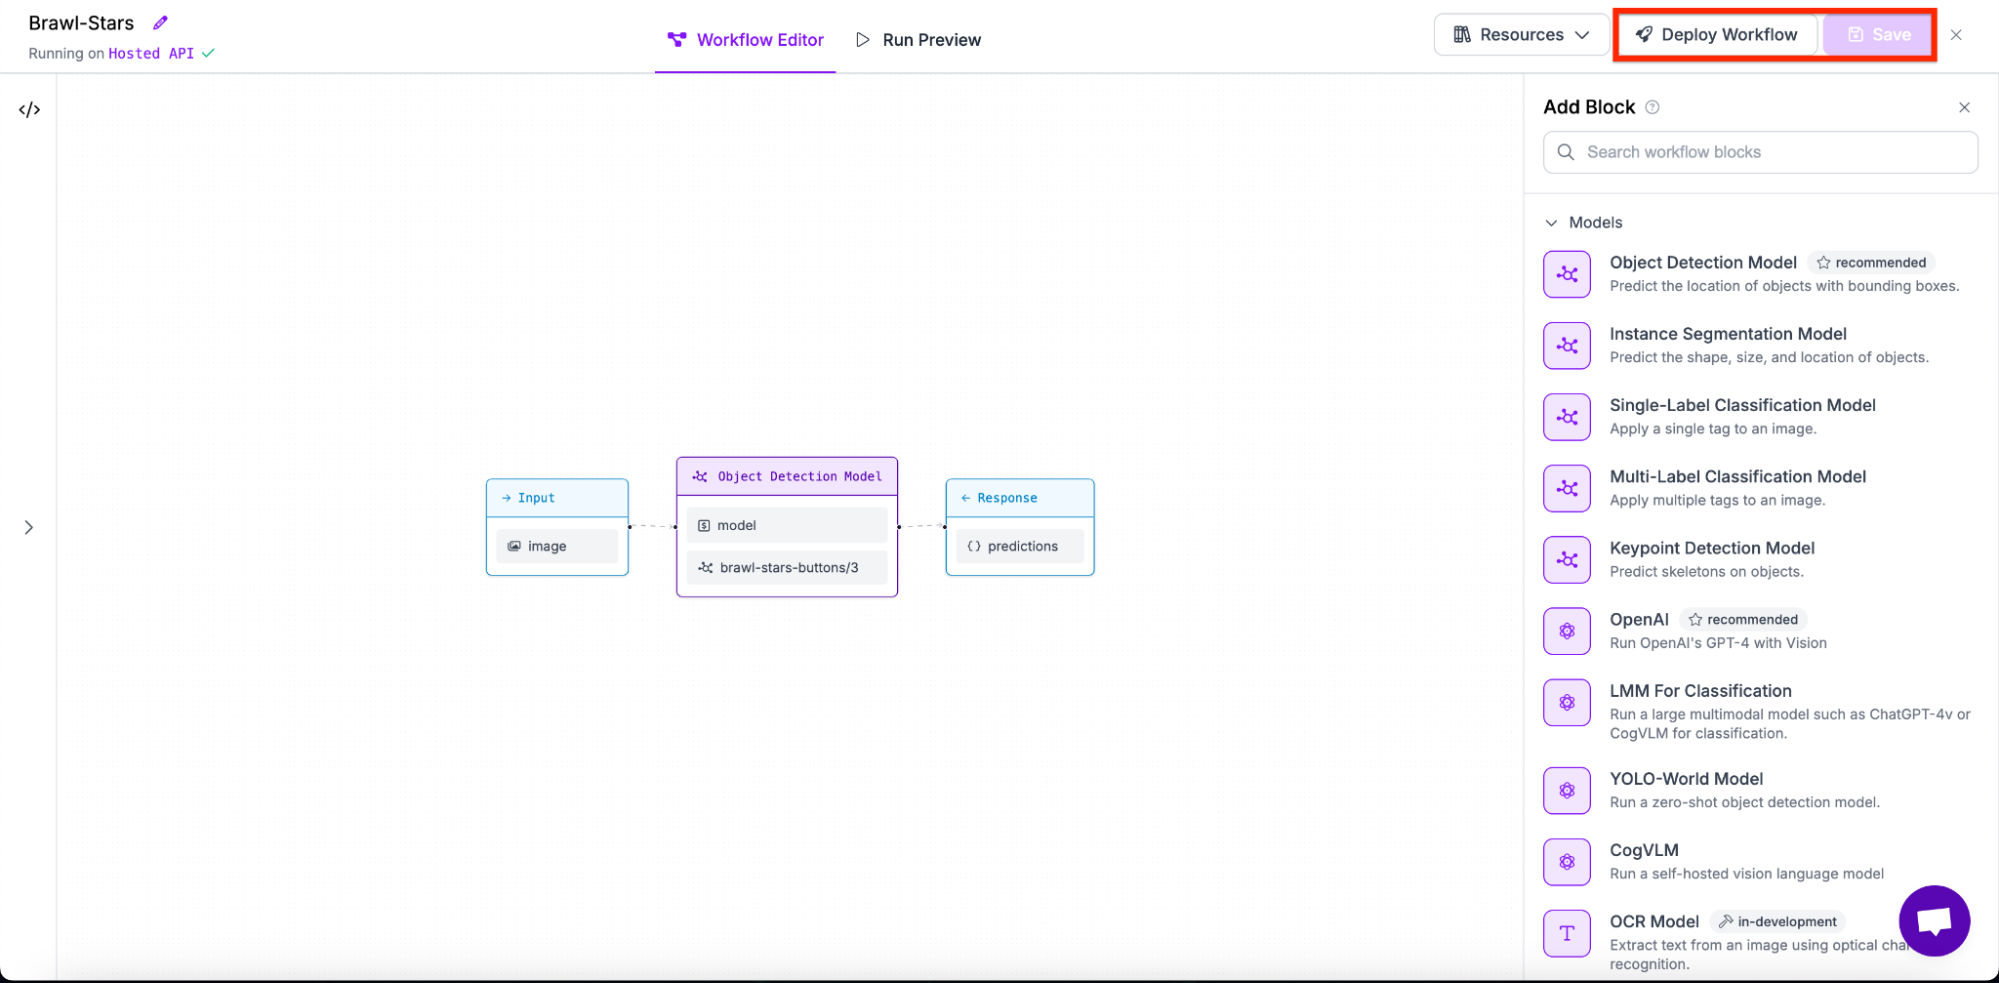
Save the model with the “Save” button, then click “Deploy Workflow”. Copy the deployment code that appears.
Step #3: Download required dependencies
For this guide, we will need to install Roboflow Inference, which we will use to run our Workflow on our device, and supervision, a Python package with utilities for working with computer vision models.
To download the libraries we need, run the following code snippet in your terminal:
pip install inference supervisionStep #4: Import libraries
After downloading the required dependencies, create a new Python file and import the needed libraries:
import cv2
from inference.core.interfaces.camera.entities import VideoFrame
from inference import InferencePipeline
import supervision as sv
import numpy as np
Step #5: Retrieve player direction
In order to map directional user inputs in Brawl Stars, we will define two functions to determine where the user is moving in the game.
The first function will:
- Get the difference of the center joystick and where the person is pushing the joystick
- Using the absolute difference, it will determine which direction is inputted
def get_direction(center, reference):
    dx = center['x'] - reference['x']
    dy = center['y'] - reference['y']

    if abs(dx) > abs(dy):
        return "right" if dx > 0 else "left"
    elif abs(dy) > abs(dx):
        return "down" if dy > 0 else "up"
    else:
        if dx > 0 and dy > 0:
            return "down-right"
        elif dx > 0 and dy < 0:
            return "up-right"
        elif dx < 0 and dy > 0:
            return "down-left"
        else:
            return "up-left"
The second function uses the first function on both the attack and movement joysticks. It then returns both the directions.
def predict_direction(joystick, middle, attack=None):
    joystick_direction = get_direction(joystick, middle)

    attack_direction = None
    if attack:
        attack_direction = get_direction(attack, middle)

    return joystick_direction, attack_direction
Step 6. Create Main Function
The main function will combine both previous functions in order to map and track what user inputs have been shown. For example, if the user moves to the right, the code will output ‘right’ on to the screen. This will be the main function in our code.
First, we take the image from the video frames.
    image = frame.image
    annotated_frame = image.copy()
Next we get the predictions from the model we created using Roboflow Workflows.
result = res['predictions']['predictions']Then, we check if there are any detections we found. If there are, we proceed
    if result is not None and hasattr(result, 'xyxy') and len(result.xyxy) > 0:
        attack = None
        joystick = None
        inner_buttons = []
Now that we know there are detections, we go through each detection and see what we detected. If we detected an attack button or we detected a joystick for movement, we created a dictionary containing its x and y positions on the screen.
Next, we need to match the middle buttons to the outside ones. In order to do this, we first get the center of the button.
       try:
            for i, class_name in enumerate(result.data['class_name']):
                if isinstance(class_name, np.ndarray):
                    class_name = class_name.item()  # Convert numpy string to Python string

                x_center = int((result.xyxy[i][0].item() + result.xyxy[i][2].item()) / 2)
                y_center = int((result.xyxy[i][1].item() + result.xyxy[i][3].item()) / 2)

                if class_name == 'attack':
                    attack = {'x': x_center, 'y': y_center}
                elif class_name == 'joystick':
                    joystick = {'x': x_center, 'y': y_center}
                elif class_name == 'inner_button':
                    inner_buttons.append({
                        'xyxy': result.xyxy[i],
                        'x': x_center,
                        'y': y_center
                    })
            if joystick and inner_buttons:
                # Find the middle point (use joystick if no attack)
                middle_x = joystick['x'] if not attack else (attack['x'] + joystick['x']) / 2
                middle_y = joystick['y'] if not attack else (attack['y'] + joystick['y']) / 2
                closest_middle = min(inner_buttons, key=lambda x: ((x['x'] - middle_x)**2 + (x['y'] - middle_y)**2)**0.5)
                joystick_direction, attack_direction = predict_direction(joystick, closest_middle, attack)
After, show the predicted Joystick and Attack directions using the cv2 library. Additionally, we annotate the frame using supervisions box_annotator and label annotator.
                # Display predicted directions
                cv2.putText(annotated_frame, f"Joystick: {joystick_direction}", (10, 30), cv2.FONT_HERSHEY_SIMPLEX, 1, (0, 255, 0), 2)
                if attack_direction:
                    cv2.putText(annotated_frame, f"Attack: {attack_direction}", (10, 70), cv2.FONT_HERSHEY_SIMPLEX, 1, (0, 255, 0), 2)
                else:
                    cv2.putText(annotated_frame, "No Attack Detected", (10, 70), cv2.FONT_HERSHEY_SIMPLEX, 1, (0, 255, 0), 2)
            # Annotate all detections
            annotated_frame = BOX_ANNOTATOR.annotate(scene=annotated_frame, detections=result)
            annotated_frame = LABEL_ANNOTATOR.annotate(scene=annotated_frame, detections=result)
Finally we show the frame as well as handle error cases.
        except Exception as e:
            print(f"Error processing frame: {e}")
    # Show the annotated frame
    cv2.imshow("frame", annotated_frame)
    if cv2.waitKey(1) & 0xFF == ord("q"):
        return
Lastly, add the deployment code we obtained from step 2 below. Make sure we are deploying for videos.
pipeline = InferencePipeline.init_with_workflow(
    video_reference="Video-File",
    workspace_name="Workspace_NAME",
    workflow_id="Workflow_ID",
    max_fps=60,
    api_key="API_KEY",
    on_prediction=on_prediction,
)
pipeline.start()
pipeline.join()
Here is our code in full:
def on_prediction(res: dict, frame: VideoFrame) -> None:
image = frame.image
annotated_frame = image.copy()
result = res['predictions']['predictions']
if result is not None and hasattr(result, 'xyxy') and len(result.xyxy) > 0:
attack = None
joystick = None
inner_buttons = []
try:
for i, class_name in enumerate(result.data['class_name']):
if isinstance(class_name, np.ndarray):
class_name = class_name.item() # Convert numpy string to Python string
x_center = int((result.xyxy[i][0].item() + result.xyxy[i][2].item()) / 2)
y_center = int((result.xyxy[i][1].item() + result.xyxy[i][3].item()) / 2)
if class_name == 'attack':
attack = {'x': x_center, 'y': y_center}
elif class_name == 'joystick':
joystick = {'x': x_center, 'y': y_center}
elif class_name == 'inner_button':
inner_buttons.append({
'xyxy': result.xyxy[i],
'x': x_center,
'y': y_center
})
if joystick and inner_buttons:
# Find the middle point (use joystick if no attack)
middle_x = joystick['x'] if not attack else (attack['x'] + joystick['x']) / 2
middle_y = joystick['y'] if not attack else (attack['y'] + joystick['y']) / 2
closest_middle = min(inner_buttons, key=lambda x: ((x['x'] - middle_x)**2 + (x['y'] - middle_y)**2)**0.5)
joystick_direction, attack_direction = predict_direction(joystick, closest_middle, attack)
# Display predicted directions
cv2.putText(annotated_frame, f"Joystick: {joystick_direction}", (10, 30), cv2.FONT_HERSHEY_SIMPLEX, 1, (0, 255, 0), 2)
if attack_direction:
cv2.putText(annotated_frame, f"Attack: {attack_direction}", (10, 70), cv2.FONT_HERSHEY_SIMPLEX, 1, (0, 255, 0), 2)
else:
cv2.putText(annotated_frame, "No Attack Detected", (10, 70), cv2.FONT_HERSHEY_SIMPLEX, 1, (0, 255, 0), 2)
# Annotate all detections
annotated_frame = BOX_ANNOTATOR.annotate(scene=annotated_frame, detections=result)
annotated_frame = LABEL_ANNOTATOR.annotate(scene=annotated_frame, detections=result)
except Exception as e:
print(f"Error processing frame: {e}")
# Show the annotated frame
cv2.imshow("frame", annotated_frame)
if cv2.waitKey(1) & 0xFF == ord("q"):
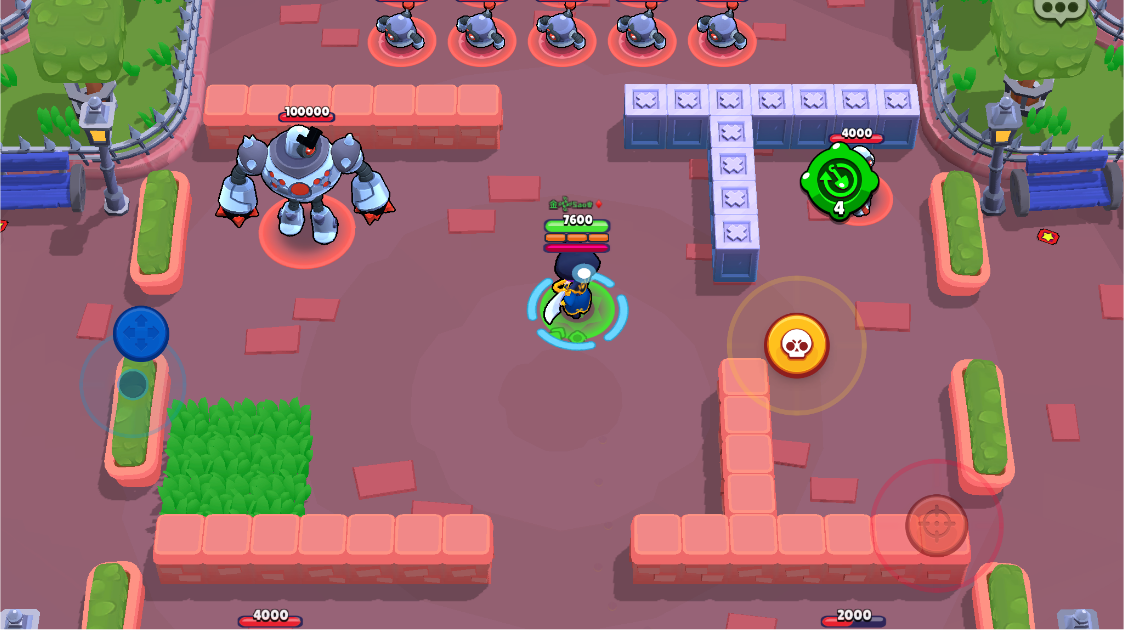
returnNow you should be all set. A similar output should look like this:
Conclusion
In this guide, we were able to successfully deploy a Roboflow model and a workflow in order to map user inputs in games. We also learned how to use the detected information to map directions to multiple detections in our system. For more tutorials and content, feel free to check out some of our blogs.
Cite this Post
Use the following entry to cite this post in your research:
Nathan Y.. (Aug 19, 2024). How to Map User Inputs in Video Games with Computer Vision. Roboflow Blog: https://blog.roboflow.com/how-to-map-user-inputs-in-video-games/