
In this guide, we’ll walk through using a custom object detection model tailored to identify glasses and show you how to seamlessly integrate it into an iOS app for instant live detection — all with minimal latency and maximum convenience.
Millions of people rely on their glasses every day, yet misplacing them is a constant hassle. What if you could instantly locate your glasses using just your phone’s camera? With the power of on-device machine learning, building a real-time visual recognition app is easier than ever.
Let's get started!
Train an Object Detection Model for iOS
To start, we'll need a model that is able to detect glasses from a given frame. You can do this easily with Roboflow. For this, I suggest following this guide describing how to train an RF-DETR object detection model. The sample data you decide to train on should be images/videos of a room with glasses somewhere in it.
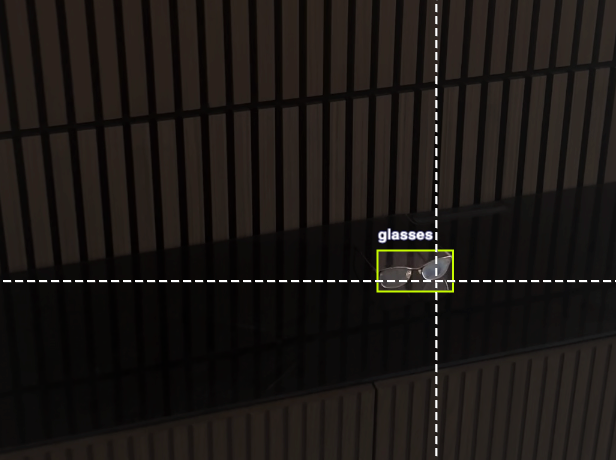
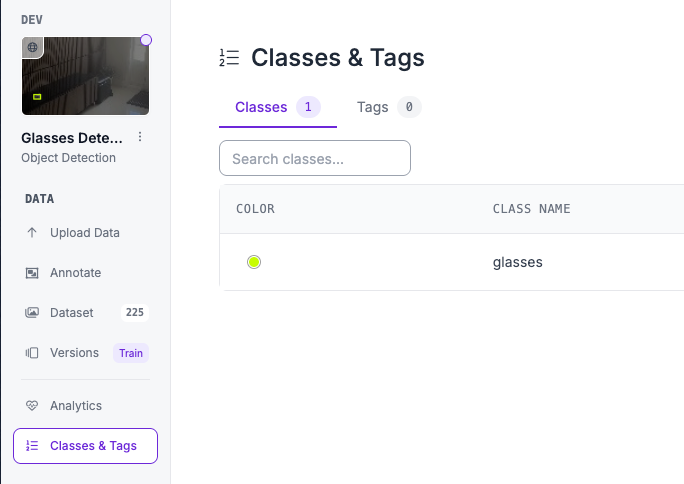
While following the training guide, make sure that you annotate with a "glasses" class in the editor. For that, you'll need to create a new class in the classes and tags section of your project, and just use bounding boxes during annotation.
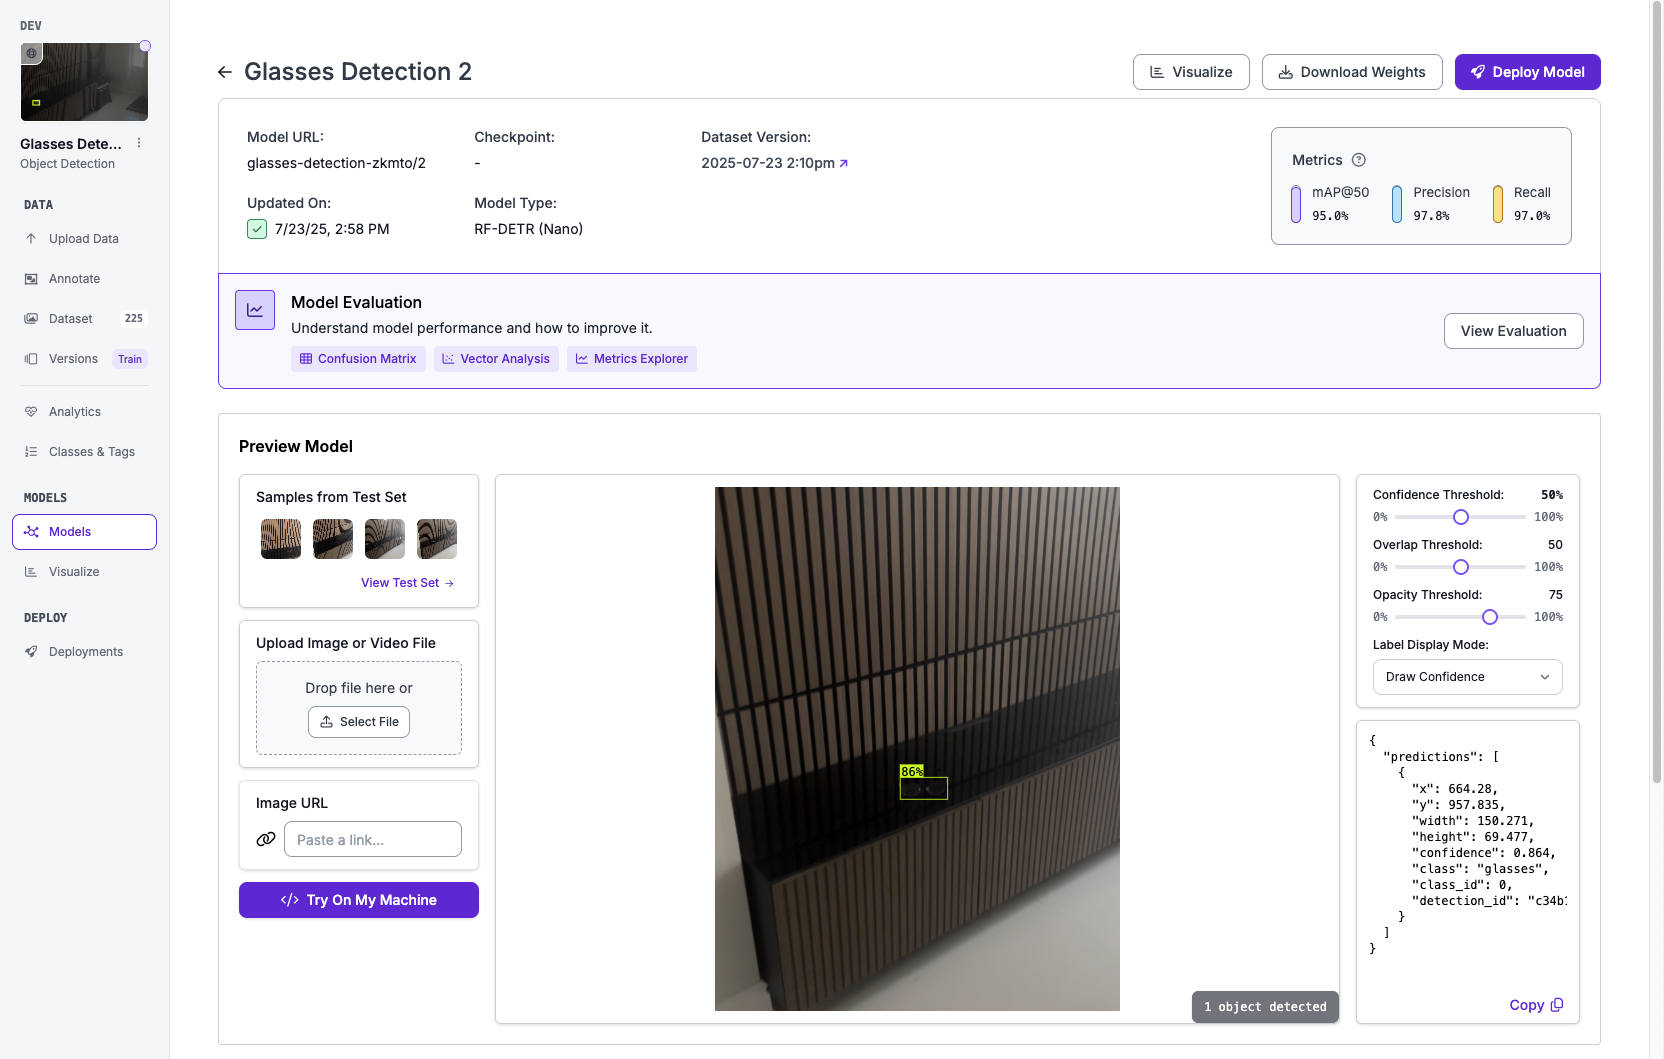
Once you've successfully annotated enough images (~200), you can create a new version and then train the model, however make sure you train with RF-DETR Nano.
We're choosing Nano because we plan to do inference on a livestream, and Nano provides extremely low latency, perfect for our use case. Although its faster speed comes with an accuracy reduction, the trained model is still accurate enough to successfully identify the glasses in every frame.
After you train the model, you can try it out on a frame of a video and see how it performs.
Now, we can start to set up our environment for creating the app.
Set up Xcode for App Development
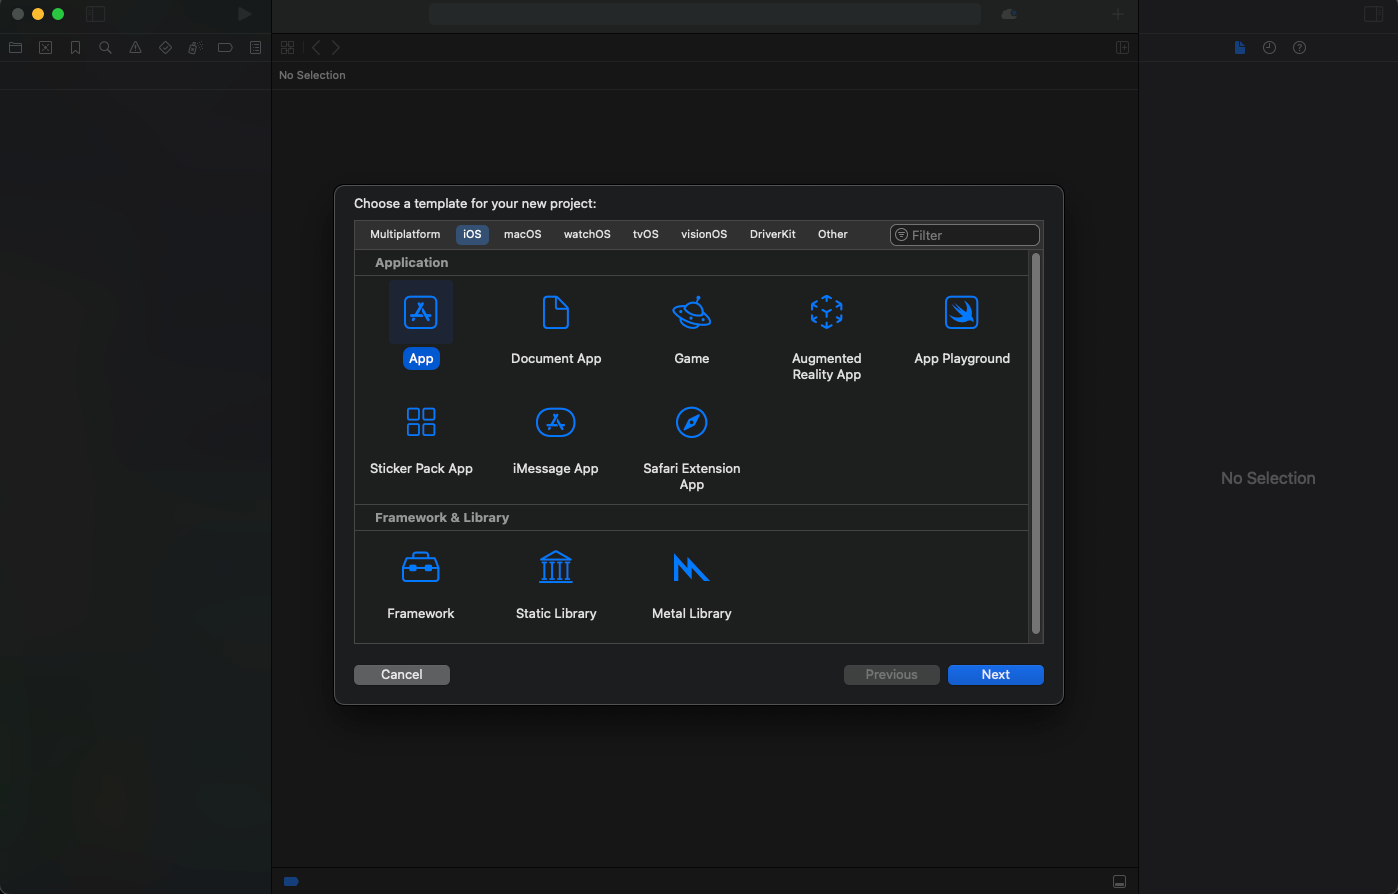
If you haven't already, install Xcode. Its how we're going to build our app for iOS devices.
Once its installed, create a new project and make sure to select the App template when creating:
Now, we need to install the roboflow-swift package which will allow us to actually use Roboflow in our iOS app.
The repo for the roboflow-swift SDK contains a clone URL that we need to copy and add to Xcode to find the package.
Then, add the repo as a package dependency in Xcode. Make sure to select the app target (the app we're making) when you add the lib.
From here, we're ready to start building.
App Implementation
Start by updating ContentView.swift to:
import SwiftUI
import Roboflow
struct ContentView: View {
@State private var showCamera = false
var body: some View {
VStack {
Button(action: { showCamera = true }) {
Text("Find My Glasses")
.font(.title2)
.padding()
.background(Color.blue)
.foregroundColor(.white)
.cornerRadius(10)
}
}
.padding()
.sheet(isPresented: $showCamera) {
CameraOverlayView()
}
}
}
#Preview {
ContentView()
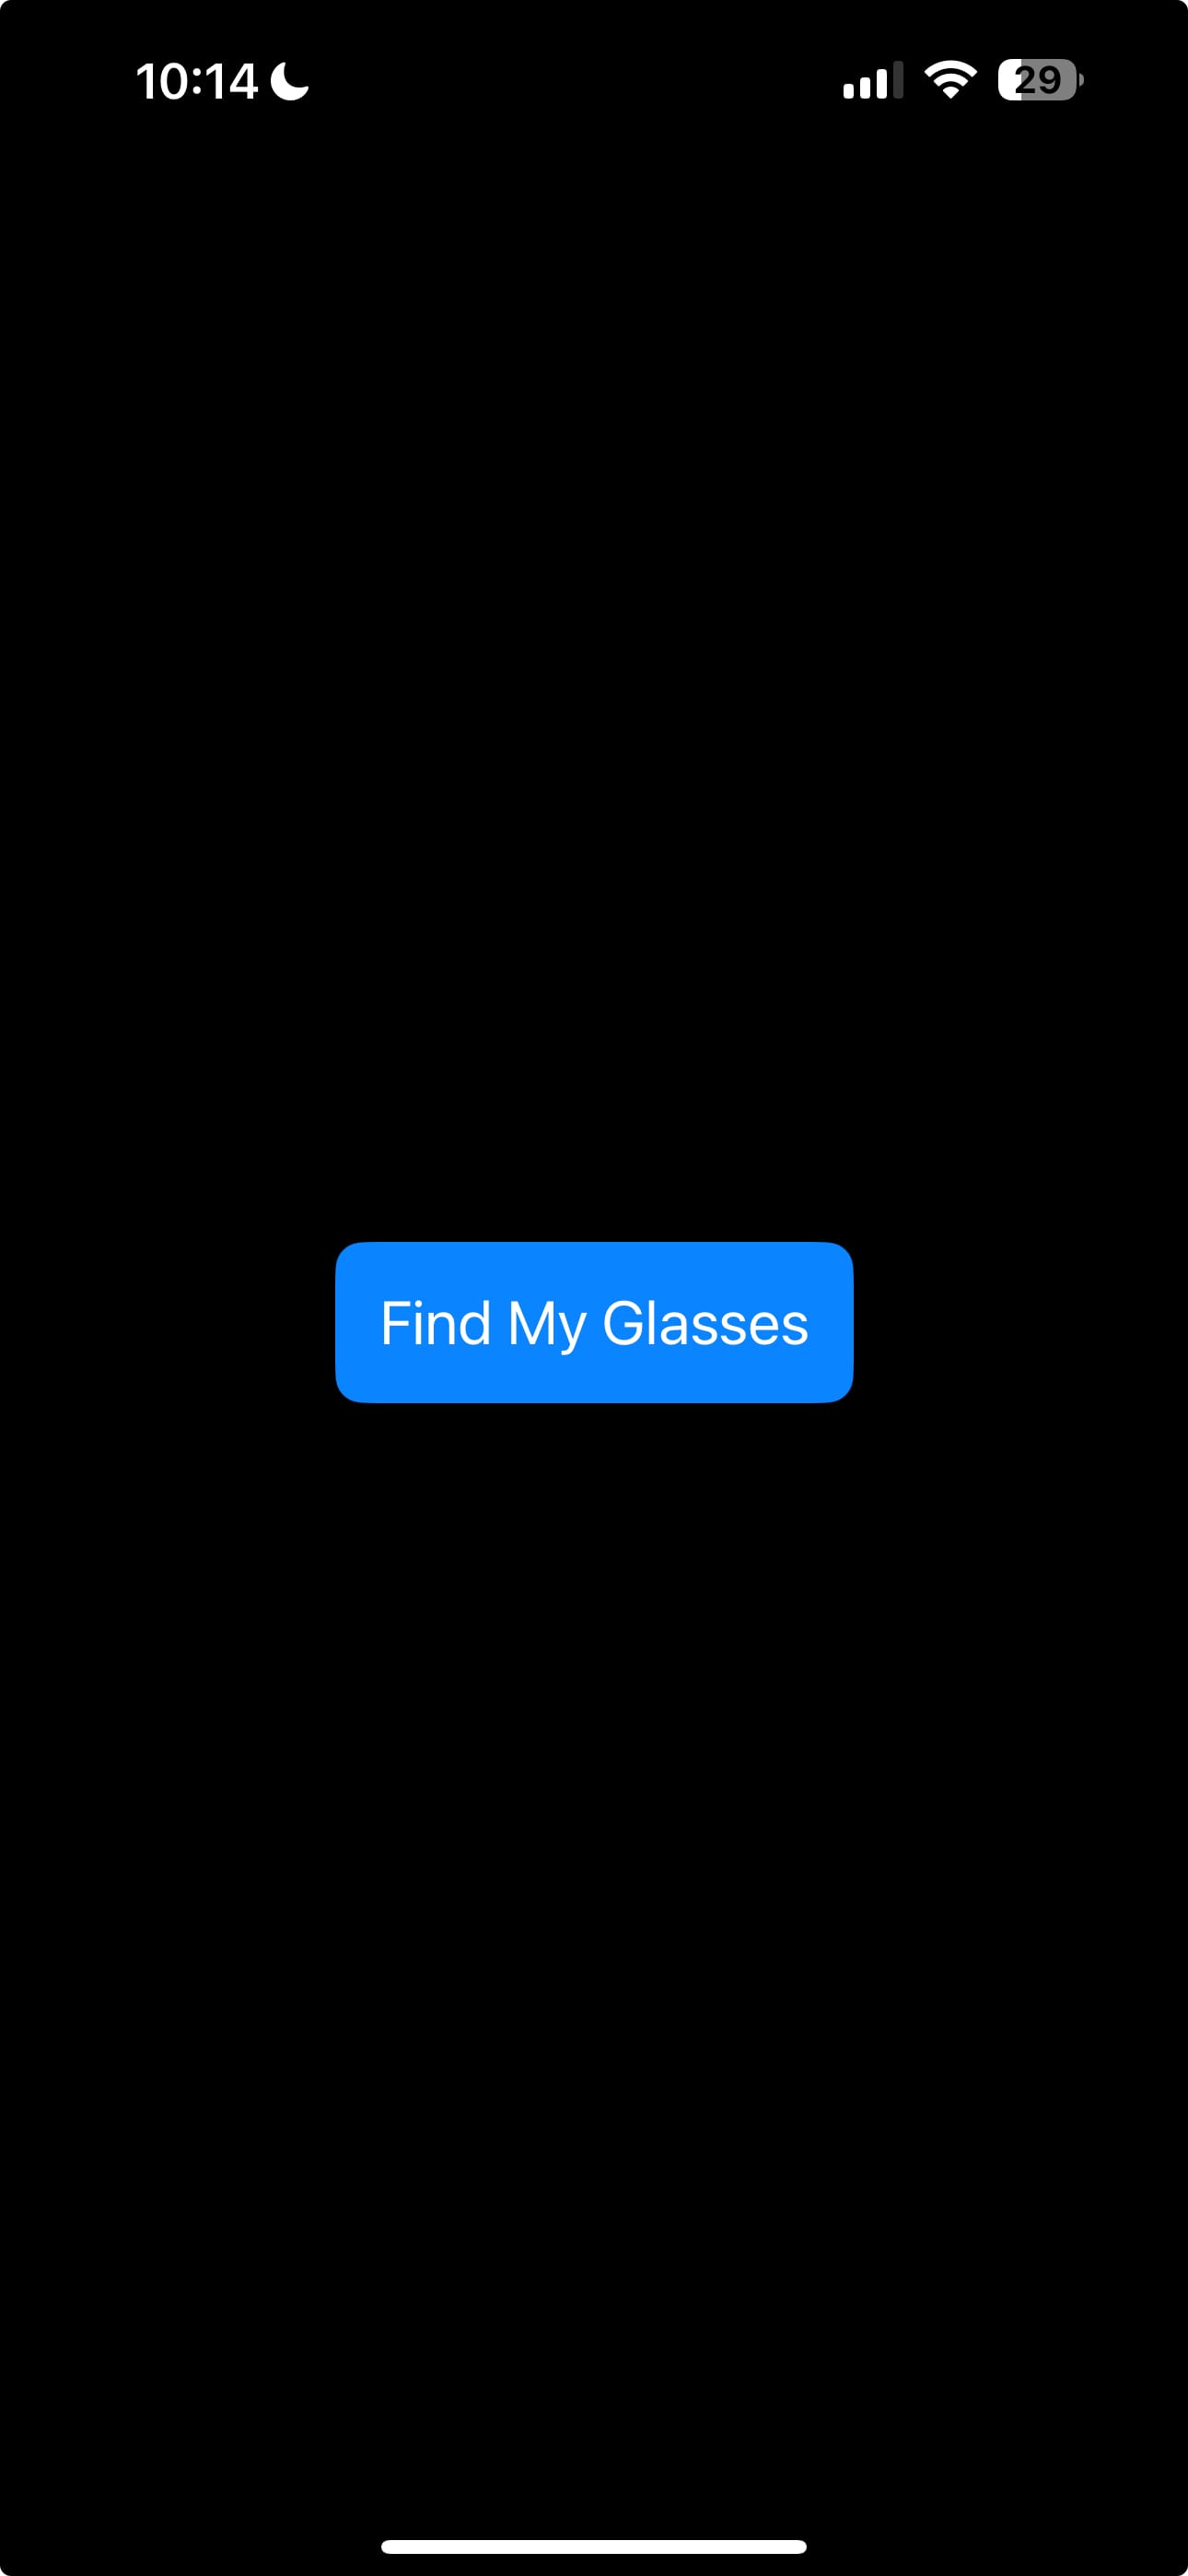
}This code creates a simple homepage with a Button that will open a live camera preview (we'll code this next). When you build and run your app:
In the same directory as ContentView, add another file called CameraOverlayView.swift. This page will show us a live camera preview that will be opened when we click the "Find My Glasses" button from the home page:
import SwiftUI
import AVFoundation

struct CameraOverlayView: View {
    var body: some View {
        ZStack {
            CameraViewControllerRepresentable()
                .edgesIgnoringSafeArea(.all)
            // Sample overlay: a semi-transparent rectangle in the center
            Rectangle()
                .strokeBorder(Color.green, lineWidth: 4)
                .frame(width: 200, height: 120)
                .opacity(0.7)
        }
    }
}

struct CameraViewControllerRepresentable: UIViewControllerRepresentable {
    func makeUIViewController(context: Context) -> CameraViewController {
        return CameraViewController()
    }
    func updateUIViewController(_ uiViewController: CameraViewController, context: Context) {}
}

class CameraViewController: UIViewController {
    private let captureSession = AVCaptureSession()
    private var previewLayer: AVCaptureVideoPreviewLayer?

    override func viewDidLoad() {
        super.viewDidLoad()
        setupCamera()
    }

    private func setupCamera() {
        guard let videoDevice = AVCaptureDevice.default(.builtInWideAngleCamera, for: .video, position: .back),
              let videoInput = try? AVCaptureDeviceInput(device: videoDevice),
              captureSession.canAddInput(videoInput) else { return }
        captureSession.addInput(videoInput)
        let previewLayer = AVCaptureVideoPreviewLayer(session: captureSession)
        previewLayer.videoGravity = .resizeAspectFill
        previewLayer.frame = view.bounds
        view.layer.addSublayer(previewLayer)
        self.previewLayer = previewLayer
        captureSession.startRunning()
    }

    override func viewDidLayoutSubviews() {
        super.viewDidLayoutSubviews()
        previewLayer?.frame = view.bounds
    }
}
This Swift code displays a live camera feed with a sample, temporary, green rectangular overlay centered on the screen. The camera feed is managed by a UIKit UIViewController (CameraViewController) embedded in SwiftUI using UIViewControllerRepresentable. Inside CameraViewController, an AVCaptureSession is set up with the back camera, which is the camera we'll be using for inference.
Next, we'll use each frame from the preview and use the object detection model we just made. However, we won't be using the hosted API. This is because for livestream, we ideally want the lowest latency possible, and for this a Core ML model on Xcode is perfect. The benefit of Core ML is that its able to run locally, meaning there's no latency for inference, and it allows for seamless integration into our iOS app as a format developed by Xcode.
For this, we can update our CameraOverlayView.swift to:
import SwiftUI
import AVFoundation
import Roboflow

struct CameraOverlayView: View {
    var body: some View {
        ZStack {
            CameraViewControllerRepresentable()
                .edgesIgnoringSafeArea(.all)
        }
    }
}

struct CameraViewControllerRepresentable: UIViewControllerRepresentable {
    func makeUIViewController(context: Context) -> CameraViewController {
        return CameraViewController()
    }
    func updateUIViewController(_ uiViewController: CameraViewController, context: Context) {}
}

class CameraViewController: UIViewController, AVCaptureVideoDataOutputSampleBufferDelegate {
    private let captureSession = AVCaptureSession()
    private var previewLayer: AVCaptureVideoPreviewLayer?
    private let rf: RoboflowMobile = {
        let apiKey = "YOUR API KEY"
        return RoboflowMobile(apiKey: apiKey)
    }()
    private let modelId = "YOUR MODEL ID"
    private let modelVersion = 2
    private var model: RFModel?
    private var isModelLoaded = false
    private var isProcessingFrame = false

    override func viewDidLoad() {
        super.viewDidLoad()
        setupCamera()
        loadRoboflowModel()
    }

    private func setupCamera() {
        guard let videoDevice = AVCaptureDevice.default(.builtInWideAngleCamera, for: .video, position: .back),
              let videoInput = try? AVCaptureDeviceInput(device: videoDevice),
              captureSession.canAddInput(videoInput) else { return }
        captureSession.addInput(videoInput)

        let previewLayer = AVCaptureVideoPreviewLayer(session: captureSession)
        previewLayer.videoGravity = .resizeAspectFill
        previewLayer.frame = view.bounds
        view.layer.addSublayer(previewLayer)
        self.previewLayer = previewLayer

        let videoOutput = AVCaptureVideoDataOutput()
        videoOutput.setSampleBufferDelegate(self, queue: DispatchQueue(label: "videoQueue"))
        if captureSession.canAddOutput(videoOutput) {
            captureSession.addOutput(videoOutput)
        }

        DispatchQueue.global(qos: .userInitiated).async {
            self.captureSession.startRunning()
        }
    }

    private func loadRoboflowModel() {
        rf.load(model: modelId, modelVersion: modelVersion) { [weak self] loadedModel, error, modelName, modelType in
            guard let self = self else { return }
            if let error = error {
                print("Error loading model: \(error)")
            } else {
                loadedModel?.configure(threshold: 0.5, overlap: 0.5, maxObjects: 1)
                self.model = loadedModel
                self.isModelLoaded = true
                print("Model loaded: \(modelName ?? "") type: \(modelType ?? "")")
            }
        }
    }

    func captureOutput(_ output: AVCaptureOutput, didOutput sampleBuffer: CMSampleBuffer, from connection: AVCaptureConnection) {
        guard isModelLoaded, !isProcessingFrame else { return }
        isProcessingFrame = true

        guard let pixelBuffer = CMSampleBufferGetImageBuffer(sampleBuffer) else {
            isProcessingFrame = false
            return
        }

        guard let image = UIImage(pixelBuffer: pixelBuffer) else {
            print("Failed to convert pixelBuffer to UIImage")
            isProcessingFrame = false
            return
        }

        model?.detect(image: image) { [weak self] predictions, error in
            DispatchQueue.main.async {
                if let error = error {
                    print("Detection error: \(error)")
                } else if let predictions = predictions as? [RFObjectDetectionPrediction] {
                    print("Detections: \(predictions.map { $0.className })")
                } else {
                    print("No predictions returned.")
                }
                self?.isProcessingFrame = false
            }
        }
    }

    override func viewDidLayoutSubviews() {
        super.viewDidLayoutSubviews()
        previewLayer?.frame = view.bounds
    }
}

// Helper: Convert CVPixelBuffer to UIImage
import CoreVideo
extension UIImage {
    convenience init?(pixelBuffer: CVPixelBuffer) {
        let ciImage = CIImage(cvPixelBuffer: pixelBuffer)
        let context = CIContext()
        if let cgImage = context.createCGImage(ciImage, from: ciImage.extent) {
            self.init(cgImage: cgImage)
        } else {
            return nil
        }
    }
}
The inference happens in the captureOutput method, where each camera frame is converted to a UIImage using a CVPixelBuffer. This image is then passed to the Roboflow model with model?.detect(image:), and the predictions are returned asynchronously. Once received, the model outputs (if any) are printed in the console.
This lets the app perform real-time object detection entirely on-device. Note that before building again, you have to replace the apiKey and modelId with your own API key and model ID.
Now, the last step is to display the predictions that we get on as an overlay on the live preview. For that, we'll need to scale the coordinates because the bounding box predictions from the model are in the coordinate space of the original input image, while the camera preview may have a different size, aspect ratio, or orientation on the screen.
To do this, update CameraOverlayView.swift to:
import SwiftUI
import AVFoundation
import Roboflow

struct CameraOverlayView: View {
    var body: some View {
        ZStack {
            CameraViewControllerRepresentable()
                .edgesIgnoringSafeArea(.all)
        }
    }
}

struct CameraViewControllerRepresentable: UIViewControllerRepresentable {
    func makeUIViewController(context: Context) -> CameraViewController {
        return CameraViewController()
    }
    func updateUIViewController(_ uiViewController: CameraViewController, context: Context) {}
}

class CameraViewController: UIViewController, AVCaptureVideoDataOutputSampleBufferDelegate {
    private let captureSession = AVCaptureSession()
    private var previewLayer: AVCaptureVideoPreviewLayer?
    private var overlayView: UIView! // Overlay for bounding boxes
    private var boundingBoxLayers: [CAShapeLayer] = []
    private let rf: RoboflowMobile = {
        let apiKey = Bundle.main.infoDictionary?["ROBOFLOW_API_KEY"] as? String ?? ""
        return RoboflowMobile(apiKey: apiKey)
    }()
    private let modelId = "glasses-detection-zkmto"
    private let modelVersion = 2
    private var model: RFModel?
    private var isModelLoaded = false
    private var isProcessingFrame = false

    override func viewDidLoad() {
        super.viewDidLoad()
        overlayView = UIView(frame: view.bounds)
        overlayView.backgroundColor = .clear
        view.addSubview(overlayView)
        setupCamera()
        loadRoboflowModel()
    }

    private func setupCamera() {
        guard let videoDevice = AVCaptureDevice.default(.builtInWideAngleCamera, for: .video, position: .back),
              let videoInput = try? AVCaptureDeviceInput(device: videoDevice),
              captureSession.canAddInput(videoInput) else { return }
        captureSession.addInput(videoInput)
        let previewLayer = AVCaptureVideoPreviewLayer(session: captureSession)
        previewLayer.videoGravity = .resizeAspectFill
        previewLayer.frame = view.bounds
        view.layer.addSublayer(previewLayer)
        self.previewLayer = previewLayer
        // Add overlayView above previewLayer
        view.addSubview(overlayView)

        // Add video output for frame capture
        let videoOutput = AVCaptureVideoDataOutput()
        videoOutput.setSampleBufferDelegate(self, queue: DispatchQueue(label: "videoQueue"))
        if captureSession.canAddOutput(videoOutput) {
            captureSession.addOutput(videoOutput)
        }
        DispatchQueue.global(qos: .userInitiated).async {
            self.captureSession.startRunning()
        }
    }

    private func loadRoboflowModel() {
        rf.load(model: modelId, modelVersion: modelVersion) { [weak self] loadedModel, error, modelName, modelType in
            guard let self = self else { return }
            if let error = error {
                print("Error loading model: \(error)")
            } else {
                loadedModel?.configure(threshold: 0.5, overlap: 0.5, maxObjects: 1)
                self.model = loadedModel
                self.isModelLoaded = true
                print("Model loaded: \(modelName ?? "") type: \(modelType ?? "")")
            }
        }
    }

    func captureOutput(_ output: AVCaptureOutput, didOutput sampleBuffer: CMSampleBuffer, from connection: AVCaptureConnection) {
        guard isModelLoaded, !isProcessingFrame else { return }
        isProcessingFrame = true
        guard let pixelBuffer = CMSampleBufferGetImageBuffer(sampleBuffer) else {
            isProcessingFrame = false
            return
        }
        guard let image = UIImage(pixelBuffer: pixelBuffer) else {
            print("Failed to convert pixelBuffer to UIImage")
            isProcessingFrame = false
            return
        }
        // Pass the raw image directly to the model (no preprocessing)
        model?.detect(image: image) { [weak self] predictions, error in
            DispatchQueue.main.async {
                self?.removeBoundingBoxes()
                if let error = error {
                    print("Detection error: \(error)")
                } else if let predictions = predictions as? [RFObjectDetectionPrediction] {
                    self?.drawBoundingBoxes(predictions: predictions, imageSize: image.size)
                } else {
                    print("Predictions: \(String(describing: predictions))")
                }
                self?.isProcessingFrame = false
            }
        }
    }

    private func drawBoundingBoxes(predictions: [RFObjectDetectionPrediction], imageSize: CGSize) {
        guard overlayView != nil, let previewLayer = self.previewLayer else { return }
        if predictions.isEmpty {
            print("No predictions to draw overlays for.")
        }
        for prediction in predictions {
            let x = CGFloat(prediction.x)
            let y = CGFloat(prediction.y)
            let width = CGFloat(prediction.width)
            let height = CGFloat(prediction.height)
            // Convert to normalized coordinates
            let normX = (x - width/2) / imageSize.width
            let normY = (y - height/2) / imageSize.height
            let normWidth = width / imageSize.width
            let normHeight = height / imageSize.height
            let normalizedRect = CGRect(x: normX, y: normY, width: normWidth, height: normHeight)
            // Convert to preview layer coordinates
            let convertedRect = previewLayer.layerRectConverted(fromMetadataOutputRect: normalizedRect)
            let boxLayer = CAShapeLayer()
            boxLayer.frame = convertedRect
            boxLayer.borderColor = UIColor.red.cgColor
            boxLayer.borderWidth = 3
            boxLayer.cornerRadius = 4
            boxLayer.masksToBounds = true
            overlayView.layer.addSublayer(boxLayer)
            boundingBoxLayers.append(boxLayer)
            print("Overlay drawn.")
        }
    }

    private func removeBoundingBoxes() {
        for layer in boundingBoxLayers {
            layer.removeFromSuperlayer()
        }
        boundingBoxLayers.removeAll()
    }

    private func convertRect(_ rect: CGRect, fromImageSize imageSize: CGSize, toView previewLayer: AVCaptureVideoPreviewLayer) -> CGRect {
        // Model coordinates (origin at top-left, size = model input size)
        // Preview layer coordinates (origin at top-left, size = previewLayer.bounds)
        let previewSize = previewLayer.bounds.size

        // Calculate scale factors
        let scaleX = previewSize.width / imageSize.width
        let scaleY = previewSize.height / imageSize.height

        // Use the smaller scale to fit the image entirely in the preview (aspect fit)
        let scale = min(scaleX, scaleY)
        let scaledImageWidth = imageSize.width * scale
        let scaledImageHeight = imageSize.height * scale
        let xOffset = (previewSize.width - scaledImageWidth) / 2
        let yOffset = (previewSize.height - scaledImageHeight) / 2

        let x = rect.origin.x * scale + xOffset
        let y = rect.origin.y * scale + yOffset
        let width = rect.size.width * scale
        let height = rect.size.height * scale

        return CGRect(x: x, y: y, width: width, height: height)
    }

    override func viewDidLayoutSubviews() {
        super.viewDidLayoutSubviews()
        previewLayer?.frame = view.bounds
        overlayView?.frame = previewLayer?.frame ?? view.bounds
    }
}

// Helper: Convert CVPixelBuffer to UIImage
import CoreVideo
extension UIImage {
    convenience init?(pixelBuffer: CVPixelBuffer) {
        let ciImage = CIImage(cvPixelBuffer: pixelBuffer)
        let context = CIContext()
        if let cgImage = context.createCGImage(ciImage, from: ciImage.extent) {
            self.init(cgImage: cgImage)
        } else {
            return nil
        }
    }
}
Here, the overlay process draws red bounding boxes over detected objects on the live camera feed. After getting predictions from the model, the code converts the bounding box coordinates from the image’s space to the screen’s coordinate system using the preview layer’s conversion method. It then creates and adds styled CAShapeLayers to an overlay view positioned above the camera preview. Before drawing new boxes, it removes any existing ones to keep the display up to date and clean.
Finally, when you build and run:
With that, the app is complete!
Conclusion
Congratulations on deploying an object detection model to iOS. Running vision models on iOS requires small models to use for real-time applications.
If you have any questions about the project, you can check out the Github repository over here.
Cite this Post
Use the following entry to cite this post in your research:
Aryan Vasudevan. (Jul 25, 2025). How to Build an iOS App with Visual AI Capabilities. Roboflow Blog: https://blog.roboflow.com/ios-rf-detr-nano/