
On a juice box assembly line, missing or malformed straws make a product unfit for distribution, and a computer vision classification model can catch these defects automatically before products are bundled. This tutorial builds a juice box inspection system using Roboflow: images are labeled in Roboflow Annotate, a classification model is trained to distinguish intact straws from missing or bent ones, and the model is deployed on a webcam using Roboflow Inference. The resulting system can feed into business logic that rejects defective boxes or routes them to a rework station.
Juice boxes need a straw before they can be bundled and sent for distribution. If a juice box does not have a straw, or if the straw is malformed, the box is not fit for purpose. Consumers would be unable to consume the product.
You can use computer vision to build a juice box quality inspection system. Using computer vision, you can classify images of juice boxes on your assembly line to identify possible defects. Defects could include a missing straw, a bent straw, and a straw that has pierced through its packaging.
In this guide, we are going to show how to build a juice box quality inspection system. By the end of the guide, we will have a system that can verify the integrity of a juice box. For example, our system reports the following carton is missing a straw:

Without further ado, let’s get started!
Step #1: Create a Project
First, create a free Roboflow account. Then, go to your Roboflow dashboard and click “Create a Project”. On this page, you will be asked to select a name for your project, choose a project type, and fill out additional information.
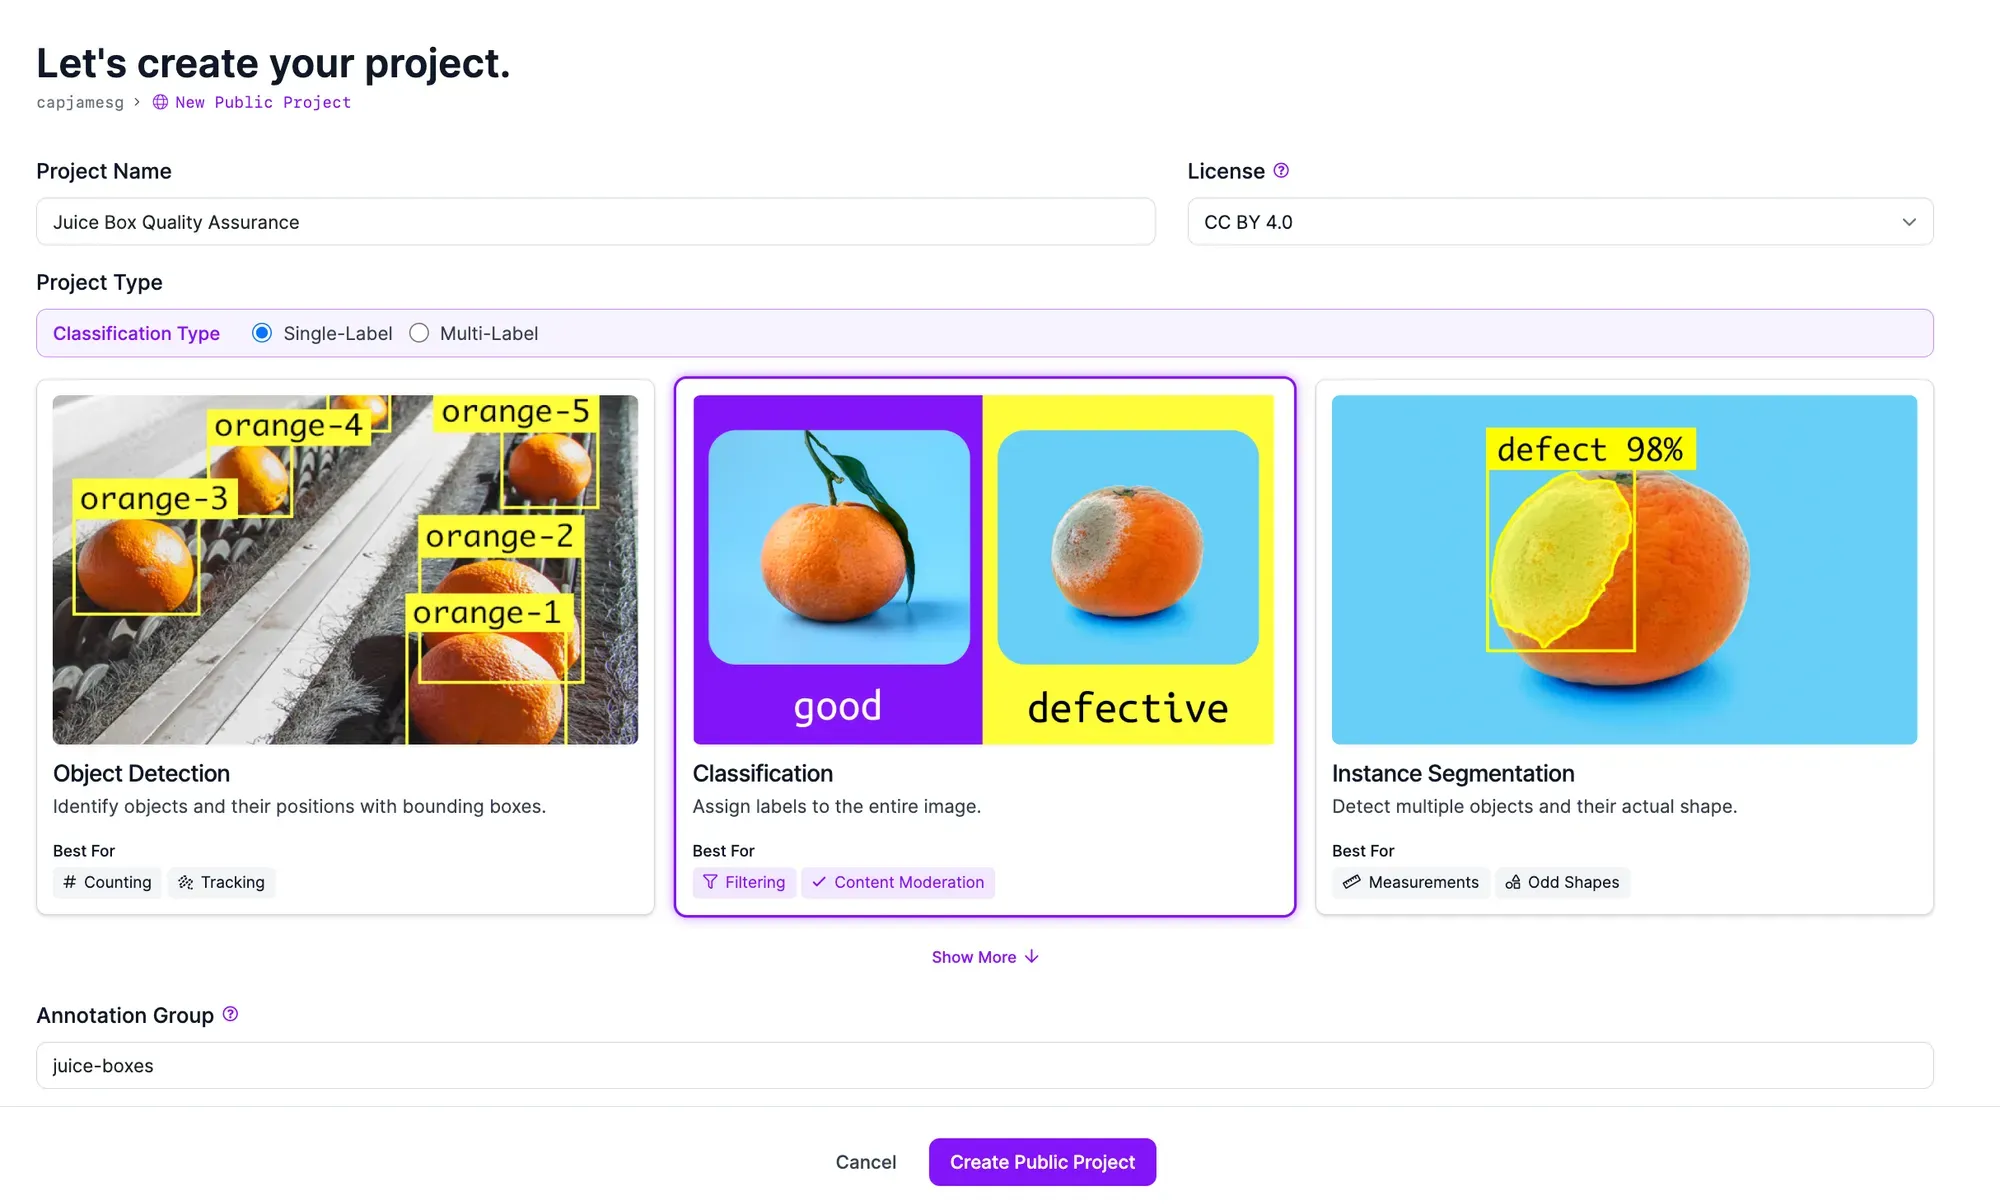
When asked to choose a project type, select Classification. This is because we are going to classify whether a juice box does or does not have a defect present. We don't need to know where the defect is, the specialty of object detection and segmentation models. Learn more about image classification in our comprehensive guide.
Click “Create Project” at the bottom of the page to create your project.
Step #2: Upload Juice Box Data
To build a computer vision system, you need images that show both acceptable and defective products. You can label these images to teach the system how to identify different defects of interest. For example, you might want to collect images where a box has a missing straw or where a straw is bent inside the packaging.
We recommend collecting 50-100 images. Of these images, you should have at least 10 images of each defect you want to classify. You should collect images from your assembly line for optimal performance. Computer vision systems work best when trained on images representative of the environment and product on which the system will be used.
Once you have gathered images, you can upload them to Roboflow.
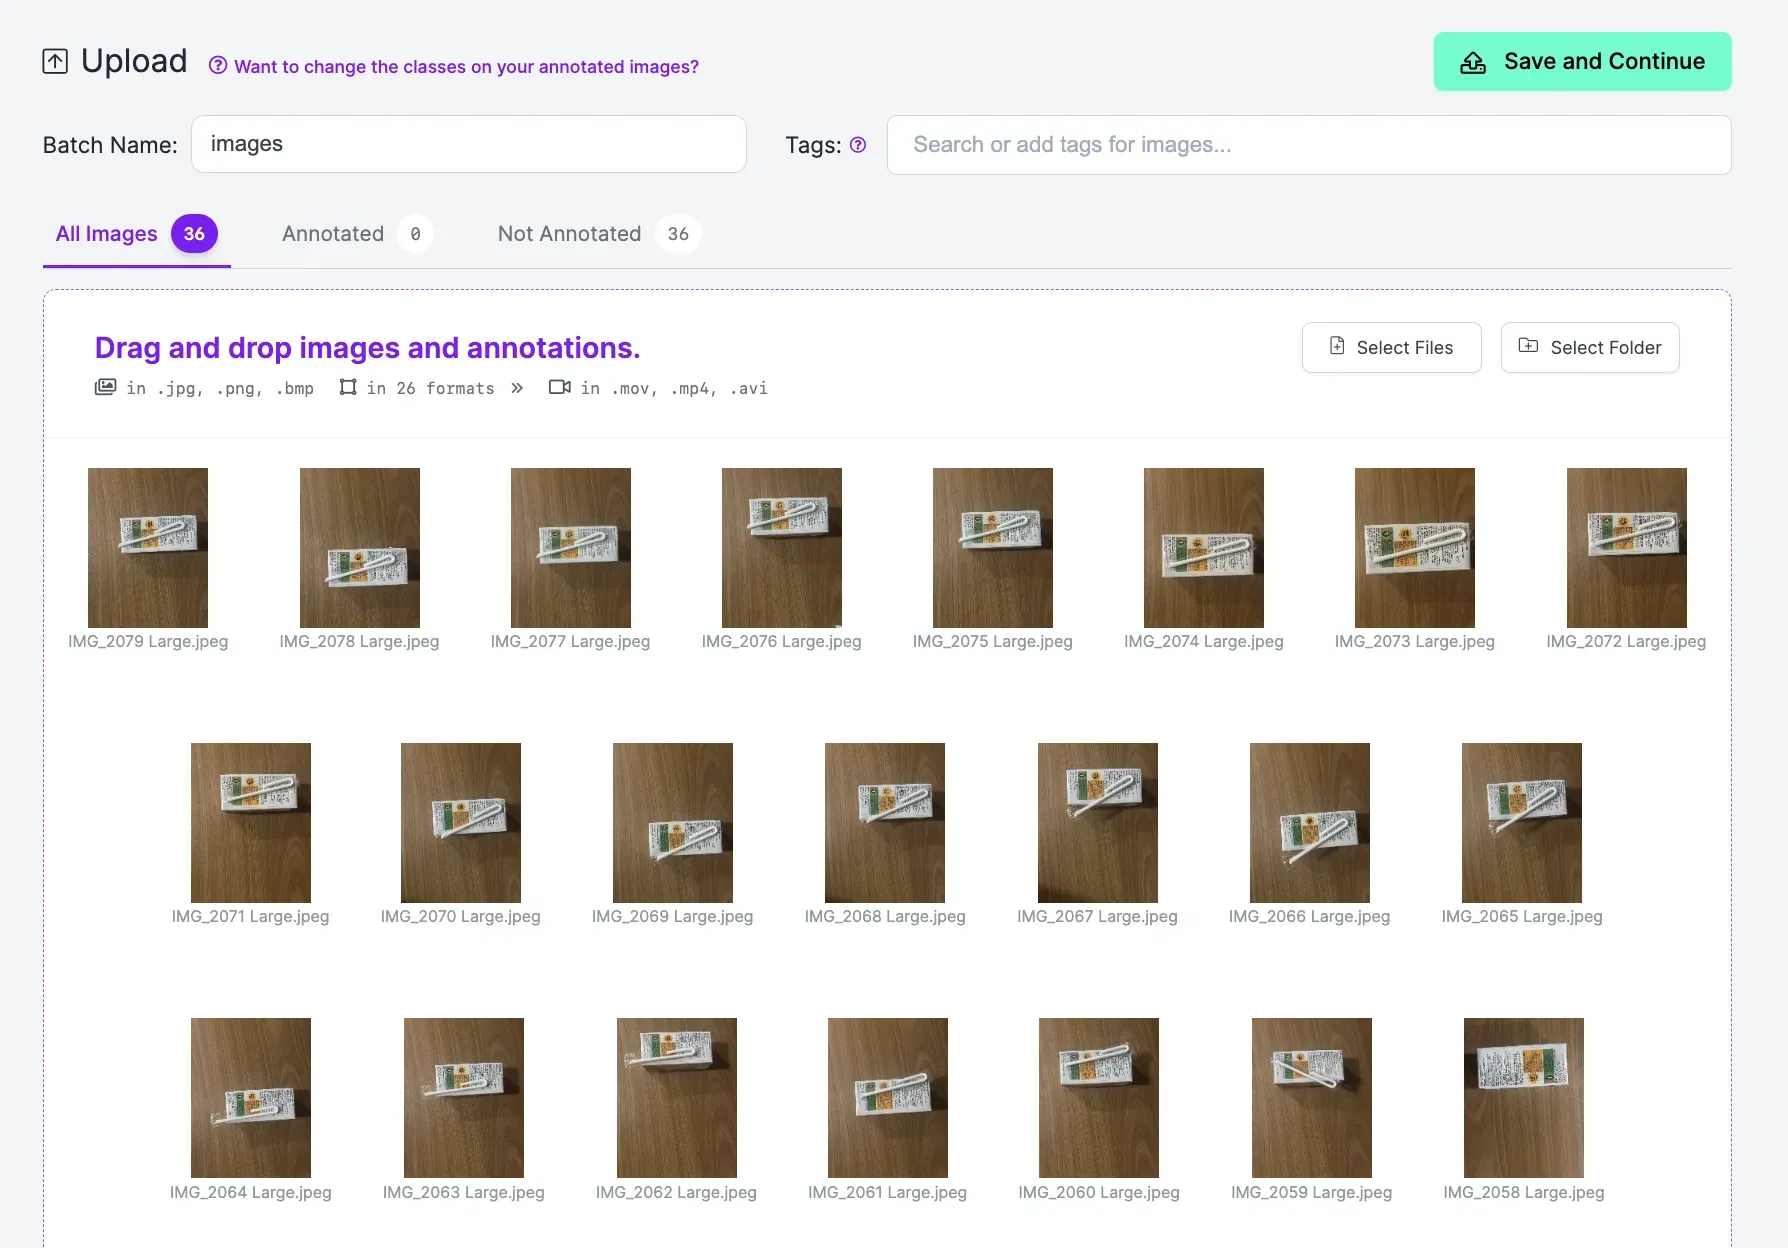
When you upload your images, they will be processed. Then, a button will appear that says “Save and Continue”. Click this button to upload your images to Roboflow.
Step #3: Label Juice Box Images
Next, we need to label images that we will use to train a vision model to assure the quality of juice boxes. To start labeling images, click Annotate in the left sidebar of your Roboflow project. Click on an image to start labeling.
To label an image, type in a label for the image in the labeling tool. Remember to use consistent, descriptive labels as you label your dataset.
For this guide, we will use four labels:
- Pierced straw
- Loose straw
- Missing straw
- Properly packaged straw (
acceptable)
Assign a single label for each image. Label every image in your dataset.
Step #4: Generate a Dataset Version
Once you have labeled your data, you can generate a dataset version. A dataset version is a snapshot of your dataset that you can use to train your juice box quality model.
Click “Generate” in the Roboflow sidebar. On this page, you can configure your dataset version. You can apply preprocessing and augmentation steps to help prepare your model for training and boost model performance, respectively.
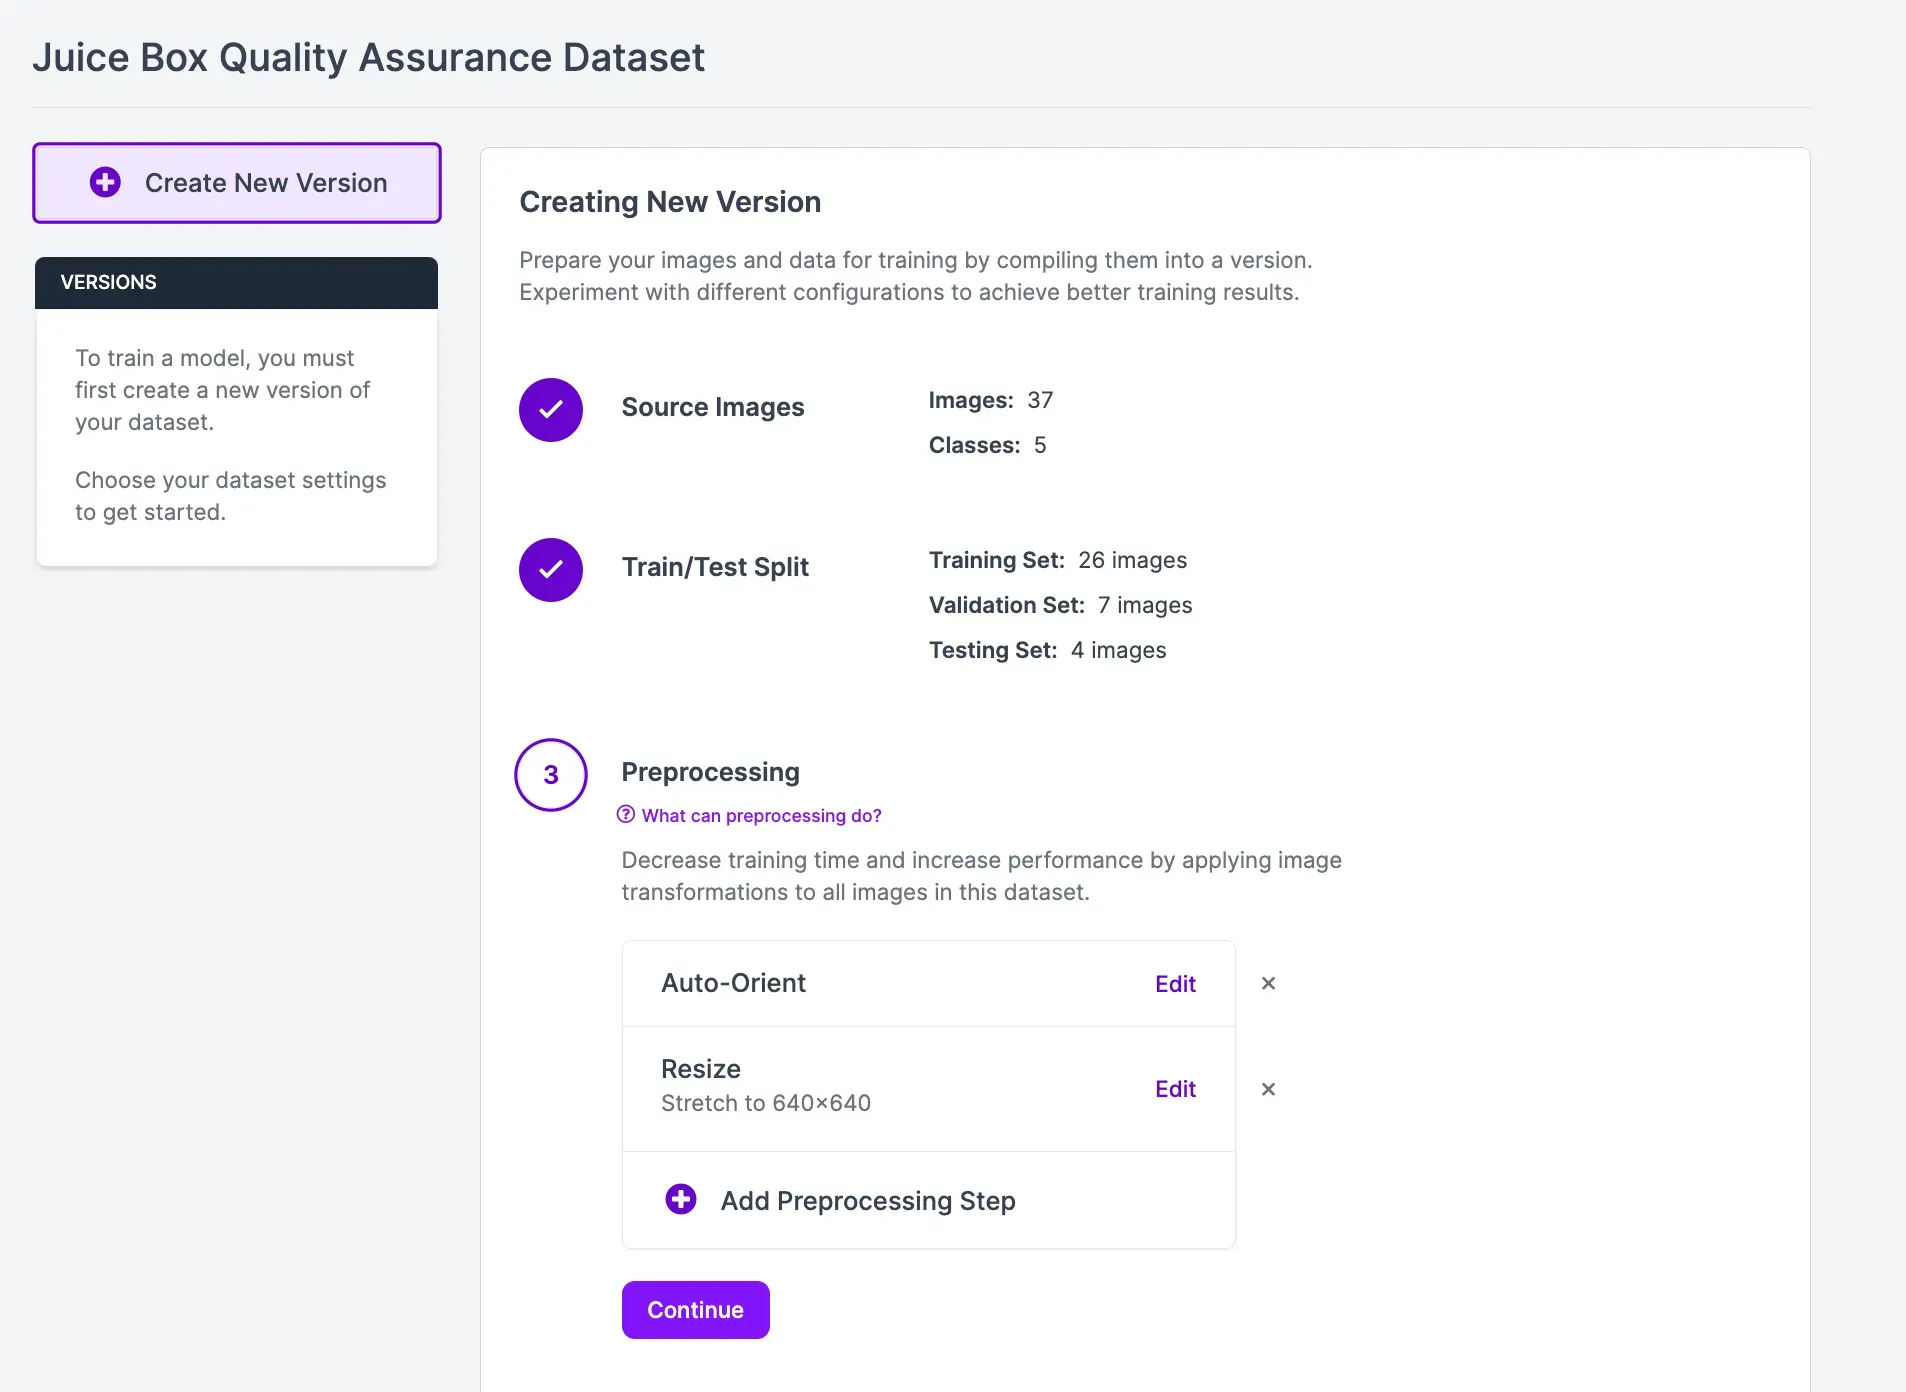
For this guide, we recommend leaving the preprocessing and augmentation steps as their default values. It is easier to add augmentation steps when you know how your model performs using your raw data without augmentation. If your model performs well without augmentation, you may not need to add augmentations. If your model struggles without augmentation, it is a sign you may need more images.
To learn more about image preprocessing and augmentation, refer to the Roboflow preprocessing and augmentation guide.
Click “Create” at the bottom of the page to generate your dataset version. The amount of time this process will take depends on the number of images you have in your dataset and what augmentations you have applied. After your dataset has been generated, you will be taken to the page on which you can start training your model.
Step #5: Train a Juice Box Inspection Model
To train your model, click the “Train with Roboflow” button on your dataset version page.
A pop up will appear in which you can configure your model training job. On the first step, select “Fast” training. On the second step, select the “Train from Public Checkpoint” option and train from the Microsoft COCO model.
Once you have configured your training job, your model training will be assigned to a server. You will receive an estimate that states roughly how long we think it will take for your model to train.
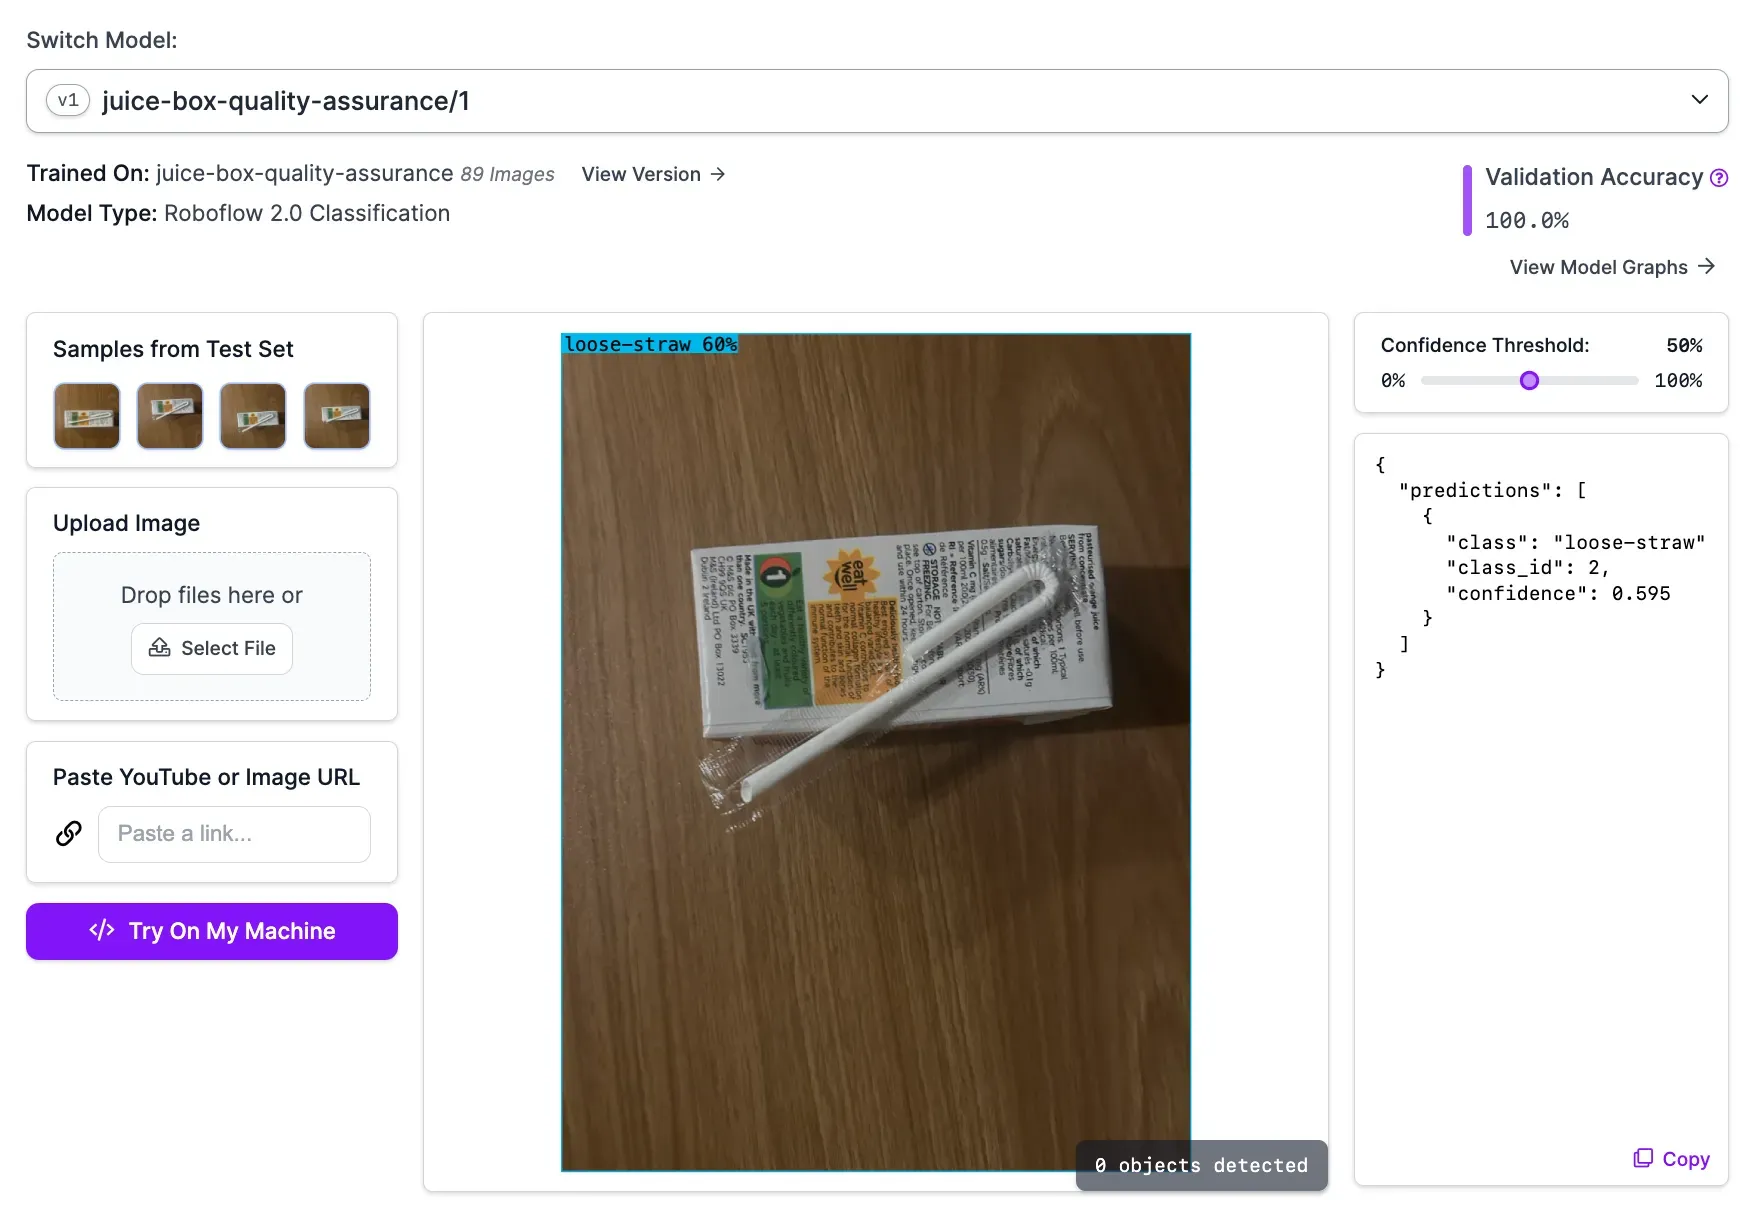
Once your model has trained, you can test it in your browser using the Visualize page, accessible from the sidebar of your project in the Roboflow dashboard.
Here is an example of our model running on an image:

The model successfully identified that the box is acceptable.
When presented with a box with a loose straw, the model identifies the defect:
Step #6: Deploy the Juice Bottle Inspection System
You can deploy your juice box quality inspection system to your assembly line using Roboflow Inference. Inference is high-performance software designed for running computer vision models. You can run vision models in real time over camera and RTSP streams with Inference. You can also run inference on images.
For this guide, we will run inference on a camera stream.
To get started, we need to install Inference and supervision. The supervision Python package provides utilities we can use to work with predictions from our model. To install these dependencies, run the following command
pip install inference supervisionWith the required dependencies ready, we can start to deploy our model.
Create new Python file and add the following code:
from inference import get_roboflow_model
import supervision as sv
import cv2

image = cv2.imread("juice.png")

model = get_roboflow_model(model_id="juice-box-quality-assurance/1")

results = model.infer(image)

print(results[0].predictions[0].class_name)
Above, replace juice-box-inspection/1 with the model ID associated with your Roboflow project. Learn how to retrieve your model ID.
This code will run the classification model on an image. The results will be displayed to your screen, interactively.
Let’s run our code on the following image:
Our code returns the classification no-straw.
Our system correctly classifies when a juice box straw is intact versus when a straw is missing or damaged.
You can connect this system to your own business logic. For example, you can automatically reject products with missing straws and move them to the straw attachment process of your assembly line. You can monitor the incidence rates of defects over time, too.
Conclusion
You can build a juice box quality inspection system with computer vision. In this guide, we walked through how to build a classification system that identifies whether a box has a straw, is missing a straw, or has a defective straw.
To build this system, we gathered images, labeled them in Roboflow, trained a classification model, then deployed our system on a webcam using Roboflow Inference.
To learn more about building industrial inspection systems with computer vision, contact the Roboflow sales team. The Roboflow sales team are experts in architecting solutions to identify defects on assembly lines.
Cite this Post
Use the following entry to cite this post in your research:
James Gallagher. (Feb 21, 2024). Build a Juice Box Quality Inspection System. Roboflow Blog: https://blog.roboflow.com/juice-box-quality-inspection/