
Before you train a keypoint detection model, you may want to add augmented images to your dataset. Augmented images are new images that are made by transforming existing images in your dataset (i.e. by applying a grayscale effect to an image). Augmented images can help improve your model’s accuracy by allowing the model to better “generalize” to new data.
With Roboflow, you can generate augmented images for keypoint detection projects. This feature is available within our dataset versioning system, which allows you to generate multiple versions of a dataset to which different augmentations can be applied.

With this system, you can keep a raw copy of your dataset, and generate versions to experiment with different augmentations.
In this guide, we are going to discuss how to generate augmented images for inclusion in a keypoint detection dataset.
Without further ado, let’s get started!
Step #1: Create a Project
First, create a Roboflow account. Once you have created your account, navigate to your Roboflow dashboard and click the “Create Project” button. You will be taken to a page where you can create a Project.
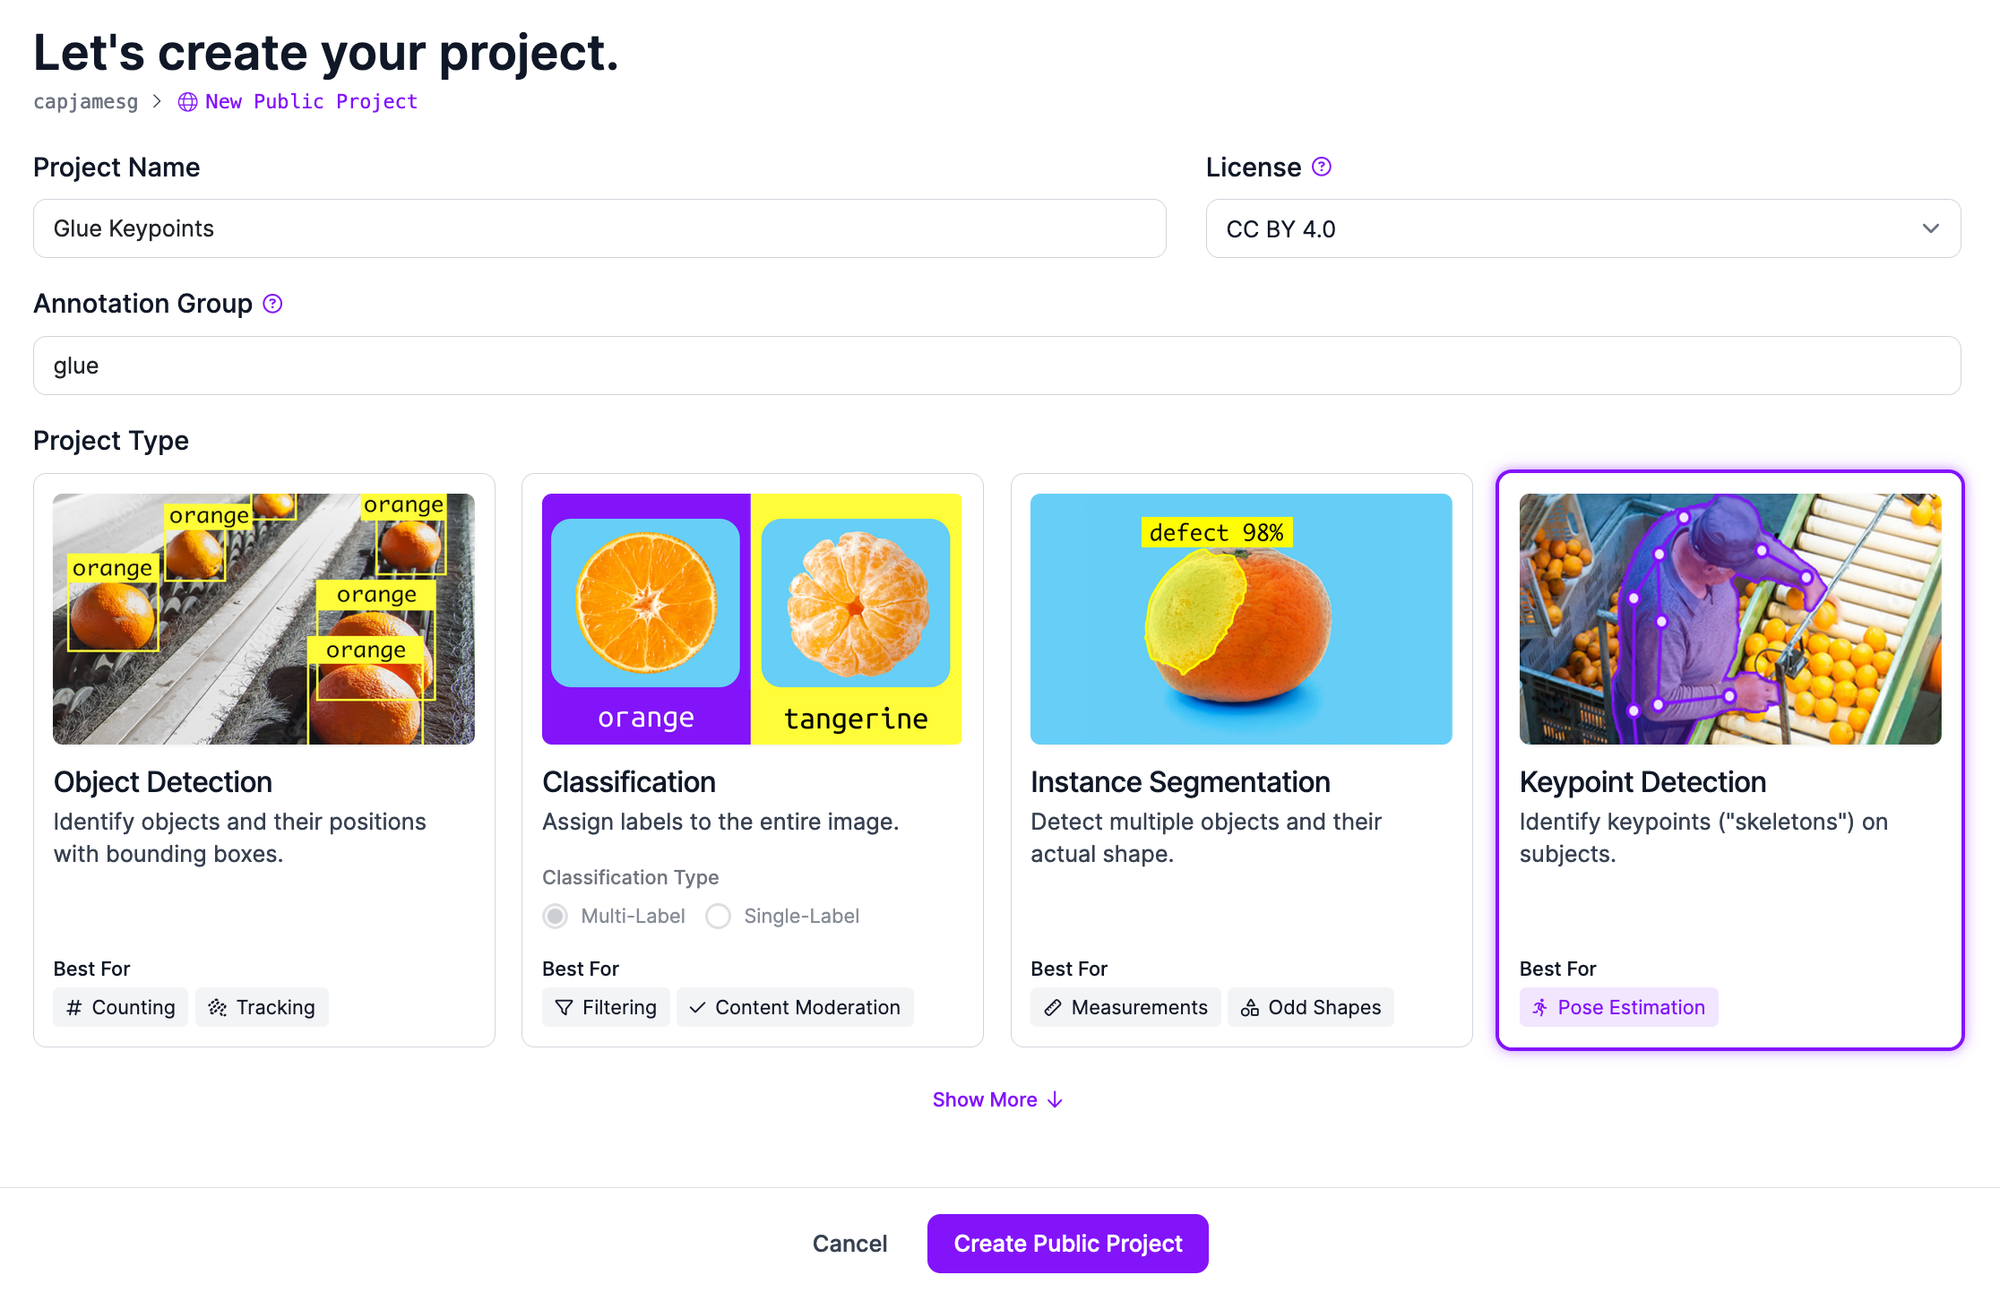
On the Project creation page, set a name for your Project, then choose the “Keypoint Detection” project type. Click the “Create Project” button to create your project.
Step #2: Configure Skeletons and Upload Data
With a project created, you need to configure skeletons for your project. You can then upload your data into Roboflow.
When you create a project, you will be asked to add classes to your dataset:
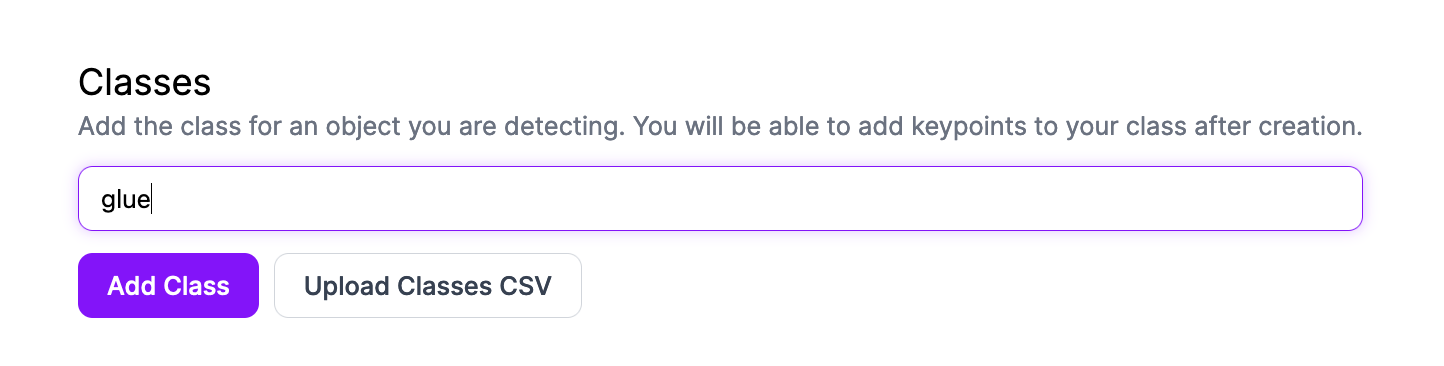
If you plan to upload annotated data, your class names must exactly match the classes in your dataset. Otherwise, you can name your classes whatever you want.
When you add a class, you will be asked to create a skeleton. A skeleton describes the structure of keypoints and how they relate in our annotation tool.
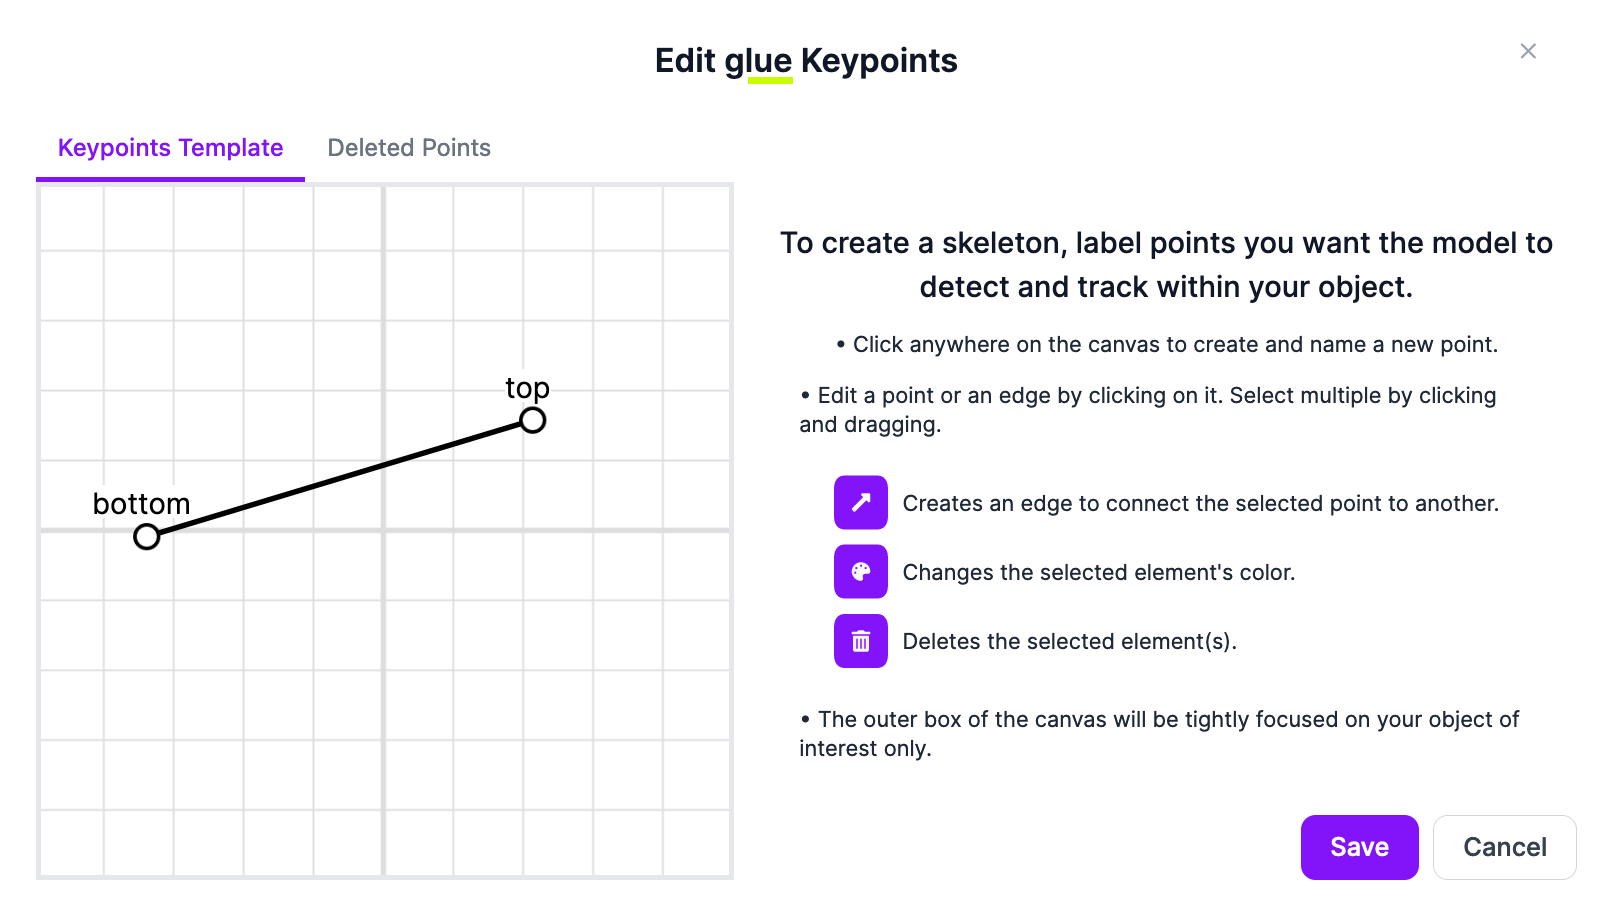
To create a keypoint, click on the grid and give the point a name. You can add as many keypoints as you want. When you have configured a keypoint class, click "Save" to save the class.
When you are ready to upload images (and annotations, if you have them), click "Upload" in the left sidebar.
You can upload either raw images, or images with COCO Keypoint data.
To upload raw or annotated images, drag and drop your data into the dataset upload page:
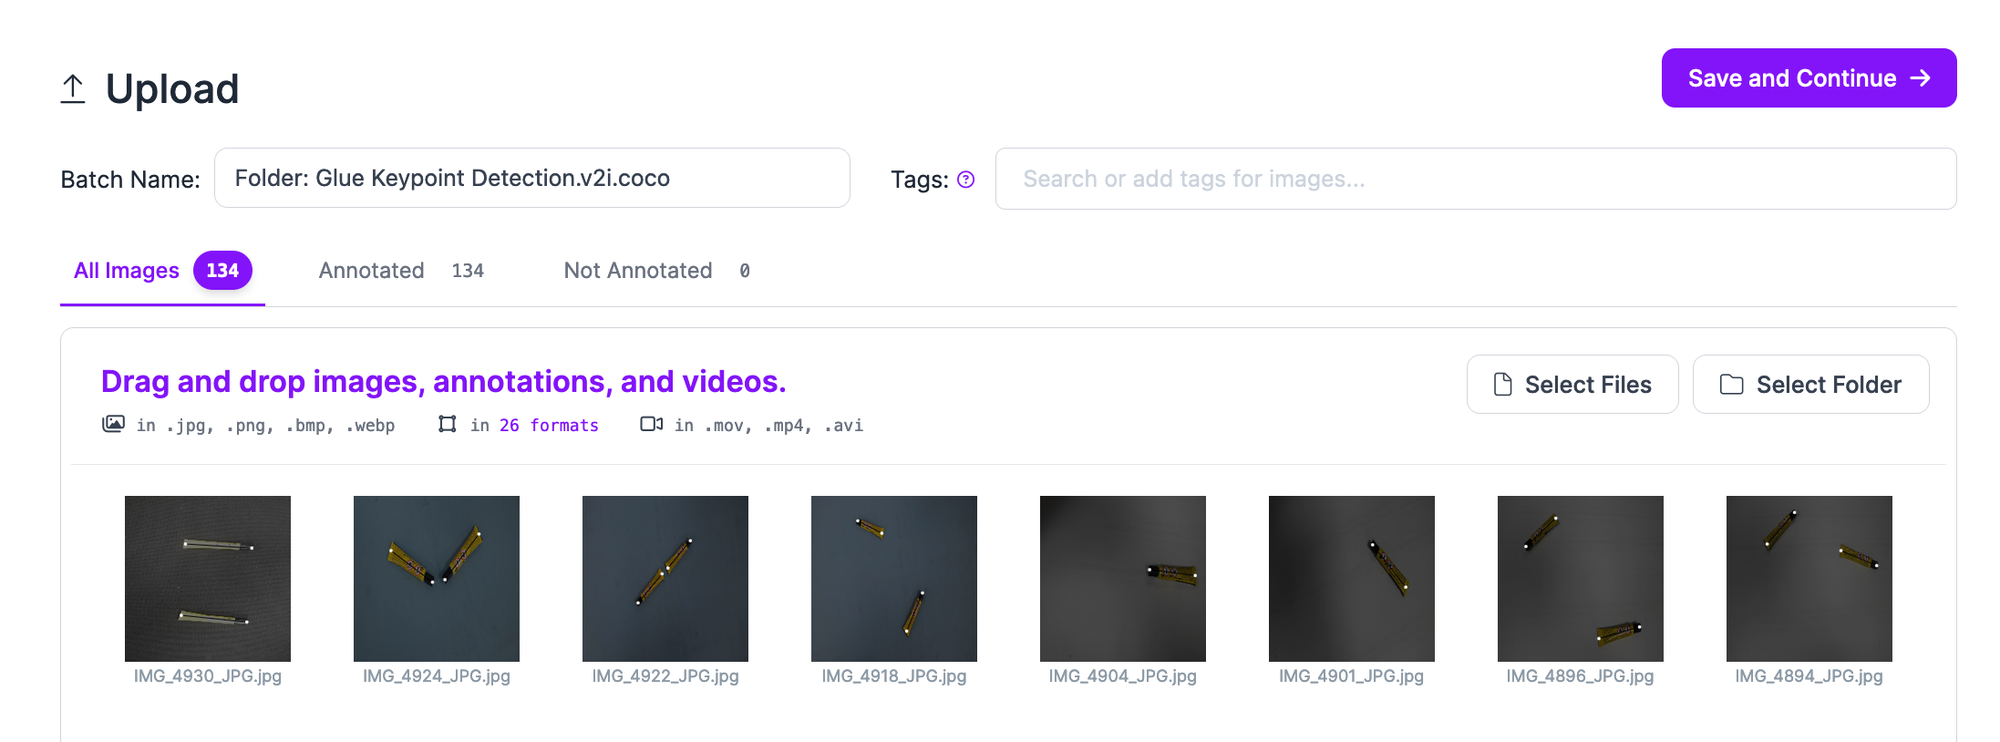
Your images will first be processed in the browser. Then, a “Save and Continue” button will appear. When you click this button, your images (and annotations if you uploaded any) will be uploaded. The amount of time the upload process takes will depend on the number of images you want to upload as well as the strength of your internet connection.
If you have unannotated data in your dataset, you can annotate it with Roboflow Annotate, a web-based annotation tool. Learn more about annotating keypoint detection datasets.
Step #3: Generate a Version and Augment Data
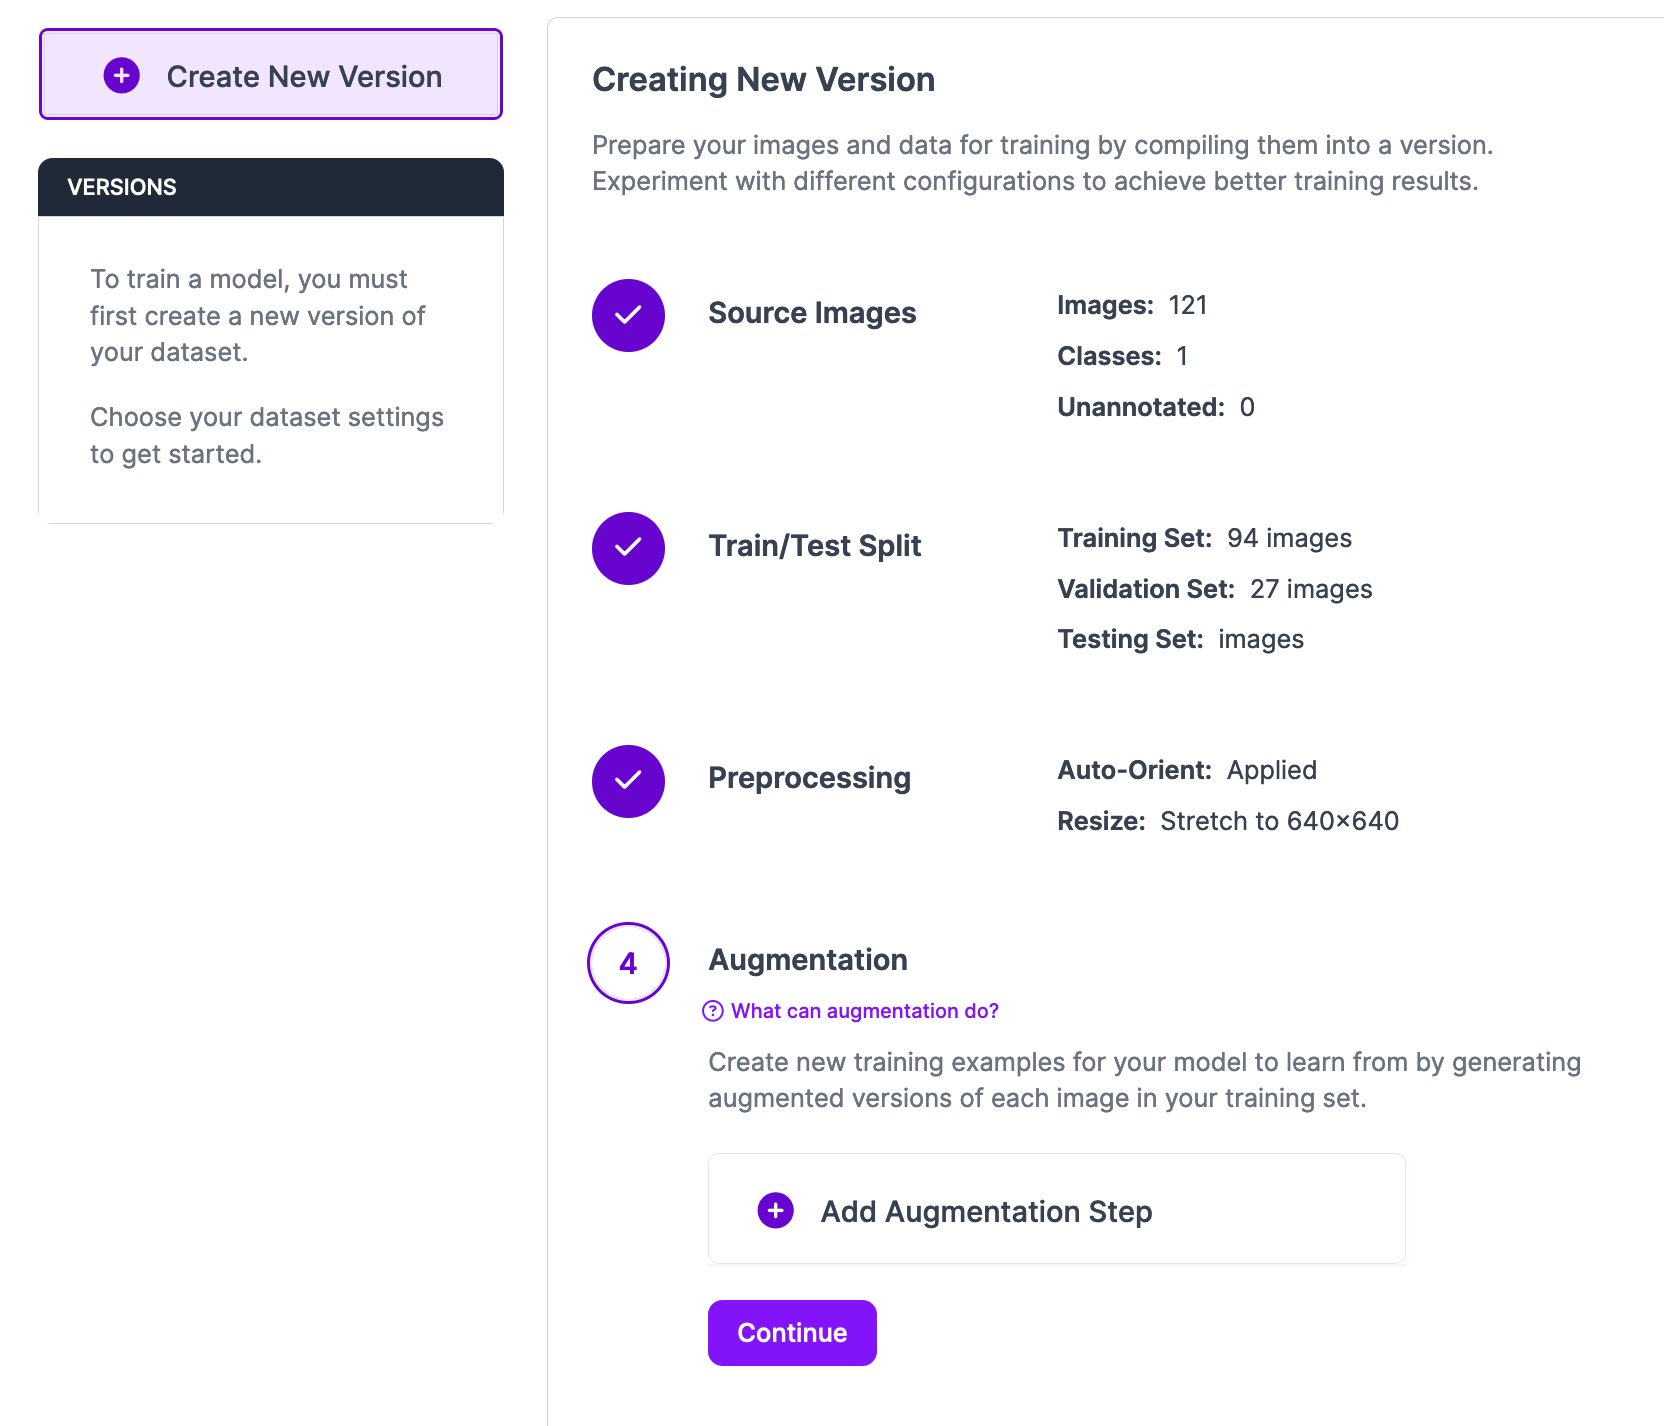
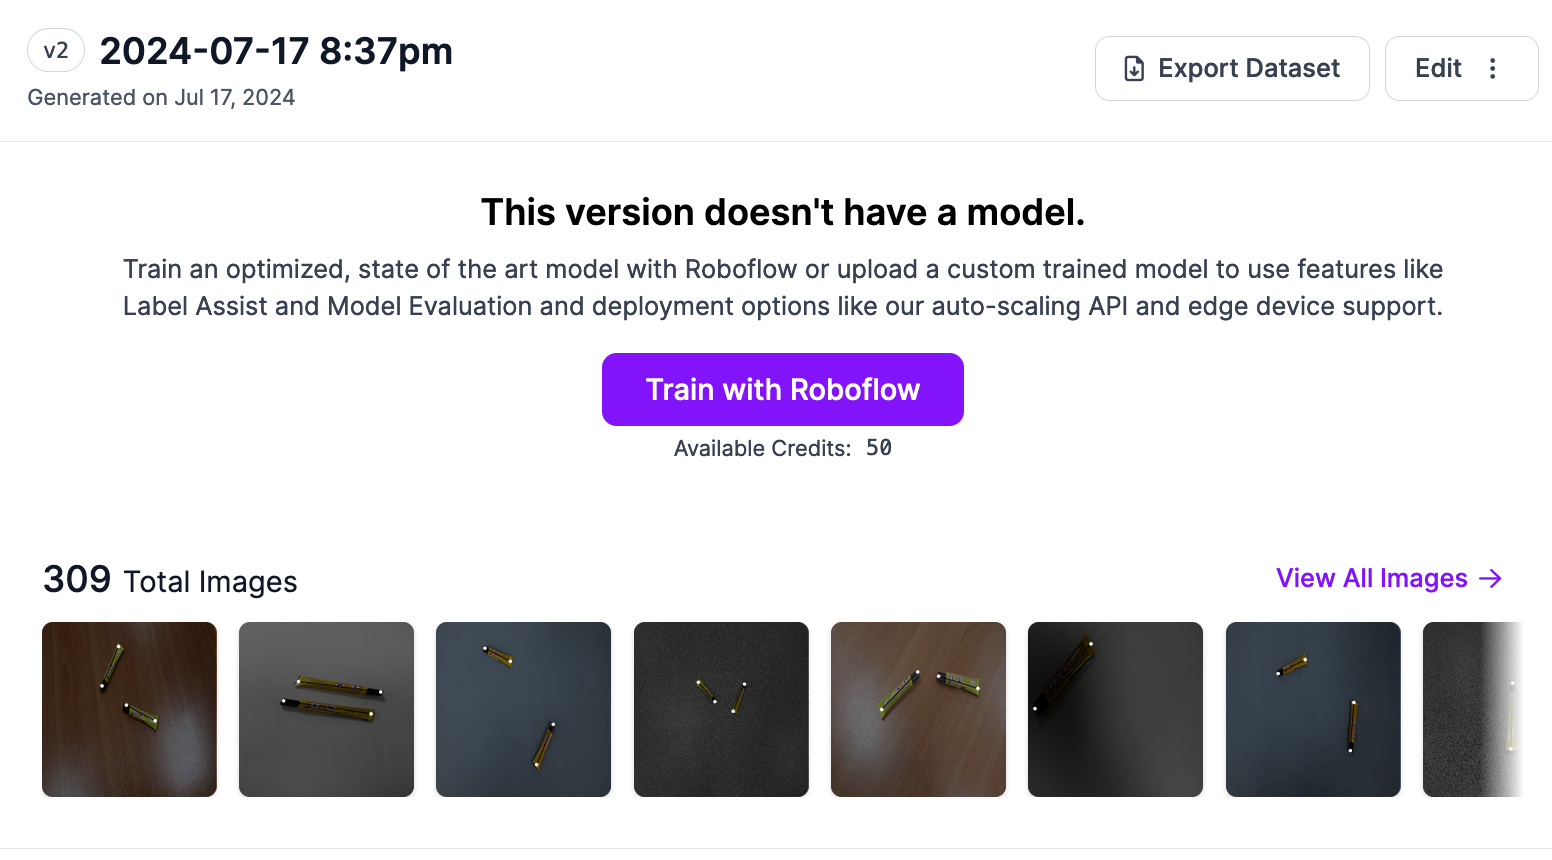
Once you have annotated data for use in training your model, you can generate a dataset version. A dataset version is a snapshot of your dataset that is frozen in time. You can generate augmented images for inclusion in a dataset version.
To generate a dataset version, click the “Generate” button in the left sidebar. You will then be taken to the dataset generation page. On this page, you can specify several parameters for your dataset version, including the train-test-valid split, preprocessing steps, and augmentations.
For this guide, we will leave all values as the default and focus on the augmentation options.
Scroll down to the Augmentations section, then click the “Add New Augmentation” button. A window will appear with options for two types of augmentations you can use: image-level and bounding box-level.
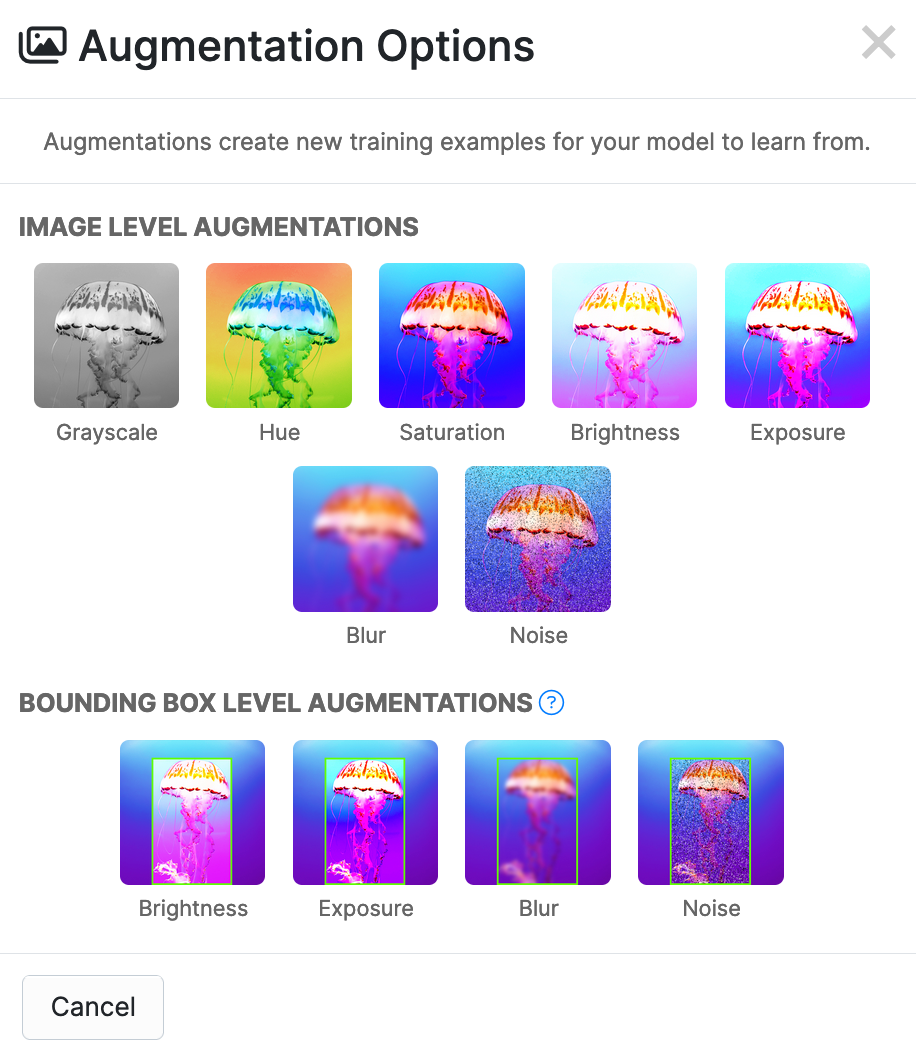
Image-level augmentations are applied to a full image, whereas bounding box-level augmentations are applied only to the region of a bounding box. In this case, a bounding box refers to the closest box that would fit around all of the key points.
To configure an augmentation, select one that you want to apply. You will then be presented with the configuration options for that augmentation. Every augmentation has its own configuration options available.
For example, if you choose a brightness augmentation, you can configure the range within which new augmented images will be made brighter, darker, or both.
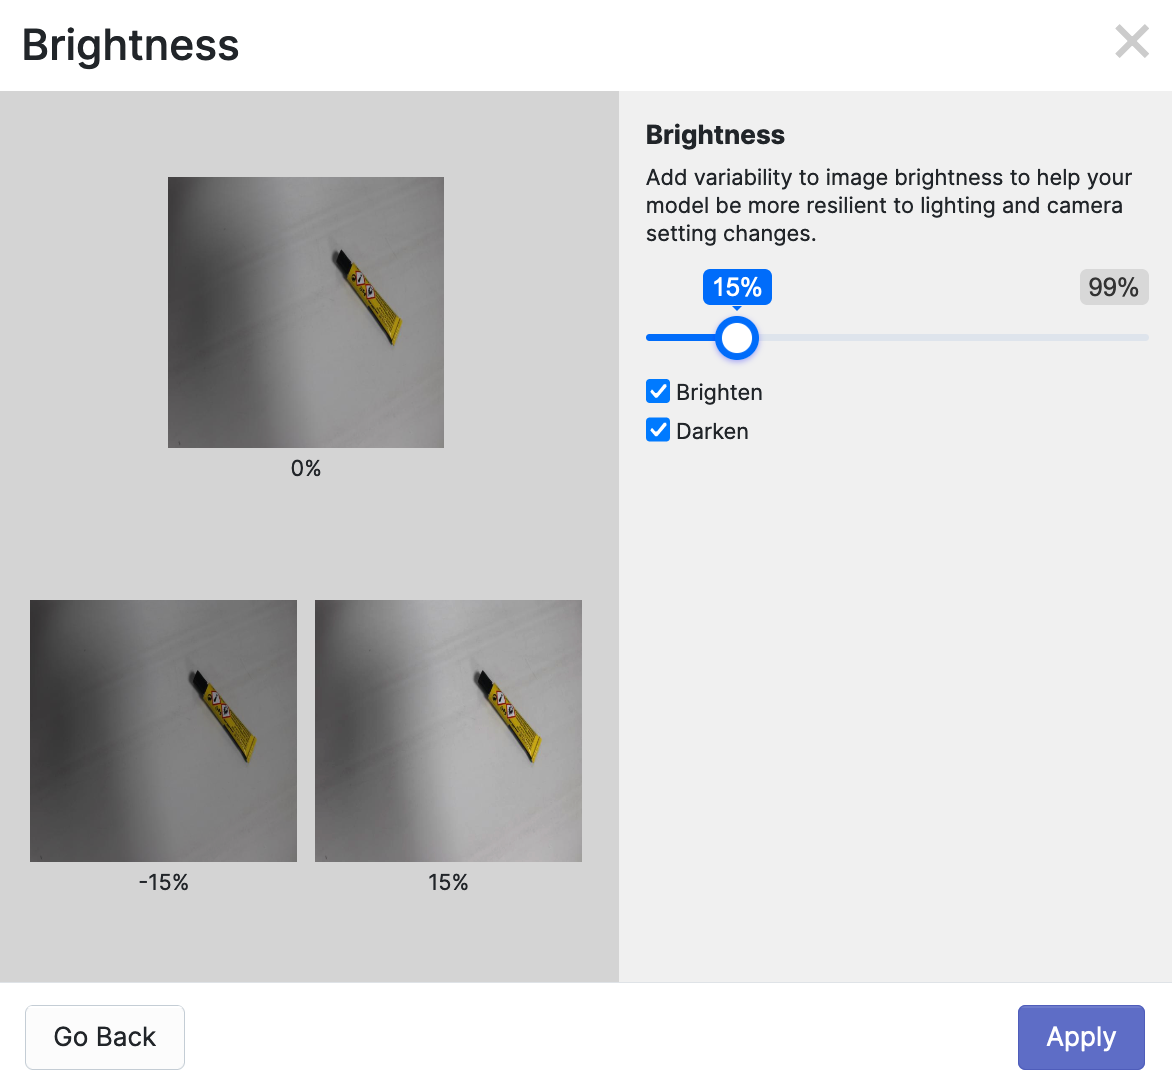
Once you have configured an augmentation, click “Apply” to save the augmentation option.
You can apply as many augmentations as you want, although more augmentations do not equal better model performance. Adding the wrong augmentations can make your model perform worse. To learn best practices on how to apply augmentations to images, refer to our image augmentation and preprocessing guide.
Once you have configured your dataset version, scroll down to the bottom of the page and click “Create”. The Maximum Version Size refers to how many images will be in your dataset after augmented images are generated and added. We recommend setting this value at 2x or 3x.
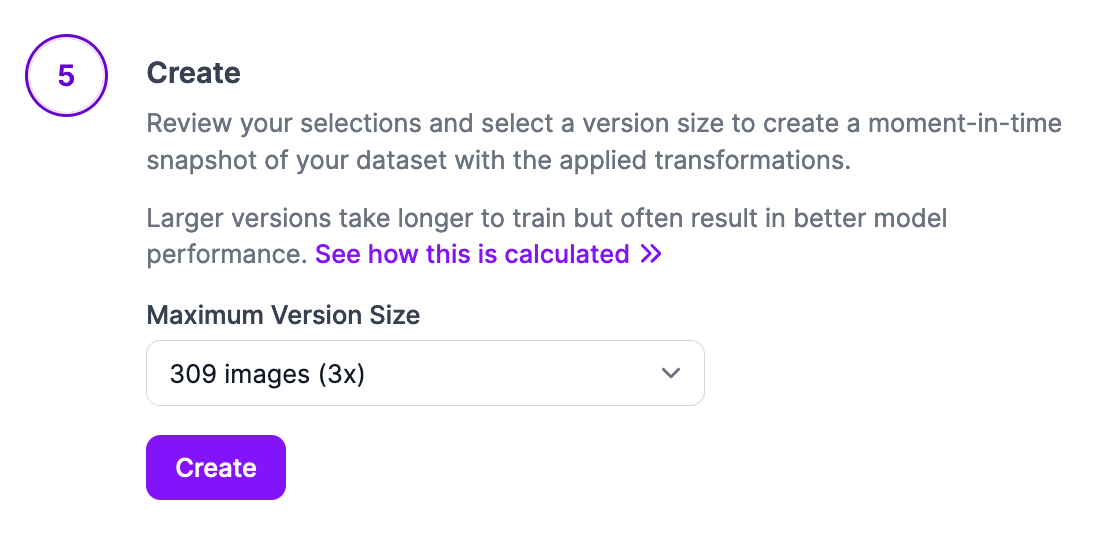
Click “Create” to create your version.
The amount of time this process takes will vary depending on how many images are in your dataset and what augmentations you have chosen. The dataset generation process can take anywhere from a few minutes for small datasets to a few hours for larger datasets.
Step #4: Train a Keypoint Detection Model
Once your dataset version is ready, you can either:
- Use it to train a model on Roboflow, or;
- Export your dataset for use in training a model on your own hardware.
If you train a model on Roboflow, you can deploy your model on your own hardware using the open source Roboflow Inference server and Python SDK. A cloud API will also be available through which you can query your model.
If you train a model on your own hardware, you can optionally upload it back to Roboflow if you want to use Inference to deploy your model or need a cloud API for your model.
To train a model in the Roboflow platform, click the “Train with Roboflow” button and configure your training job. To export your dataset, click the “Export Dataset” button. You can export your dataset into the COCO Keypoints format.
Conclusion
With Roboflow, you can generate augmented images for use in a keypoint detection dataset.
In this guide, we walked through the steps you need to follow to generate augmented images. We first created a project in Roboflow, then we uploaded data. We then generated a dataset version with specific augmentations. Finally, we discussed how to train a model with your dataset with Roboflow or export your dataset.
To learn more about Roboflow’s deployment offerings, refer to the Roboflow Inference documentation.
Cite this Post
Use the following entry to cite this post in your research:
James Gallagher. (Jul 17, 2024). How to Augment Images for Keypoint Detection. Roboflow Blog: https://blog.roboflow.com/keypoint-detection-augmentation/