
Roboflow now supports the full keypoint detection pipeline: defining a skeleton, uploading and annotating images, generating a versioned dataset with preprocessing and augmentation, training a model, and testing predictions in the browser. The launch walkthrough uses a glue stick orientation task to show each step, but the same workflow covers any keypoint application from human pose estimation to robotic arm tracking.
Keypoint detection enables you to identify specific points on an image. With keypoints, you can calculate how different parts of an object relate. For example, you can use keypoint predictions for pose estimation of a person during a tennis game or you can use keypoint detections to measure the envelope of a robotic arm.
We are excited to announce support for keypoint detection tasks in Roboflow. You can use Roboflow to define keypoint skeletons, label key points on an image, train a keypoint detection model, and deploy your keypoint model to the cloud and on your own hardware.
In this guide, we are going to show you how to label data for, train, and deploy a keypoint detection model in the cloud using the Roboflow platform.
We will train a keypoint detection model to identify key points on glue sticks. The points we will identify are the top and bottom of the glue stick. This model could be used on a manufacturing line to ensure glue sticks are oriented properly before reaching the packaging stage of the production line.
Without further ado, let’s get started!
Step #1: Create a Keypoint Project
First, we need to create a project in Roboflow. Create a free Roboflow account and follow the in-app setup instructions. In your Roboflow dashboard, click the “Create a Project” button. A pop up will appear in which you can create a project:
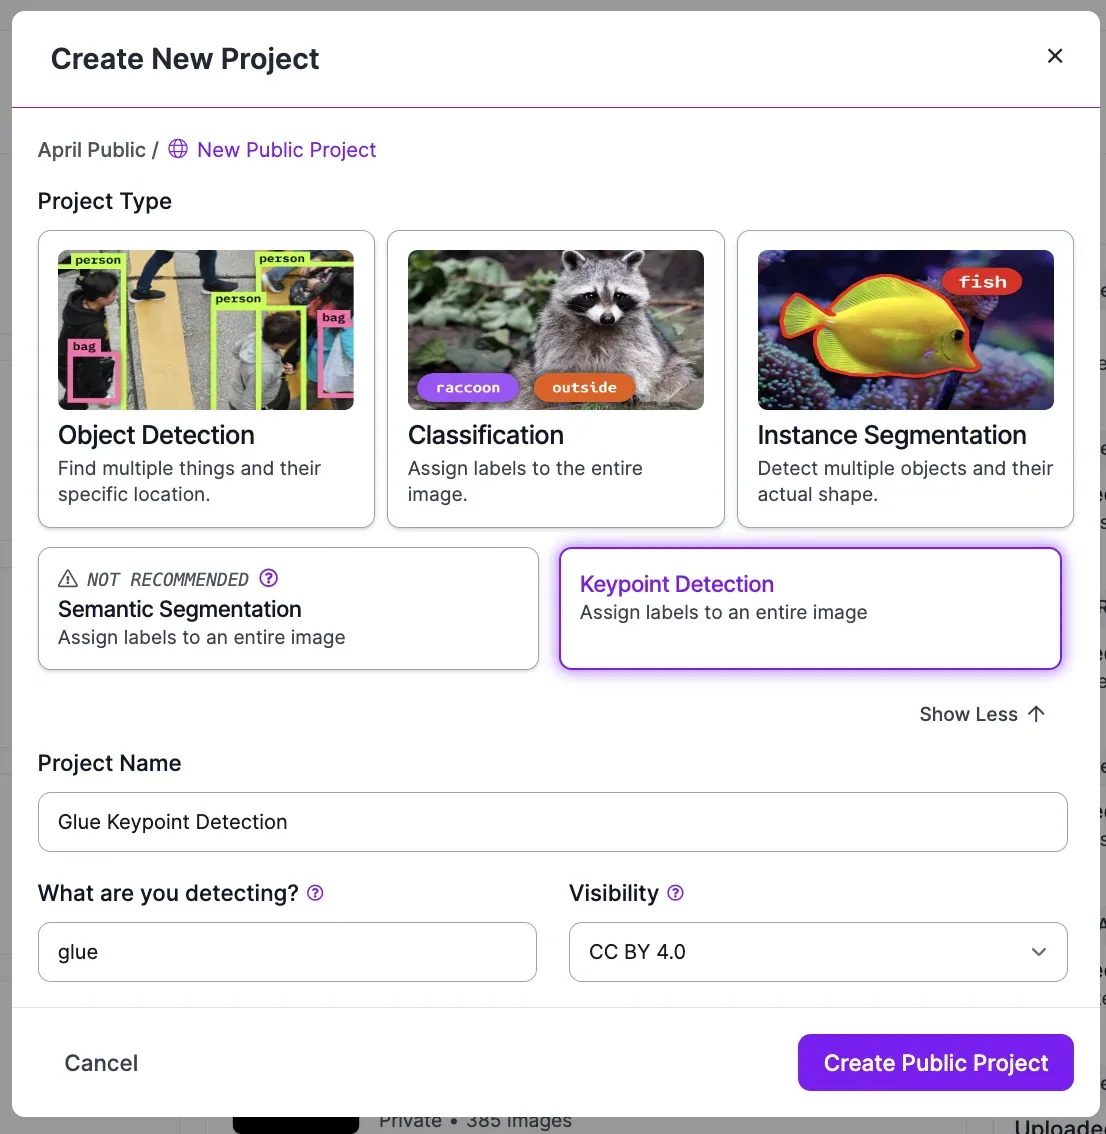
We are going to create a Keypoint Detection project. In the pop up, select “Show More” and select “Keypoint Detection”.
Then, fill out the fields that ask for a project name and the type of object you want to annotate. If you are on a free plan, you will be asked to specify the license under which your dataset will be licensed.
Click “Create Project” to create a project.
Step #2: Define a Skeleton
Next, we need to define a skeleton. A skeleton is a structure that contains all of the key points that you are going to use to annotate images. A skeleton defines both what the key points are called and how they connect. For example, a skeleton may contain “left_elbow” and “left_wrist” classes which are both connected.
To create the first point in your skeleton, click on the “Classes” list in the sidebar. Add a class you want to identify.
A grid will appear in which you can define your skeleton. Once you click a point, you can type to specify the class name for that point. You can add as many points as you want to your skeleton. You can change your skeleton later.
You will need to create a skeleton for each type of object you want to identify. For example, if you want to detect keypoints in people and tennis rackets you would specify a skeleton for both a person class and a tennis racket class.
Once you have defined a skeleton, click “Save” to save the skeleton. You can now use the skeleton to create keypoint annotations on images.
Step #3: Upload Data
With a skeleton defined, you can start uploading data. You can upload raw images through the Roboflow web interface or using the Roboflow API.
To upload data with the web interface, drag in your images into the Roboflow web application:

Your images will be processed then uploaded to the Roboflow platform.
Once your images have been uploaded, you can start annotating them for use in training a keypoint detection model.
Step #4: Annotate Key Points on Images
Once you have uploaded your images, click “Annotate” in the sidebar and select the images you want to annotate. When you click on an image to annotate, the Roboflow Annotate interface will open. In this interface, you can annotate keypoints and occluded keypoints.
To start annotating, first click on the keypoint tool in the left sidebar. Then, click at the points in the image to which you want to add a keypoint. When you click on a point on the image, a box will appear in which you can choose the label to assign to the point.
If a keypoint is not visible, you can mark it as occluded. For example, if you are training a human pose detection model and a person’s elbow is partially hidden behind an object, you could mark the key point as occluded. To do so, click where you think the keypoint should be. Then, right click and select “Mark as Occluded”.
Step #5: Generate a Dataset
Once you have annotated your data, you can generate a dataset. A dataset is a frozen-in-time version of your images that you can use to train a computer vision model.
To generate a dataset, click “Generate” in the sidebar. On this page, you can choose preprocessing and augmentation steps to apply to your data.
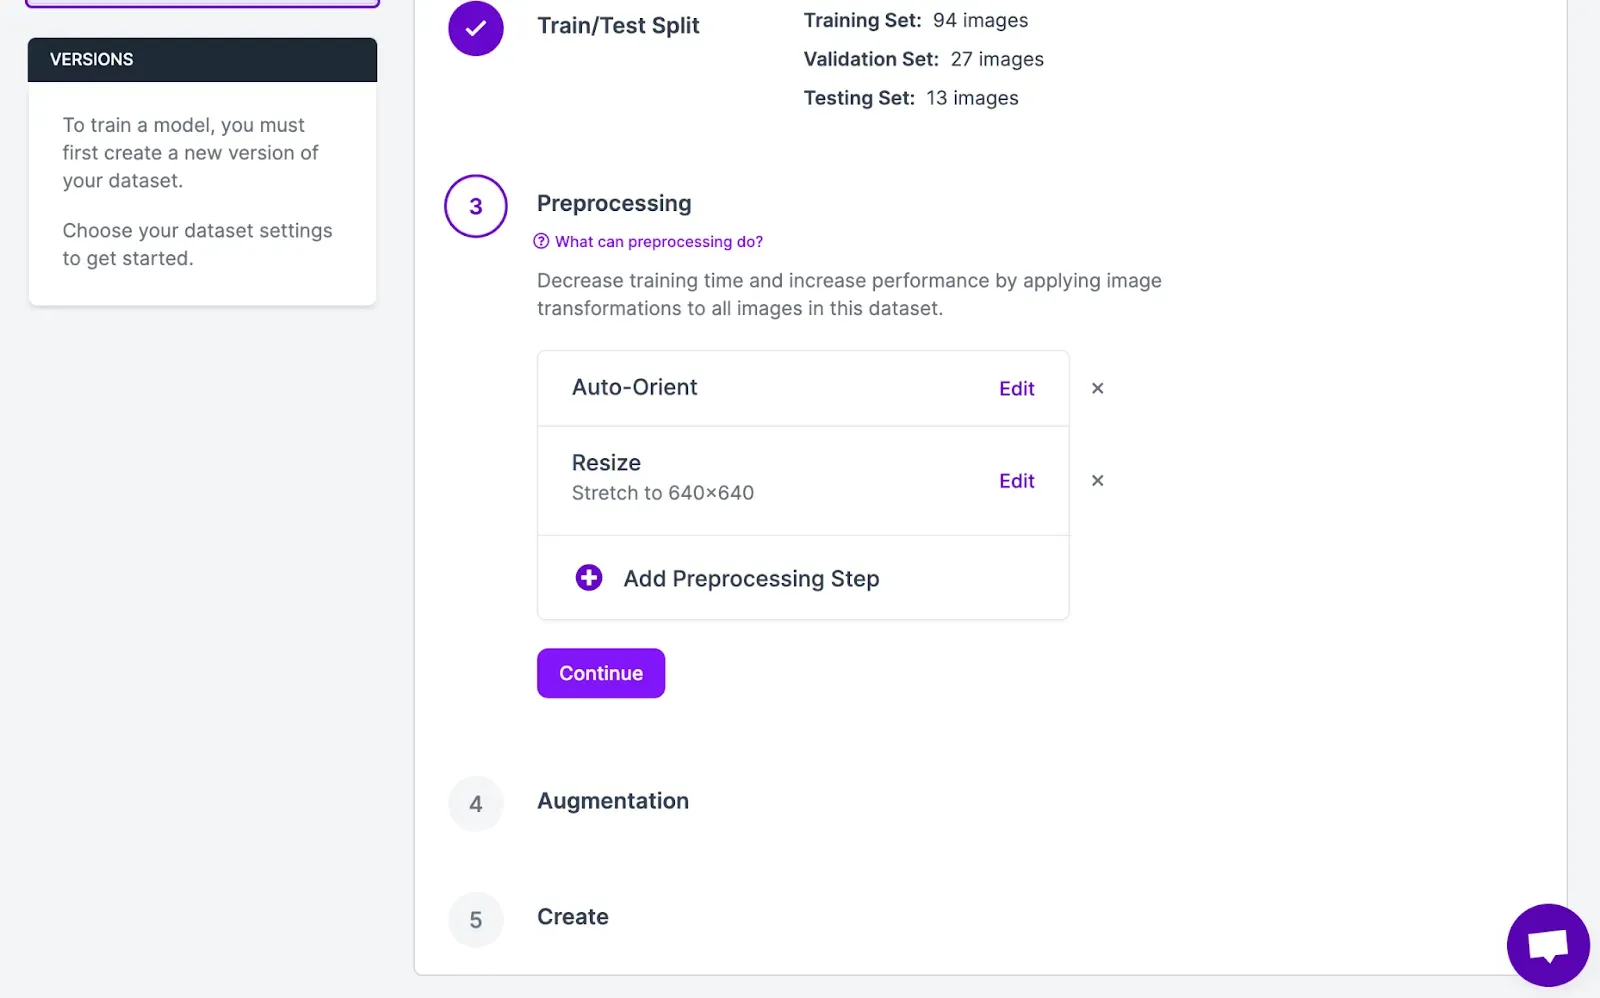
Preprocessing steps help you make your data consistent before training a model. Augmentation steps can help you improve model performance by generating new, augmented images based on existing images in your dataset.
For your first model version, we recommend applying the default preprocessing steps. We do not recommend applying augmentations until you have trained a version of your model without augmentations. Training without augmentations will allow you to collect data on the baseline performance for your model. You can use this data to evaluate the impact different augmentations have in the future.
Once you have selected your preprocessing and augmentation steps, click “Generate” at the bottom of the page. Your dataset will start generating.
The amount of time it takes to generate a dataset depends on the number of images in your dataset and the number of augmented images you have created. The more images and augmented images in your dataset, the longer it will take for your dataset to generate.
Step #6: Train a Model
When your dataset has been generated, you will be taken to your dataset version page. From this page, you can train a keypoint detection model using your dataset.
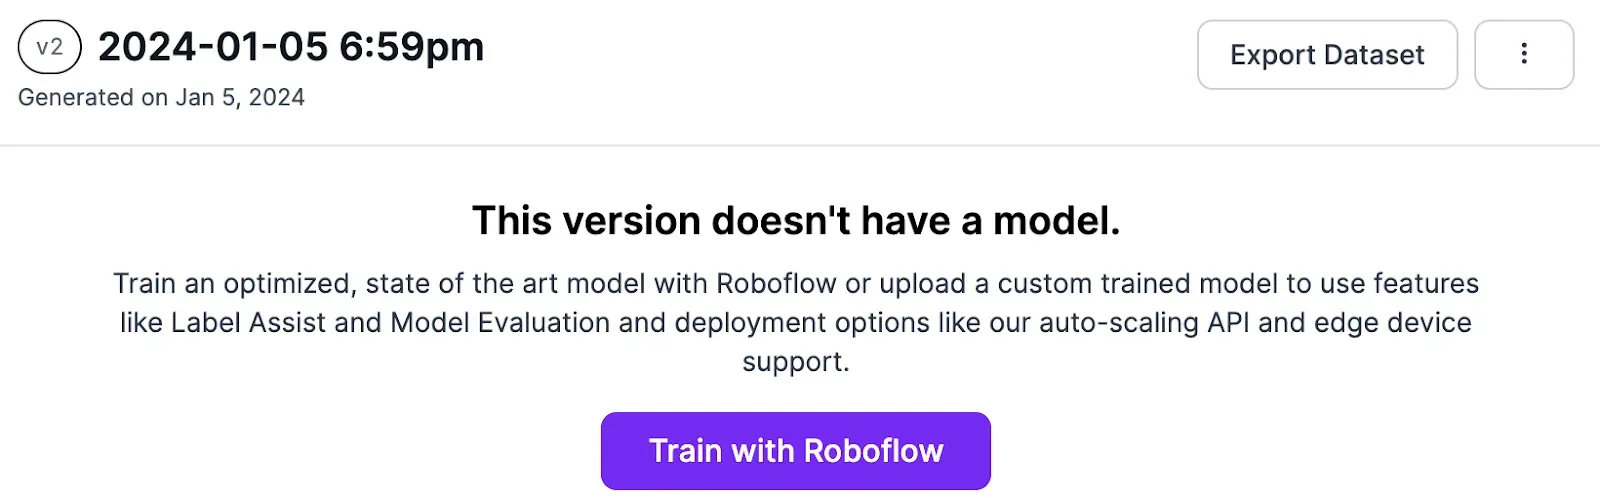
To train a keypoint detection model, click “Train a Model” on your dataset page.
Follow the instructions in the Roboflow web application to configure your model training job. When you have configured your training job, your job will be allocated to a machine. This can take a few moments.
Once your job has been allocated to a machine, you will start to see graphs that show your model performance as it trains. You will also see an estimate that shows how long, approximately, it will take to train your model.
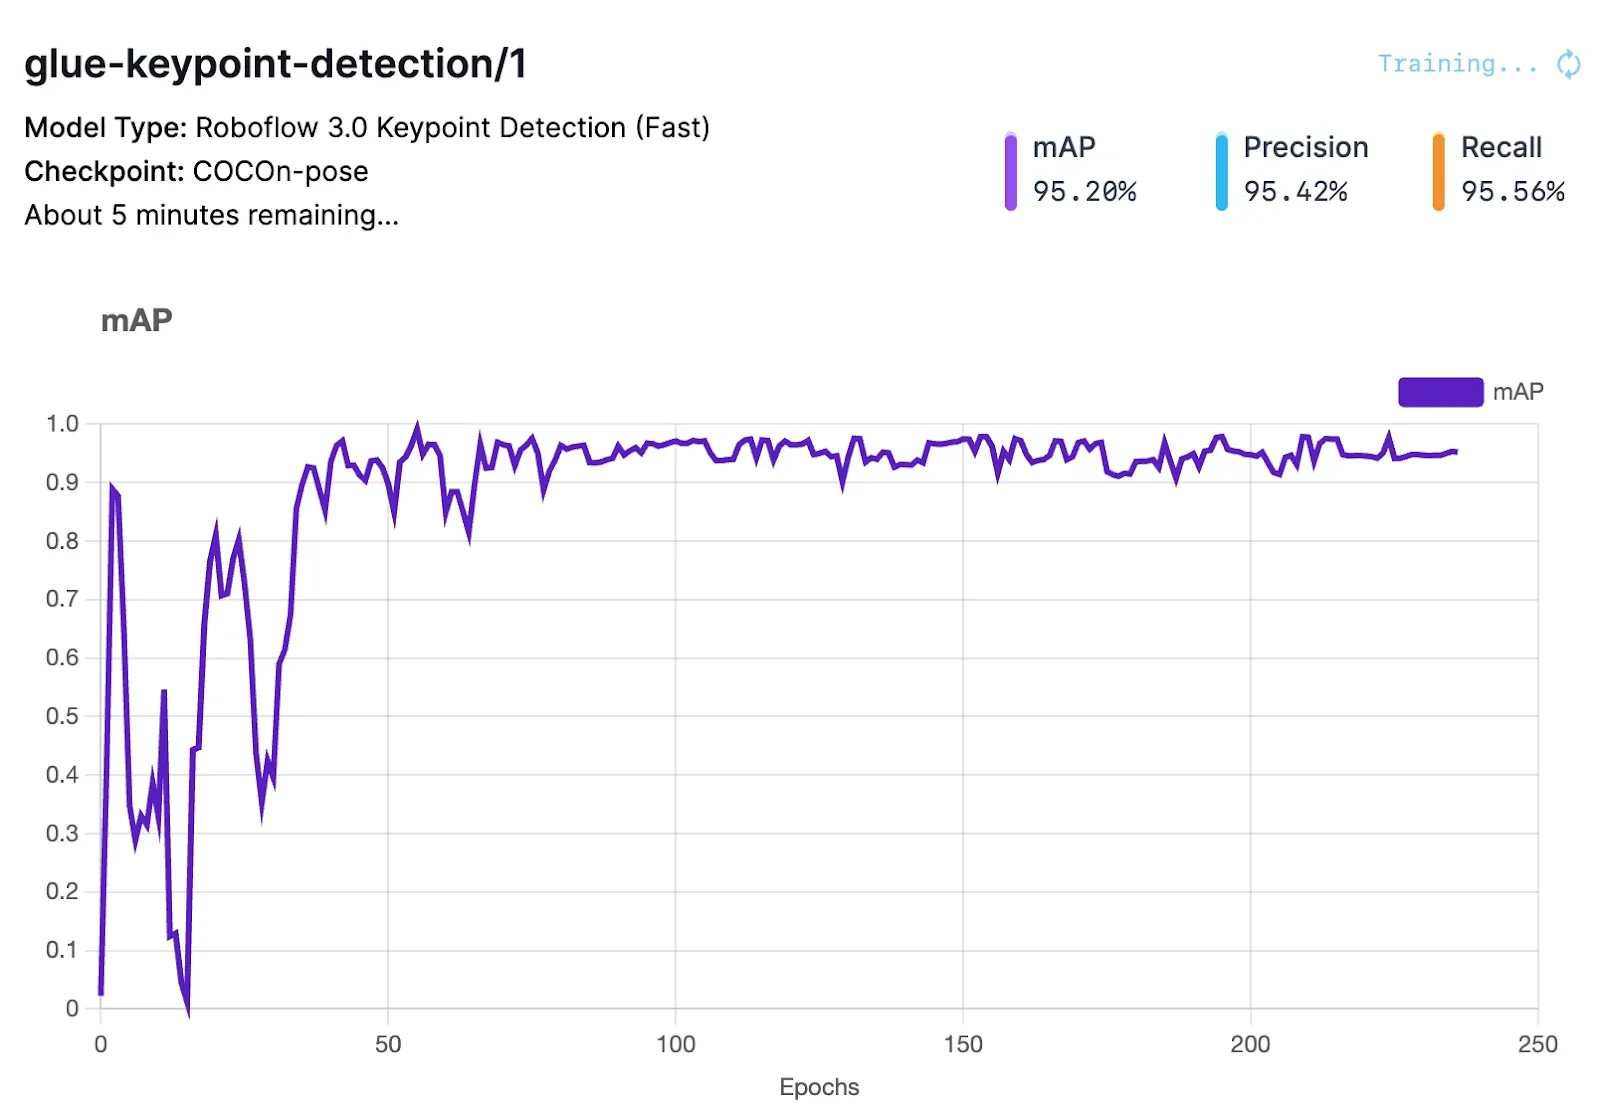
After the training process is complete, you will receive an email informing you that your model is now ready to use.
Step #7: Test the Model
You can test your keypoint detection model in the browser using the Roboflow Deploy tab. This allows you to interactively evaluate how your model performs when run on an image or video.
You can upload an image or video to evaluate, or choose an image from your test set. The results from the model will be plotted on your data so you can visualize how your model performs.
Here is an example of a keypoint detection model running on an image:
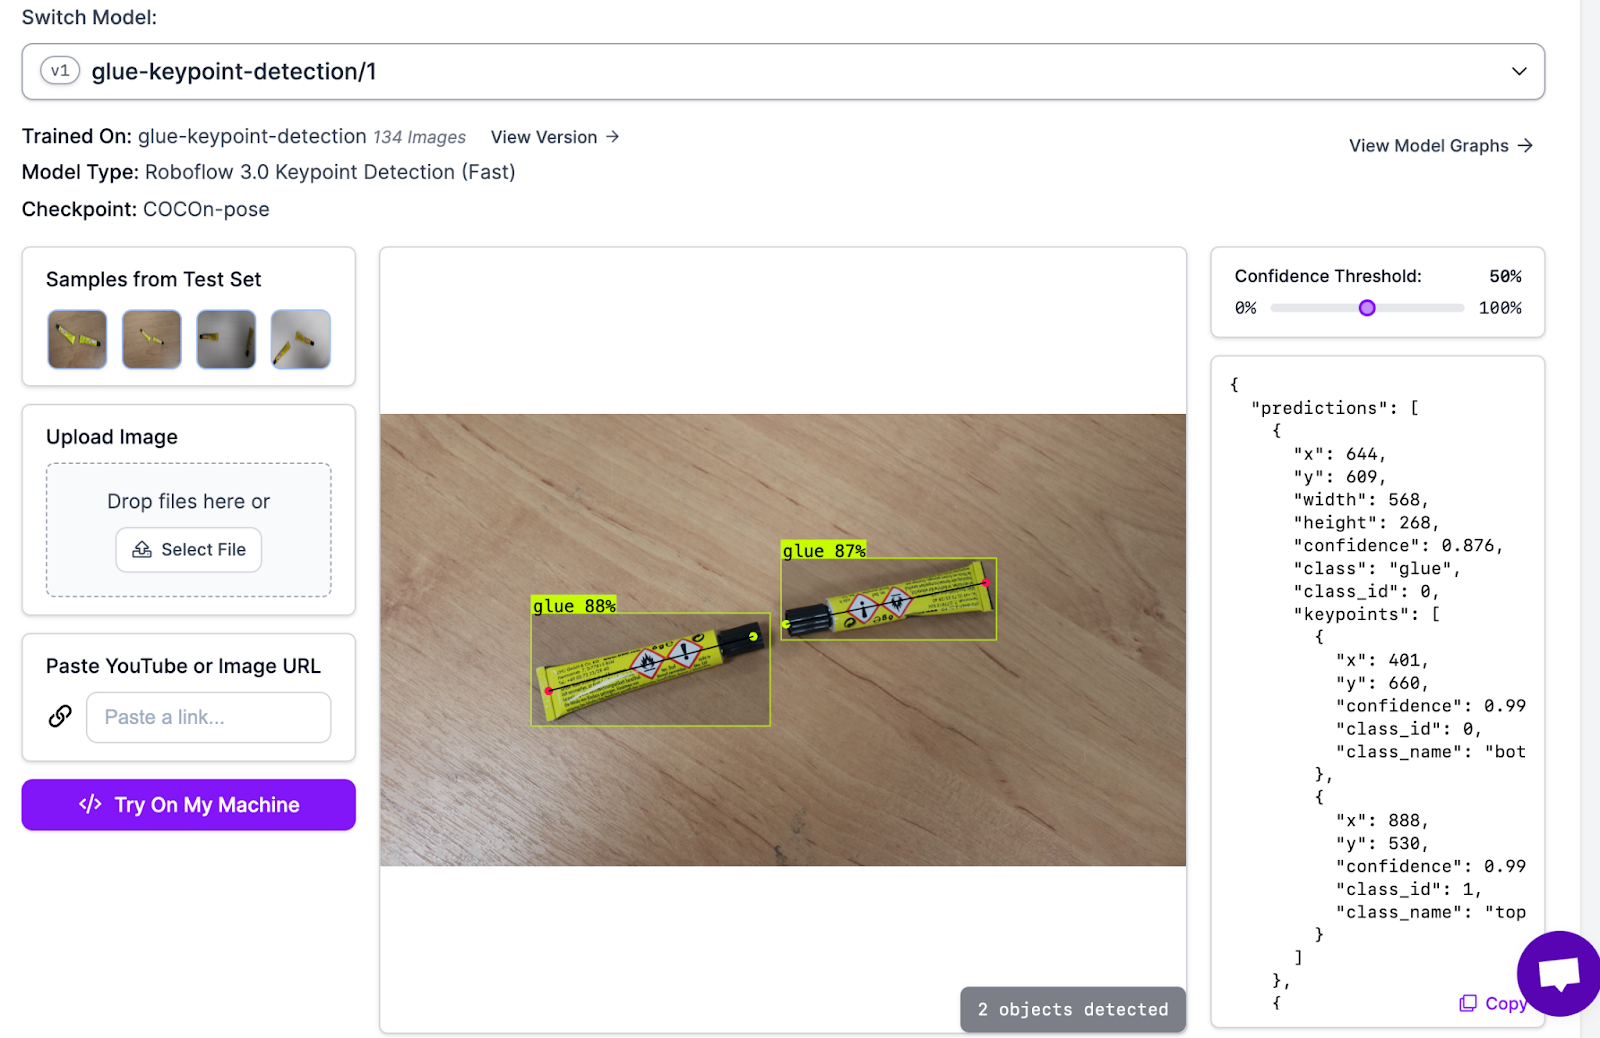
The model correctly identified the glue sticks and the two key points: “bottom” (red) and “top” (green).
Conclusion
Keypoint detection models identify specific key points on an image. For example, you can identify key points on a person (i.e. an elbow, a wrist, a hand) or a robotic arm. You can train keypoint detection models on Roboflow.
In this guide, we demonstrated how to train a keypoint detection model on Roboflow. We walked through how to upload and annotate data. We then discussed how to generate a dataset version with preprocessing applied to help prepare your dataset and augmentation steps to boost model performance. We then trained a model and tested the model in a browser.
Cite this Post
Use the following entry to cite this post in your research:
James Gallagher. (Jan 5, 2024). Launch: Label, Train, Deploy Support for Keypoint Detection Models in Roboflow. Roboflow Blog: https://blog.roboflow.com/keypoint-detection-on-roboflow/