
When you deploy a computer vision model, you may want to have a dedicated server, or several servers, to which you can route requests to your vision model. This is ideal for workflows where you are processing images from a client (i.e. a web application), recorded videos, and more.
We are excited to announce a new tool, Dedicated Deployments, to help you allocate dedicated GPUs and CPUs for use in running models supported in the Roboflow ecosystem.
We built Dedicated Deployments to help our customers operationalize and scale Roboflow Inference and Workflows. They provided the following benefits:
- Infrastructure Management: Focus on your vision applications while Roboflow handles:
- Server provisioning and scaling
- Security updates
- TLS certificate management
- System maintenance
- Resource Isolation: Dedicated compute resources ensure consistent performance
- Security:
- Workspace-specific API keys
- HTTPS encryption
- Private cloud infrastructure
- Hardened endpoints
Without further ado, let’s get started!
Introducing Roboflow Dedicated Deployments
Dedicated Deployments are servers provisioned exclusively for your use and are configured with Roboflow Inference out of the box. Dedicated Deployments are available to all paying users.
We are launching Dedicated Deployments with two server types:
- CPU only
- GPU
If you choose a server with a GPU type, your Deployment will be automatically configured to use the GPU. This means you do not have to worry about hardware choice, drivers or any of the other frictions associated with setting up a server with GPUs for deep learning workflows.
Roboflow offers two distinct environments for dedicated deployments, each optimized for different use cases (the main difference is that Development is short-lived while Production is persistent):
Development Environment
- Ephemeral Nature: Servers last 1-6 hours (default is 3 hour)
- Pay-Per-Hour Billing: Only charged for actual server uptime (details)
- Perfect for:
- Integration testing
- Prototyping
- Short-term experiments
Production Environment
- Persistent Servers: Run until explicitly terminated
- Dedicated Subdomain: Consistent
<your-name>.roboflow.cloudURL - Pay-Per-Hour Billing: Only charged for actual server uptime (details)
- Ideal for:
- Long-running applications
- Production workloads
- Stable Roboflow inference API endpoints
Getting Started
Deployments can be created and managed through the Roboflow UI or via the Roboflow CLI.
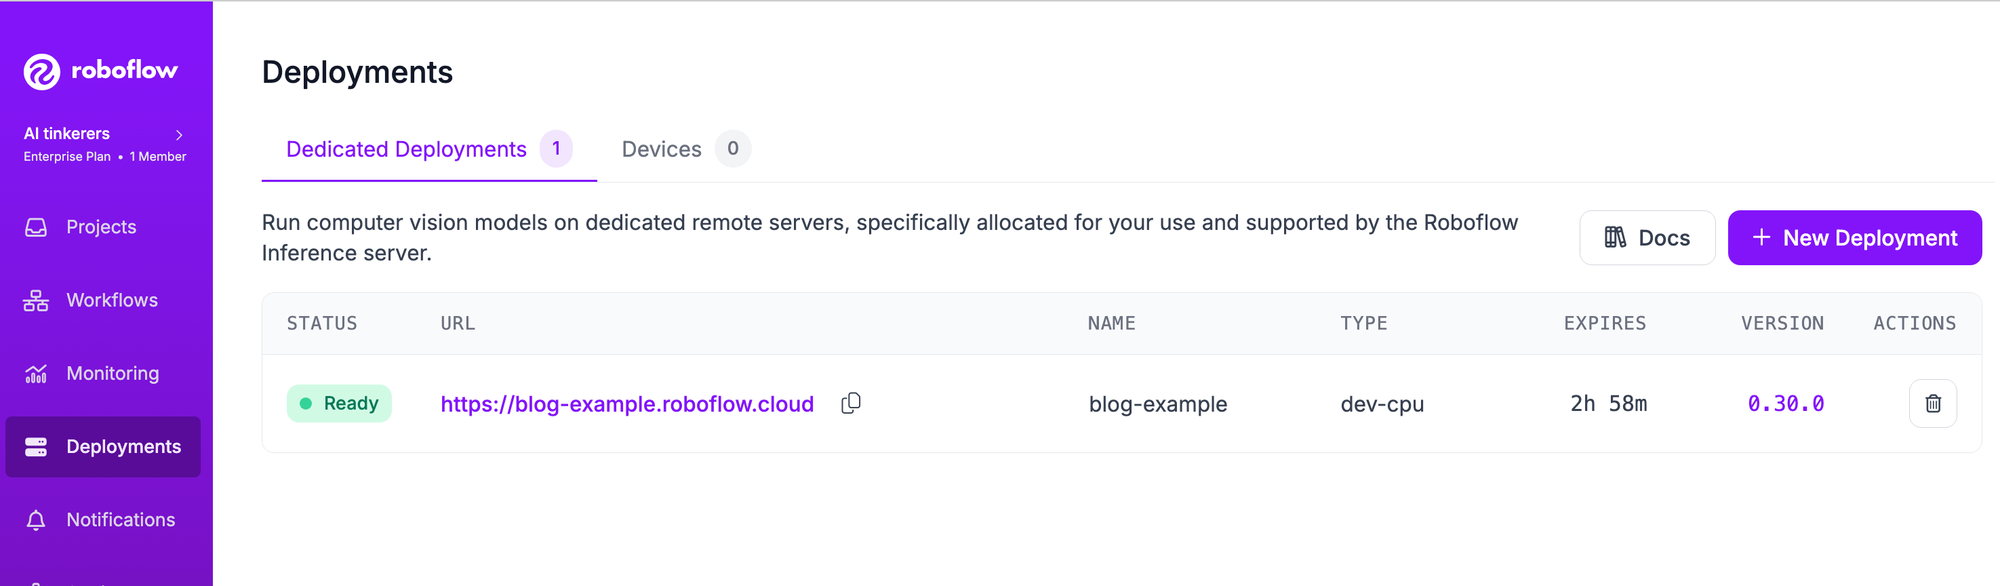
Roboflow UI: Navigate to Deployments → Dedicated Deployments. Click on the + New Deployment button on the top-right of the screen to start a dedicated deployment.
Roboflow CLI: Use commands like:
roboflow deployment add my-deployment -m prod-gpu
roboflow deployment list
roboflow deployment get my-deployment
For more information on managing Dedicated deployments read the documentation available here.
Use a Dedicated Deployment
You can use Dedicated Deployments with:
- Models trained on Roboflow
- Models uploaded to Roboflow
- Foundation models supported by Roboflow Inference
- Roboflow Workflows
You can run multiple models concurrently, provided they fit in the RAM available for your GPU type. You can run several Roboflow models concurrently on all instance types. Foundation models take up more RAM. You may only be able to load a few foundation models depending on your instance type.
Let’s test a Dedicated Deployment with a model trained on Roboflow.
First, install the Roboflow Python package and the Inference SDK:
pip install roboflow inference-sdkThen, create a new Python file and add the following code:
# import the inference-sdk
from inference_sdk import InferenceHTTPClient

# initialize the client
CLIENT = InferenceHTTPClient(
    api_url="DEPLOYMENT_URL",
    api_key="API_KEY"
)

# infer on a local image
result = CLIENT.infer("YOUR_IMAGE.jpg", model_id="MODEL_ID")

print(result)
Above, replace:
- DEPLOYMENT_URL with your Dedicated Deployment URL.
- API_KEY with your Roboflow API Key.
- MODEL_ID with your Roboflow model ID and version (i.e. `basketball-players-fy4c2/20`).
This code will print the results from running inference on our model. Our model will run on our Dedicated Deployment server, then the result will be printed to the console.
Use a Dedicated Deployment with Workflows
You can use Dedicated Deployments with computer vision applications built in Roboflow Workflows, a low-code, web-based computer vision application builder.
To use your Dedicated Deployment, click the “Deploy Workflow” button within the Workflow editor and replace the API_URL in the code snippets with your Dedicated Deployment:
from inference_sdk import InferenceHTTPClient

client = InferenceHTTPClient(
	api_url="DEPLOYMENT_URL",
	api_key="API_KEY"
)

result = client.run_workflow(
	workspace_name="roboflow-universe-projects",
	workflow_id="detect-common-objects",
	images={
    		"image": "YOUR_IMAGE.jpg"
	}
)
Learn more about how to deploy Workflows.
Conclusion
Roboflow's Dedicated Deployments offer a flexible, secure, and scalable solution for deploying computer vision models. Whether you're in the development phase or ready for production, the service provides the infrastructure needed to focus on what matters most: building powerful computer vision applications.
For teams and organizations looking to streamline their computer vision deployment pipeline while maintaining control over resources and performance, Dedicated Deployments present a compelling solution that bridges the gap between development and production environments.
To learn more, access the Dedicated Deployments documentation here.
Cite this Post
Use the following entry to cite this post in your research:
James Gallagher, Shuyang Dou, Sachin Agarwal. (Dec 13, 2024). Launch: Dedicated Deployments. Roboflow Blog: https://blog.roboflow.com/launch-dedicated-vision-model-deployments/