
In this post, you’ll see how Roboflow and n8n work together to let you build automations that give your computer the ability to see and take aciton. Roboflow gives you ready-to-use vision models, easy training tools, and a plug-and-play API. n8n lets you automate almost anything without touching a single line of code. Put them together, and you can build smart workflows that sort, label, and react to images automatically.
You’ll learn how to build an automated system that detects whether an image uploaded to Google Drive contains a human, sorting it into a “Selfies” folder if a human is detected or a “No Selfies” folder otherwise. This is tailored for n8n users, showcasing how to integrate vision models into automation pipelines.
Automate Image Sorting with n8n and Roboflow
By the end of this tutorial, you’ll know how to:
- Train a human detection model using Roboflow.
- Configure preprocessing and augmentations for optimal model performance.
- Set up a workflow for API-based inference.
- Create an n8n workflow to trigger on Google Drive uploads, process images, and sort them based on model results.
- Test and activate the workflow for continuous automation.
- Iterate on the model with production data for ongoing improvement.
Let’s dive into the step-by-step process!
Step 1: Train a Human Detection Model
The core of this automation is a reliable computer vision model to classify whether an image contains a human. Roboflow Universe offers thousands of pre-labeled datasets and pre-trained models, saving you the effort of manual annotation. We’ll use the “Human” dataset from Roboflow Universe, ideal for binary classification tasks.
If you prefer not to follow the written tutorial for the Roboflow section, you can watch this video, which walks through every step.
Log into Roboflow
- Navigate to Roboflow and sign in. If you don’t have an account, sign up for free; it takes just a minute.
- Ensure you have a workspace set up for your projects.
Import the Dataset
- Use the “Human” dataset. This dataset includes diverse images labeled for human presence or absence.
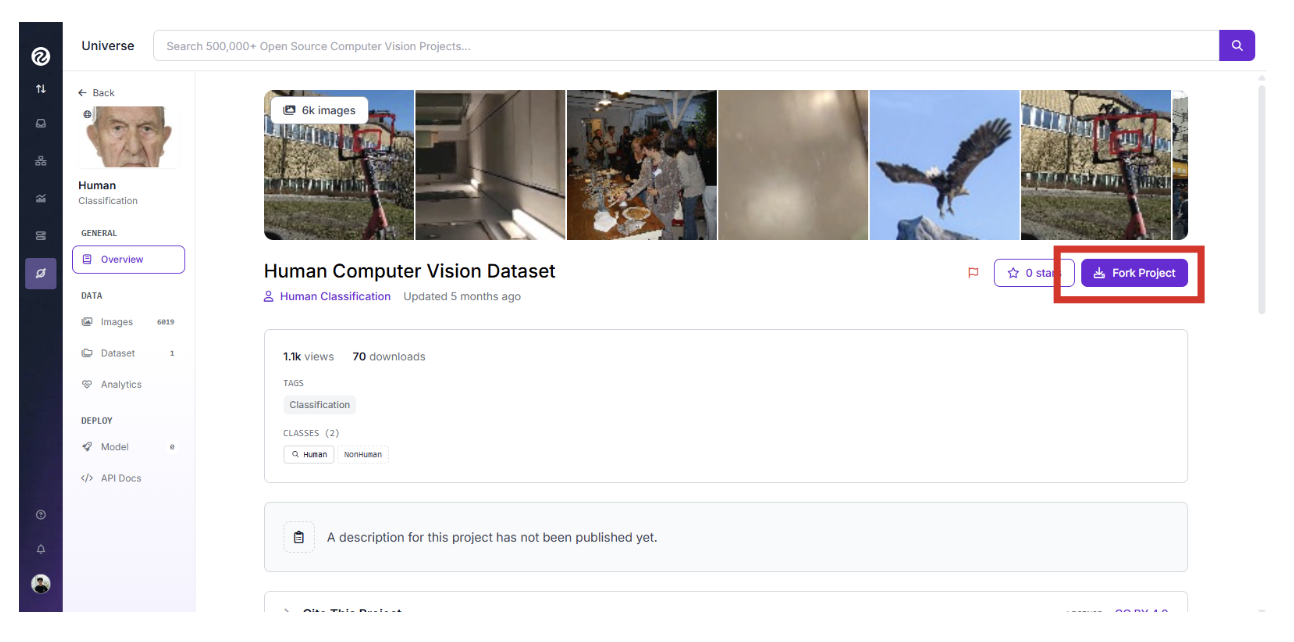
- Click “Fork Project” to import it into a new Roboflow project in your workspace.
Configure Dataset Splits and Preprocessing
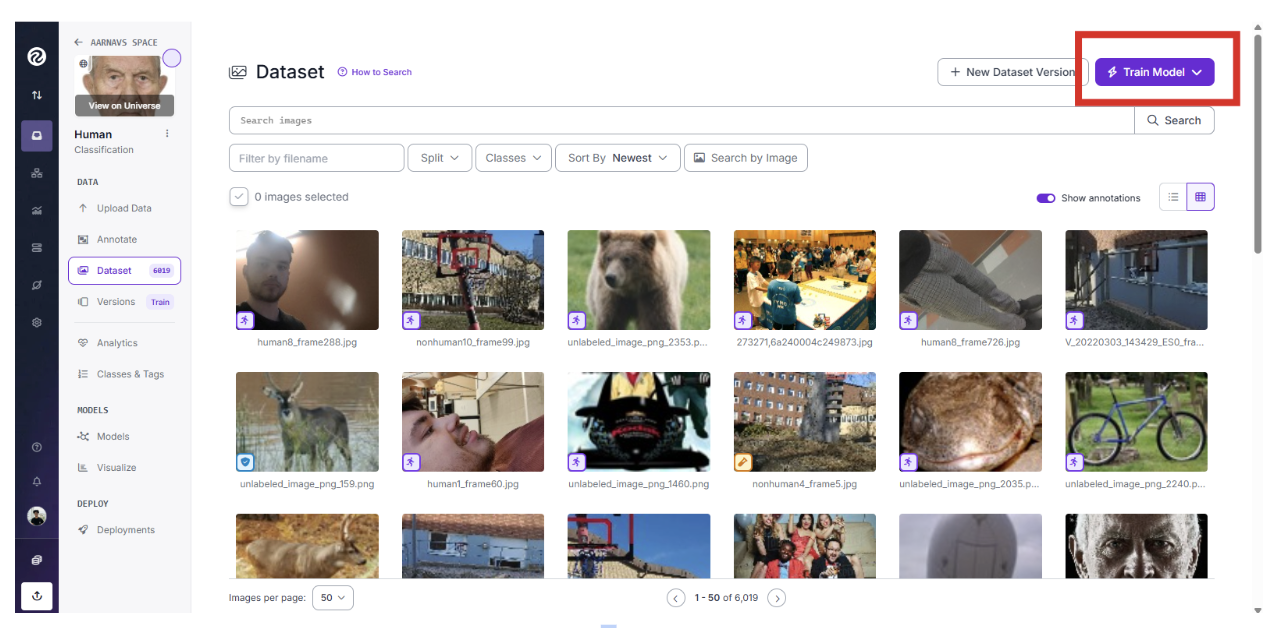
Click Train Model, then custom training, once you navigate to your dataset section on the top right:
- Review the dataset splits in Roboflow:
- Train Set: ~70%
- Valid Set: ~20%
- Test Set: ~10%
- These splits ensure robust training, validation, and testing.

- Apply preprocessing steps:
Auto-Orient: Enable to correct image orientations based on EXIF data, ensuring consistency during training.
Resize: Stretch images to 640x640 pixels. This standardizes input sizes, balancing detail and computational efficiency.
Add Augmentations
To improve model robustness for real-world scenarios (e.g., varying lighting or angles), enable augmentations:

- Outputs per Training Example: 4 (generates multiple augmented versions per image).
- Flip: Horizontal (mirrors images to simulate different perspectives).
- Saturation: Between -25% and +25% (adjusts colour intensity for over/underexposed images).
- Exposure: Between -10% and +10% (simulates diverse lighting conditions). These augmentations help the model generalize, reducing overfitting.
Why This Dataset and Setup?
The “Human” dataset is pre-labeled with high-quality annotations, covering diverse scenarios like crowds, portraits, and empty scenes. The classification project type suits our binary task (human vs. no human), and preprocessing/augmentations ensure the model handles real-world variability effectively.
Step 2: Train the ViT Multi-Label Classification Model
With the dataset ready, we’ll train a Vision Transformer (ViT) model, known for its superior performance in image classification due to its attention-based architecture.

After the pre-processing finishes, select “Custom Train” to use Roboflow’s cloud-based GPUs for efficient training.
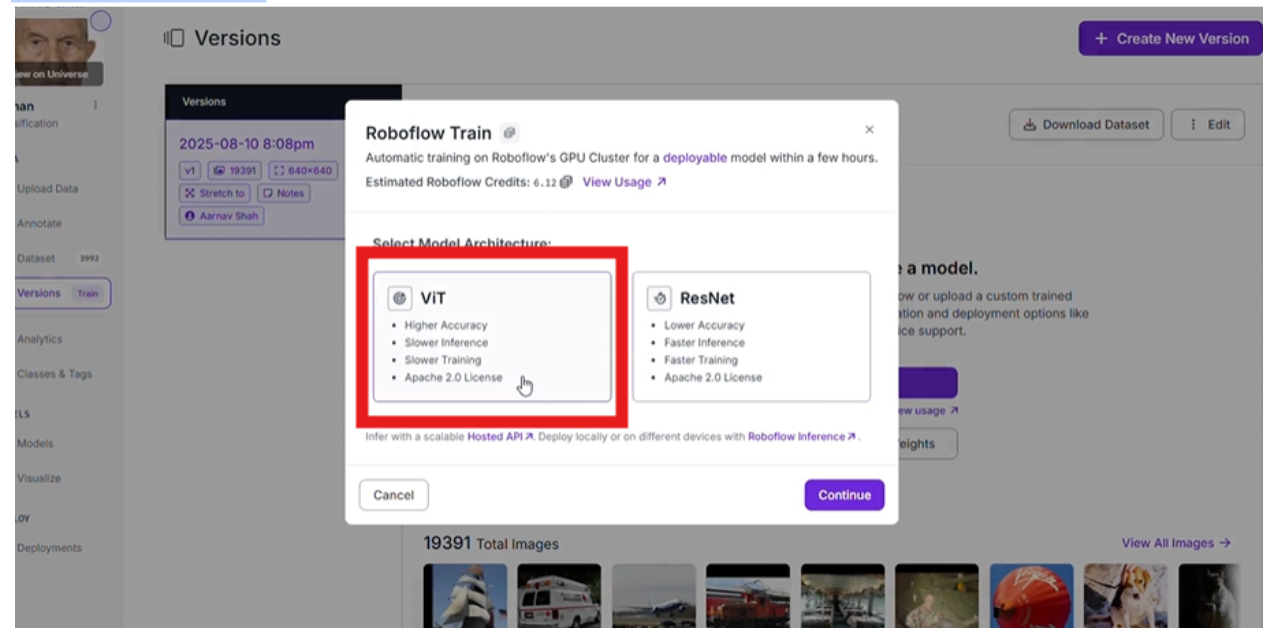
Then click the ViT model for the best accuracy.
Training may take a few hours, depending on dataset size and GPU availability.
Roboflow will notify you via email when training completes, providing metrics like accuracy, precision, and recall.
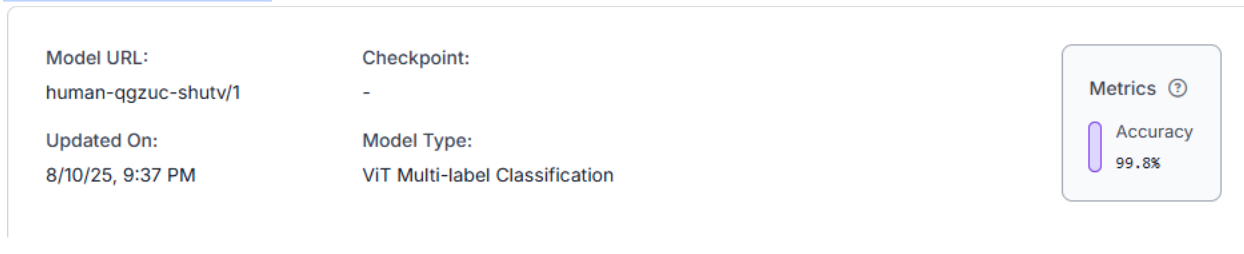
Evaluate Results
- Review the model’s performance in Roboflow’s dashboard:
- Check the confusion matrix to ensure low false positives/negatives.
- Aim for >90% accuracy on the validation set.
- View sample predictions to confirm the model correctly identifies humans.
Your model is now ready for inference!
Step 3: Create a Workflow for Inference
To integrate the model with n8n, we’ll create a simple Roboflow workflow to expose the model via an API endpoint.
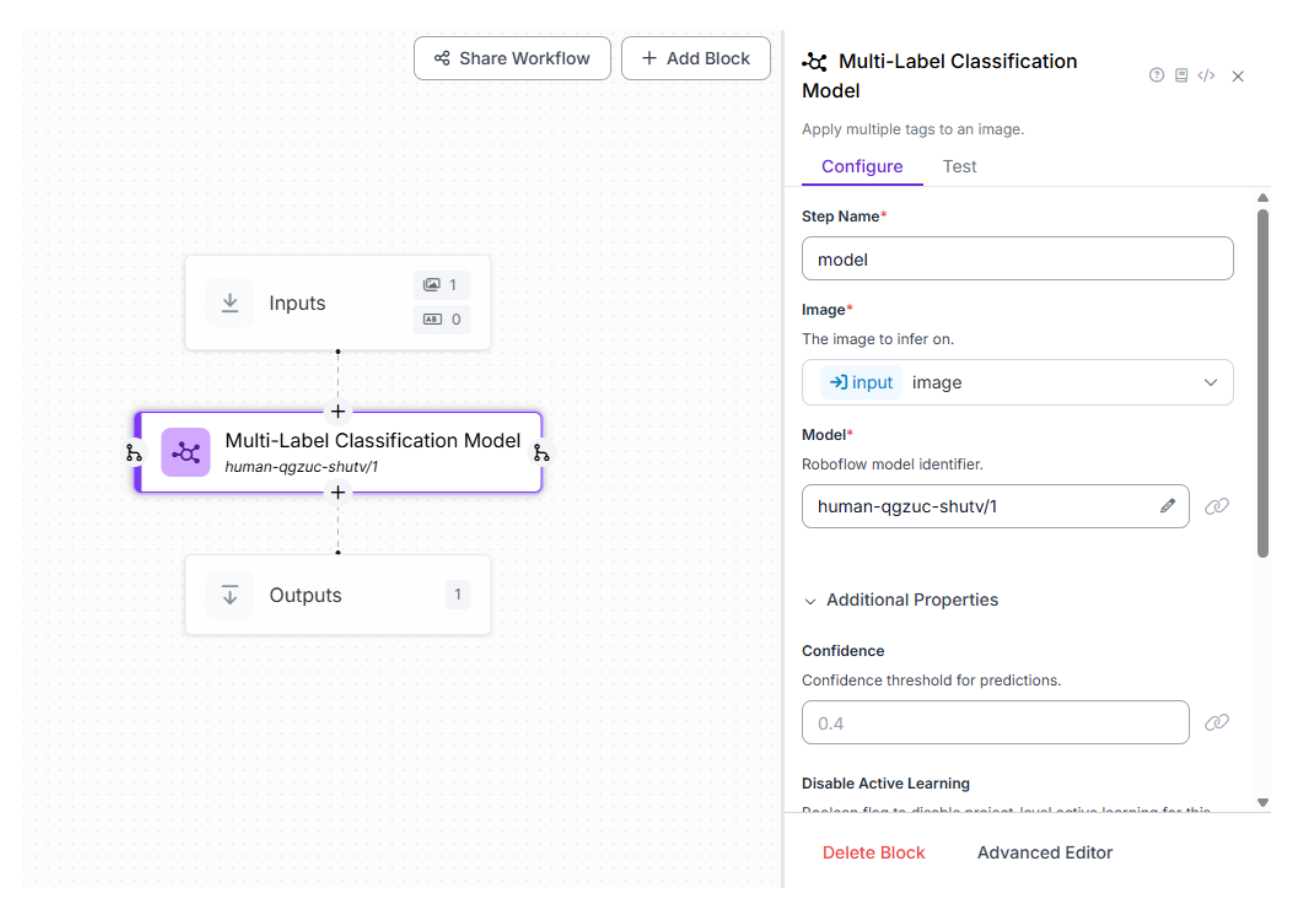
Navigate to Workflows
- In your Roboflow project, go to the “Workflows” tab.
- Click “Create Workflow” and name it (e.g., “Human Detection Workflow”).
Add Blocks
- Drag a “Model” block onto the canvas and select your trained ViT model.
- No additional blocks are needed. Our goal is a straightforward classification output (confidence score for the “Human” class).
Save and Note the Endpoint
- Save the workflow. Roboflow generates an API endpoint, e.g., https://detect.roboflow.com/infer/workflows/[your-workspace]/custom-workflow-[id].
- Copy your Roboflow API key from the dashboard settings for later use.
This workflow enables n8n to send images to Roboflow and receive predictions.
Step 4: Set Up n8n and Connect Accounts
n8n is a powerful automation tool that integrates APIs and services via no-code nodes. We’ll use it to orchestrate the workflow: triggering on Google Drive uploads, processing images, calling Roboflow, and sorting files.
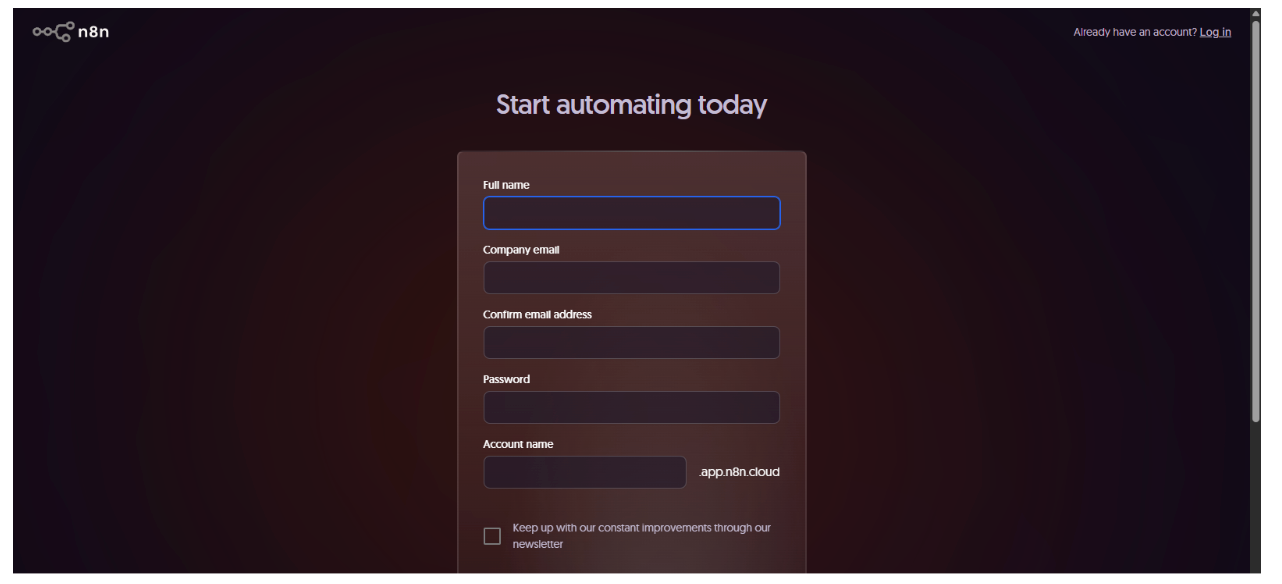
Sign Up for n8n
Use any email you have, and the sign-up process should be very straightforward.
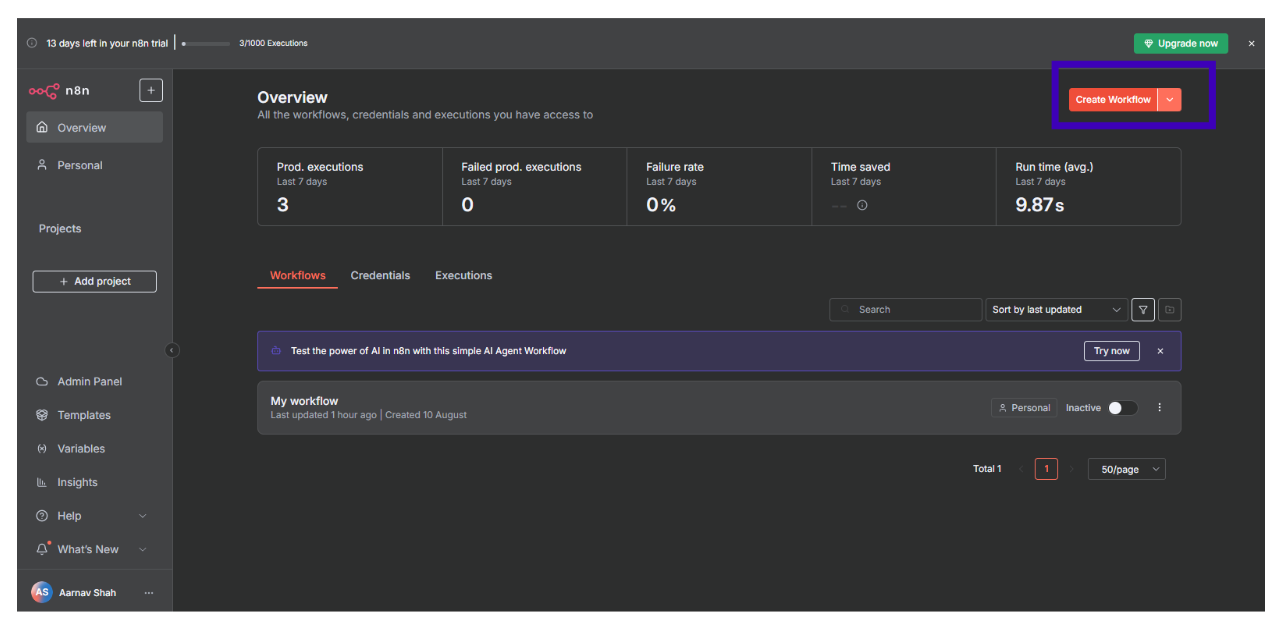
Create a new workflow.
Connect Google Drive
- Set up Google Drive API credentials in Google Cloud Console, enabling scopes for file read/write. Follow this tutorial for guidance: YouTube - Google Drive OAuth Setup.
- In n8n, add a Google Drive credential using your OAuth details.
Prepare Google Drive Folders
- In your Google Drive account, manually create three folders:
- Roboflow n8n Watch Folder: For incoming uploads.
- n8n Selfies: For images with humans.
- n8n No Selfie: For images without humans.

n8n’s flexibility makes it ideal for bridging storage (Google Drive) with computer vision (Roboflow).
Step 5: Build the n8n Workflow - Trigger and Download
Let’s construct the n8n workflow, starting with the trigger and file download.
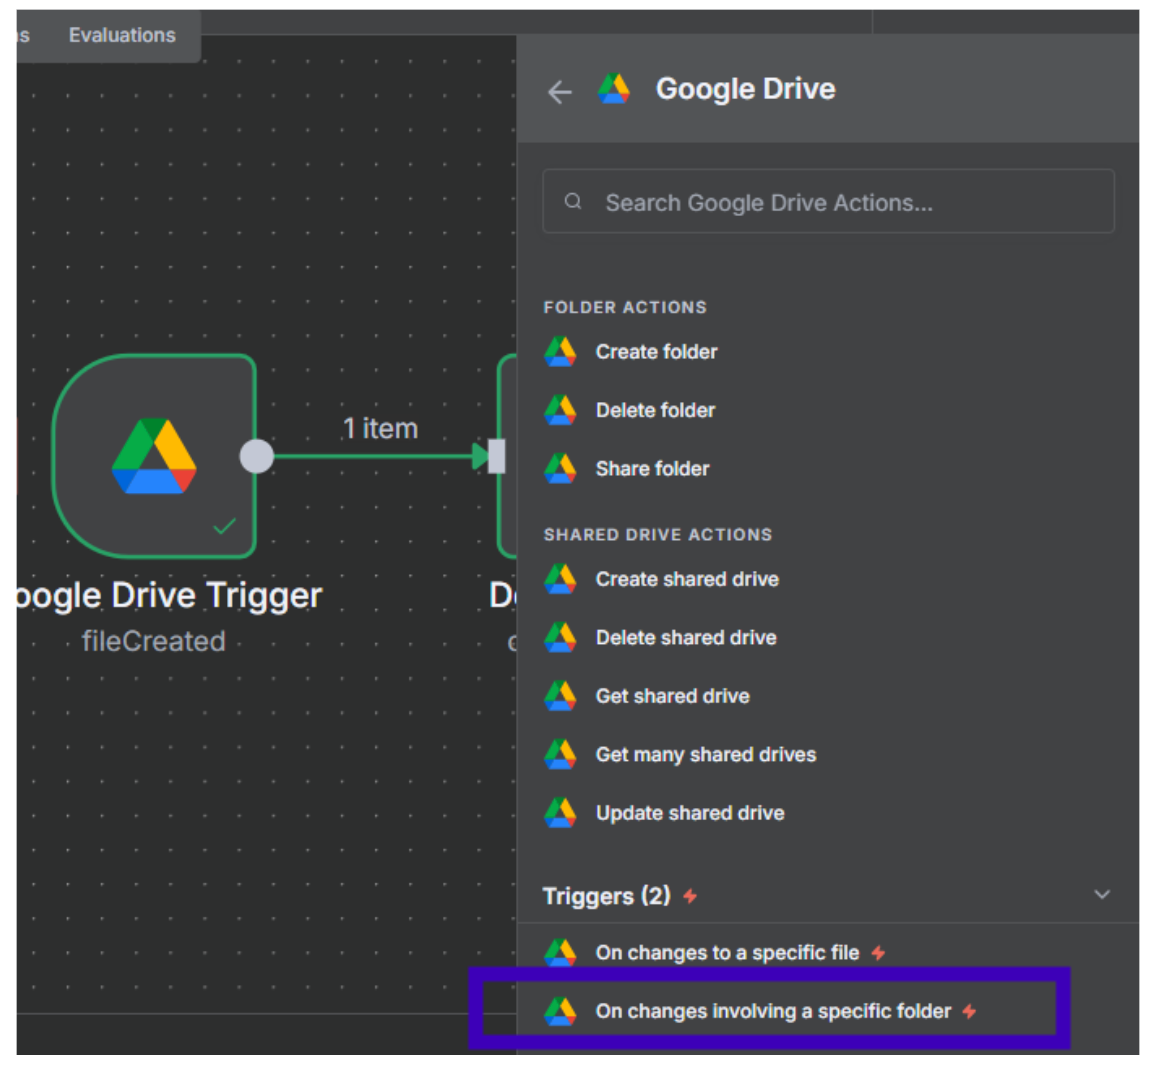
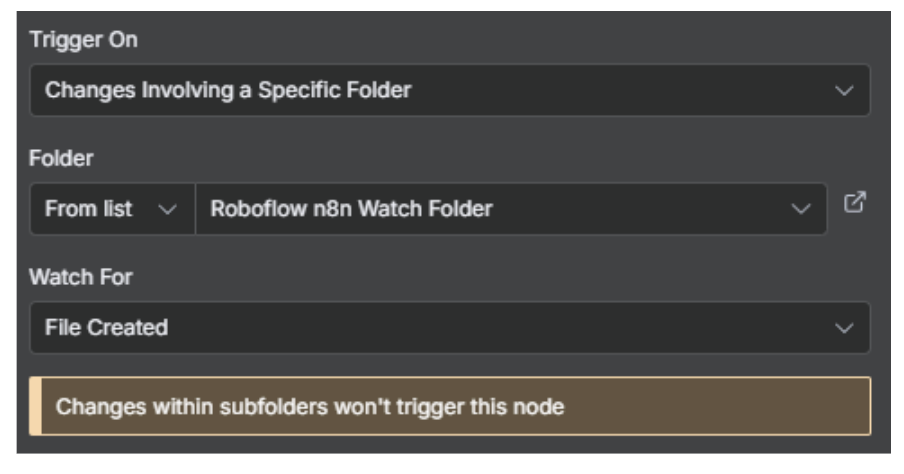
Add Google Drive Trigger Node
- Drag a “Google Drive Trigger” node into the canvas.
- Configure:
- Event: File Created.
- Folder: Select “Roboflow n8n Watch Folder” via list or ID.
- Poll Time: Every minute (adjust for production).
- This node watches for new files and starts the workflow.
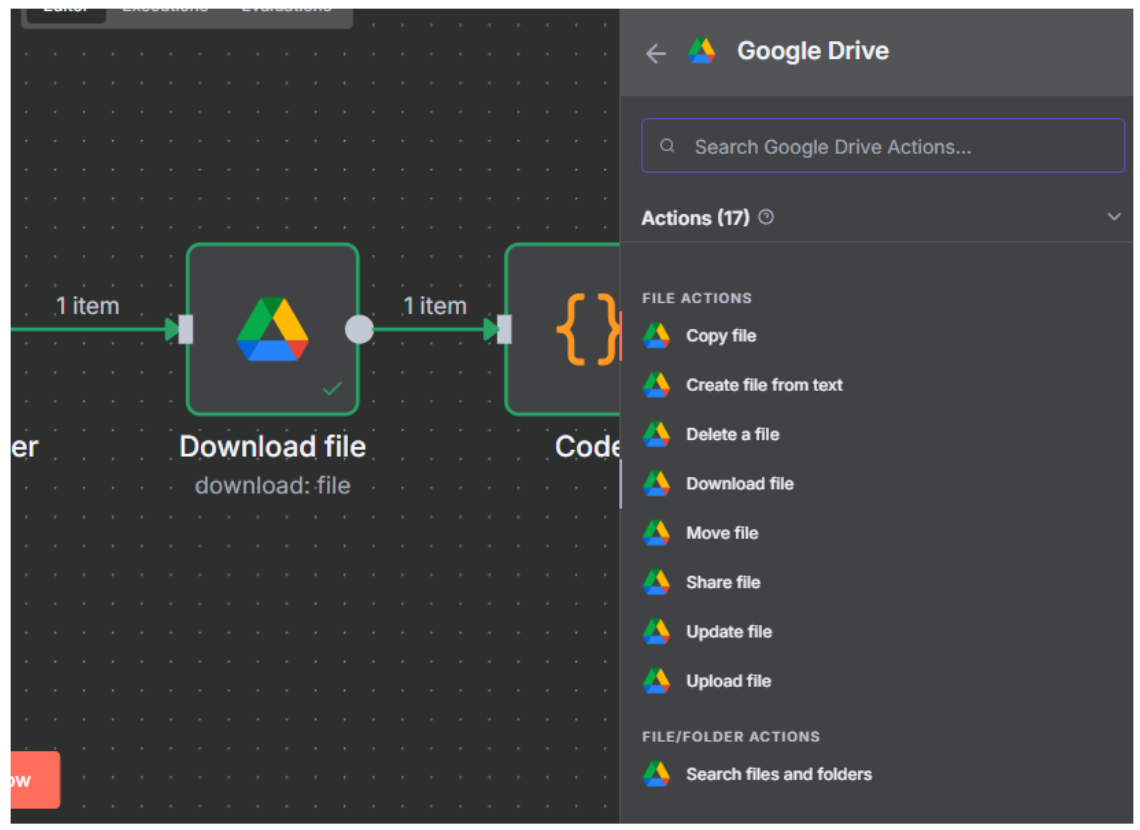
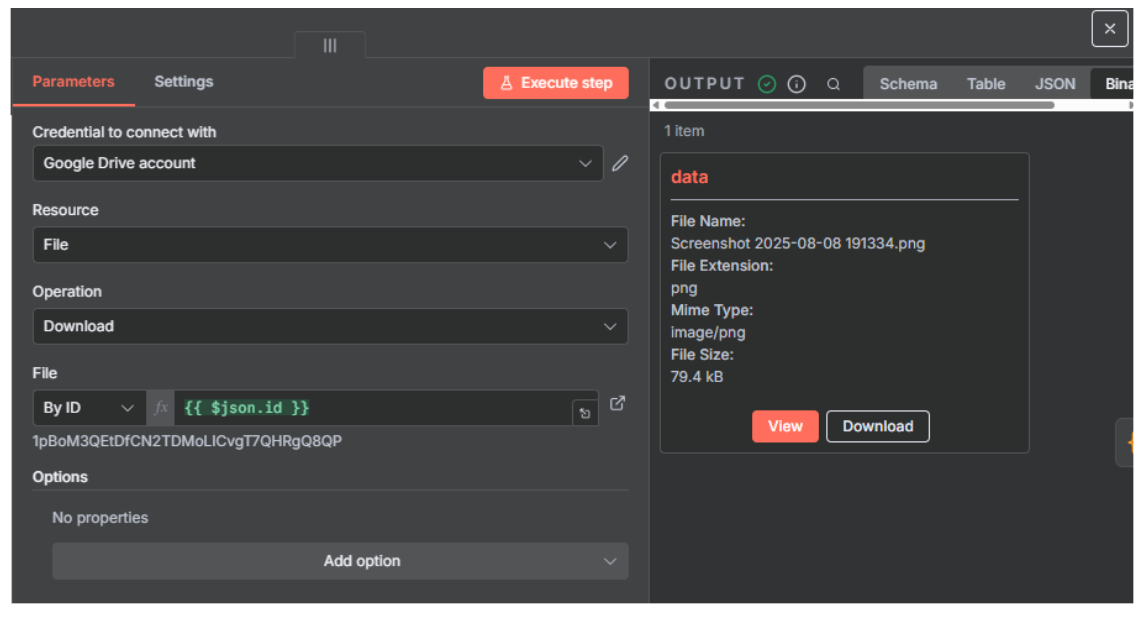
Next, add Google Drive Download Node
- Add a “Google Drive” node.
- Configure:
- Resource: File.
- Operation: Download.
- File ID: {{ $json.id }} (fetches the file ID from the trigger node).
- This downloads the uploaded image as binary data.
Step 6: Build the n8n Workflow - Image Processing and Roboflow Inference
These nodes handle image conversion and API calls, the most technical part, so proceed carefully.
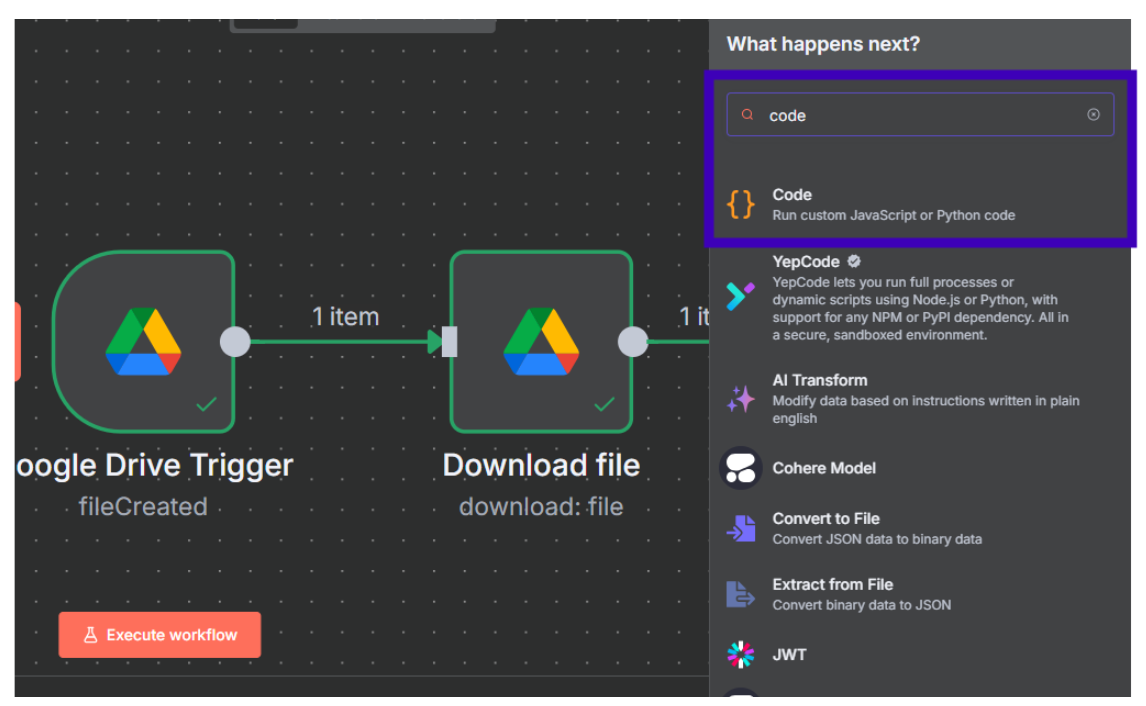
Add Code Node for Base64 Conversion
- Add a “Code” node.
- Configure:
- Mode: Run Once for All Items.
- Language: JavaScript.
- Code: javascript
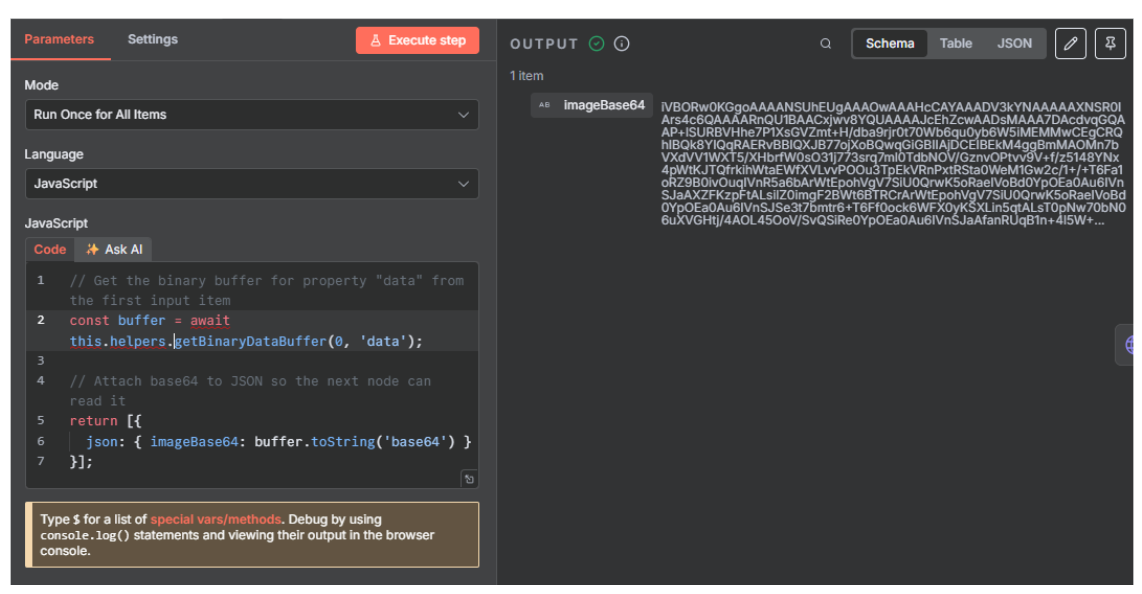
Code to input into the Node:
// Get the binary buffer for property "data" from the first input item
const buffer = await this.helpers.getBinaryDataBuffer(0, 'data');


// Attach base64 to JSON so the next node can read it
return [{
  json: { imageBase64: buffer.toString('base64') }
}];
This converts the image binary to base64, which Roboflow’s API accepts.
Add HTTP Request Node for Roboflow
- Add an “HTTP Request” node.
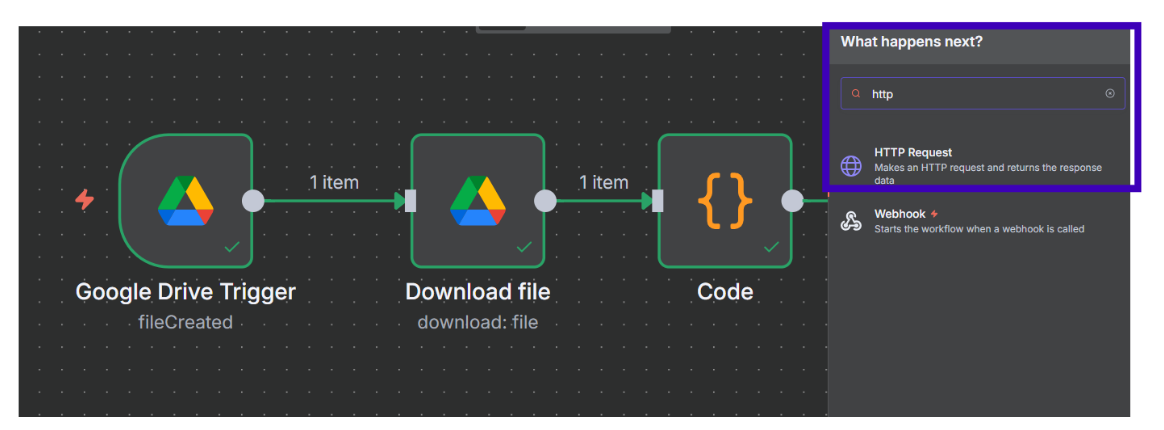
- Configure:
Watch this video for a visual:
- Method: POST.
- URL: Your Roboflow workflow endpoint (like this for example, replace with your workspace and workflow ID).
- Authentication: None (API key in body).
- Send Headers: Enable.
- Header: Content-Type, Value: application/json.
- Send Body: Enable.
- Content Type: JSON.
Body: Use Expression mode and input:
{
  "api_key": "YOUR_ROBOFLOW_API_KEY",
  "inputs": {
    "image": {
      "type": "base64",
      "value": "{{ $json.imageBase64 }}"
    }
  }
This node sends the image to Roboflow and receives predictions, including the “Human” class confidence score.
Step 7: Build the n8n Workflow - Conditional Sorting
Use logic to sort images based on the model’s output.
Add IF Node
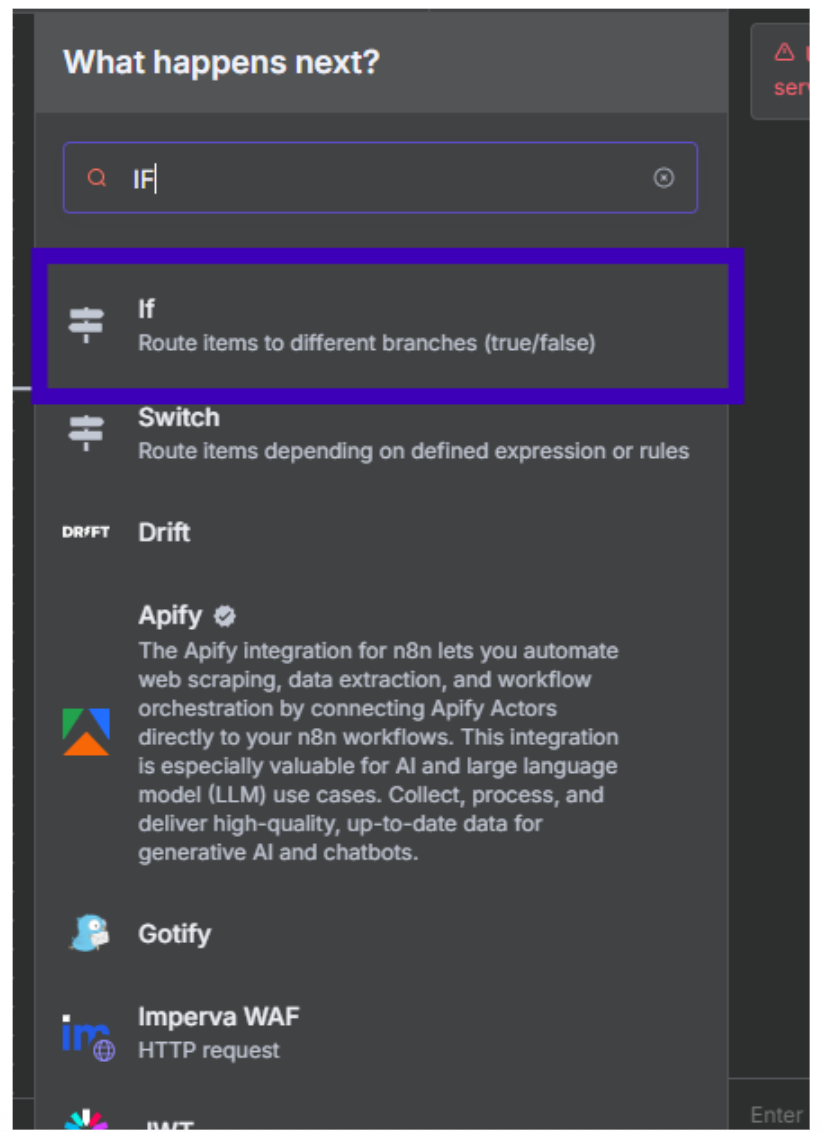
- Add an “IF” node.
- Configure:
- Condition: Use Expression mode: {{ $json.outputs[0].predictions.predictions.Human.confidence }}.
- Operator: Number, Greater Than or Equal To.
- Value: 0.6 (adjust based on your model’s performance; 0.6 balances precision and recall).
- This checks if the confidence score for “Human” is ≥0.6, outputting True (human detected) or False.

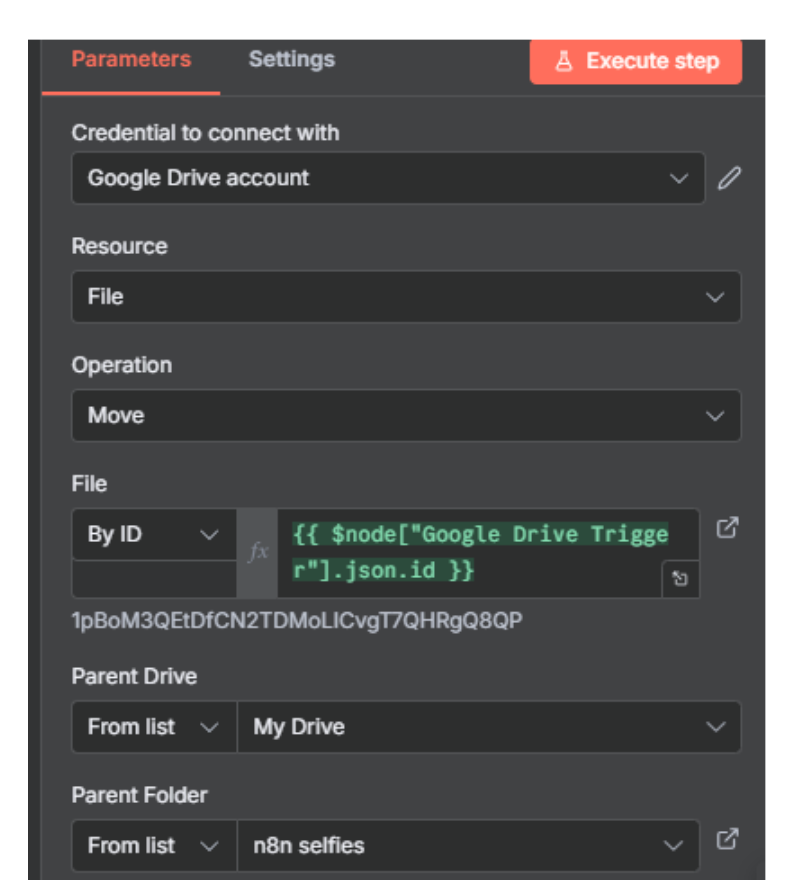
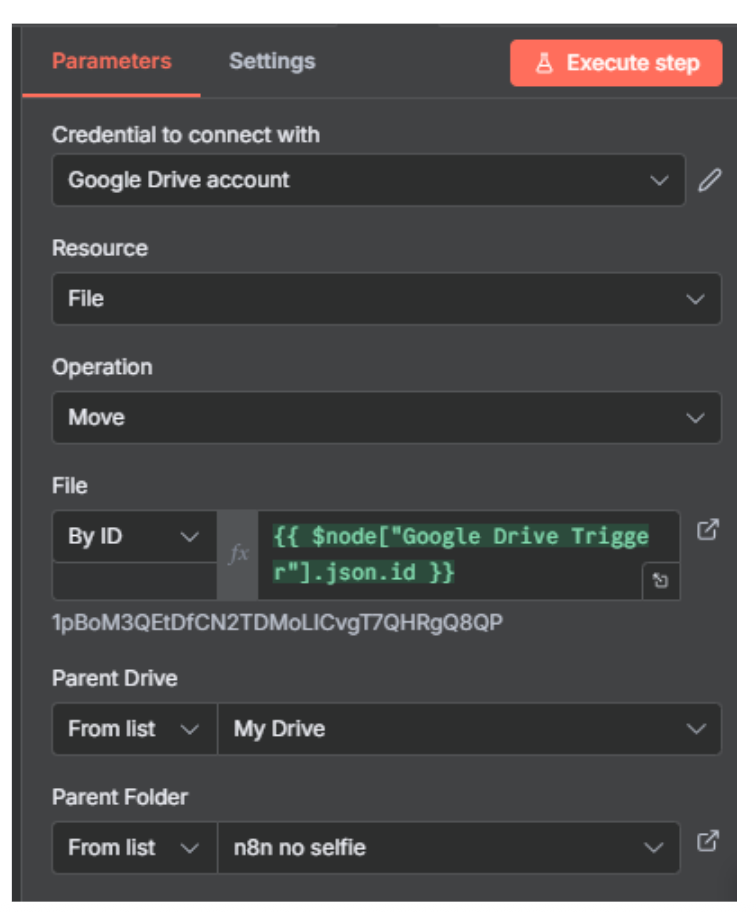
Add Google Drive Move Nodes
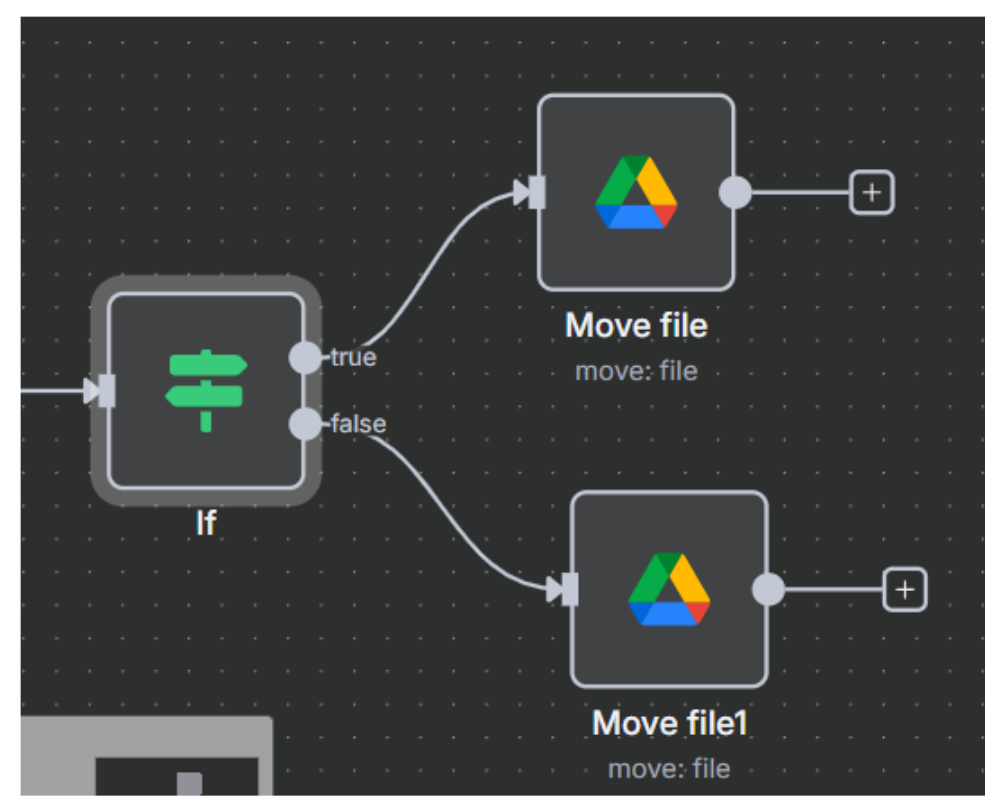
- For both True and False branches, add a “Google Drive” node.
- Configure for each:
- Resource: File.
- Operation: Move.
- File ID: {{ $node["Google Drive Trigger"].json.id }}.
- Parent Folder:
- True Branch: Select “n8n Selfies” via list.
- False Branch: Select “n8n No Selfie” via list.
This moves the file to the appropriate folder based on the IF condition.
Step 8: Test, Activate, and Iterate
With the workflow complete, validate and deploy it.
Test the Workflow
- Upload a test image to “Roboflow n8n Watch Folder” in Google Drive.
- Click “Execute Workflow” in n8n.
- Monitor each node for errors (debug Code or HTTP nodes if issues arise).
- Verify: Images with humans move to “n8n Selfies,” others to “n8n No Selfie.”
Activate for Automation
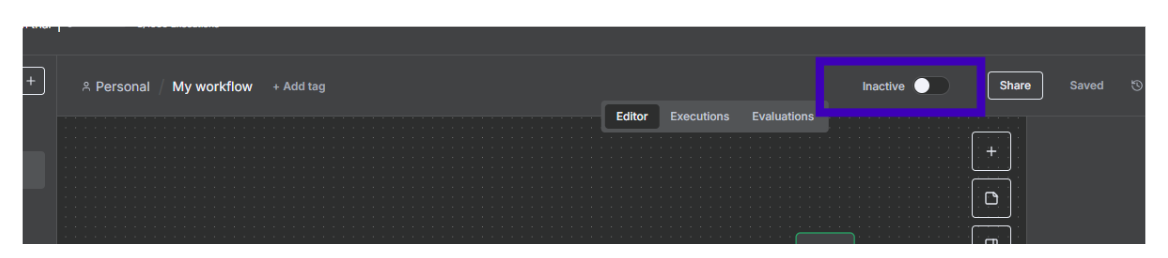
- Toggle the “Activate” slider in n8n (top-left near the Share button).
- In the Google Drive Trigger node, confirm poll time (e.g., every minute) and save.
Incorporate Production Data
- Collect misclassified images in Roboflow for retraining.
- Upload them to your project, label if needed, and retrain the ViT model to improve accuracy over time.
Your workflow is now live, automatically sorting images as they’re uploaded!
Conclusion
Congratulations! You’ve built an end-to-end automated system that uses Roboflow’s ViT model to detect humans in images and sorts them in Google Drive via n8n.
From training on Roboflow Universe data to orchestrating a workflow, you’ve harnessed computer vision for practical automation. This setup is scalable; add more classes, adjust thresholds, or integrate with other tools like email notifications for further customization.
Roboflow and n8n make advanced AI accessible, turning complex vision tasks into streamlined pipelines. Experiment with new datasets, fine-tune augmentations, or explore other automation platforms to expand your solution. The possibilities are endless!
Written by Aarnav Shah
Cite this Post
Use the following entry to cite this post in your research:
Contributing Writer. (Aug 13, 2025). Use Roboflow and n8n to Automate Image Sorting. Roboflow Blog: https://blog.roboflow.com/n8n-roboflow-automate-data-processing/