
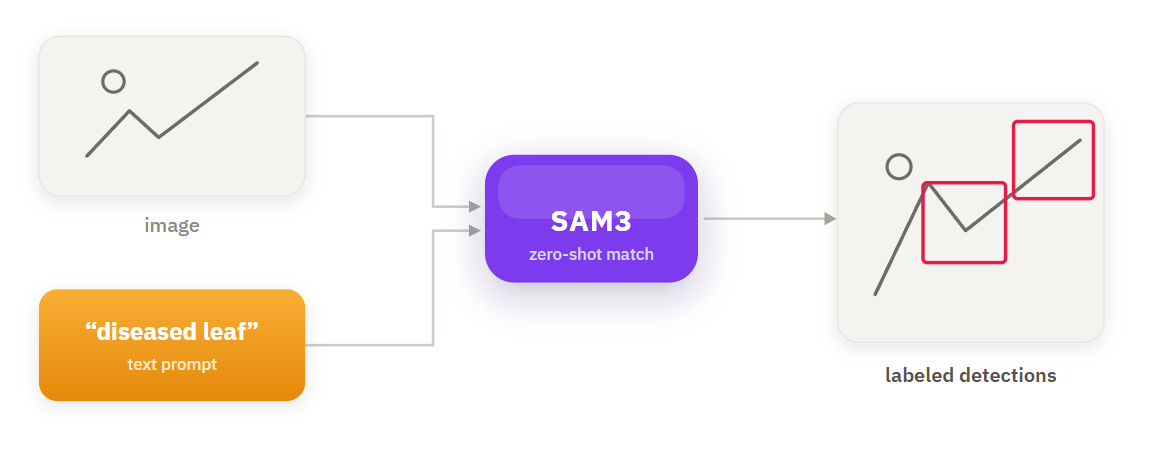
Text prompt object detection lets you find objects by typing what you want instead of training a model: pass an image and a list of text classes to SAM3 in a Roboflow Workflow, and it returns a bounding box, mask, and confidence score for every match, with no dataset or training required. The tradeoff is precision, not capability, so use it to prototype and bootstrap a dataset, then swap in a trained RF-DETR model when you need consistent production accuracy.
Plant pests and diseases destroy up to 40% of global crops each year, causing more than $220 billion in annual losses. Early detection can prevent small outbreaks from turning into major crop losses, but traditional inspection still depends on expert visual assessment, making it difficult to scale. This tutorial shows how text prompt object detection can catch diseased leaves without a single labeled image.
Computer vision can help, but it usually comes with one major bottleneck: labeled data. Before you can train a model, you need to collect images, annotate diseased leaves, and build a dataset. That process can easily take weeks, and disease symptoms vary enough across crops and conditions that a single labeled dataset rarely covers every case.
Text prompt object detection takes a faster path. Using SAM3 inside Roboflow Workflows, you can detect diseased leaves by typing a plain-text description of what you are looking for. Pass an image and a list of text classes, and the model returns bounding boxes for matching regions with no training job required. No dataset. No annotation.
Text Prompt Object Detection
By the end of this tutorial, you will have a working Workflow that takes a plant image as input and returns bounding boxes around diseased areas using a text prompt you define. Here's the workflow we'll build.
What Is Zero-Shot Object Detection?
Zero-shot detection works differently from standard object detection:
- Enter the class names you want to detect, separated by commas, such as diseased leaf, yellow spots, or brown lesions
- The model matches those class names to the image and returns bounding boxes
- No labeled dataset or retraining is required
Zero-shot simply means the model was not trained on your specific classes. Instead, it uses the visual knowledge learned from large image-text datasets to recognize new concepts from the names you provide.
This makes it especially useful for plant disease detection because:
- Symptoms vary by crop, lighting, and growth stage
- Building a dataset that covers every case takes time
- You can start testing immediately by entering class names instead of collecting and labeling images
The tradeoff is accuracy. Zero-shot models can produce extra or incomplete detections, so getting reliable results often depends on choosing clear class names and tuning the confidence threshold.
What Is SAM3?
Most foundation models either detect objects with boxes or segment them with masks, not both from open-ended text. SAM3 changes that.
SAM3 is Meta's foundation model for image and video segmentation, built to detect, segment, and track objects using text prompts, point clicks, or image exemplars. It extends SAM 2 with the ability to find every instance of a concept from a short text phrase, what Meta calls Promptable Concept Segmentation. Each match returns a bounding box, a segmentation mask, and a confidence score.
SAM3 is fully integrated into Roboflow Workflows. Add a block, connect an image, and list your classes. The workflow handles training, annotation, and dataset versioning automatically. Precision still depends on the prompt and confidence threshold, as shown in the Results section.
Build the Workflow
The workflow consists of the following components, each responsible for a specific task:
- Inputs: image plus a what_to_detect field for comma-separated class names
- SAM3: detects and segments every region matching those classes
- Bounding Box Visualization: draws a box around each detection
- Label Visualization: adds the class label to each box
- detection_count: counts total detections
- Unique Labels: removes duplicate class names
- Text Display: overlays count and labels on the image
- Detection Summary: formats the final text summary
- Outputs: returns the annotated image and summary
Step 1: Create a new Workflow in Roboflow
Start by opening the Workflows tab and creating a new Workflow. An Image Input and Outputs block are added automatically by Roboflow.
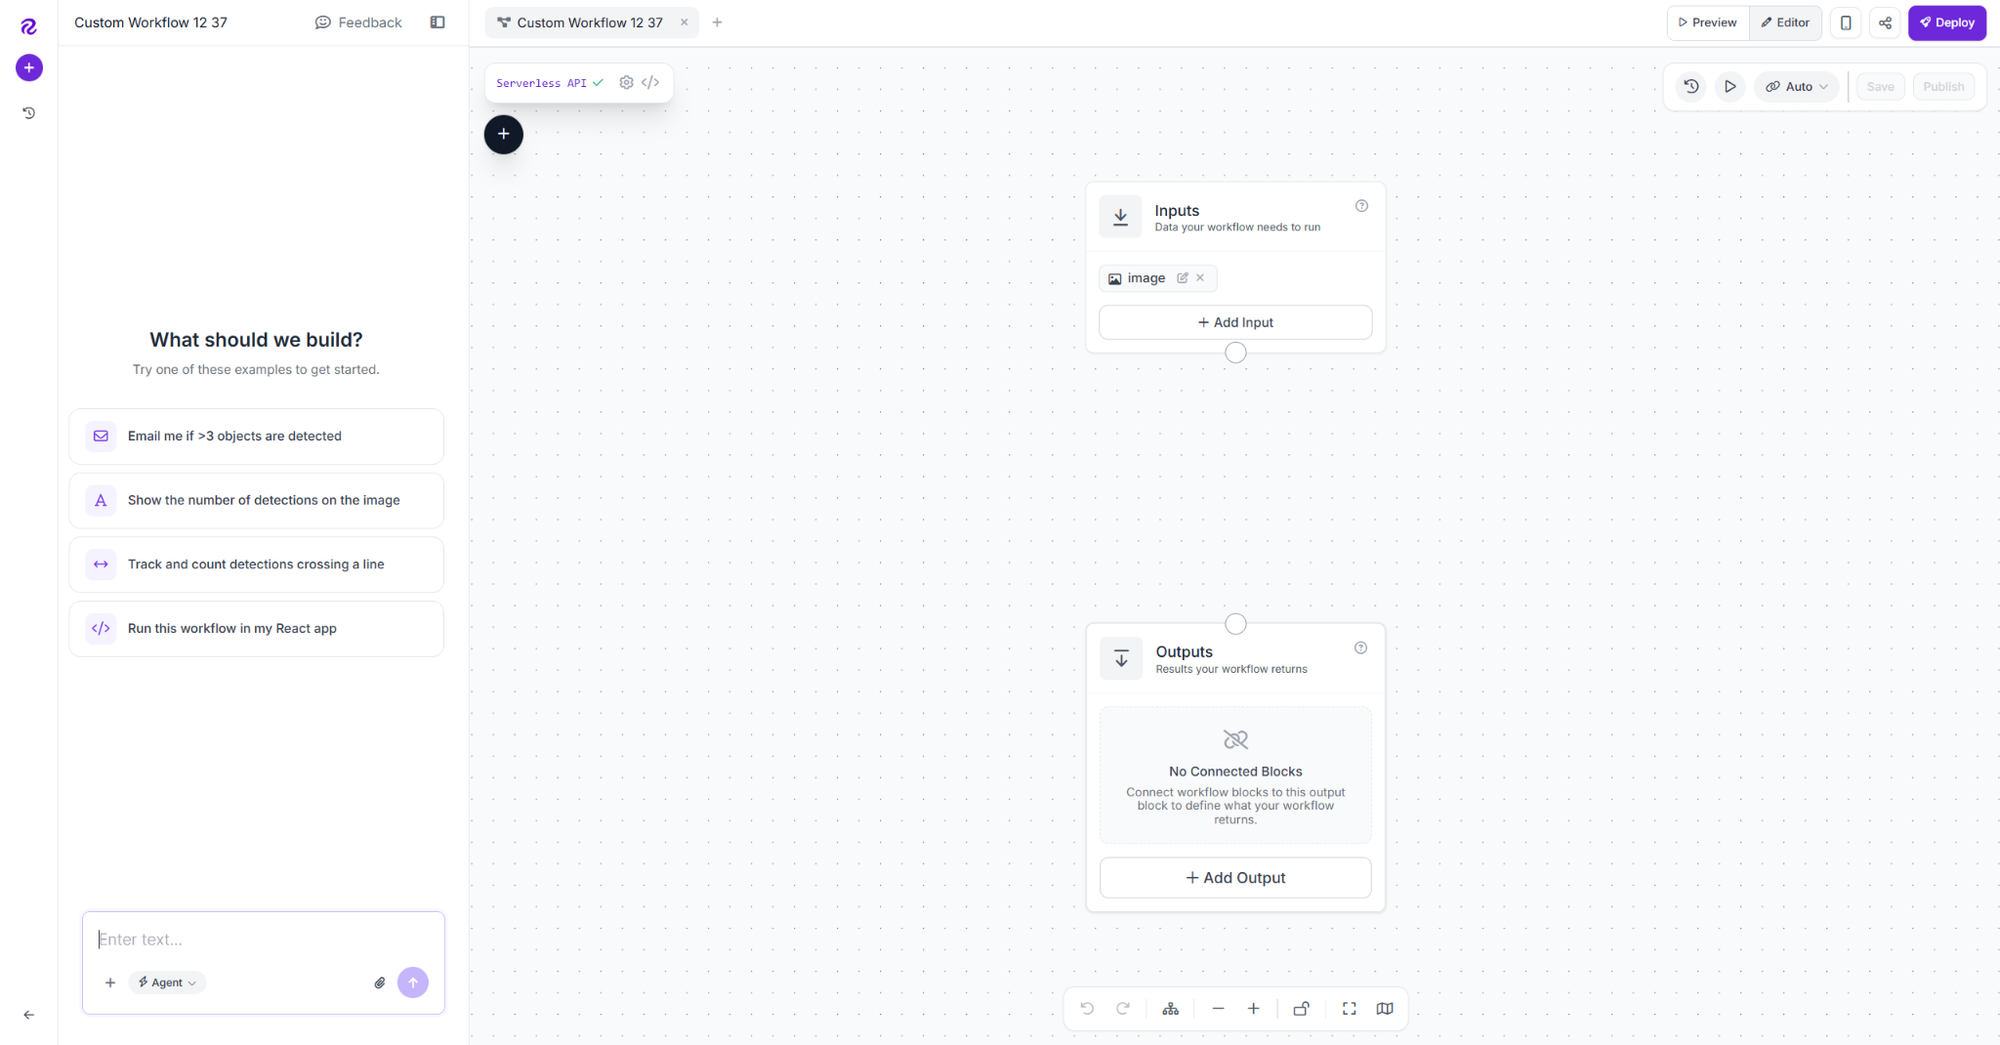
This is the starting point before any detection logic is added.
Step 2: Add the SAM3 block
Click the plus icon, search for SAM3, and add it as sam3. Connect Image to inputs.image.
Add a Workflow input field named what_to_detect of kind string. This is where you type the class names you want SAM3 to look for, comma-separated, for example "diseased leaf, yellow spots, brown lesions". Connect it to the Class Names field on the SAM3 block.
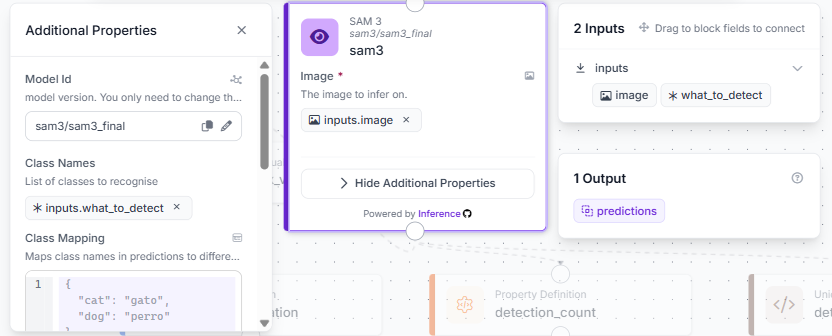
SAM3 runs zero-shot, so no model training or dataset version is required. Whatever you type into what_to_detect becomes the list of concepts the model searches for in the image
Step 3: Add Bounding Box Visualization
Add a Bounding Box Visualization block. Connect Input Image to inputs.image and Predictions to sam3.predictions.
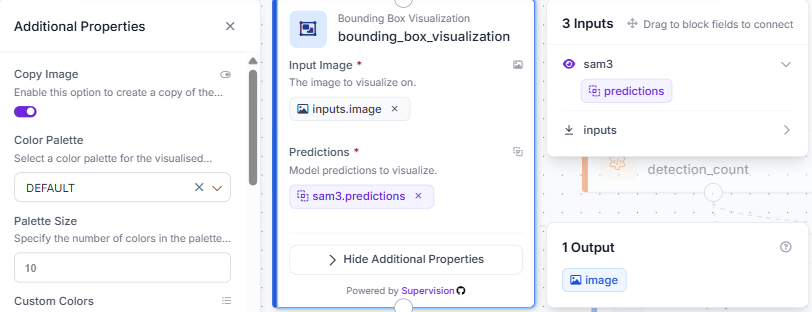
This draws a box around every region SAM3 matched to your prompt, directly on the original image.
Step 4: Add Label Visualization
Add a Label Visualization block. Connect Input Image to bounding_box_visualization.image and Predictions to sam3.predictions. Set Text to Class.
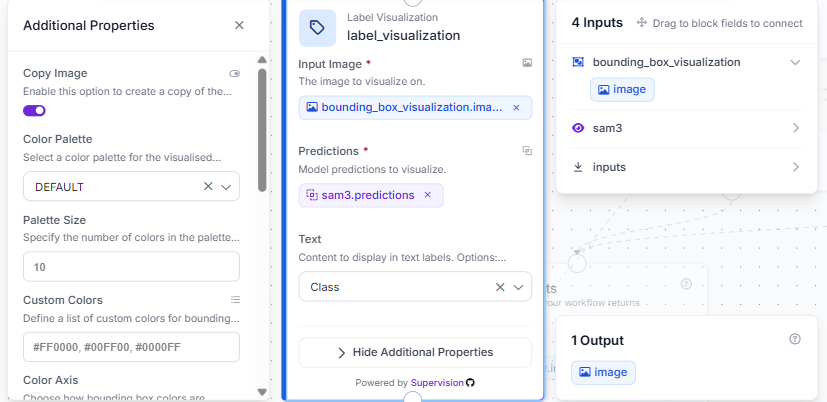
Chaining the image input from the previous block, instead of the original input, draws the class labels on top of the existing bounding boxes rather than replacing them.
Step 5: Count detections with a Property Definition block
Add a Property Definition block named detection_count. Connect Data to sam3.predictions and set the operation to Count Items.
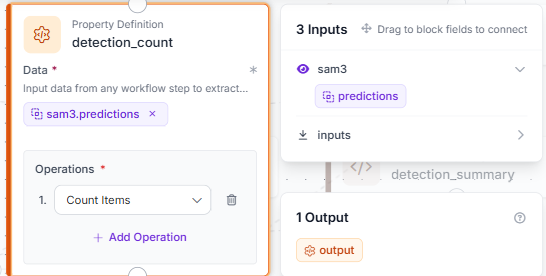
This outputs a single number, the total count of detections SAM3 returned, which gets used later in the text overlay.
Step 6: Deduplicate labels with a Custom Python Block
Add a Custom Python Block named detected_labels. Connect Predictions to sam3.predictions. This block extracts the class name from each detection and returns only the unique ones, so if SAM3 returns 10 "diseased leaf" detections, the output is just ["diseased leaf"] instead of the name repeated 10 times.

Click Edit Code to open the full editor.
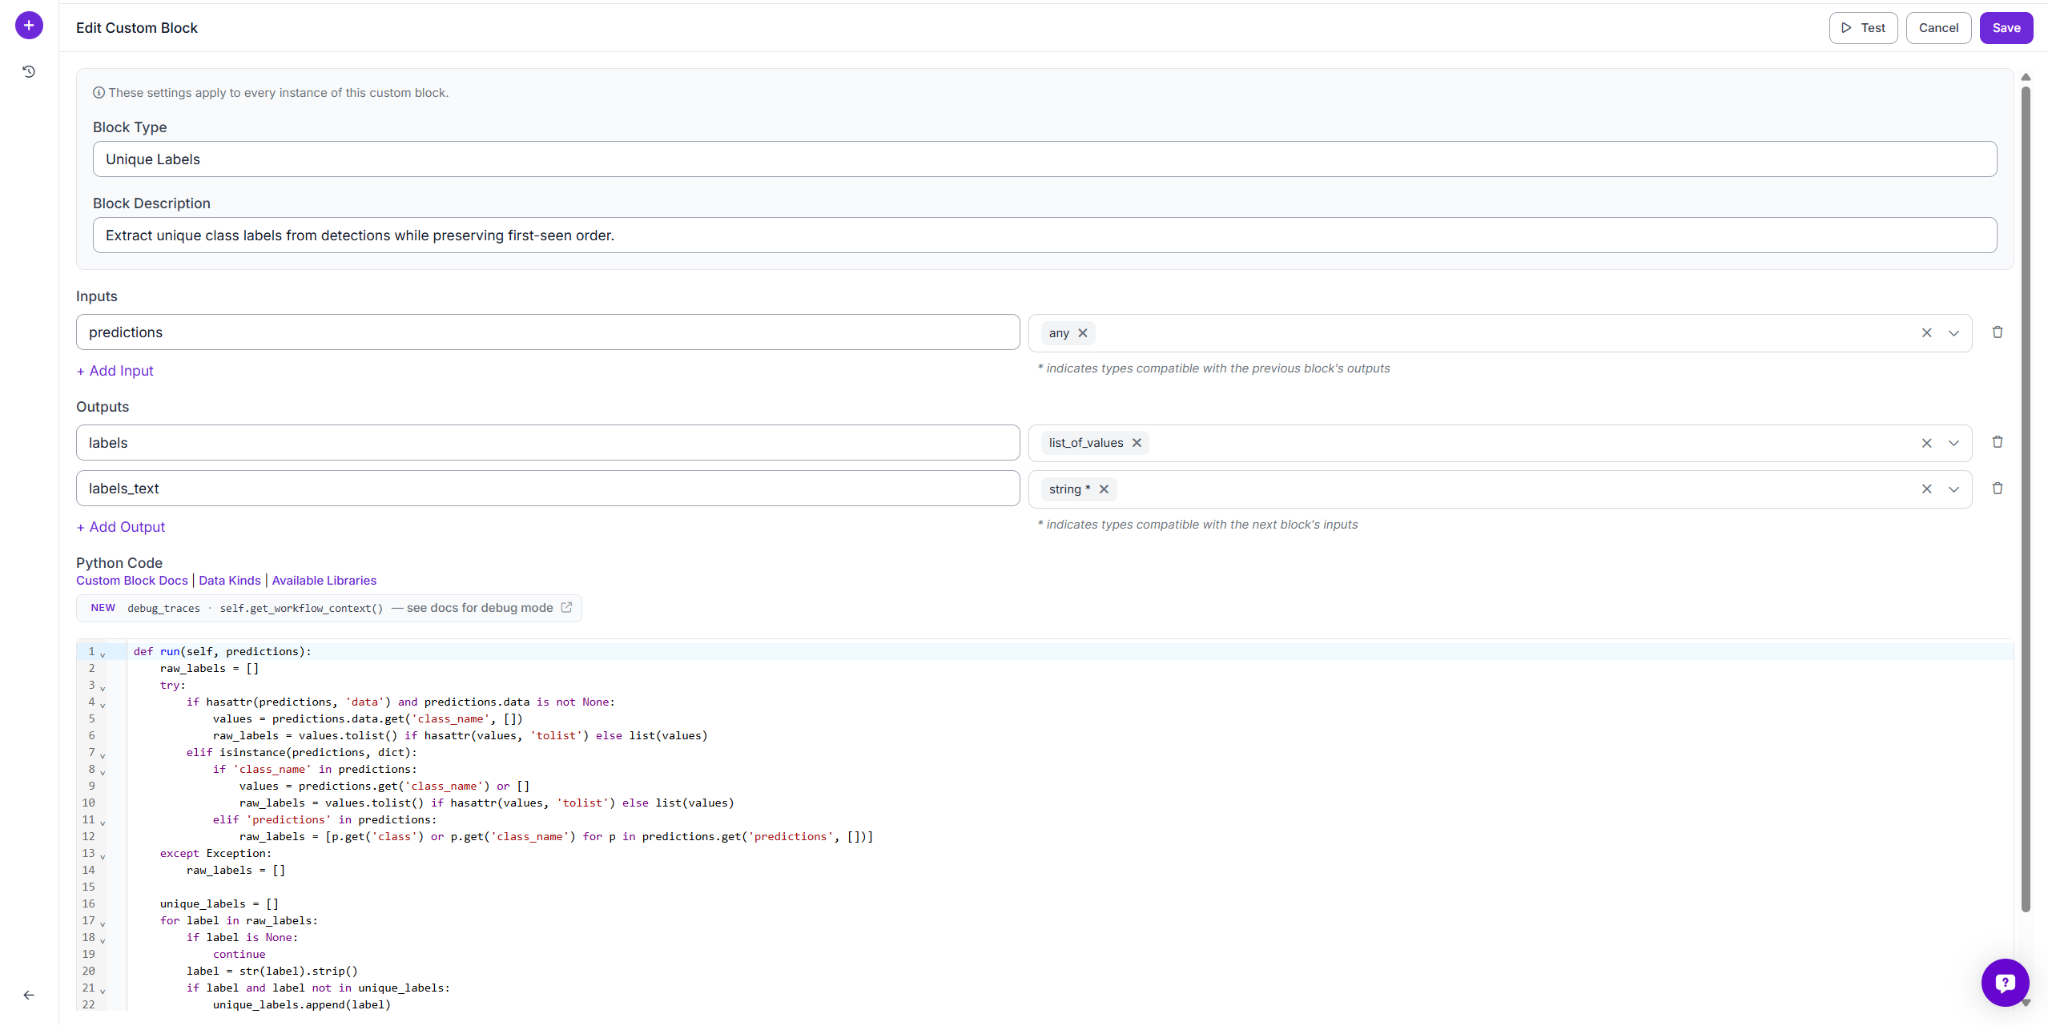
Paste the following code:
def run(self, predictions):
    raw_labels = []
    try:
        if hasattr(predictions, 'data') and predictions.data is not None:
            values = predictions.data.get('class_name', [])
            raw_labels = values.tolist() if hasattr(values, 'tolist') else list(values)
        elif isinstance(predictions, dict):
            if 'class_name' in predictions:
                values = predictions.get('class_name') or []
                raw_labels = values.tolist() if hasattr(values, 'tolist') else list(values)
            elif 'predictions' in predictions:
                raw_labels = [p.get('class') or p.get('class_name') for p in predictions.get('predictions', [])]
    except Exception:
        raw_labels = []
    unique_labels = []
    for label in raw_labels:
        if label is None:
            continue
        label = str(label).strip()
        if label and label not in unique_labels:
            unique_labels.append(label)
    return {
        'labels': unique_labels,
        'labels_text': ', '.join(unique_labels) if unique_labels else 'none'
    }
The block pulls labels from the predictions object, strips whitespace, and appends each label only if it hasn't been seen yet, preserving first-seen order. It returns labels, the deduplicated list, and labels_text, a comma-separated string ready for display.
Step 7: Add a Text Display block
Add a Text Display block. Connect Input Image to label_visualization.image and set Text to:
Detections: {{ $parameters.count }}
Labels: {{ $parameters.labels }}
With Text Parameters mapped to $steps.detection_count.output for count and $steps.detected_labels.labels_text for labels.
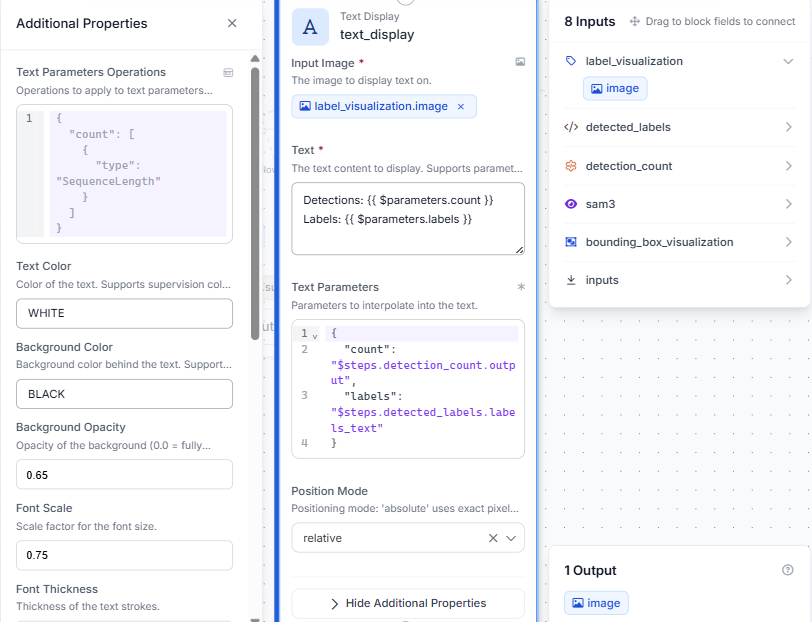
This overlays a clean, deduplicated summary directly on the output image, instead of repeating the same label once per detection.
Step 8: Add a Detection Summary block
Add a Custom Python Block named detection_summary. Connect count to detection_count.output and labels to detected_labels.labels.
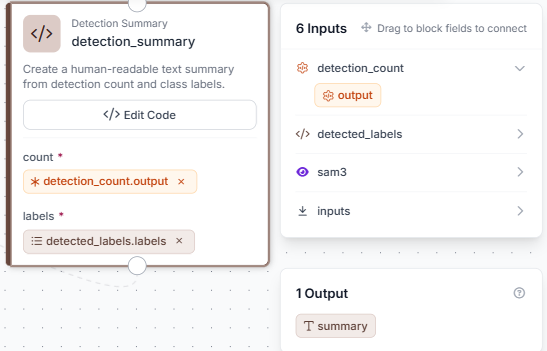
Click Edit Code to open the full editor.
Paste the following code:
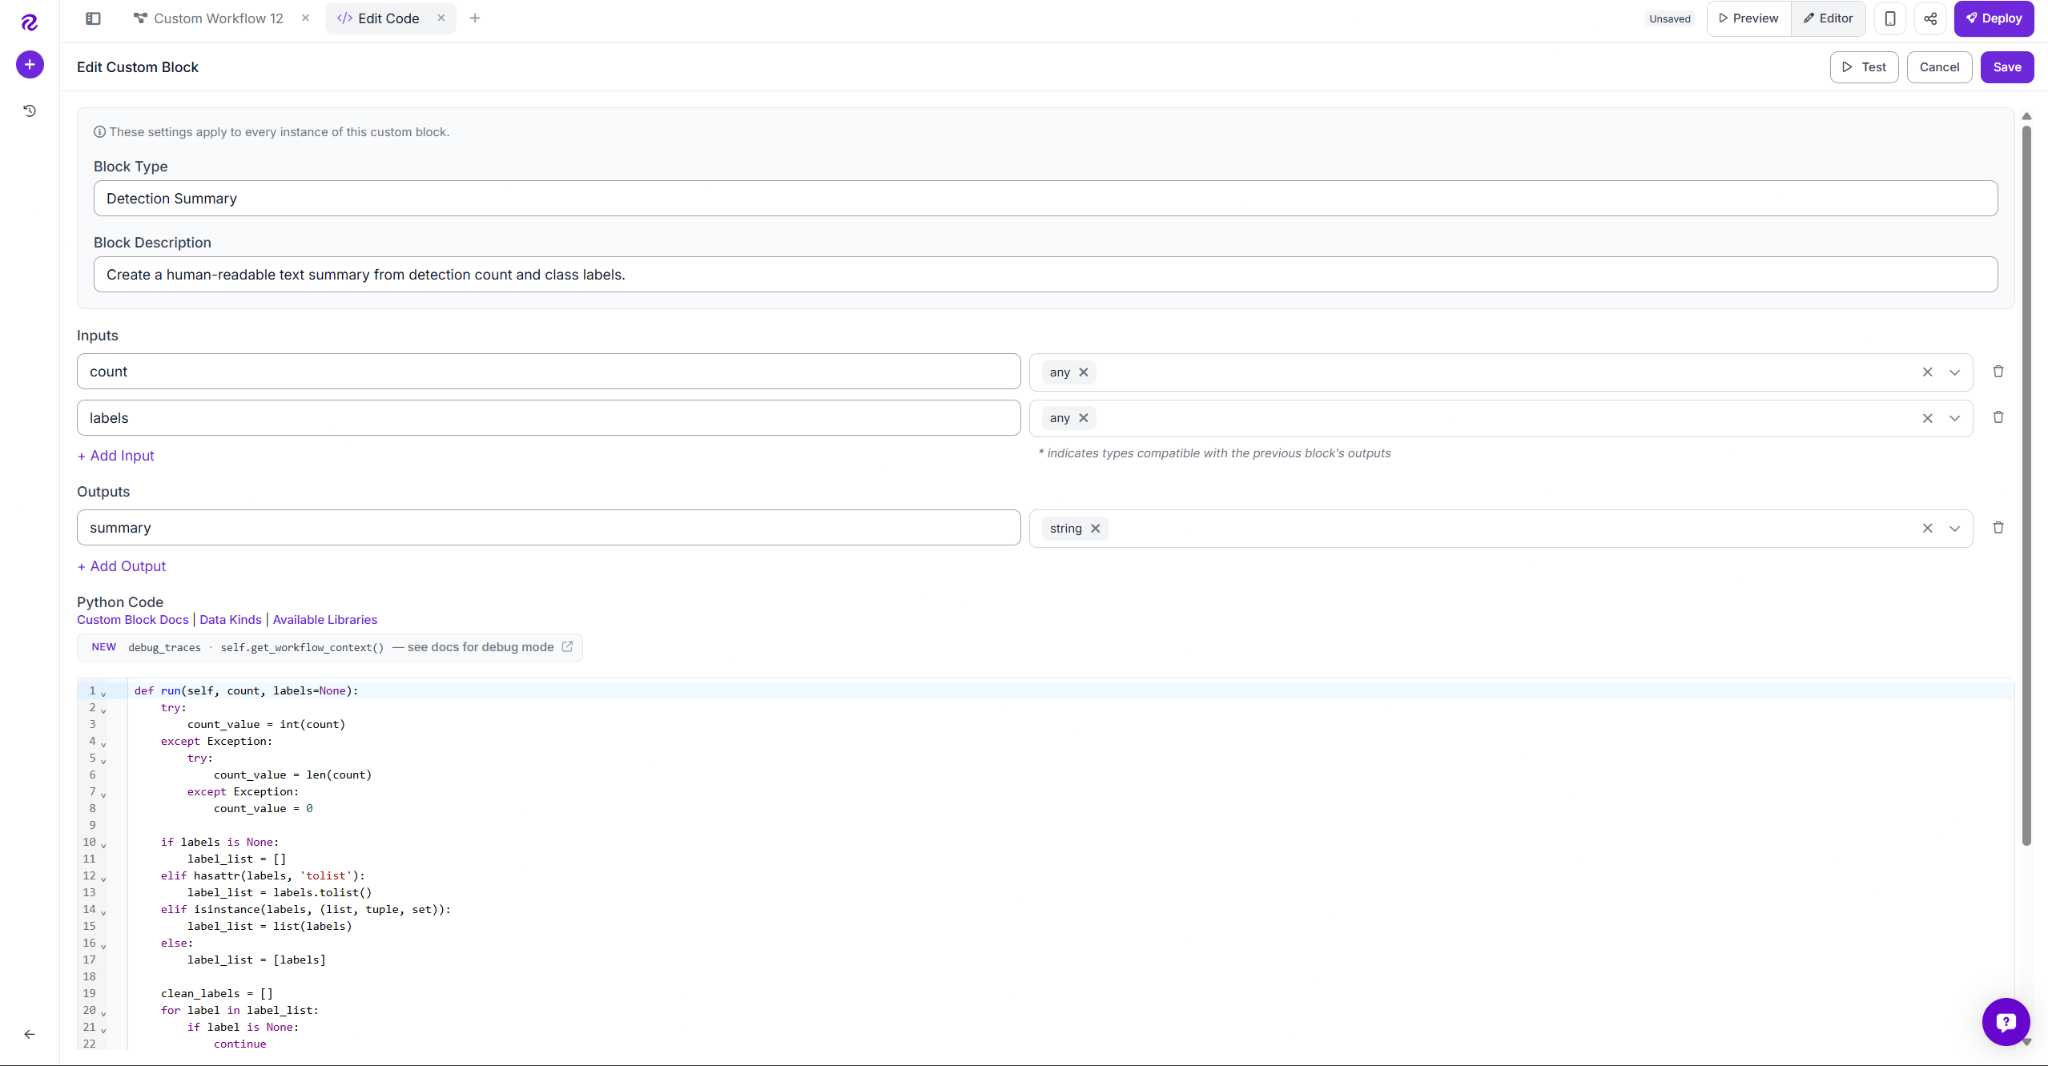
def run(self, count, labels=None):
    try:
        count_value = int(count)
    except Exception:
        try:
            count_value = len(count)
        except Exception:
            count_value = 0
    if labels is None:
        label_list = []
    elif hasattr(labels, 'tolist'):
        label_list = labels.tolist()
    elif isinstance(labels, (list, tuple, set)):
        label_list = list(labels)
    else:
        label_list = [labels]
    clean_labels = []
    for label in label_list:
        if label is None:
            continue
        clean_labels.append(str(label))
    unique_labels = []
    for label in clean_labels:
        if label not in unique_labels:
            unique_labels.append(label)
    if count_value == 0:
        summary = 'No requested visual indicators were detected.'
    else:
        label_text = ', '.join(unique_labels) if unique_labels else 'unlabeled detections'
        summary = f'Detected {count_value} requested visual indicator(s): {label_text}.'
    return {'summary': summary}
The block normalizes the count into an integer, deduplicates the labels as a safety check, and builds one of two sentences: a "no detections" message if nothing was found, or a sentence naming the count and unique labels detected.
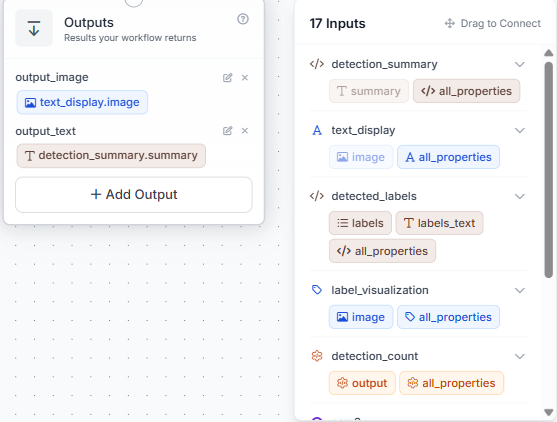
Step 9: Configure Outputs
Set two outputs: output_image from text_display.image, and output_text from detection_summary.summary.
With all blocks configured and connected, the complete Workflow looks like this:

From here, every image that comes in gets a labeled output and a structured text summary based on whatever you typed into what_to_detect.
Results
Test case 1: No disease present, zero detections
A healthy plant image with no visible disease symptoms returns zero detections, and the output text correctly reports that no requested visual indicators were found instead of forcing a false match.
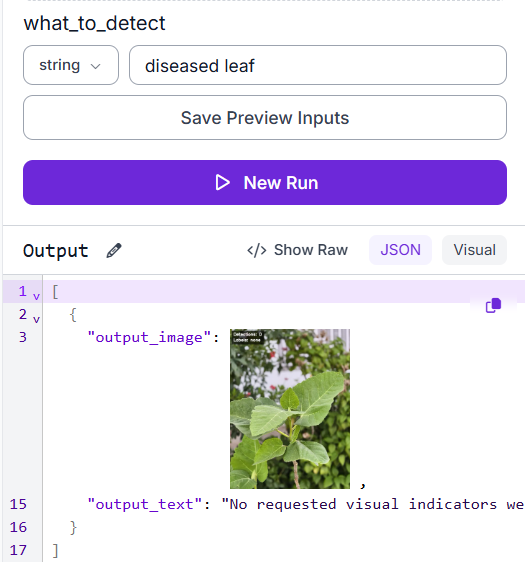
This is the behavior you want from a zero-shot model on a clean image: it stays quiet rather than guessing.
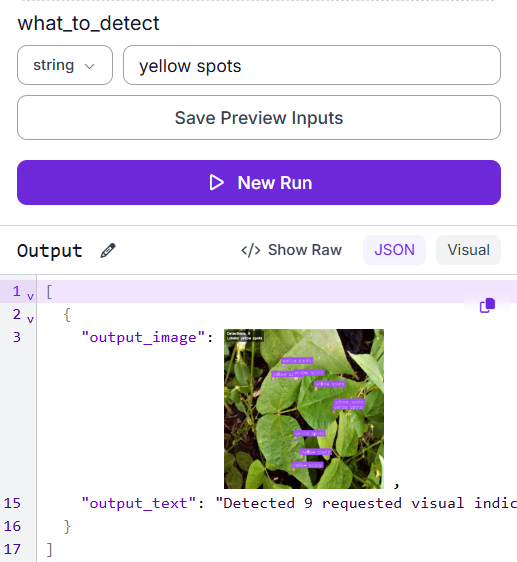
Test case 2: Fine-grained symptom detection with a different prompt
Changing the prompt to yellow spots shifts what SAM3 looks for entirely. Instead of boxing whole diseased leaves, it isolates individual lesion marks, 9 small, precise detections scattered across the leaf surface, with the deduplicated label correctly showing "yellow spots" once.
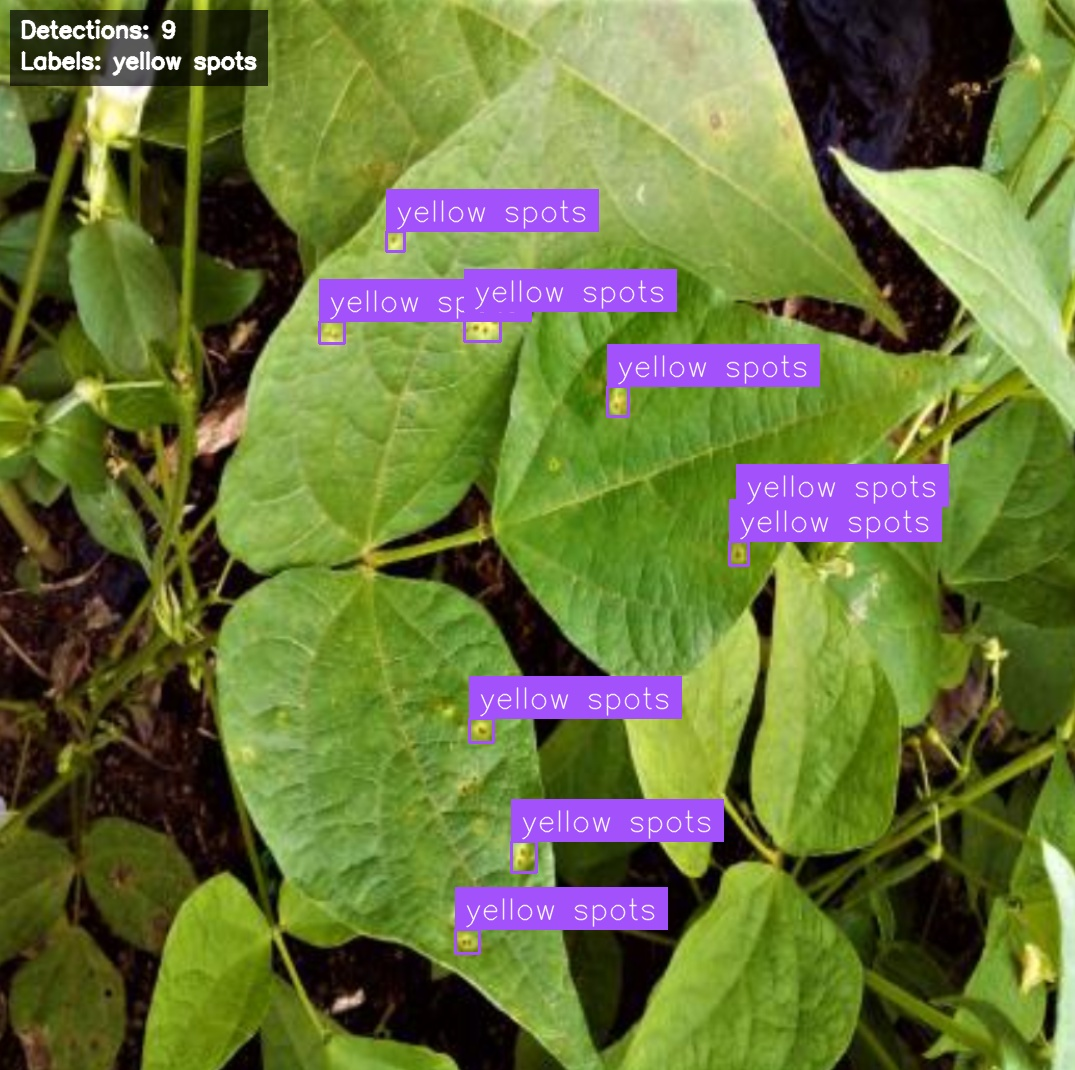
The same prompt-driven flexibility applies to the JSON output, the what_to_detect field controls exactly what gets reported.
This shows the real value of text-prompt detection: the same Workflow can target whole leaves or specific symptom marks just by changing the words you type, no retraining, no new model.
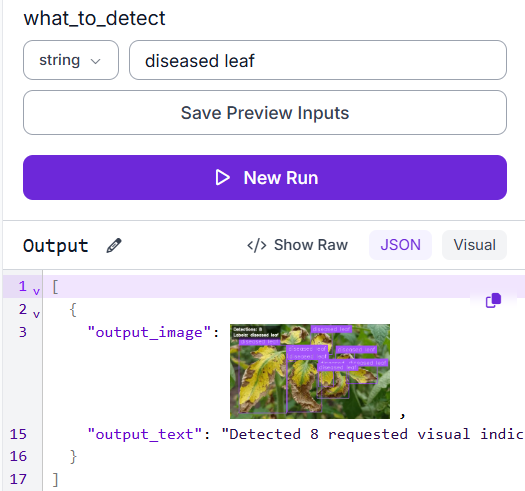
Test case 3: Multiple diseased leaves, deduplicated label output
A different diseased plant image returns 8 detections across overlapping leaves with the prompt diseased leaf. The deduplication step keeps the output readable.
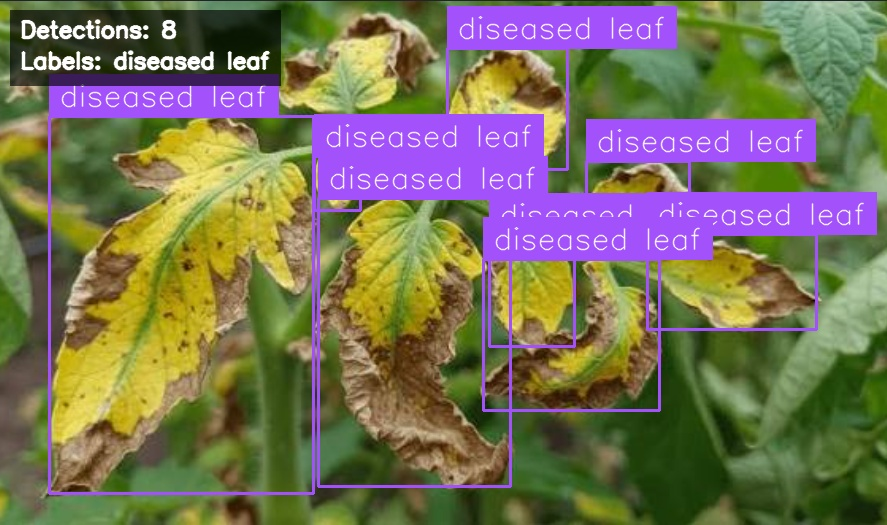
The JSON output mirrors what the overlay shows.
The JSON output follows the same pattern, returning a single readable sentence rather than a wall of repeated class names.
When to Use Text-Prompt Detection
Zero-shot detection does not replace trained models in every case. It works best in specific scenarios.
- Rapid prototyping: Test a detection idea in minutes using a text prompt instead of spending weeks building a dataset
- Dataset bootstrapping: Run SAM3 on images and refine the outputs instead of labeling everything from scratch
- Changing targets: New defects, diseases, or anomalies often require only a prompt update instead of full relabeling
- Production inspection: Better suited for exploration than high-volume systems that require consistent accuracy
- Key dependency: Results vary based on prompt quality, confidence thresholds, and image complexity
This Workflow is often used as a starting point for dataset creation. Once enough data is collected, a dedicated model such as RF-DETR is trained and replaces the zero-shot stage. The Workflow stays the same. Only the detection block changes.
Use Roboflow Agent
If you'd rather not add each block by hand, use Roboflow Agent. Instead of configuring blocks one at a time, you describe the pipeline you want in plain text and the Agent builds it for you. Here's an example:
Text Prompt Object Detection Conclusion
This Workflow takes a plant image and a text prompt no labeled dataset, no training job, and returns bounding boxes around whatever the prompt describes. SAM3 matches the image and the prompt, and a few supporting blocks turn the raw detections into a clean, readable output.
The tradeoff is precision, not capability. SAM3 finds the right region most of the time, but how cleanly it draws that region depends on prompt wording, confidence threshold, and image clutter. A trained model needs weeks of labeled data before its first prediction. This Workflow needs a sentence.
Further reading
Cite this Post
Use the following entry to cite this post in your research:
Mostafa Ibrahim. (Jun 30, 2026). Text Prompt Object Detection with Roboflow. Roboflow Blog: https://blog.roboflow.com/text-prompt-object-detection/