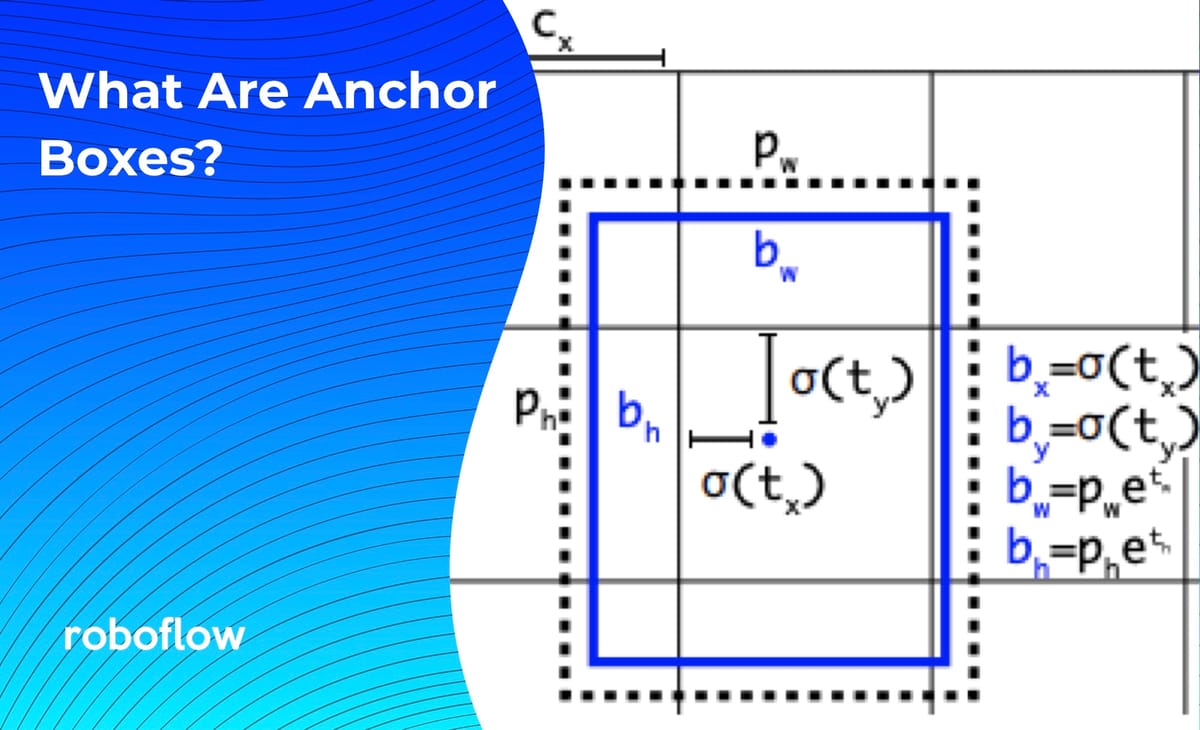
Object detection models utilize anchor boxes to make bounding box predictions. In this post, we dive into the concept of anchor boxes and why they are so pivotal for modeling object detection tasks. Understanding and carefully tuning your model's anchor boxes can be a very important lever to improve your object detection model's performance, especially if you have irregularly shaped objects.

Anchors Boxes and Object Detection Tasks
In object detection, we are seeking to identify and localize objects as they appear in an image. Object detection differs from image classification because there may be multiple objects of the same or different classes present in the image, and object detection seeks to accurately predict all of these objects.

Object detection models tackle this task by breaking the prediction step into two pieces - first they predict a bounding box through regression and second by predicting a class label through classification.
What are Anchor Boxes?
In order to predict and localize many different objects in an image, most state of the art object detection models such as EfficientDet and the YOLO models start with anchor boxes as a prior, and adjust from there.
State of the art models generally use bounding boxes in the following order:
- Form thousands of candidate anchor boxes around the image
- For each anchor box predict some offset from that box as a candidate box
- Calculate a loss function based on the ground truth example
- Calculate a probability that a given offset box overlaps with a real object
- If that probability is greater than 0.5, factor the prediction into the loss function
- By rewarding and penalizing predicted boxes slowly pull the model towards only localizing true objects
This is why when you have only lightly trained a model, you will see predicted boxes showing up all over the place.
Anchor box predictions that have not yet converged
After training has completed, your model will only make high probability bets based on the anchor box offsets that it finds most likely to be real.
After training, the model will predict boxes more reliably
How to custom tune anchor boxes
In your model's configuration file, you will have an opportunity to set custom anchor boxes. For example, the anchor boxes in YOLOv5 are configured this way:
# parameters
nc: 80  # number of classes
depth_multiple: 0.33  # model depth multiple
width_multiple: 0.50  # layer channel multiple

# anchors
anchors:
  - [116,90, 156,198, 373,326]  # P5/32
  - [30,61, 62,45, 59,119]  # P4/16
  - [10,13, 16,30, 33,23]  # P3/8

# YOLOv5 backbone
YOLOv5 anchor box configuration
You may want to custom set these anchor boxes if your objects differ significantly from the box distribution in the COCO dataset. For example, if you are detecting tall and skinny objects like giraffes or flat and wide objects like manta rays.
Thankfully, YOLOv5 auto learns anchor box distributions based on your training set. This touch often helps users training models on their custom dataset that may look different than the normal COCO distribution that preset anchor boxes are typically optimized for.
Conclusion
In this post, we have discussed the concept of anchor boxes and explored their importance for object detection predictions.
We also introduced a model that auto learns your anchor box distributions for you so you can easily apply it to novel custom datasets with strangely shaped objects.
See our how to Train YOLOv5 tutorial to get started with custom anchor boxes today.
Cite this Post
Use the following entry to cite this post in your research:
Jacob Solawetz. (Jul 13, 2020). What are Anchor Boxes in Object Detection?. Roboflow Blog: https://blog.roboflow.com/what-is-an-anchor-box/
