

How to use a Raspberry Pi, a phone camera, and a Roboflow classification model to know when a pool needs a refill. Follow along and build one in a weekend.
My colleague Michael keeps posting demos of Roboflow running at the edge on a Raspberry Pi. Every time one showed up in my feed I thought the same thing: I want to build something like that. So when I went home to Saint Louis, I brought my Raspberry Pi with me and took a note out of his book.
My dad supplied the use case. Our pool loses water over time, and if the level drops too far, the pump can run dry. He wanted to know, without walking outside and eyeballing it, whether the water level was low and it was time to turn on the hose. In other words, he wanted a computer vision model watching the pool for him.
That is a perfect edge deployment problem. The camera never moves, the question is simple, and there is no reason to stream video to the cloud all day to answer: "Is the water low?" Here is how the build went, including the parts that did not work on the first try, laid out so you can follow along.
What you need
- A Raspberry Pi: I used a Pi 5, and any recent model with a few GB of RAM works. No GPU required.
- A phone with an RTSP camera app: this becomes your wireless camera. A cheap RTSP security camera works too.
- A laptop on the same WiFi network: for SSH and for opening the dashboard.
- A free Roboflow account: for labeling, training, and building the Workflow.
Step 1: Set up the Raspberry Pi
Get the Pi on your network and confirm you can SSH into it from your laptop. Then install Docker:
curl -fsSL https://get.docker.com | shDocker is what runs Roboflow's inference server locally on the Pi, so every frame gets processed on the device instead of being sent to the cloud.
This is where I hit my first real snag. The managed Roboflow Edge container I started with was trying to load GPU and TensorRT dependencies. My Raspberry Pi has no GPU. It is a CPU-only device, so the container kept crashing in a loop, restarting, and crashing again.
The fix was simple: switch to the CPU-only Roboflow Inference container and run the Workflow locally through that instead.
sudo docker run -it --rm -p 9001:9001 roboflow/roboflow-inference-server-cpuIt is still Roboflow end to end, only a lighter local deployment path that matches what the Pi can actually do. If you are deploying on a Pi, save yourself the debugging session and start with the CPU-only container.
Step 2: Turn a phone into a wireless camera
Next, the Pi needed eyes. I wanted the whole setup to be wireless, so instead of running a cable to a webcam, I installed an RTSP camera app on my phone (search your app store for "RTSP camera"; several free options work). The app turns the phone into a live video stream with a URL like rtsp://192.168.1.42:8554/stream, which the Pi can read over WiFi exactly like it would read a mounted security camera.
To confirm everything was talking to everything else, Roboflow Agent helped me spin up a simple local web page that displayed the frames the Pi was receiving from the phone. Seeing the pool show up in the browser was the moment the hardware part of the project was done. Everything after this was a modeling problem.
Step 3: Collect and label your data
The next day I connected the Pi to my Roboflow account and started on the model. Registering the Pi in my workspace was the easiest part of the whole project. It showed up almost immediately with a heartbeat. I was thrilled.
Data collection meant standing in the backyard taking pictures of a pool. I photographed the low water state first, then turned on the hose and kept shooting as it filled so I could capture the OK state too. While the pool filled, I labeled the first batch of images in Roboflow. A few dozen images per class is enough to start; you can always add more later and retrain.
One decision worth calling out: I used image classification instead of object detection. I did not need the model to draw a box around the water line or measure anything precisely. I needed it to look at the scene and make one call: is the water level LOW or OK?
When your question is about the overall state of a scene rather than the location of an object, classification is the simpler and better fit. If your version of this project does need to locate or count things (packages on a porch, birds at a feeder), train an object detection model with RF-DETR instead; the rest of the build stays the same.
Step 4: Train the model
I trained a DINOv3 Small classification model in Roboflow. This is a visual state recognition problem, not a precise measurement problem, and DINOv3 is strong at learning visual states from a modest number of examples. The Small version keeps inference fast on a Raspberry Pi CPU.
Step 5: Build the Workflow
With a trained model in hand, I had Roboflow Agent build the Workflow for me. The Workflow takes in a frame from the phone camera, runs the classification model on it, and checks the result. If the pool is fine, it shows the feed. If the water is low, it adds a big warning overlay across the frame that says LOW, TURN ON HOSE. Subtlety was not the goal. My dad wanted an answer he could read from across the room.
Step 6: Serve a dashboard
Finally, Agent helped me wrap the whole thing in a small Flask web app, so the Pi serves a live dashboard that anyone in the house can open in a browser and see the pool status in real time. That is the finished system: a phone acting as a wireless camera, a Raspberry Pi doing all the inference locally, and a classification model telling my dad exactly when to go turn on the hose.
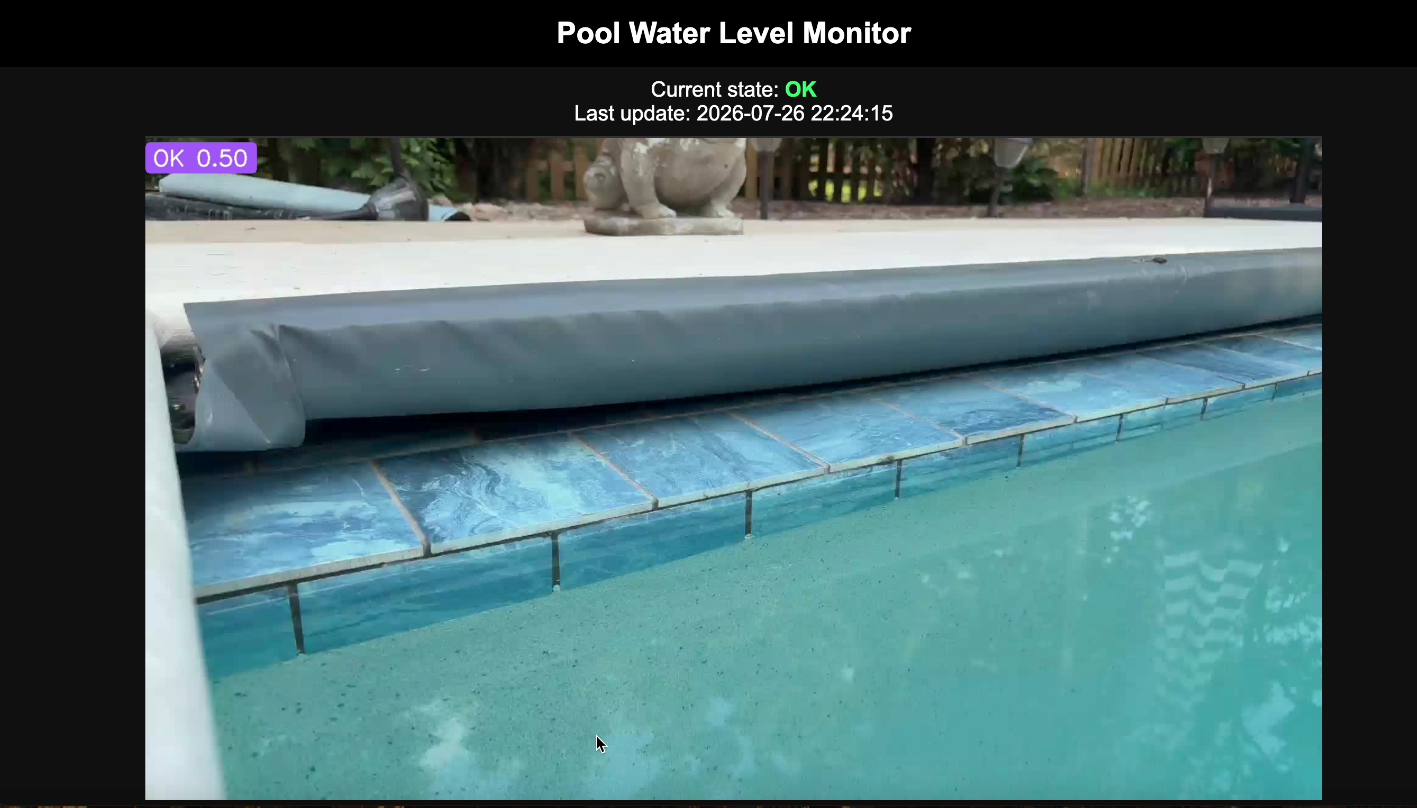
No cloud video streaming, no expensive hardware, and no more squinting at the water line from the porch. See the full video here.
What's next
The part I keep coming back to is how little of this required deep expertise. The hardest problem I hit was a container mismatch, and the fix was swapping to the right image. Everything else, from registering the device to building the Workflow to serving the dashboard, was guided by tools that already knew what I was trying to do.
We already have a wishlist for version two: a permanently mounted camera so I can have my phone back, a prettier dashboard for my dad, and the obvious endgame of having the system trigger the hose automatically when the water dips. But even in its current form, the project took a real problem someone I love has and solved it with a camera, a forty dollar computer, and a model I trained in an afternoon.
If you have a Raspberry Pi collecting dust in a drawer, there is a pool, a garden, a driveway, or a bird feeder in your life that could use a pair of eyes. Create a free Roboflow account and start with the CPU container.


Cite this Post
Use the following entry to cite this post in your research:
Grace Freund. (Jul 31, 2026). Building a Pool Monitor with Raspberry Pi and Roboflow. Roboflow Blog: https://blog.roboflow.com/building-a-pool-monitor-with-raspberry-pi/