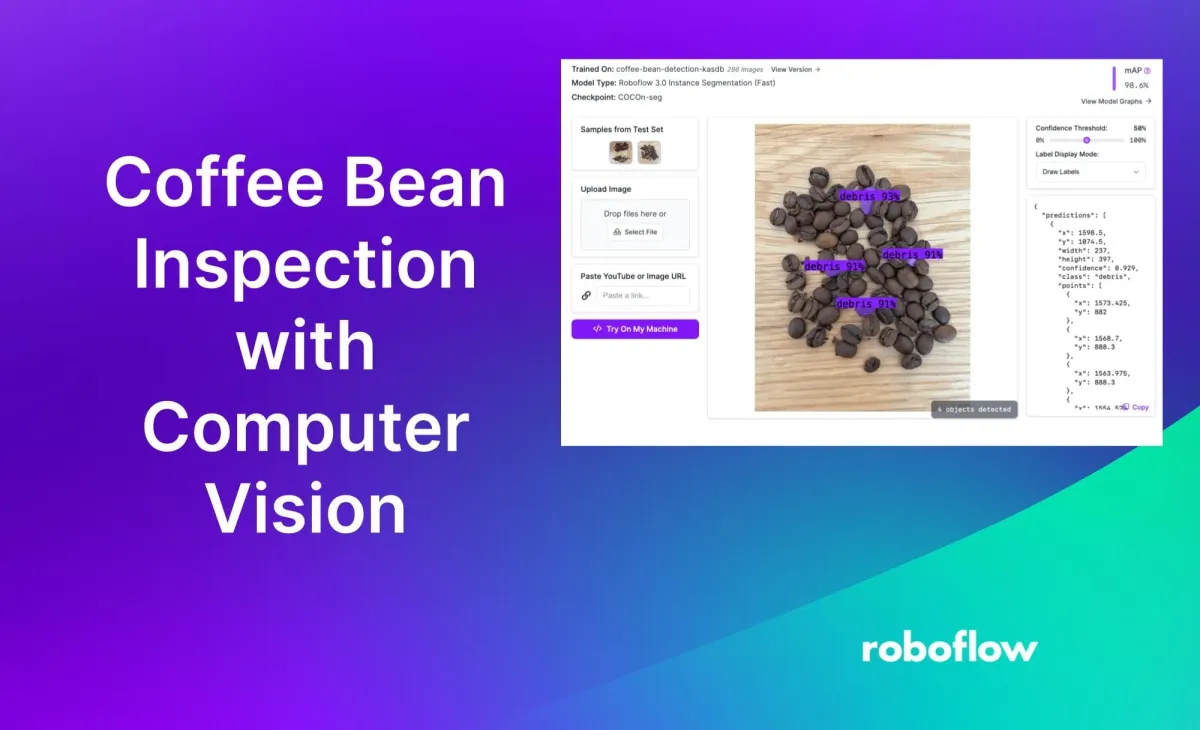
There are several quality checks that need to be run on coffee beans before they are packaged and ready for delivery.
A professional taster will “cup” coffee to ensure it meets a given taste profile. The color of the coffee beans may be checked using a photometer to ensure the roast profile is met. In addition, a round of visual inspection should occur, looking for stones and quakers, both potential defects that should not make their way into a packaged bag of coffee.
To build a visual coffee bean inspection system, you can use computer vision. You can train a computer vision system to identify quakers and stones in coffee, then deploy this system on an assembly line or in a roastery to conduct automatic checks on roasted coffee before it is packaged and shipped to customers.
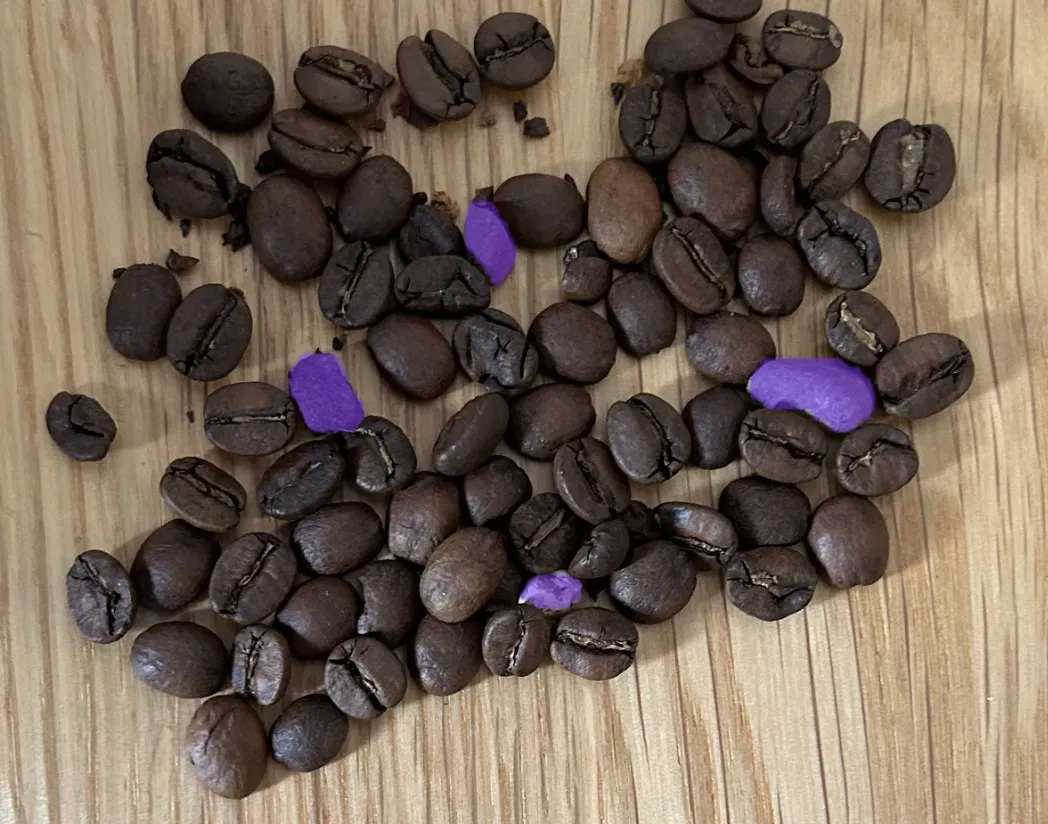
In this guide, we will build a system that identifies stones in coffee. You can use the same steps covered in this guide to search for quakers, too.
Here is an example of the system we will build identifying a stone in coffee:
Without further ado, let’s get started!
Step #1: Create a Project
To get started, create a free Roboflow account. Go to your Roboflow dashboard, then click the “Create Project” button. You will be taken to a page where you can create a new project. On this page, set a name for your project and choose the “Instance Segmentation” project type.
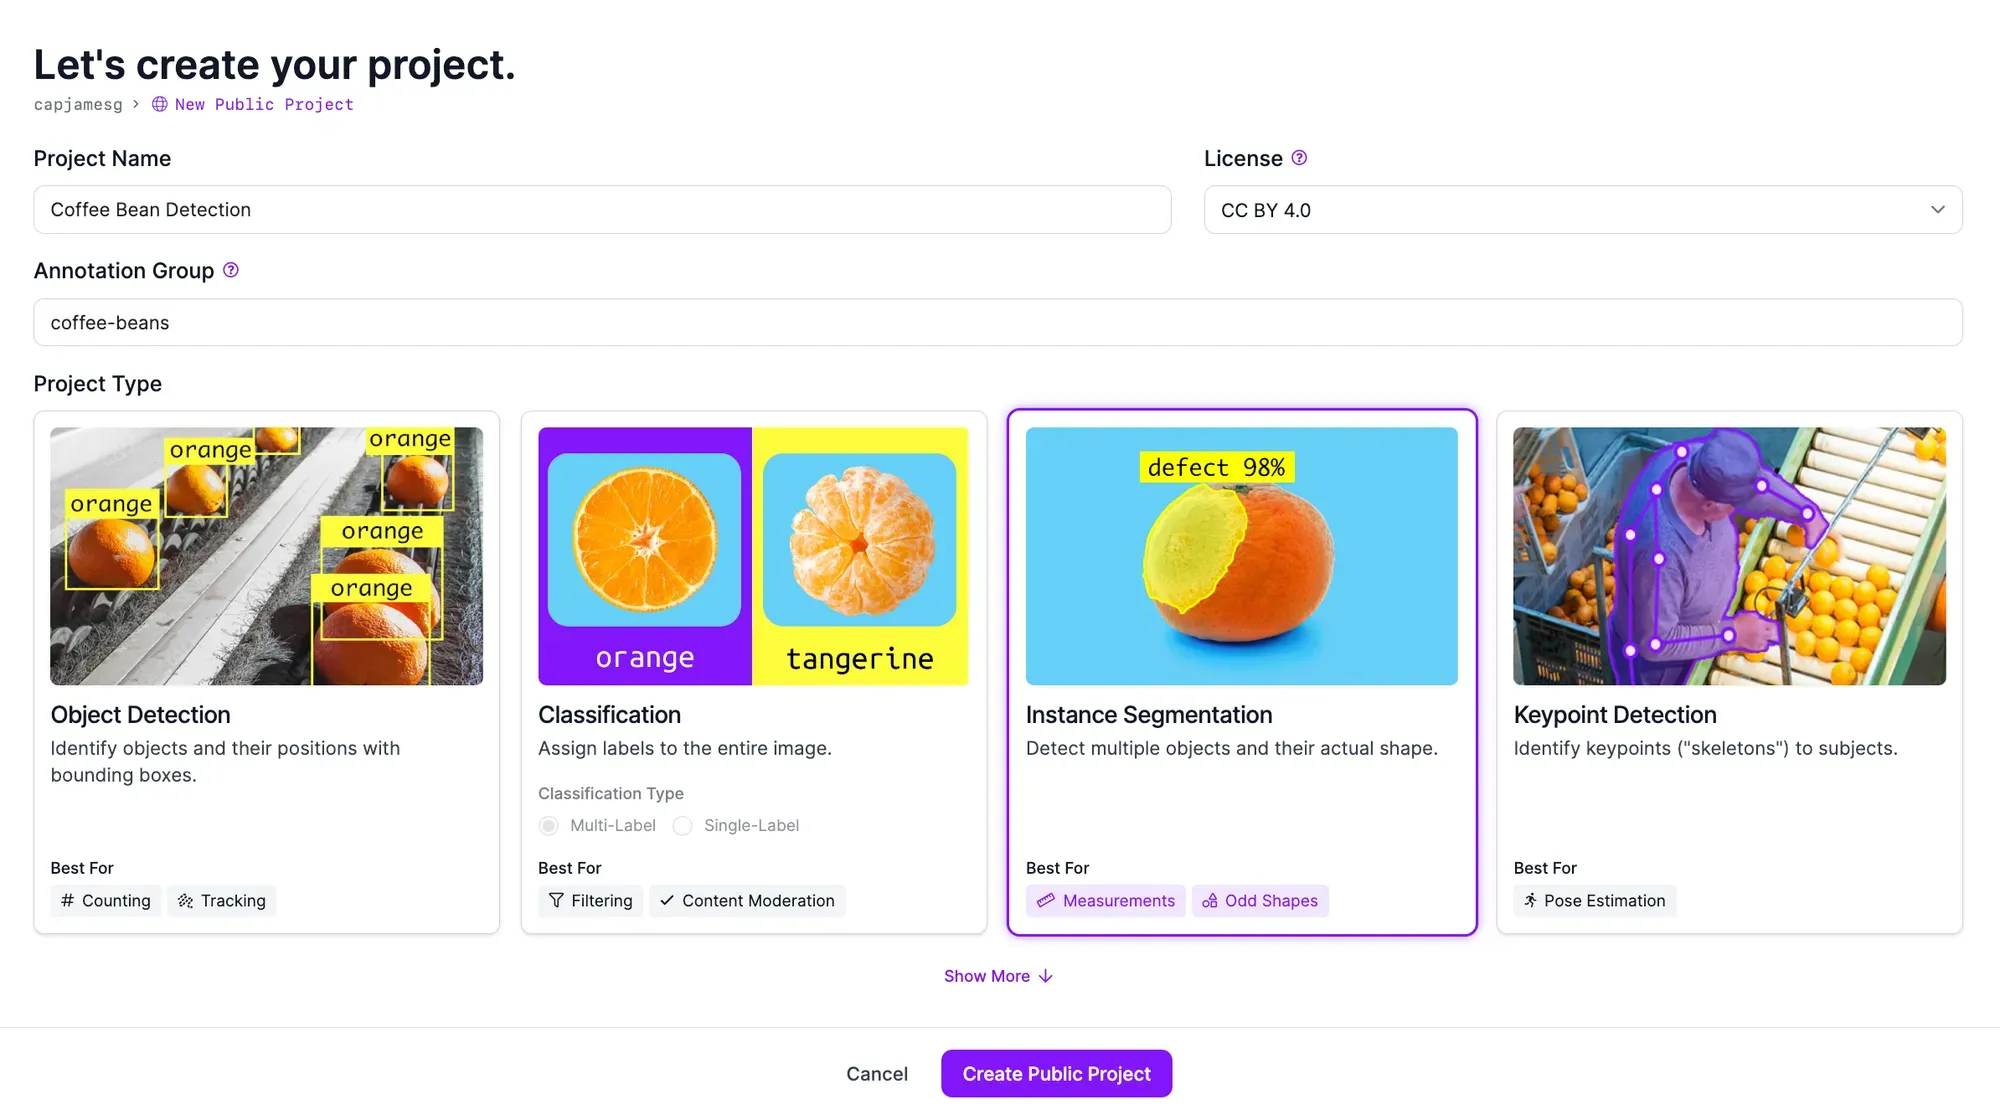
Once you have configured your project, click “Create Project” at the bottom of the page.
Step #2: Upload Coffee Bean Images
To train a vision model, you need images representative of the environment in which your model will be deployed. For example, if your model will be deployed on an assembly line from a top-down camera, you should collect images from your assembly line.
We need to collect images of coffee beans. We also need images that contain the defect we want to identify: stones. (If you want to identify quakers, you will need images where there are visible quakers, too.)
We recommend gathering 20-30 images for use in training your first model.
Once you have gathered data, you can upload them to Roboflow. To do so, drag your images into the data upload page in your Roboflow project:
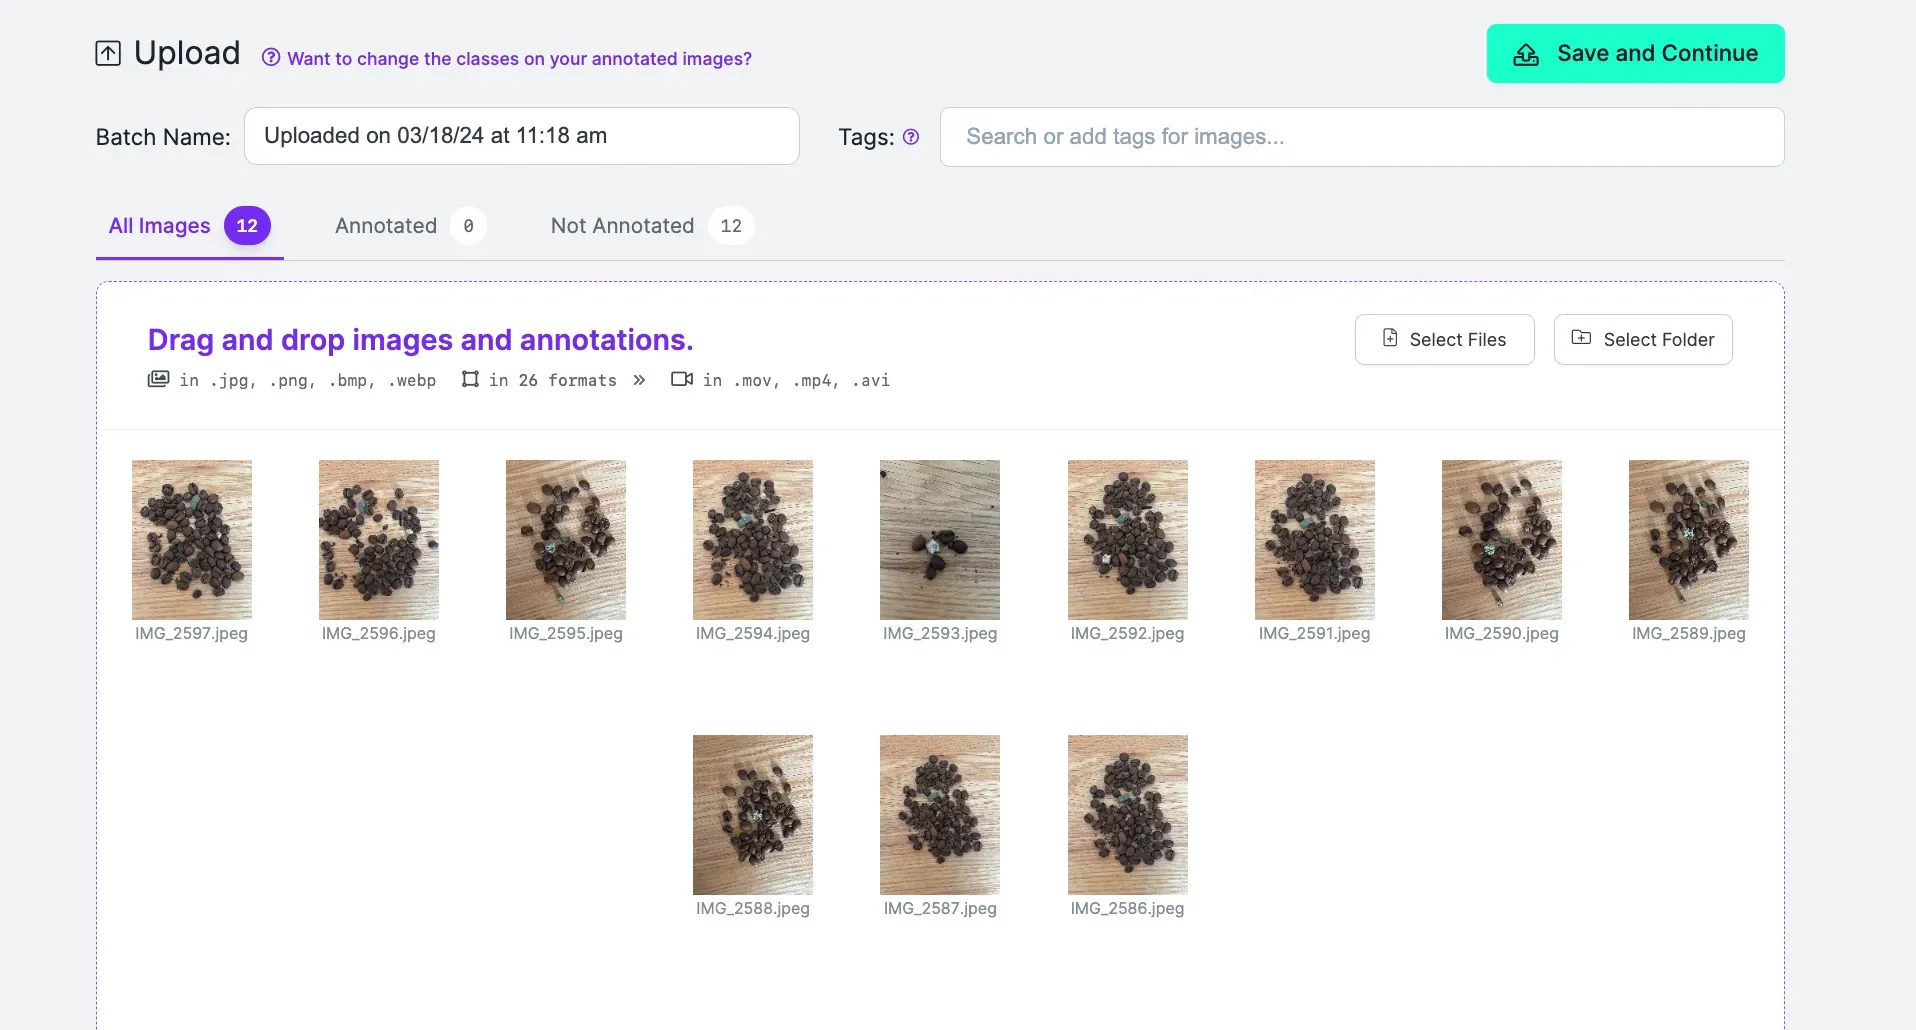
Your images will be processed in your browser. Click the “Save and Continue” button when it appears to upload your data to Roboflow.
Step #3: Label Coffee Bean Images
Computer vision models need to be trained to identify an object of interest. This involves annotating images with labels. Since we are training an object detection model, we will create polygons around objects of interest – stones and other similar foreign debris – in our images. These boxes will be used as an input for training our model, alongside the images.
To start labeling images, click “Annotate” in the your project sidebar. Then, choose an image to annotate. The Roboflow Annotate interface will open in which you can label your data.
To create polygons, we will use the Segment Anything-powered polygon annotation tool. This tool allows you to click on an object and generate a polygon around the object. This is easier than manually drawing polygons around each piece of debris.
Press "S" on your keyboard. Then, choose the "Advanced" Smart Polygon option. You will then be able to use the point-and-click tool to draw polygon annotations. The video below shows how to create an annotation with Smart Polygon:
Repeat this process for all the images in your dataset.
Step #4: Generate a Dataset Version
Once you have labeled all of your images, you can generate a dataset version. A dataset version is a frozen-in-time snapshot of your dataset.
You can apply preprocessing steps and augmentations to your dataset version. Preprocessing steps prepare your images for training. Augmentations let you generate new images using your dataset that may help improve model performance.
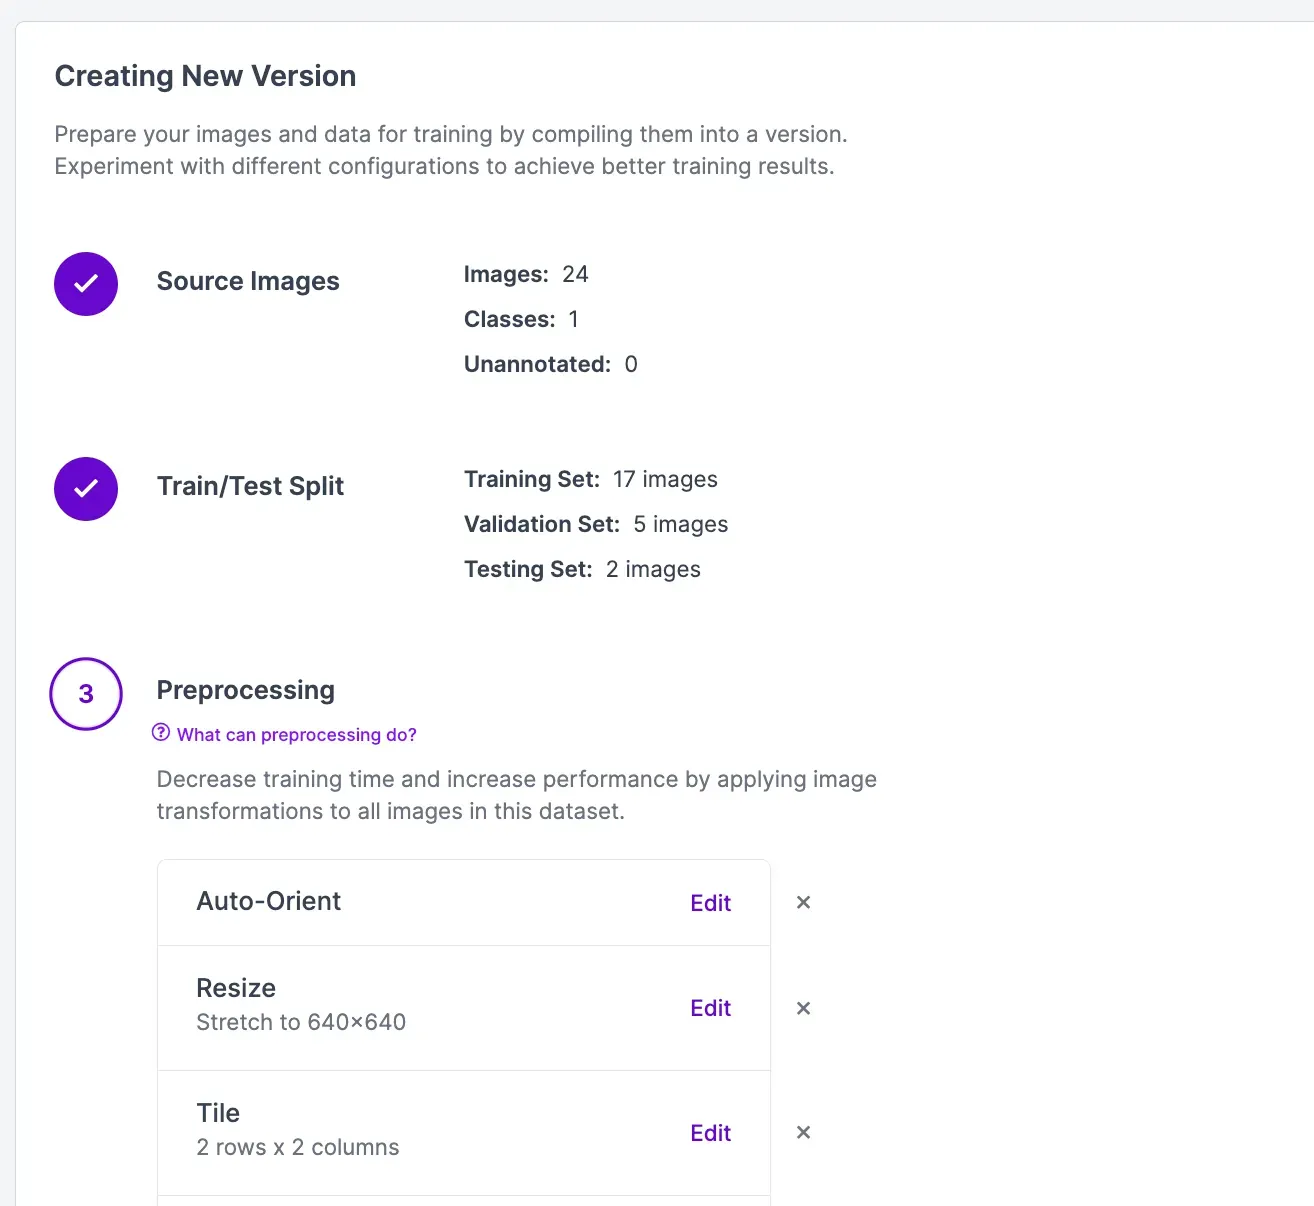
To generate a dataset version, click the “Generate” link in the left sidebar.
For this project, add a "Tile" preprocessing step.
Also, apply a 90 degree rotate augmentation. This augmentation will generate new images for use in training by rotating a selection of existing images in our dataset. These new images, used in combination with our already-labeled images, will give our model more information from which to learn.
Click “Generate” at the bottom of the page to generate a dataset version. It will take a few moments for your dataset to be ready for use in training a model.
Step #5: Train a Coffee Bean Inspection Model
With your dataset labeled and a dataset generated, you are ready to train your coffee bean inspection model. To do so, click the “Train with Roboflow” button on your dataset page.
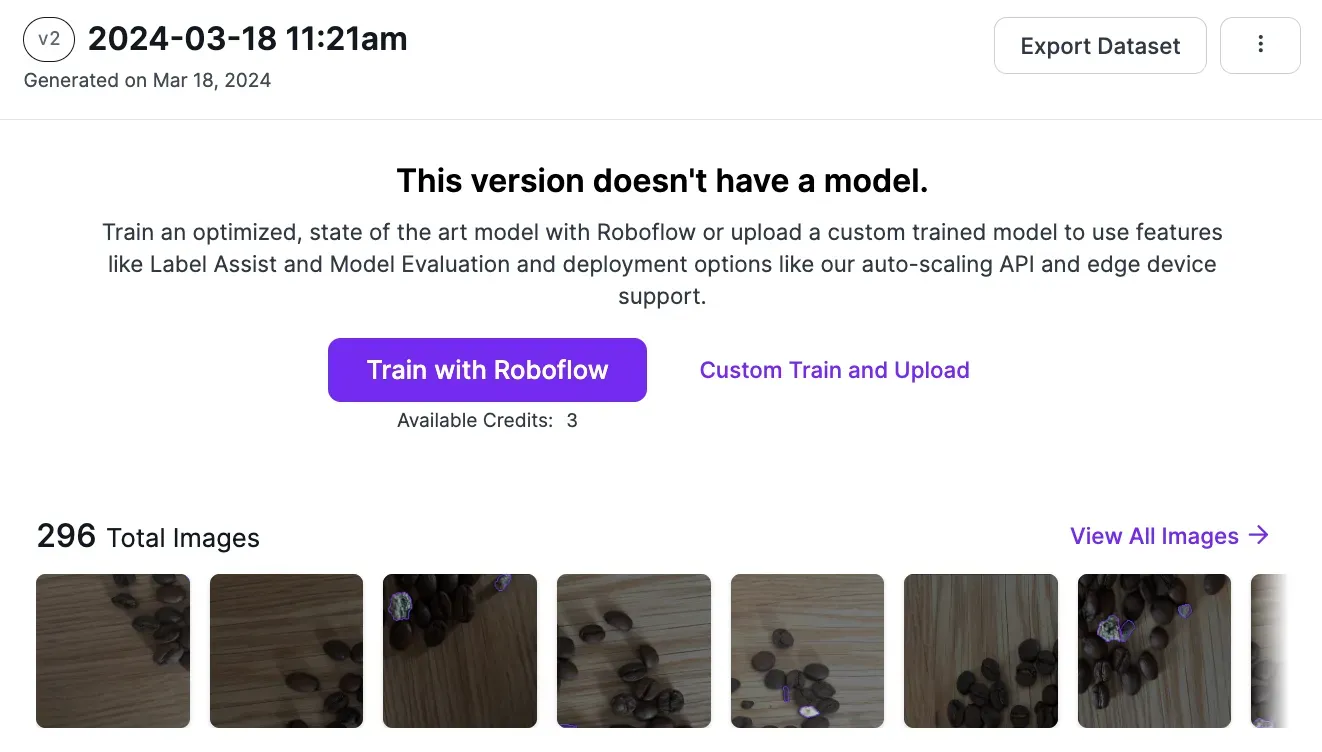
A pop up will appear with options from which you can choose to configure your training job. Select “Fast” training. Then, make sure you train from the existing MS COCO checkpoint.
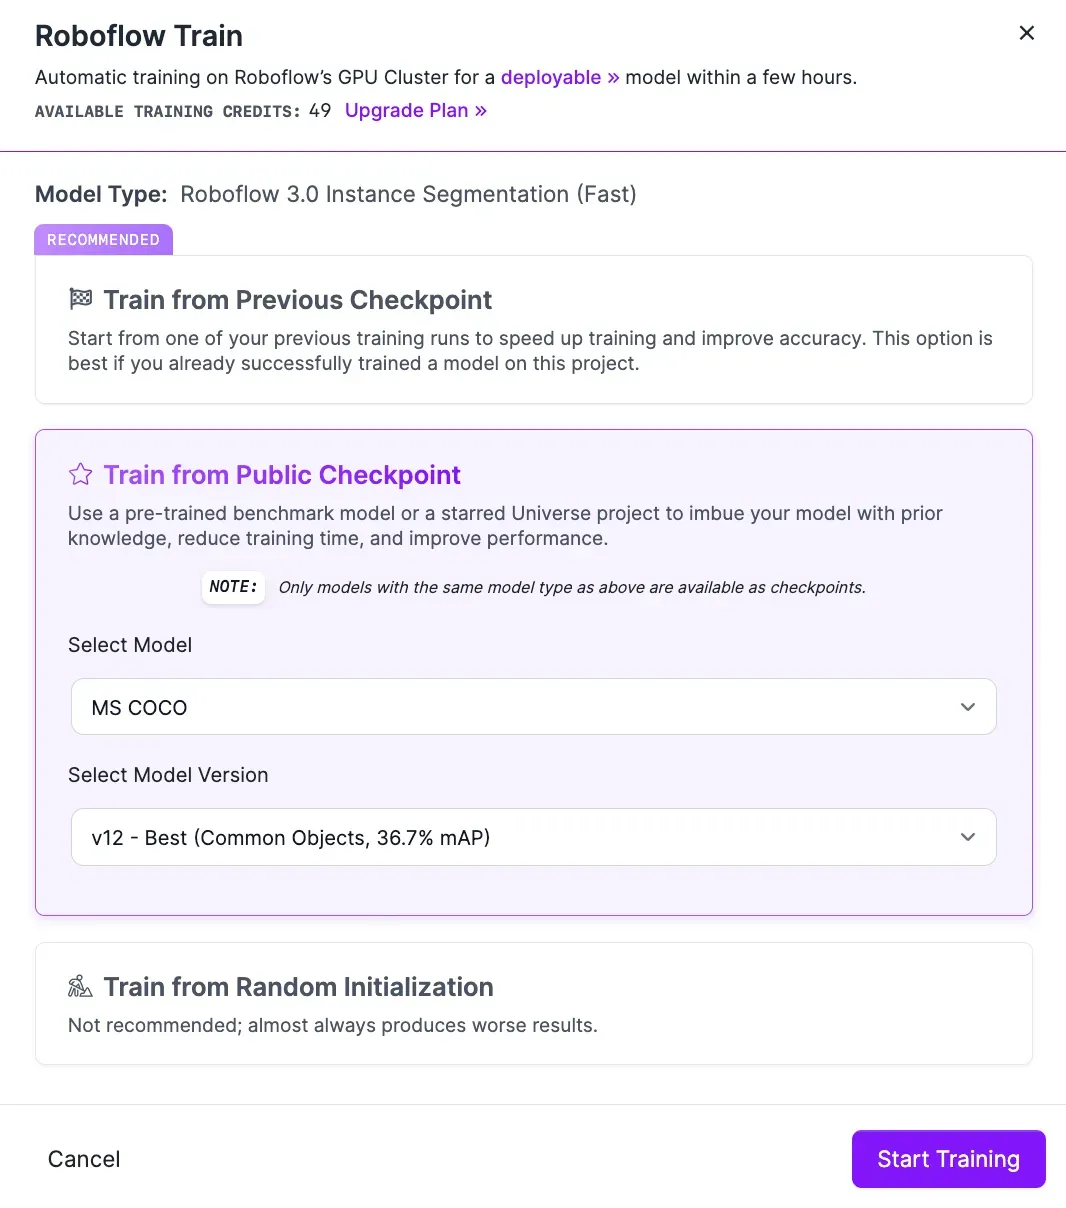
We always recommend training from this checkpoint for your first model version. In future versions, you can train from previous versions of your model to refine model performance. You should only use a previous model version as a checkpoint if your model is already performing well, otherwise you will be training from a suboptimal checkpoint. This will negatively impact model performance.
Once you have completed the fields in the pop up, your training job will be allocated to a server. You will receive an estimate that shows how long we think it will take to train your model.
You can view the live performance of your training job from your dataset page:
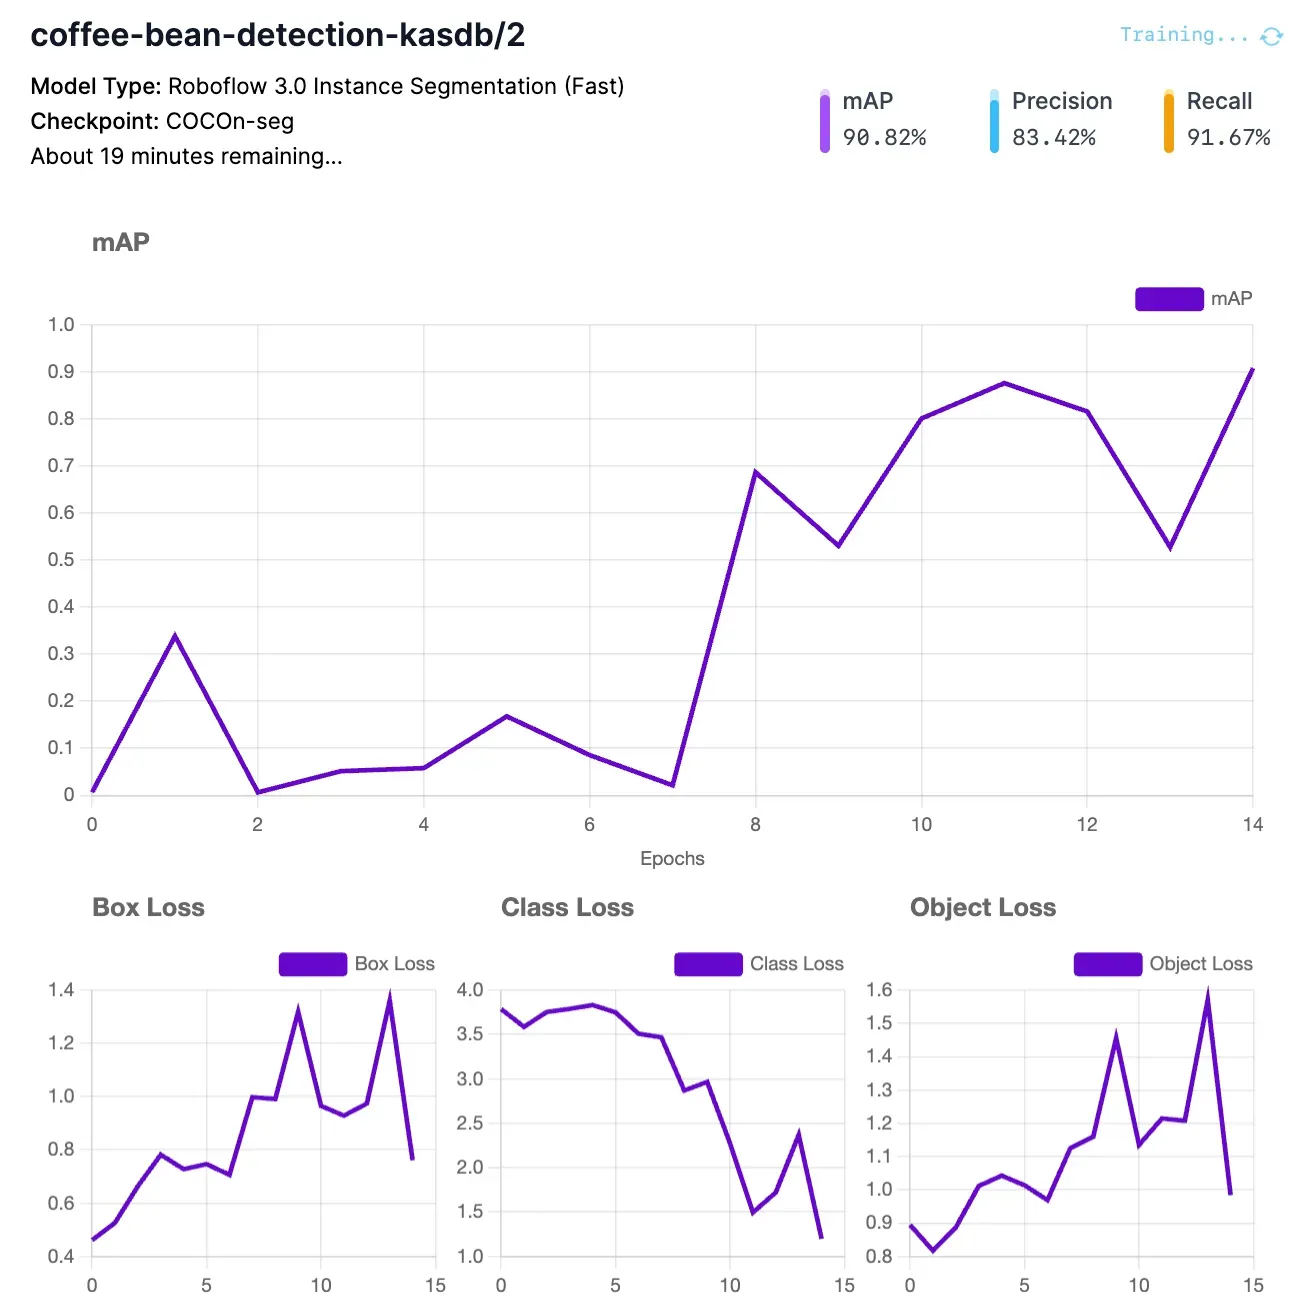
You will receive an email once your model is ready for use.
When your model has been trained, you can test it from the “Visualize” tab, accessible from the sidebar of your project page. Here is an example of our model running on an image:
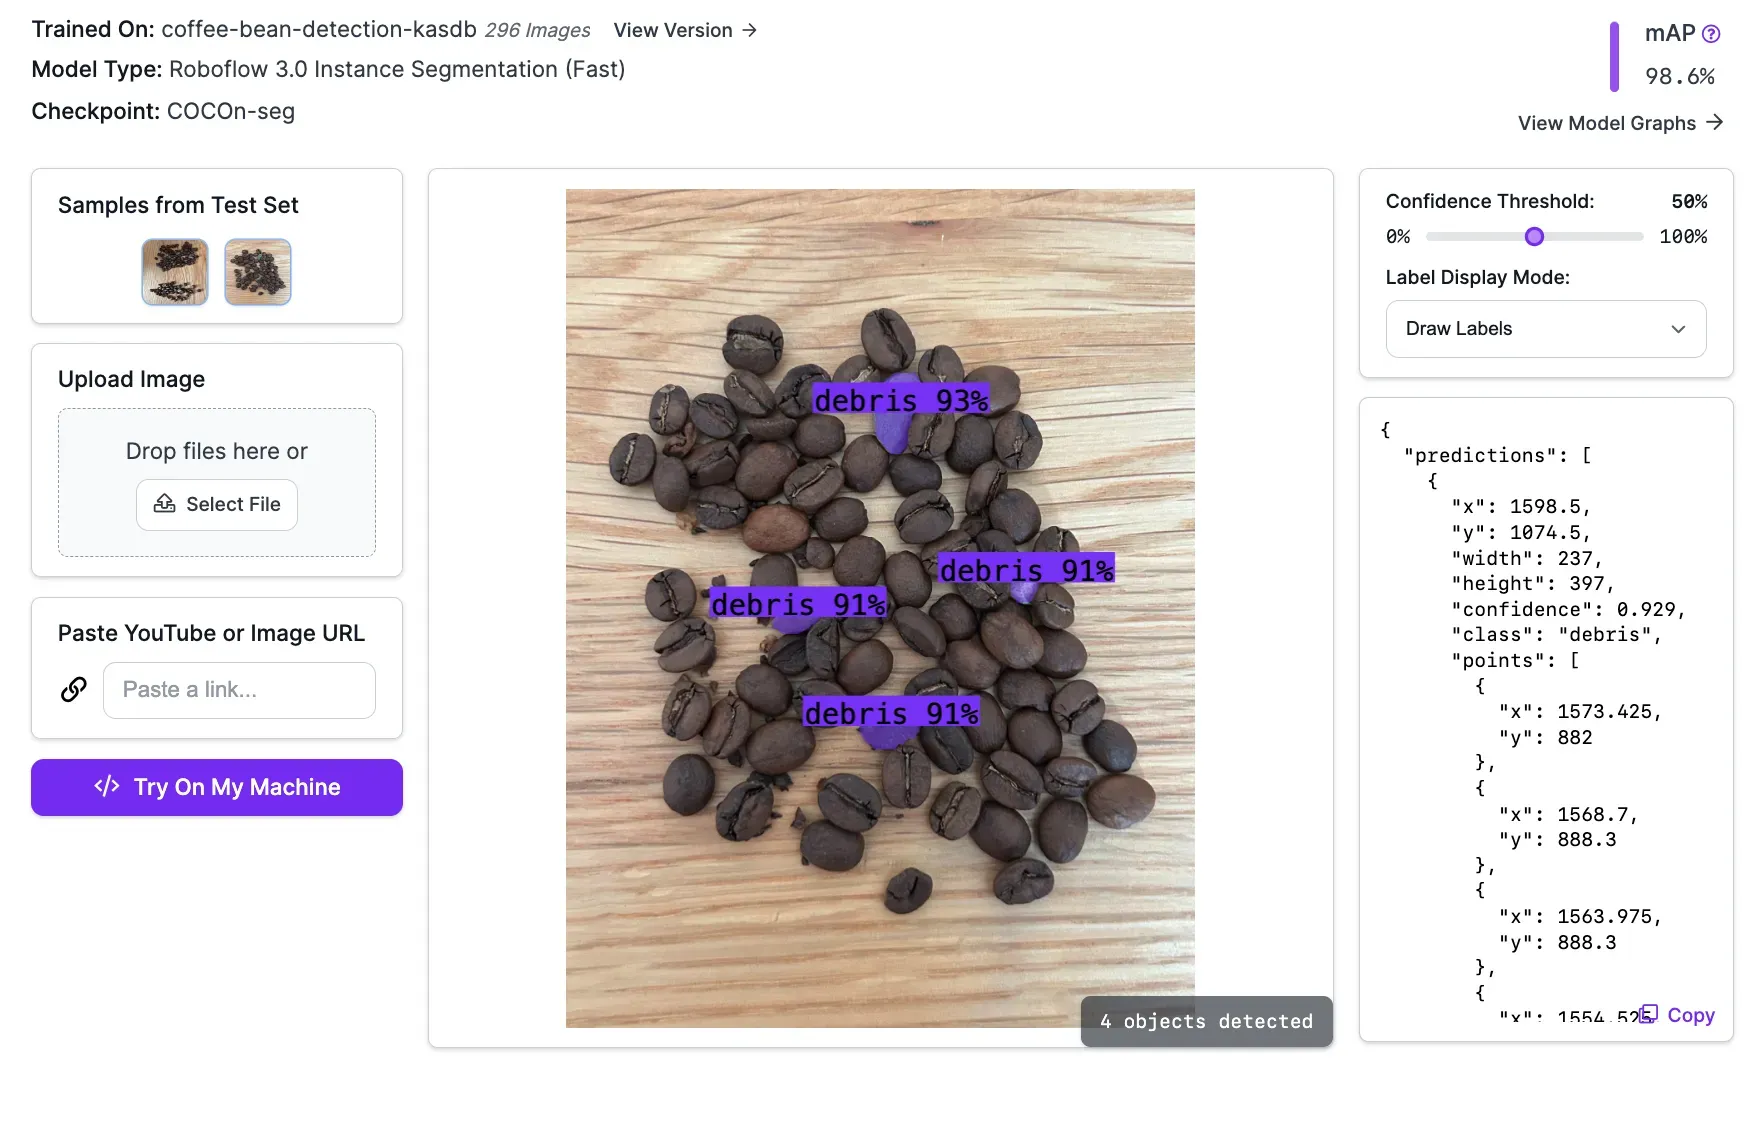
Our model successfully identified the presence of a stone in the image.
Step #6: Deploy the Coffee Bean Inspection Model
You can deploy your coffee bean inspection model on your own hardware with Roboflow Inference. Inference is an open source application that you can use to run computer vision models. For example, you can deploy your inspection system to an NVIDIA Jetson connected to a webcam that looks over your assembly line, with Inference running the model on your device.
To deploy your model, first install Inference:
pip install inferenceNext, install supervision, a Python package with utilities you can use to work with vision model predictions:
pip install supervisionNext, export your Roboflow API key into an environment variable called ROBOFLOW_API_KEY:
export ROBOFLOW_API_KEY="key"Learn how to retrieve your Roboflow API key.
Finally, create a new Python file and add the following code:
from inference import get_roboflow_model
import supervision as sv
import cv2

image = cv2.imread("image.jpg")

model = get_roboflow_model(model_id="coffee-bean-inspection/2")

result = model.infer(image)[0]
detections = sv.Detections.from_inference(result)

bounding_box_annotator = sv.BoundingBoxAnnotator()
label_annotator = sv.LabelAnnotator()

annotated_image = bounding_box_annotator.annotate(
    scene=image, detections=detections)
annotated_image = label_annotator.annotate(
    scene=annotated_image, detections=detections)

sv.plot_image(annotated_image)
Above, replace coffee-bean-inspection/1 with your Roboflow model ID. Learn how to retrieve your model ID.
When you first run the script above, the weights for your model will be downloaded. This will take a few moments. Then, the model will run on the output of your default system camera. You can change the video source from 0 to a different number if you have multiple webcams (i.e. 1 for your second camera). You can also provide an RTSP stream instead of a webcam source.
The model will run on output from your camera.
When a stone comes into view, our model identifies it. This stone could then be removed either by a human (ideal for individual roasteries) or using an automated system (ideal for larger roasteries with an automated assembly line process).
Conclusion
You can use computer vision to inspect coffee beans. In this guide, we developed a system that identifies the presence of stones in bags of coffee beans.
To build this system, we collected images of coffee beans, including images where stones were among the coffee beans. We uploaded the data to Roboflow, labeled all the stones, then trained a model. We then deployed the model to our own hardware using an open source tool, Roboflow Inference.
The guide above can be expanded to identify different instances of defects. For example, you could identify quaker beans by labeling quakers in the images you use to train your model.
Do you need assistance building a coffee bean inspection system? Contact the Roboflow sales team. Our sales team are experts in architecting computer vision systems for use in manufacturing processes. Our sales team can advise on how best to integrate computer vision into your workflow.
Cite this Post
Use the following entry to cite this post in your research:
James Gallagher. (Mar 18, 2024). Coffee Bean Inspection with Computer Vision. Roboflow Blog: https://blog.roboflow.com/coffee-bean-inspection-with-computer-vision/
