
This guide covers training a YOLOv7 instance segmentation model on a custom dataset sourced from Roboflow Universe, then uploading the resulting weights to Roboflow to create a hosted inference API. The walkthrough uses a windows segmentation dataset as the worked example, covers the dataset version and export steps inside Roboflow, and shows how to query the deployed model via the Roboflow Inference server. Commercial use of YOLOv7 weights through Roboflow Inference requires a Roboflow Enterprise license, which also grants access to device management and auto-batch inference features.
Earlier this year, we announced that you can upload your own YOLOv5 and YOLOv8 model weights to Roboflow, enabling you to train custom models in your own environment and then deploy them with Roboflow. From today, we are expanding support for this feature to include YOLOv7 instance segmentation weights.
By hosting your YOLOv7 instance segmentation weights on Roboflow, you can eliminate the hassle associated with deploying your model to the edge and use your model to automate annotating images in your datasets.
When you upload your weights to Roboflow, we create a secure, infinitely scalable API through which you can interact with your model.
In this guide, we’re going to show how to deploy YOLOv7 instance segmentation models with Roboflow. Without further ado, let’s get started!
Create or Upload a Dataset
In this guide, we’re going to train a custom instance segmentation model to identify the location of buildings in aerial imagery. Before we begin, you’ll need to create a free Roboflow account.
With your account in place, you’re ready to start gathering data for your project. In this guide, we’ll gather data from Roboflow Universe, a repository of over 110,000 open-source datasets for computer vision projects. If you don’t already have an instance segmentation dataset for your project, feel free to explore Universe to see if you can find data that meets your needs.
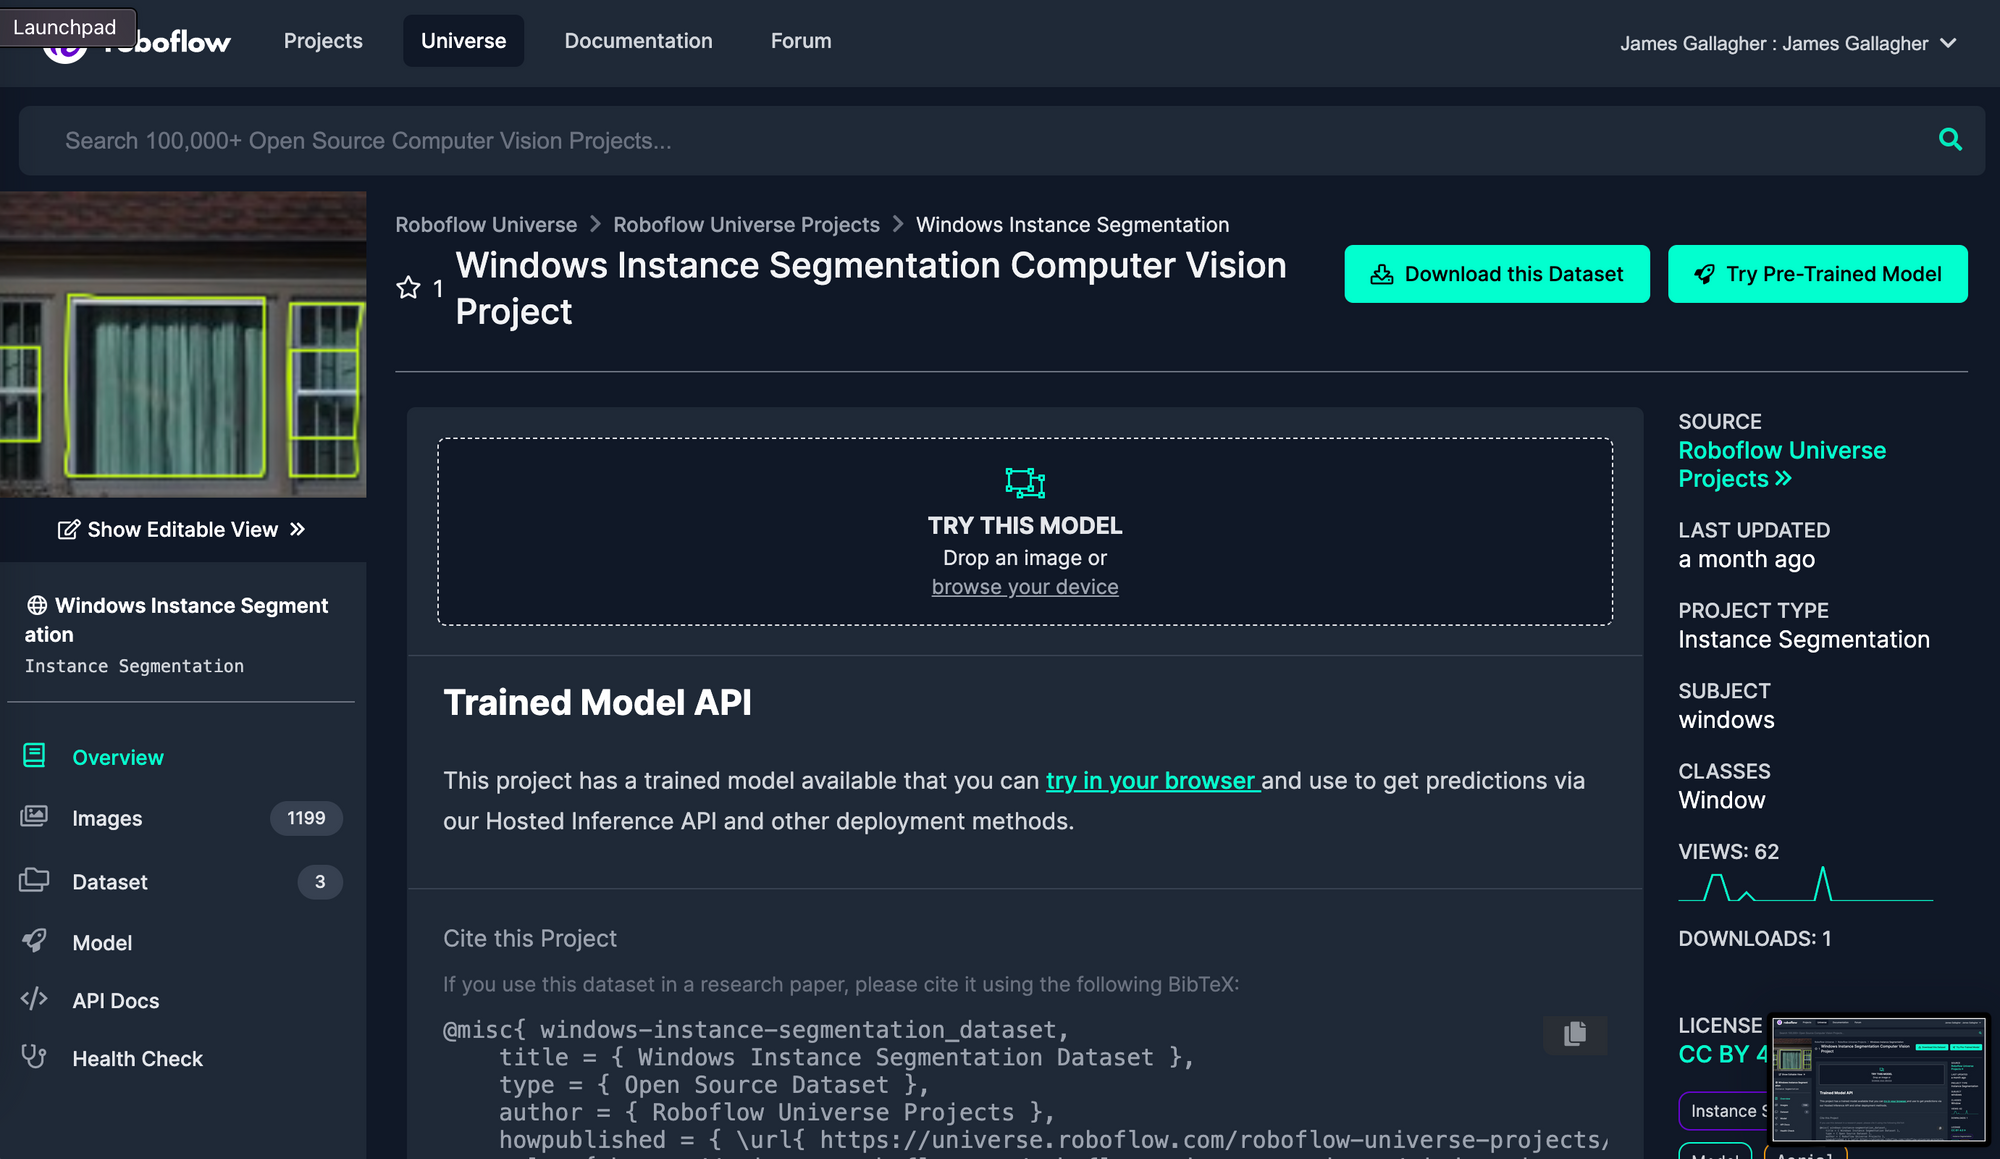
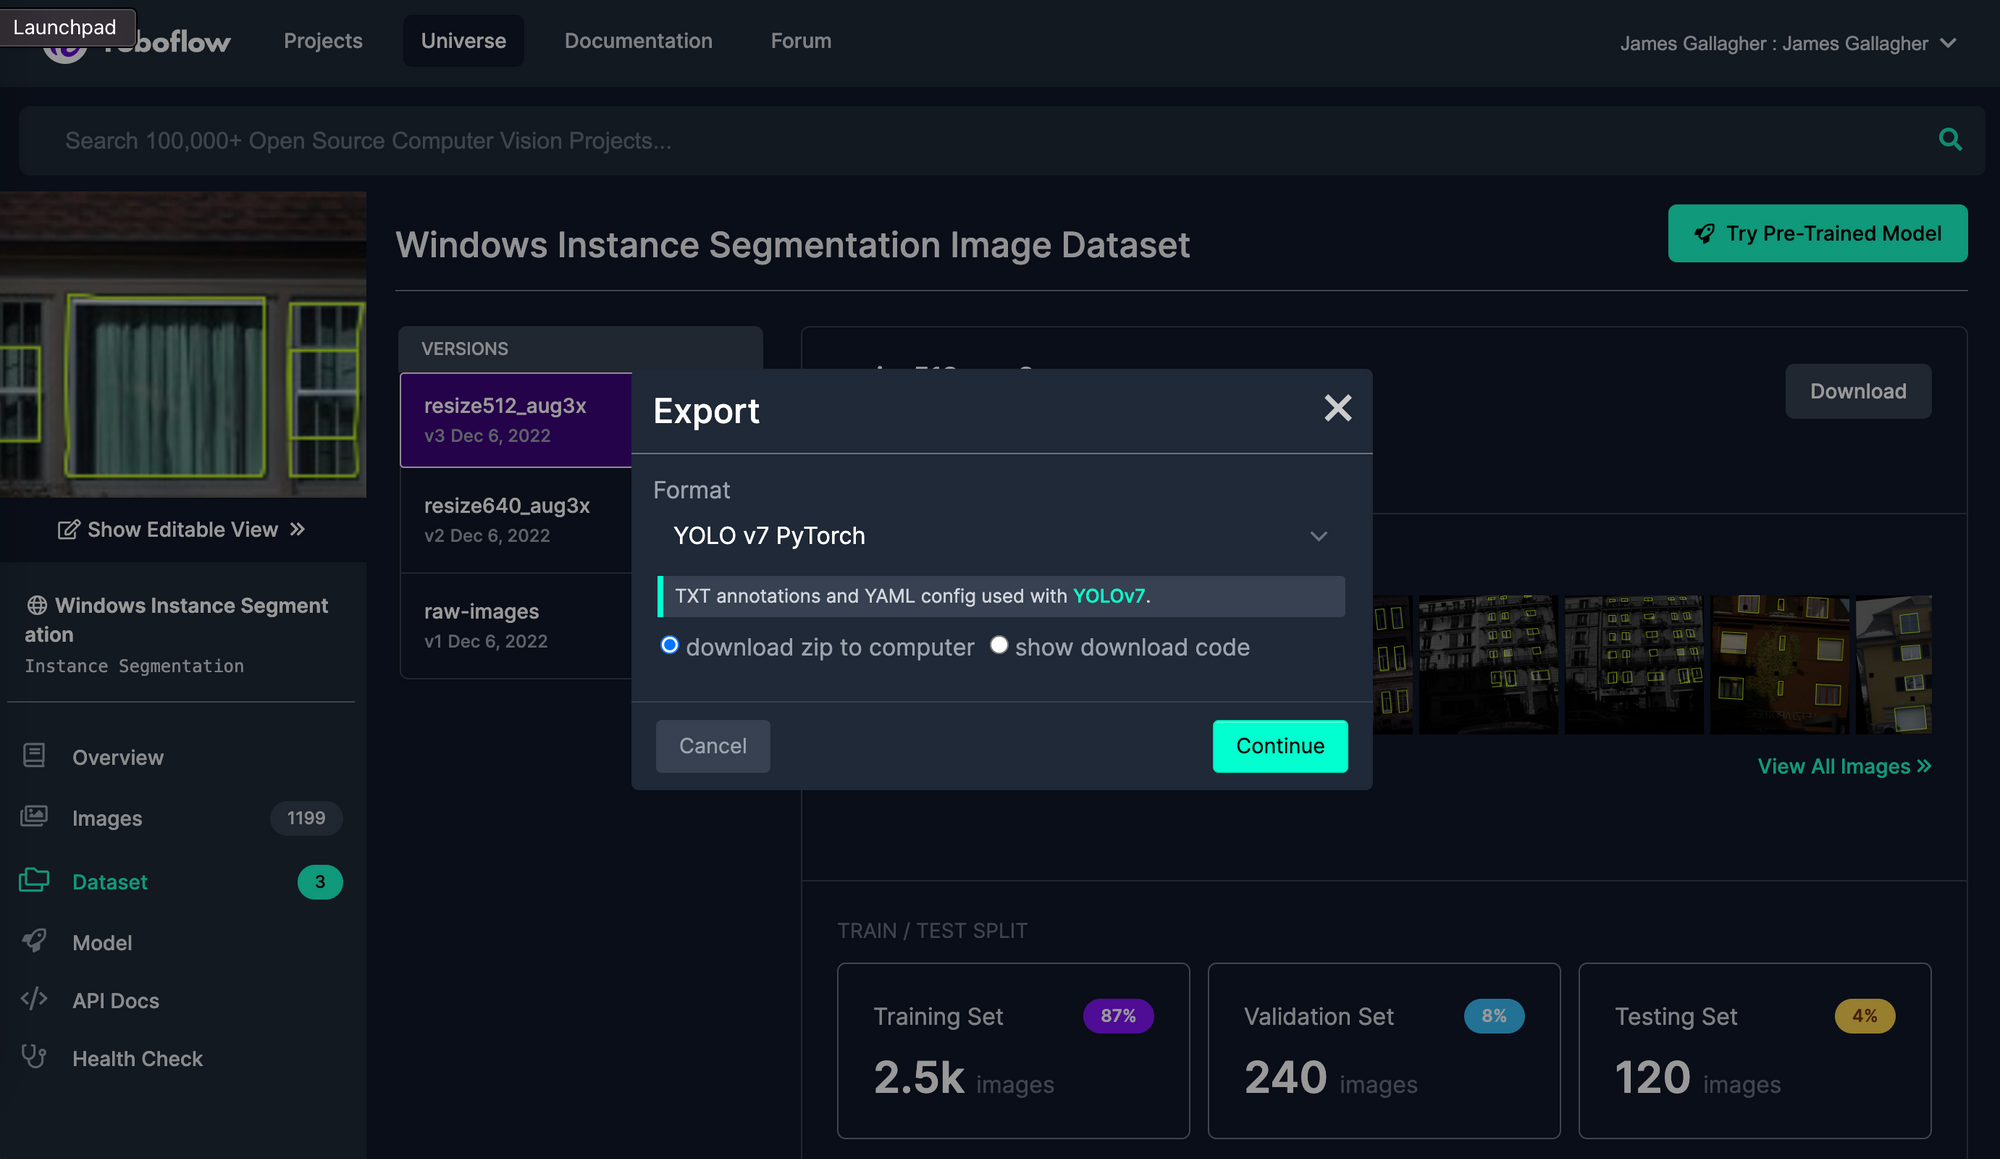
The dataset with which we will be working is called “Windows Instance Segmentation”. To download the dataset for use in training our model, click “Download this Dataset” and export the data in the YOLOv7 PyTorch Format. Select “download ZIP to computer” when exporting your data.
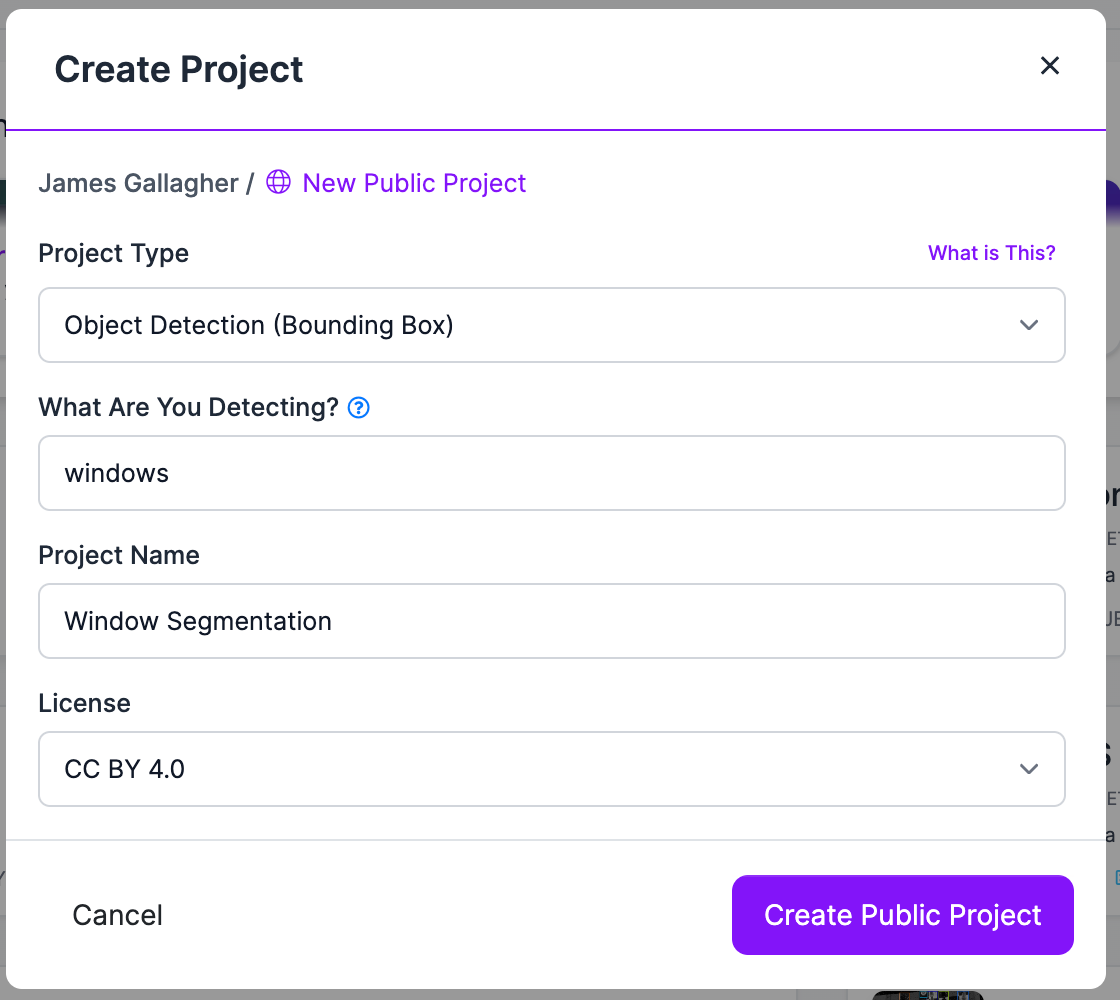
Next, we need to create a Project in Roboflow and upload our dataset. Later in this guide, we’ll upload the model weights we train in a Colab notebook to our Project.
To create a project, go to the Roboflow dashboard and click the “Create New Project” button. Fill in the details for your project in the dialog box that pops up:
Next, unzip the file that you downloaded from Roboflow Universe (if you downloaded data from Universe) and upload all of your data into the platform. If your data is not already annotated, you can add annotations using the Roboflow Annotate tool.
With the data uploaded, we can approve its inclusion in our dataset. Follow the instructions provided to you in the dashboard to approve your annotations.
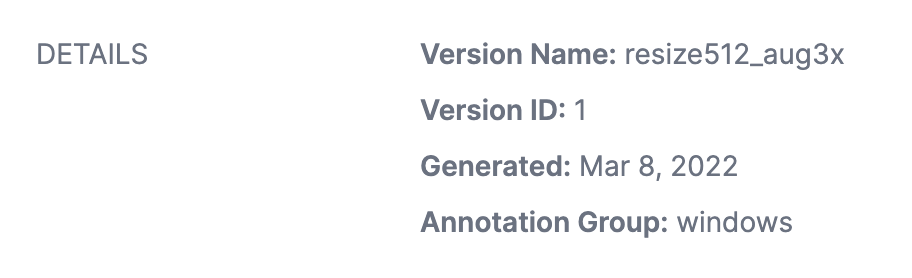
Then, click “Versions” in the dashboard sidebar. Here, we will create a new version of our dataset on which we’ll train our model. A version is a snapshot of our dataset frozen in time. We’ll associate our model weights with this version when we train our model.
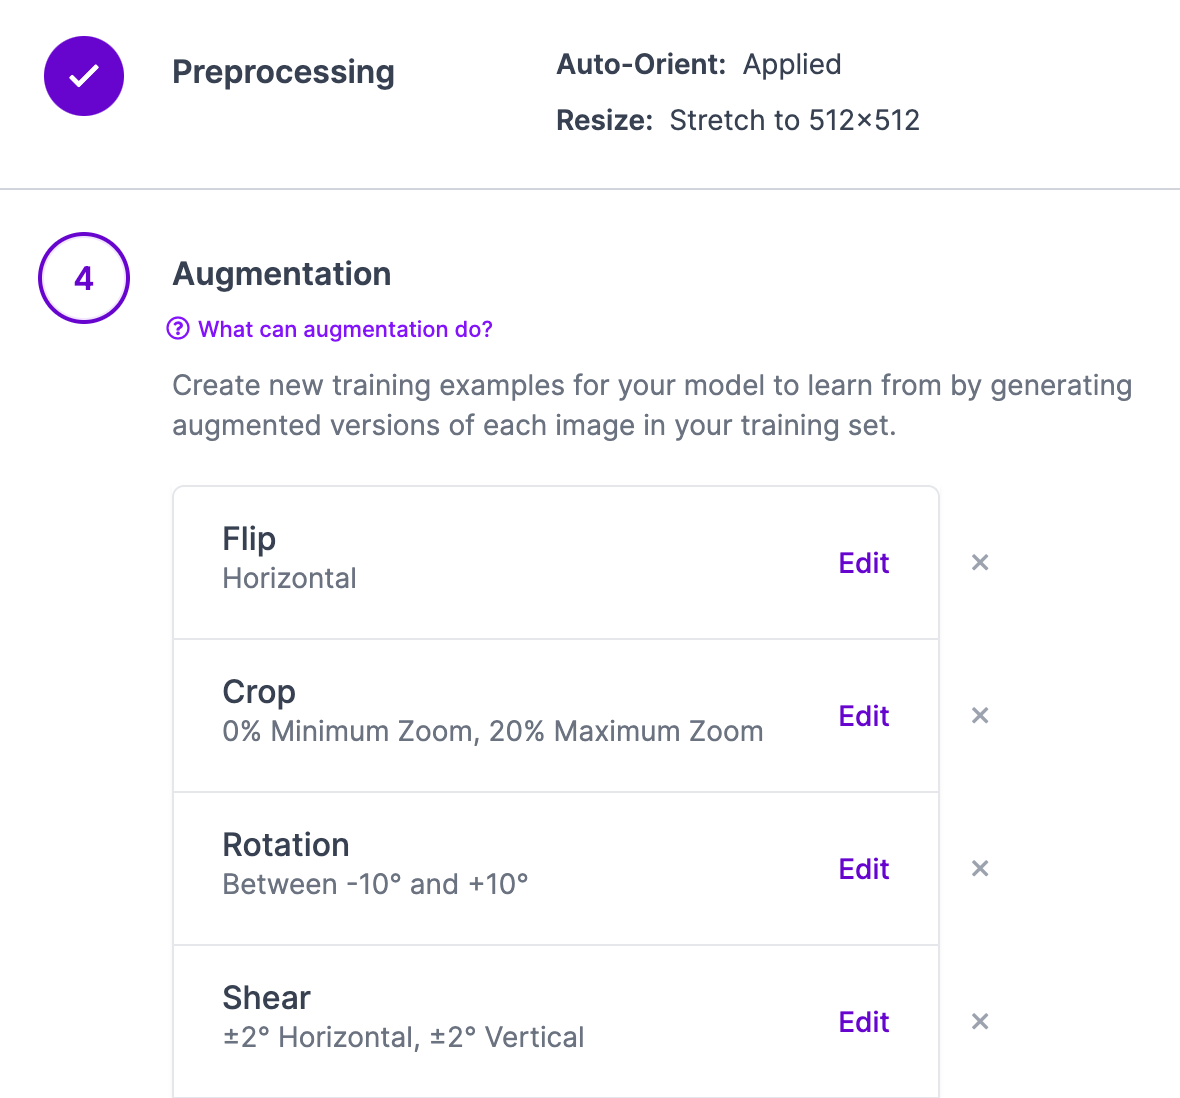
At this stage, you can choose to apply pre-processing and data augmentation steps to your data. Using our guide to pre-processing and data augmentation, you can learn best practices that will help you maximize performance of your computer vision model.
For this example, we’ll skip adding more augmentations because our downloaded dataset already contains augmented images.
Once you are ready, click “Generate” at the bottom of the page. This will create a new version of your dataset that we can download into a notebook and use to generate a model. This may take a few moments, depending on how many images you have uploaded and chosen to generate.
With a generated version of our dataset, we can now begin training our model.
Train a YOLOv7 Instance Segmentation Model
To export your generated dataset for use in a Colab notebook or another environment, click on the dropdown in the “Custom Train & Deploy” tab. Select “YOLOv7 Instance Segmentation” from the available options, then click “Get Snippet”. This will give you code that you can use to download your dataset with the chosen augmentations and pre-processing steps applied:
from roboflow import Roboflow

rf = Roboflow(api_key="API_KEY")
project = rf.workspace("WORKSPACE_ID").project("PROJECT_ID")
dataset = project.version(VERSION_NUMBER).download("coco")
The Roboflow team has prepared a notebook for training a YOLOv7 instance segmentation model, available for use in Google Colab, Kaggle, and AWS SageMaker Studio Labs. You can view this notebook in the Roboflow Notebooks GitHub repository.
We have a YouTube guide that walks through how to use the notebook to train a YOLOv7 instance segmentation model, as well as an accompanying blog post.
When you have your model weights ready for use in your model, you can upload them using the following line of code:
project.version(DATASET_VERSION).deploy(model_type="yolov7-instance-seg", model_path=f"{HOME}/runs/detect/train/")If you are not using the aforementioned Notebook, use this long-form snippet:
from roboflow import Roboflow

rf = Roboflow(api_key="API_KEY")
project = rf.workspace().project("PROJECT_ID")
project.version(DATASET_VERSION).deploy(model_type="yolov7-instance-seg", model_path=f"{HOME}/runs/detect/train/")
You can retrieve your API key from the Roboflow dashboard and your project ID and dataset version number from the Versions tab on the dashboard:
When you run this code, your model weights will be uploaded to the Roboflow dashboard. This may take some time.
After a few moments, go back to the Versions tab. You should see a green checkmark next to your model version indicating that your weights have been uploaded successfully. A label will appear on the page that shows your weights were uploaded manually.
Try Out the Model
With your weights hosted on Roboflow, you have many deployment options at your disposal. Within the dashboard, you can run inference on your model by:
- Uploading an image or video;
- Choosing an image from your test set;
- Providing the URL of a YouTube video or image;
- Using your webcam.
Click "Deploy" in the sidebar of your project page to view deployment options.
Here’s an example of running our model on an image from our test set:
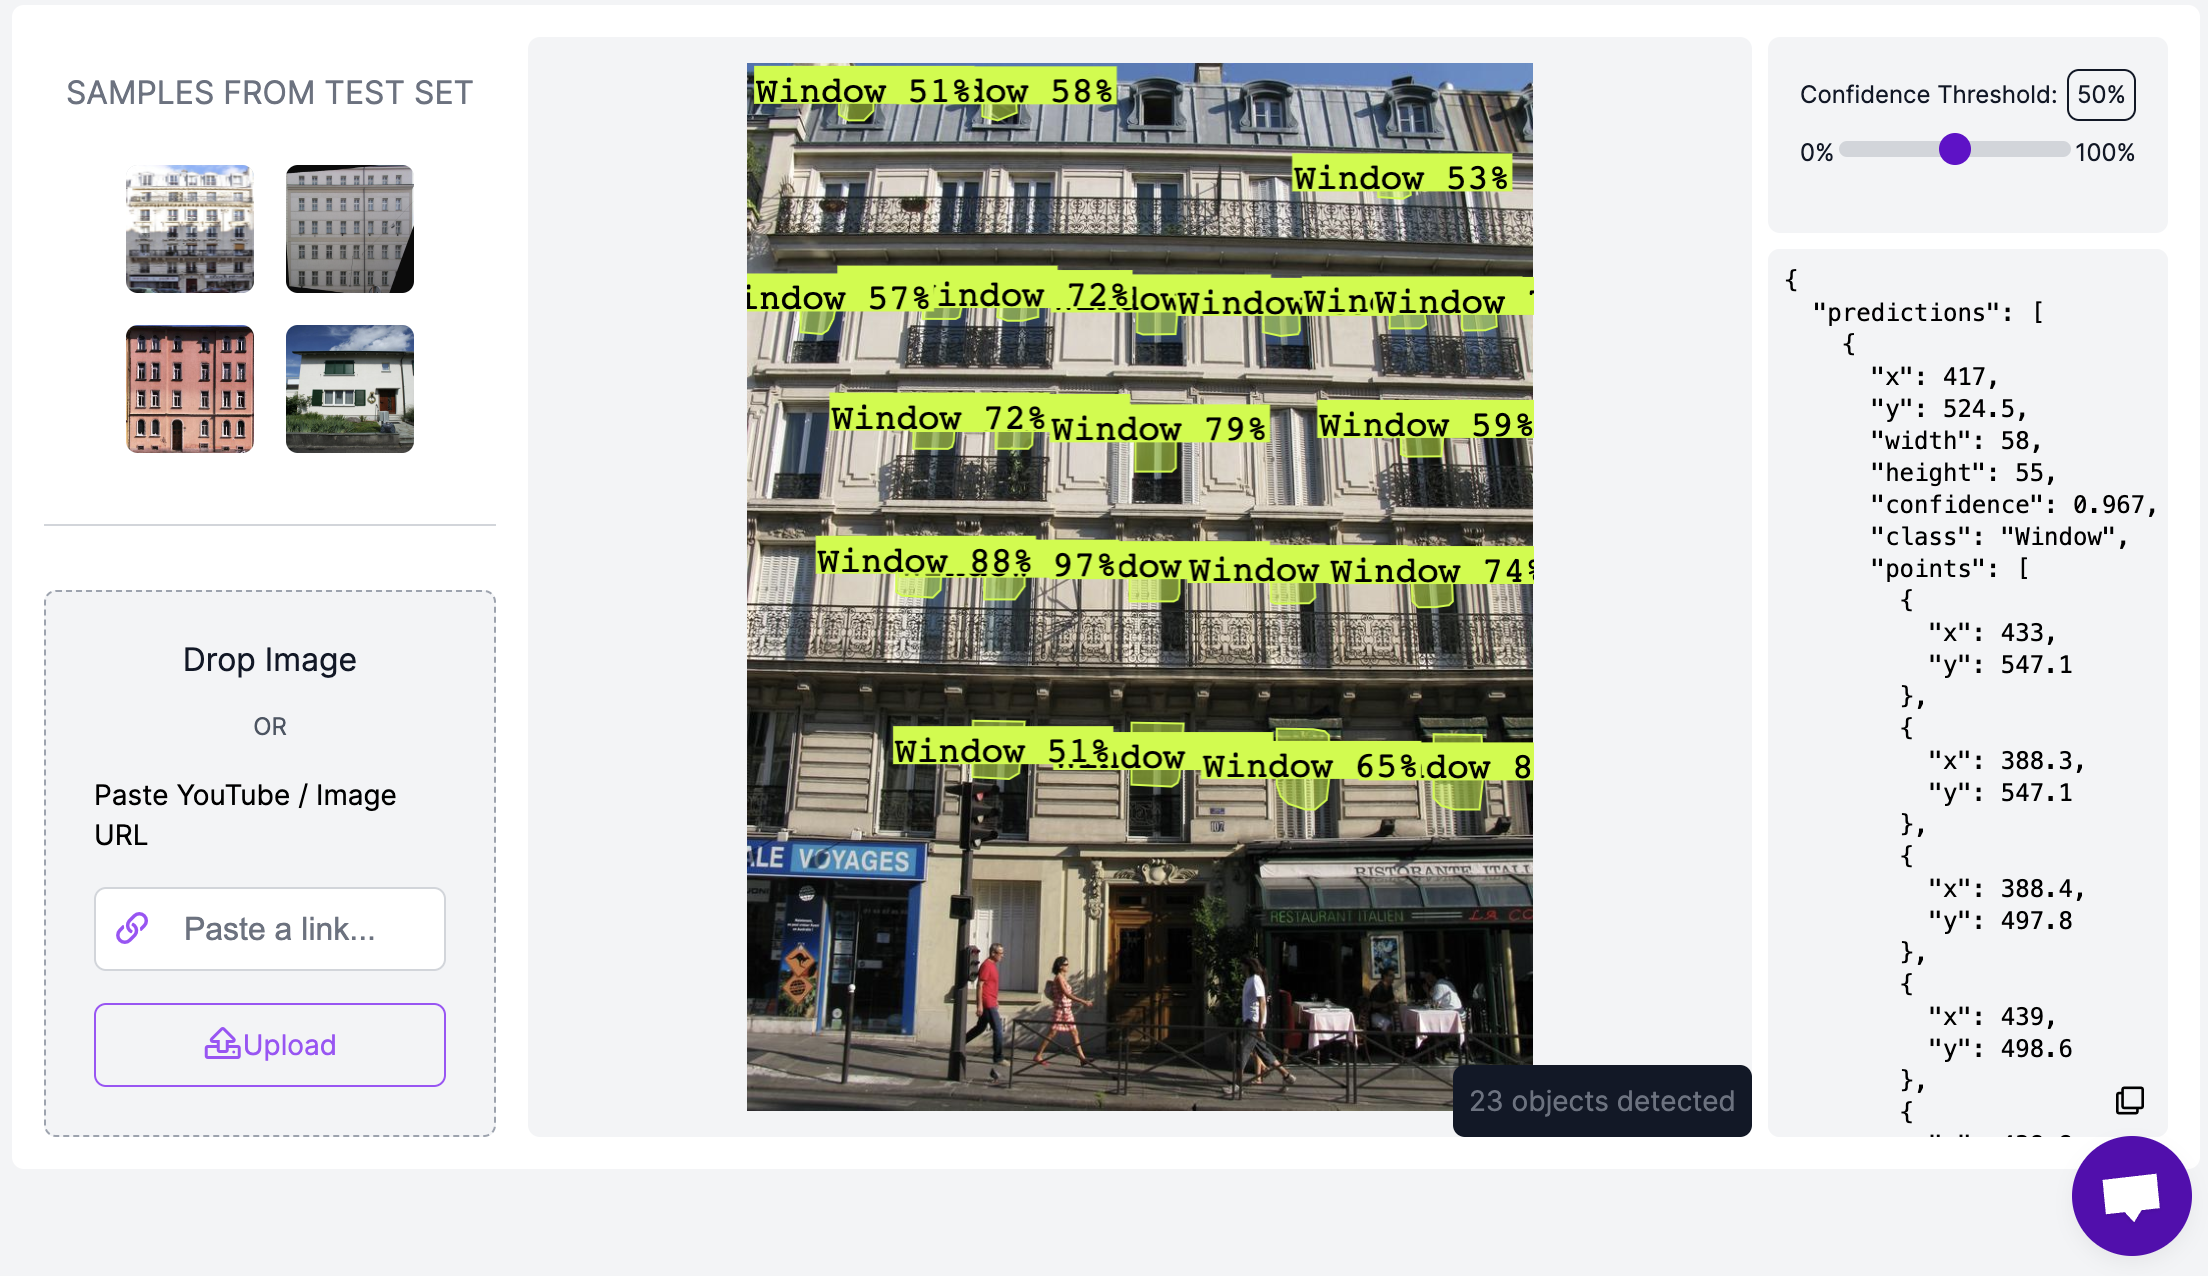
Our model is working as expected! From here, you are ready to think about deploying your model. Check out our documentation on our instance segmentation hosted API for information on how to query the API associated with your project.
You can also use your model to automate the labeling of data to be added to future datasets. Your model enables you to use Label-Assist in the Roboflow Annotate UI or the Annotate API for automatically labeling large datasets.
Deploy Your Model to the Edge
In addition to using the Roboflow hosted API for deployment, you can use Roboflow Inference, an open source inference solution that has powered millions of API calls in production environments. Inference works with CPU and GPU, giving you immediate access to a range of devices, from the NVIDIA Jetson to TRT-compatible devices to ARM CPU devices.
With Roboflow Inference, you can self-host and deploy your model on-device.
You can deploy applications using the Inference Docker containers or the pip package. In this guide, we are going to use the Inference Docker deployment solution. First, install Docker on your device. Then, review the Inference documentation to find the Docker container for your device.
For this guide, we'll use the GPU Docker container:
docker pull roboflow/roboflow-inference-server-gpuThis command will download the Docker container and start the inference server. This server is available at http://localhost:9001. To run inference, we can use the following Python code:
import requests

workspace_id = ""
model_id = ""
image_url = ""
confidence = 0.75
api_key = ""

infer_payload = {
    "image": {
        "type": "url",
        "value": image_url,
    },
    "confidence": confidence,
    "iou_threshold": iou_thresh,
    "api_key": api_key,
}
res = requests.post(
    f"http://localhost:9001/{workspace_id}/{model_id}",
    json=infer_object_detection_payload,
)

predictions = res.json()
Above, set your Roboflow workspace ID, model ID, and API key.
Also, set the URL of an image on which you want to run inference. This can be a local file.
To use your YOLOv7 model commercially with Inference, you will need a Roboflow Enterprise license, through which you gain a pass-through license for using YOLOv7. An enterprise license also grants you access to features like advanced device management, multi-model containers, auto-batch inference, and more.
To learn more about deploying commercial applications with Roboflow Inference, contact the Roboflow sales team.
Conclusion
In this guide, we have built a YOLOv7 instance segmentation model to identify the location of windows in an image.
We downloaded data from Roboflow Universe for use in our project, created a project version in Roboflow to which we could upload our weights, and trained our model in a notebook. We uploaded our trained weights to the Roboflow platform.
Now you have a hosted cloud API that you can use to run instance segmentation in your next project!
Cite this Post
Use the following entry to cite this post in your research:
James Gallagher. (Mar 30, 2023). Deploy YOLOv7 Instance Segmentation Models with Roboflow. Roboflow Blog: https://blog.roboflow.com/deploy-yolov7-instance-segmentation/