
This tutorial covers training a YOLOv7 instance segmentation model on a custom concrete crack dataset, walking through environment setup, running inference with a pre-trained model, preparing and exporting a segmentation dataset from Roboflow, training on custom data, and evaluating results. The same workflow applies to other instance segmentation tasks where pixel-level object boundaries matter, such as identifying structural damage in buildings or bridges.
YOLO was designed exclusively for object detection. However, it has proven influential in the creation of high-speed image segmentation architectures such as YOLACT.
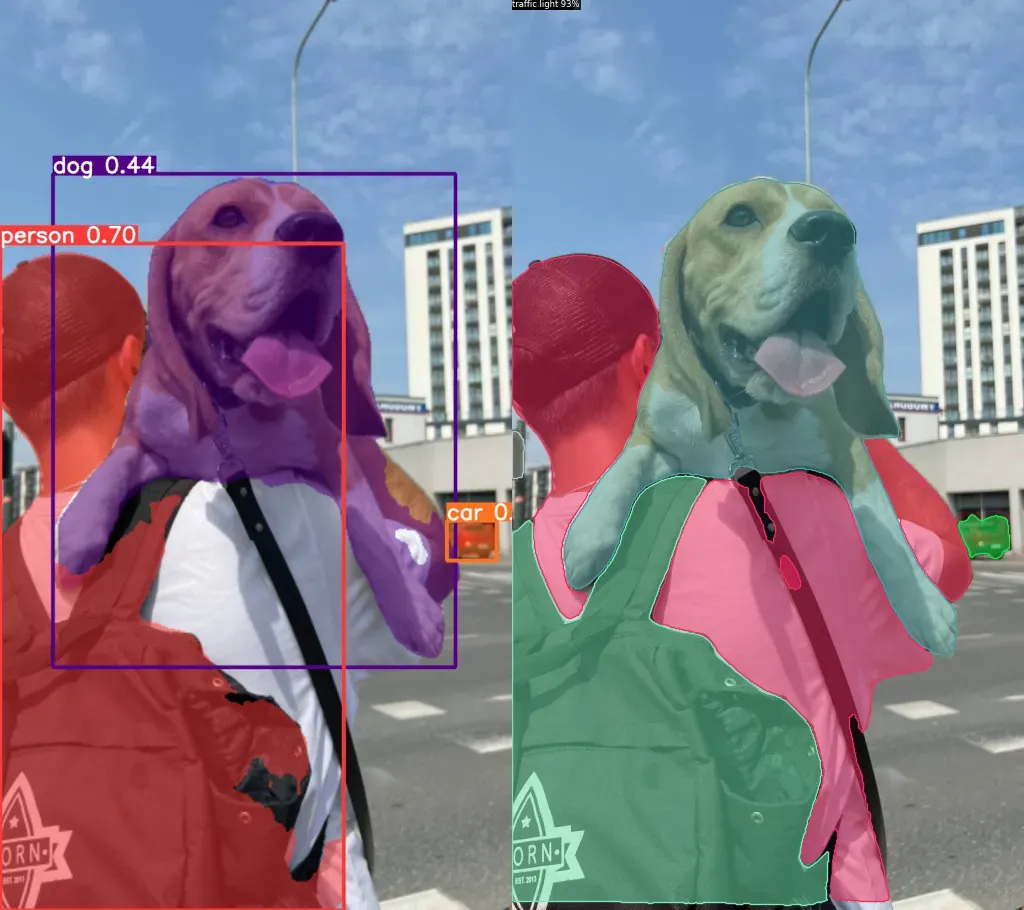
The recently released YOLOv7 model natively supports not only object detection but also image segmentation. Using this technique, you can locate objects in a photo or video with great precision.
This tutorial will show you how to leverage this latest iteration of the YOLO model to perform concrete crack instance segmentation.
In this guide, we will follow these steps to train a YOLOv7 instance segmentation model:
- Set up a Python environment
- Infer with a pre-trained model using the command line
- Prepare a custom dataset for training
- Train a model using our custom dataset
- Test and evaluate the model
Let's begin!
Step 1: Setting up a Python Environment
Before we train our custom model, we must ensure that we can access the GPU. Although CPU training is possible, it is inefficient and time-consuming, especially for instance segmentation as it is more resource-demanding than object detection.
Let’s execute nvidia-smi to confirm that everything works as expected. If this command returns an error, try to enable the GPU acceleration for your environment. This process may vary depending on the platform you are using (i.e. between different hosted notebooks). For Google Colab, you can enable GPU acceleration by clicking Edit → Notebook settings → Hardware accelerator and set it to GPU.
To make it easier to manage the file and script paths later in the tutorial, let's create a HOME constant that will store the location of the root directory.
import os
HOME = os.getcwd()
creating auxiliary HOME constant
Now we are ready to install YOLOv7 and its dependencies. We start by cloning the official repository and then immediately change the git branch from main to u7. Unlike YOLOv5, where all supported computer vision tasks are available in the same codebase, each task on YOLOv7 is stored on a separate branch. Instance segmentation can be found on u7. Where did the descriptive name come from? No clue! That's what I call proper engineering practices.
To ensure no breaking changes are introduced, we check out a specific commit from the instance segmentation branch. It is represented by the long 44f30a... hash in the code snippet below. At this point, the only thing left is to navigate to the seg subdirectory and install all the dependencies listed in requirements.txt.
# clone YOLOv7 repository
cd {HOME}
git clone https://github.com/WongKinYiu/yolov7

# navigate to yolov7 directory and checkout u7 branch
cd {HOME}/yolov7
git checkout 44f30af0daccb1a3baecc5d80eae22948516c579

# navigate to seg directory and install python dependencies
cd {HOME}/yolov7/seg
pip install --upgrade pip
pip install -r requirements.txt
installing YOLOv7 and its dependencies
Step 2: Inferring with a Pre-Trained Model
One of the best ways to test whether the installation of the environment was successful is through test inference. In our case, we will use the YOLOv7 instance segmentation model pre-trained on the COCO dataset. Let's download weights from the GitHub repository first and create WEIGHTS_PATH constant, to store the path to that file.
cd {HOME}/yolov7/seg
wget https://github.com/WongKinYiu/yolov7/releases/download/v0.1/yolov7-seg.pt
Downloading the pre-trained YOLOv7 instance segmentation weights
WEIGHTS_PATH = f"{HOME}/yolov7/seg/yolov7-seg.pt"Defining a WEIGHTS_PATH constant
Now we can use predict.py script to load the model into the memory and perform inference on the selected image or video. The results will be saved in the runs directory.
cd {HOME}/yolov7/seg
python segment/predict.py \
--weights $WEIGHTS_PATH \
--source $IMAGE_PATH \
--name coco
Run inference on a folder of images using the YOLOv7 instance segmentation model
Accuracy vs Speed Trade-off
The trade-off between accuracy and speed is common in Computer Vision and applies to many different types of models, not just those used for instance segmentation. More accurate models tend to be slower, as they require more computations to make predictions. On the other hand, faster models tend to have lower accuracy, as they are making fewer computations and may not be able to capture as much detail.
For example, OneFormer is a model that is known for its high accuracy across all segmentation tasks, but it also requires a larger number of computations, which makes it slower to use. On the other hand, YOLOv7 has a lower accuracy, but it's a lot faster. The trade-off between accuracy and speed can be critical when selecting a model for a particular task. It will determine the balance between the model's performance and the resources required to run it.
If you are looking for a fast and efficient instance segmentation model for a real-time use case YOLOv7 is a great candidate.
Step 3: Preparing a Custom Dataset for Instance Segmentation
I found my dataset by browsing through Roboflow Universe. Lucky guy! I did not need to gather images, label them, and convert annotation formats. If you are working on something truly original you will probably have to start from scratch. Nevertheless, Roboflow makes this process as straightforward as possible.
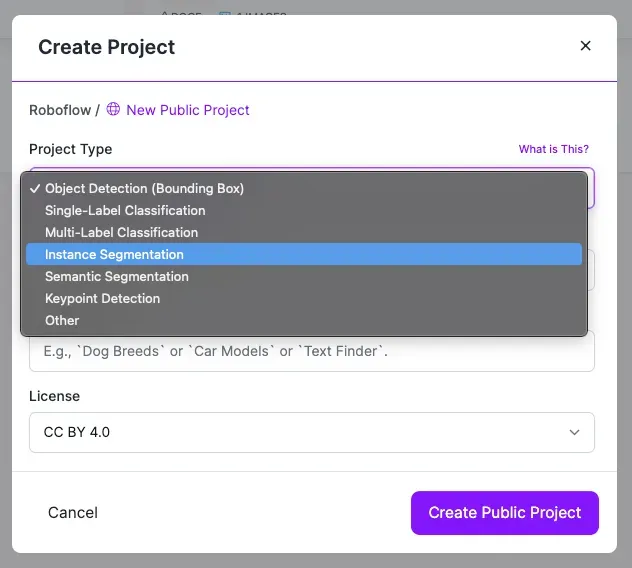
Create Instance Segmentation Dataset
Create a new project in the Roboflow dashboard and select Instance Segmentation as the Project Type.
Next, add the data to your newly created project. You can do it via API or through our web interface. If you're using a dataset from Roboflow Universe as a starting point, you can download the data with the annotations already done for you (assuming the dataset you are using contains annotated images). This is a great option as it minimizes the amount of manual annotation you have to do yourself.

If you drag and drop a directory with a dataset in a supported format, the Roboflow dashboard will automatically read the images and annotations together. If you only have images, you can label them in Roboflow Annotate.
With Auto Label, you can use foundation models like Grounding DINO and Segment Anything to automatically label images in your dataset. Refer to our Auto Label launch post for more information about how Auto Label works, and how you can use it with your project.
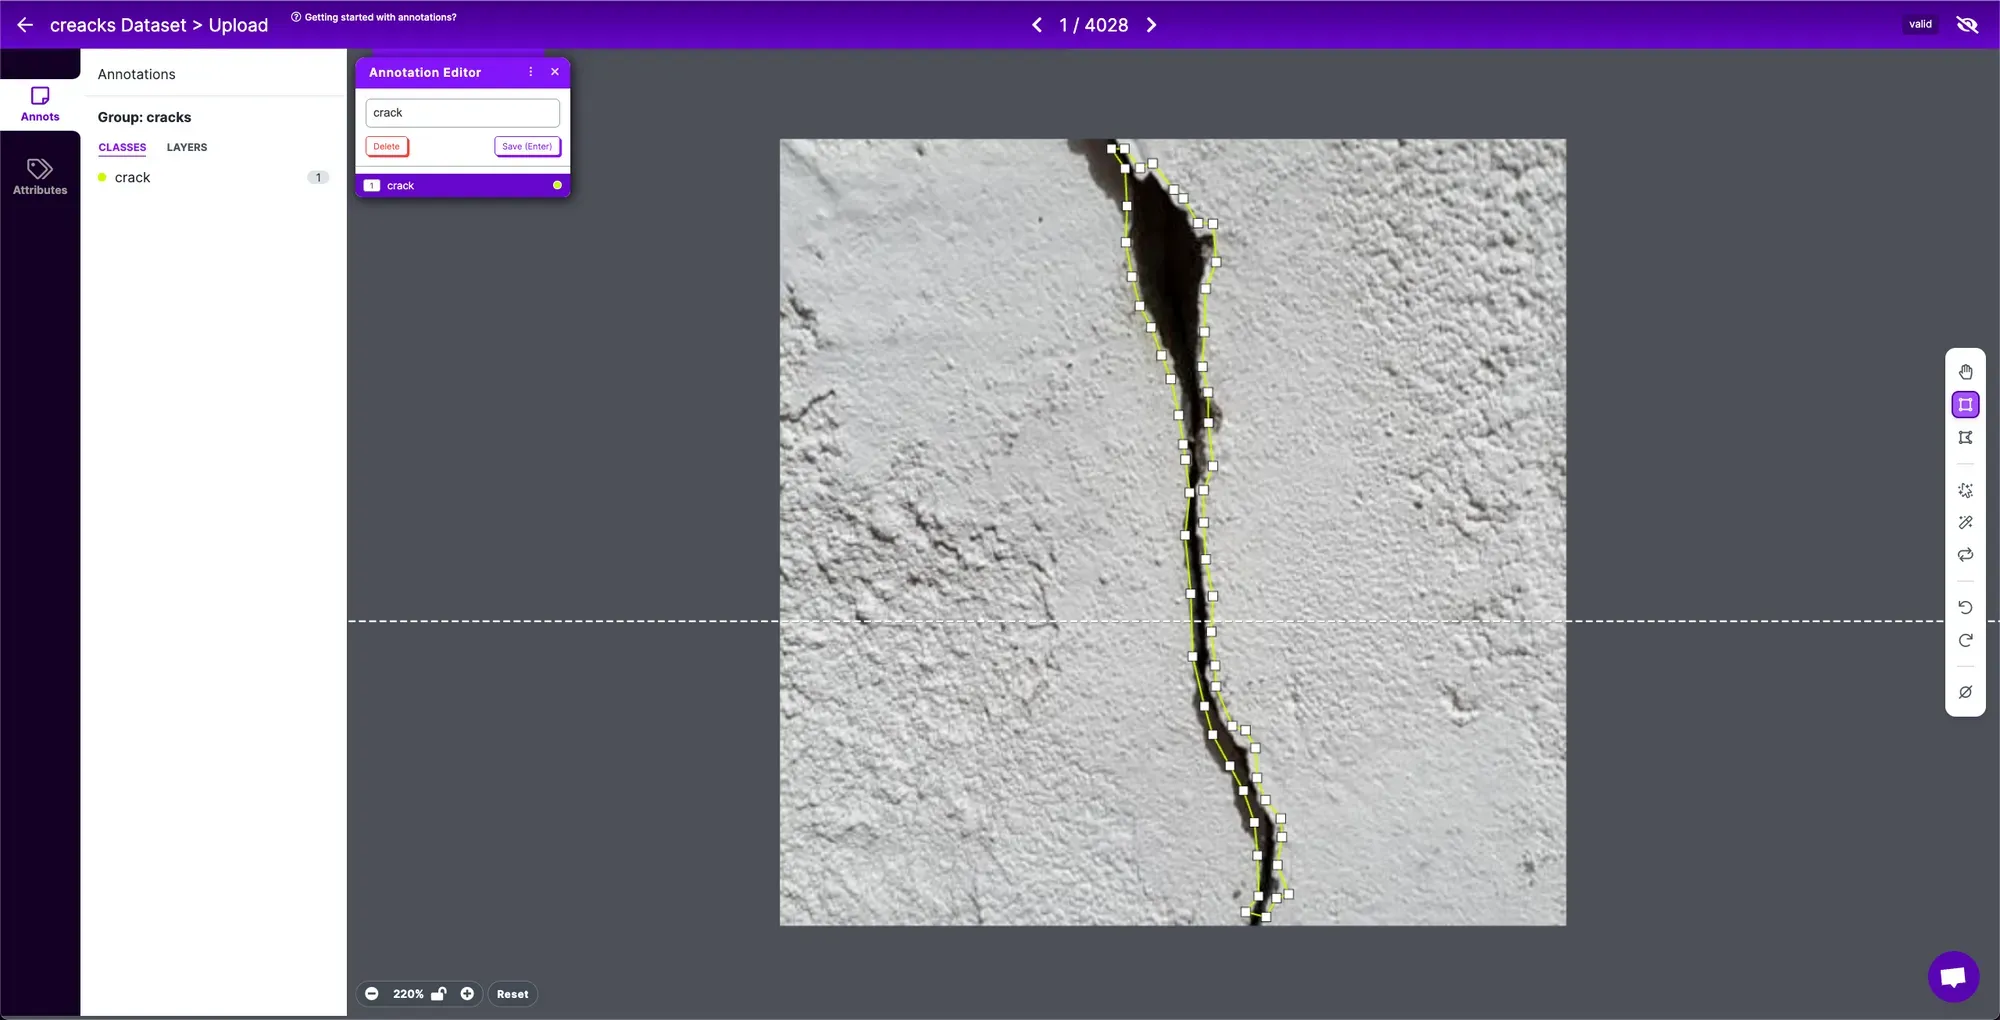
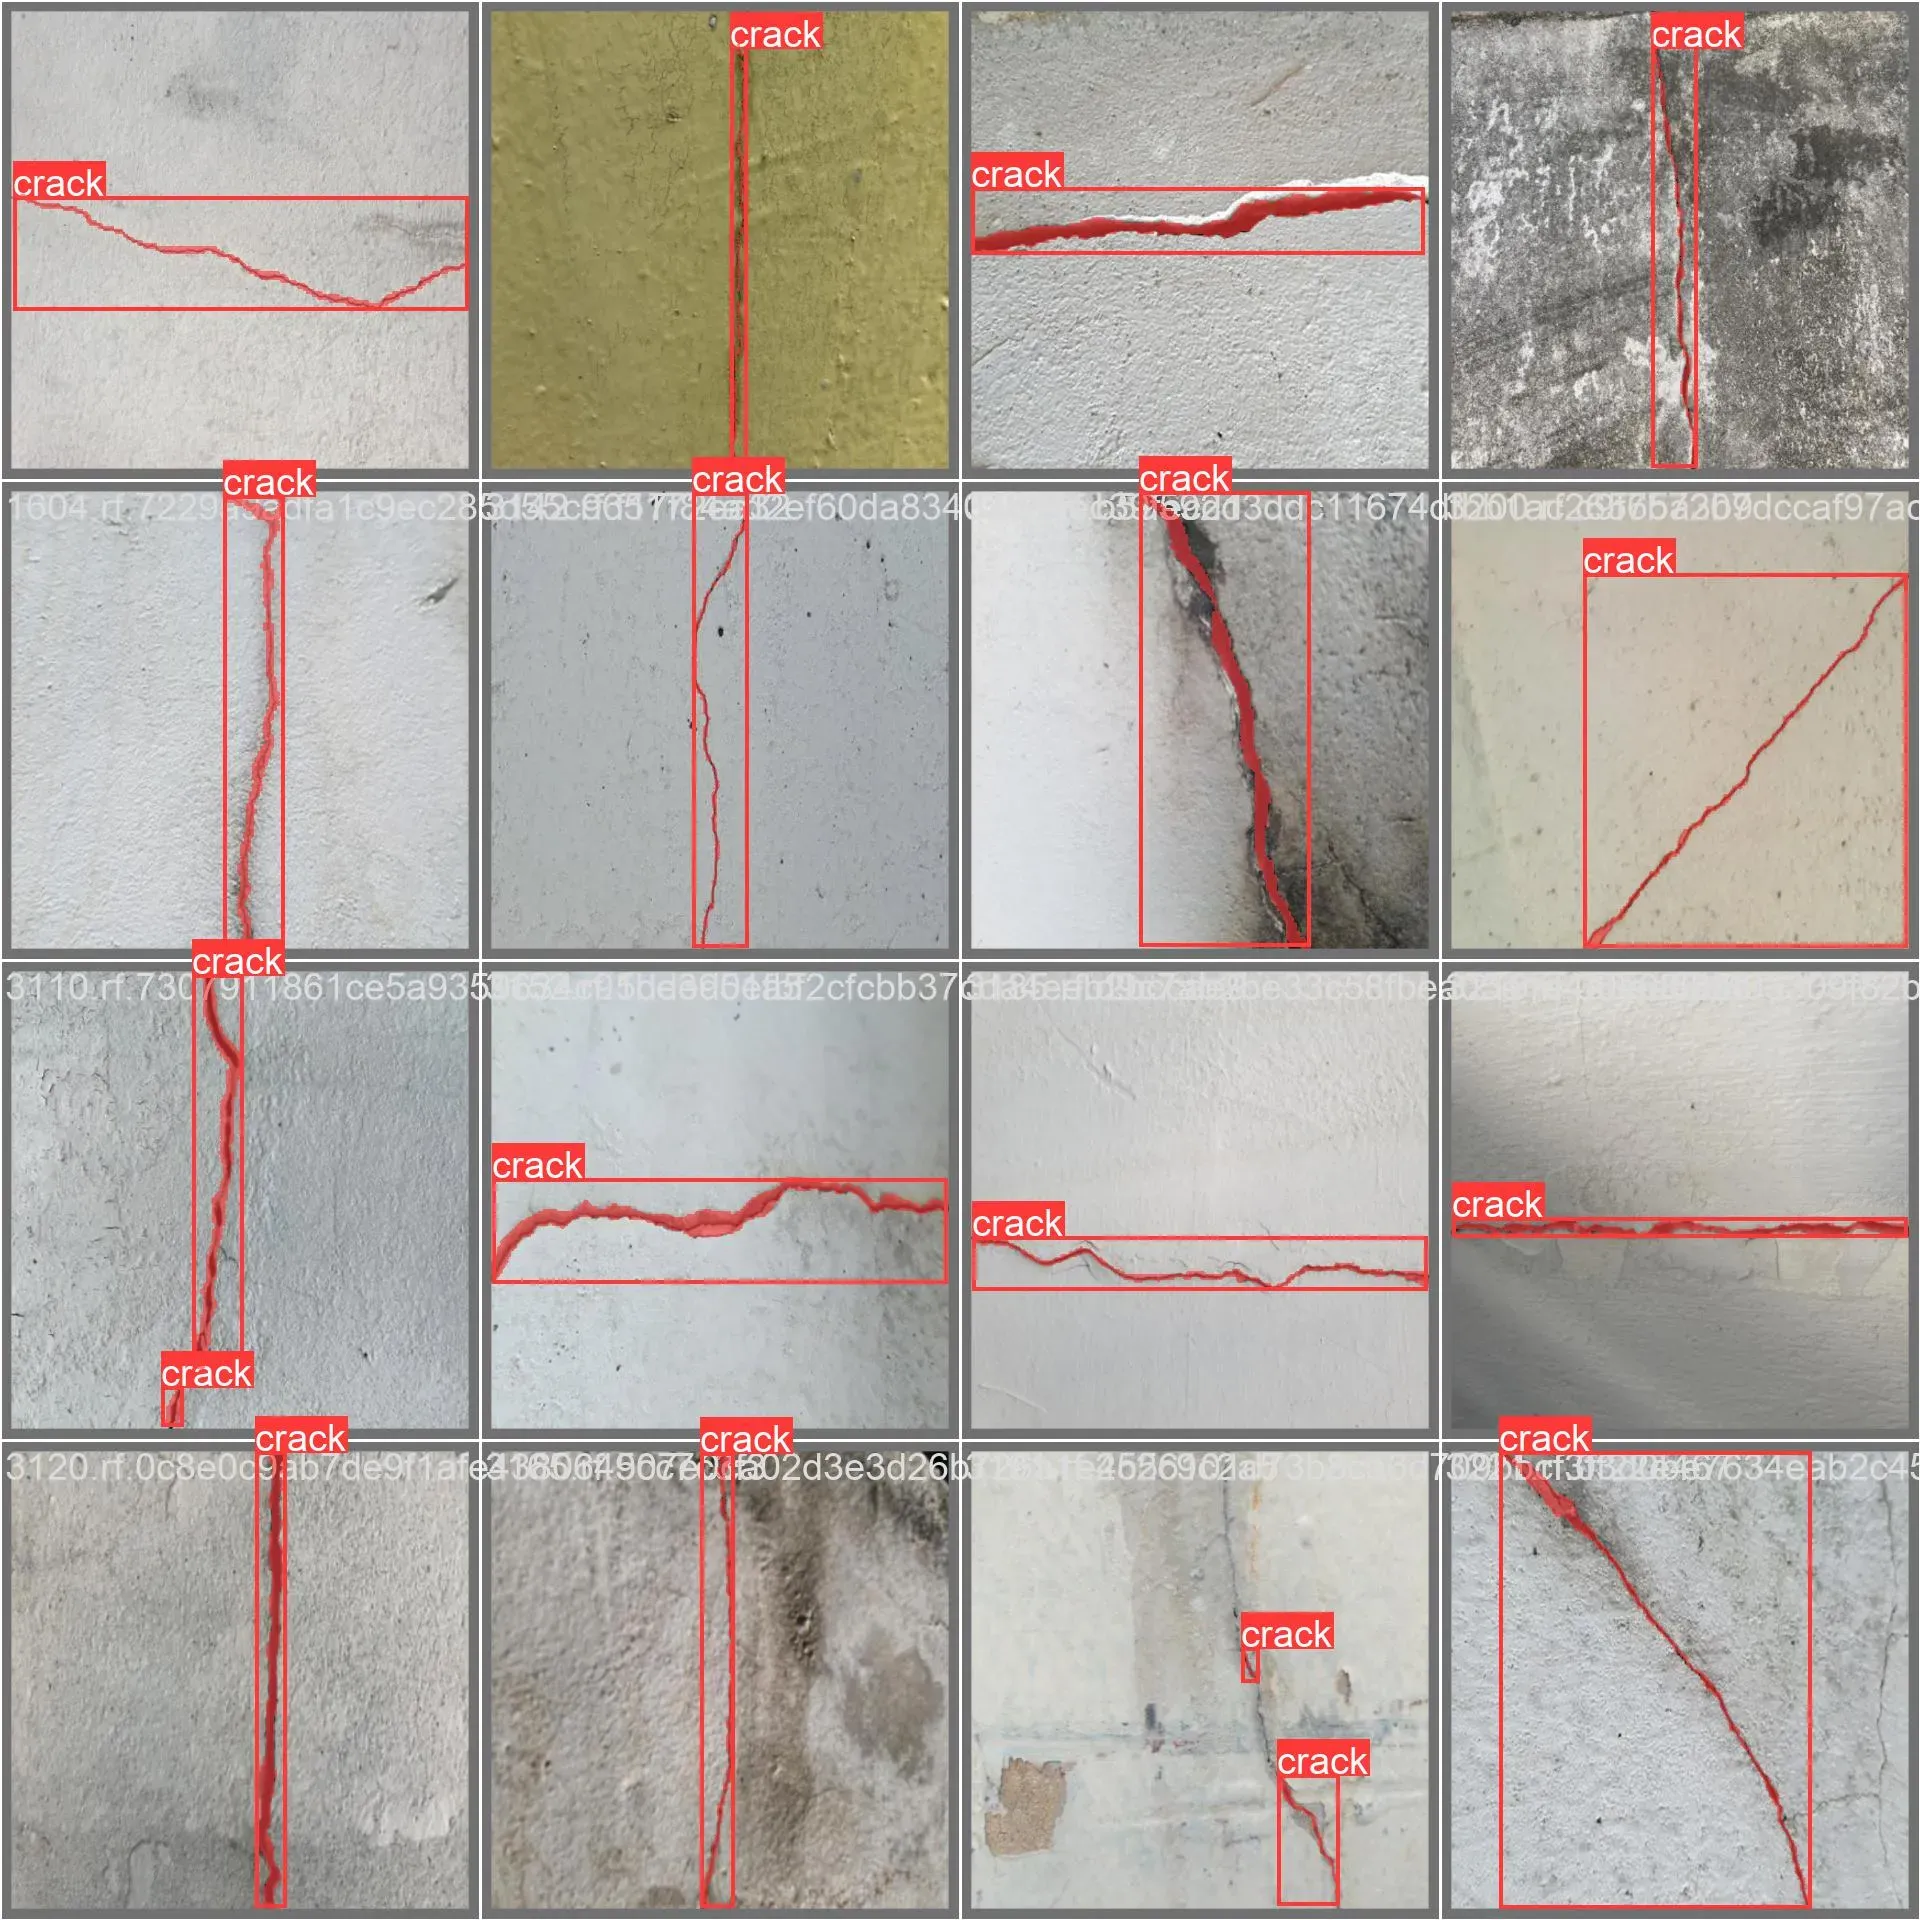
When labeling for instance segmentation tasks, it's important to use polygon annotations. This is key because we want the model to learn the precise shape of each object (as opposed to object detection, where a bounding box around an object is sufficient).
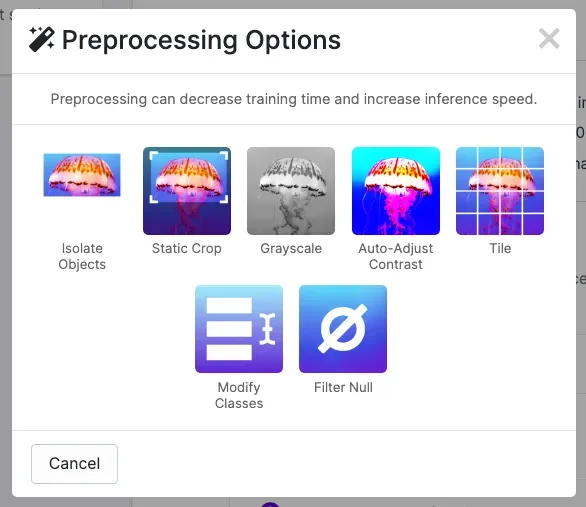
After labeling the data, we can apply preprocessing and augmentation to increase the size of our dataset and account for cases that may give our model difficulty predicting the object.
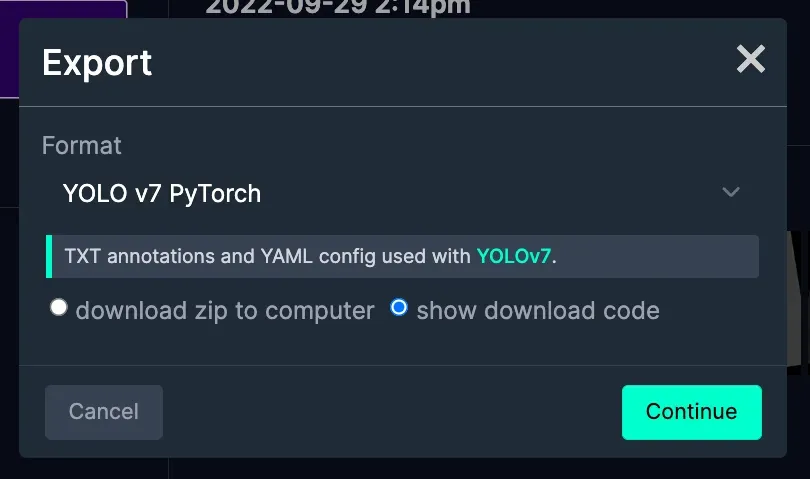
Export Your YOLOv7 Instance Segmentation Dataset
One of the most convenient ways to download your dataset from Roboflow Universe is to use our pip package. You can generate the appropriate code snippet directly in our UI. On your dataset's Universe home page, click Download this Dataset button and then select YOLO v7 PyTorch export format.
After a few seconds, you will see a code similar to the one below, except with all the necessary parameters filled in. You can simply copy and paste it into your Jupyter Notebook. When you execute it, the dataset will be downloaded to your machine in the appropriate format. Magic!
from roboflow import Roboflow

rf = Roboflow(api_key='API_KEY')
project = rf.workspace('workspace-name').project('project-name')
dataset = project.version(1).download('yolov7')
Download the dataset from Roboflow Universe using our pip package
YOLOv7 Instance Segmentation Dataset Structure
After downloading the YOLOv7 dataset, we can take a quick look at its file structure. The directory contains images and labels divided into three subsets: train, test, and validation. In addition, there will be a data.yaml file in the dataset root directory.
HOME/
└── dataset-name/
    ├── test/
    │   ├── images/
    │   │   ├── image-0.jpg
    │   │   ├── image-1.jpg
    │   │   └── ...
    │   └── labels/
    │       ├── image-0.txt
    │       ├── image-1.txt
    │       └── ...
    ├── test/
    │   ├── images/
    │   │   └── ...
    │   └── labels/
    │       └── ...
    ├── valid/
    │   ├── images/
    │   │   └── ...
    │   └── labels/
    │       └── ...
    └── data.yaml
Each label file must be in .txt format and have the same name (except for the extension) as the corresponding image. Each line represents a separate polygon and has the following structure class_index p1.x p1.y p2.x p2.y p3.x p3.y .... class_index is a number between 0 and n-1 representing the position of the given class name in the class list. p1, p2 and p3 are consecutive points forming the polygon.
There are dozens of different Computer Vision annotation formats. If you want to learn more about them visit our formats directory where we talk about each of them in detail and show how you can convert data between different formats.
Step 4: Train a Model on a Custom Dataset
The most difficult part of the task is behind us - YOLOv7 is installed and the custom dataset is created. Now we're ready to start training our model. Before we kick off, let's take a moment to consider the values of the parameters we pass. Most notably, we should pay attention to epochs , batch-size and img-size. There are many more but these three are crucial to training performance. epochs refer to the number of times the model will cycle through the data during training. The batch-size is the number of samples per gradient update, and the img-size is the dimensions of the input images.
If you have a dataset of 10,000 images and an batch-size of 100, it will take 100 gradient updates to complete 1 epoch. On the other hand, the img-size determines how many pixels the model has to process for each image. Increasing the epochs, batch-size, and img-size can improve model performance but may also increase training time and require more computational resources.
cd {HOME}/yolov7/seg
python segment/train.py --batch-size 16 \
 --img-size 640 \
 --epochs 10 \
 --data {dataset.location}/data.yaml \
 --weights $WEIGHTS_PATH \
 --device 0 \
 --name custom
Code to train a YOLOv7 instance segmentation model
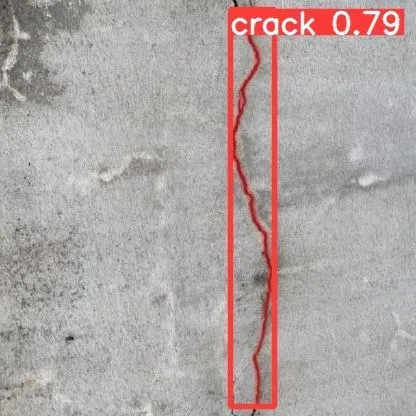
As with inference, the results of the training -- particularly the weights -- are stored in the runs catalog. Above that, you will find graphs illustrating the change in key metrics across training epochs and the inference results of a freshly trained model on selected images from a validation set.
Step 5: Evaluating the Model
We evaluate deep learning models on a test dataset to measure their generalization performance. This refers to how well the model can predict outcomes for new, unseen data. This is important because we want to ensure that the model has learned meaningful relationships present in the data that can be applied to unseen data (data not used in training).
Test images are usually selected by randomly taking a sample of the available data and excluding it from the training process. This allows us to evaluate the model's performance on data it has not seen during training and gives us a better idea of how the model will perform on real-life data. It is essential to carefully select and design the test data set to ensure that it is representative of the types of data the model will encounter in the real world.
At Roboflow, we let you choose the proportion of your train, test, and validation subsets. We handle the data splitting process, so you don't have to worry about splitting data yourself.
cd {HOME}/yolov7/seg
python segment/predict.py \
--weights {HOME}/yolov7/seg/runs/train-seg/custom/weights/best.pt \
--conf 0.25 \
--source {dataset.location}/test/images \
--name custom
Evaluate the results of the YOLOv7 instance segmentation model
Deploy to Roboflow
Once you have finished training your YOLOv7 model, you’ll have a set of trained weights ready for use with a hosted API endpoint. These weights will be in the “runs/train-seg/custom/weights/best.pt” folder in your project. You can upload your model weights to Roboflow Deploy with the deploy() function in the Roboflow pip package to use your trained weights.
To upload model weights, first create a new project on Roboflow, upload your dataset, and create a project version. Check out our complete guide on how to create and set up a project in Roboflow. Then, write a Python script with the following code:
import roboflow

roboflow.login()

rf = roboflow.Roboflow()

project = rf.workspace().project(PROJECT_ID)

project.version(DATASET_VERSION).deploy(model_type=”yolov7-seg”, model_path=f”{HOME}/runs/detect/train/”)
Replace PROJECT_ID with the ID of your project and DATASET_VERSION with the version number associated with your project. Learn how to find your project ID and dataset version number.
Shortly after running the above code, your model will be available for use in the Deploy page on your Roboflow project dashboard.
Deploy Your Model to the Edge
In addition to using the Roboflow hosted API for deployment, you can use Roboflow Inference, an open source inference solution that has powered millions of API calls in production environments. Inference works with CPU and GPU, giving you immediate access to a range of devices, from the NVIDIA Jetson to TRT-compatible devices to ARM CPU devices.
With Roboflow Inference, you can self-host and deploy your model on-device.
You can deploy applications using the Inference Docker containers or the pip package. In this guide, we are going to use the Inference Docker deployment solution. First, install Docker on your device. Then, review the Inference documentation to find the Docker container for your device.
For this guide, we'll use the GPU Docker container:
docker pull roboflow/roboflow-inference-server-gpuThis command will download the Docker container and start the inference server. This server is available at http://localhost:9001. To run inference, we can use the following Python code:
import requests

workspace_id = ""
model_id = ""
image_url = ""
confidence = 0.75
api_key = ""

infer_payload = {
    "image": {
        "type": "url",
        "value": image_url,
    },
    "confidence": confidence,
    "iou_threshold": iou_thresh,
    "api_key": api_key,
}
res = requests.post(
    f"http://localhost:9001/{workspace_id}/{model_id}",
    json=infer_object_detection_payload,
)

predictions = res.json()
Above, set your Roboflow workspace ID, model ID, and API key.
Also, set the URL of an image on which you want to run inference. This can be a local file.
To use your YOLOv7 model commercially with Inference, you will need a Roboflow Enterprise license, through which you gain a pass-through license for using YOLOv7. An enterprise license also grants you access to features like advanced device management, multi-model containers, auto-batch inference, and more.
To learn more about deploying commercial applications with Roboflow Inference, contact the Roboflow sales team.
Conclusions
Instance segmentation is a computer vision task that finds applications in many fields, from medicine to autonomous cars. This tutorial will allow you to train your own model that precisely detects cracks in an image.
Using this guide, you can build a model that identifies structural damage in buildings or bridges. Models like that could be helpful for insurance companies to measure risk, for building inspectors, and for many others.
Use the code in our Notebook to bootstrap your project and unleash your creativity. Most importantly, let us know what you've been able to build.
Stay up to date with the projects I am working on at Roboflow and on my GitHub page! ⭐
Cite this Post
Use the following entry to cite this post in your research:
Piotr Skalski. (Dec 29, 2022). How to Train YOLOv7 Instance Segmentation on a Custom Dataset. Roboflow Blog: https://blog.roboflow.com/train-yolov7-instance-segmentation-on-custom-data/