
Earlier this month, we announced that you can deploy and share custom YOLOv8 models on Roboflow.
We are now excited to release an extension of our model deployment feature that allows you to upload custom YOLOv5 weights to Roboflow. In a few lines of code, you can upload weights from a YOLOv5 model you have trained and have your model deployed on our infinitely-scalable, robust cloud infrastructure. Your model will be ready to use in minutes.
Immediately leverage our SDKs, tutorials, and open source software to deploy your model on a range of devices, from using your model in web browsers to working on the edge with an NVIDIA Jetson.
In this guide, we’re going to walk through how to deploy your YOLOv5 weights to Roboflow. Without further ado, let’s get started!
Export and Upload YOLOv5 Weights
To upload model weights to Roboflow, you can use the deploy() function. This function will send the specified weights up to the Roboflow cloud and deploy your model, ready for use on whatever deployment device you want (i.e. Luxonis OAK, web browser, NVIDIA Jetson).
To upload model weights, use the following line of code:
project.version(dataset.version).deploy(model_type="yolov8", model_path=f"{HOME}/runs/detect/train/")You will need to replace “dataset.version” with the version number associated with your dataset, and the HOME value with the home directory in which you are working. If you are following our notebook above, these values will already be set.
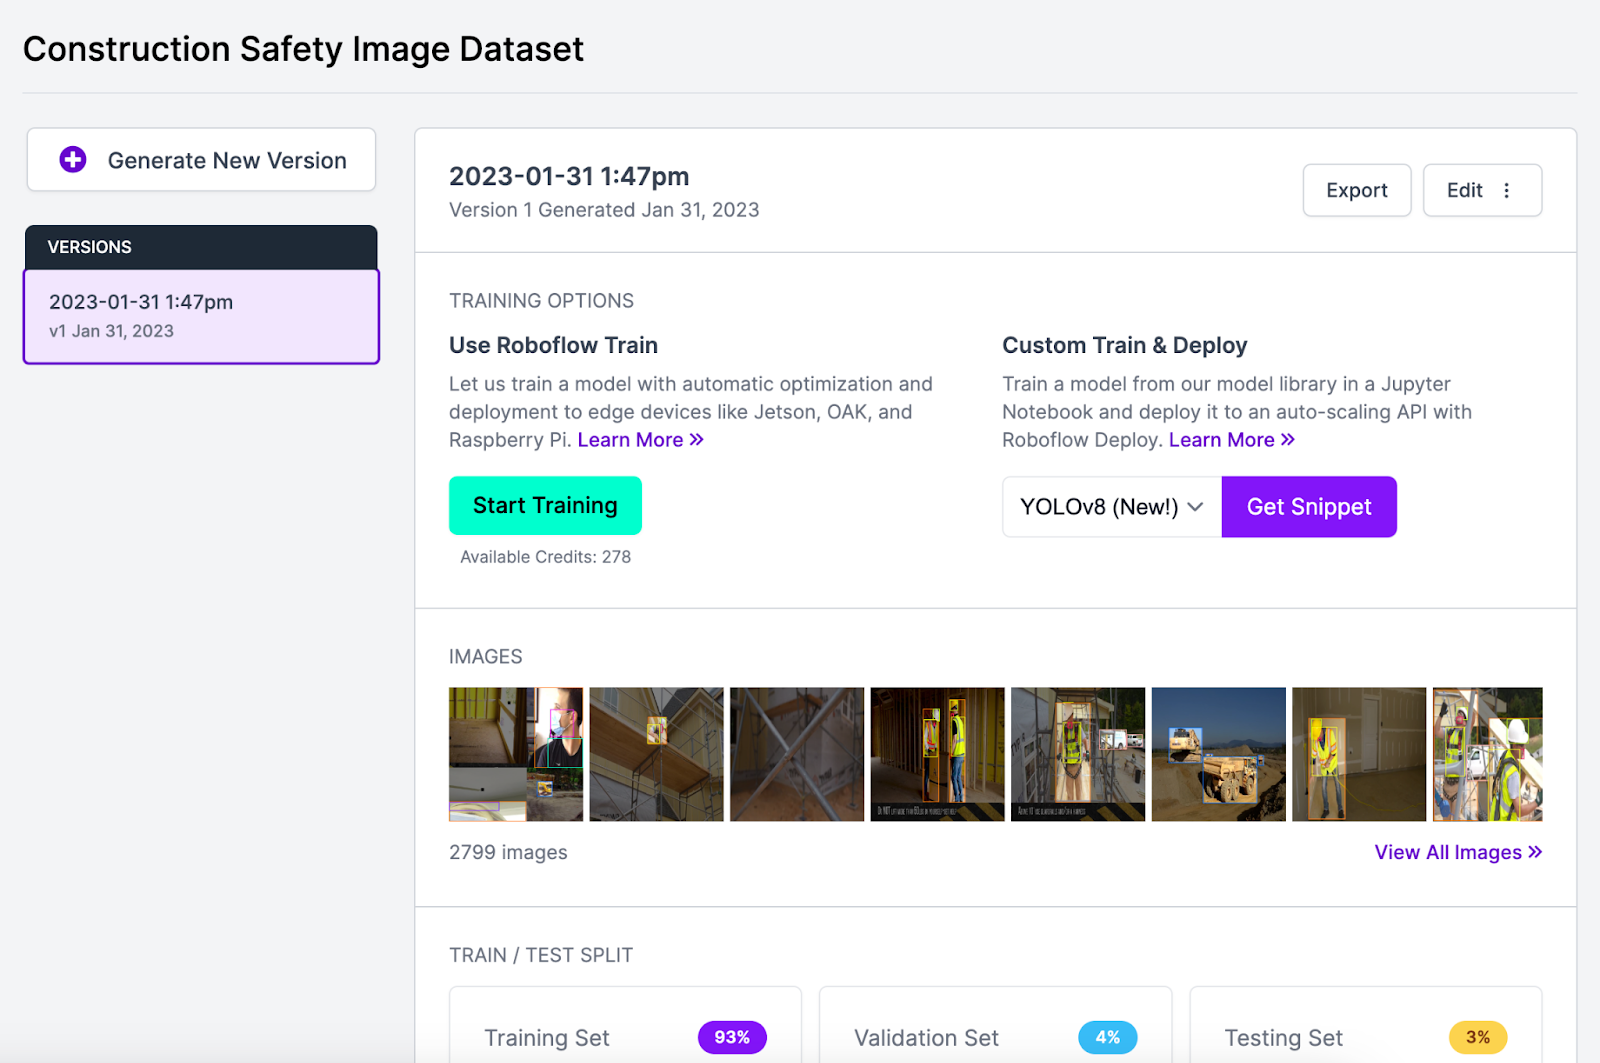
When you run this line of code, the Roboflow dashboard will be updated to show that your model weights are loading. After a bit of time, your model page will change to say that there is now a trained model available.
A sentence will appear stating “YOLOv5 MODEL UPLOAD” which documents that your model is using custom weights you uploaded:

If you already have weights ready and are working without the aforementioned notebook, here is a full code snippet that you can use to deploy your weights:
from roboflow import Roboflow

home = "/path/to/project/folder"

rf = Roboflow(api_key=os.environ["ROBOFLOW_API_KEY"])
project = rf.workspace().project("PROJECT_ID")

project.version(PROJECT_VERSION).deploy(model_type="yolov5", model_path=f"/{home}/yolov5/runs/train/")
To use this code snippet, you will need to:
- Set the value of the “home” variable to be equal to the root directory in which you are working.
- Export your Roboflow API key into an environment variable called ROBOFLOW_API_KEY.
- Substitute “PROJECT_ID” with the ID associated with your project in the Roboflow dashboard. You can retrieve this by copying the text under the “Training Results” section on your model page. This text will be a string such as “construction-counter-xyzz”.
- Replace “PROJECT_VERSION” with the version number of your dataset. You can find this by scrolling down to the “Details” section on your model page and copying the version ID. Your project version should be an integer in your Python script.
Deploy YOLOv5 Into Production
Now you have a trained model ready to use in your projects! There are plenty of ways in which you can use your model. Navigate to the “Deploy” tab using the link in the sidebar of your project in the Roboflow dashboard. This page lists various different ways to deploy your project, accompanied by code snippets and reference materials.
You can try out your model in the browser by uploading a photo or video or allowing access to stream your webcam.
Here’s an example of our model running inference on an uploaded image:
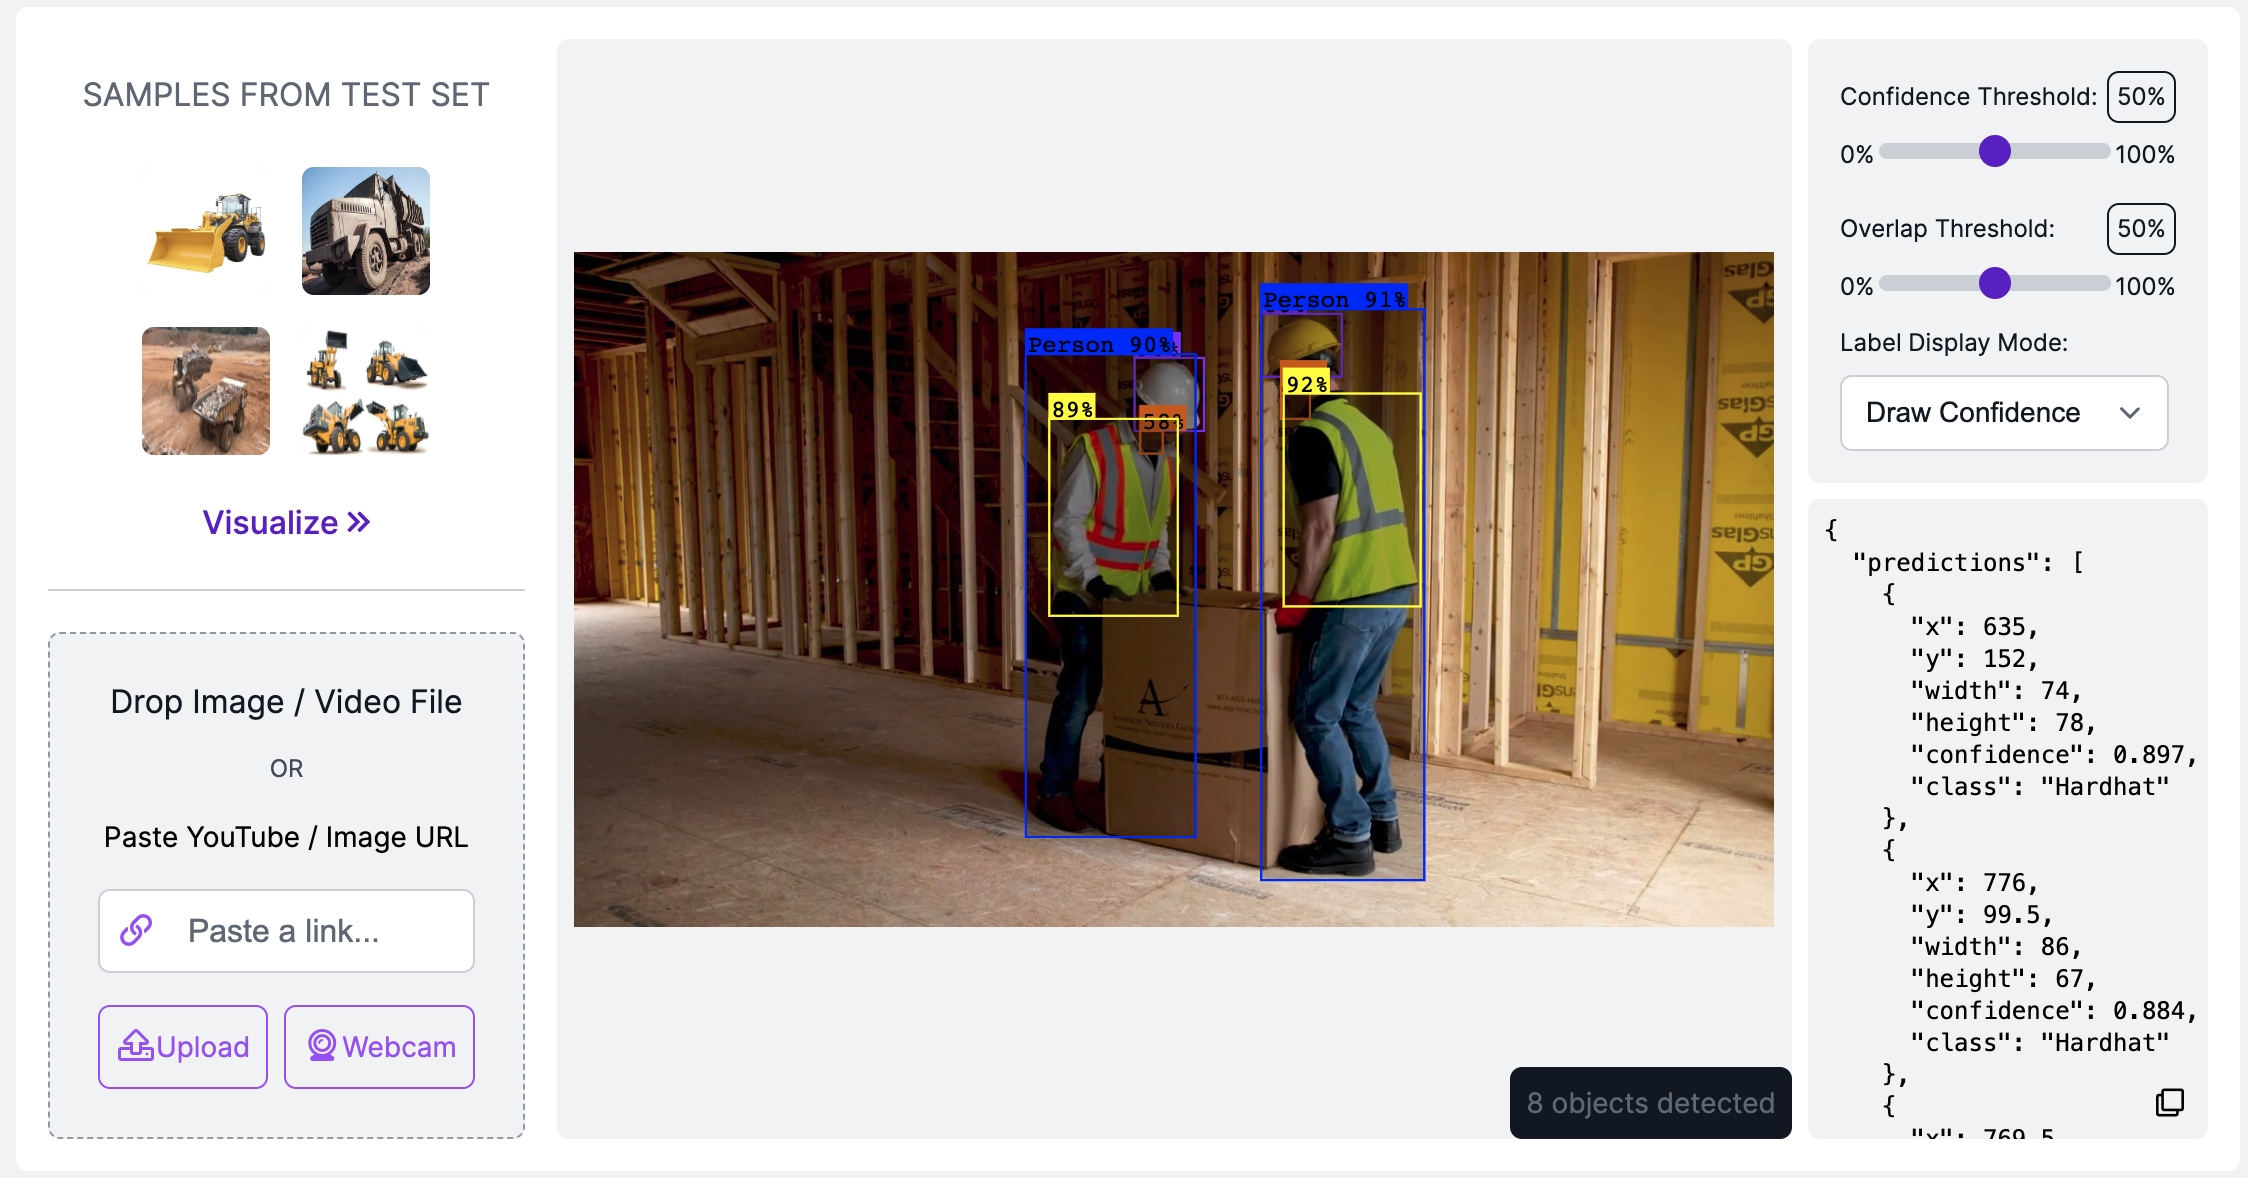
Our model successfully identifies various classes in our dataset!
From here, we could:
- Use our model in a Python script with the Roboflow pip package.
- Deploy our model to the browser using roboflow.js and a tool such as Repl.it.
- Deploy to the edge using a Luxonis OAK.
And more! We have documented all of the deployment options available in the “Inference - Object Detection” section of our documentation.
Automate Annotating Images with YOLOv5
Using Roboflow's Label Assist feature, you can use trained models to assist in your annotation. Label Assist runs your model on images you want to annotate and recommends annotations.
As you refine your model, Label Assist will be able to annotate images with a greater degree of accuracy, thereby reducing the amount of time you spend annotating images.
To leverage Label Assist, upload new images for annotation. Select an image for annotation, then click the magic wand icon in the right side panel on the annotation tool. You can select the version of your YOLOv5 model whose weights you uploaded.
0:00/1×
Create a Project in Roboflow
In this tutorial, we’re going to train a model that identifies construction equipment and violations of safety guidance in photos and videos. Before we can train this model, we need to collect image data and annotate our images with the requisite classes.
To speed up the process of creating our project, we’re going to use an open-source dataset on Roboflow Universe. Universe is an open repository of over 110,000 image datasets that you can use in your computer vision projects. We have already created a project called “Construction Site Safety” with annotated images of construction equipment and safety violations.
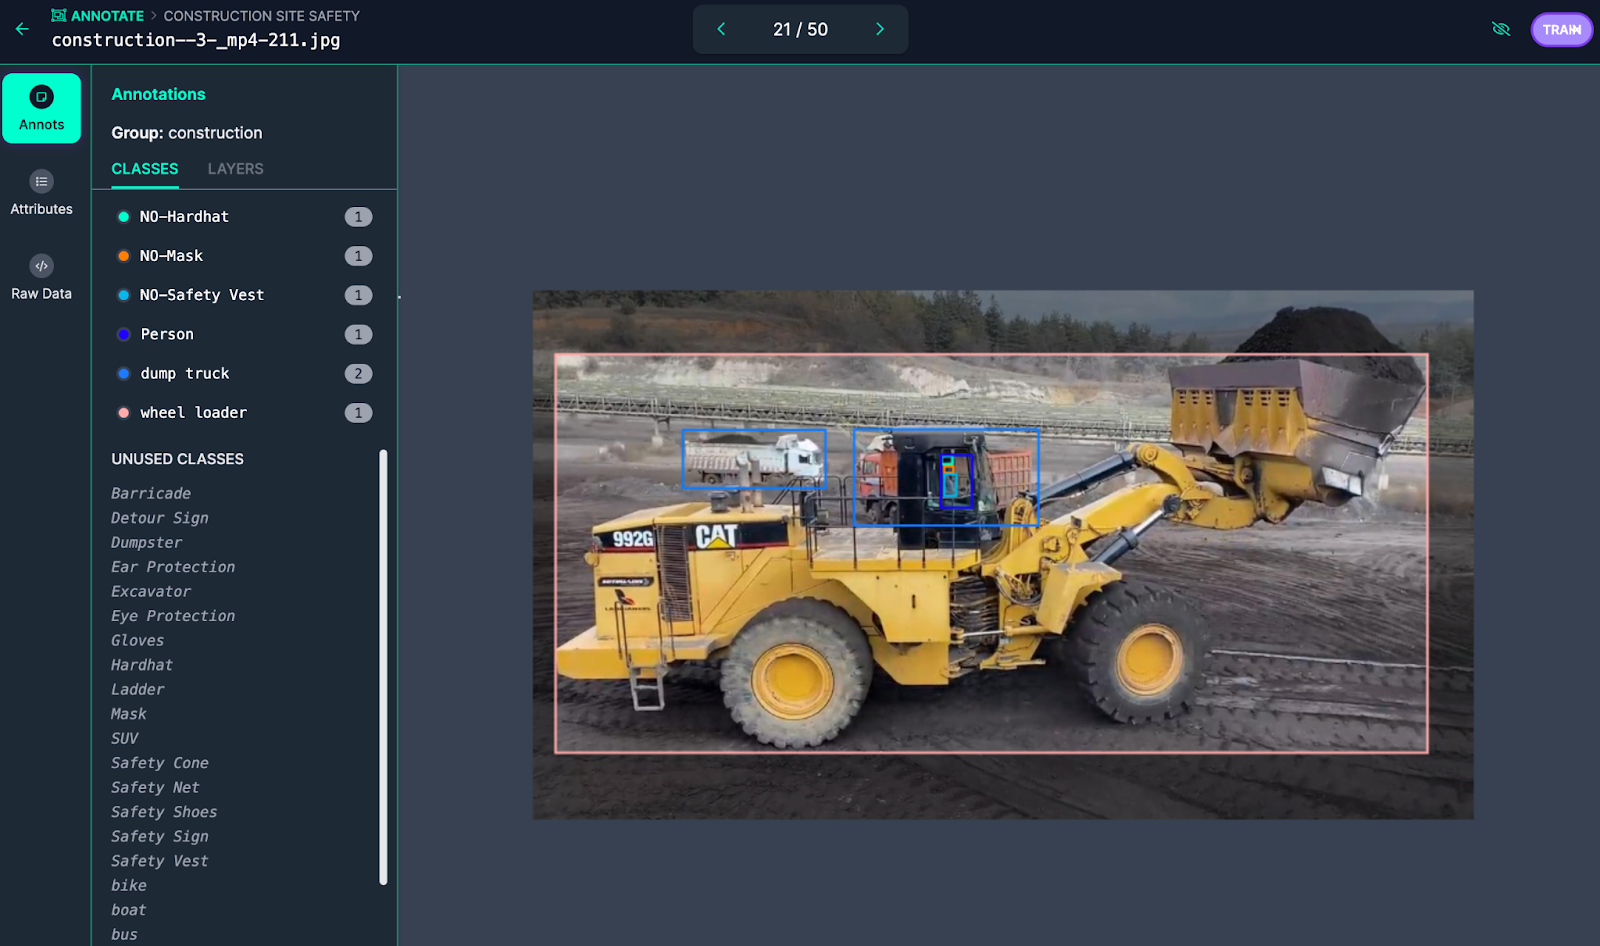
Here’s an example annotated image from the dataset:
To use the dataset, we will first need a Roboflow account. Create one for free and then go to the Construction Site Safety project page. Click the “Download this Dataset” button and opt to download a zipped version of the dataset:
0:00/1×
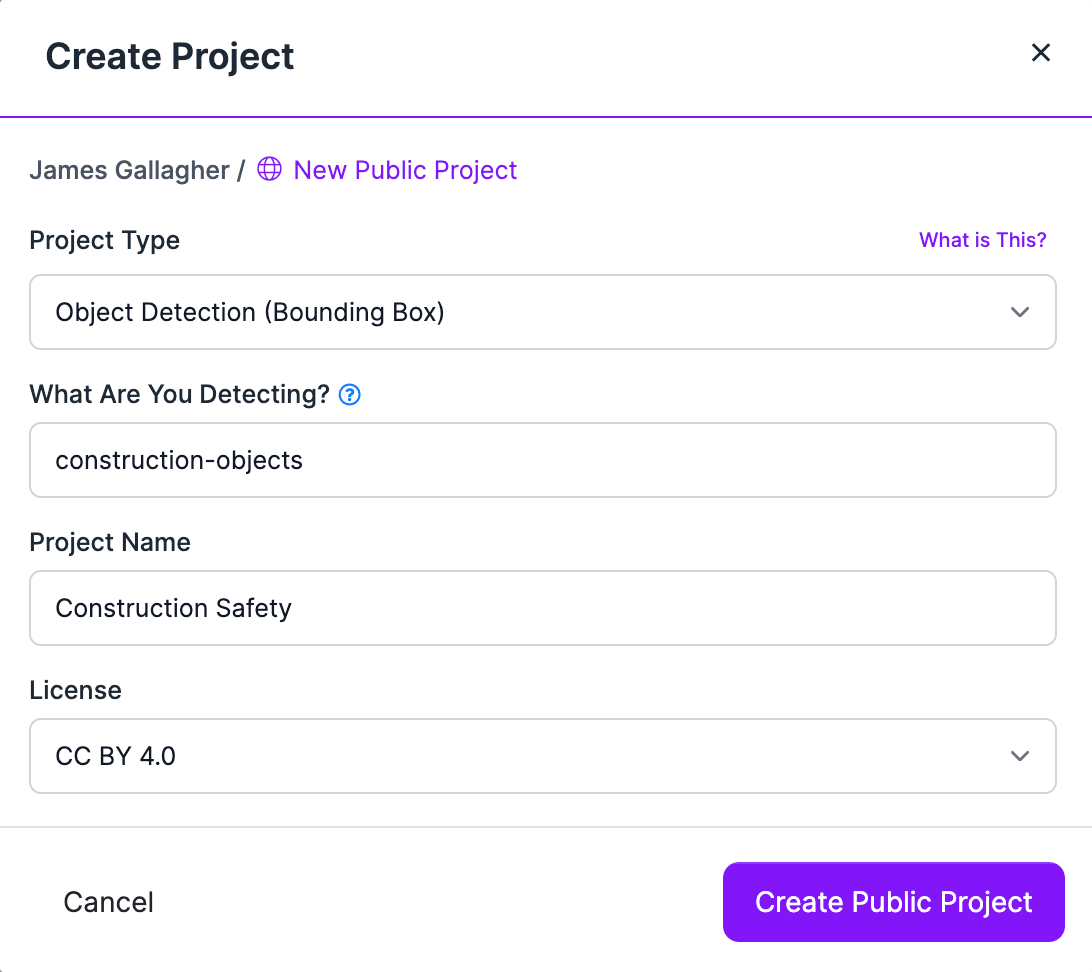
Unzip the dataset on your computer and then navigate to the Roboflow dashboard. You can do this by clicking “Projects” in the navigation bar. Click the button to create a new project and fill in information about your project. In this case, we’ll call our project “Construction Safety”.
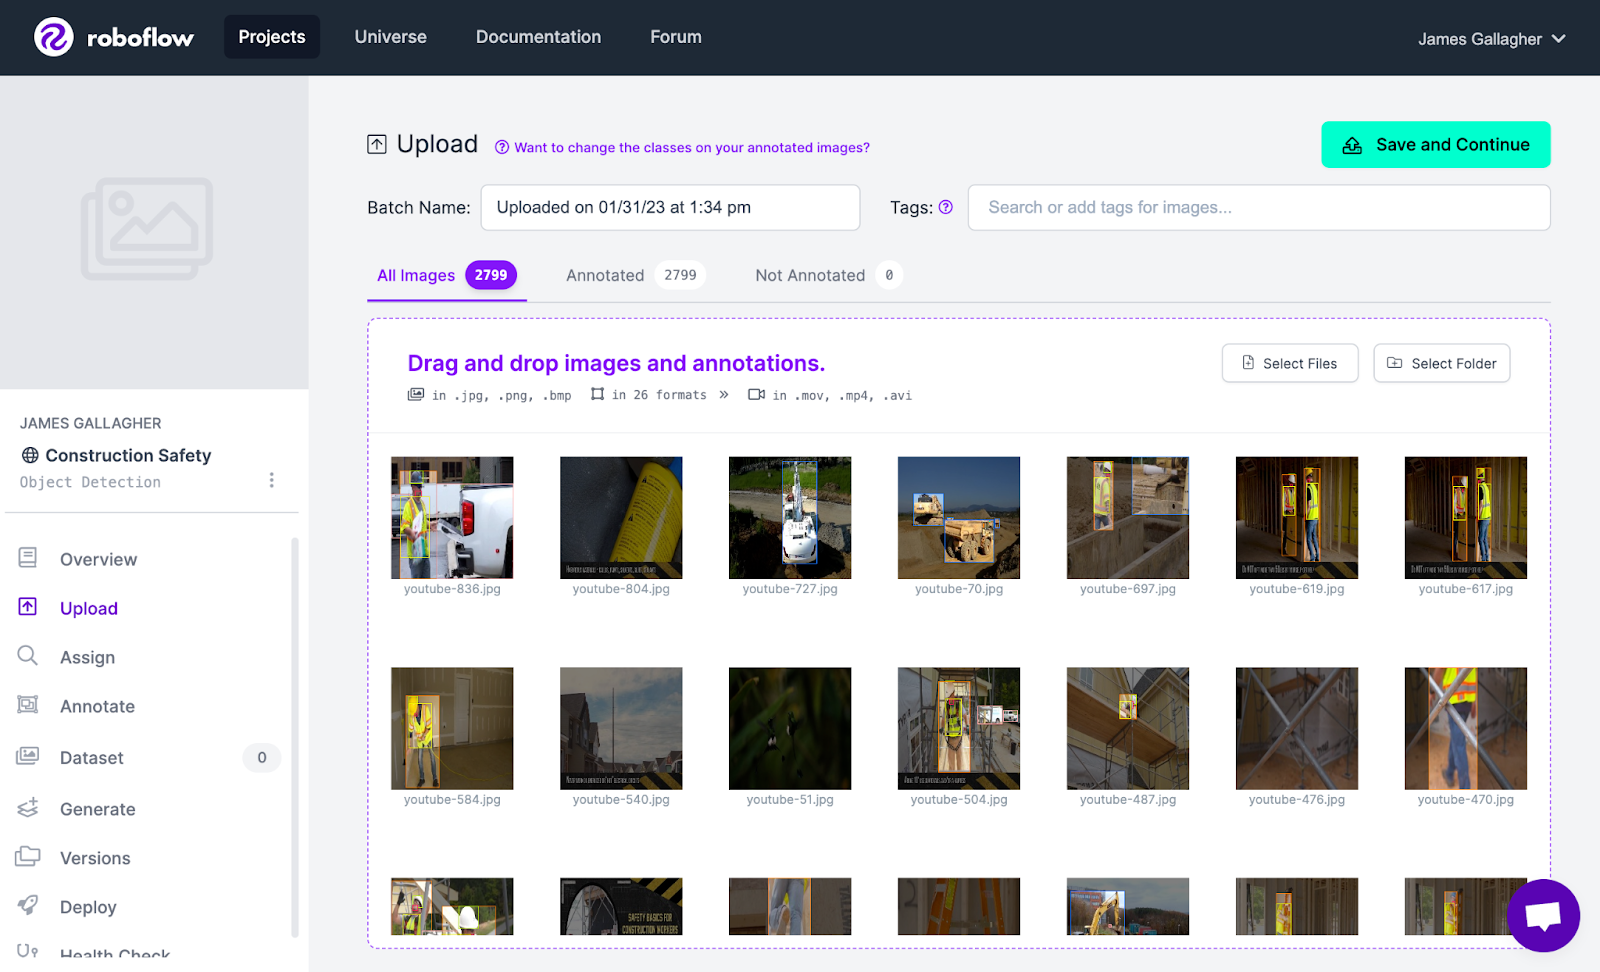
Once you have created your project, you can upload your data. Drag the unzipped folder that you downloaded from Universe (or your own custom data) into the Roboflow dashboard.
The time it takes to upload your data will depend on how much data you upload – the more images and annotations you upload, the longer the process will take.
0:00/1×
Once your files have been processed, click the “Save and Continue” button to save your images and annotations.
Proceed to annotate your images using the “Annotate” feature accessible in the sidebar of the dashboard if your images are not annotated. We have a guide on image annotation best practices that will give you the knowledge you need to effectively annotate images.
Once you have annotated images, click “Generate” in the sidebar to create a new project version. You can add image augmentations and preprocessing steps at this stage.
For guidance on what steps may make sense for your project, check out our guide on image augmentations and preprocessing.
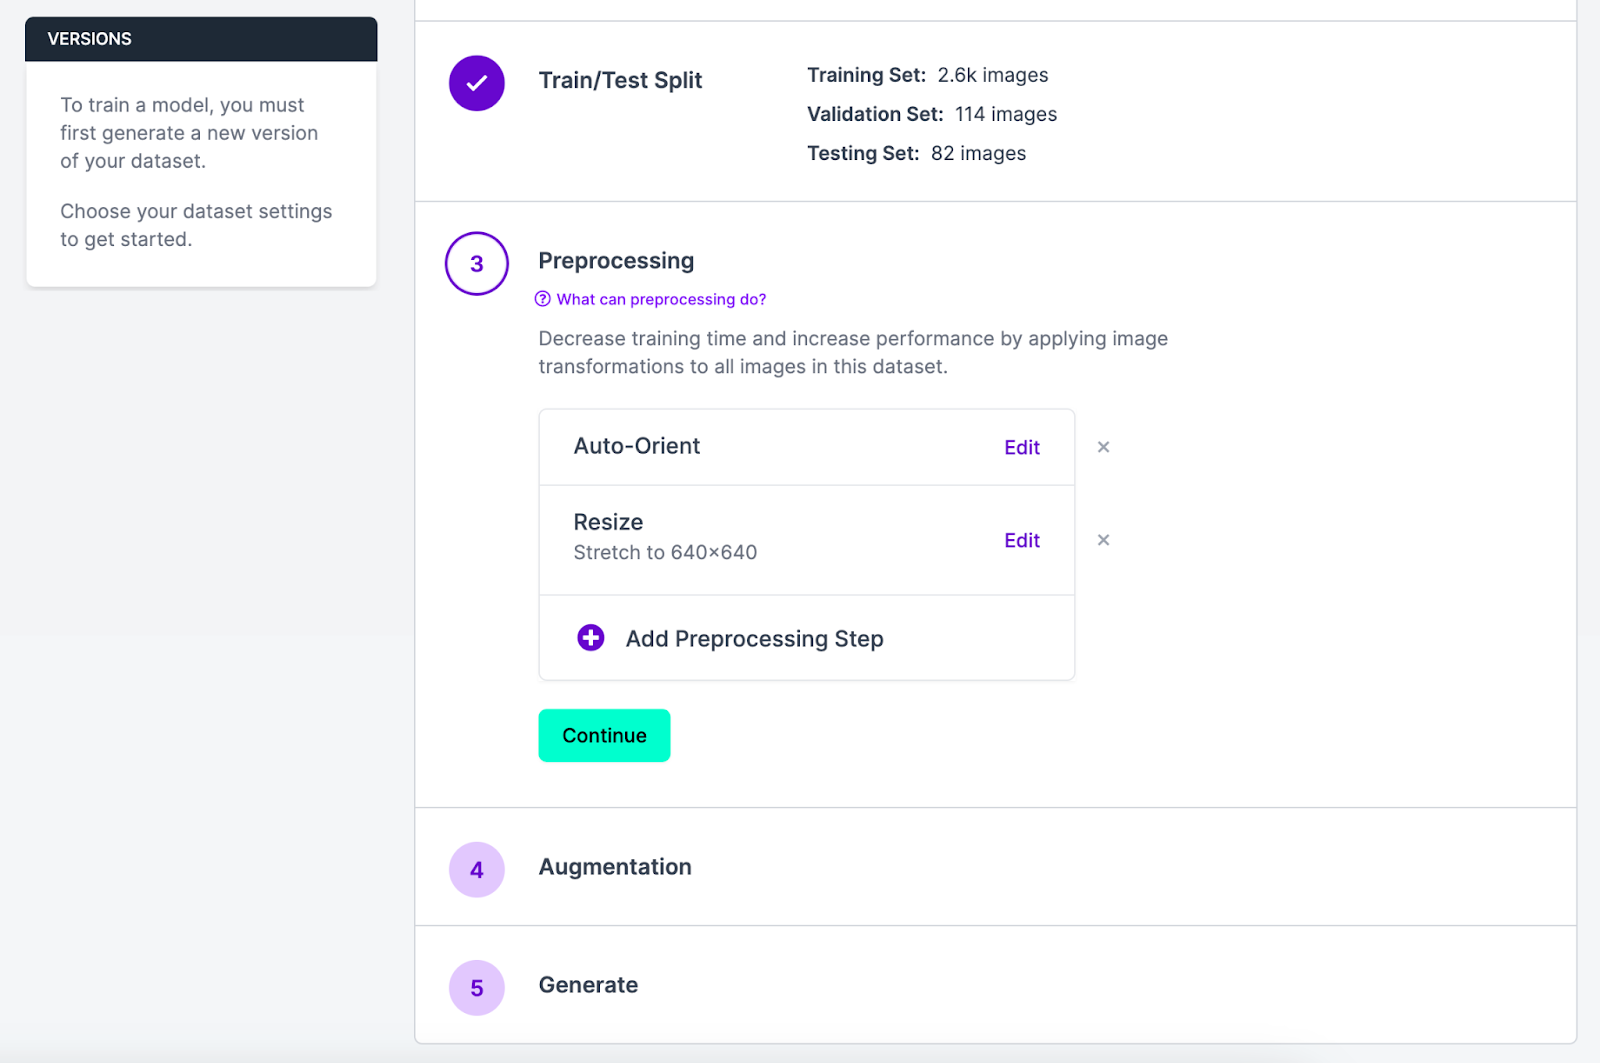
When you have configured your dataset version, click “Generate”. This will create a snapshot of your data to which you can upload model weights.
Train a YOLOv5 Model
Now that you have created a version of the dataset, you can get to training a YOLOv5 model. Our team has prepared an open-source Google Colab notebook that walks through how to train a YOLOv5 model. This notebook comes with a written tutorial with commentary and more guidance to help you leverage the notebook.
If you don’t already have a trained model, navigate to our notebook and create a copy in your own Google account:
0:00/1×
Then, follow the steps documented in the notebook to retrieve your annotated data, configure your model, and start training. In the video tutorial below, we walk through how to use our YOLOv5 notebook to train a custom model:
In our YOLOv5 notebook, we define a YAML script that states the configuration of the model. You can adjust the configuration of the model as you desire and your weights will work with the Roboflow platform:
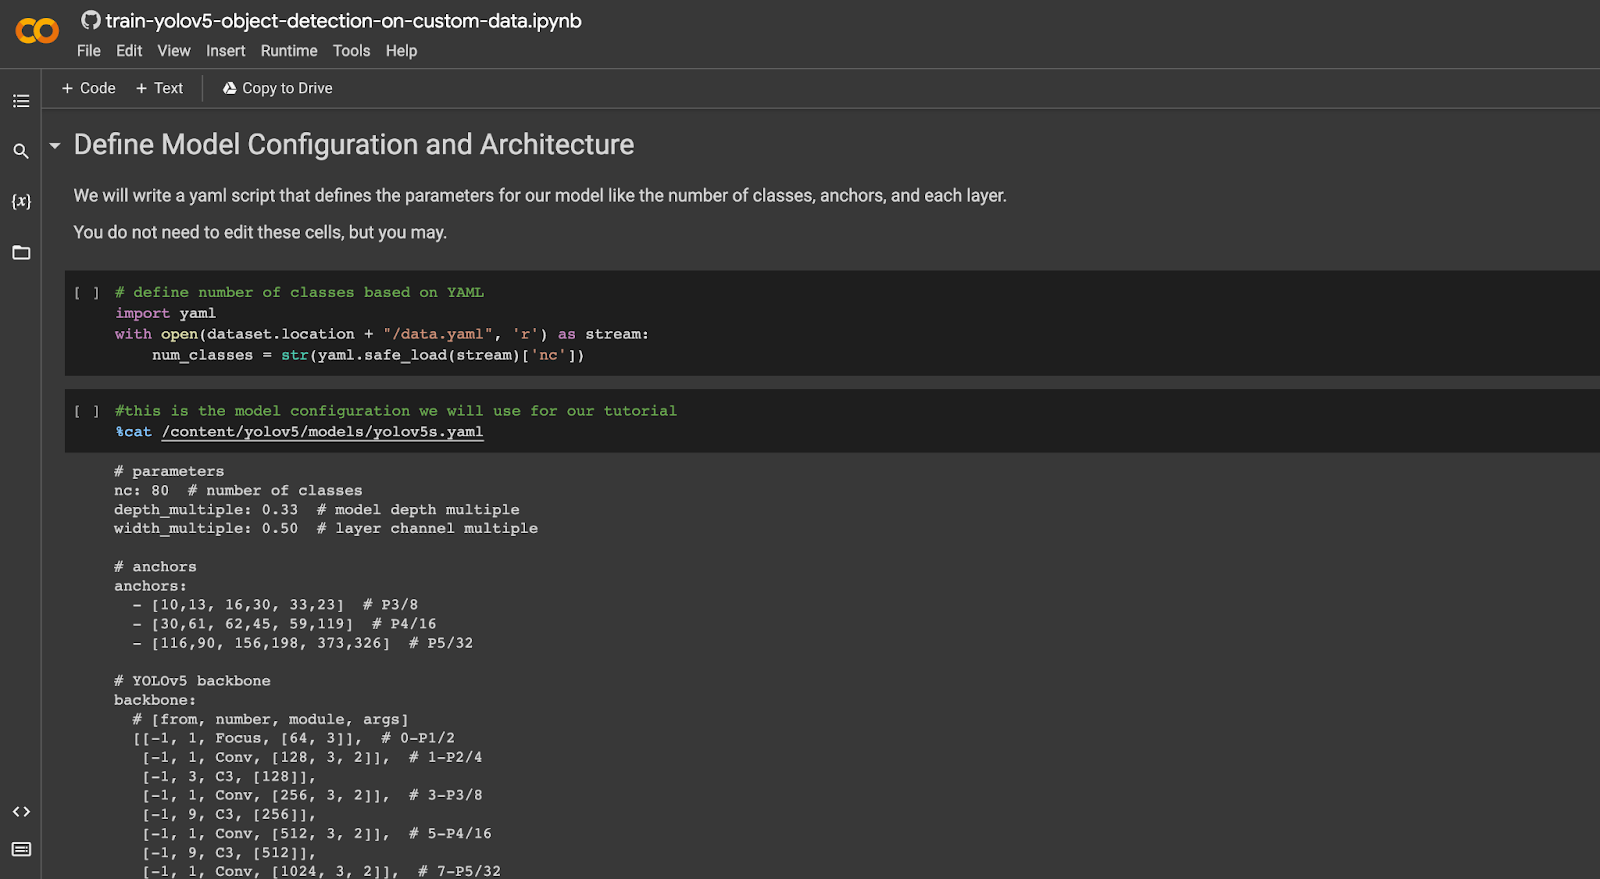
After you have run all of the cells in the notebook and have a set of weights, you can upload them to Roboflow and deploy a version of your model.
Conclusion
With the launch of our YOLOv5 deployment feature, you can now deploy custom YOLOv5 models to the cloud with minimal hassle.
In a few lines of Python code, you can upload your weights to our infrastructure and have a hosted API on which you can run inference.
Cite this Post
Use the following entry to cite this post in your research:
James Gallagher. (Feb 1, 2023). How to Deploy YOLOv5 Models with Roboflow. Roboflow Blog: https://blog.roboflow.com/deploy-yolov5-roboflow/