
This tutorial walks through deploying a YOLOv8 model in ONNX format to an Amazon SageMaker endpoint, using Intel OpenVINO as the ONNX execution provider for CPU inference. The steps cover configuring a SageMaker Studio domain, converting YOLOv8 PyTorch weights to ONNX, uploading the model artifact to S3, building a custom Docker image in AWS Elastic Container Registry, and serving inference requests through the SageMaker endpoint. The post also includes a cost benchmark comparing OpenVINO against the default CPU (MLAS) execution provider so you can evaluate the tradeoff for your workload.
Introduction
In this post we will walk through the process of deploying a YOLOv8 model (ONNX format) to an Amazon SageMaker endpoint for serving inference requests, leveraging OpenVino as the ONNX execution provider. We will start by setting up an Amazon SageMaker Studio domain and user profile, followed by a step-by-step notebook walkthrough.
By the end of this tutorial, you will have a better understanding of how to utilize Amazon SageMaker for deploying your ONNX models.
Full notebook here. Let's get started!
Set up Amazon StageMaker Studio
Before we dive into the notebook walkthrough, ensure that you have completed the following steps:
1) Set up a SageMaker Studio domain and user profile
A. Domain overview
B. Domain quick setup
C. Add/remove domain user profile
D. Launch Amazon SageMaker Studio
2) Start SageMaker Studio
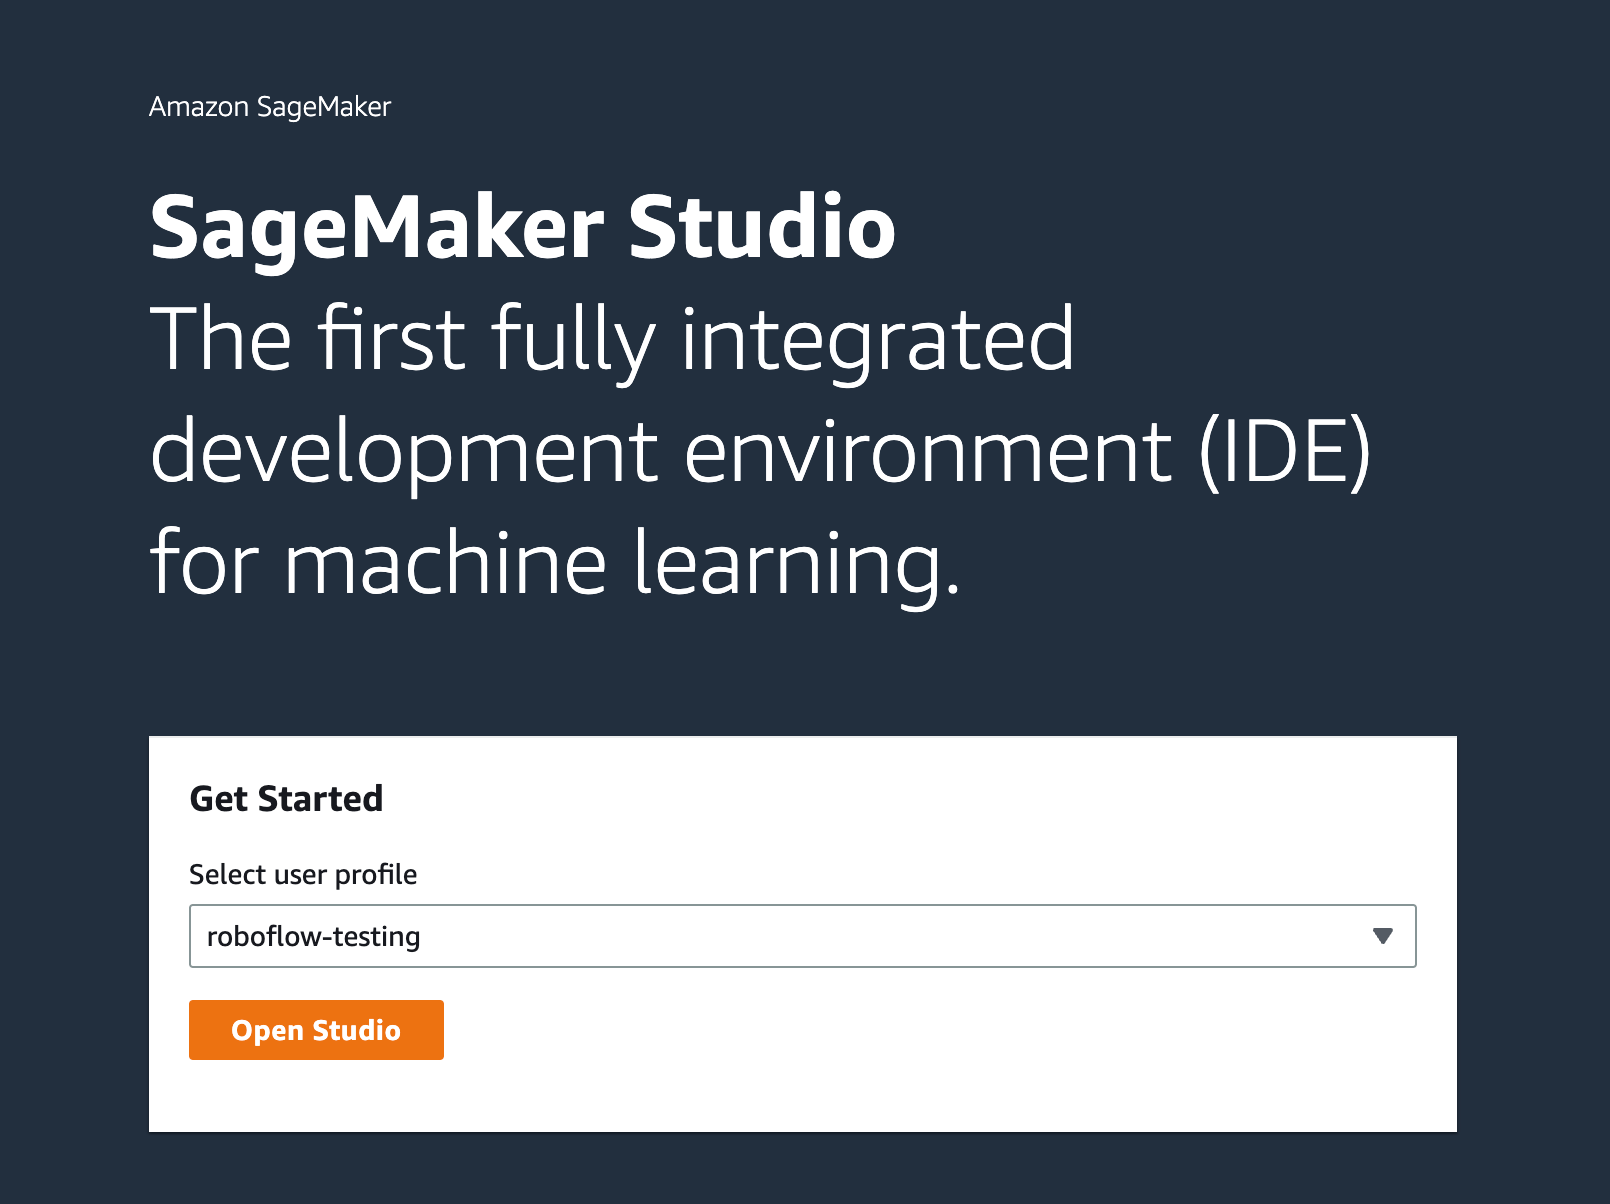
First, go to your user profile and click on the launch button to open the studio. Then, upload this notebook to the studio documented here.
Next, select a SageMaker kernel as the configuration mentioned below:
- Image: Base Python 3.0
- Kernel: Python 3
- Instance type: ml.t3.medium
- Start-up script: No script
Start SageMaker Studio Instance
YOLOv8 Model Conversion and AWS S3 Upload
Next, we're going to prepare our model for inference in SageMaker Studio Labs.
In the code below, we download the yolov8 Pytorch model from the Roboflow GitHub repo and export ONNX weights using the ultralytics YOLO CLI. Then, we zips (as ".tar.gz" file) for use in uploading to S3, the Amazon storage product that we'll use to interact with our weights in SageMaker Studio Labs. The model is then uploaded to S3 for use in SageMaker Studio Labs.
!mkdir -p model
%cd model
!wget https://github.com/roboflow/sagemaker-yolov8/tree/main/yolov8-weights/runs/detect/train -O yolov8n.pt

# Convert pytorch version of YOLOV8 model file to onnx format
if not os.path.isfile('/home/ec2-user/SageMaker/model/yolov8n.onnx'):
    !yolo mode=export model=yolov8n.pt format=onnx dynamic=True # To get a static model chnage dynamic flag to False
else:
    print("ONNX file alreday exist. Please re-run the cell after removing it.")

# Model needs to be zipped before storing into a S3 bucket
import tarfile
import os

source_files = ['/root/model/yolov8n.onnx']
output_zip_file = '/root/model/model.tar.gz'

if not os.path.isfile(output_zip_file):
    with tarfile.open(output_zip_file, mode="w:gz") as t:
        for sf in source_files:
            t.add(sf, arcname=os.path.basename(sf))
        print(f"ZIP file is created at {output_zip_file} location.")
else:
    print(f"ZIP file '{output_zip_file}' already exist. Please re-run the cell after removing it.")
 	print("<bucket>: ", bucket)

# Upload the model to default S3 bucket of your sagemaker domain
model_location = session.upload_data(path=output_zip_file, key_prefix='deployment_model')
print(f"Zip file is uploaded to {model_location} location of '{bucket}' S3 bucket.")
Build Docker Image on AWS Elastic Container Registry
Next, we need to create a custom service script, container entry point script, and a Docker file to deploy the ONNX model to a SageMaker inference endpoint.
Run cells 12,13, and 14 in this full notebook to write the Docker files to a directory called "docker-inference" which will create a DockerFile, dockerd-entrypoint.py and model-script.py.
# Creating an ECR uri to inference with the build docker image
ecr_repository = 'yolov8-deployment'
tag = ':latest'
uri_suffix = 'amazonaws.com'
inference_repository_uri = '{}.dkr.ecr.{}.{}/{}'.format(account_id, t/model/model.tar.gz'

%cd ..
!mkdir -p docker-inference
This step needs to be manually carried out in an AWS EC2 instance. To build the image, download the "docker-inference" folder from "File Browser" section and follows the commands mentioned below to push the Docker image to an AWS Elastic Container Registry (ECR).
- Build the image with
ecr_repositorytag.sudo docker build -t <ecr_repository> docker-inference/ - Re tag the image with
inference_repository_uriname.sudo docker tag <ecr_repository> <inference_repository_uri> - Create an AWS ECR and login into to push the image.
A.aws ecr get-login-password --region <region> | sudo docker login --username AWS --password-stdin <account_id>.dkr.ecr.<region>.amazonaws.com
B.aws ecr create-repository --repository-name <ecr_repository>
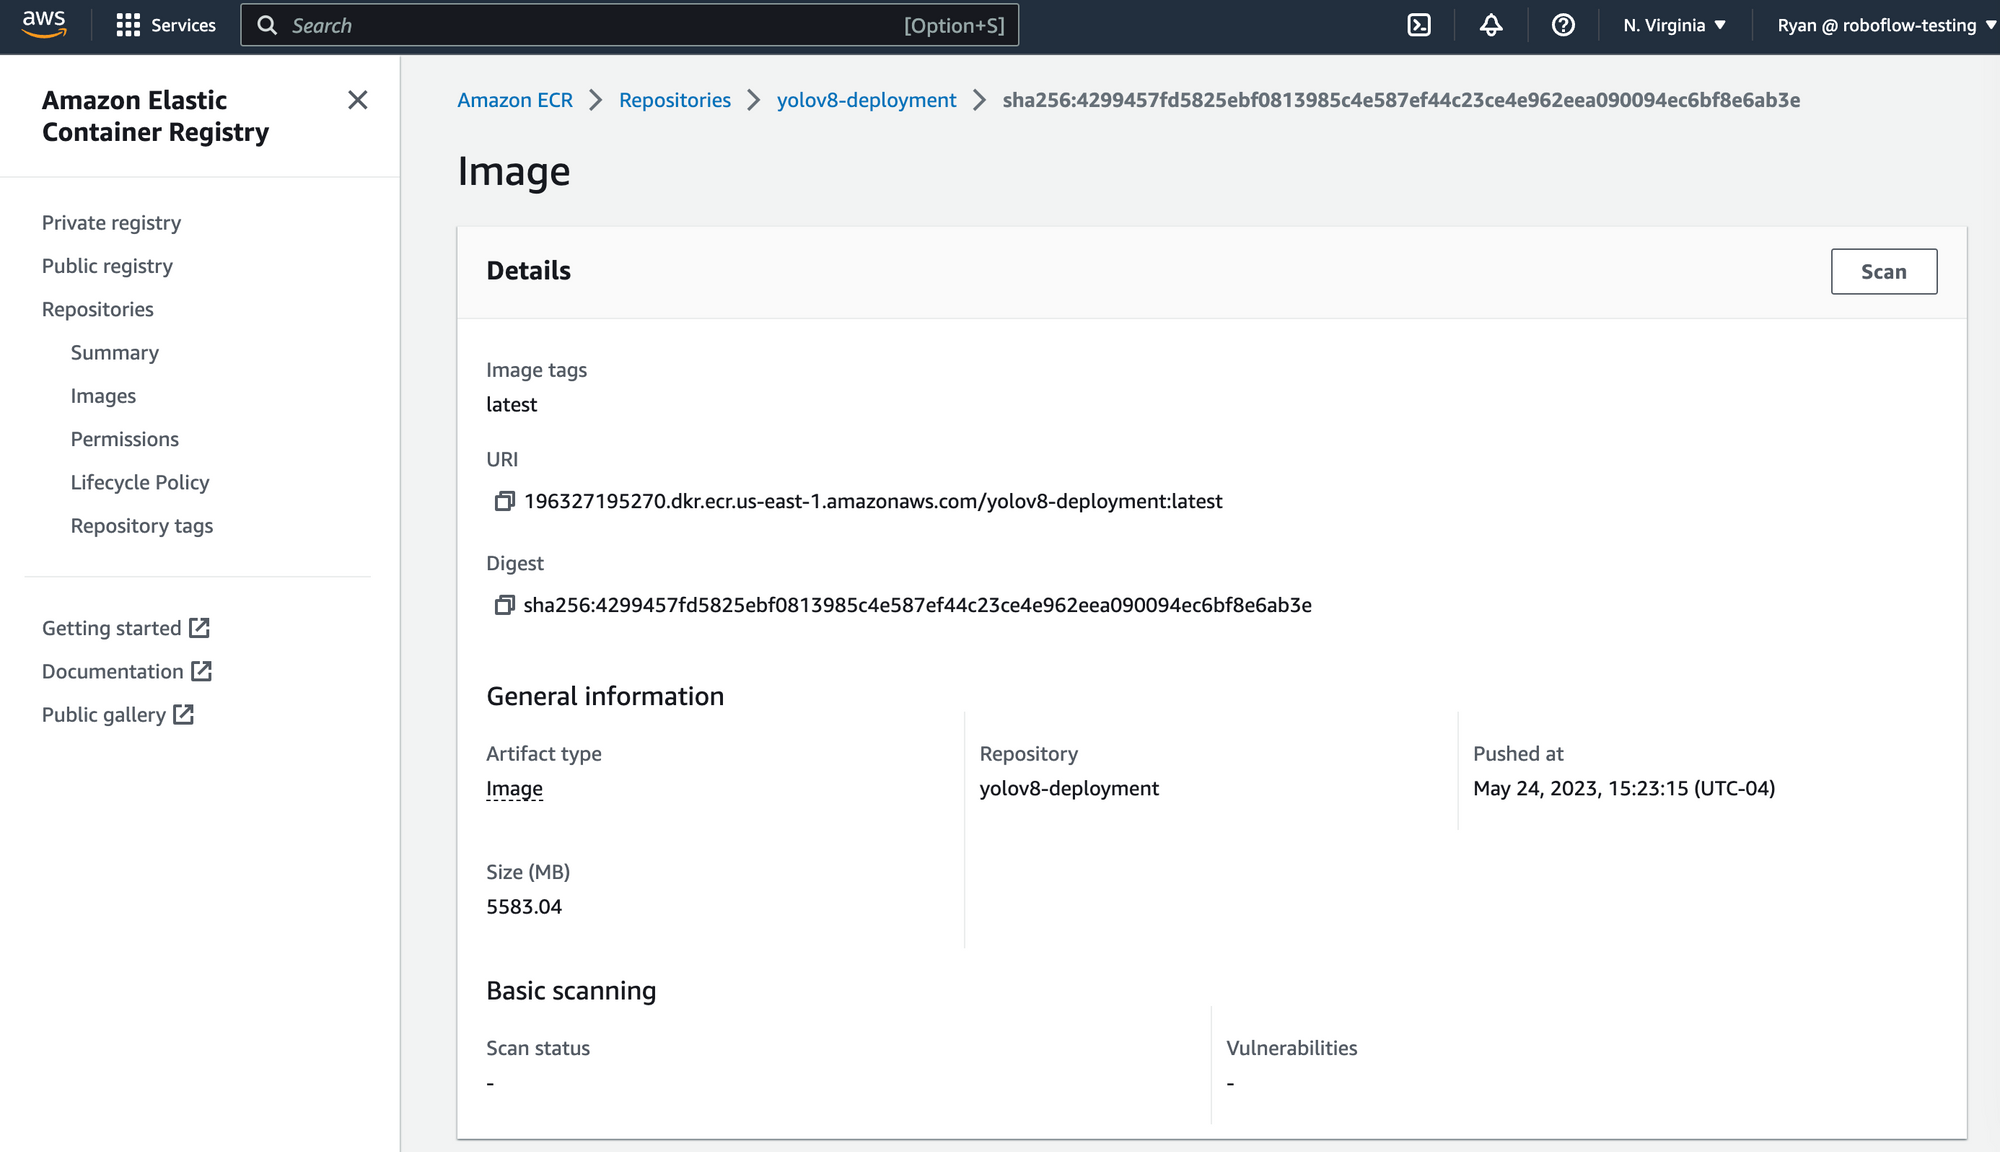
C.sudo docker push <inference_repository_uri>
Deploy YOLOv8 Model to Sagemaker
Now deploy the model to a SageMaker endpoint. The instance size to use for deployment is ml.c6i.xlarge. Make sure the image is built and pushed to ECR before trying out this part.
import sagemaker
from sagemaker import Model

ENDPOINT_NAME = "YOLO-V8-DEPLOYMENT"
yolo_model = Model(
                   model_data=model_location,
                   role=role,
                   image_uri=inference_repository_uri,
                   name='YOLO-V8-deployment-1')

yolo_model.deploy(initial_instance_count=1, instance_type='ml.c6i.2xlarge', endpoint_name=ENDPOINT_NAME)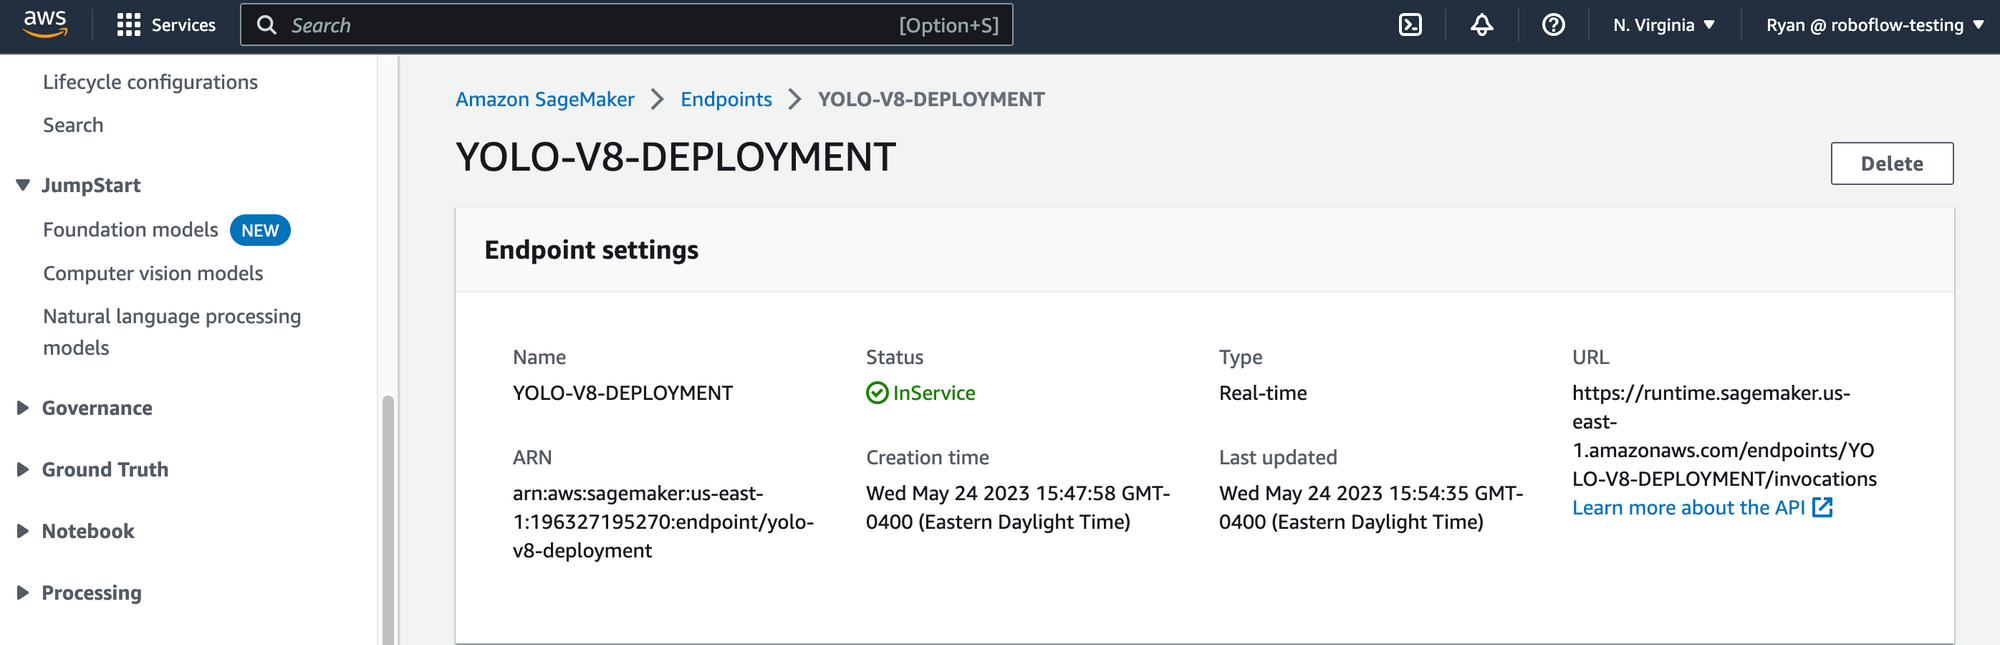
YOLOv8 Inference with Amazon SageMaker
Now we're ready to run our model! In the script below, we demonstrate how to run inference on your YOLOv8 model. First, provide a URL of an image on which you want to run inference on input data. Then, add a comma then specify the device type on which inference should run. Supported image types are 'jpg', 'jpeg', 'png' and device types are 'cpu' & 'CPU_FP32'.
Setting cpu as the device type will perform the ONNXRuntime inference with default CPU EP(MLAS). Setting CPU_FP32 will perform the ONNXRuntime inference with OpenVINO EP.
payload2 = "https://github.com/roboflow/sagemaker-yolov8/blob/main/yolov8-weights/runs/detect/predict/dog.jpeg,CPU_FP32"
# warmup steps
for _ in range(warmup_steps):
predictor.predict(payload2)
!sleep 10
total_latency = 0
for _ in range(num_iter_steps):
response2 = predictor.predict(payload2)
total_latency += float(response2.decode().split('\n')[0].split(':')[1][:-1].strip())
print("(OpenVINO EP) Avg Latency In Seconds: ", total_latency/num_iter_steps)
print("\nSingle Inference Details:\n",response2.decode())
# Dsiplay the output
# update the labels, points and confidences with your inference output
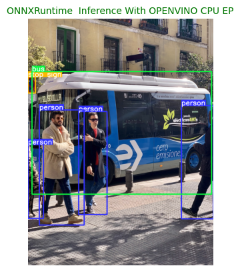
labels2 = ['person', 'stop sign', 'person', 'person', 'person', 'bus']
points2 = [[(0, 551), (67, 874)], [(0, 255), (32, 325)], [(221, 406), (345, 857)], [(670, 380), (810, 876)], [(49, 399), (245, 903)], [(17, 231), (802, 768)]]
confidences2 = [0.30, 0.35, 0.82, 0.85, 0.87, 0.87]
display('bus.jpg', labels2, points2, confidences2, class_to_idx, 'ONNXRuntime Inference With OPENVINO CPU EP')Here is an example prediction:
Cost Analysis: OpenVINO vs Default CPU
The benchmark results below demonstrate the cost saving comparison of "OpenVINO Execution provider" over "Default CPU(MLAS) Execution provider". The results may be helpful when deciding which ONNXRuntime is best for your applications.

Conclusion
In this guide, we have built a YOLOv8 object detection model and deployed to a AWS SageMaker endpoint, serving inference requests with ONNXRuntime and OpenVino as the execution provider.
Cite this Post
Use the following entry to cite this post in your research:
Ryan Ball. (May 30, 2023). How to Deploy YOLOv8 Using Intel's OpenVINO and Amazon SageMaker. Roboflow Blog: https://blog.roboflow.com/deploy-yolov8-onnx-amazon-sagemaker/