
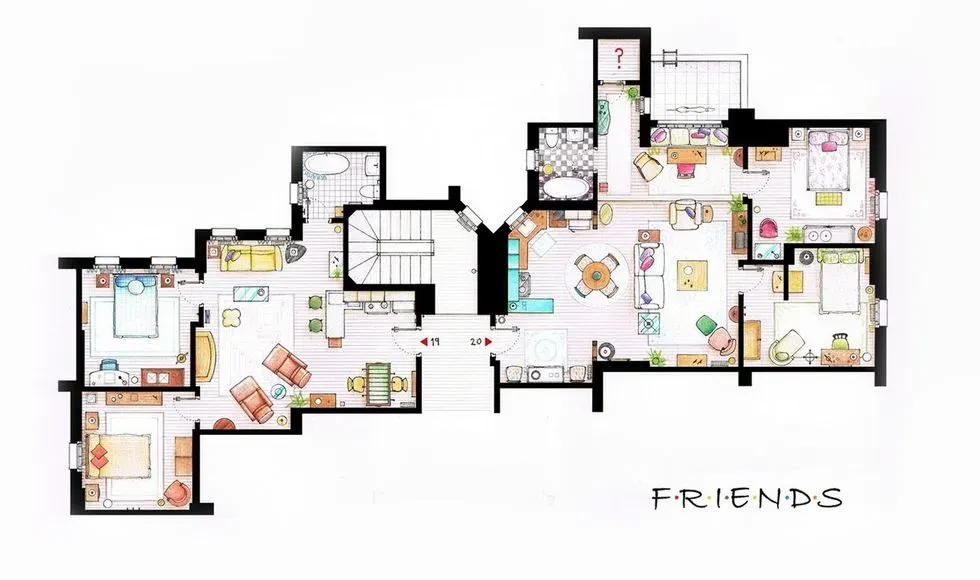
A floor plan is a detailed architectural drawing that represents a two-dimensional layout of a building or space as viewed from above. It showcases the arrangement of rooms, walls, doors, windows, and other architectural elements, as shown in the image below.
Floor plans are crucial for creating understanding spaces in interior design, architecture, and construction projects. Traditionally, analyzing floor plans required painstaking manual effort from a select few experts, draining time and resources. With computer vision, we now have the power to automate and scale floor plan analysis.
In this guide, we’ll walk through how to build a computer vision model that can segment a floor plan into its various components. Using computer vision to understand floor plans allows you to unlock and generate data from what has historically been a static asset.
Let's dive in!
Floor Plan Analysis AI
The Challenges of Traditional Floor Plan Analysis
One of the primary obstacles that traditional floor plan analysis encounters is its heavy reliance on manual examination by skilled experts. This process can be extremely time-consuming, especially when dealing with larger or more complex floor plans.
As designers strive for greater efficiency and quick turnarounds, the slow pace of manual analysis becomes a significant hindrance, impeding the progress of projects.
Moreover, manual floor plan analysis may not scale effectively to handle a large volume of projects or accommodate continuous updates in real time. This limitation poses challenges for design teams aiming to tackle multiple projects simultaneously and stay up-to-date with evolving requirements.
Likewise, ensuring that floor plans comply with accessibility standards and building codes is very important. Achieving compliance can be a daunting task that makes precise analysis and adjustments necessary in order to meet stringent regulatory requirements. Failing to meet these standards can result in costly revisions and delays in project completion.
To overcome these challenges, designers, and architects are increasingly turning to modern technologies, such as computer vision and automated analysis tools. These advanced solutions streamline the analysis process, boost efficiency, and help create optimized and compliant floor plans that align with the vision of the project and meet the needs of both clients and end-users.
Building a Floor Plan Segmentation Model Using Computer Vision
Step 1: Preparing Your Dataset
Collect Computer Vision Data
Go ahead to the next step if you already have your data.
The first step is to collect images of floor plans, ensuring that the data you put together is relevant to your end goal.
To help with data collection, Roboflow offers two useful tools: Roboflow Collect and Roboflow Universe. Roboflow Collect is an automated data collection tool that allows you to effortlessly gather data using a webcam and directly upload it to Roboflow. Roboflow Universe boasts a vibrant community housing over 200,000 computer vision datasets that cover diverse use cases.
In this guide, we will work with the dataset shown below from Roboflow Universe, which has about 504 annotated images of floor plans.
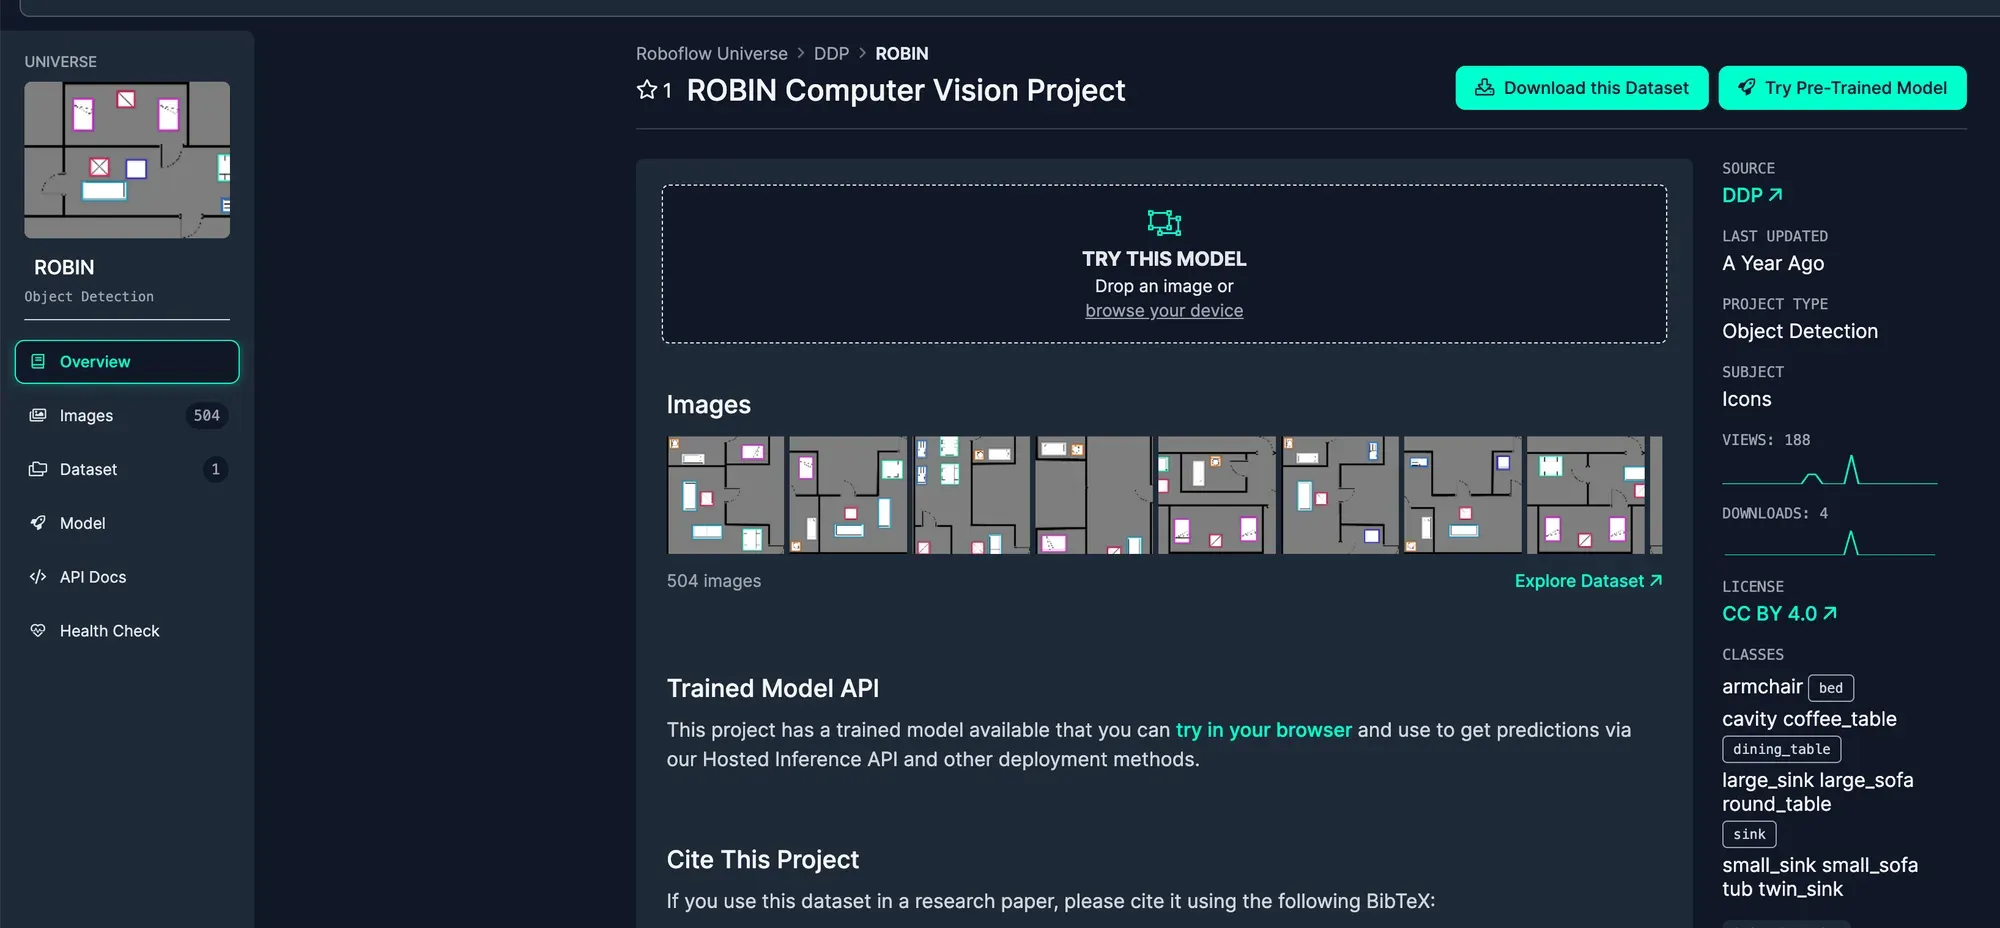
To access this dataset, navigate to the Universe project page and click on "Download this Dataset." You will find a checkbox that lets you download the dataset as a ZIP file. Be sure to unzip this file so that we can use it in the next step.
Upload Data to Roboflow
Now that you have gathered all the necessary data, it's time to upload it to Roboflow.
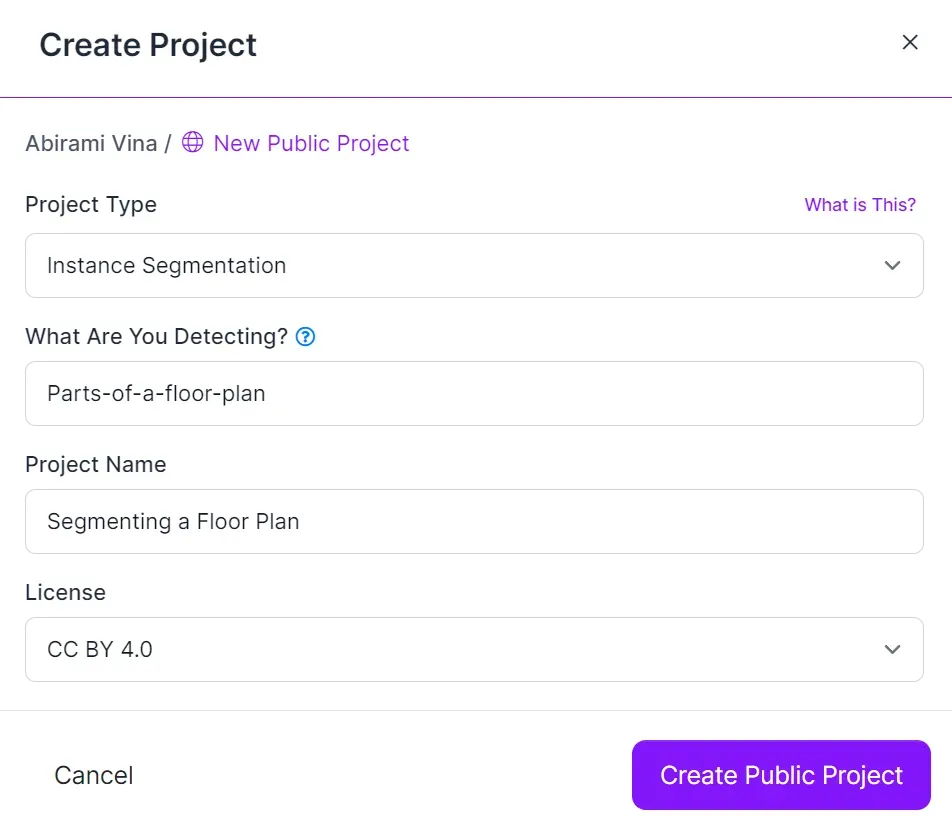
To get started, sign up for a Roboflow account, and access the dashboard. Click on "Create New Project," just like the image below shows.
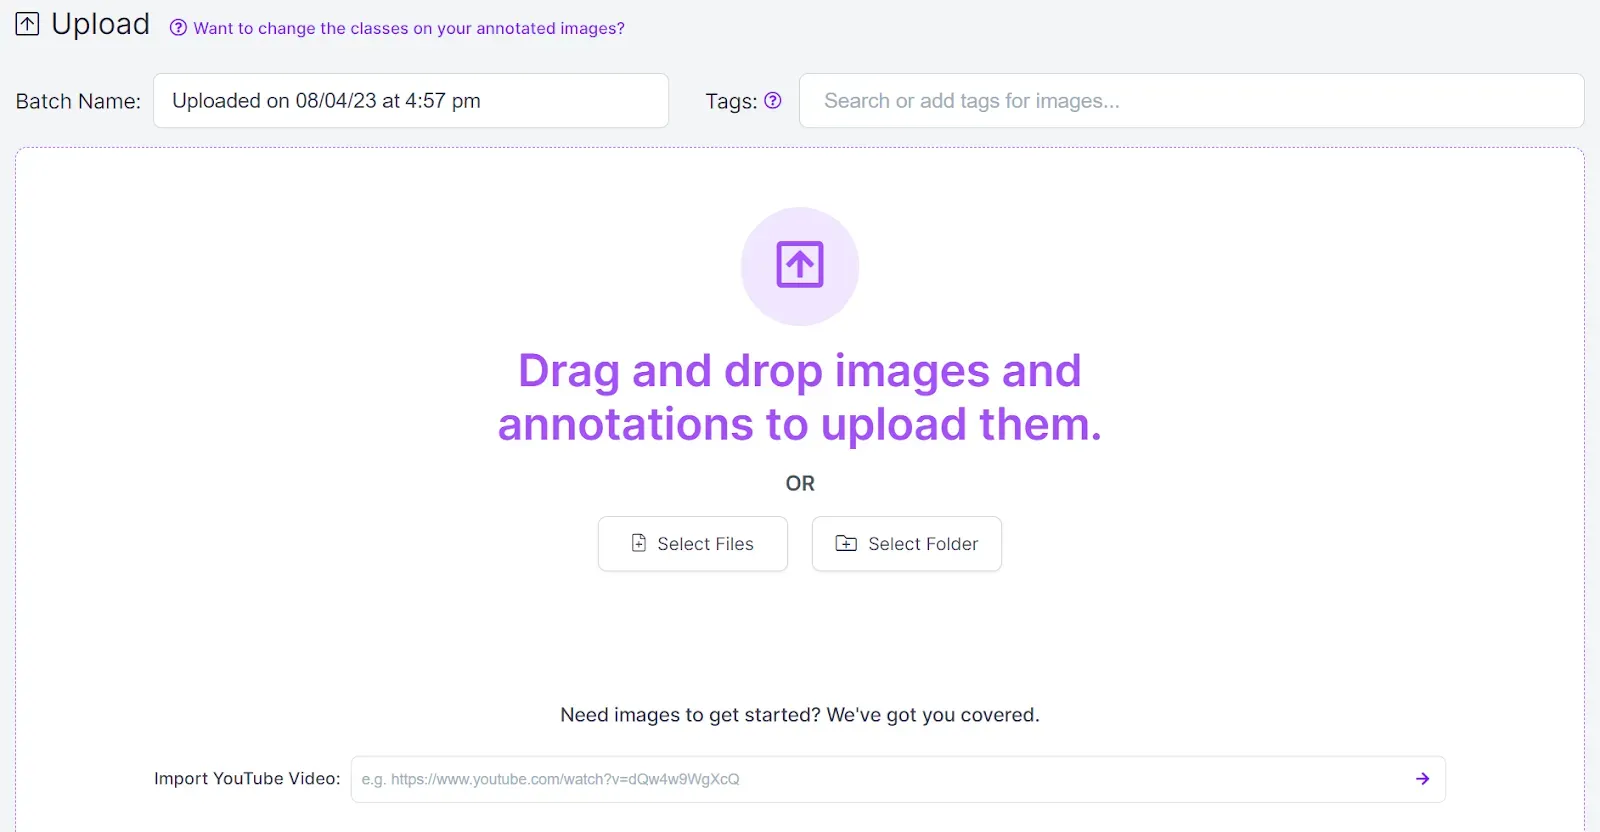
Now, as demonstrated below, you can easily drag and drop all the images and annotations you wish to use for training your model.
Annotate Data with Roboflow
Roboflow Annotate is a powerful annotation tool that offers an interactive web interface for annotating images. To begin annotating, click on "Annotate" in the sidebar of your project within the Roboflow dashboard. Clicking on an image will open it in the annotation view, as illustrated below.
To mark images with annotations, access the polygon tool located in the right sidebar. Use your cursor to draw polygons around each object of interest. Once a polygon is drawn, you will be prompted to select a class to associate with the annotation. You can choose from pre-existing classes or create new ones. To save the annotation, simply press the Enter key on your keyboard.
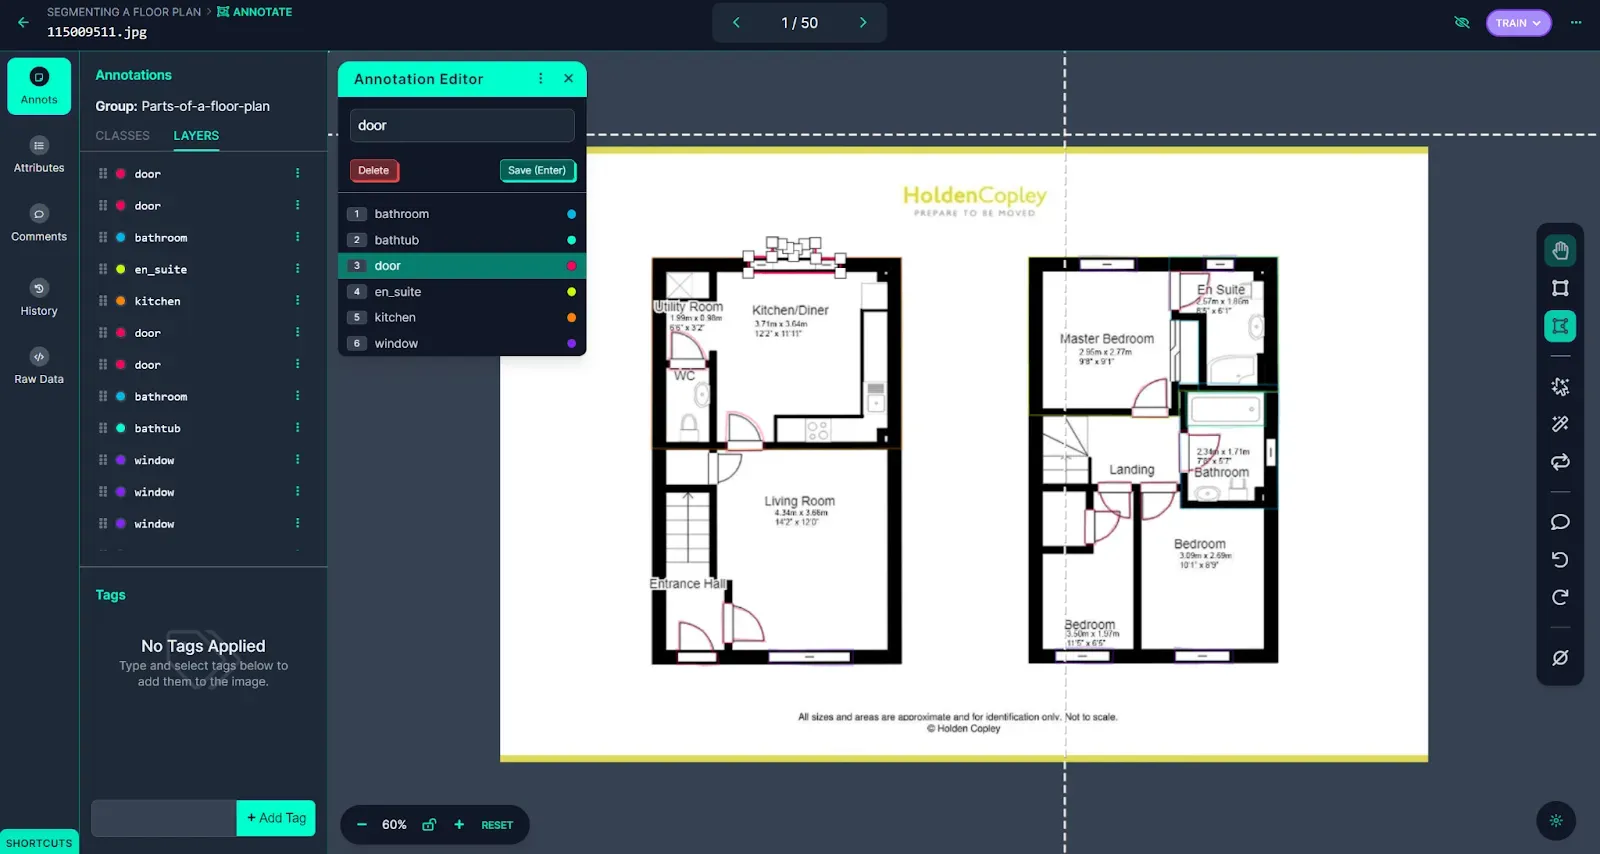
Roboflow provides several tools to streamline the annotation process, including the Smart Polygon feature. This feature allows for image annotation using polygons, leading to improved model performance. In the past, creating polygon annotations took more time compared to bounding boxes. However, with Smart Polygon, the process becomes faster and simpler.
To utilize Smart Polygon, click on the magic wand icon in the right sidebar and follow the on-screen instructions to configure the feature. Once set up, hover your cursor over any object in the image, and Smart Polygon will suggest an annotation. This intelligent recommendation system saves time and effort during the annotation process. For further insights into using Smart Polygon effectively, you can refer to the Roboflow Annotate documentation. And learn more about how to label floor plan data for computer vision models.
With the annotation process completed, the next step is to create a dataset version.
Create a Dataset Version
To create a dataset version, simply click on the "Generate" option in the Roboflow sidebar. While you have the option to configure data preprocessing and augmentation steps, it is advisable to refrain from setting any pre-processing or augmentation steps for the initial version of the model. Click on the "Generate" button, as shown below, to proceed with creating the dataset version.
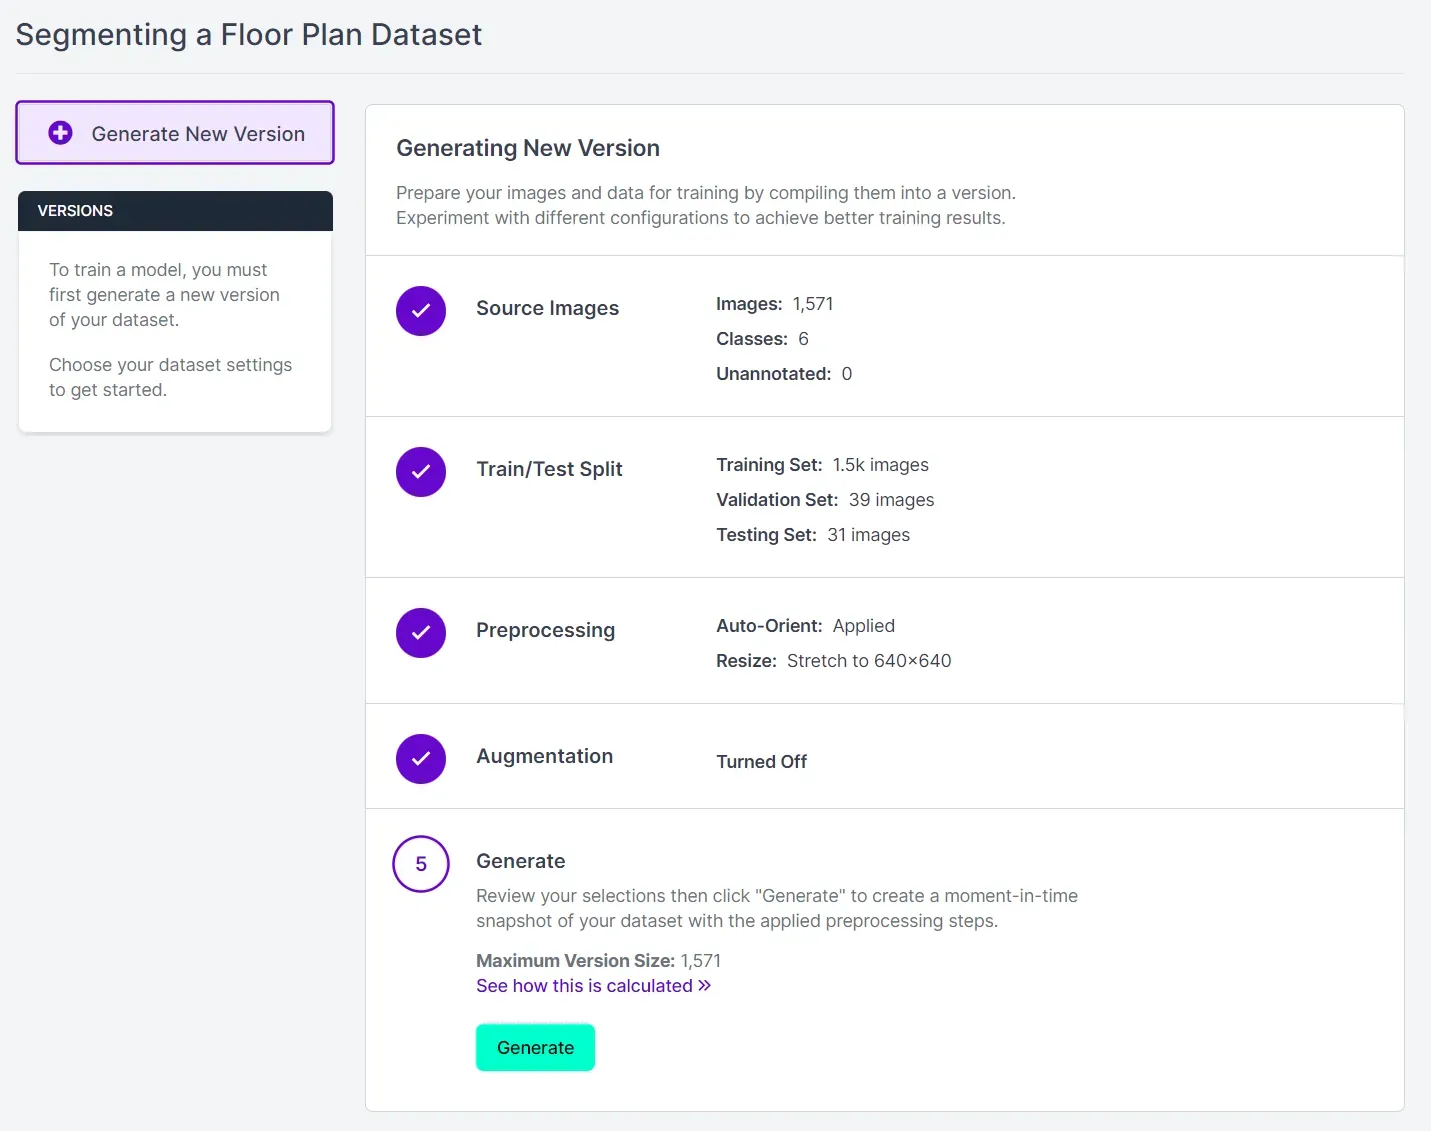
The dataset version creation process may take a few minutes, depending on the size of the dataset. Once the dataset version is successfully generated, we are all set to proceed with training our model!
Step 2: Train Your Instance Segmentation Model
Training computer vision models on Roboflow is incredibly straightforward using Roboflow Train. Once you have created a dataset version, navigate to the dataset version page, where you will find the option "Train a Model." Click on the "Start Training" button, as illustrated below.
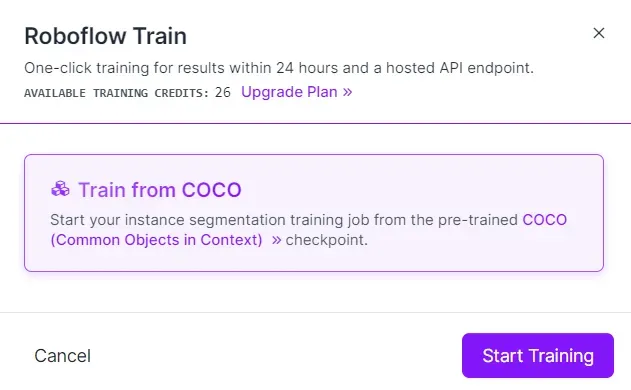
A cloud-hosted computer will be assigned to handle your training job. The duration of model training will depend on the number of images you've used. Once your model is fully trained and ready for use, you will receive a notification via email, letting you know it's ready to go.
Step 3: Test Your Model
After your model has completed the training process, you can evaluate its performance using the Roboflow Deploy page, as indicated below. To access it, navigate to the Roboflow sidebar and click on "Deploy."
Once on the Deploy page, you'll find a box where you can perform inference on images from your test set. This allows you to assess how well your model performs on unseen data (which was not used during training). Moreover, you can also upload new images for additional testing and evaluation.
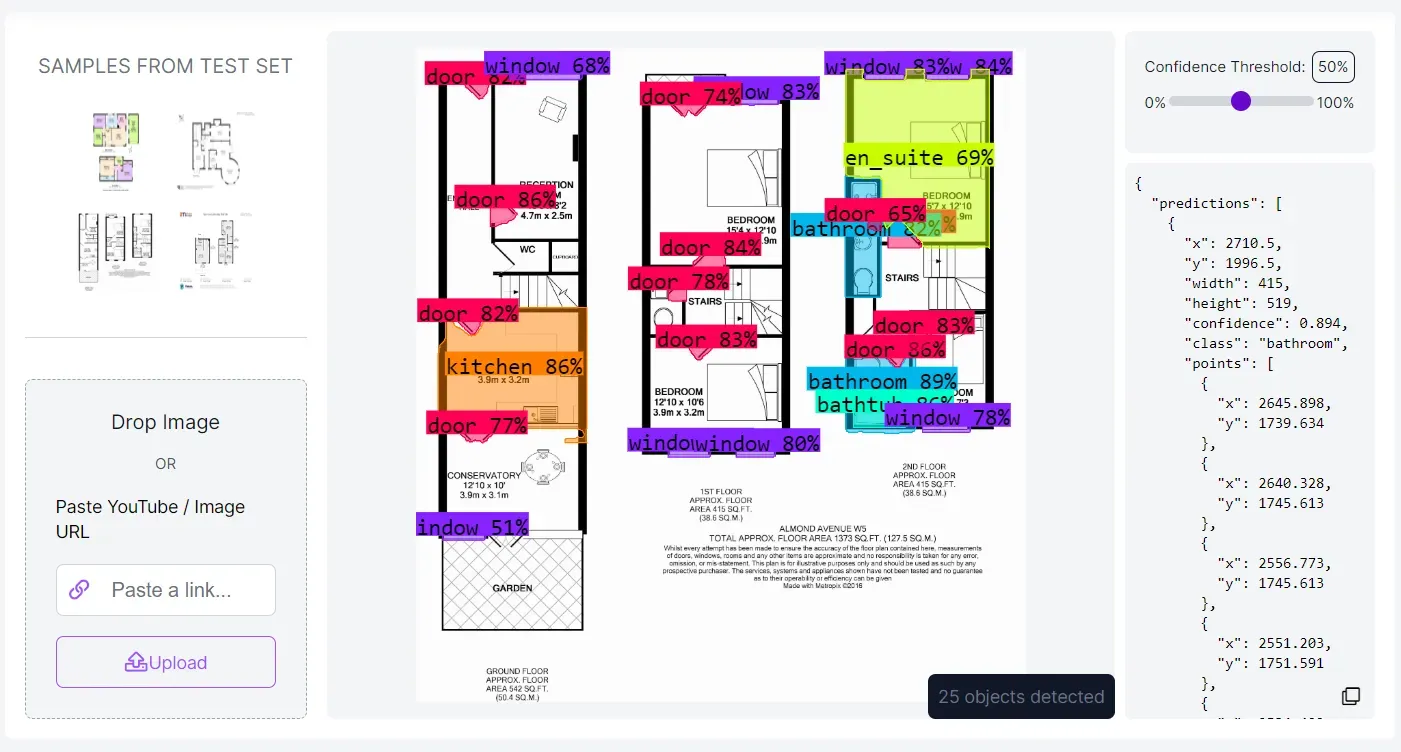
You can see that the model successfully segments different elements of the floor plan.
Step 4: Deploy Model to Production
Reaching the milestone of having a trained model is significant, but the next step is crucial: deploying the model in production. Roboflow simplifies this process by offering a range of Software Development Kits (SDKs) and tools specifically designed for efficient model deployment. You have the flexibility to deploy your model on various devices, such as NVIDIA Jetson, Raspberry Pi, Luxonis OAK, Web (via roboflow.js), iOS, and CPU devices (via Docker).
To explore the specific deployment options available for your model, consult the deployment compatibility matrix featured in the Roboflow documentation. Once you've chosen a deployment option, configuring the respective device(s) for using your model is the next logical step. Each option listed above is accompanied by comprehensive guides to ensure a smooth setup.
By leveraging Roboflow's deployment capabilities, you can seamlessly integrate your model into real-world applications, driving innovation and efficiency in your projects. This empowers you to unlock the full potential of your computer vision model and realize its impact in practical and diverse applications.
Floor Plan Analysis AI
Applying instance segmentation techniques to floor plan analysis offers a transformative approach to interior design and architecture. By leveraging computer vision, designers can automate and streamline the analysis process, saving valuable time and resources.
Roboflow further simplifies the entire process from data collection to model deployment. Its compatibility with various devices allows you to seamlessly integrate models into real-world applications, driving efficiency and innovation in diverse projects.
The journey to redefine our understanding of space has just begun, and with the synergy of floor plan analysis, computer vision, and innovative tools like Roboflow, we can shape a future where design is elevated, and human experiences are enriched.
This article was contributed to the Roboflow blog by Abirami Vina.
Cite this Post
Use the following entry to cite this post in your research:
Trevor Lynn. (Aug 16, 2023). Floor Plan Analysis with Computer Vision. Roboflow Blog: https://blog.roboflow.com/floor-plan-analysis-computer-vision/