
This guide walks you through the process of building, training, and deploying a custom computer vision workflow using OpenAI and Roboflow. The process is broken down into three steps:
- Building the model
- Connecting the model to a Workflow
- Writing code to get the outputs
Through the use of computer vision, you can automatically digitize written notes onto your document. In this guide, we use homework booklets to demonstrate how to build a custom model as well as a foundation model.
Step 1: Build the Model
To begin, you can either copy an existing model (takes less time), or build your own. You can use the Model ID and your API key to immediately get started using the model I trained. I will also teach you how to create your own model by using an existing dataset, but refer to this tutorial if you want to build your own dataset from scratch.
To copy an existing model, you can find models on Roboflow Universe, where thousands of computer vision models are stored.
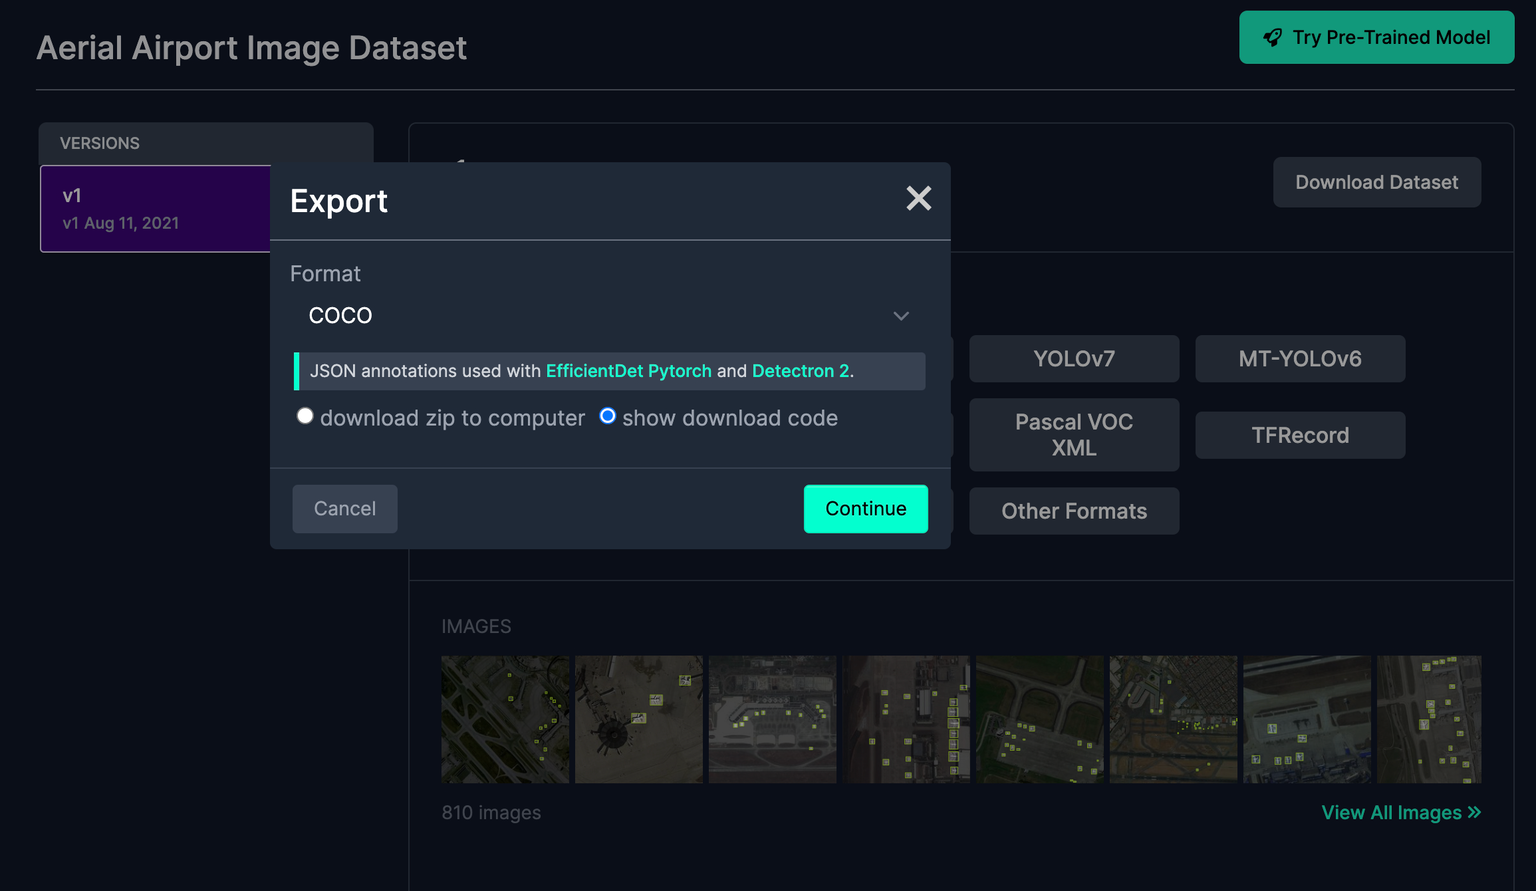
Once you find a model that works for your use case, download the full dataset.
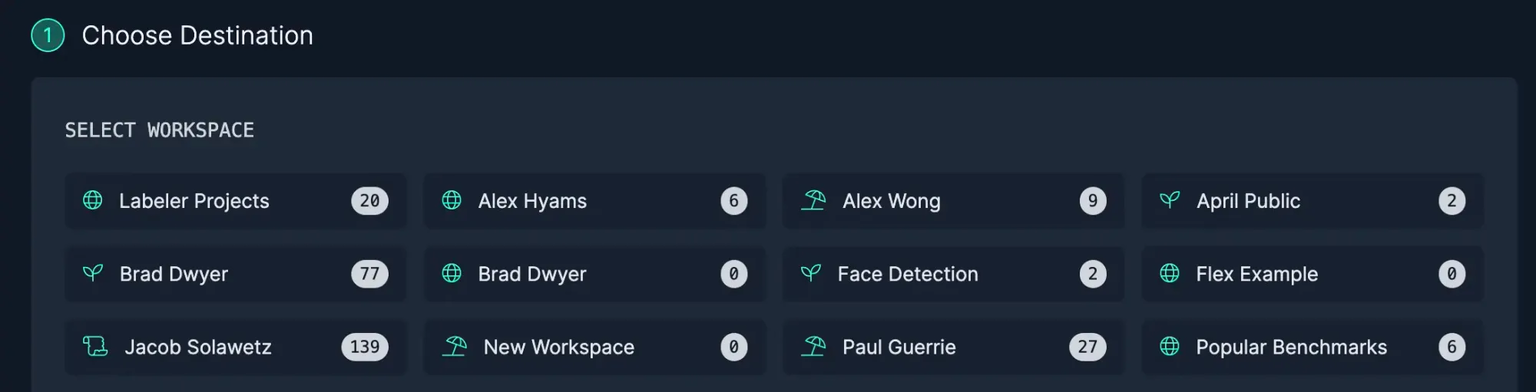
Select the workspace you want to put it in:
After, add the images to the dataset.
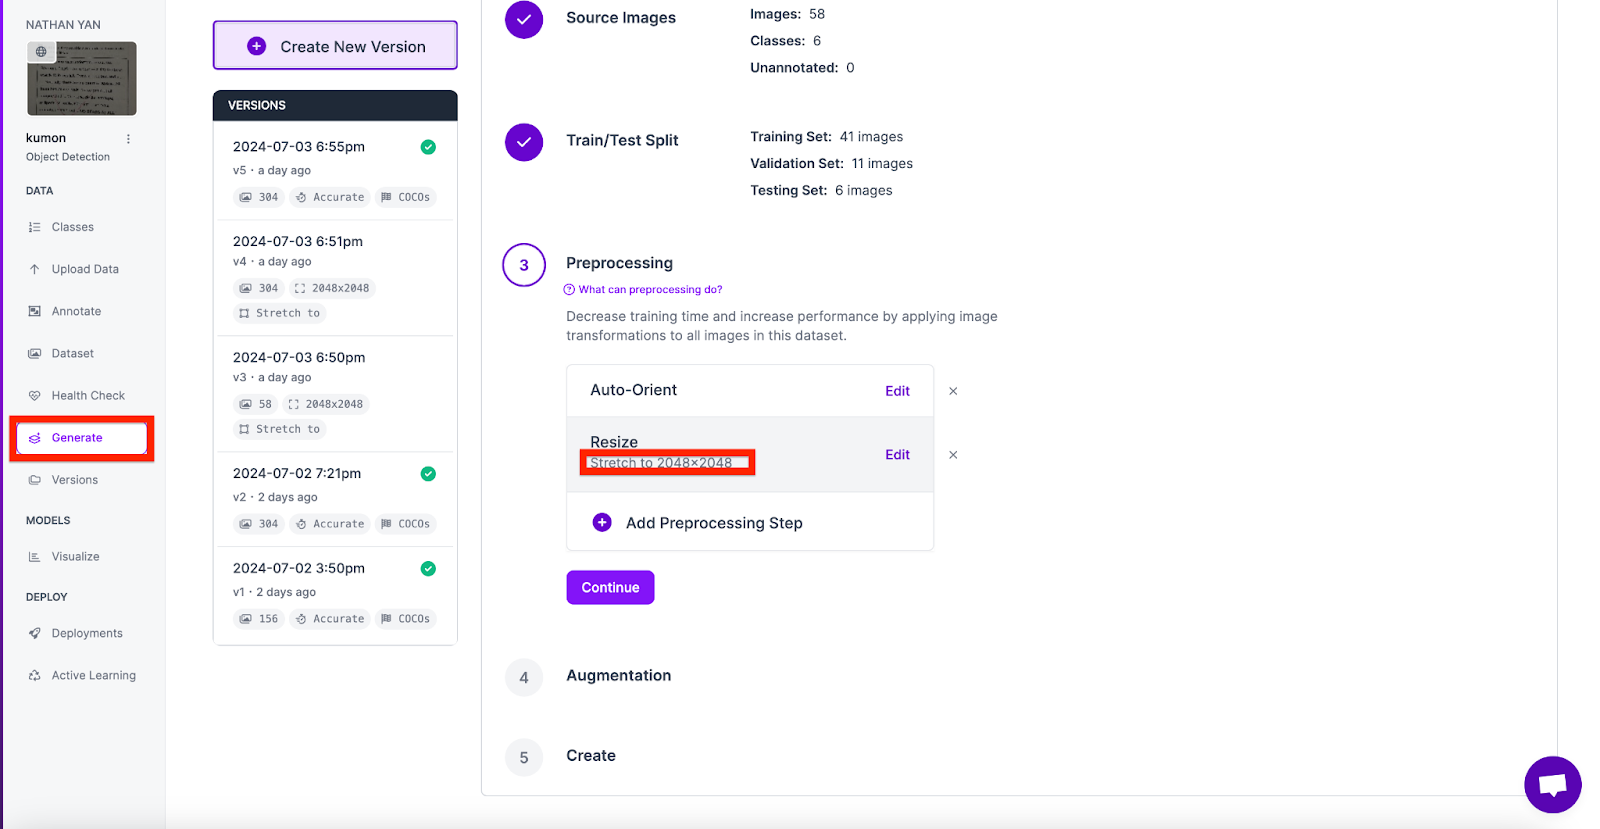
Next, you’ll use this dataset to train a model in your account.. To do this, go to generate and create a new version. Make sure to add a preprocessing step which should resize the image to 2048 to 2048.
When the model is done training, you can move on to the next step.
Step 2: Add the Model to a Workflow
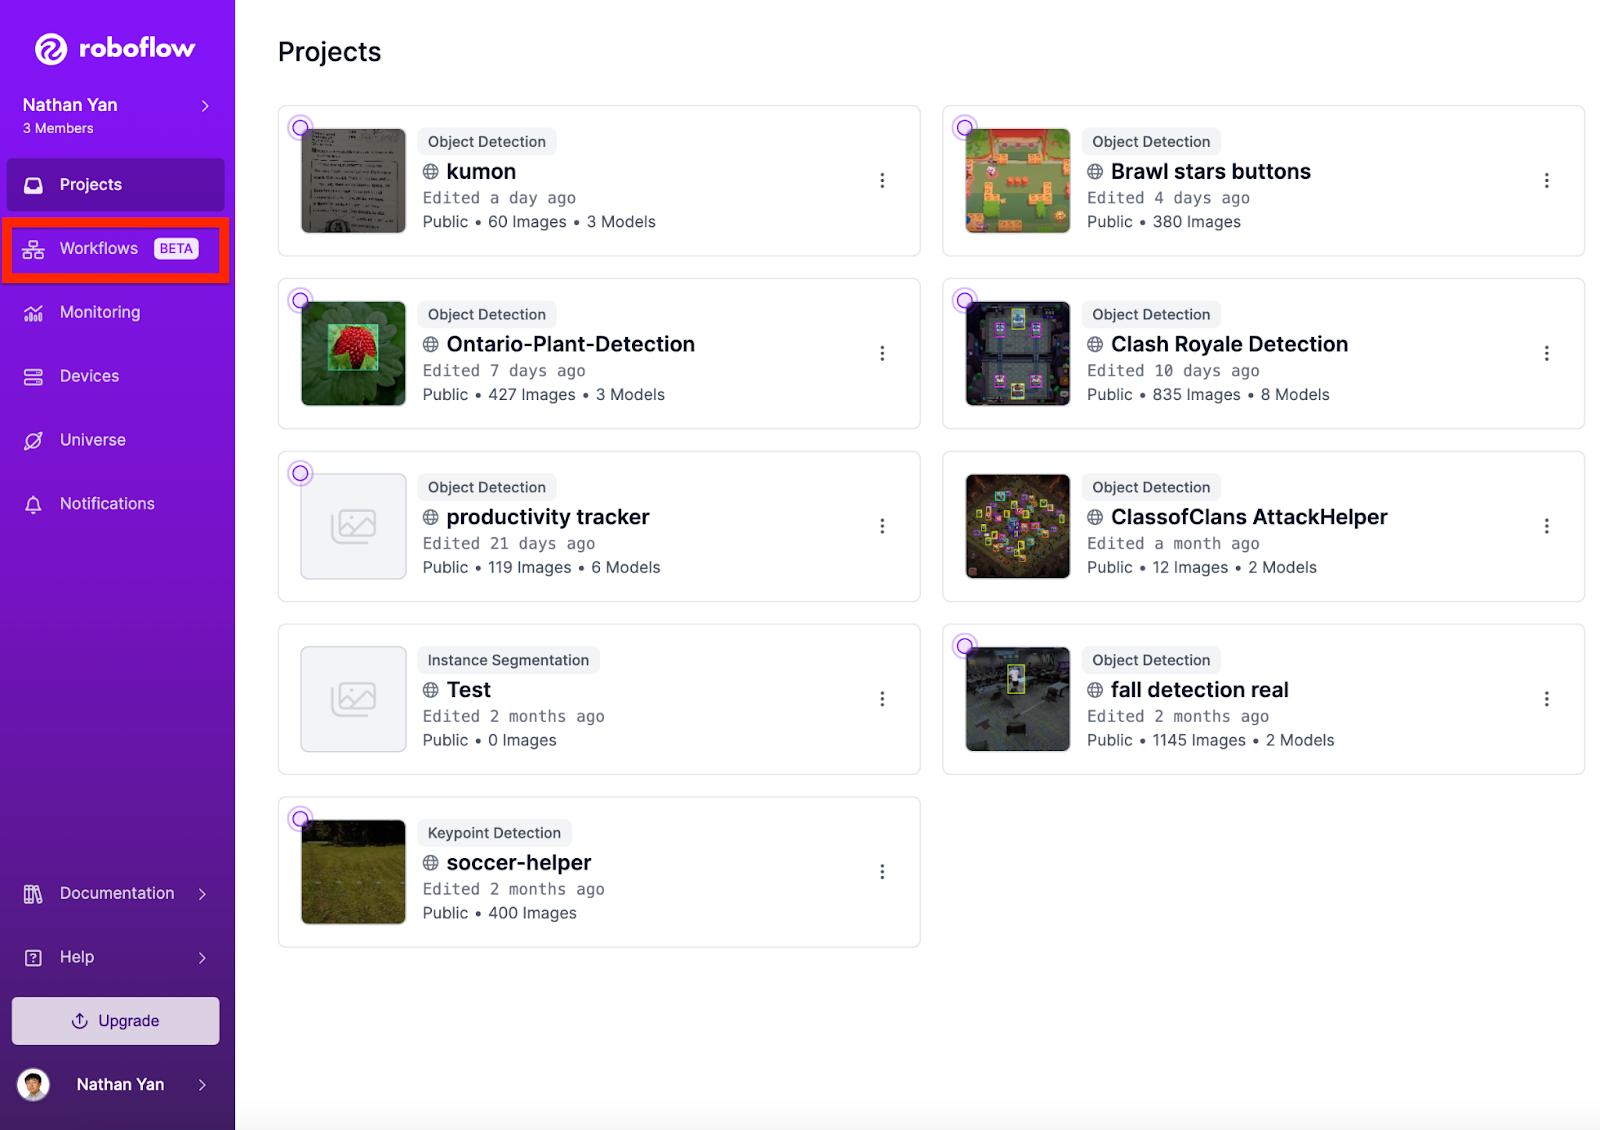
On the sidebar, open Workflows:
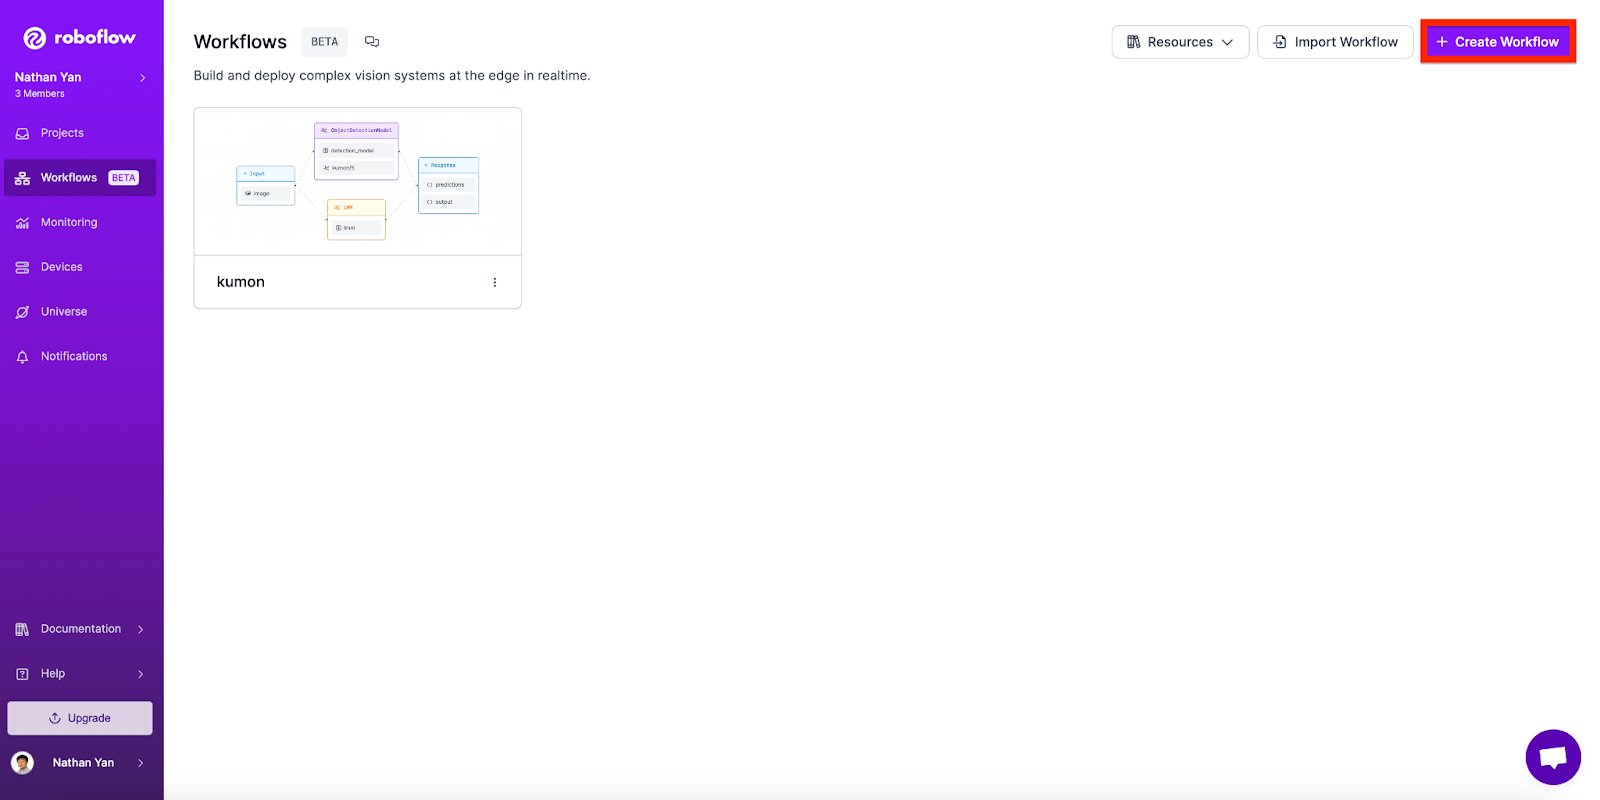
Click Create Workflow
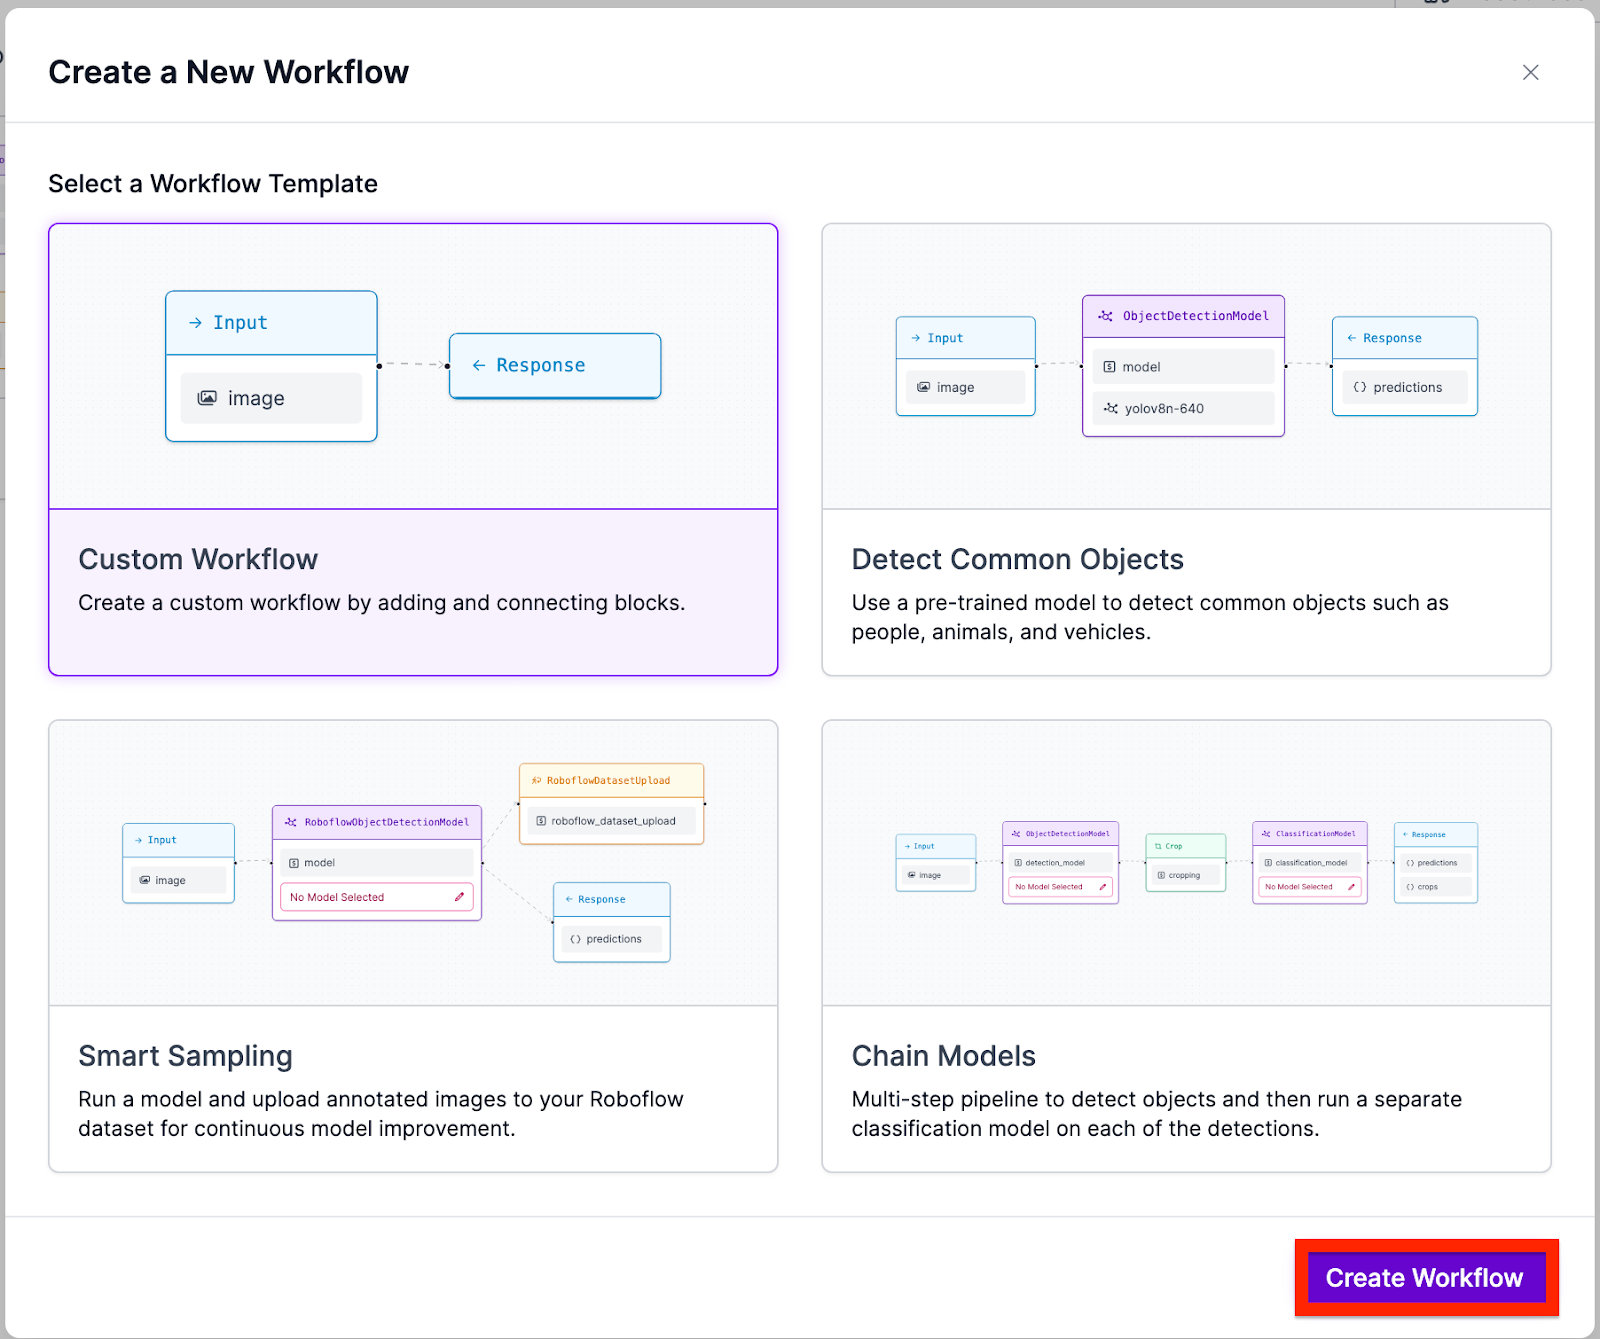
Add the following models
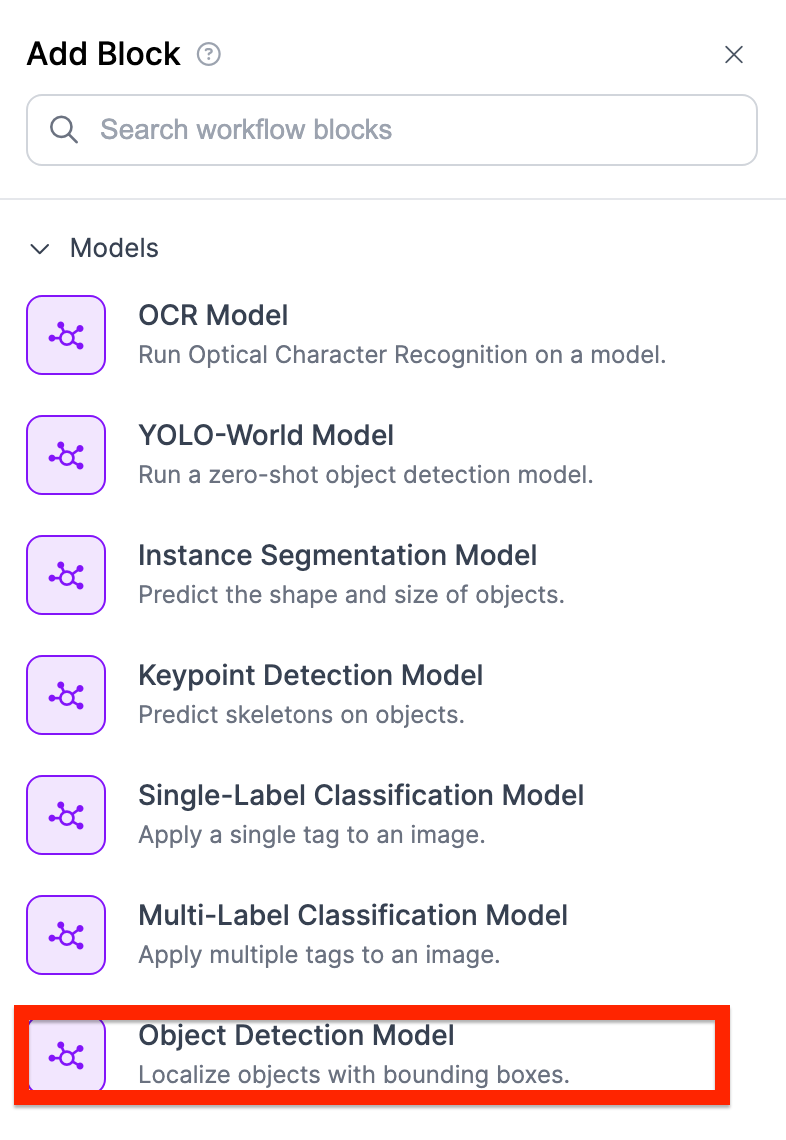
After, in your object detection block, add the model you trained.

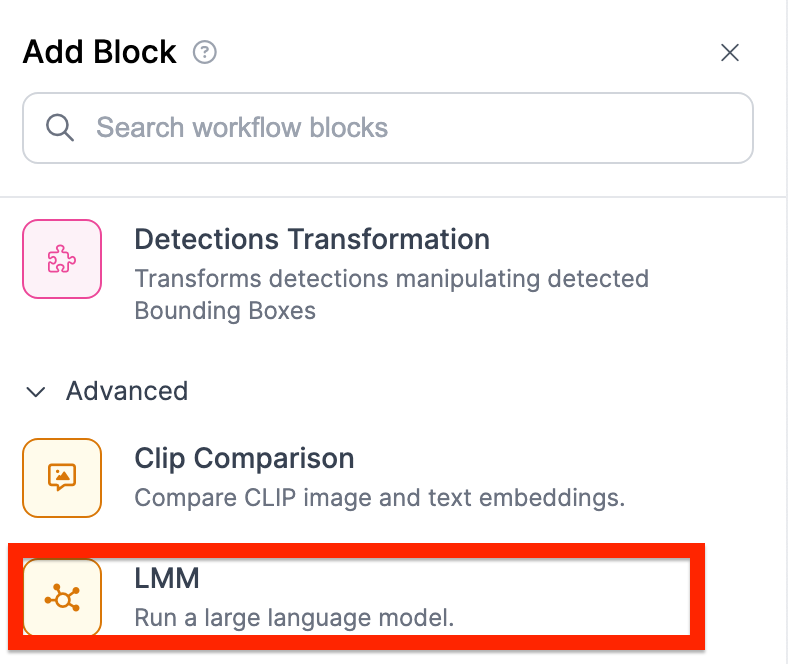
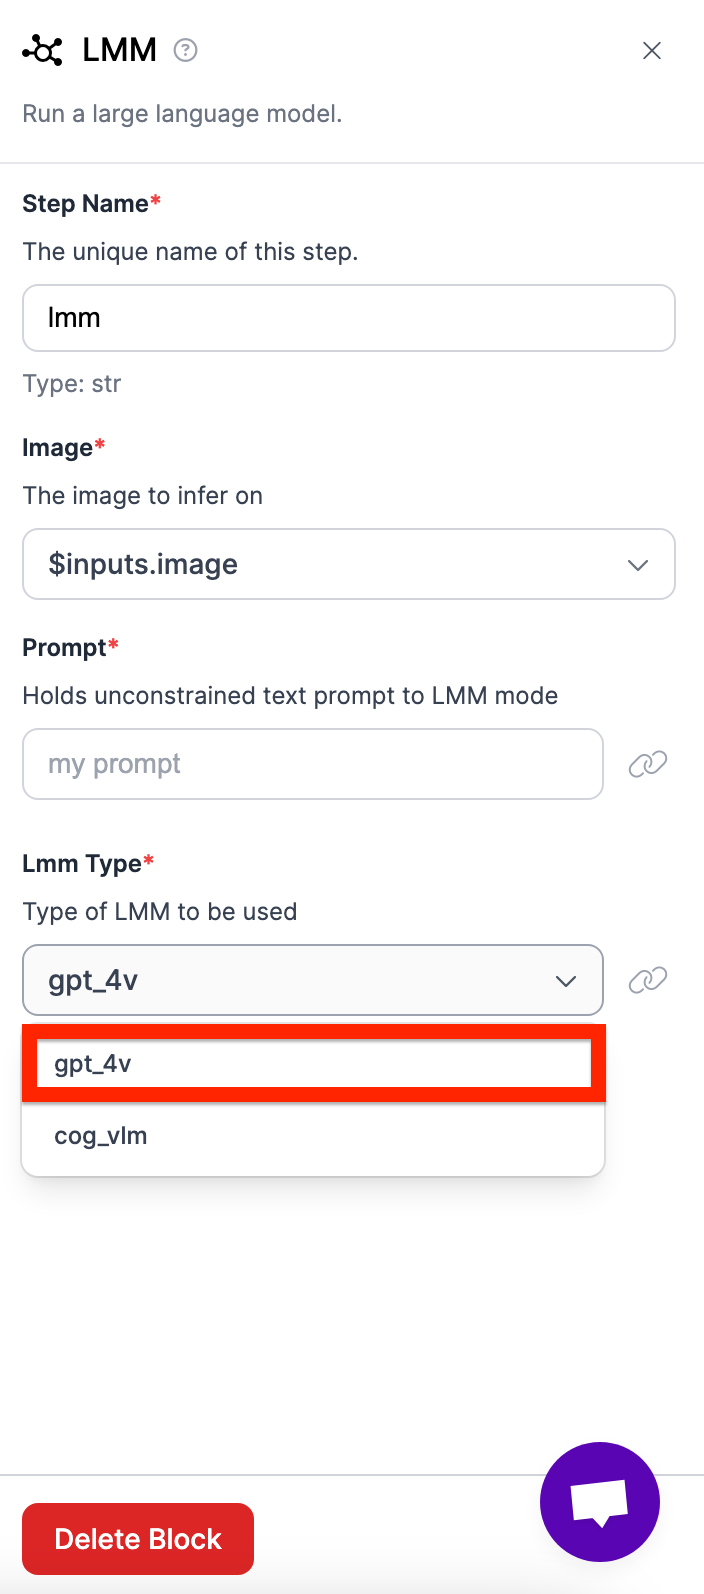
Next, do something similar with the LMM (GPT-4).
- Click on your LMM
- Add a prompt (my prompt was: how much time did it take for the child to complete the booklet? output only the child's name as well as the time in a list format. For example if the amount of time was 10, and the name was Nathan, it would be: ["Nathan", "10"].)
- Specify the model
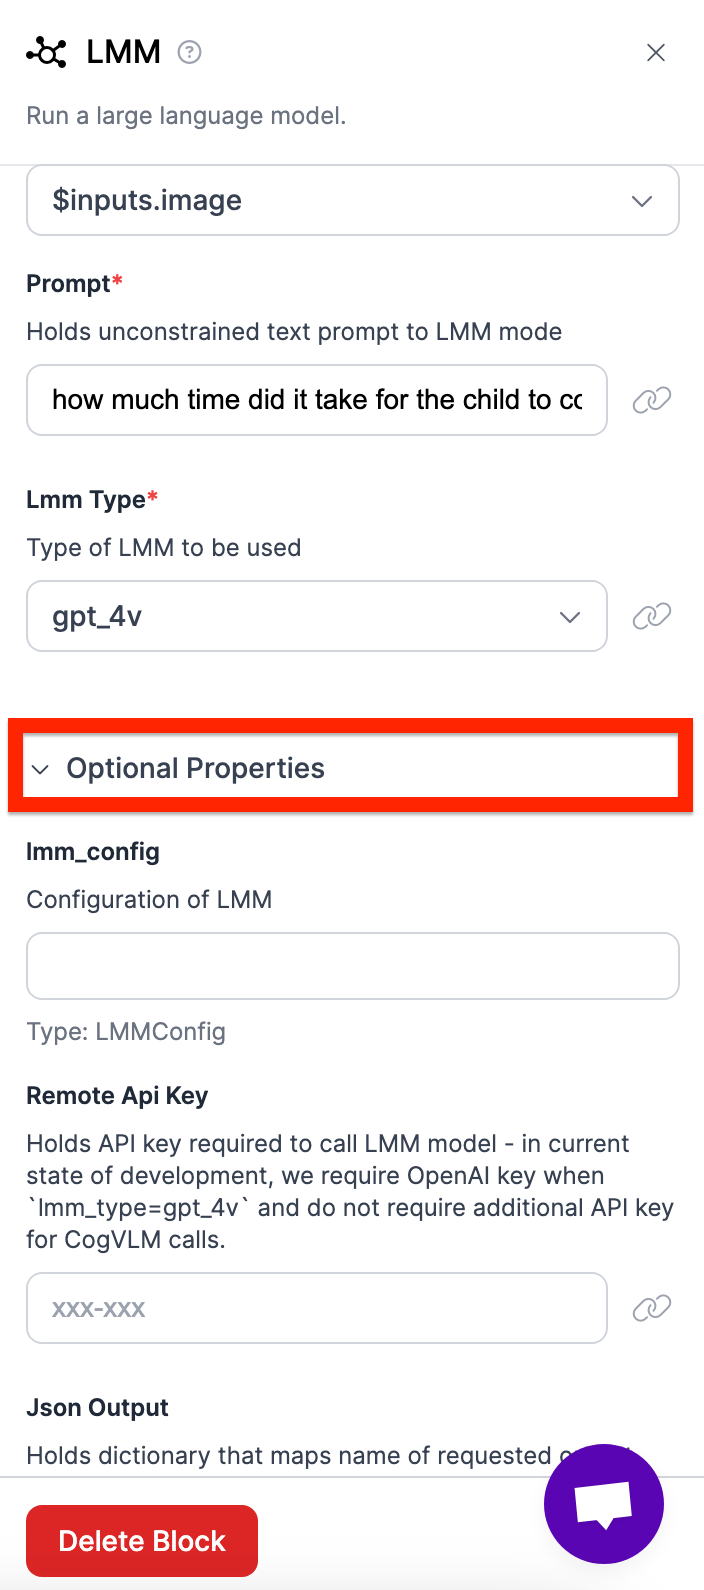
- Add your OpenAI API key by opening up optional properties
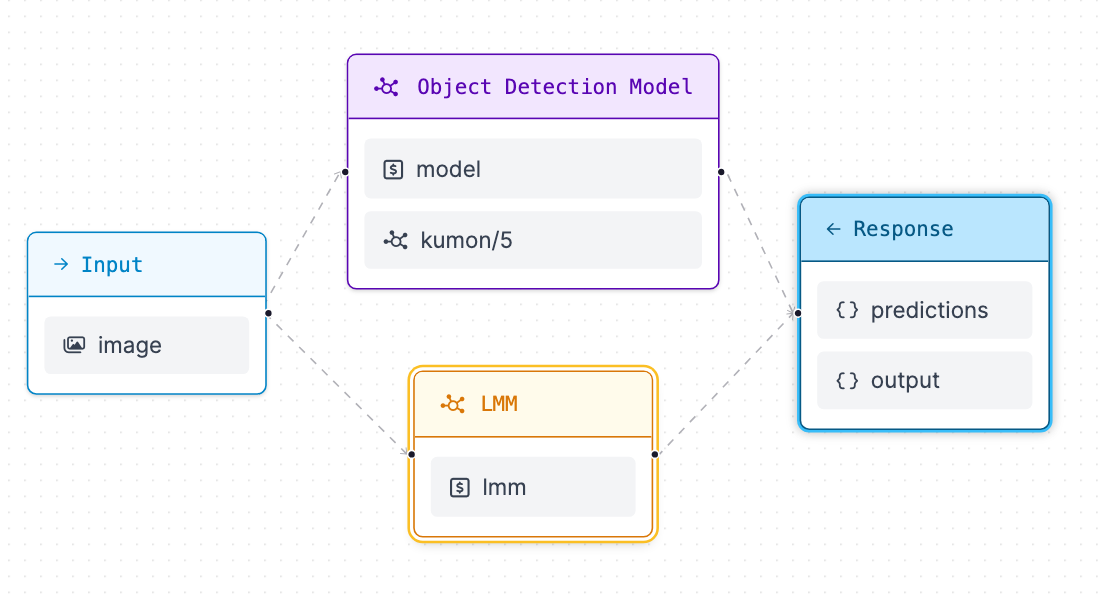
Now that you’ve added the model, your workflow should look something like this:
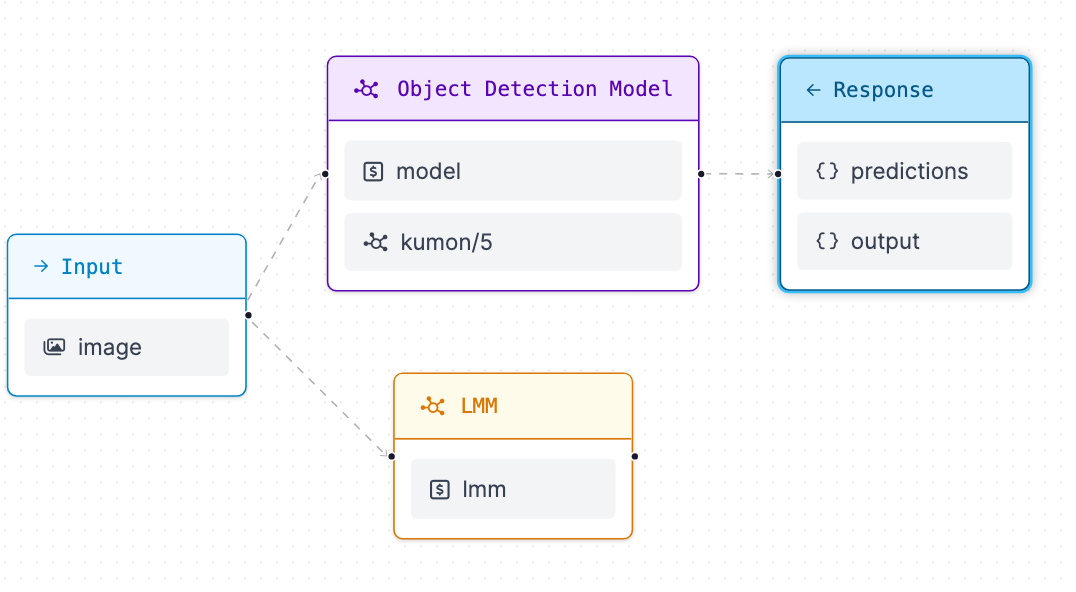
Notice how there isn't a line connecting the LMM with the response?
To add the LMM, click on response and add another output.
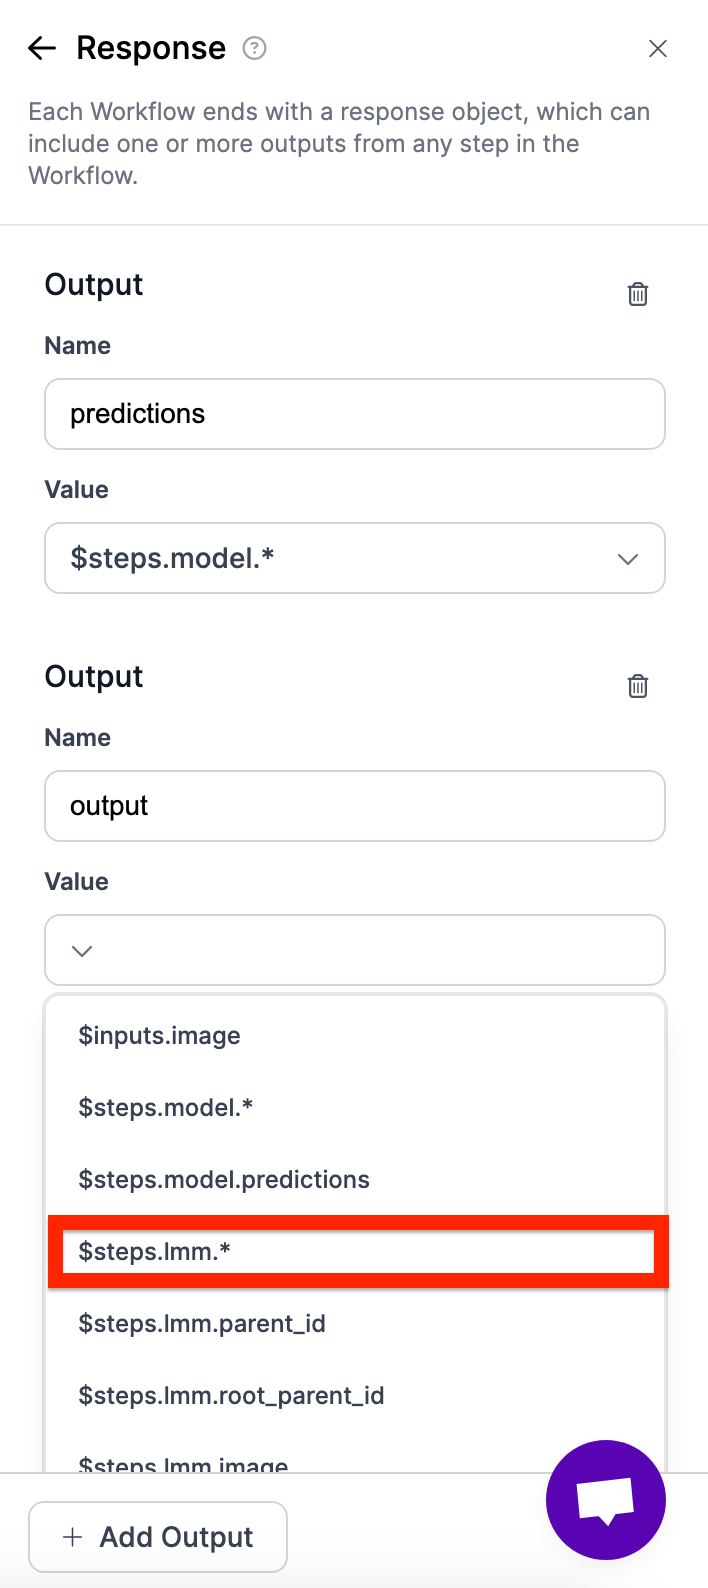
Then, your workflow should look like this.
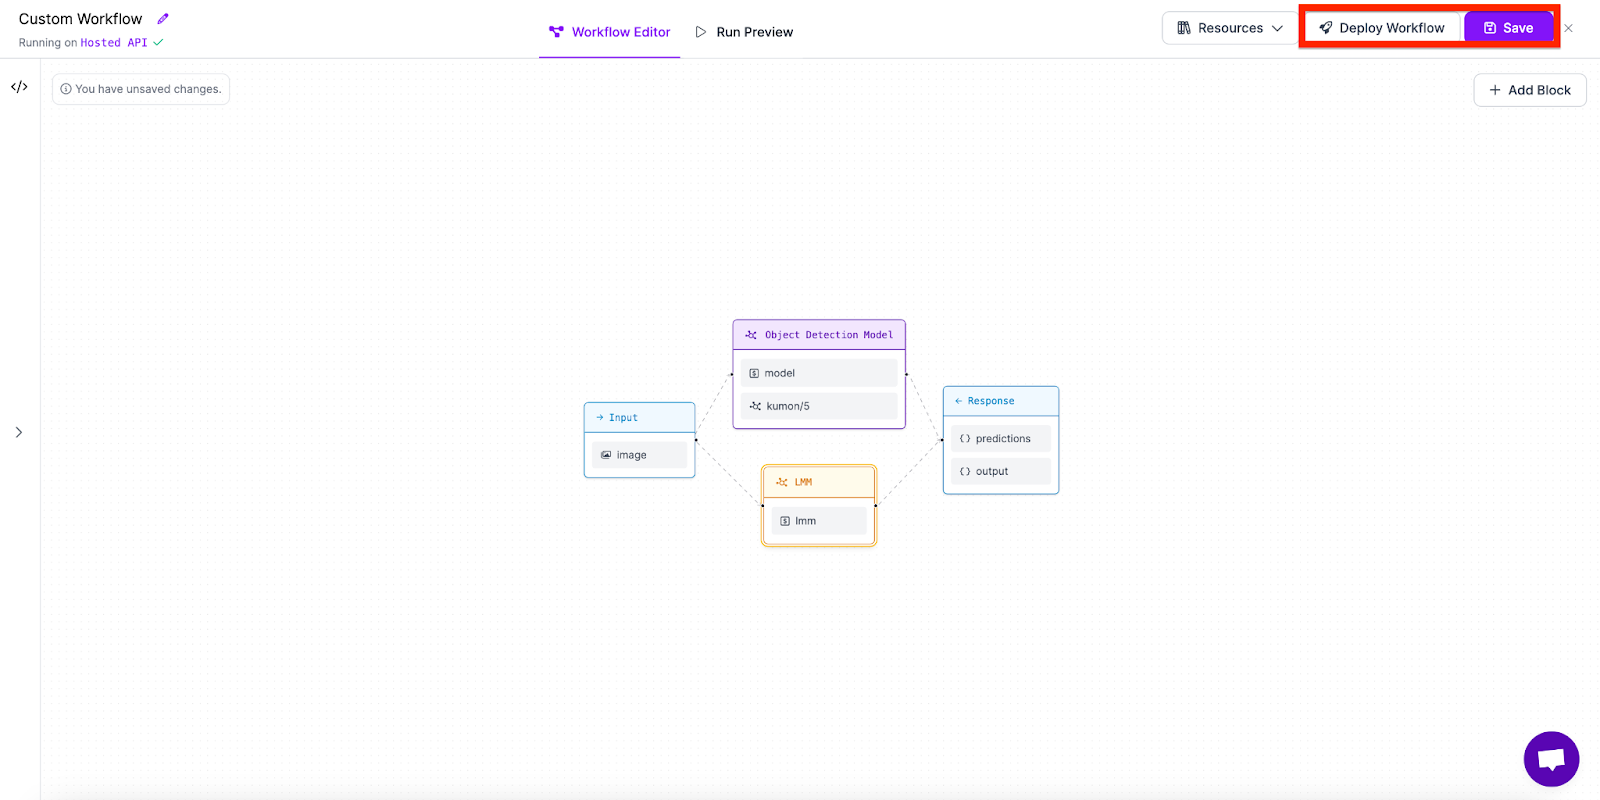
Now your workflow is set up.
To deploy it, click save, and deploy workflow. Use the python code provided in Deploy Workflow.
Step 3: Deploy the Workflow
Reference this Google Colab Notebook to follow along as we build the next step in the project. Start by installing the needed libraries.
These include:
- OpenCV
- Inference
!pip install inference opencv-pythonNext, add the code gotten from workflows.
from inference_sdk import InferenceHTTPClient
client = InferenceHTTPClient(
   api_url="https://detect.roboflow.com",
   api_key="ADD YOUR API KEY"
)

result = client.run_workflow(
   workspace_name="nathan-yan",
   workflow_id="kumon",
   images={"image": "/content/IMG_3442.jpg"},
)
Now, let's check out the image we are working with. Because I am using kumon booklets, I used an image of my own booklet obtained from the following google drive link.
# Link to image: https://drive.google.com/file/d/1pDJaWemV5oMcMkSeTETxWl_ks-_Jp2AO/view?usp=sharing
!wget --no-check-certificate 'https://drive.google.com/ucexport=download&id=1pDJaWemV5oMcMkSeTETxWl_ks-_Jp2AO' -O kumon.jpg
Next, I show the image using code to better understand what the expected output should be. In this case, the time I took was 10 minutes, the name is Nathan, and I got 70% on one page with the other 4 being perfect.
from google.colab.patches import cv2_imshow
import cv2
image = cv2.imread("IMAGE_PATH")

# Display the image
cv2_imshow(image)

# The mark is check, 7, check, check, check.
# The time is 10 minutes
# The name is Nathan
Here, we define our variables and get the results of each prediction. For each prediction, we take the x variable as well as the class of the object (should be check, 9, 8, 7, or 6). This way, we are able to get the order of the pages as well as which specific page was wrong.
scores = []

main_dict = result[0]

# Predictions
predictions = main_dict['predictions']['predictions']

# Access each prediction's details
for prediction in predictions:
   x = prediction['x']
   class_name = prediction['class']
   scores.append([class_name, x])
Next, using the order x coordinate of the detected classes, we sort the detections in order. Add only the specific marks and not the x coordinates into the list “marks”.
sorted_scores = sorted(scores, key=lambda item: item[1])
marks = []
for score in sorted_scores:
   marks.append(score[0])
There! We got our marks! Now we need to access our time and name, which is obtained using GPT-4 Vision.
First get the raw output from GPT-4.
raw_output = main_dict['output']['raw_output']The data that the raw output stores should look something like this:“[“Nathan”, “14”]”
So, in order to convert the string into a list, we use the following code below.
import ast
output = ast.literal_eval(raw_output)
Finally, we are able to access both variables, which means we can piece both together with the code below.
booklet_information = {
   "name": output[0],
   "time": output[1],
   "scores": marks
}

print(f"Booklet Information: {booklet_information}")
Conclusion
Congratulations! You created, trained, and deployed an application that extracts handwriting from an image and sends that information to be stored in a digital format.
Cite this Post
Use the following entry to cite this post in your research:
Nathan Y.. (Jul 5, 2024). How to Use GPT-4 To Extract Handwritten Text from Images. Roboflow Blog: https://blog.roboflow.com/gpt-4-extract-handwritting-images/