

To detect an object's orientation, segment it with an instance segmentation model, treat every mask pixel as a 2D point, and run PCA. In a Roboflow Workflow that is one Custom Python Block, plus a Continue If threshold and a Slack alert.
Measuring an object's orientation from a visual comes up any time a physical thing has to be straight before the next step can happen. A bottle tilted past a few degrees jams the capper; a part seated crooked on a fixture fails the next station; a utility pole leaning a little more each day might mean a worrying foundation. In all three cases, the question a camera needs to answer is the same: what angle is this object sitting at, and has it crossed the line we set?
Computer vision can answer that.
This guide walks through the full pipeline in Roboflow. You'll train an RF-DETR instance segmentation model on a bottle dataset from Roboflow Universe, build a Workflow that runs PCA on the mask in a Custom Python Block, overlay the angle on the image, and send a Slack alert whenever the tilt passes a threshold.
Then you'll run the same Workflow on part alignment and pole lean datasets to show the method carries over to other objects without changing the code. Along the way you'll see the factors worth knowing before trusting it in production, including the 180-degree ambiguity, symmetric objects, and camera perspective.
If you want the angle without wiring blocks by hand, Roboflow Agent can build the same Workflow from a plain-language prompt, covered near the end.
How to Measure Object Orientation and Angle with Computer Vision
This tutorial builds a workflow that segments an object, computes its tilt angle using PCA, displays that angle on the image, and sends an alert when the angle crosses a set threshold. Let's get started.
Start with the Dataset
Go to Roboflow Universe and fork the bottle orientation dataset. The images show bottles held at a wide range of angles, which is exactly what this tutorial needs to test the PCA method against real variation rather than a single fixed pose.
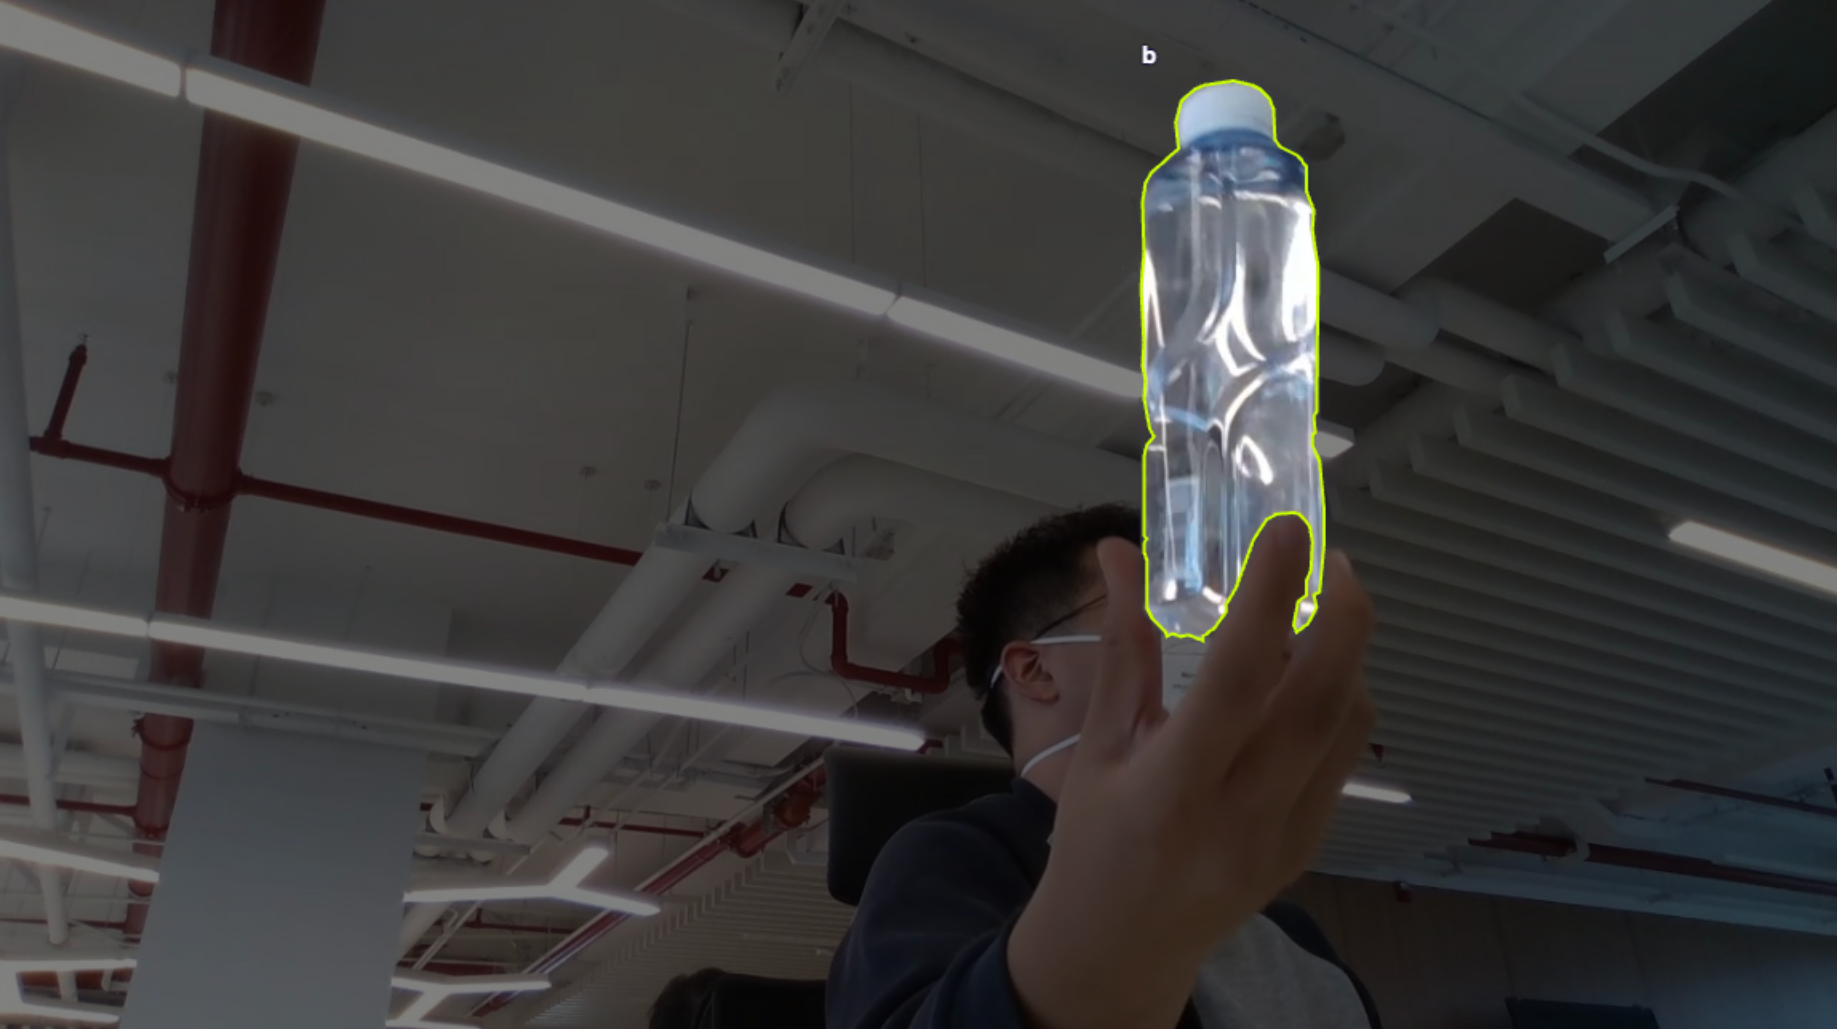
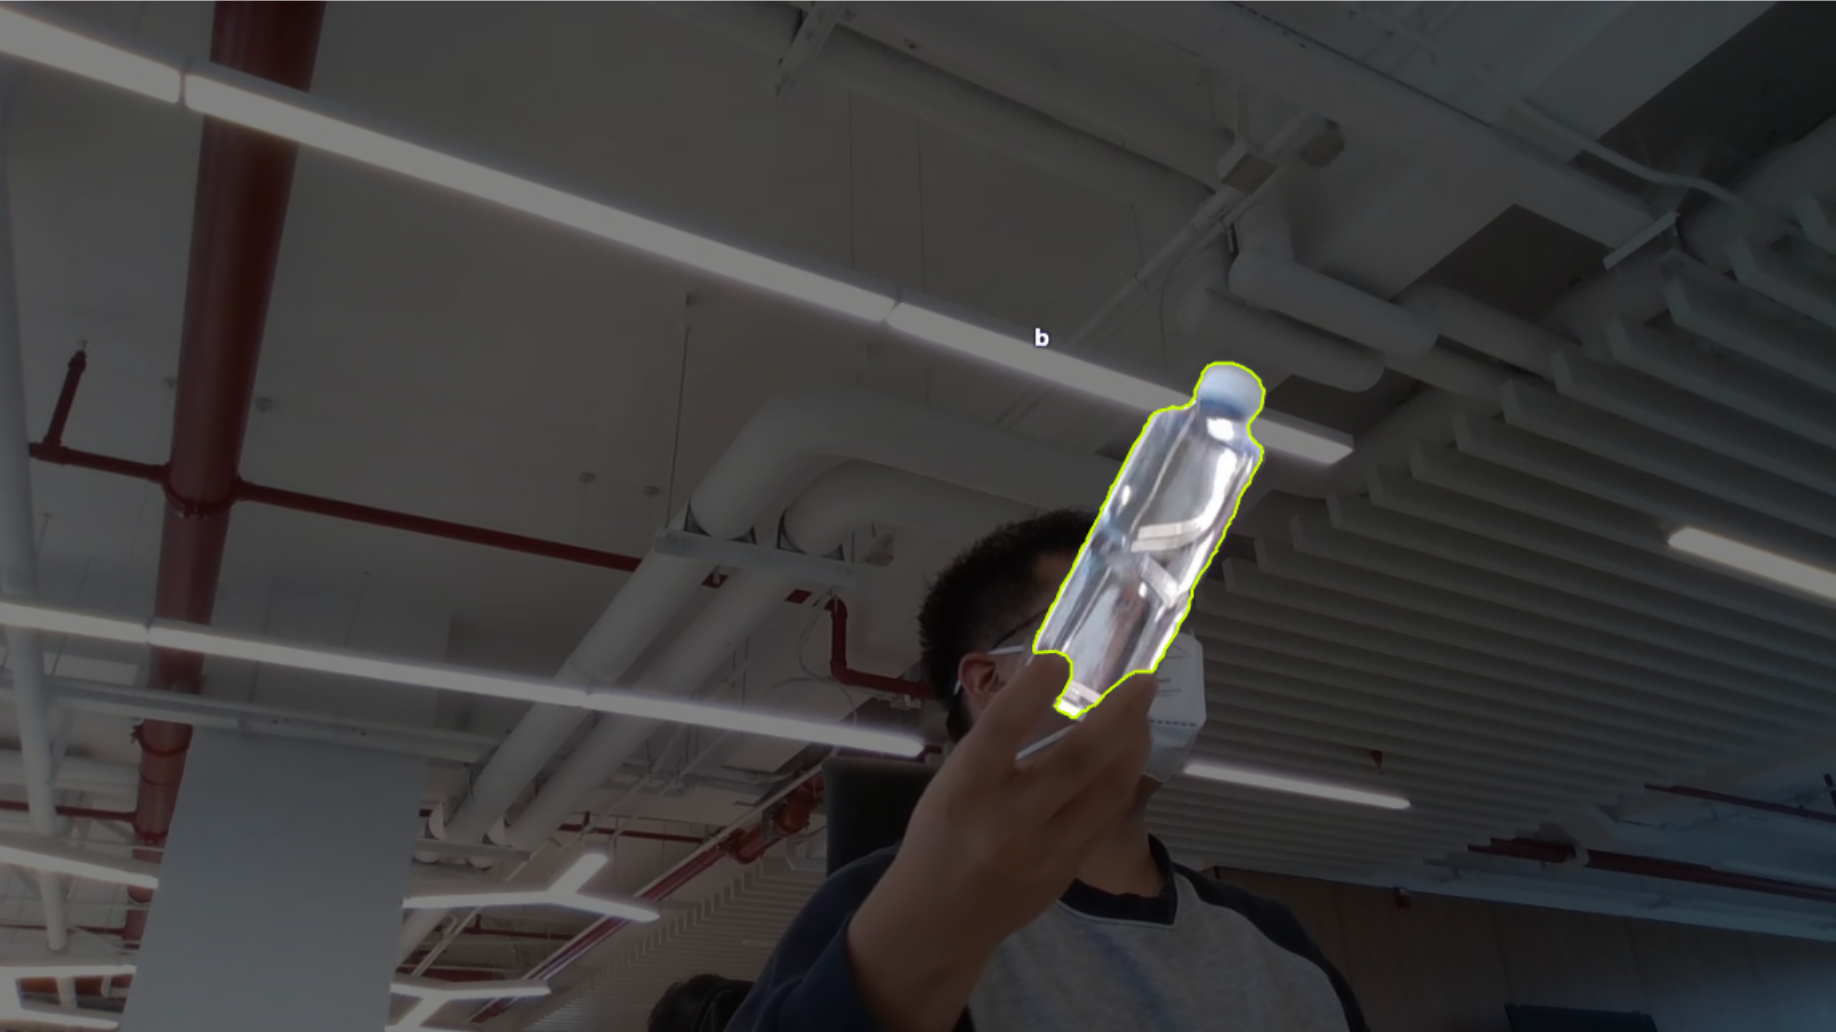
The same steps later apply to the part alignment and pole lean datasets, used in the Results section to show the workflow generalizing to other objects.
Train RF-DETR
From your forked project, generate a new dataset version using a 70/20/10 train/validation/test split.
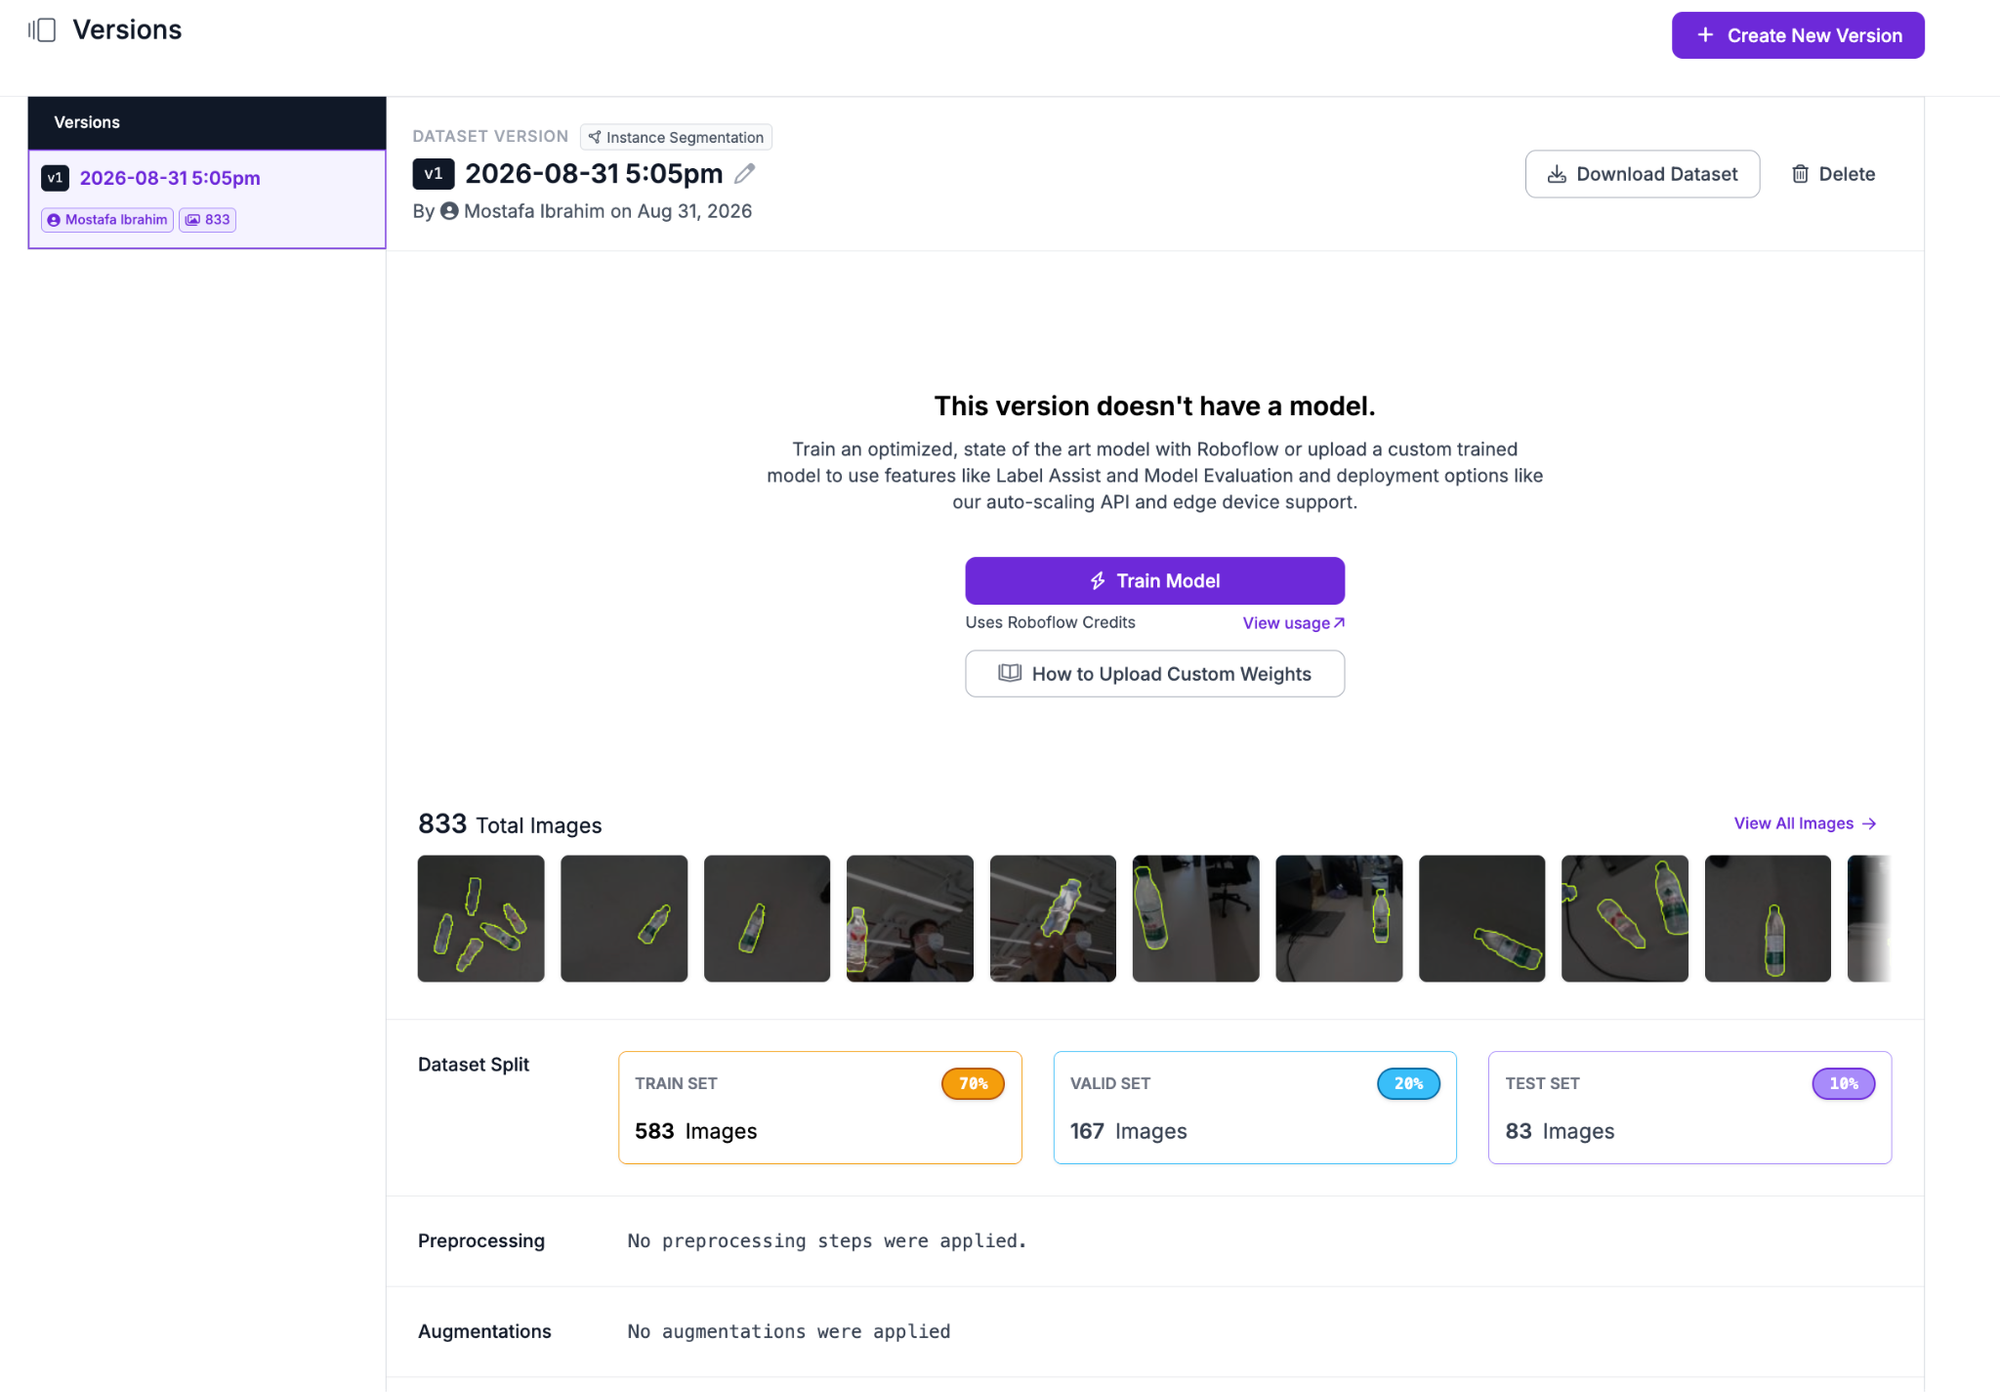
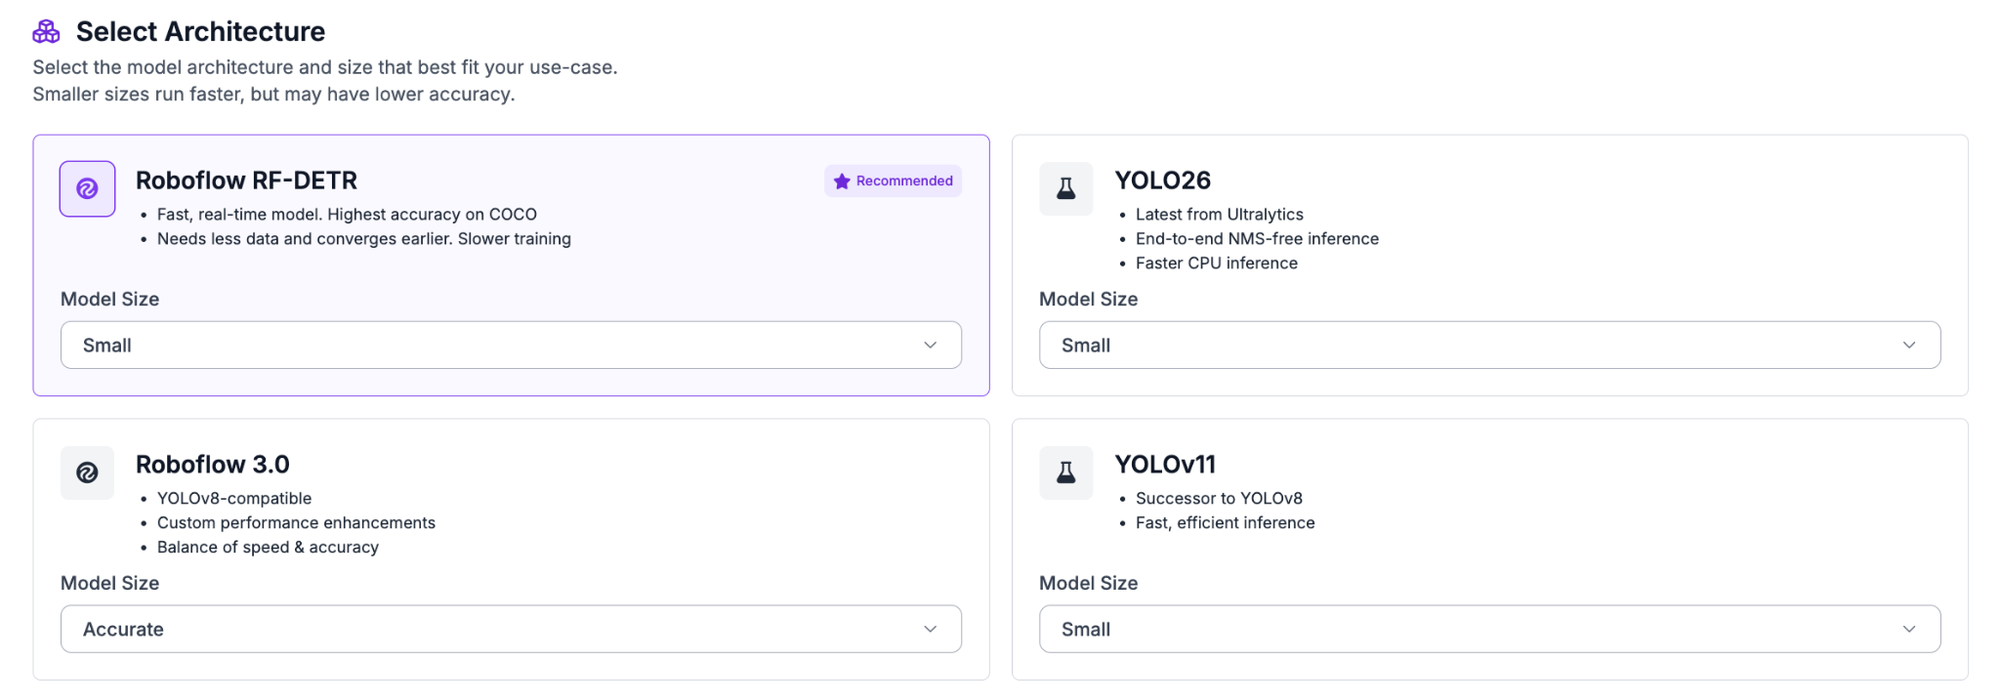
Click Custom Train and select RF-DETR as the model. This trains an instance segmentation model that outputs a precise mask for each bottle, which the PCA calculation later needs to work.
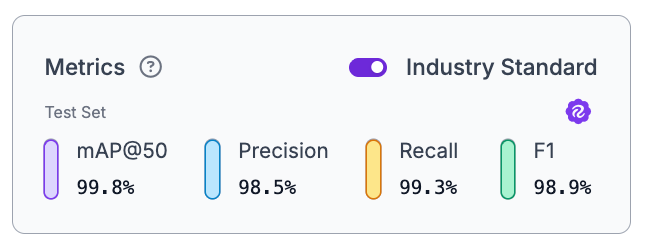
Once training finishes, review the test set metrics. This run reached 99.8% mAP@50, 98.5% precision, 99.3% recall, and 98.9% F1, confirming the model segments bottles accurately enough for the mask to reflect the object's true shape and angle.
The Math Behind PCA-Based Orientation
The method starts with a segmented object, since PCA needs pixel coordinates to work with rather than a bounding box. Every pixel belonging to the mask gets treated as a point in 2D space, forming a cloud shaped roughly like the object itself.
From there, the code centers those points around their mean, then computes the covariance matrix, a small table describing how the x and y positions vary together. The matrix's eigenvectors point along the directions the cloud spreads out in, and the eigenvector with the largest eigenvalue marks the direction of greatest spread, which for an elongated object lines up with its long axis. Converting that eigenvector into a usable number with `arctan2` gives the tilt angle.
`cv2.minAreaRect` and fitted polygon methods take a different route, fitting a bounding shape around the object's outline. Both are sensitive to small irregularities on the object's edge, a rough contour or a stray pixel can shift the fitted rectangle's angle noticeably. PCA works from the object's overall pixel distribution instead of its outline, so a few noisy edge pixels barely move the result, making it a steadier choice when working with real segmentation masks rather than clean synthetic shapes.
What to Watch Out For
A few issues are worth knowing before relying on this method in production.
- 180-degree ambiguity. PCA finds a line, not a direction. An object tilted at 30 degrees and one flipped to point the opposite way share the same long axis, so the math has no way to tell them apart and always returns the same angle for both.
- Symmetric objects. A perfectly round or square object has no single dominant axis, so its covariance matrix has no clear principal eigenvector, and the angle output becomes unstable or meaningless.
- Mask noise. A jagged or partially occluded mask shifts the pixel cloud's shape, which can tilt the computed axis away from the object's true orientation. Cleaner segmentation models produce more reliable angles.
- Camera perspective distortion. An object photographed at an angle rather than straight on can appear tilted in the image even when it's physically upright. The method measures orientation in the 2D image plane, not in real-world 3D space, so camera placement matters as much as the object itself.
Build the Workflow to Measure Orientation
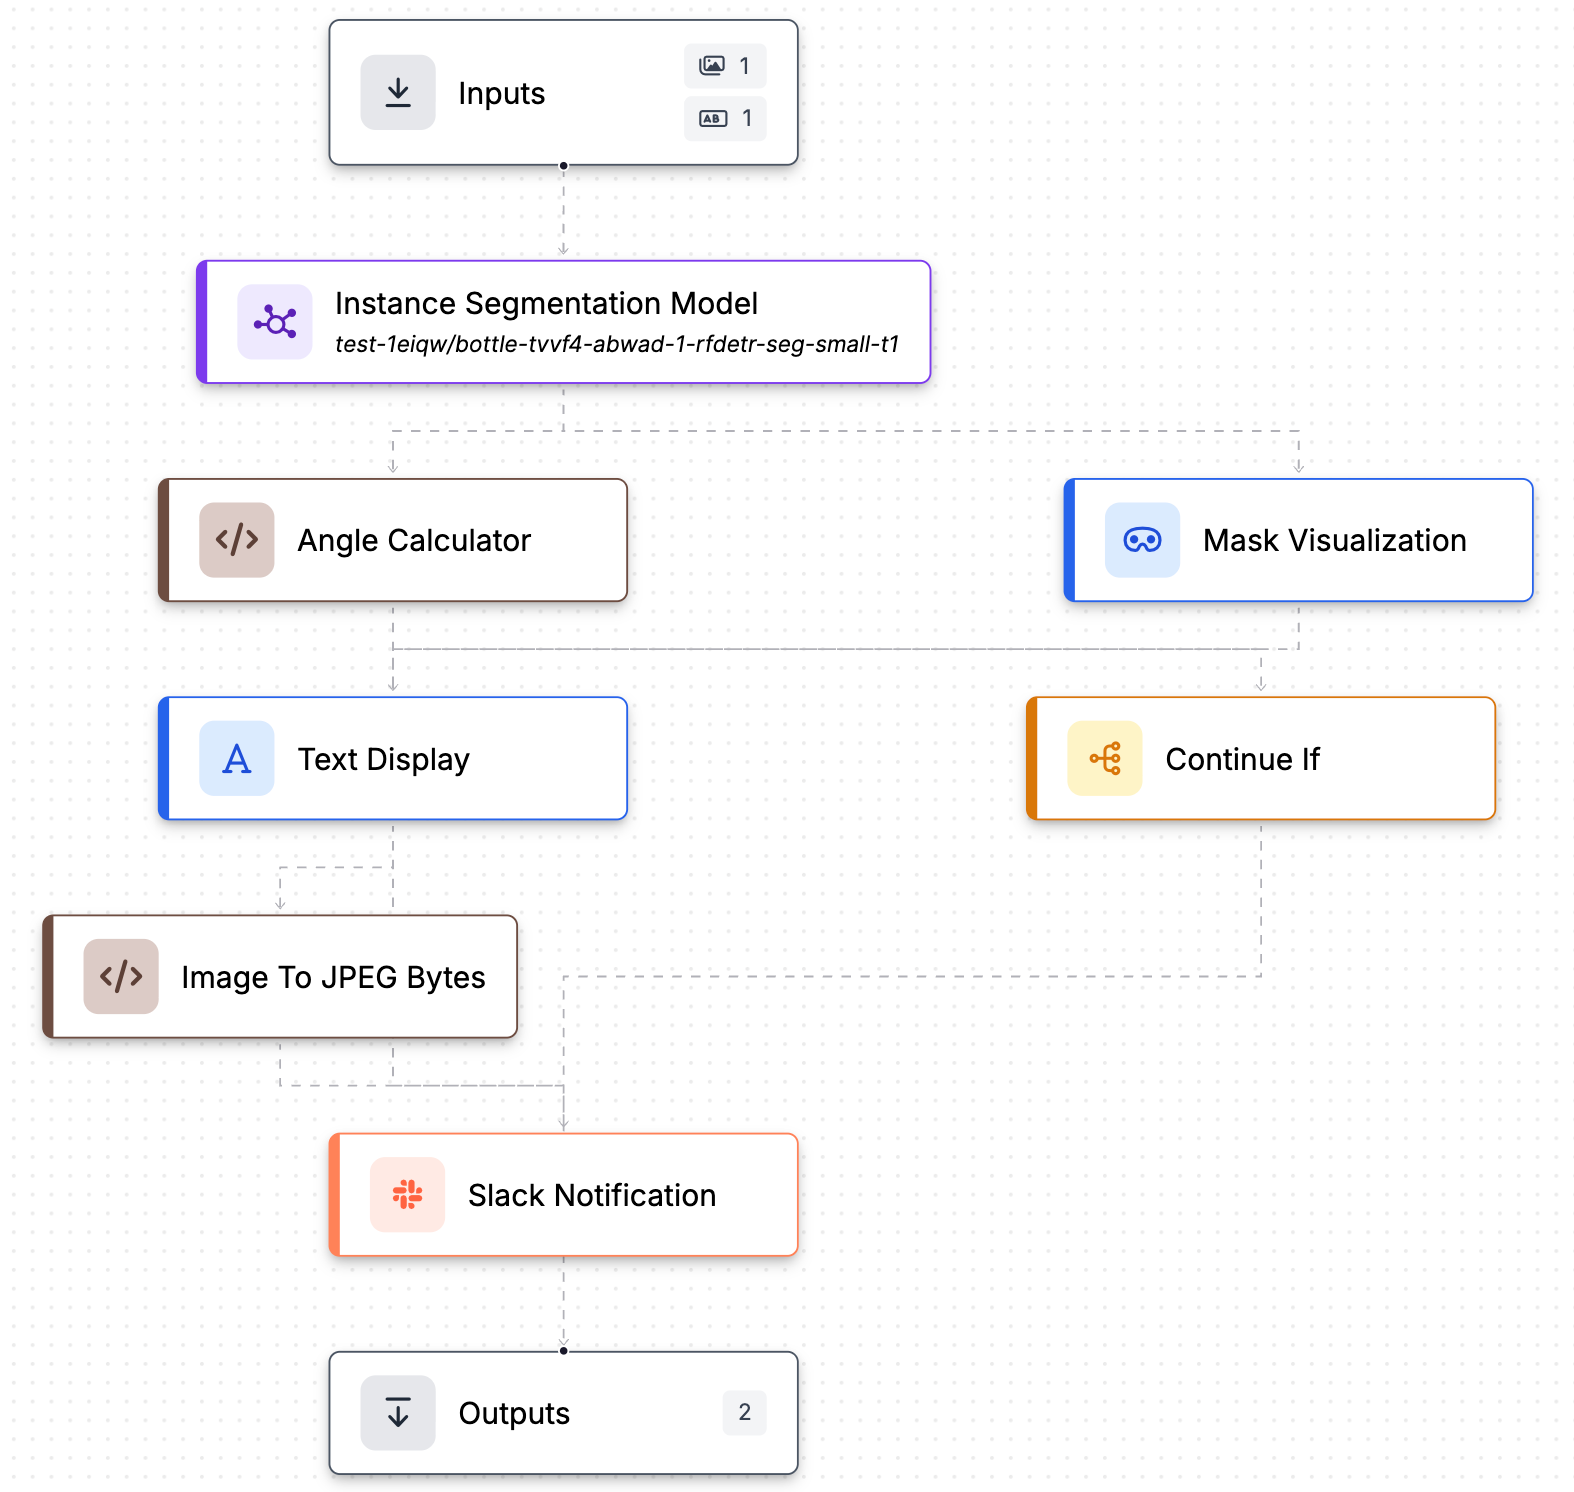
Now, we'll build a workflow that takes a bottle image, segments the bottle, calculates its tilt angle with PCA, and sends a Slack alert if the angle crosses a set threshold. Here's the workflow we're building, and here's what each block does:
- Instance Segmentation Model: Detects the bottle and returns a mask.
- Custom Python Block: Runs PCA on the mask to compute the tilt angle.
- Mask Visualization: Draws the mask on the image.
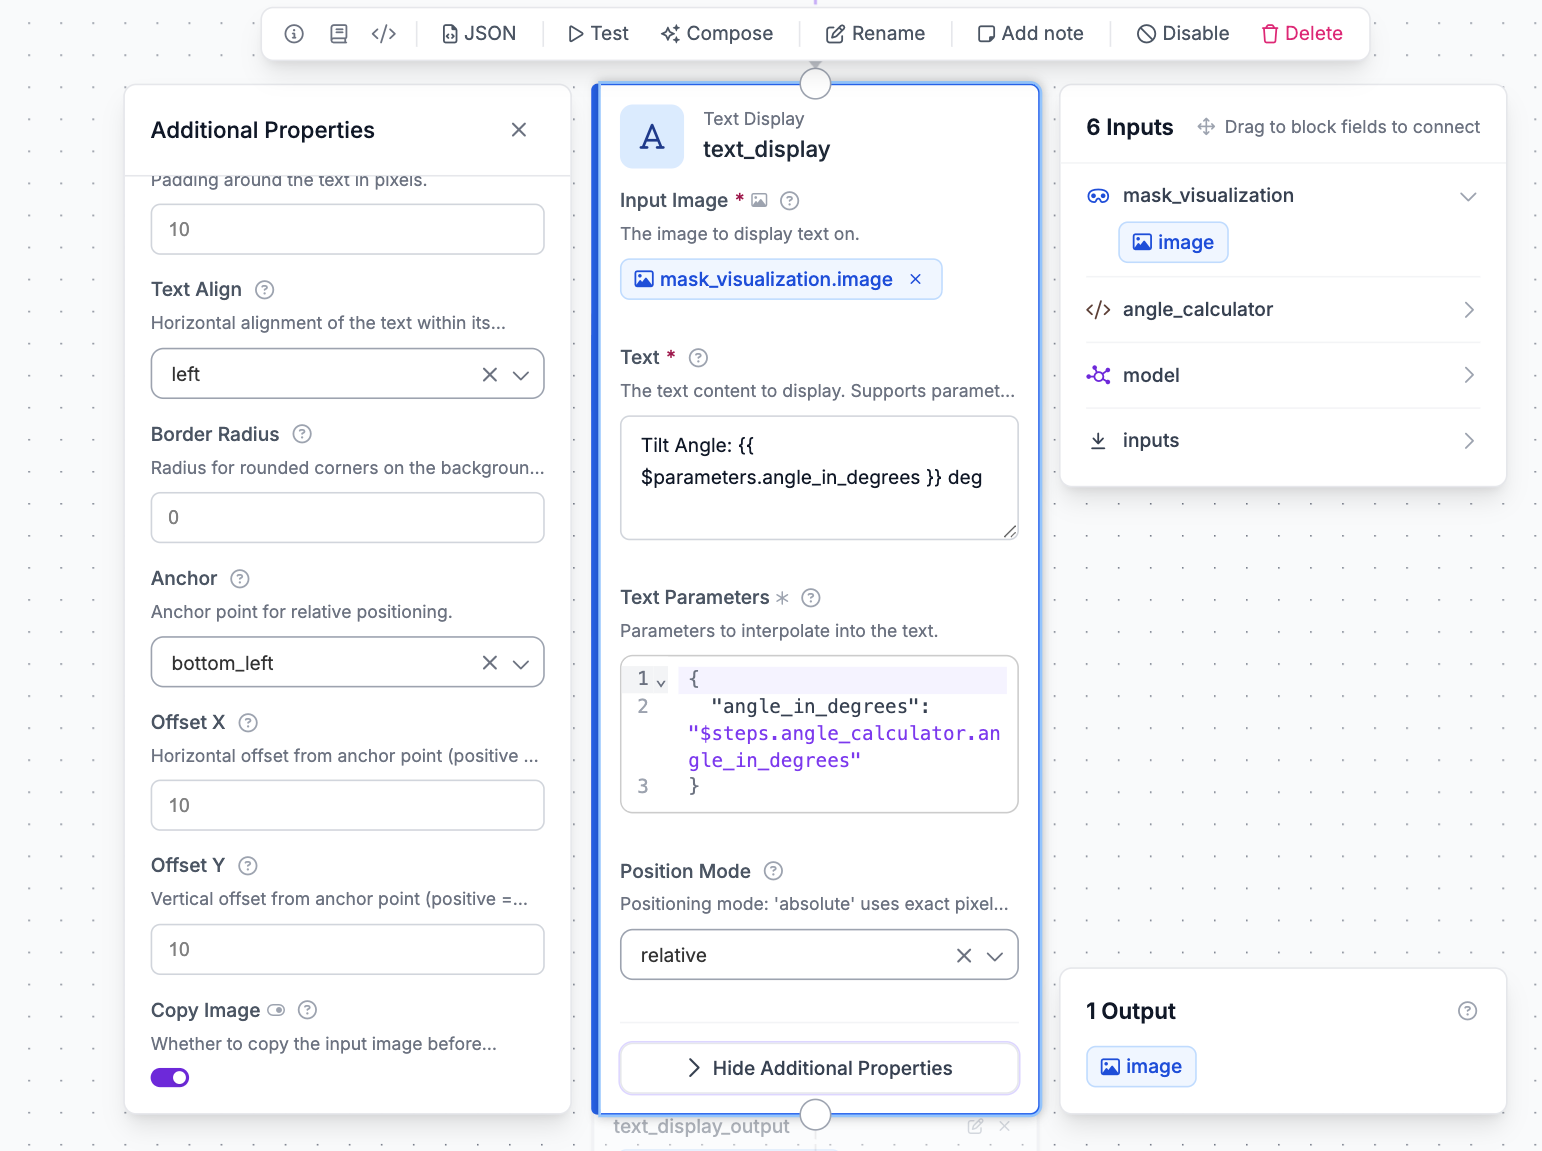
- Text Display: Shows the angle on the image.
- Image To JPEG Bytes: Converts the final image into a format Slack can attach.
- Continue If: Checks whether the angle crosses the threshold.
- Slack Notification: Sends an alert with the image when the threshold is crossed.
- Outputs: Returns the labeled image and the angle.
Step 1: Add the trained model as an Instance Segmentation block
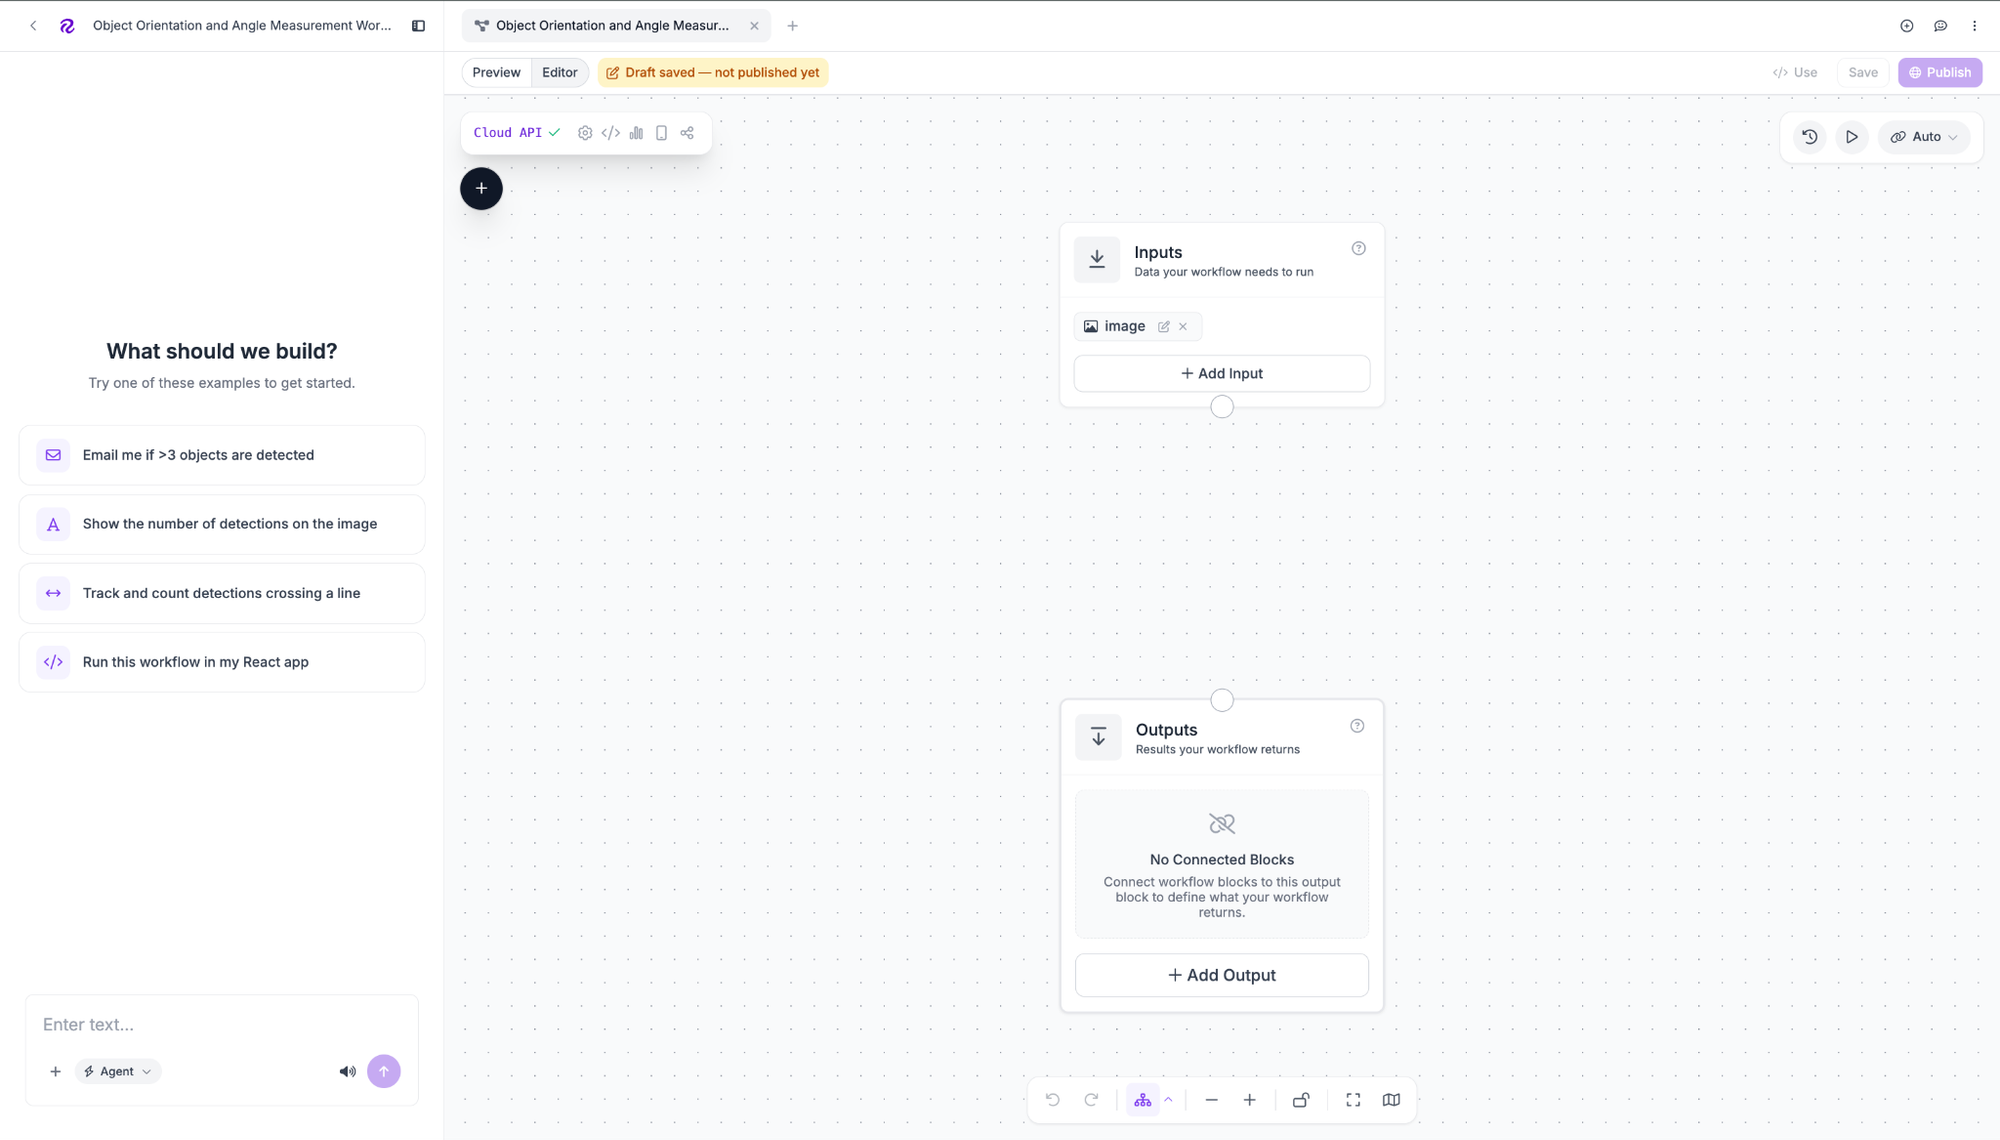
Open the Workflows tab and create a new Workflow. An empty canvas automatically includes Image Input and Outputs blocks.
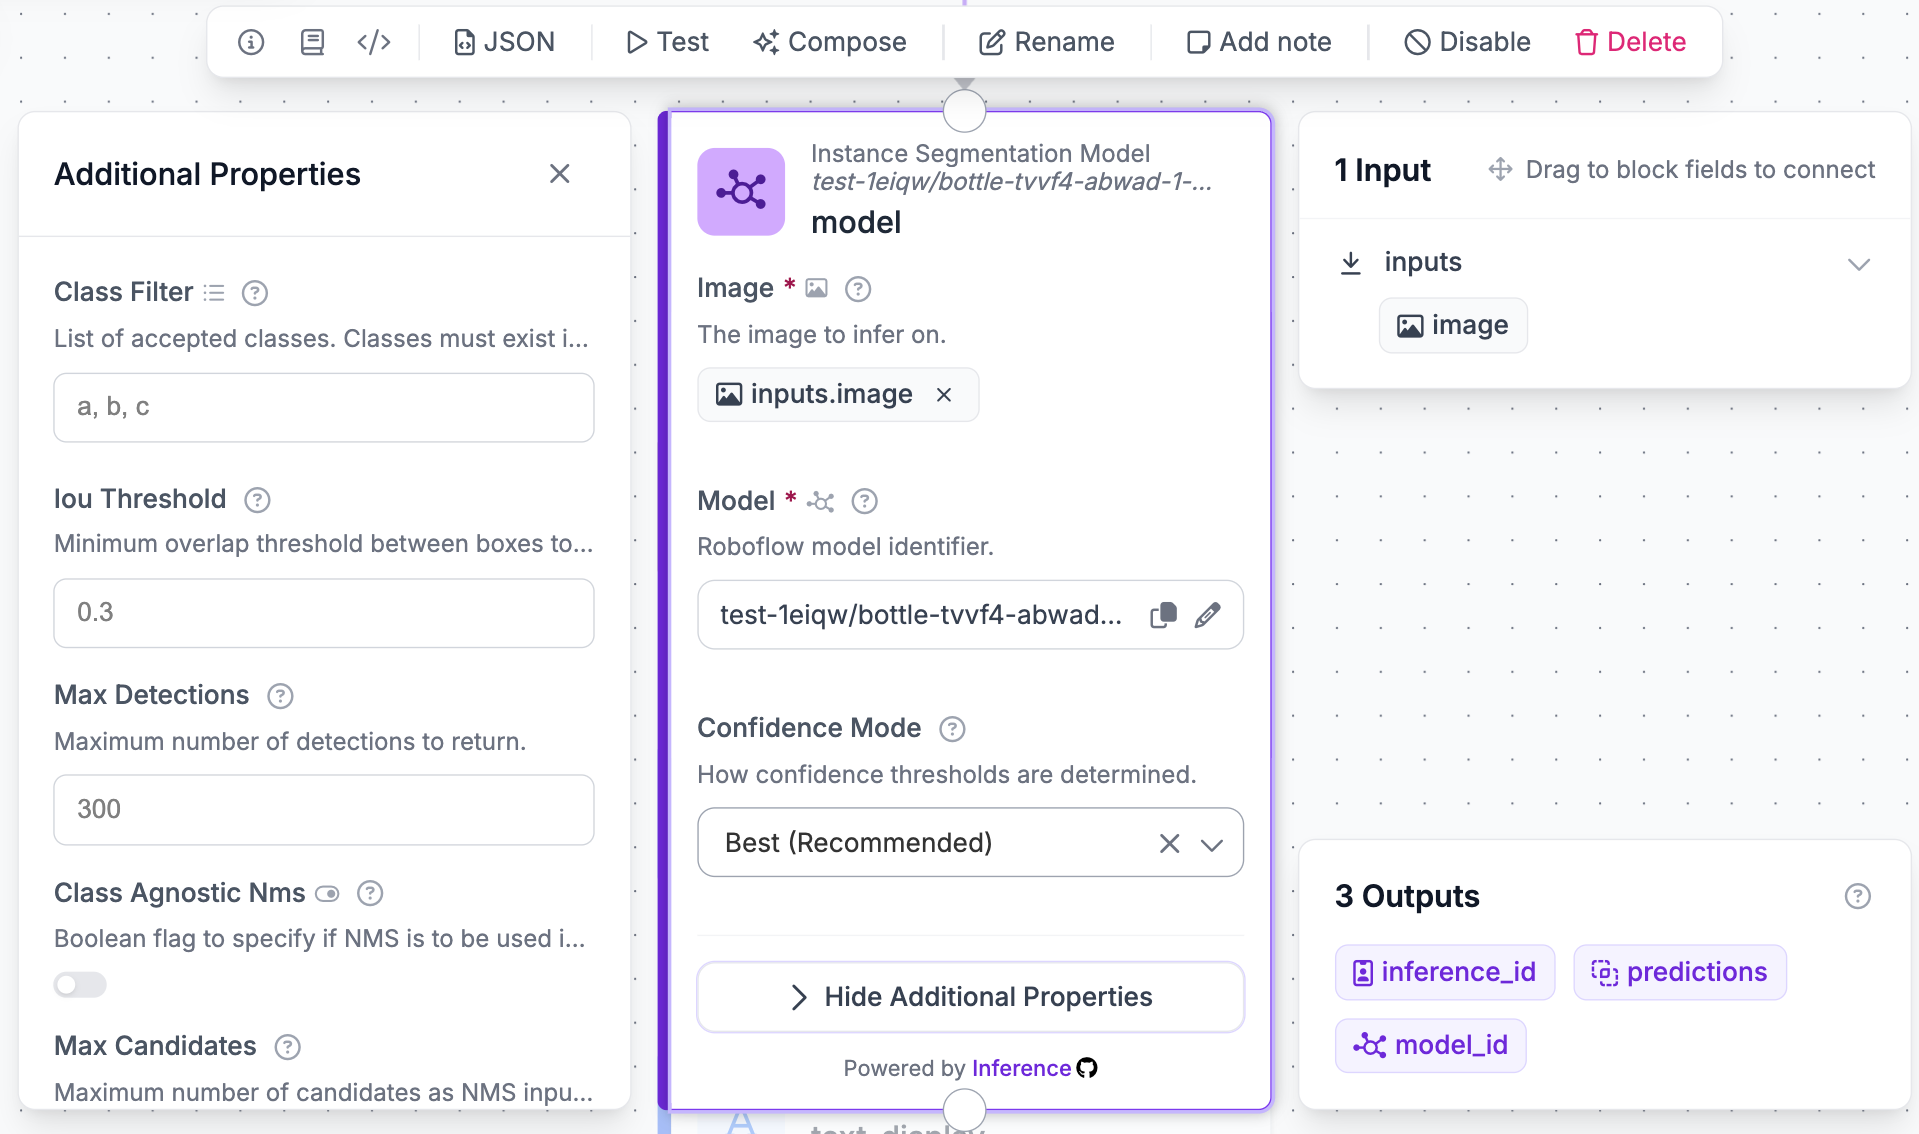
Add an Instance Segmentation Model block. Connect its image input to inputs.image, then select your trained RF-DETR model from the dropdown.
Step 2: Add the Custom Python Block with the PCA angle calculation code
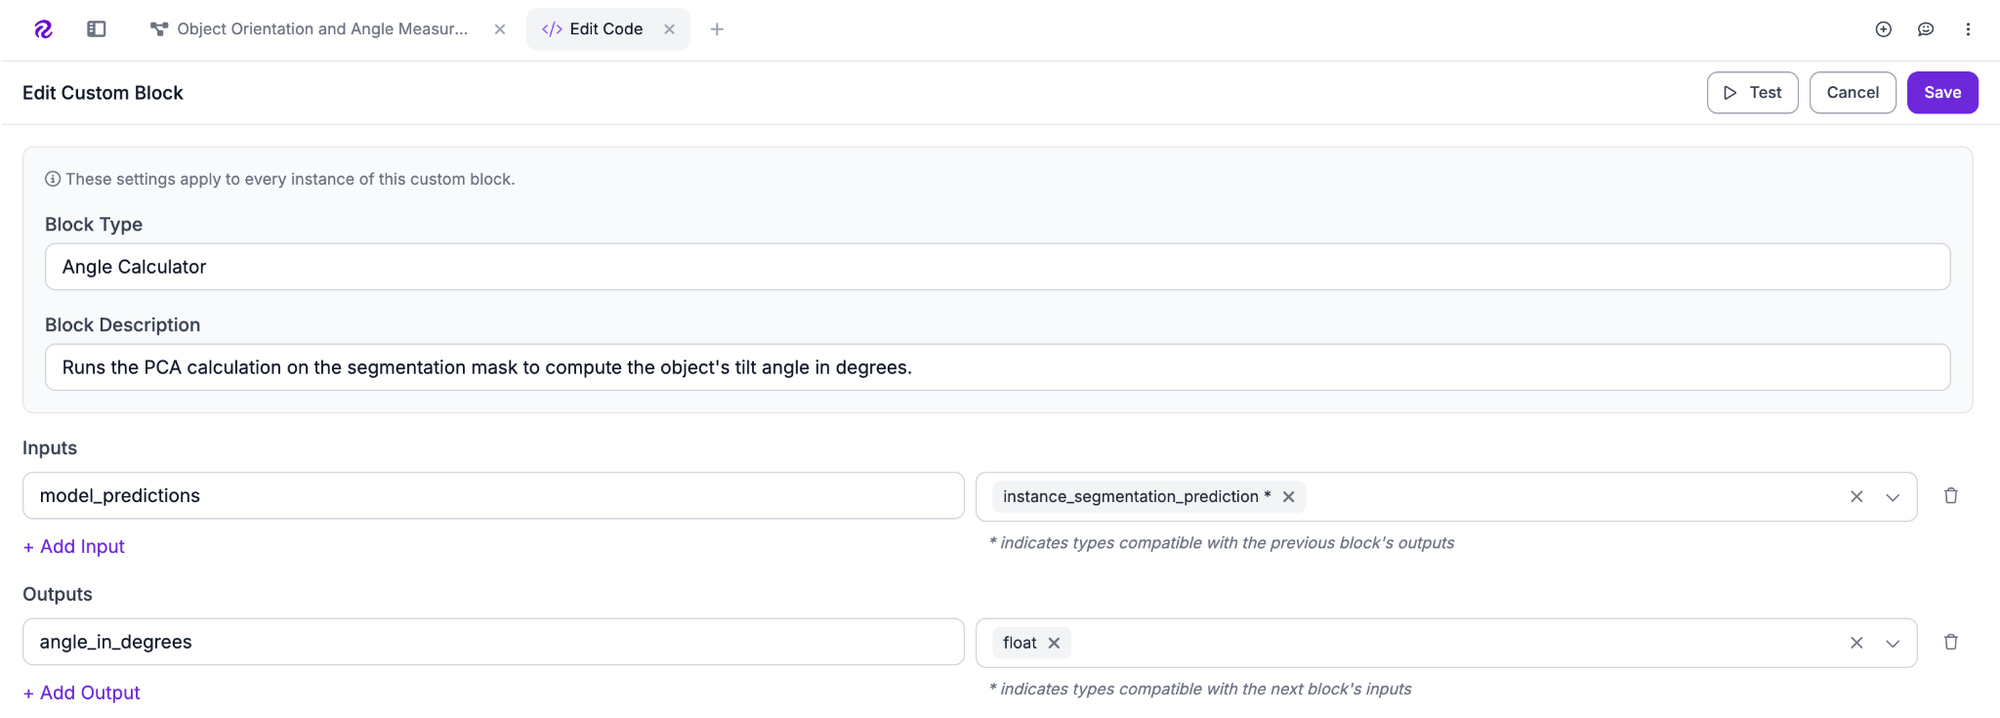
Add a Custom Python Block named `angle_calculator`. Connect its `model_predictions` input to the Instance Segmentation Model's predictions output, and add `angle_in_degrees` as the output.
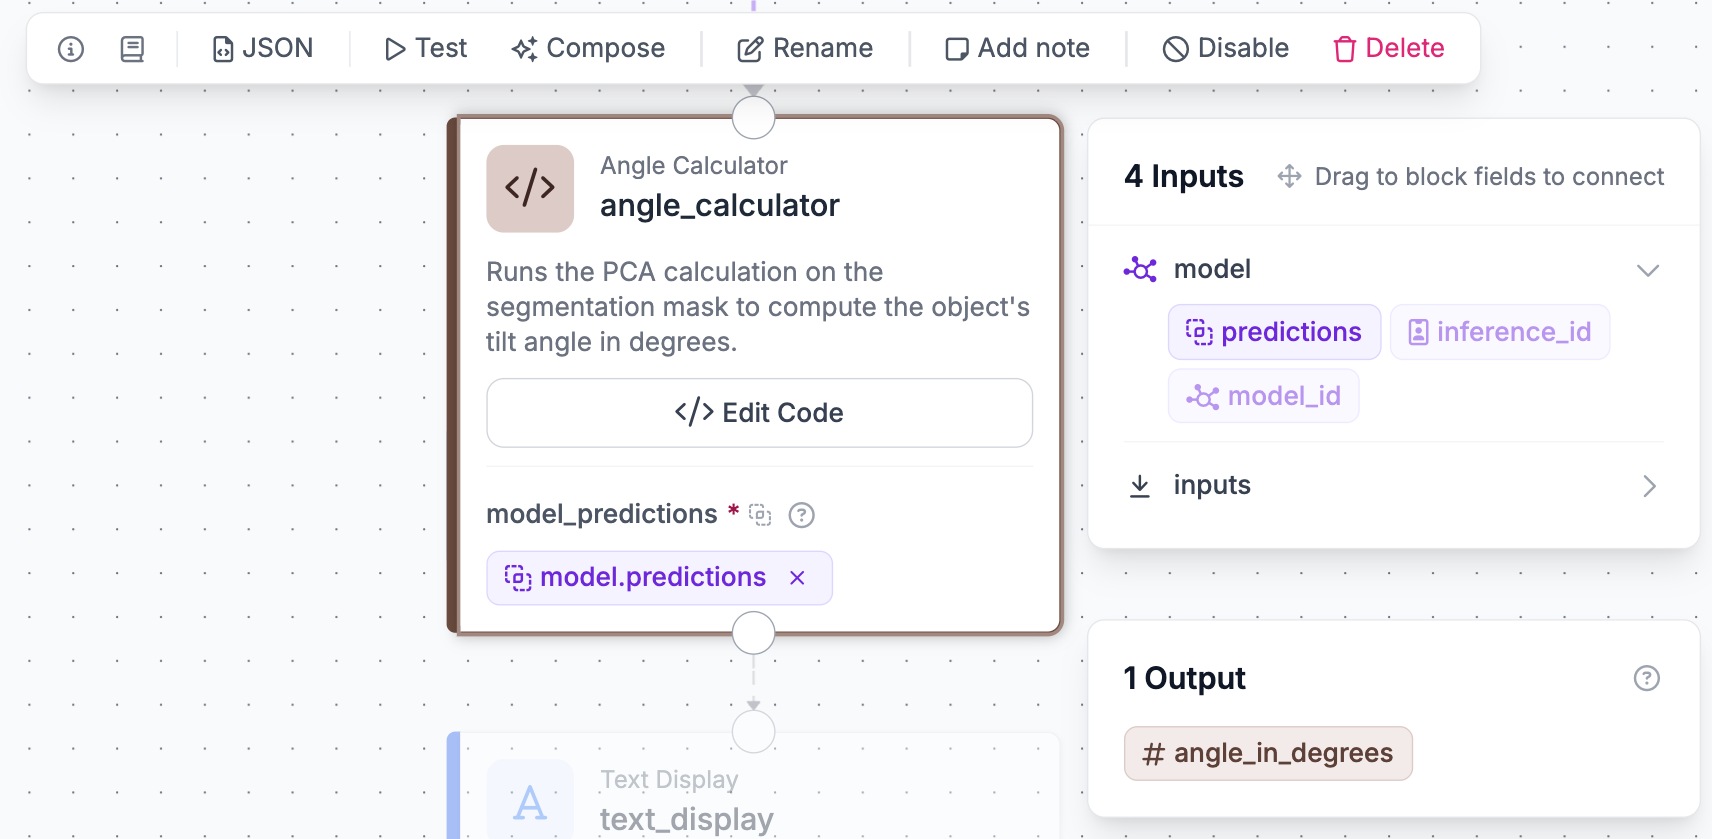
Click Edit Code to open the full editor to set the input and output types and write the PCA logic.
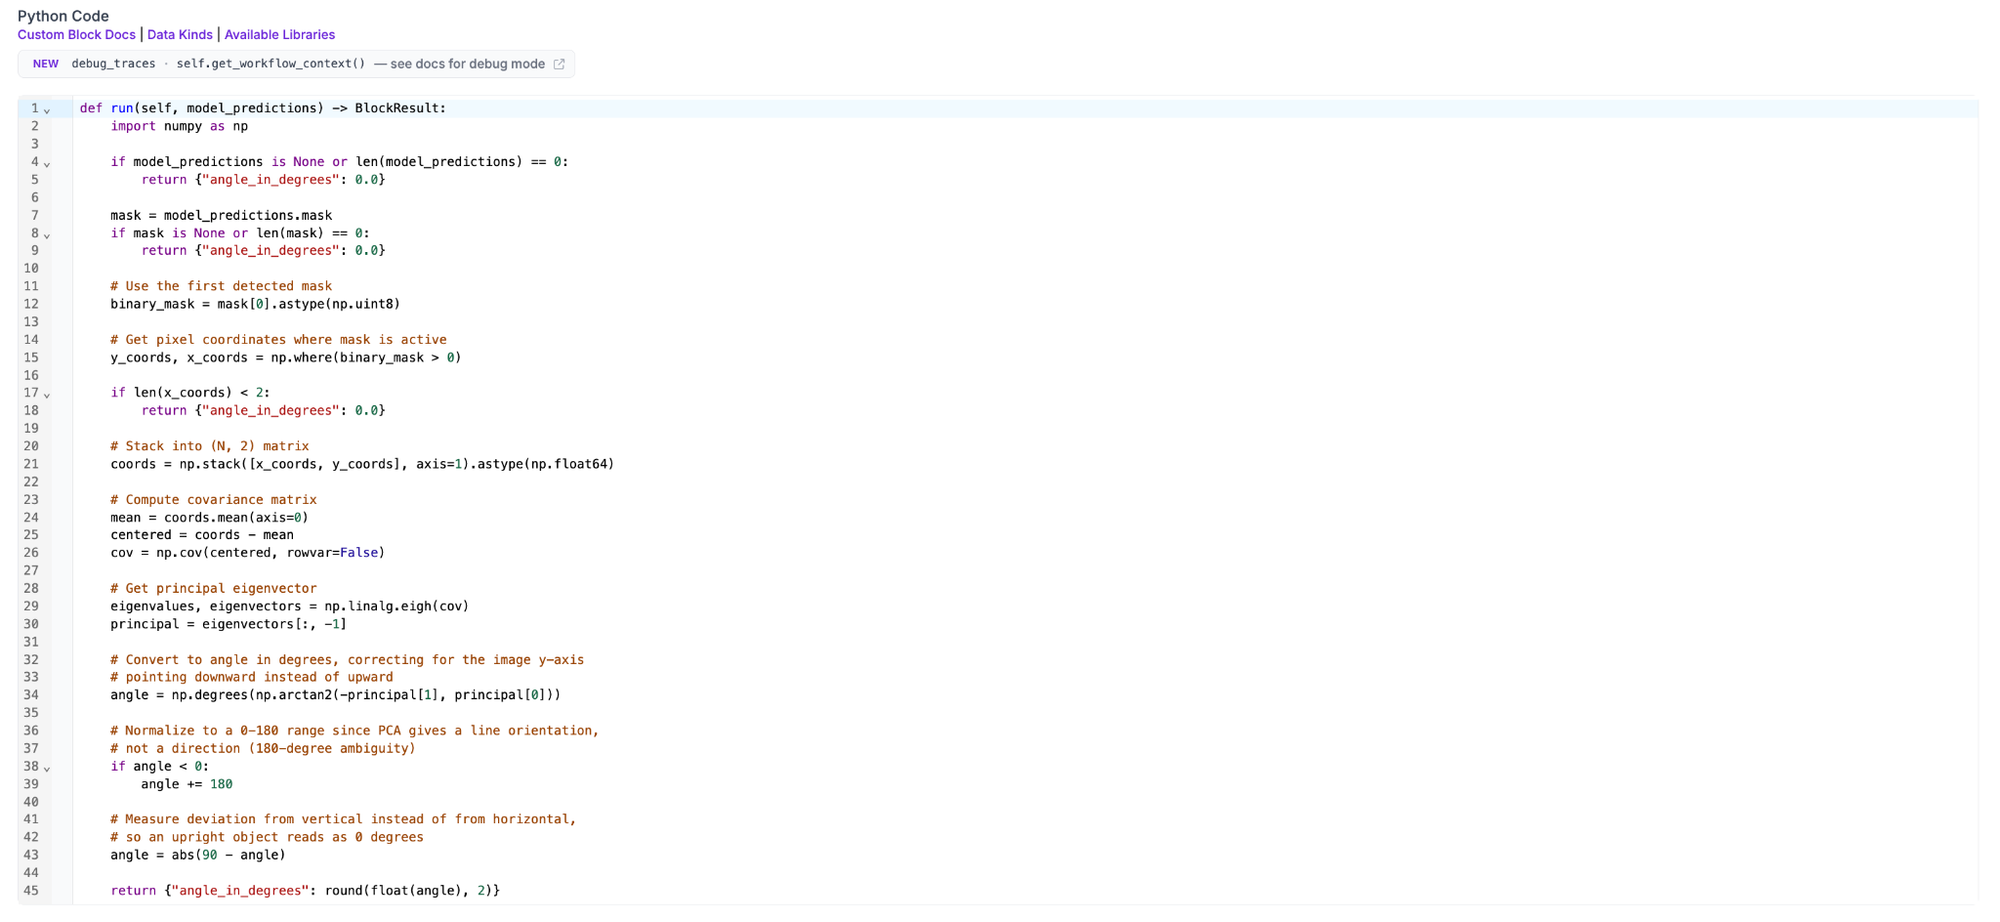
def run(self, model_predictions) -> BlockResult:
   import numpy as np


   if model_predictions is None or len(model_predictions) == 0:
       return {"angle_in_degrees": 0.0}


   mask = model_predictions.mask
   if mask is None or len(mask) == 0:
       return {"angle_in_degrees": 0.0}


   # Use the first detected mask
   binary_mask = mask[0].astype(np.uint8)


   # Get pixel coordinates where mask is active
   y_coords, x_coords = np.where(binary_mask > 0)


   if len(x_coords) < 2:
       return {"angle_in_degrees": 0.0}


   # Stack into (N, 2) matrix
   coords = np.stack([x_coords, y_coords], axis=1).astype(np.float64)


   # Compute covariance matrix
   mean = coords.mean(axis=0)
   centered = coords - mean
   cov = np.cov(centered, rowvar=False)


   # Get principal eigenvector
   eigenvalues, eigenvectors = np.linalg.eigh(cov)
   principal = eigenvectors[:, -1]


   # Convert to angle in degrees, correcting for the image y-axis
   # pointing downward instead of upward
   angle = np.degrees(np.arctan2(-principal[1], principal[0]))


   # Normalize to a 0-180 range since PCA gives a line orientation,
   # not a direction (180-degree ambiguity)
   if angle < 0:
       angle += 180


   # Measure deviation from vertical instead of from horizontal,
   # so an upright object reads as 0 degrees
   angle = abs(90 - angle)


   return {"angle_in_degrees": round(float(angle), 2)}
Here is what this code does. It pulls out the x and y pixel positions that make up the bottle's mask, giving you a cloud of points shaped like the bottle. `np.linalg.eigh` extracts the covariance matrix's eigenvectors, and the one with the largest eigenvalue points along the bottle's long axis, the tilt we want to measure.
That eigenvector is just an x and y value, not an angle. `np.arctan2` converts it into degrees, with one correction needed first: image coordinates count downward as y increases, the opposite of a normal graph, so the code negates the y-component before calling `arctan2` to match what you actually see in the picture.
The result at this point is measured from horizontal, so a flat object reads near 0 and an upright one reads near 90. Since the goal is to catch how far something has tilted away from vertical, the code flips that around with `abs(90 - angle)`, so an upright object reads close to 0 and the number grows as it leans further.
Step 3: Draw the mask with Mask Visualization
Add a Mask Visualization block. Connect Input Image to inputs.image and Predictions to your model's predictions output.
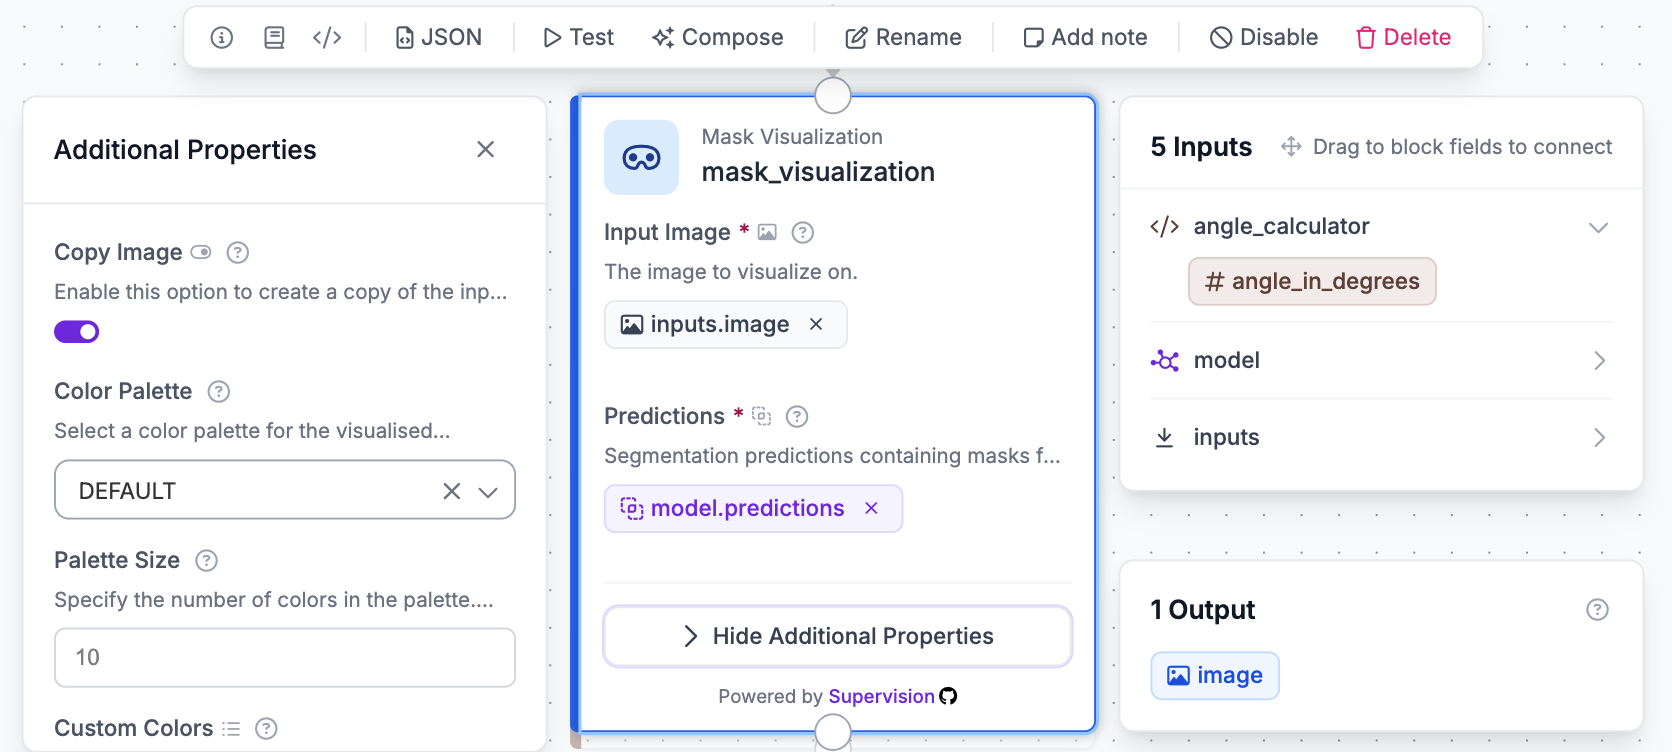
Step 4: Write the angle with Text Display
Add a Text Display block. Connect Input Image to mask_visualization.image, and set Text to `Tilt Angle: {{ $parameters.angle_in_degrees }} deg`, using white text on a solid black background.
Step 5: Convert the image with Image To JPEG Bytes
Slack Notification needs the image as raw bytes rather than the image object Roboflow passes between blocks. Add a Custom Python Block named `image_to_jpeg_bytes` and connect its `image` input to text_display.image.
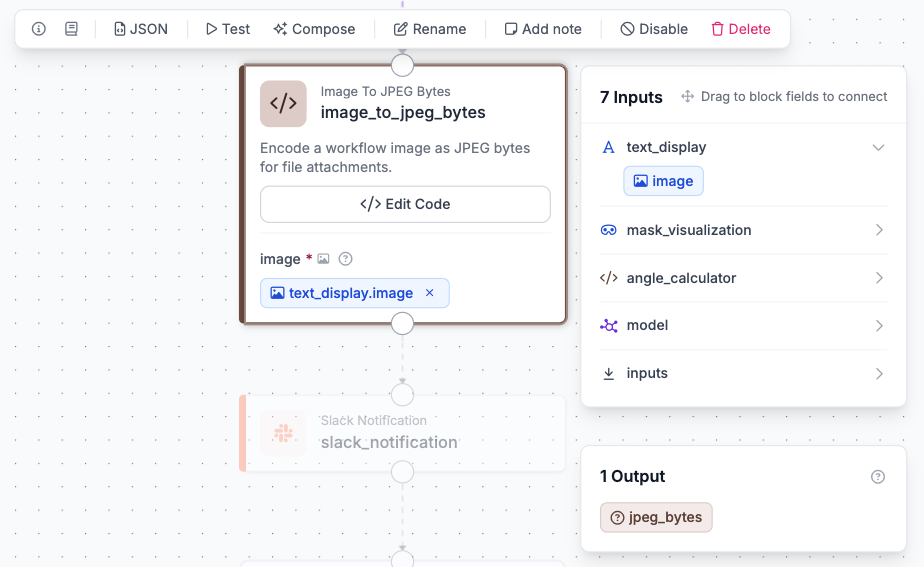
Open the full editor to set up the block and add the code.
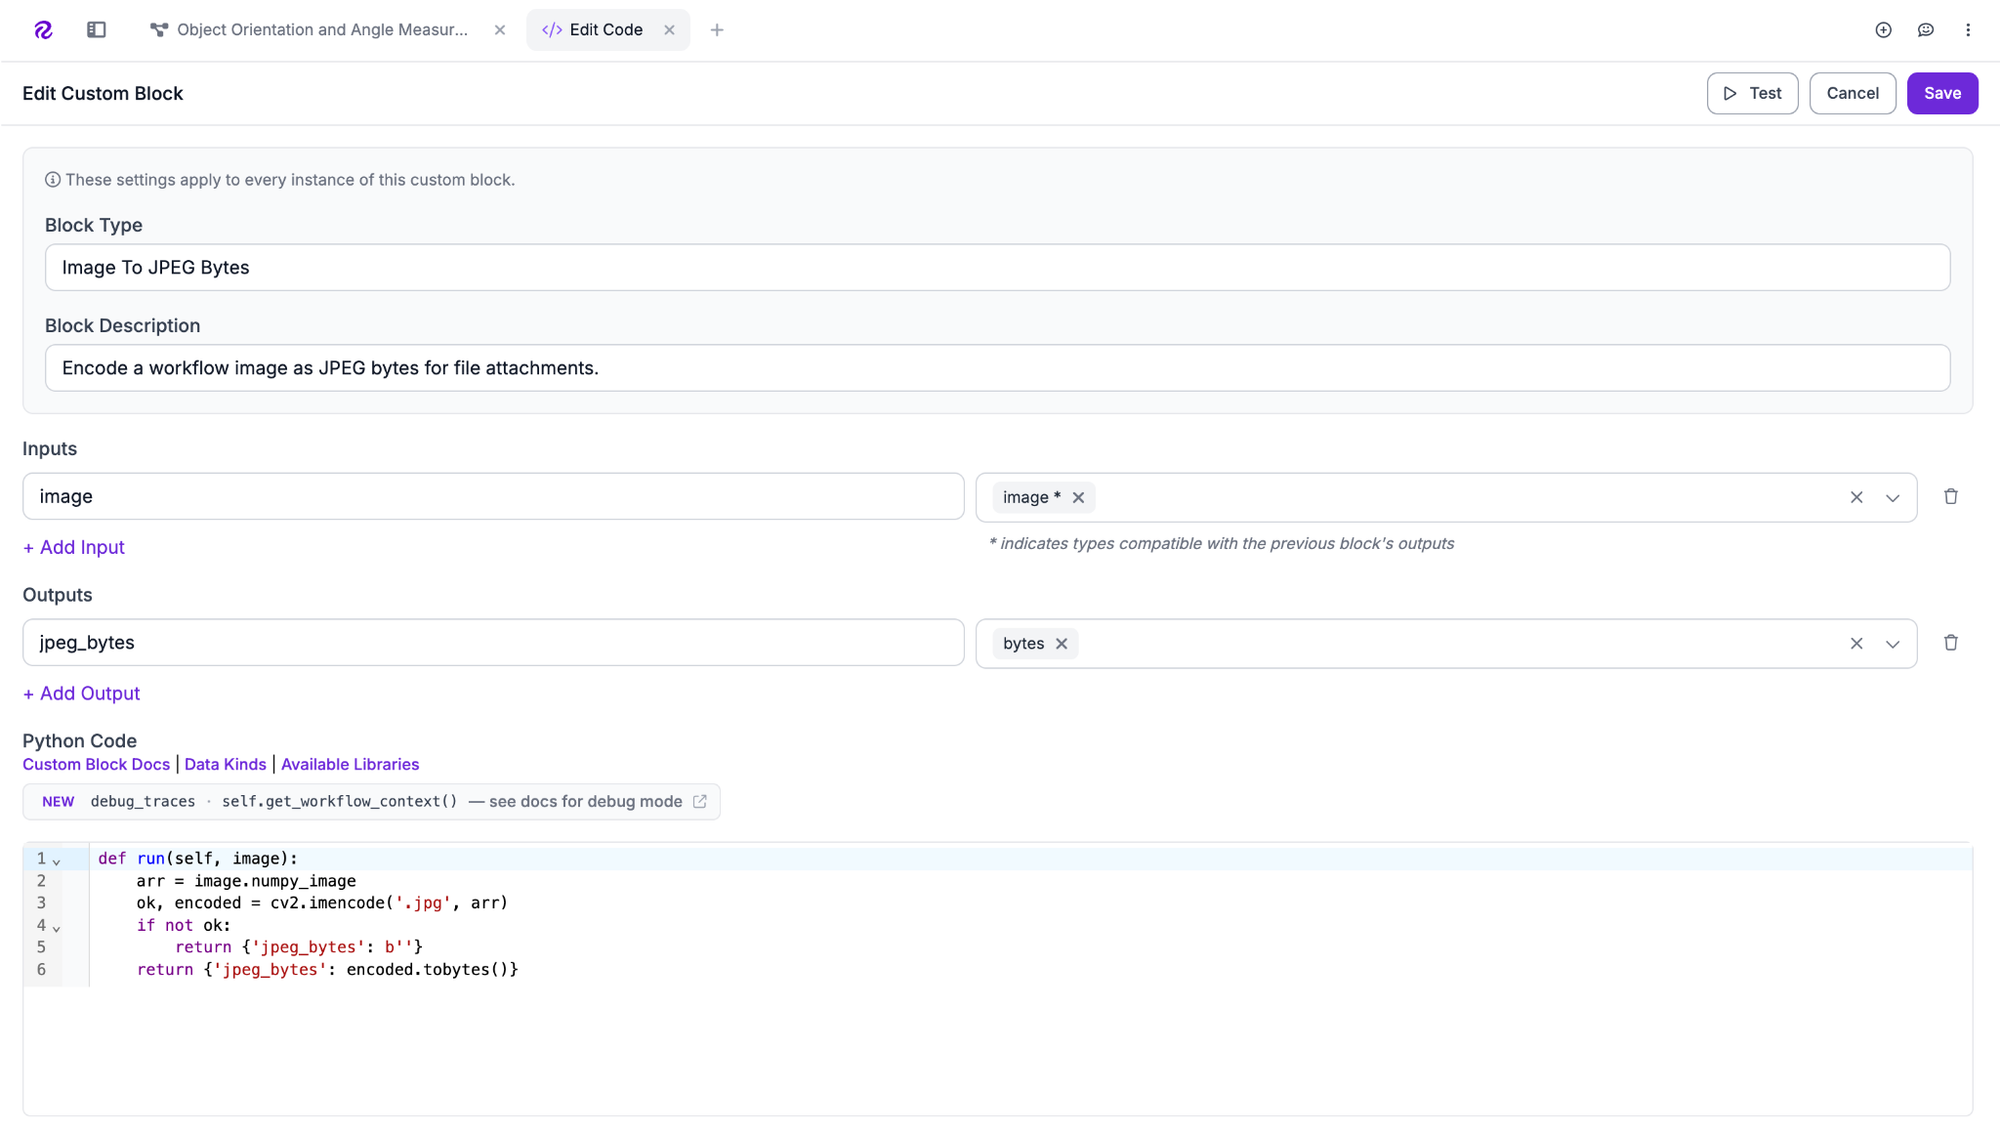
def run(self, image):
   arr = image.numpy_image
   ok, encoded = cv2.imencode('.jpg', arr)
   if not ok:
       return {'jpeg_bytes': b''}
   return {'jpeg_bytes': encoded.tobytes()}
This pulls the raw pixel array out of the workflow's image object, then uses OpenCV's imencode to compress it into JPEG format. The result is a byte string, the format Slack expects for a file attachment, which the code returns as `jpeg_bytes`.
Step 6: Add a Continue If block to check the angle against the threshold
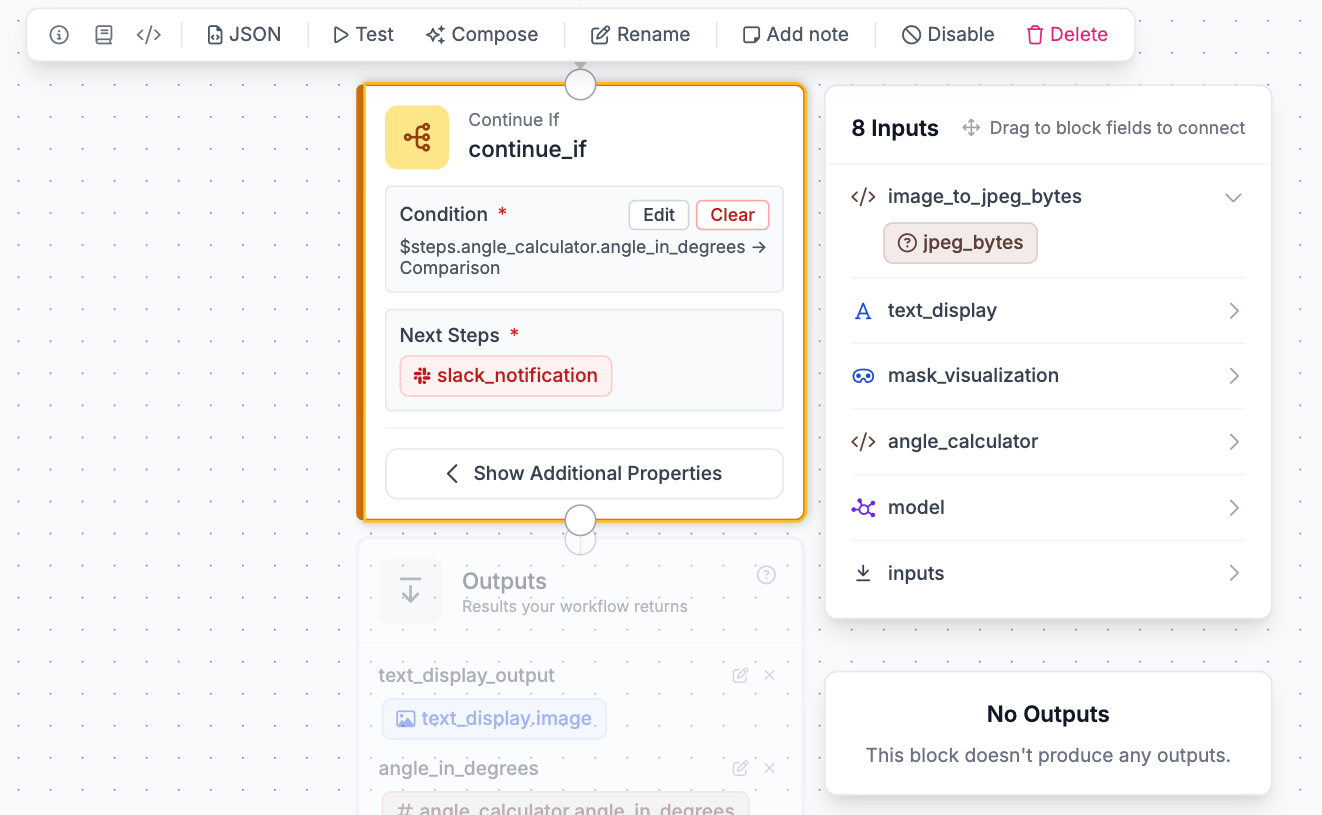
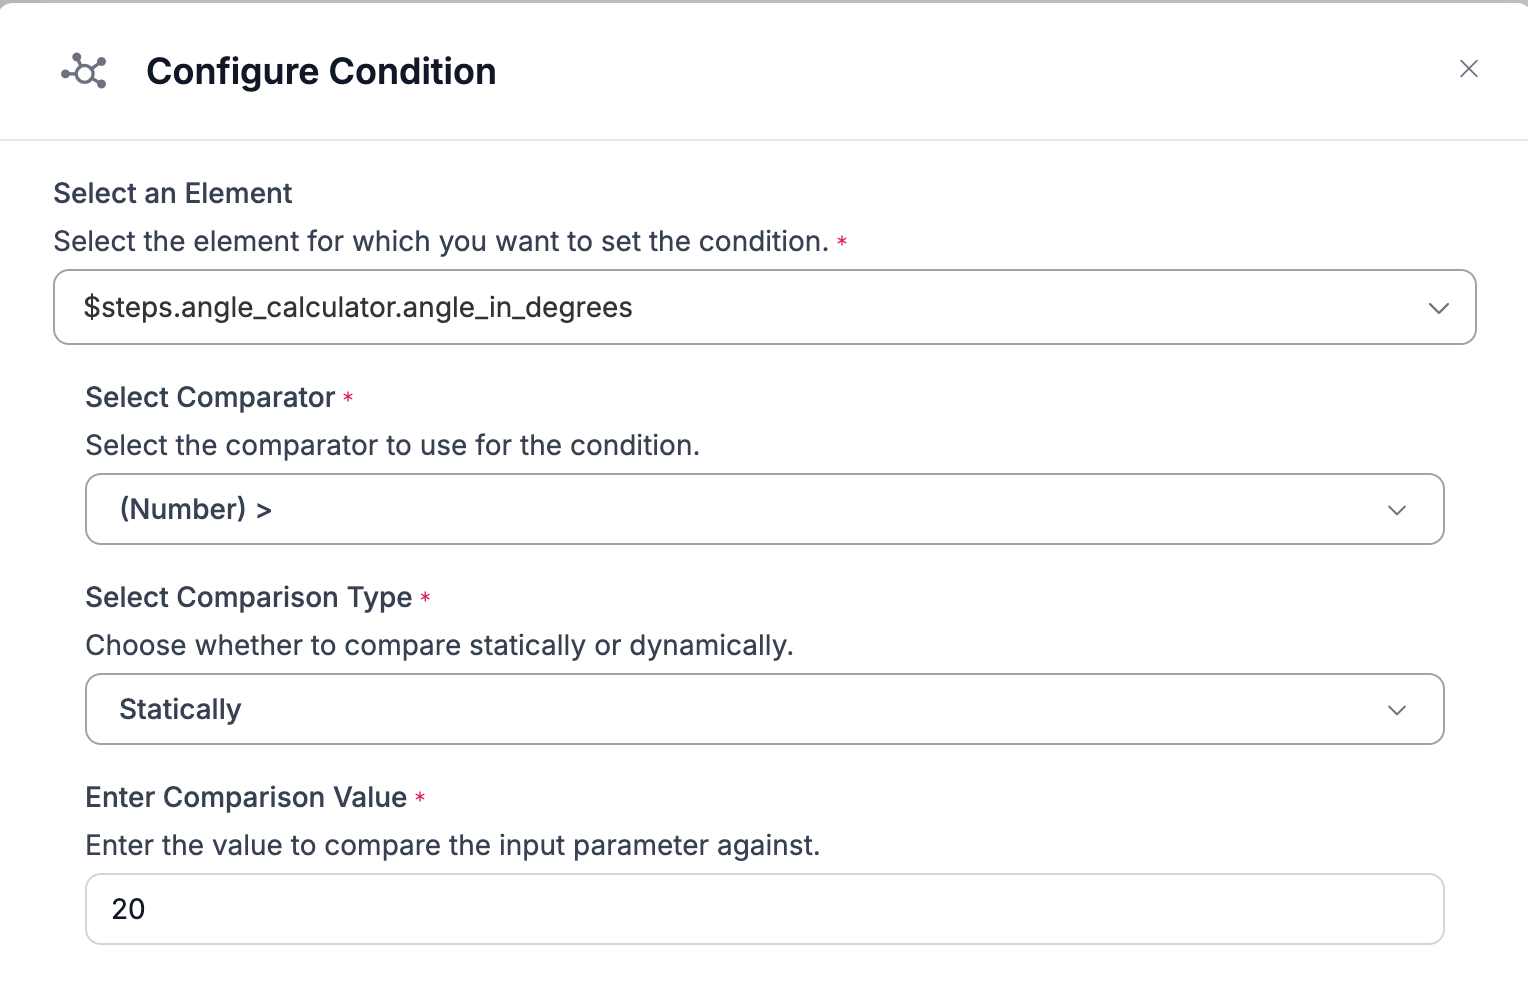
Add a Continue If block. Set the condition to compare `$steps.angle_calculator.angle_in_degrees` against a static value using the greater than comparator, with 20 as the threshold. Connect slack_notification as the next step, so the workflow only proceeds to send an alert when the angle exceeds this limit.
Step 7: Add a Slack Notification block to alert when the threshold is crossed
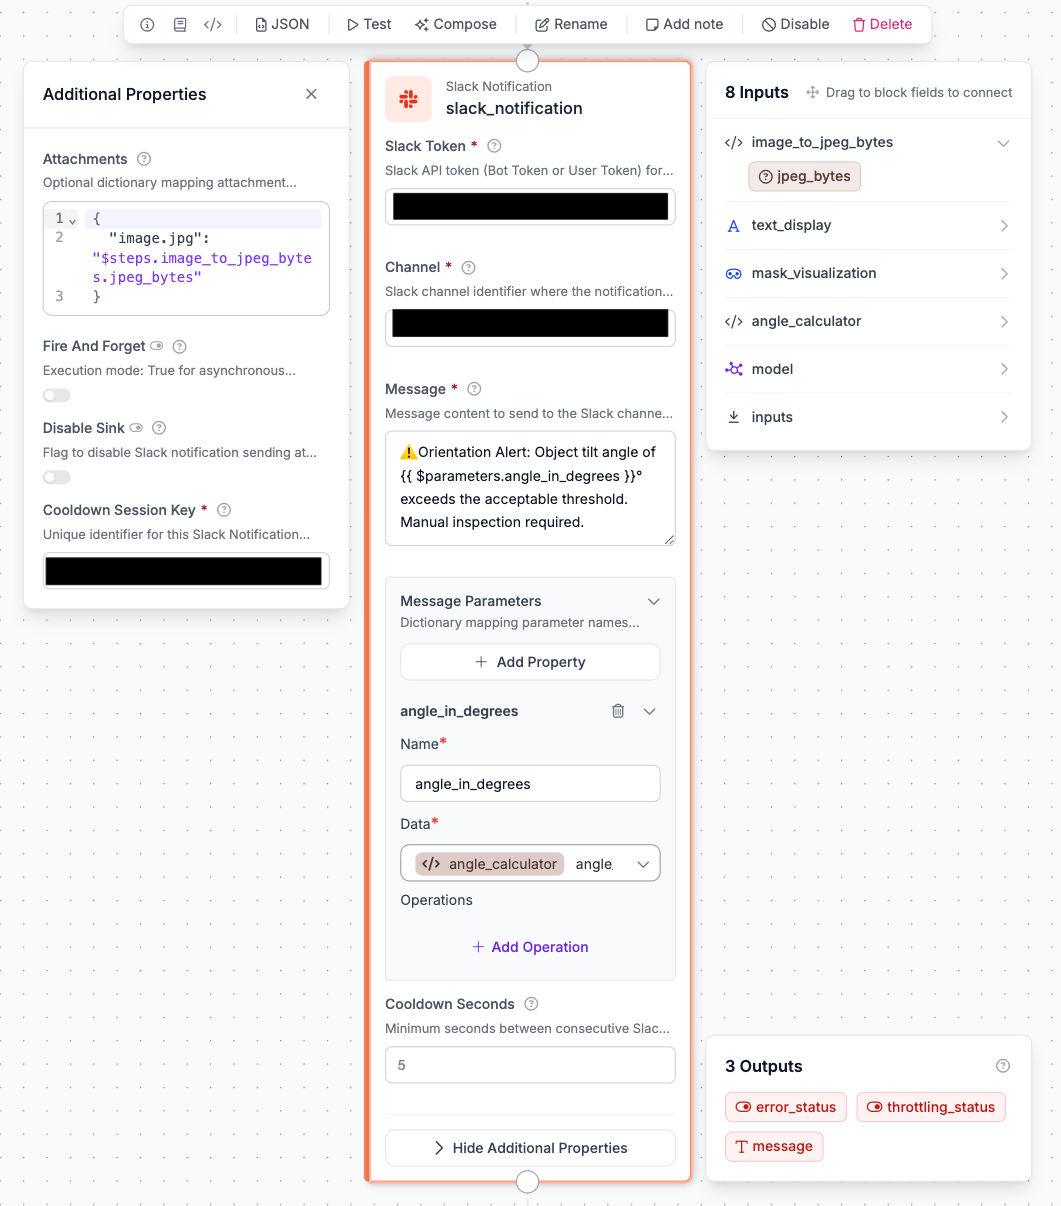
Add a Slack Notification block and connect the fields shown in the screenshot below. This includes your Slack token, target channel, alert message with the angle interpolated in, and the image attachment pulled from the Image To JPEG Bytes block. For a full walkthrough of setting up the Slack app and generating a token, see this guide on sending Slack notifications from a Roboflow Workflow.
Step 8: Configure Outputs
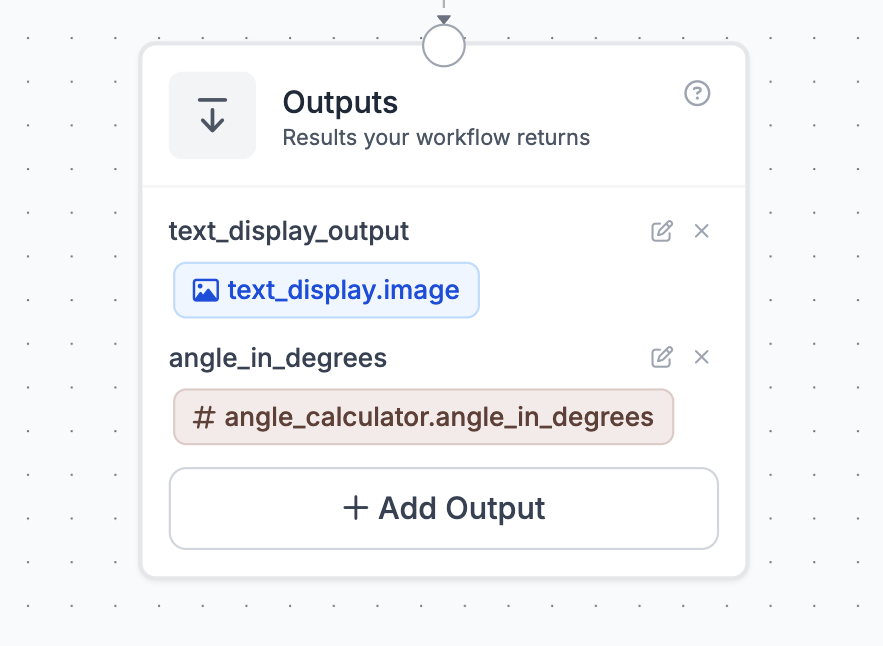
Set text_display_output to text_display.image and angle_in_degrees to angle_calculator.angle_in_degrees. This returns the labeled image and the raw angle value from every run of the workflow.
Measure Object Orientation and Angle Workflow Results
Test case 1: Bottle Orientation
On a bottling line, each bottle needs to stay within a set tilt range before it reaches the capping station. A bottle held at a clear angle tests whether the workflow catches that kind of deviation, from segmentation through PCA to the Slack alert.
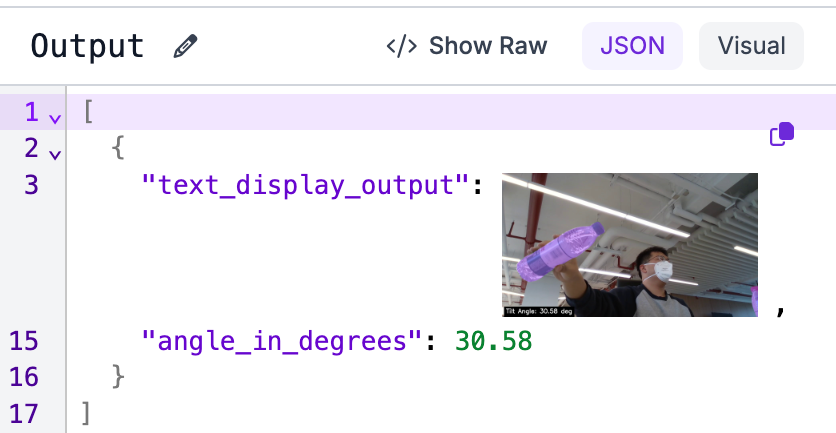
The workflow calculated a tilt of 30.58 degrees, above the 20 degree threshold, so Continue If passed the result along and Slack Notification fired.
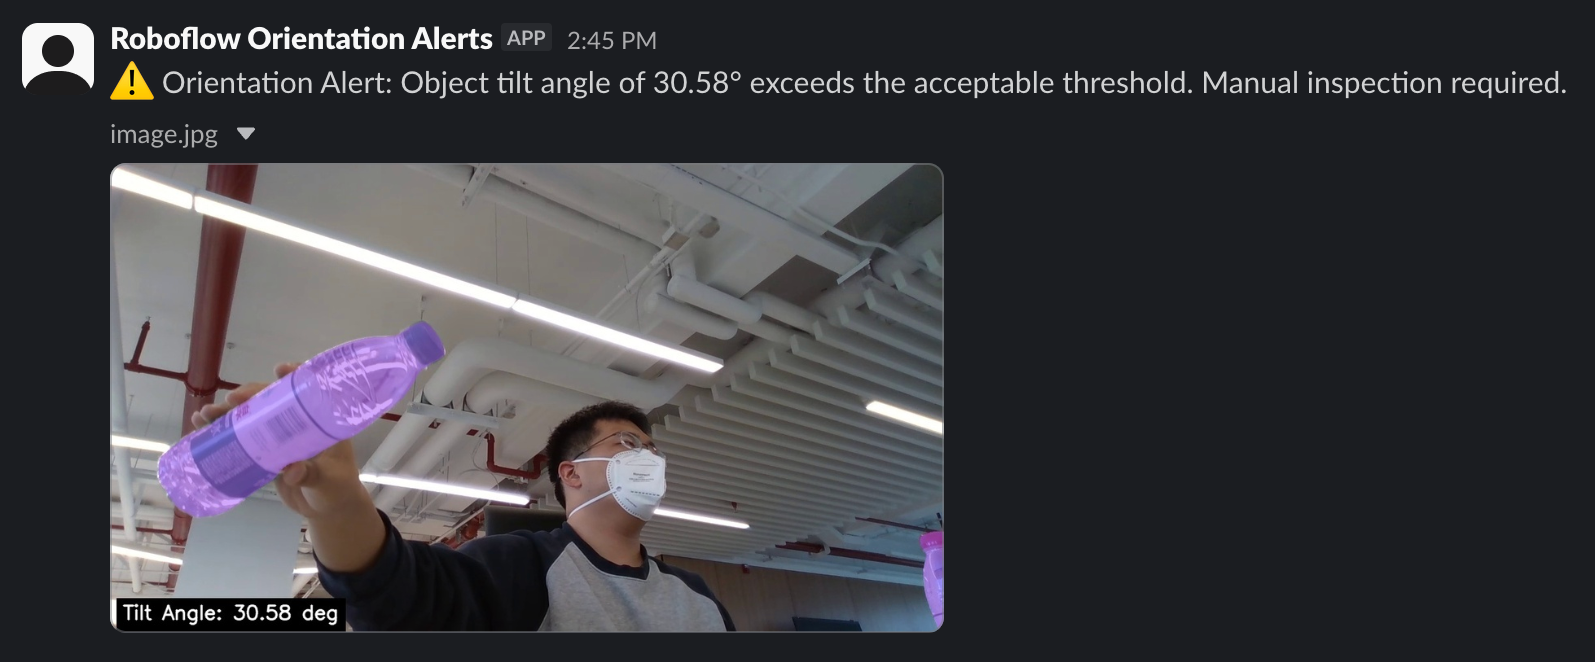
The alert includes the exact angle and the labeled image, giving whoever reviews it immediate visual confirmation of what triggered the notification, without needing to pull up the line footage separately.
Test case 2: Part Alignment on a Fixture
On an assembly line, a part placed on a fixture needs to sit within a narrow angle range before the next station accepts it. A well-seated part reads close to 0 degrees, and any tilt shows up directly as the deviation from vertical.
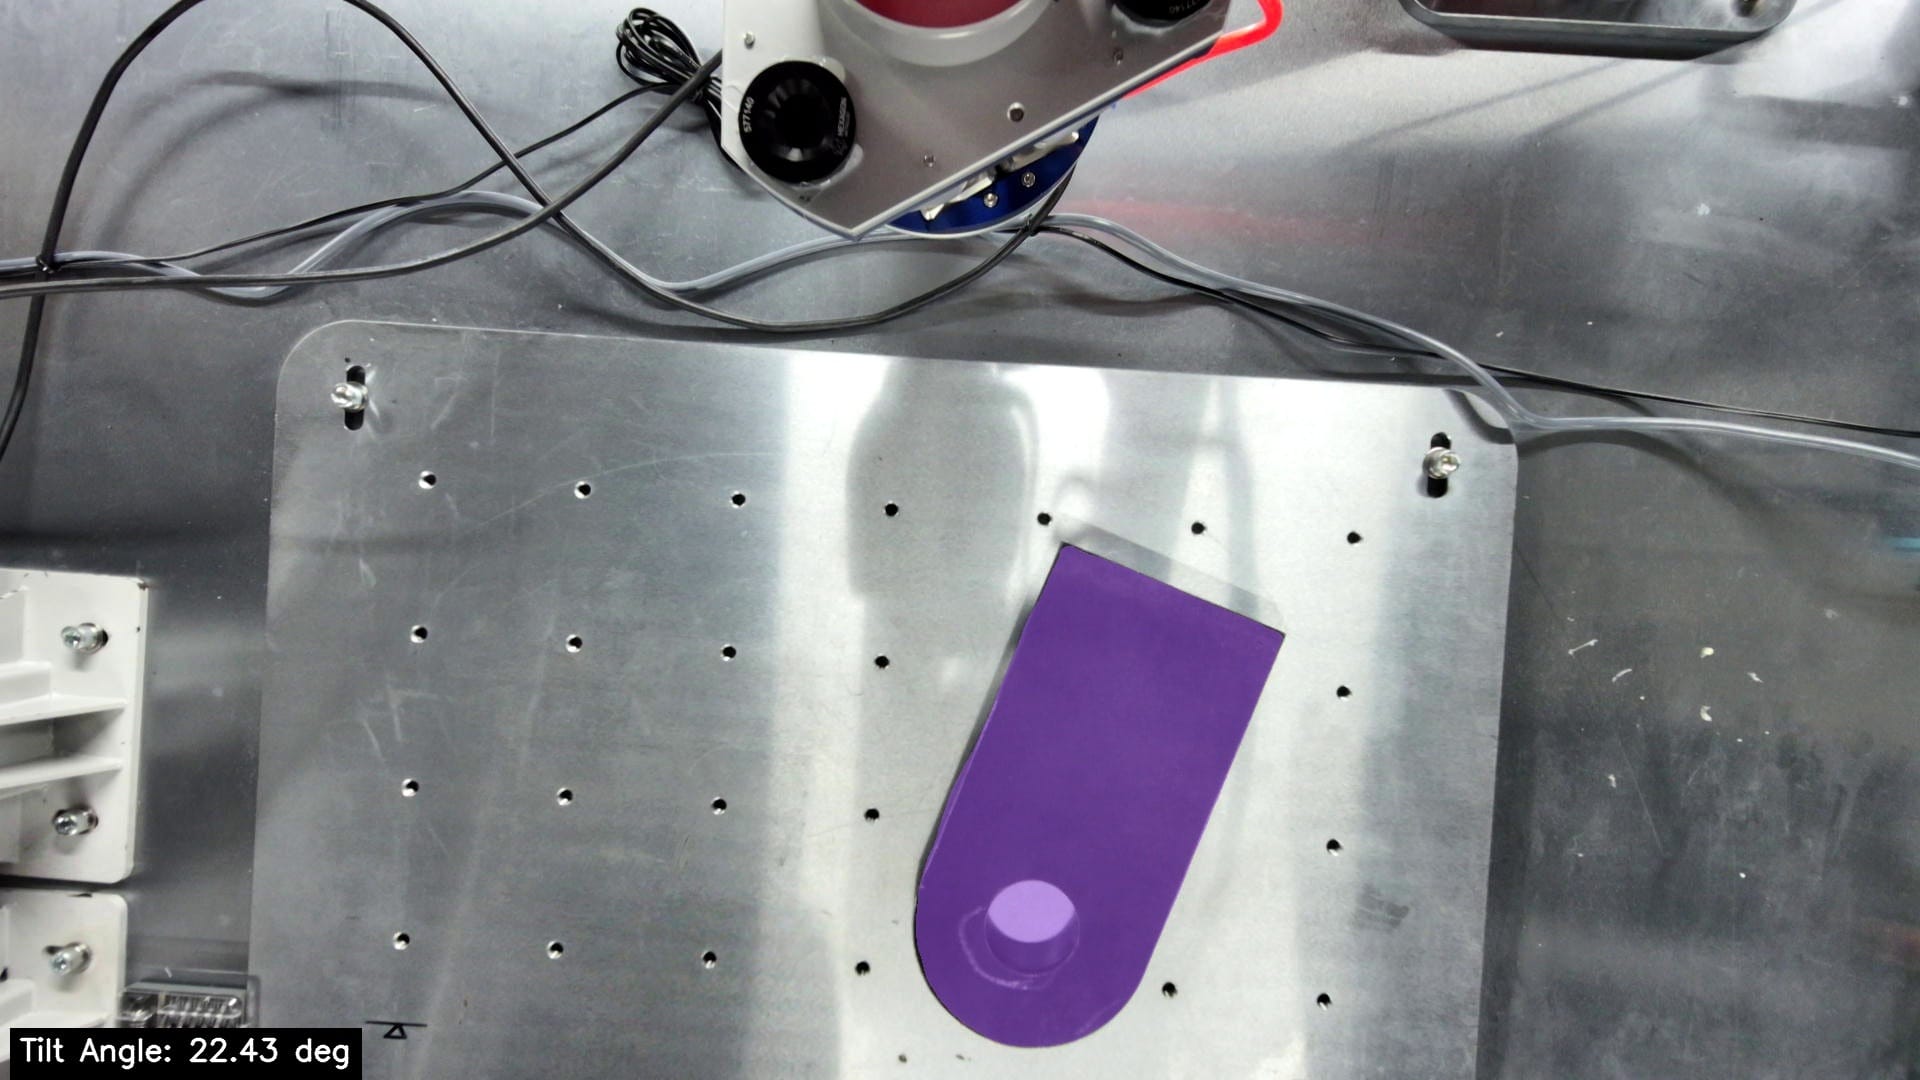
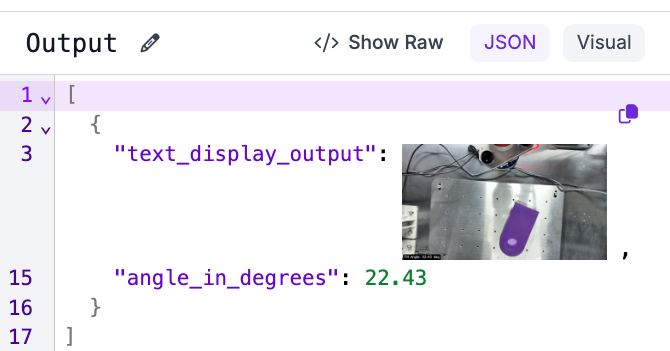
The workflow measured a 22.43 degree deviation from vertical, well above what most fixture tolerances would allow, flagging the part as misaligned before it reaches the next stage.
Test case 3: Pole or Structure Lean
Utility poles are a common target for lean monitoring, since even a small tilt can signal foundation issues or storm damage before a full failure occurs. This dataset includes multiple classes such as insulators and wires alongside the pole itself, so the code needs a small addition: filtering `model_predictions` down to detections where `class_name` matches "pole" before running PCA. If you're working with a dataset that has more than one class, add this same filter and swap in whichever class name applies to your object.
# Filter for the pole class only, since this dataset has multiple classes
   class_names = model_predictions.data.get("class_name", [])
   pole_indices = [i for i, name in enumerate(class_names) if str(name).lower() == "pole"]


   if not pole_indices:
       return {"angle_in_degrees": 0.0}


   pole_predictions = model_predictions[pole_indices]


   mask = pole_predictions.mask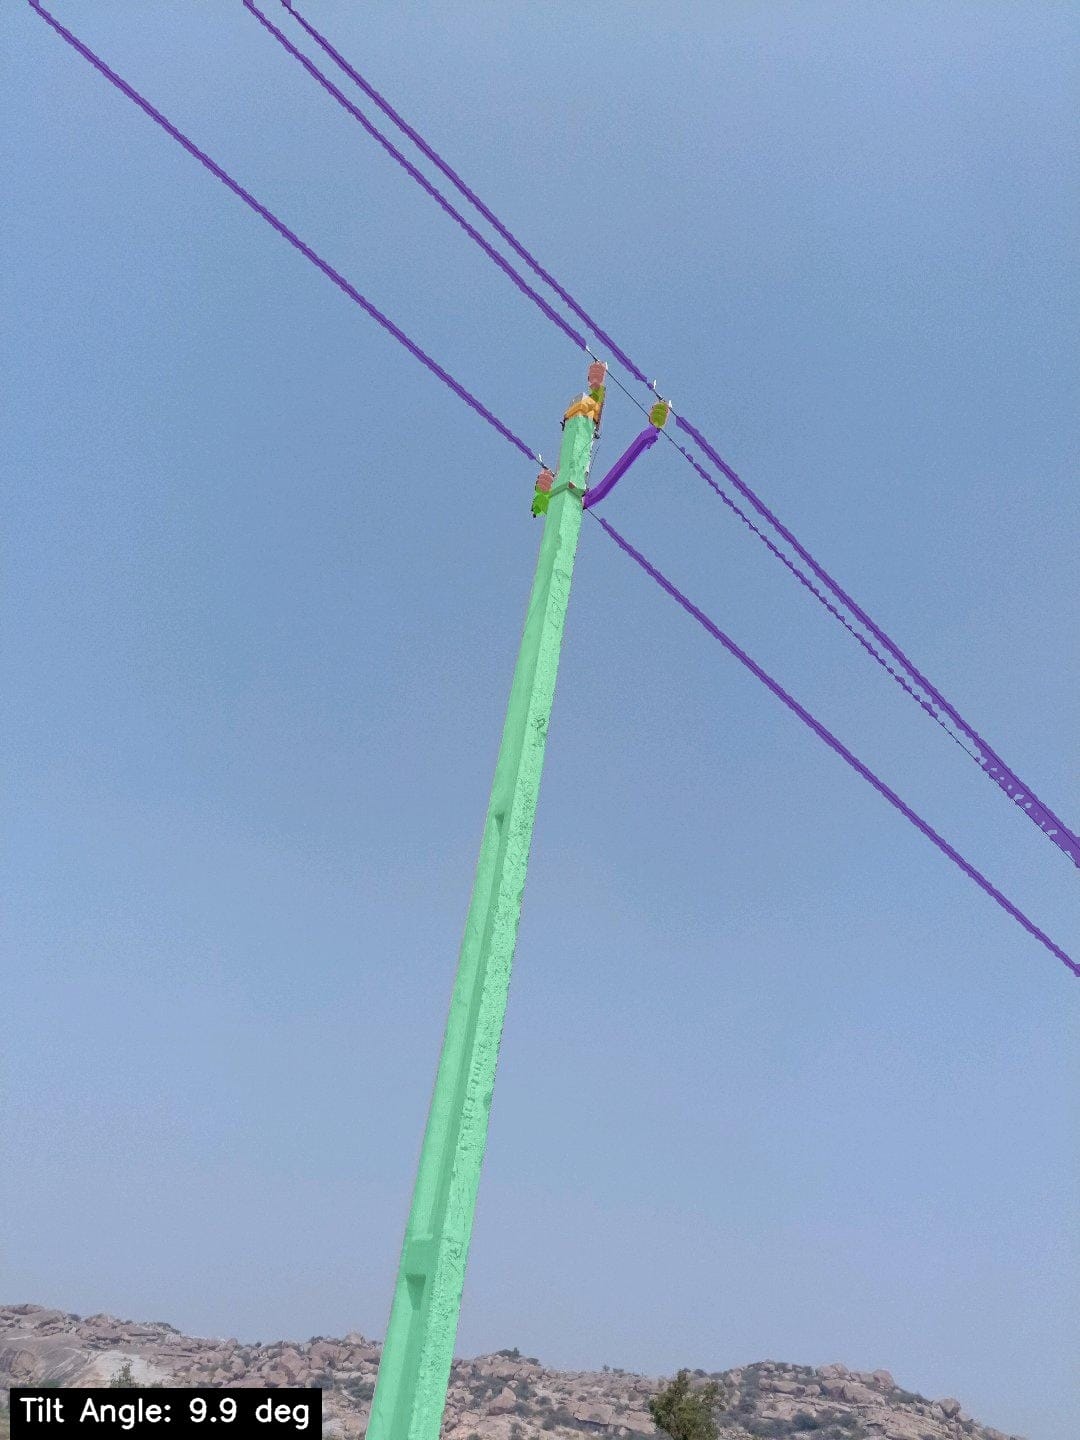
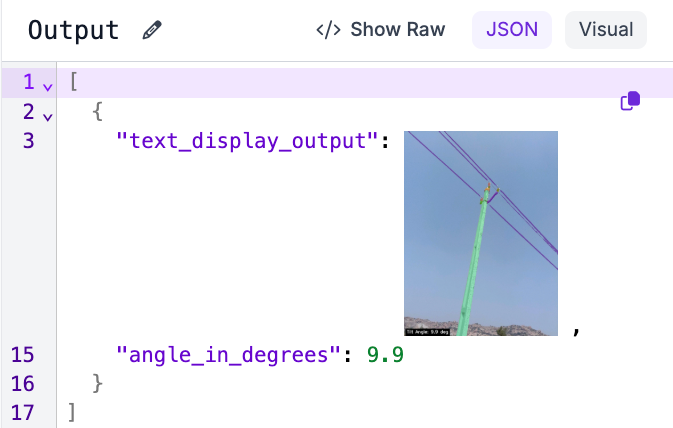
The workflow measured a 9.9-degree lean from vertical. Worth noting here: this particular photo was taken from an angle rather than straight on, so part of that reading comes from camera perspective rather than the pole's actual physical tilt. It is a good live example of the perspective distortion gotcha covered earlier in this article, and a reminder that camera placement should stay consistent when this method is used for real lean monitoring.
Use Roboflow Agent to Measure Object Orientation and Angle with Vision AI
Instead of wiring each block by hand, you can describe your goal in plain language and let Roboflow Agent build the pipeline for you. Prompting it to segment an object, compute its tilt angle with PCA, and alert on a threshold can automatically configure and connect the Instance Segmentation Model, Custom Python Block, and Slack Notification for you.
Production Deployment
Moving from a tested Workflow to a live deployment depends on how images reach the pipeline and where inference runs. Hosted inference on Roboflow's infrastructure is the simplest option to get started, while Roboflow Inference runs the same Workflow locally, useful for factory floors or sites where sending images to the cloud isn't practical.
Image sources are flexible too. The Workflow can accept uploaded files, image URLs, a webcam feed, or an RTSP stream from a fixed camera watching a fixture, line, or pole. Whatever the source, each image runs through the same segmentation, angle calculation, and threshold check, with an alert firing whenever the result crosses the line you set.
Conclusion
This tutorial built a Workflow that segments an object, calculates its tilt with PCA, displays the angle on the image, and sends a Slack alert when it crosses a threshold. The same pipeline applies to any object where tilt or alignment matters. Swap in a different dataset and model, and the PCA logic works without changes.
Further Reading


Cite this Post
Use the following entry to cite this post in your research:
Mostafa Ibrahim. (Aug 12, 2026). How to Measure Object Orientation and Angle with Computer Vision. Roboflow Blog: https://blog.roboflow.com/how-to-measure-object-orientation-and-angle/