Introduced in the paper "Deep Residual Learning for Image Recognition'' in 2015, ResNet-50 is an image classification architecture developed by Microsoft Research. The default ResNet50 checkpoint was trained on the ImageNet-1k dataset, which contains data on 1,000 classes of images.
In this guide, we are going to walk through how to install ResNet-50 classify images using ResNet-50.
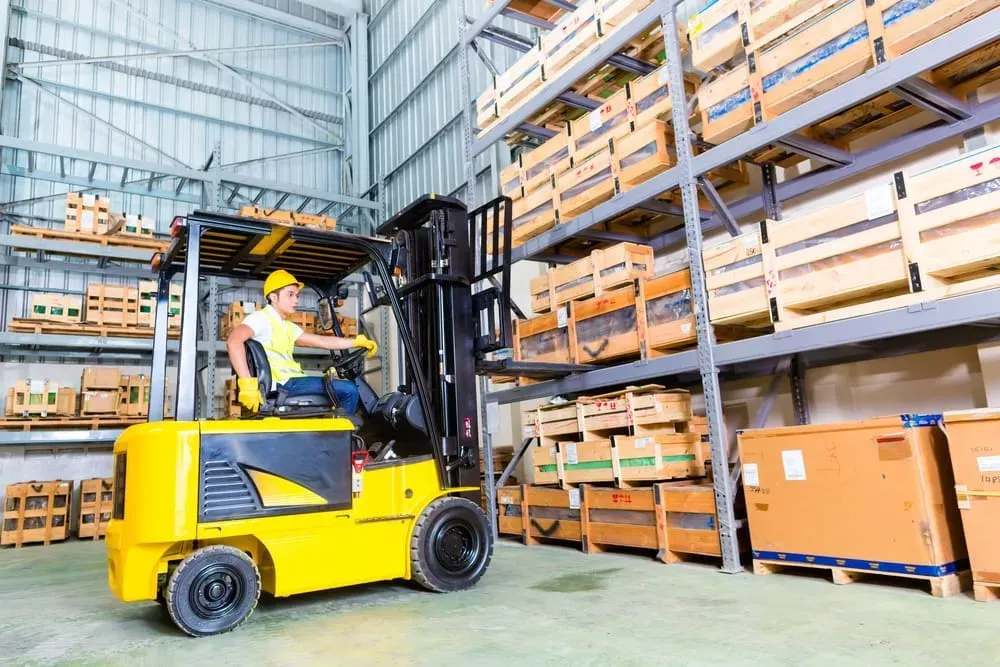
By the end of this guide, we will have code that assigns the class “forklift” to the following image:

Without further ado, let’s get started!
What is ResNet-50?
ResNet-50 is an image classification model architecture. Introduced in 2015, ResNet-50 won first place on the ILVRC 2015 image classification task. While many new model architectures that achieve strong performance have since been introduced, ResNet-50 is still a notable architecture in the history of computer vision.
The default ResNet checkpoint can identify any of 1,000 classes in the ImageNet-1k dataset.
How to Install ResNet-50
You can install ResNet-50 using the HuggingFace Transformers Python package.
To get started, first install Transformers:
pip install transformersOnce you have installed Transformers, you can load the microsoft/resnet-50 model in your code with the ResNetForImageClassification data loader.
How to Use ResNet-50
To get started, create a new Python file and add the following code:
from transformers import AutoImageProcessor, ResNetForImageClassification
import torch
from datasets import load_dataset
from PIL import Image

image = Image.open(“image.jpg”)

processor = AutoImageProcessor.from_pretrained("microsoft/resnet-50")
model = ResNetForImageClassification.from_pretrained("microsoft/resnet-50")

inputs = processor(image, return_tensors="pt")

with torch.no_grad():
    logits = model(**inputs).logits

predicted_label = logits.argmax(-1).item()
print(model.config.id2label[predicted_label])
In this code, we first open an image called image.jpg. Then, we load our model. We run inference on our model with the model(**inputs) function call. Finally, we retrieve the class with the highest confidence returned by our model.
In the code above, replace image.jpg with the name of the image on which you want to run inference.
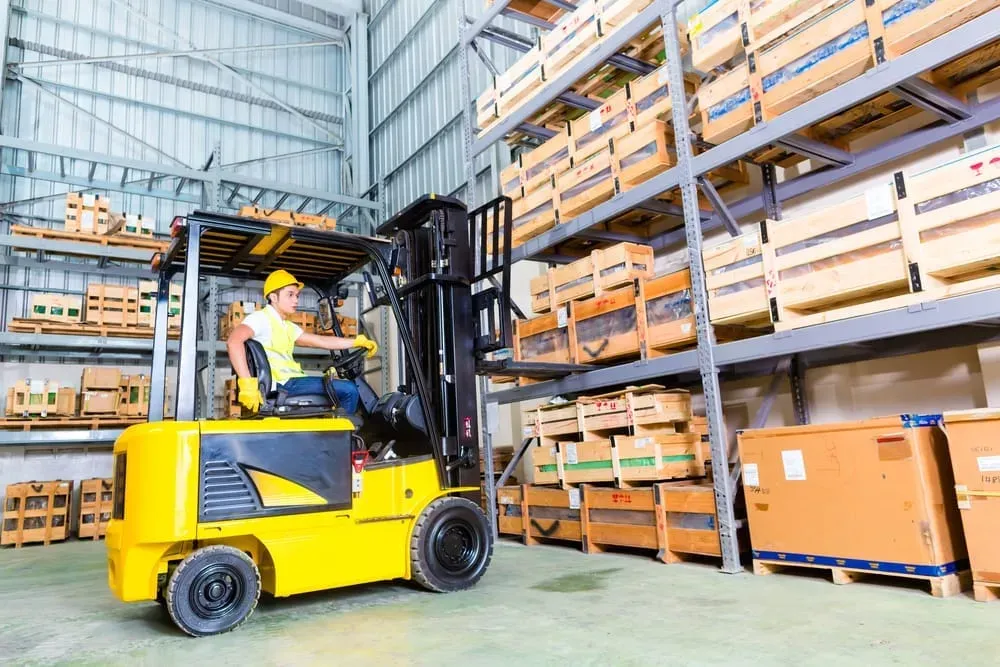
Consider the following image of a forklift:

When we run the image through ResNet, the model returns “forklift”.
Conclusion and The Current Classification Landscape
ResNet-50 is an image classification architecture introduced in 2015 and was trained on the ImageNet-1k dataset. You can train models on a custom dataset using the ResNet architecture if you want to identify your own classes.
While ResNet is several years old, the model is established as an image classification model. Since then, many new architectures have been introduced that allow you to fine-tune a model on a custom dataset, including:
There are also zero-shot classification models where you can use the model on arbitrary classes without fine-tuning models.
For example, you can use OpenAI CLIP to assign labels to images without fine-tuning the model. This is because CLIP has been trained on a large dataset with a wide range of descriptions.
Zero-shot models like CLIP can be used on their own (i.e. for classification, content moderation), or used to auto-label framework like Autodistill for use in training a faster, fine-tuned vision model.
Cite this Post
Use the following entry to cite this post in your research:
James Gallagher. (Mar 4, 2024). How to Use ResNet-50. Roboflow Blog: https://blog.roboflow.com/how-to-use-resnet-50/
