

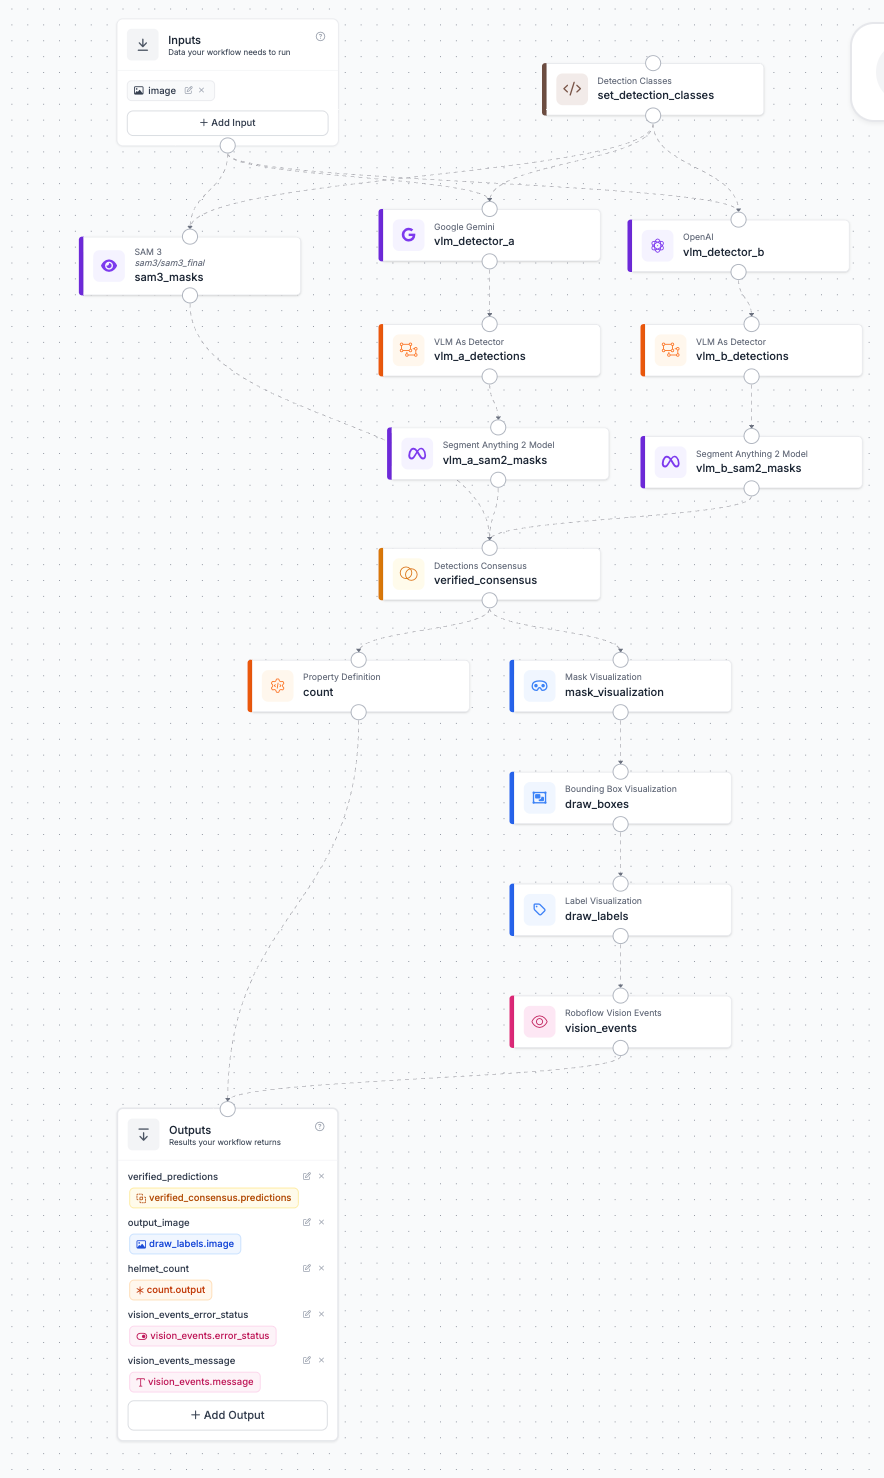
Roboflow's Workflows integration with Auto Label isn't just for bounding boxes. In this article, we build a multi-model consensus pipeline that produces pixel-perfect segmentation masks using SAM 3 prompted directly with text, plus two frontier VLMs (Google Gemini and OpenAI's GPT) whose detections are refined into masks by SAM 2. A rules-based consensus block only keeps masks that at least two of the three branches independently agree on, and we launch the whole thing serverlessly on a batch of unannotated images with just a few clicks.
In this post, we showed how to combine multiple VLMs into a 2-of-3 consensus workflow for auto-labeling object detection datasets. However, bounding boxes only apply to object detection. For many production use cases (defect analysis, medical imaging, robotics, anything where the exact shape of an object matters), you need segmentation masks. Hand-drawing these masks is by far the slowest, most expensive form of annotation.
This is exactly where multi-model auto labeling is most efficient. If consensus labeling saves you time on boxes, it saves you an order of magnitude more on masks.
Multi-Model Segmentation Benefits
The macro benefit here is that you can have the same freedom as before. You're not locked into a single segmentation model or a single provider. But segmentation adds a twist, because the best mask generators and the best object finders are often different models entirely.
SAM-family models produce incredibly crisp masks, but they need to be told where to look. VLMs like Gemini and GPT are excellent at finding and classifying objects, but their raw outputs are boxes, not pixels. With Workflows, you don't have to choose. You can chain them: let the VLMs find the objects, let SAM carve out the pixels, and let a text-promptable segmentation model like SAM 3 run as an independent third opinion.
The result is a pipeline where every mask in your dataset has been found by one model family, refined by another, and verified by a third, before a human ever sees it.
The Concept: Consensus on Masks
When a single model segments your data, it has no safety net. If it hallucinates an object, or bleeds a mask into the background, that error goes straight into your training set.
By running three independent branches (SAM 3, Gemini + SAM 2, and GPT + SAM 2) we eliminate uncorrelated errors. SAM 3 might occasionally grab a background object that vaguely matches your text prompt, but it's highly unlikely that Gemini and GPT will independently box that same false positive at the same coordinates.
Segmentation also gives the consensus block a new mask aggregation strength. When two or more branches agree on an object, we take the intersection of the agreeing masks, keeping only the pixels that multiple models independently claimed belong to the object. Hallucinated mask spillover gets trimmed away automatically, and what survives is the most conservative, highest-confidence mask possible.
Building the Multi-Model Segmentation Auto-Labeler
Let's build it from scratch. If you already have a segmentation workflow in mind, you can skip ahead to the auto-labeling section. We'll build a live 2-of-3 mask consensus workflow using safety helmets on construction sites as our target class without writing a single line of code.
Step 1: Access the Roboflow Platform
Initialize the workspace by logging into your Roboflow account. If you are a new user, you can set up a free tier to begin building and organizing your custom vision projects.

Step 2: Create a New Workflow
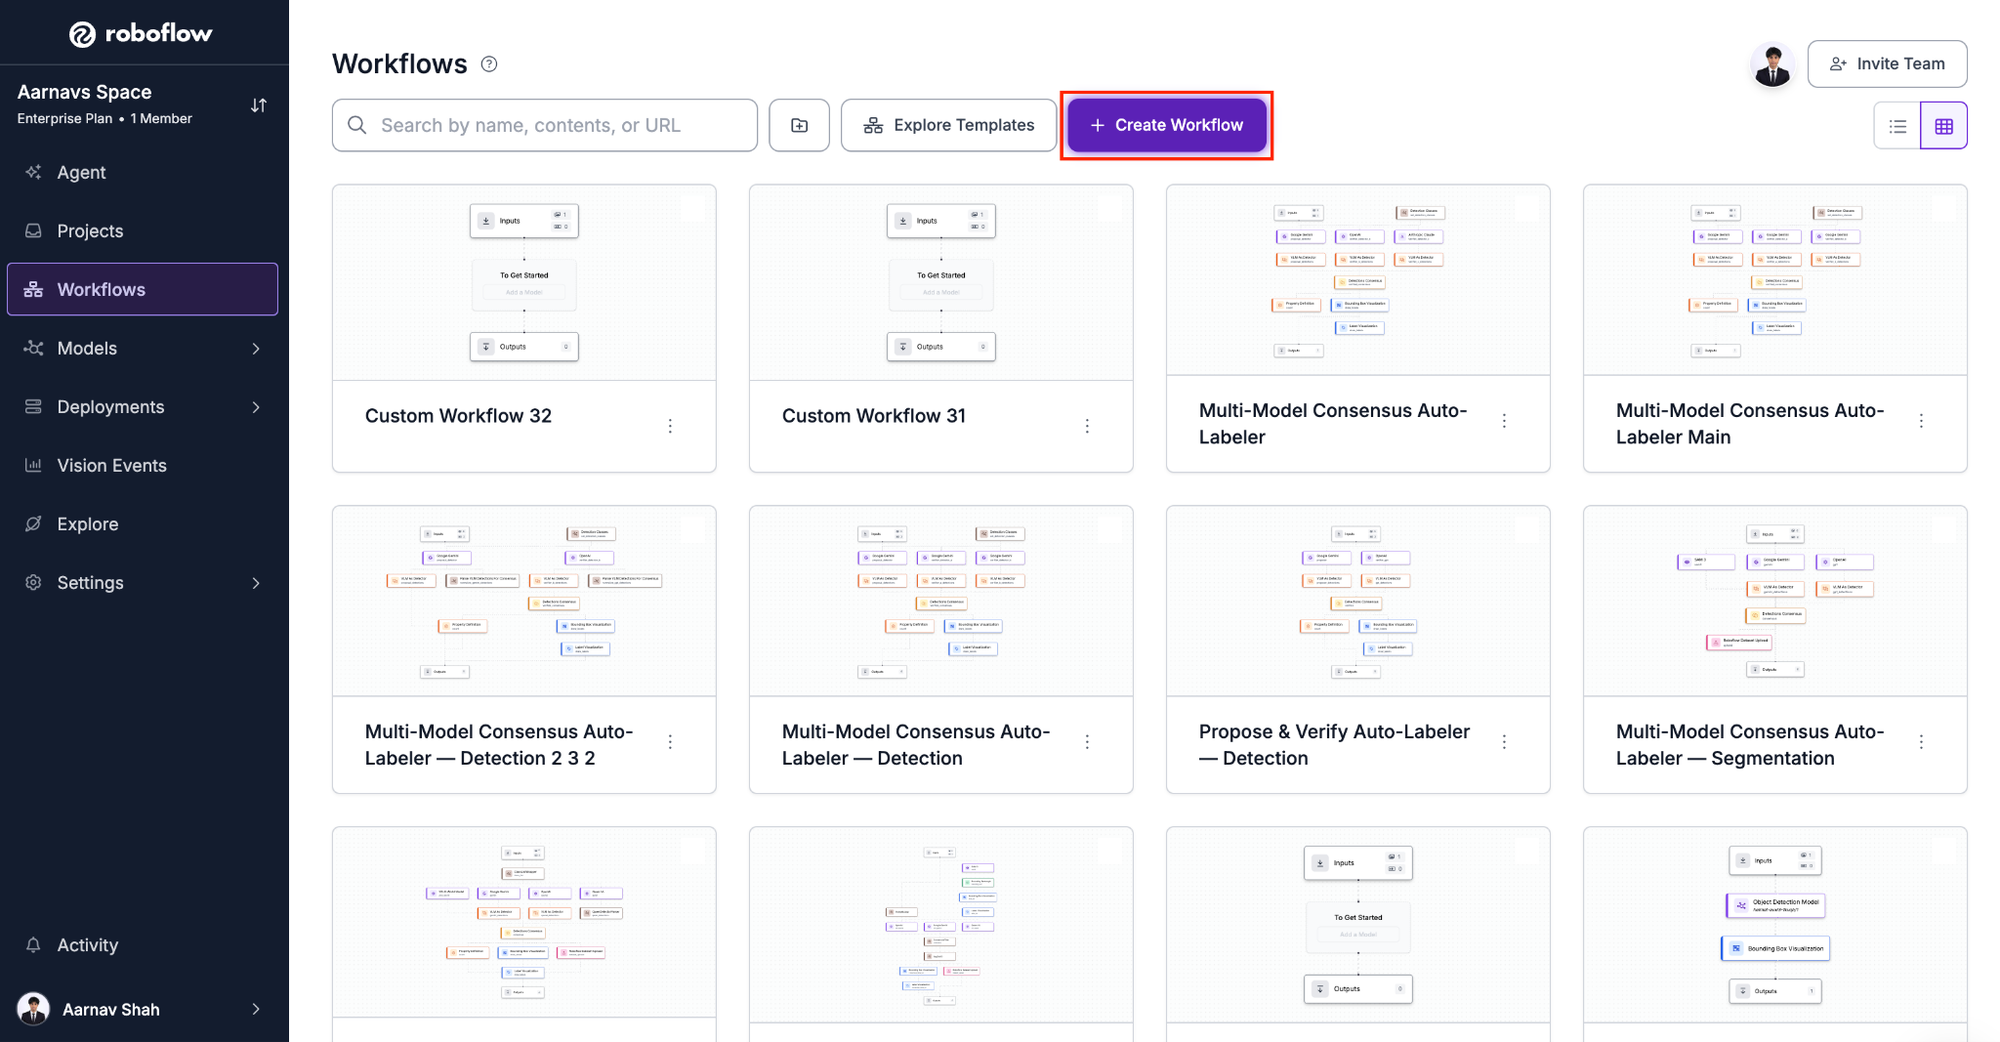
Navigate to the Workflows tab in your dashboard sidebar and click Create Workflow. Choose a blank workflow to open up the interactive node graph canvas.
Step 3: Configure Inputs & Class Setup
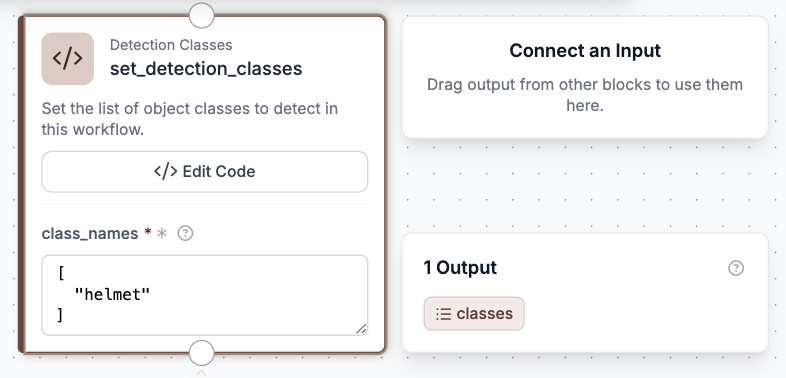
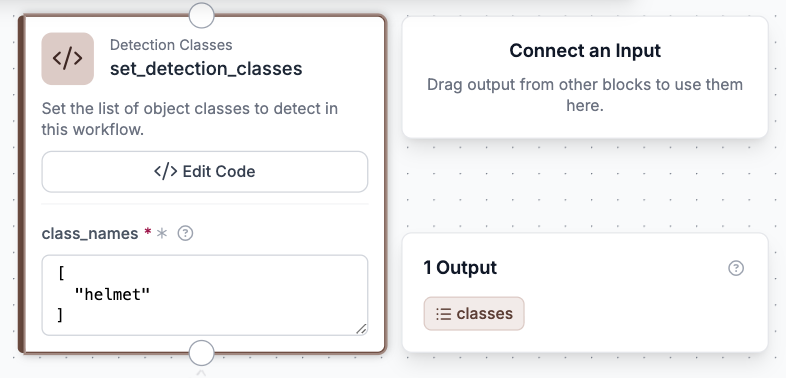
Just like the detection version, add a centralized Detection Classes block (set_detection_classes) to your workflow. This is the single control point for your entire pipeline, and every branch downstream reads its target classes from here.
For this build, set the class to helmet. Since every model in this pipeline is open-vocabulary or promptable, pivoting the entire workflow from helmets to cracks on a weld seam is very simple. All three branches adapt instantly.
Step 4: Add SAM 3 as Your First Segmentation Branch
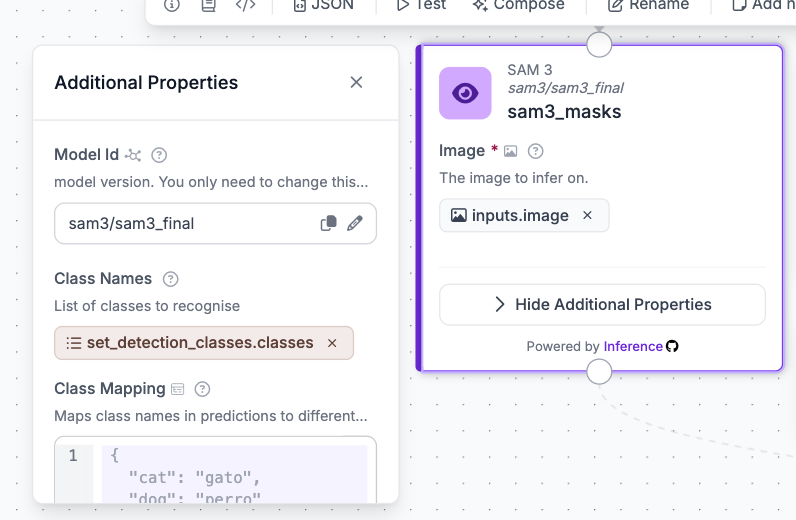
Drop a SAM 3 block (sam3_masks) onto the canvas and wire it to your image input and your detection classes block. SAM 3 is text-promptable, so it takes your class names directly and returns polygon masks natively. Set the output format to polygons.
This branch is your segmentation expert since it goes straight from text to pixels with no intermediate steps.
Step 5: Add the VLM Branches
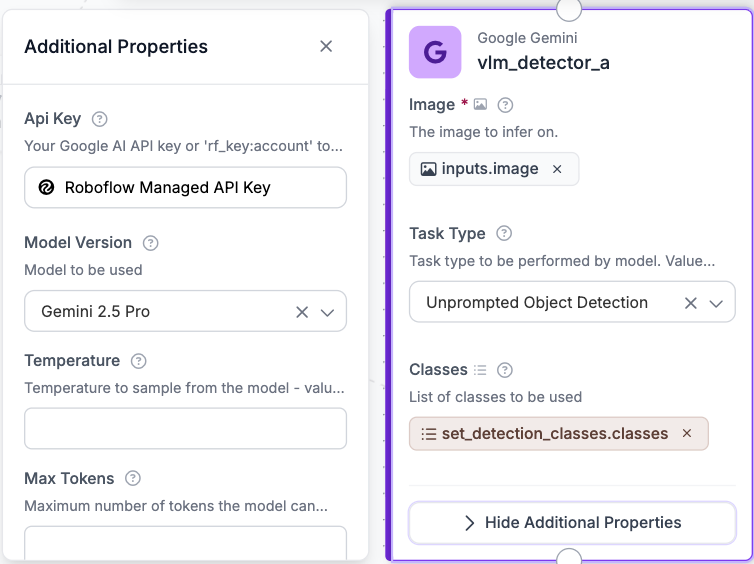
Now add your two verifier branches. Drop in a Google Gemini block (vlm_detector_a, running gemini-2.5-pro)
Also add an OpenAI block (vlm_detector_b, running gpt-5.5).
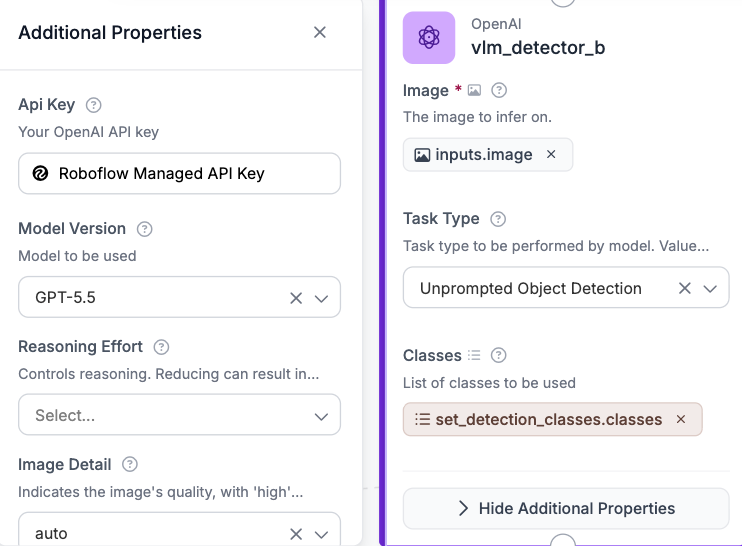
Set both to the object-detection task type and wire both to the same image input and detection classes block. All three foundation branches are now evaluating the exact same visual data against your exact target labels at the exact same time.
Step 6: Convert VLM Outputs and Upgrade Them to Masks
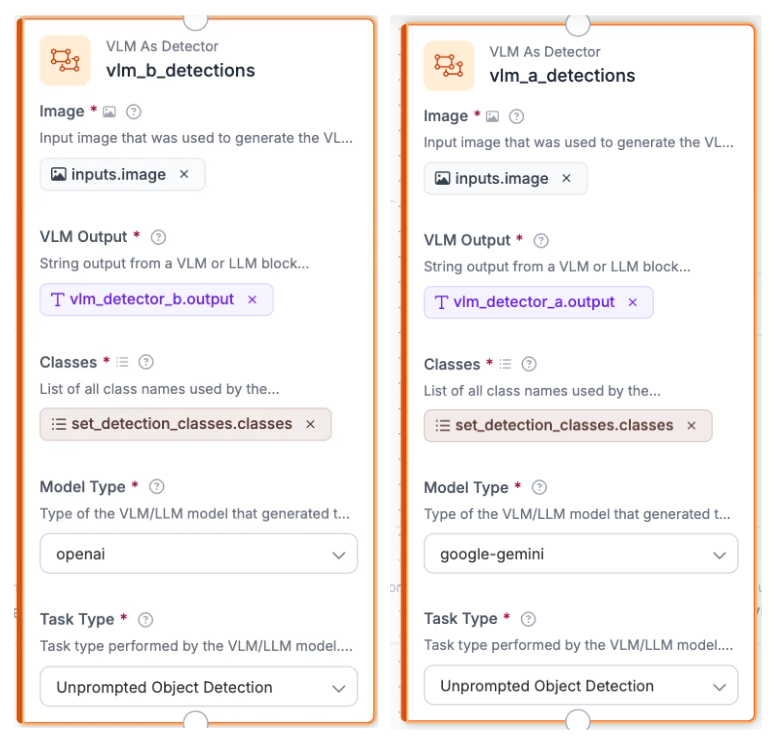
Raw text and coordinate responses from multimodal models need to be structured into format-compliant computer vision data. Drop a VLM As Detector block underneath each VLM to handle that natively.
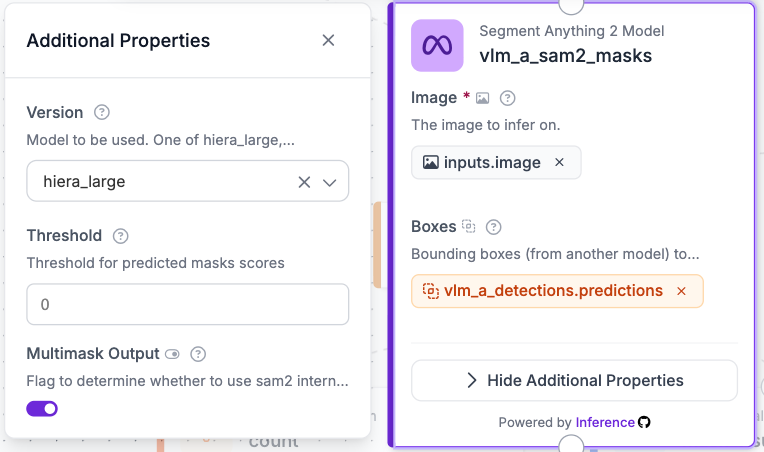
Next, since the VLMs only give you boxes, so we feed each branch's boxes into its own Segment Anything 2 block (vlm_a_sam2_masks and vlm_b_sam2_masks, using the hiera_large checkpoint). SAM 2 takes each box as a prompt and carves out a pixel-accurate mask inside it.
Step 7: Route into Rules-Based Mask Consensus
Connect all three mask outputs (SAM 3, Gemini + SAM 2, and GPT + SAM 2) into a single Detections Consensus block (verified_consensus). Configure it like so:
required_votes: 2, so a mask only survives if at least two of the three branches independently found the same objectclass_aware: enabled, so branches must agree on both location and classiou_threshold: 0.3, which controls how much overlap counts as agreementdetections_merge_mask_aggregation: intersection, so the final mask keeps only the pixels the agreeing models both claimed
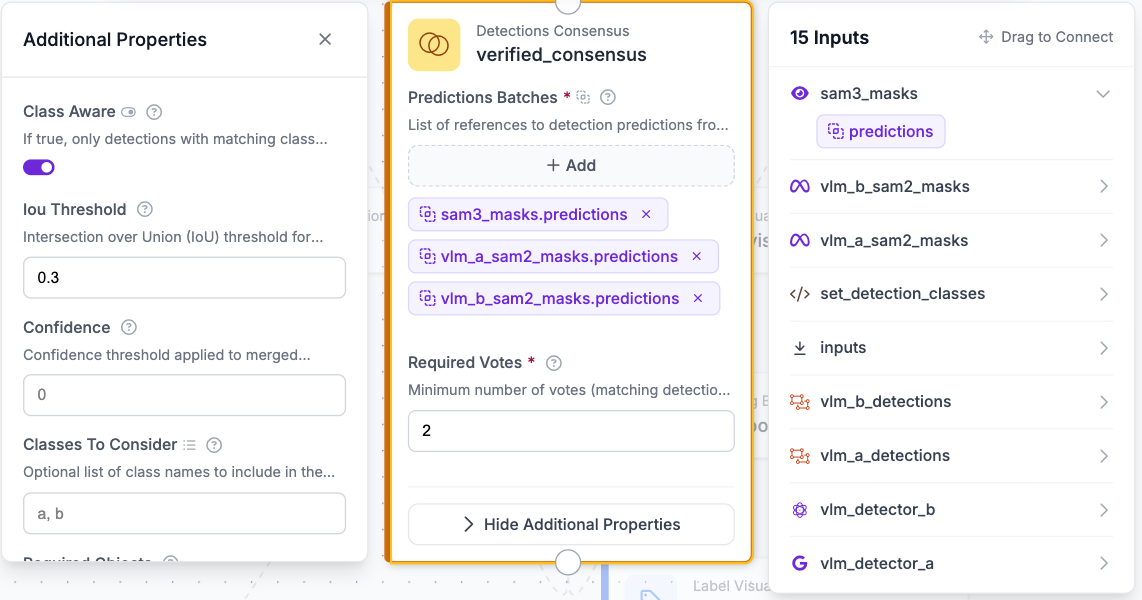
If a branch experiences a random hallucination, it won't get a second vote and gets automatically filtered out. And even for objects that pass the vote, the intersection aggregation trims any pixels only one model believed in.
Step 8: Add Visualization and Production Telemetry (Optional)
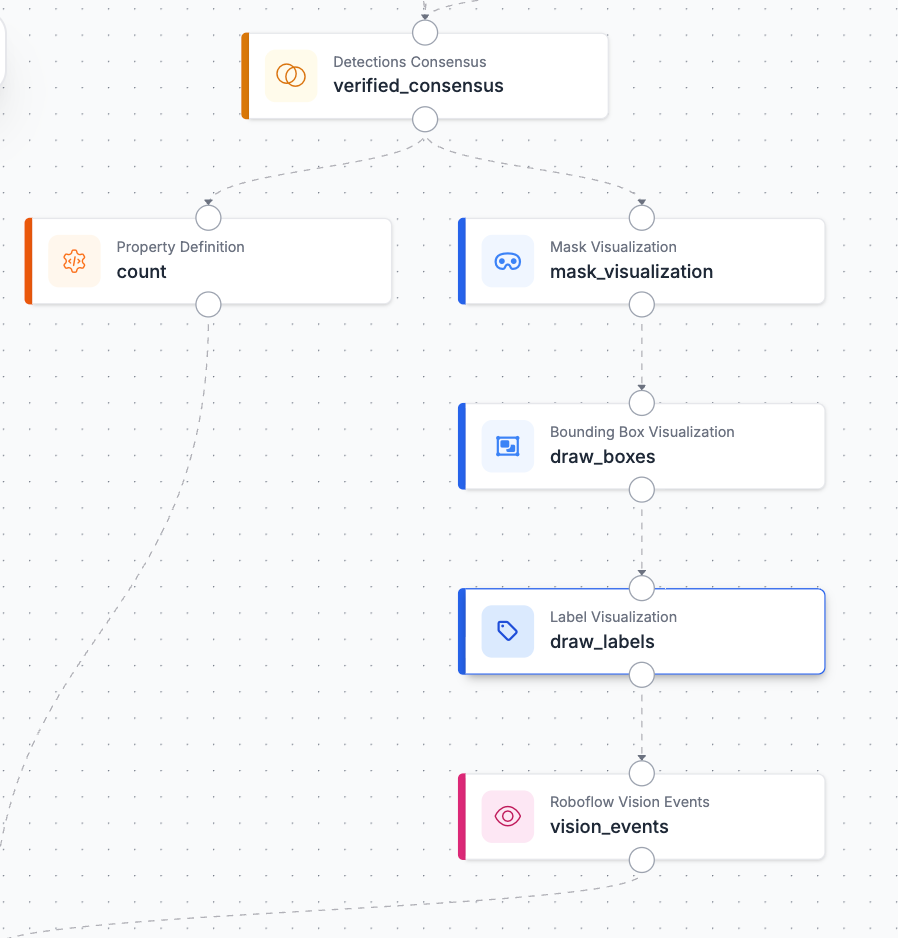
For manual debugging, you can chain a Mask Visualization block (set the opacity to around 0.5) into Bounding Box and Label Visualization blocks, plus a count block to track how many verified objects appear per image.
I also wired in a Vision Events block, which logs every verified segmentation as a structured production event, complete with custom metadata like the workflow goal and target class. This gives you a queryable audit trail of everything your auto-labeler has done, which is useful once this pipeline is churning through thousands of images.
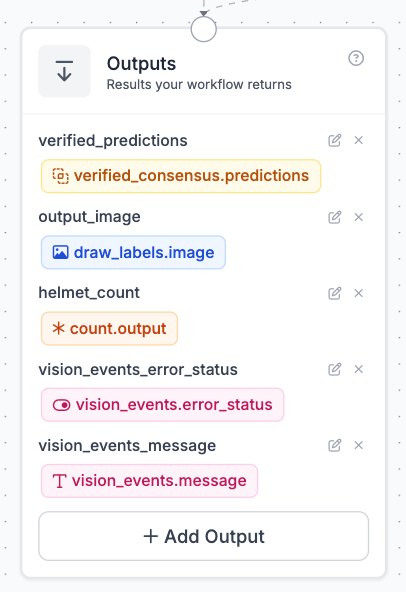
Step 9: Direct the Workflow Outputs
Just like with detection, you can choose to have all of the outputs of just a select few.
How to Use Your Workflow in Auto Label
Once you've built and saved your workflow, launching it on an unannotated batch of images takes just a few clicks.
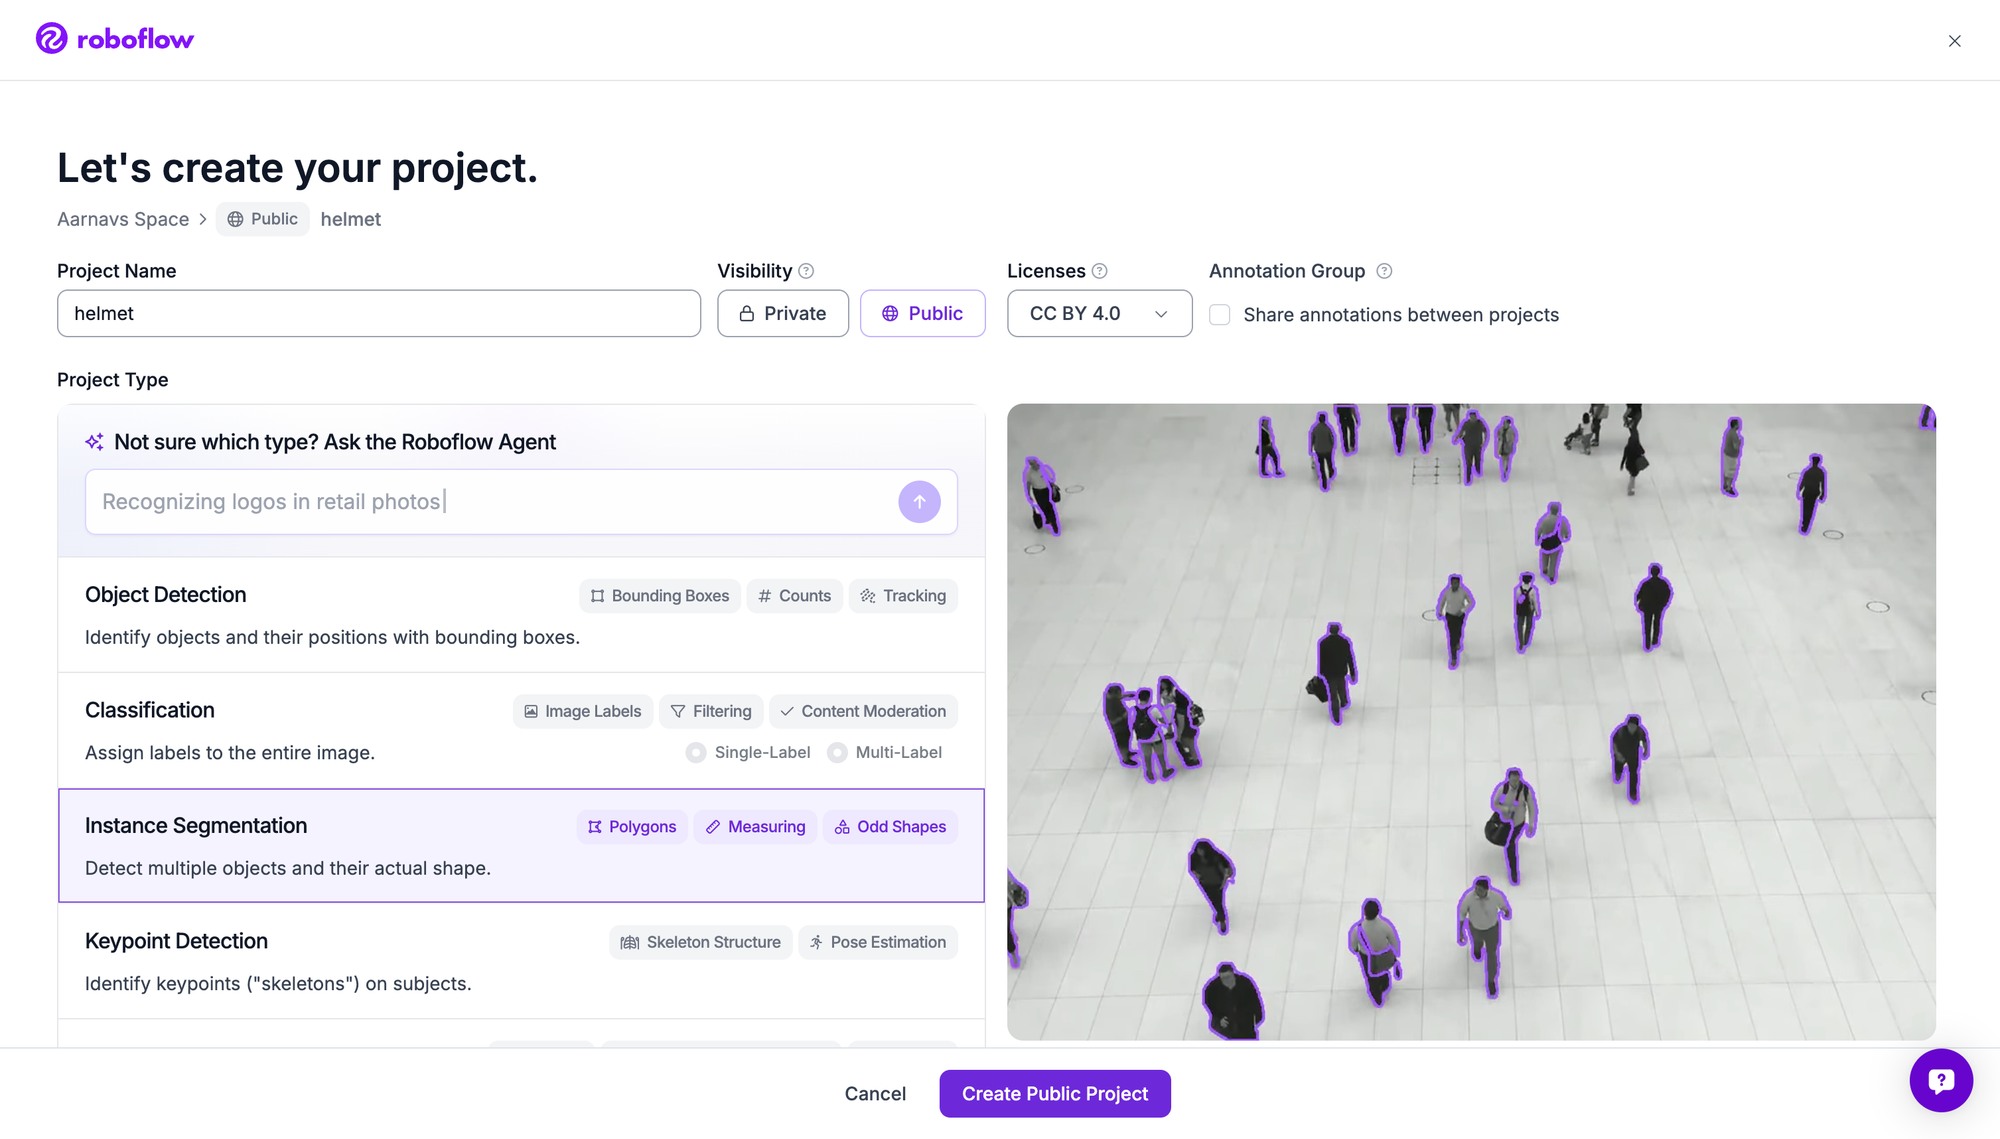
Step 1: Create your project and add images
Sign into Roboflow, create a new instance segmentation project or go to an existing one, and add the images you want to annotate.
Step 2: Choose Your Classes
Because we have a highly customizable workflow, simply go into the detection classes block and change it to your preferred target class. For this project, we'll keep it as helmet.
Step 3: Use your Workflow to Annotate your Images
Go back to the annotate tab, select "auto-label entire batch", and select your workflow.
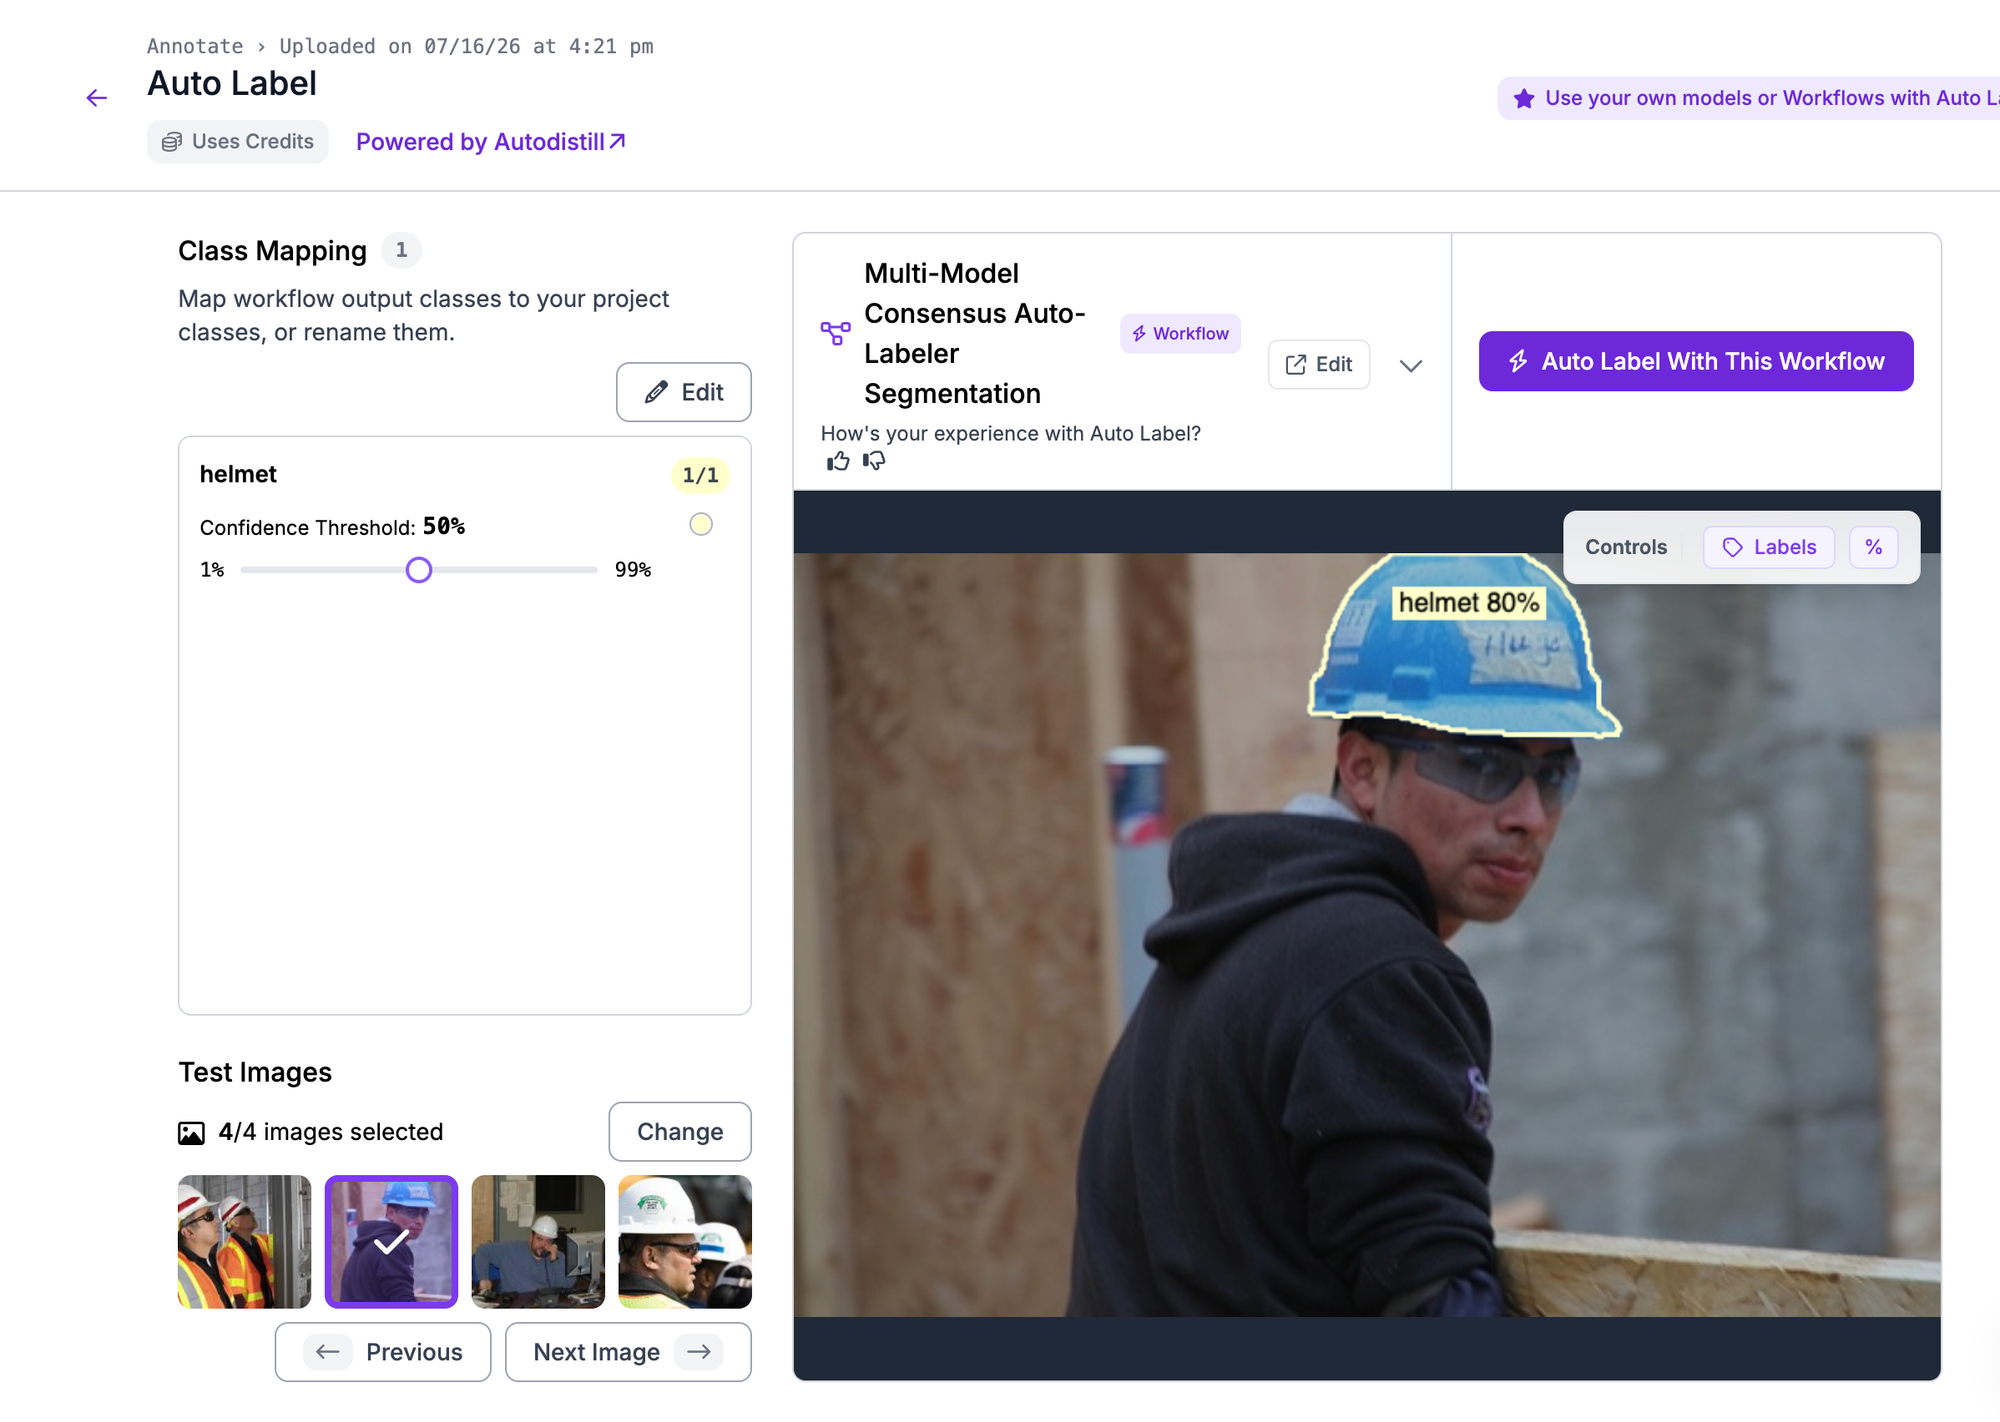
Every image in your batch comes back with verified, intersection-refined polygon masks, ready for human review or straight into a dataset version.


Cite this Post
Use the following entry to cite this post in your research:
Aarnav Shah. (Jul 16, 2026). Multi-Model Auto Labeling for Segmentation with Roboflow Workflows. Roboflow Blog: https://blog.roboflow.com/multi-model-auto-labeling-for-segmentation/