
The Roboflow people detection model, trained on 19,233 images and scoring 89.4% mAP on its test set, returns bounding-box coordinates for every person visible in a submitted image or video frame. This guide shows how to query the model using the Roboflow Python SDK, retrieve the prediction JSON, and render the detections as an annotated image. Practical applications covered include occupancy monitoring, restricted-area access control, and after-hours office tracking, all of which can be connected to additional business logic using patterns from the Roboflow templates library.
Detecting the presence of people is a common use case for computer vision models across industry. For example, construction companies can use a person detection model to identify whether there are any workers in restricted areas; security systems can use a person detection model to track how many people have entered a room at a given time of day.
Roboflow provides a free people detection API that, given an image, will return coordinates that represent the location of all of the people in an image. This API is hosted on Universe, home to over 110,000 datasets useful in training computer vision models, as well as 11,000 pre-trained models ready to use.
In this guide, we'll show how to use the people detection API to identify all of the people in an image. By the end of this guide, we'll have both coordinates of the people in an image and an annotated version of the photo showing these coordinates visually:
Let's begin!
Using the People Detection API
Before you can use the Roboflow people detection API, you will need an API key that permits you to use the pre-trained models available on Roboflow Universe. To retrieve an API key, create a free account on Roboflow. Once you have an account, you can start using our people detection API.
To get started, open up the "People Detection Computer Vision Project" on Roboflow Universe. This project contains a model trained on 19,233 images. When benchmarked against the test dataset, this model achieves an 89.4% mAP score and an 85.6% accuracy score.
Click on "Model" in the sidebar of the model page. This page contains all the information you need to start using the API. At the top of the page, you will find an intercative interface through which you can test the API to make sure it meets your needs. You can test the API by:
- Uploading your own images or videos;
- Pasting in the URL of an image or URL on which you want to run inference;
- Running the model live in the browser using your webcam and;
- By selecting from one of the example images in the test set.
Now that we have tested the model, we can begin integrating it into an application. The first step in doing so is to scroll down to the "Infer on Local and Hosted Images" section on the page. This section contains code snippets and guidance on how to deploy the model on a variety of different devices. For this tutorial, we'll focus on using our model with the Roboflow Python package.
First, install the Python package through pip:
pip install roboflowNext, copy the code snippet provided on the Model page into a new Python script. This code snippet will look something like this, with your API key already in place:
from roboflow import Roboflow
rf = Roboflow(api_key="API_KEY")
project = rf.workspace().project("people-detection-general")
model = project.version(5).model

# infer on a local image
print(model.predict("your_image.jpg", confidence=40, overlap=30).json())
Remove the comment from the line that saves predictions to a file:
model.predict("your_image.jpg", confidence=40, overlap=30).save("prediction.jpg")In full, this code:
- Loads the Roboflow Python library;
- Creates an object through which we can interface with the Roboflow API;
- Runs inference on an image and prints a JSON output showing the coordinates of all of the people in an image on the console and;
- Runs inference and saves an image showing the location of all of the people to a file.
Let's run our script on the following image:

When we run our script, we get the following console output:
{'predictions': [{'x': 317.5, 'y': 210.5, 'width': 49.0, 'height': 129.0,
'confidence': 0.7501630783081055, 'class': 'person',
'image_path': 'workarea.jpg', 'prediction_type': 'ObjectDetectionModel'},
{'x': 111.0, 'y': 160.0, 'width': 32.0, 'height': 58.0,
'confidence': 0.6420493125915527, 'class': 'person',
'image_path': 'workarea.jpg', 'prediction_type': 'ObjectDetectionModel'}
], 'image': {'width': 500, 'height': 375}}
This information contains the coordinates of all of the people in our image. Two people have been found in our image. If you want to plot these coordinates onto an image yourself, check out our guide to drawing bounding boxes in Python.
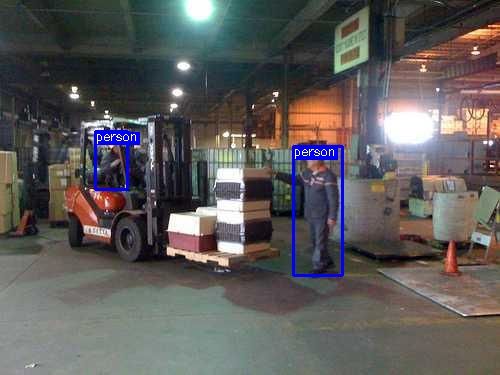
But, the Roboflow Python package already has a method you can use to plot coordinates. The .save() method used in our script above saves an image that shows our predictions. After running the script, you will have a new file called "prediction.jpg" on which bounding boxes are drawn representing the coordinates returned by the model. Here are the bounding boxes for the image with which we are working:

Our model has successfully identified the people in our image. The next step is to think about the most optimal way to deploy our model.
Deploying the Model to Production
Roboflow has an extensive set of resources on deploying models hosted on our platform to production. We currently support the following deployment options:
- Python SDK: Our Python SDK, used earlier in this guide, lets you send image data to Roboflow for inference and retrieve the results.
- Web browser: Run your model in the browser and make detections using your webcam.
- iOS: Run your model in an iOS application.
- NVIDIA Jetson: Run your model on a special-purpose edge inference computer. Ideal for high FPS applications.
- Luxonis OAK: Run your model on an edge device with a webcam available. Ideal for high FPS applications.
- Raspberry Pi: Run your model on a Pi with an attached webcam.
- Docker: There are Docker containers available for deploying models on an edge inference server on both CPUs and GPUs.
There is no general recommendation on what deployment device to use. You should use the device that makes the most sense for your needs. For example, if you want to run inference using a camera, an OAK, Jetson, or Pi may make the most sense; if you want to run inference with a webcam and provide a web interface through which you can interact with predictions, deploying to the web may be more appropriate.
People Detection Model Applications
The applications for our person detection model are vast. For example, you could use the model to:
- Count how many people are in a work room with a limited capacity and trigger a warning when the room has exceeded maximum occupancy;
- Count how many people enter a work area and;
- Track when people enter an office building after hours.
You can read more about Office Occupancy monitoring from the blog post below:
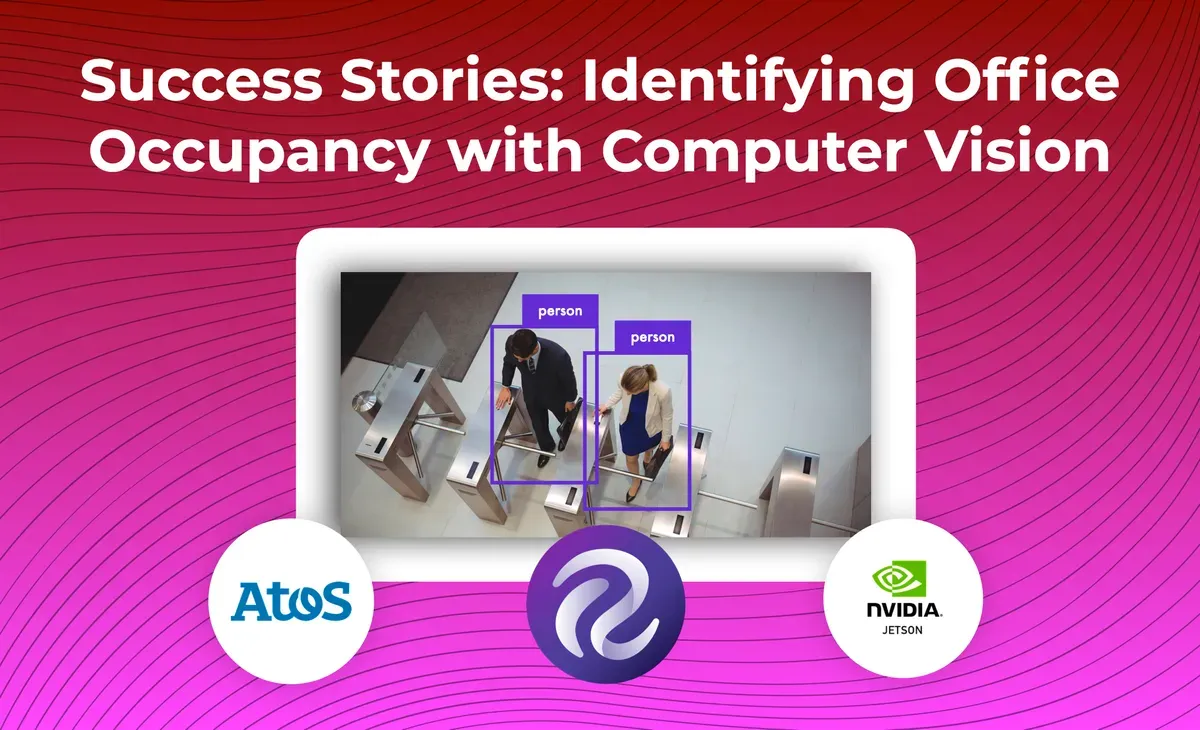
These are a few of the many ways in which you could use the people detection model. To learn more about connecting the model to business logic, check out the Roboflow templates library, a repository of over a dozen guides with patterns that may be relevant to your project. For example, there is a guide on blurring regions in a bounding box (useful for blurring faces in an image), cropping the regions where predictions are made, and more.
Conclusion
In this guide, we have demonstrated how to use the Roboflow person detection API to identify the locations of all of the people in an image. We used the Roboflow Python SDK to retrieve predictions and create a visual representation of those predictions on an image.
Now that you have the ability to detect people with our API, you can connect your application to business logic and devise a strategy for deployment based on the option that makes the most sense for your use case.
Cite this Post
Use the following entry to cite this post in your research:
James Gallagher. (Feb 20, 2023). How to Use the Roboflow People Detection API. Roboflow Blog: https://blog.roboflow.com/people-detection-api/