Every new hire at Roboflow creates a visionary project in their first two weeks. The visionary project is an opportunity to build what "scratches your itch" with computer vision and Roboflow tooling. There have been some pretty incredible projects in the past, including a vacuum tracking system and a sheet music player. The following is a short write-up of my visionary project called Secure Desk.
What Is Secure Desk?
Secure Desk is a real time computer vision application that secures a desk/office behind a vision powered passcode and alerting system. The main functionality of the application is to send a push notification if a person is detected and they do not enter a passcode within 30 seconds of detection. Passcodes are configurable in length, and entered via digits on your hand. Let’s watch a short demo.
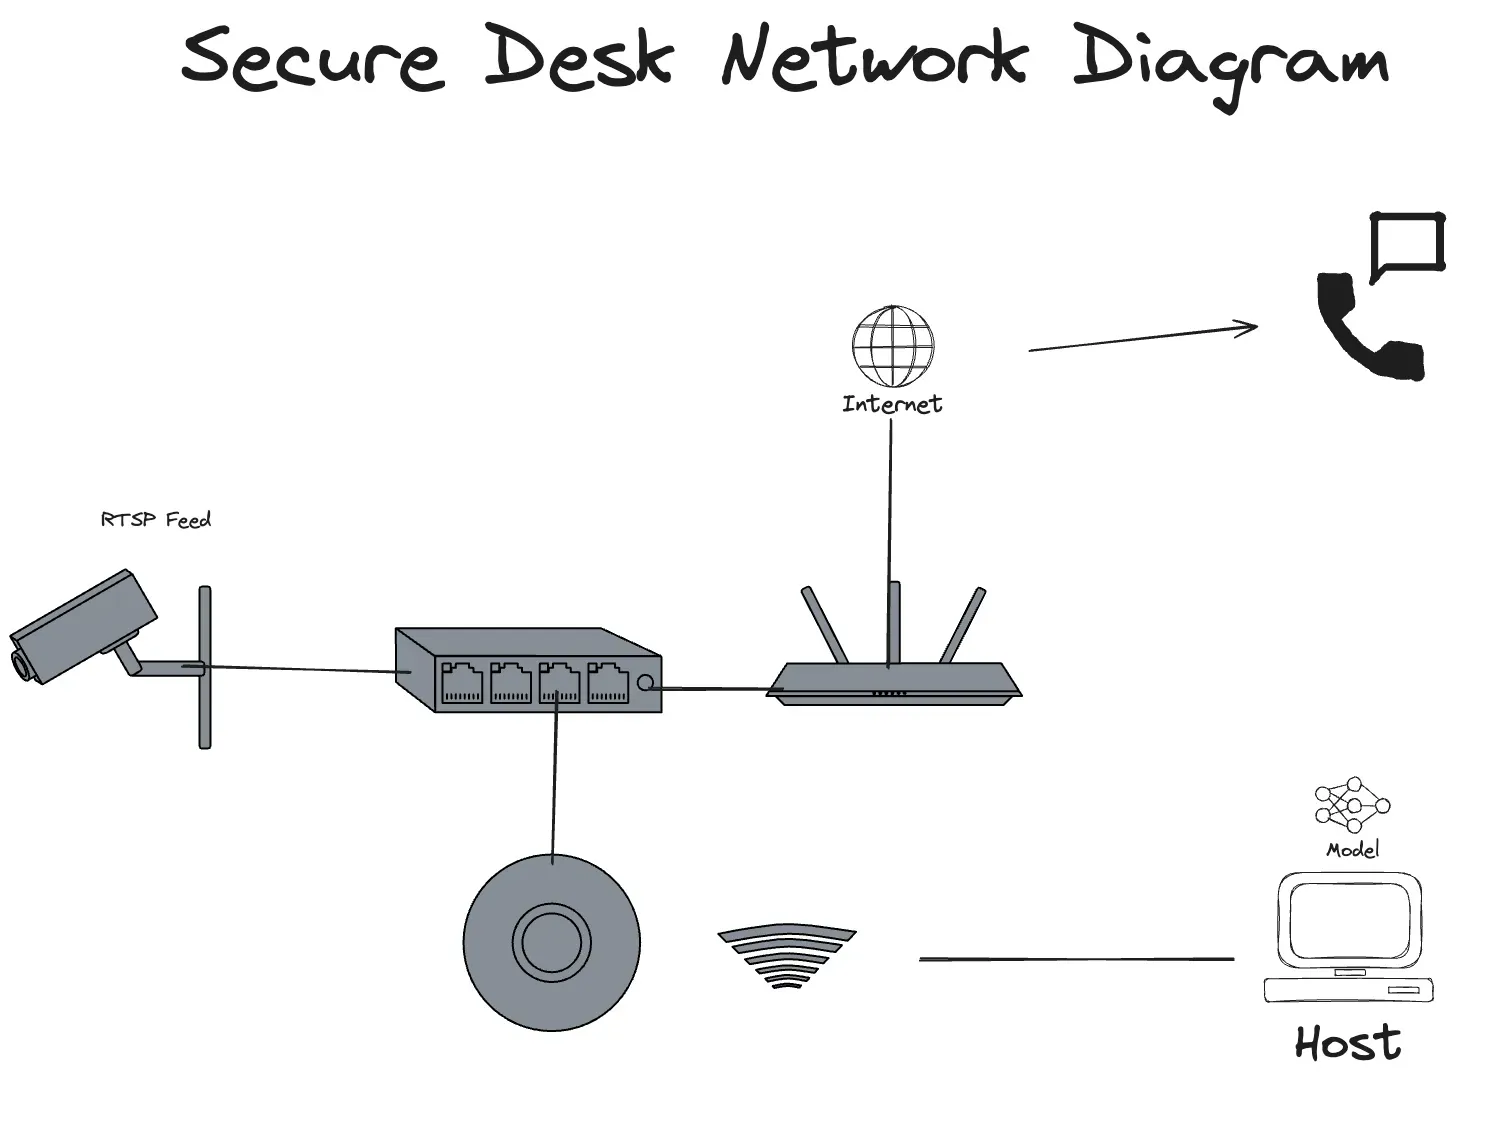
Security Camera Monitoring Architecture Diagram
Below is a diagram of how the application is deployed. There is a computer that runs Python code that handles model inference and application state. This computer is on the same network as a camera that exposes an RTSP feed that the host computer ingests. When certain conditions aren’t met, the application uses a notification software as an service tool to send a push notification over an internet connection.
Building the Model
When starting a new computer vision project, it’s important to take a step back and evaluate some requirements of what you’re building. Thinking about what your model needs to do will help you select the type of model, and architect what you’ll detect. Class ontology, data collection, and labeling methods are all areas to think about. Let’s dive into the process of building the model for Secure Desk.
The Roboflow Platform
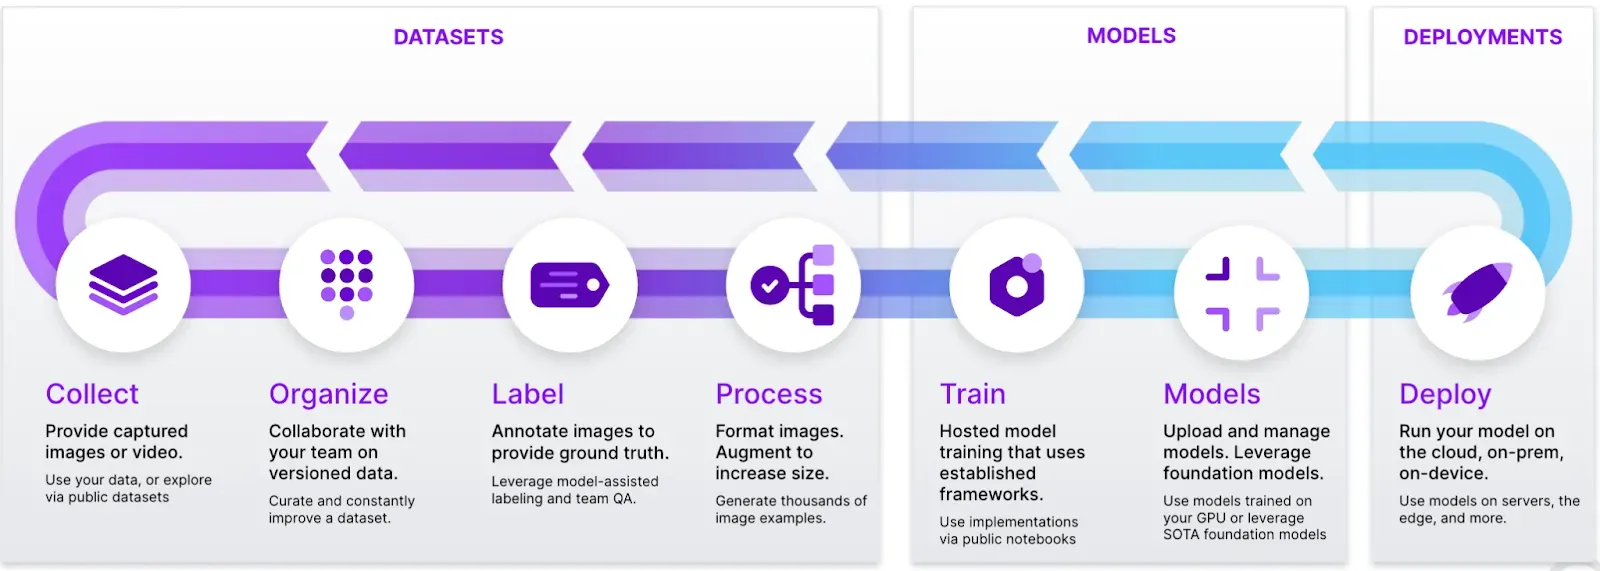
For the project, I used the Roboflow platform for my entire computer vision lifecycle. The functionality of tools centered around Datasets, Models, and Deployments was the perfect match for starting with images and ending a fully deployed application.
Class Ontology and Model Selection
Class ontology refers to the different objects that a computer vision system can recognize and understand in a frame. This is the collection of classes, such as types of products, parts, or defects that are included in a dataset. Roboflow has some pretty impressive features around class ontology.
With this information in mind, this project uses an object detection model
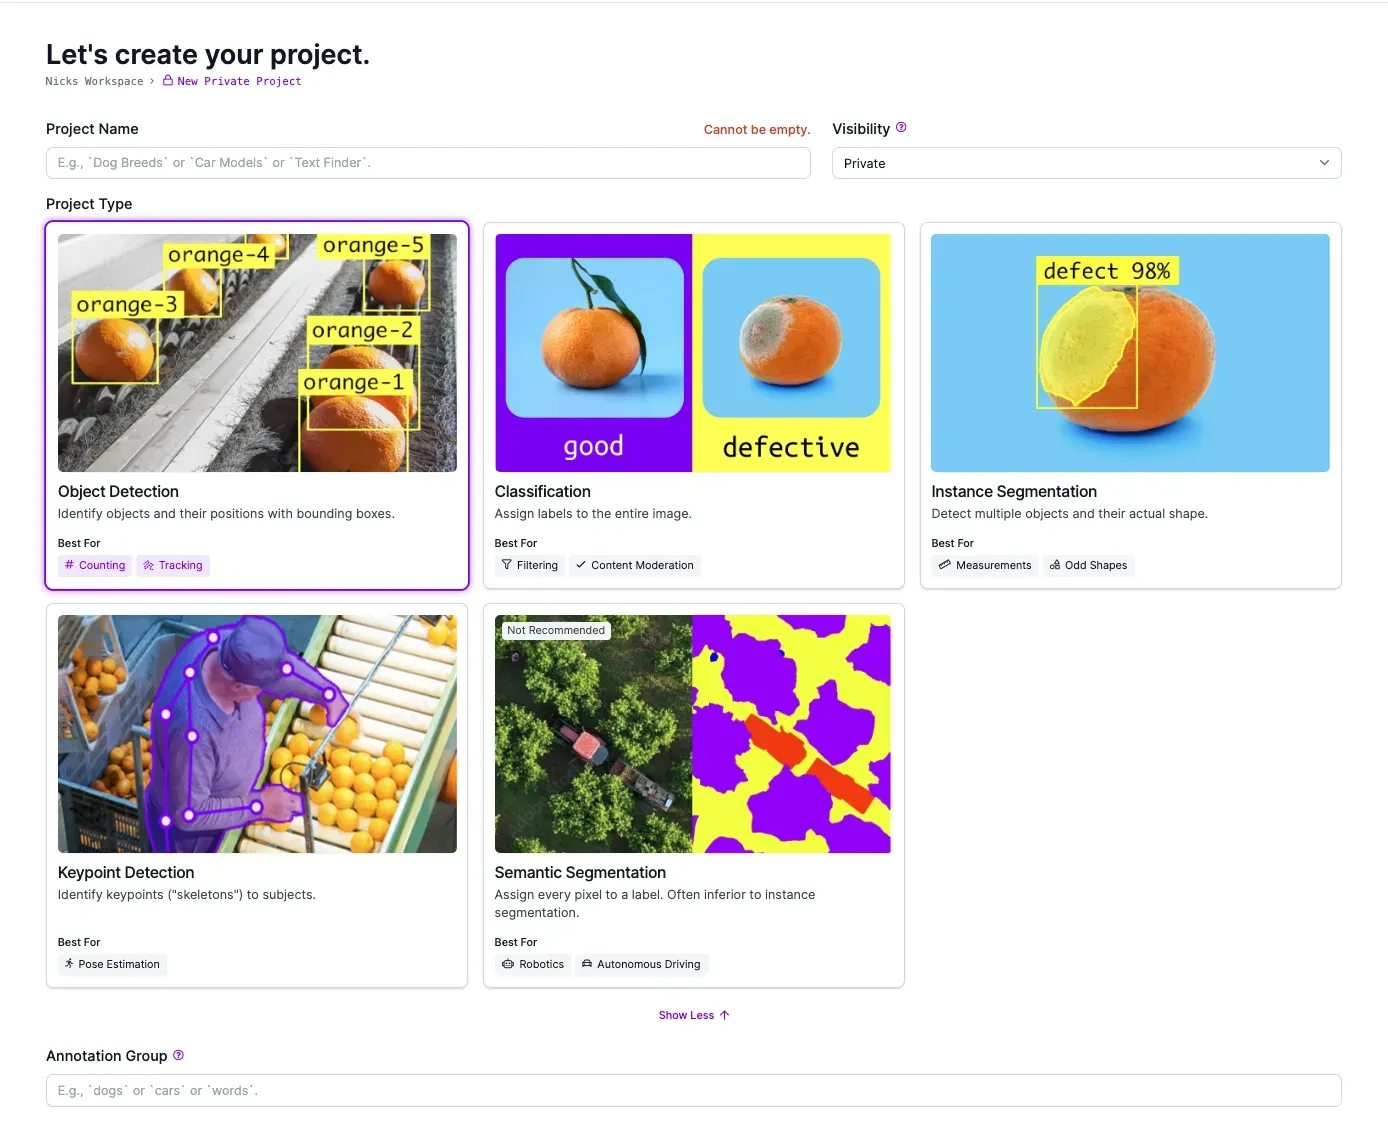
This model is responsible for two tasks.
1. Detecting people near a desk.
2. Detecting a passcode composed of hand gestures.
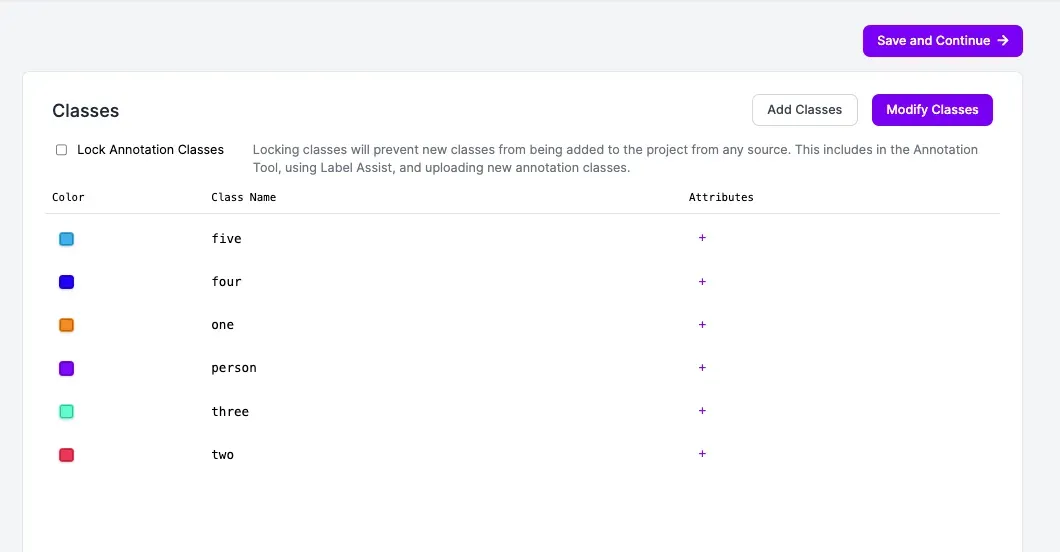
The object detection model would have a class for people to enable detection of someone near the desk. It would also have the classes one, two, three, four, and five that represent the possible code gestures the model would detect. Below is a picture of the ontology.
Collecting Data with Active Learning
With a project created in Roboflow, it was time to start collecting data. For this, you can use active learning. You can use Active Learning to intelligently upload data into the platform with or without a model!
You can configure the Roboflow app to randomly sample images from the RTSP feed to get some initial data in the application. Below is a snippet of the active learning configuration.
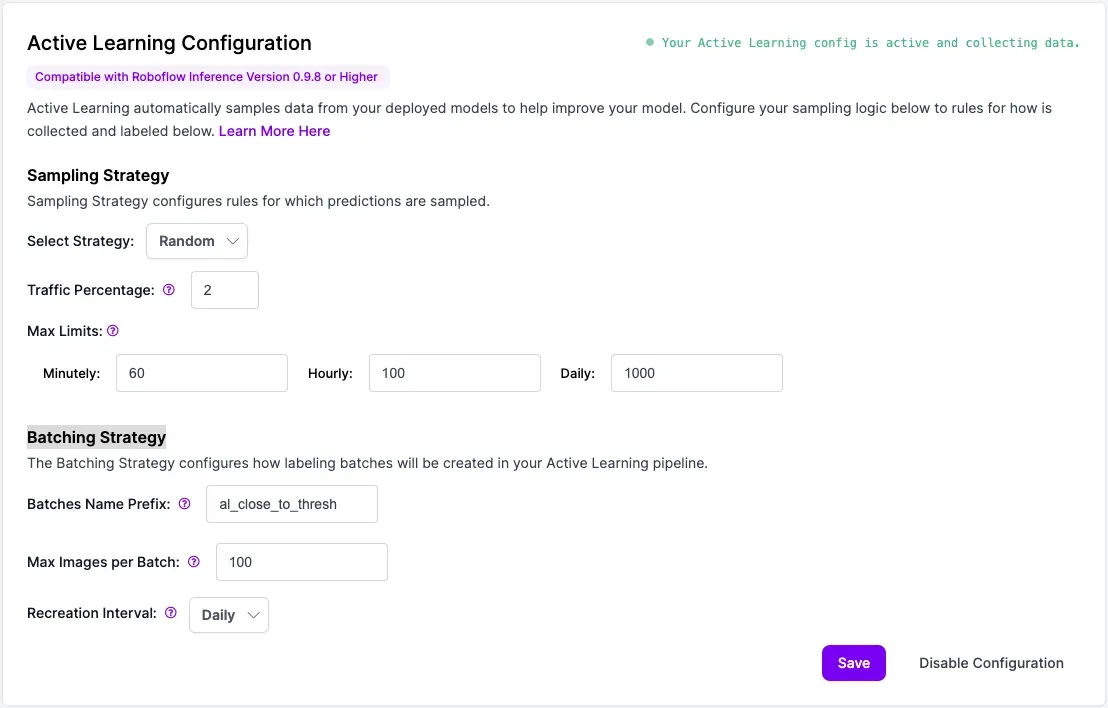
This configuration is randomly sampling images on 2 percent of the frames, and has set up some maximum limits and batching strategies. The user interface is still evolving, but active learning can also be configured via the Roboflow API. More information on active learning can be found in this documentation.
With this configuration enabled, you can utilize the package to randomly sample images from an RTSP feed. You can use the code snippet below, but note that you need to add your RTSP camera url and your API key. Another call out is the use of a “model stub” to collect data, which lets you collect production data randomly without training a model.
   from inference import InferencePipeline

   def on_prediction(results, frame):
       return

   pipeline = InferencePipeline.init(
        model_id=”secure-desk/0”,
        api_key=””, # Replace with your roboflow api key
        video_reference=””, # the rtsp camera stream url.
        on_prediction=on_prediction,
        active_learning_enabled=True,
    )
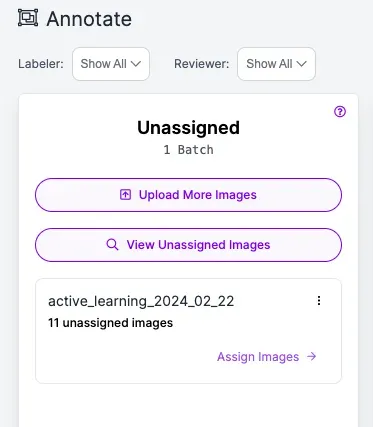
Here is a snippet of a few images randomly sampled from the feed with a batch name.
Improving Data Diversity
Once the model is trained on an initial set of images, you can begin to experiment with additional methods for improving the model. The first is to add a more diverse set of images. Infrared images are added to give the model an idea of what people look like when the lights are off and null images are added to help the model understand scenarios where there aren’t any objects to be detected.
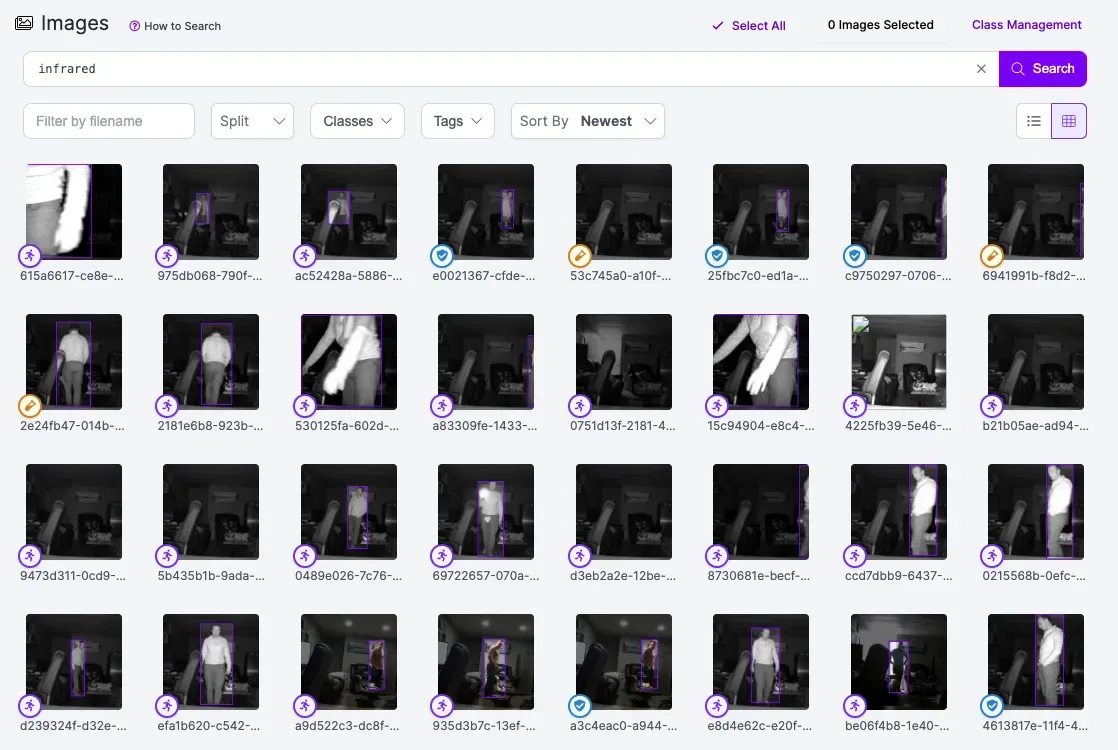
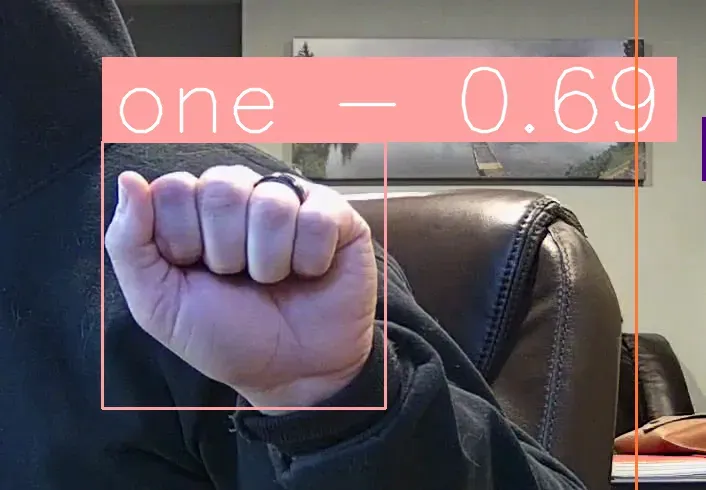
Side note, you can type “infrared” into the search bar to find these images. Under the hood, this search bar runs using similarity search with CLIP embeddings. Another interesting example of using null images was adding images of fists. This helped solve the problem where a fist was detected as a one as seen in the image below. Once null images of fists were in the dataset, this problem was solved, showing the importance of null images in the dataset.
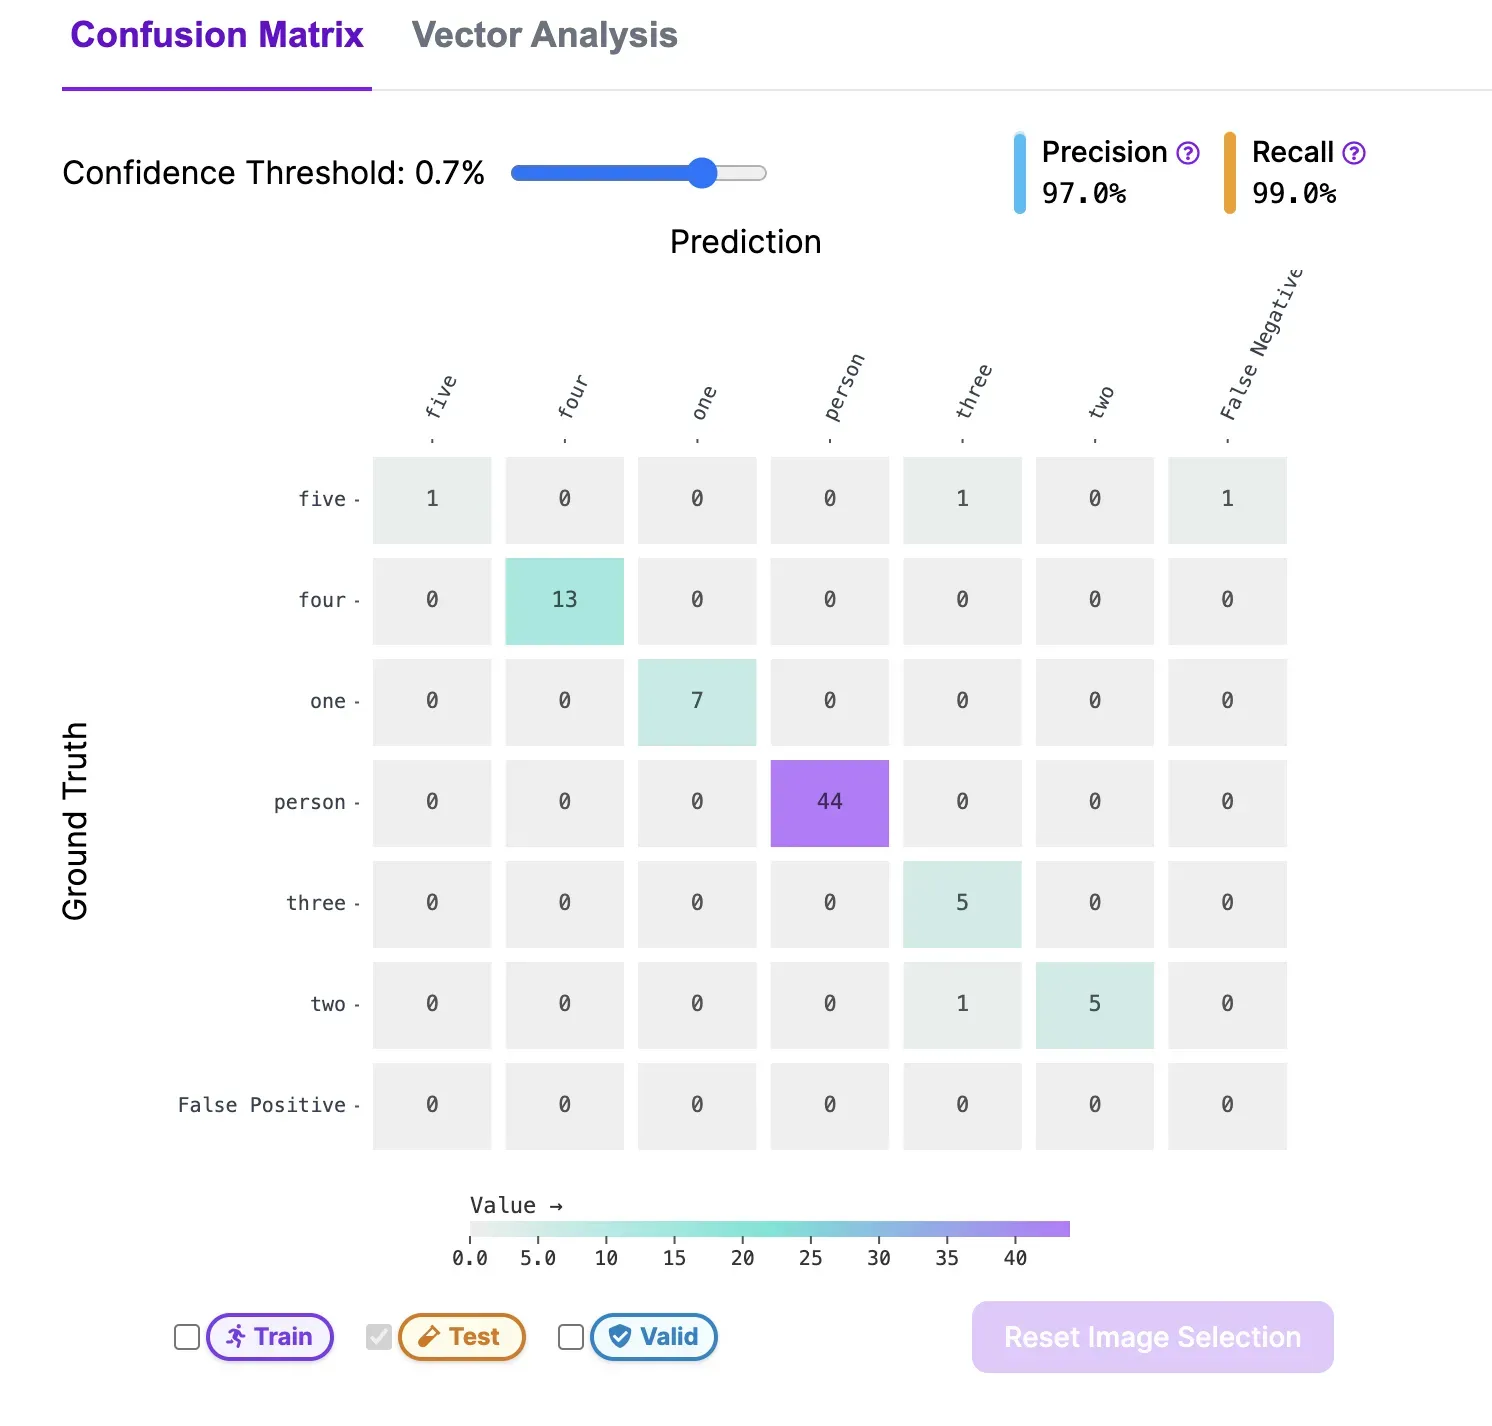
After labeling and training a variety of images, the model was able to predict digits with a high confidence. This can also be seen in the confusion matrix below, where we see ground truths and predictions at a confidence threshold of 70%. This confusion matrix can be found in the Roboflow platform under the “Versions” tab, and is available for all paid users.
Building the Security Camera Monitoring Application
With the model in place, it is time to write the application. All code is available in this GitHub repo, but there are a few callouts that are interesting and worth noting in this blog post.
Real Time Processing with Inference
Thanks to the help of Roboflow Inference, setting up a real time inference pipeline was as simple as a few lines of code. We already saw this code above with the use of active learning, but it’s worth calling out a few key features. First, it’s extremely simple to swap your model out without changing any other code. You can use models from Roboflow Universe, aliased models, or your own custom trained models. Next, you can plugin in a variety of video_references, including RTSP feeds, a webcam, or even a video. Lastly, the callback function can be configured to your needs, and sends results, and a frame for acting on predictions and adding annotations to frames.
def on_prediction(results, frame):
    # You can do something with the inference results.
    print(results)

    # You can annotate the frame for display
    print(frame)

    pipeline = InferencePipeline.init(
        model_id=roboflow_model,      # Use any model from universe, aliases, or custom trained
        api_key=roboflow_api_key,
        video_reference=rtsp_url,        # Use rtsp feed, video file, or webcam.
        on_prediction=on_prediction,   # Use your own callback function, to access predictions an the frame.
    )
Tracking Passcodes with Supervision
Another interesting call out for building a Secure Desk was the use of a tracker to actively check whether or not a code was being entered in a sequence. Trackers are a piece of software that assign a unique tracker_id that helps you track detections across multiple frames. A tracker was needed for this application to ensure that we were only counting each digit entered once.xt
In the below code example, we are looping through our tracker_ids and only checking the code sequence if it’s a newly tracked detection.
# Initialize a tracker from supervision
tracker = sv.ByteTrack(match_thresh=2)
# Parse inference detections into supervision data model.
detections = sv.Detections.from_inference(inference_results)

# Create global set for keeping track of codes.
tracked_codes = set()

# Add detections to the tracker.
tracked_detections = tracker.update_with_detections(detections)

# Add tracker id to tracked_codes if it's a new tracker id.
for tracker_id in tracked_detections.tracker_id:
    if tracker_id not in tracked_codes:
        tracked_codes.add(tracker_id)
        check_code_sequence(tracked_detections.class_id)
Trackers are extremely powerful to be able to make sense of detections across multiple frames. We have great documentation on trackers in the Supervision documentation.
CCTV Computer Vision
Transforming a desk into a secure desk was a challenging and fun project. The Roboflow platform and tooling helped put this application into production in three days thanks to our open source tooling and data collection/labeling web application.
Inference was important for both initial data collection utilizing active learning features and also for running inference with my production model. Supervision was useful for tracking frames, and annotating frames with application specific detections and feedback.
The Roboflow platform provides annotation tooling that cuts down on the time required to label images while also offering additional functionality for comparing how adding or removing data improved or worsened my computer vision model
If you have any questions or suggestions feel free to reach out! All code is available and open source in the GitHub repository. All the datasets and models are available in Roboflow Universe.
Cite this Post
Use the following entry to cite this post in your research:
Nick Herrig. (Feb 23, 2024). Security Camera Monitoring: CCTV Computer Vision. Roboflow Blog: https://blog.roboflow.com/security-camera-monitoring/
