We are excited to announce that, from today, you can upload YOLOv8 model weights to Roboflow using our Python pip package and deploy your model using Roboflow Deploy.
With this change, you have the flexibility to train a YOLOv8 object detection model on your own infrastructure based on your needs. Then, you can bring your weights to our managed deployment solution. By deploying your weights on Roboflow Deploy, you will have:
- No hardware lock in: Deploy to edge devices, your own cloud, and more with our device-optimized containers and field-tested SDKs.
- Infinite scalability: Our hosted inference API handles 10 requests per second and has been used to train over 10,000+ models. We handle millions of inferences with 99.99% uptime.
- A model ready to integrate into your workflow: Use YOLOv8 with your existing toolset by bringing in data from 28 formats. You can use YOLOv8 for model assisted labeling, reducing the time you spend on annotating images. You can also build performant computer vision applications easily with the Roboflow PIP package.
In this post, we are going to walk through how to upload YOLOv8 object detection weights and deploy your model on the Roboflow platform. Let’s begin!
Create, Upload, or Clone a Dataset
First, we need to prepare a dataset that we can use to train our model. We’ll need to create a version of our dataset in Roboflow to which we can upload model weights in Python. In this tutorial, we'll use the “Aerial Airport” dataset that is publicly available on Roboflow Universe, a repository of over 110,000 open source computer vision datasets.
To use the dataset, click “Download this Dataset” on the dataset page. Select the “YOLO v8 PyTorch” format from the list of supported formats to which you can export, then click “Continue”. Follow the provided ZIP link to download a copy of your project data.
Next, go to the Roboflow dashboard and create a new project. Let’s call the project “Aerial Imagery”.
Unzip the file you downloaded earlier and drop in all of the files for your project.
Uploading images into the Roboflow platform
Click “Upload images” and wait for your files to upload. This may take a few moments depending on how many images you upload.
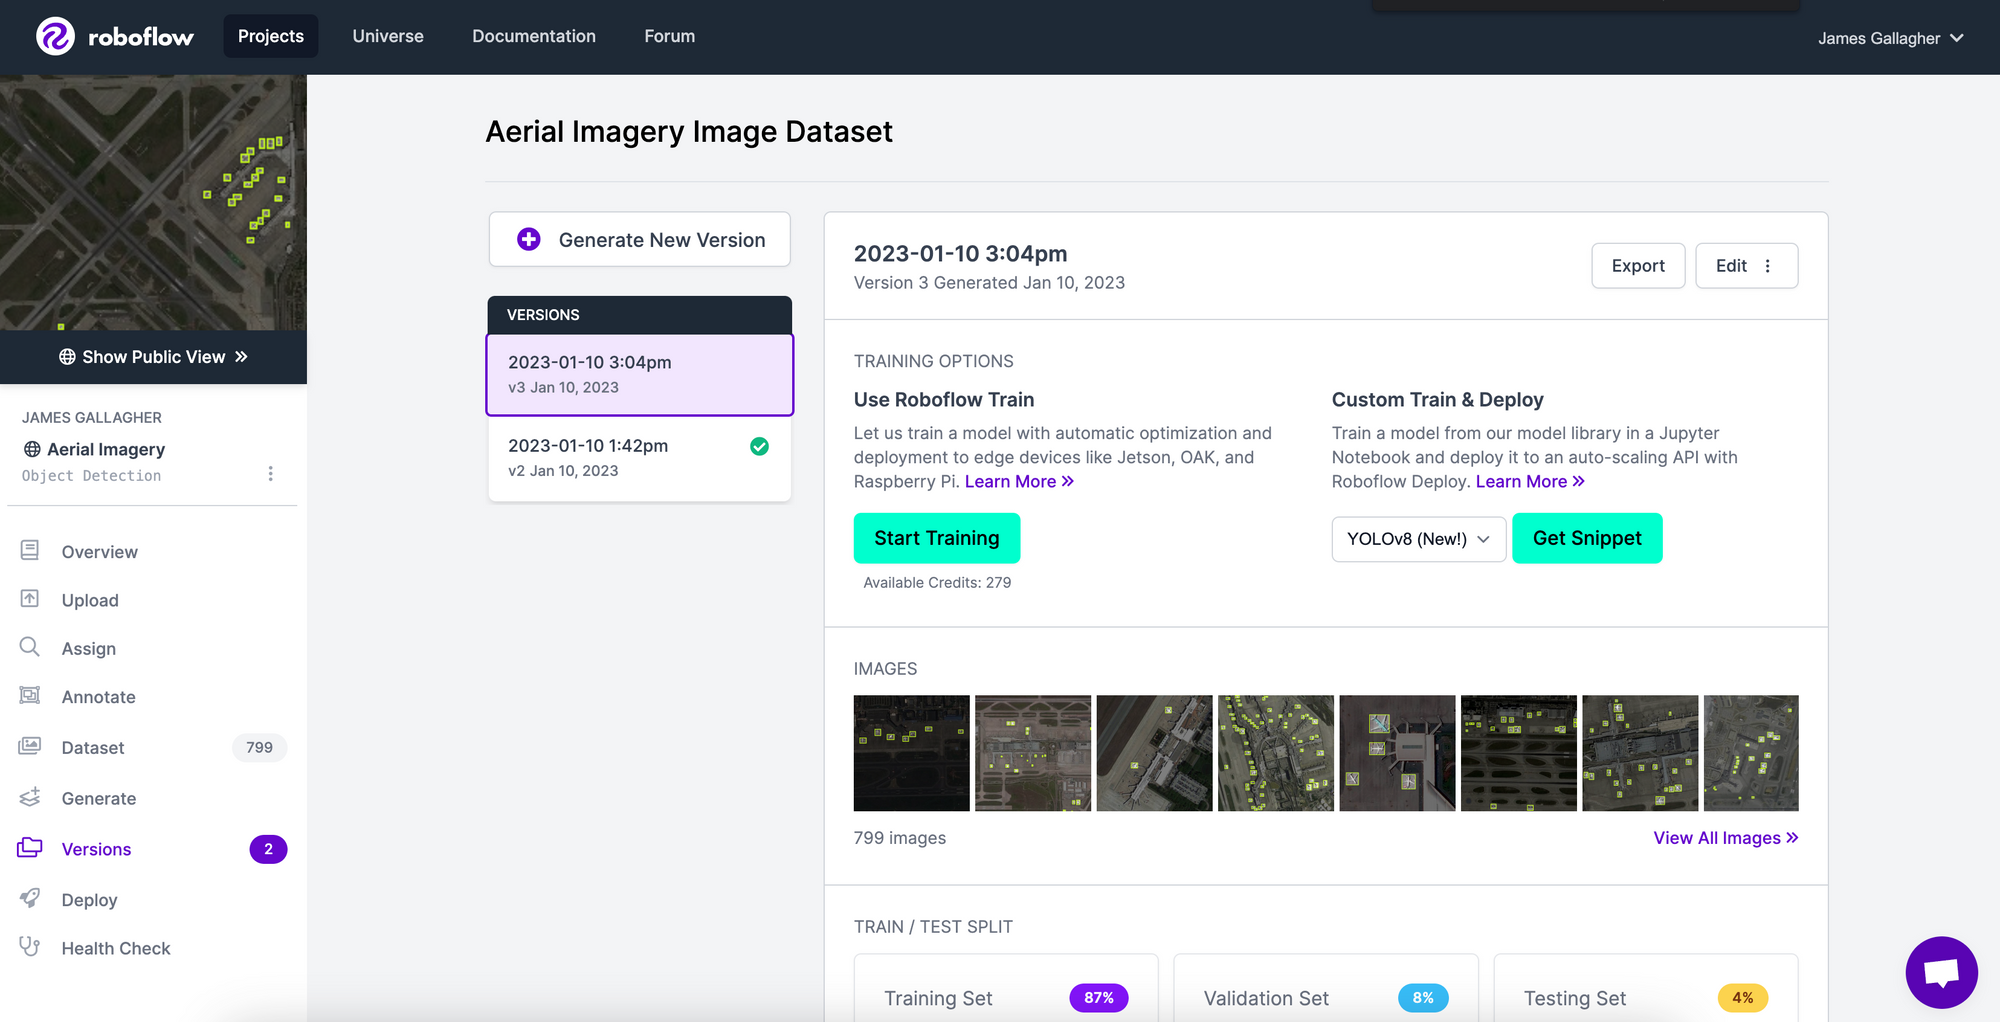
Now that we have our data in Roboflow, we can create a dataset version. To do so, go to the “Versions” page on the Roboflow dashboard and generate a new version with any augmentations and preprocessing steps that you want to apply. After clicking the “Generate” button, your new version will be created:
Generating a model version.
Now we’re ready to start training our model.
Train YOLOv8 in Colab or SageMaker StudioLab
The Roboflow Team has prepared Colab and SageMaker Studio notebooks that contains information on how to train YOLOv8 on a custom dataset.
On your dataset version page, click the button that says “Get Snippet” under the heading “Custom Train & Deploy”.

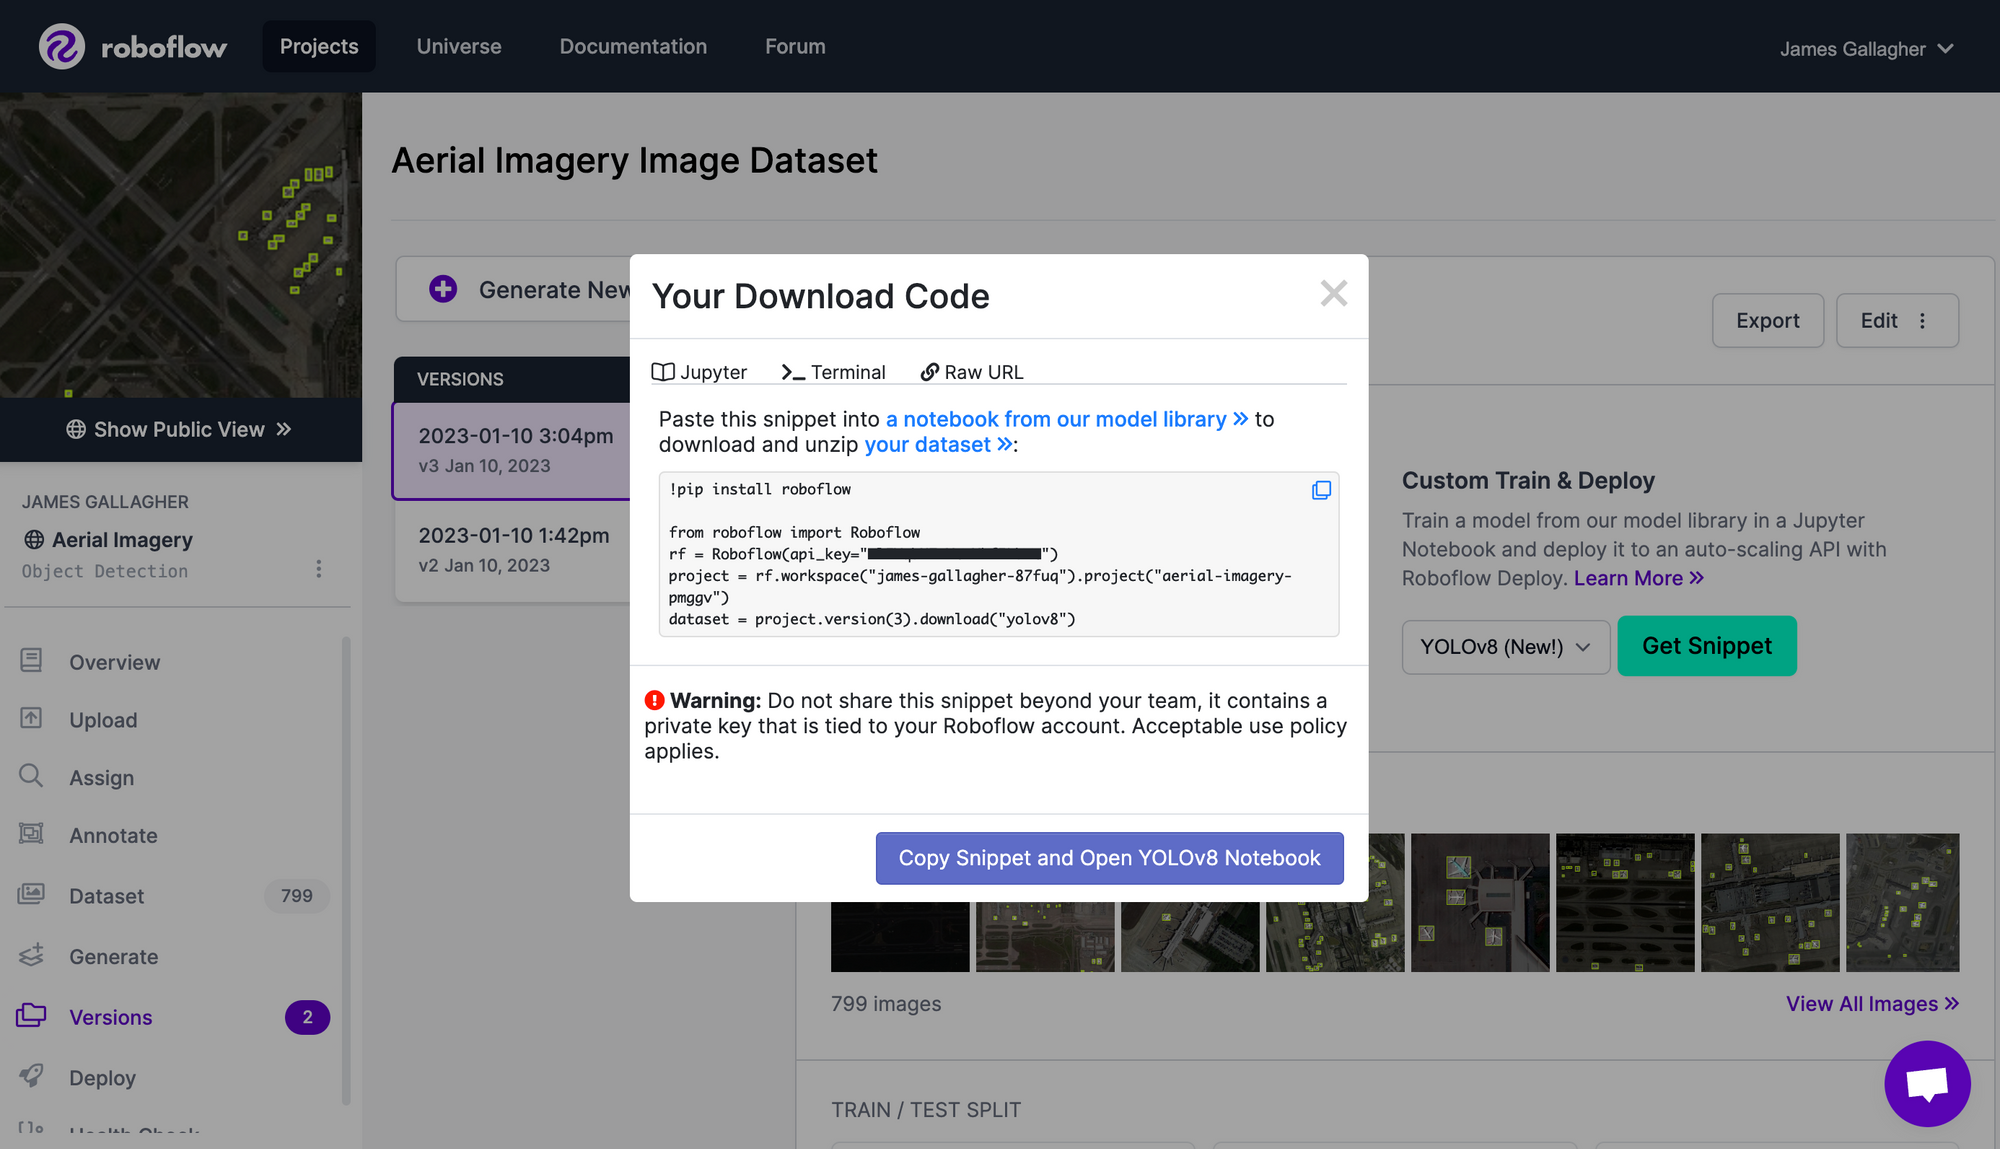
When you click this button, you’ll be given a code snippet that you can paste into the YOLOv8 training notebook we have prepared.
Click the button to copy the snippet and open the notebook, then scroll down to the “Preparing a custom dataset” section. Replace the code in the cell below the screenshots with the code provided in the Roboflow dashboard. The code will look something like this:

To help you train a model, we have a blog post tutorial and an accompanying YouTube video explaining custom training with YOLOv8.
After running all of the cells in the notebook, you’ll have a working model and a set of weights that you can upload to the Roboflow platform.
Export and Upload Weights
Once you have finished training your YOLOv8 model, you’ll have a set of trained weights ready for use. These weights will be in the “/runs/detect/train/weights/best.pt” folder of your project. You can upload your model weights to Roboflow Deploy to use your trained weights on our infinitely scalable infrastructure.
The deploy() function in the Roboflow pip package now supports uploading YOLOv8 weights.
To upload model weights, add the following code to the “Inference with Custom Model” section in the aforementioned notebook:
project.version(DATASET_VERSION).deploy(model_type=”yolov8”, model_path=f”{HOME}/runs/detect/train/”)
Replace the DATASET_VERSION value with the version number associated with your project. If you downloaded your weights from Roboflow using the code snippet provided earlier, the “DATASET_VERSION” number is stored in the “dataset.version” value.
If you have uploaded your own data manually, without using our Python package, you can retrieve your dataset version number by going to the Roboflow dashboard. Select a version of your model and then note the number that appears in the “Version ID” section of the “Details” list on your model version page.
When you run the code above, you’ll see a green checkmark appear next to the version for which you have uploaded weights. You will also see a label that says you uploaded your weights using the YOLOv8 weight upload feature:
Share Your Model
Now your model is ready for use! Click on "Deploy" in the sidebar of the Roboflow dashboard to see the deployment options available to you. In your browser, you can test your model by using your webcam, by uploading an image or video, or by pasting in a YouTube link to a video on which you want to run inference.
For example, you can upload an image or select one from your test set to see your model in action:
Inference running on a model using examples from the test dataset
You can also use your webcam to test your model live in your browser or paste in a YouTube video link to test your model on a video. Scroll further down on the page, and you'll find code you can use to interact with your model using the Roboflow API in languages like Python, JavaScript, and Swift.
Conclusion
You can now upload YOLOv8 model weights and deploy your custom trained model to Roboflow. This gives you the flexibility to run your own custom training jobs while leveraging Roboflow’s infinitely scalable, secure infrastructure to run your model.
Explore available YOLOv8 models on Roboflow Universe and consider adding your own model to the community as well!
Cite this Post
Use the following entry to cite this post in your research:
James Gallagher. (Jan 10, 2023). Launch: Deploy YOLOv8 with Roboflow. Roboflow Blog: https://blog.roboflow.com/upload-model-weights-yolov8/
