
Traditional object detection is limited to a fixed set of categories, such as "person," "car," "dog," or "bicycle," etc., and cannot recognize objects outside these classes.
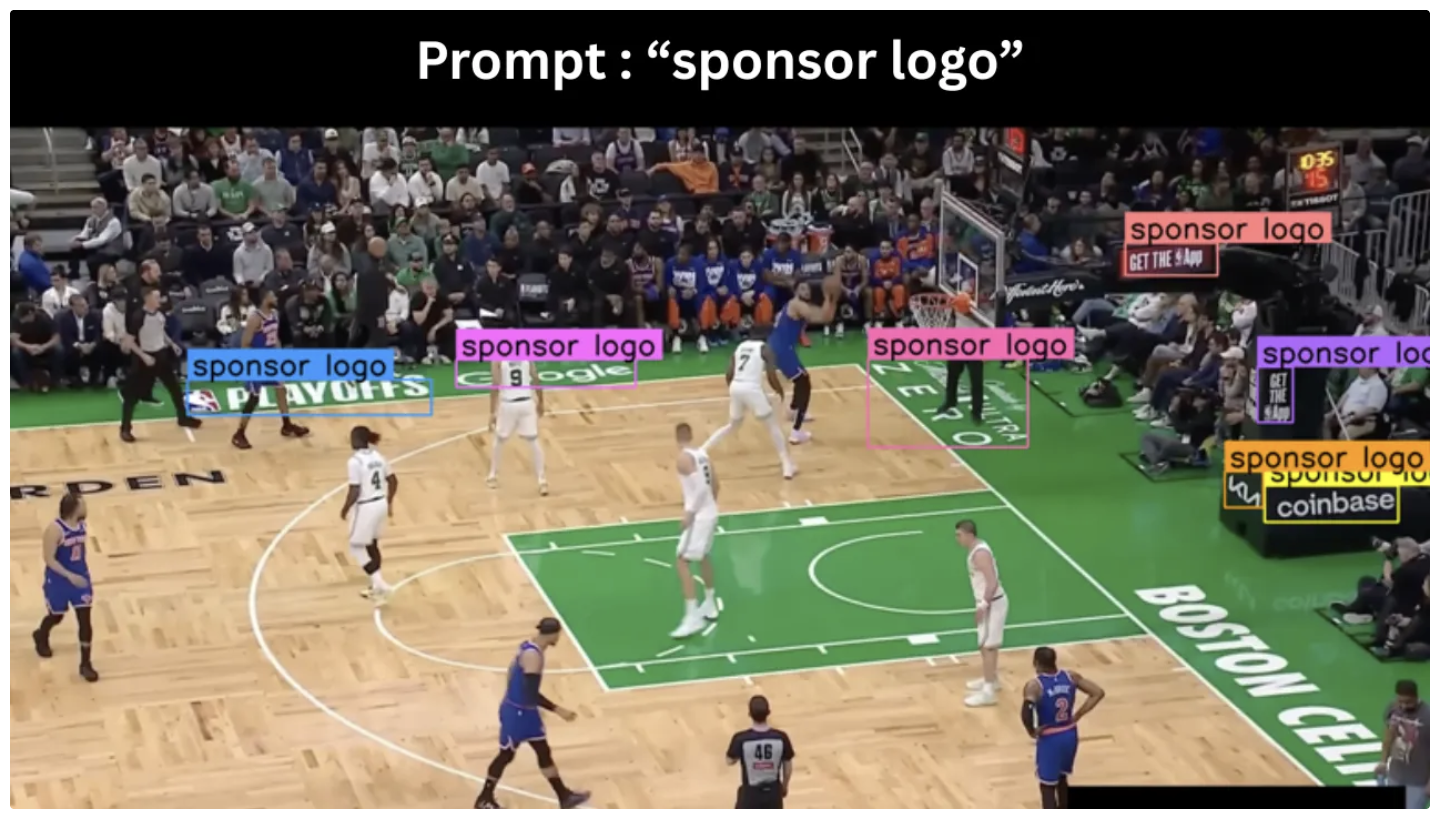
In contrast, open-vocabulary object detection can identify and label objects it was not explicitly trained on by using descriptive language instead of a predefined list of categories. It works by matching image regions to natural language descriptions, allowing the model to detect unseen objects such as "red backpack," "construction helmet," or "electric scooter" without retraining.
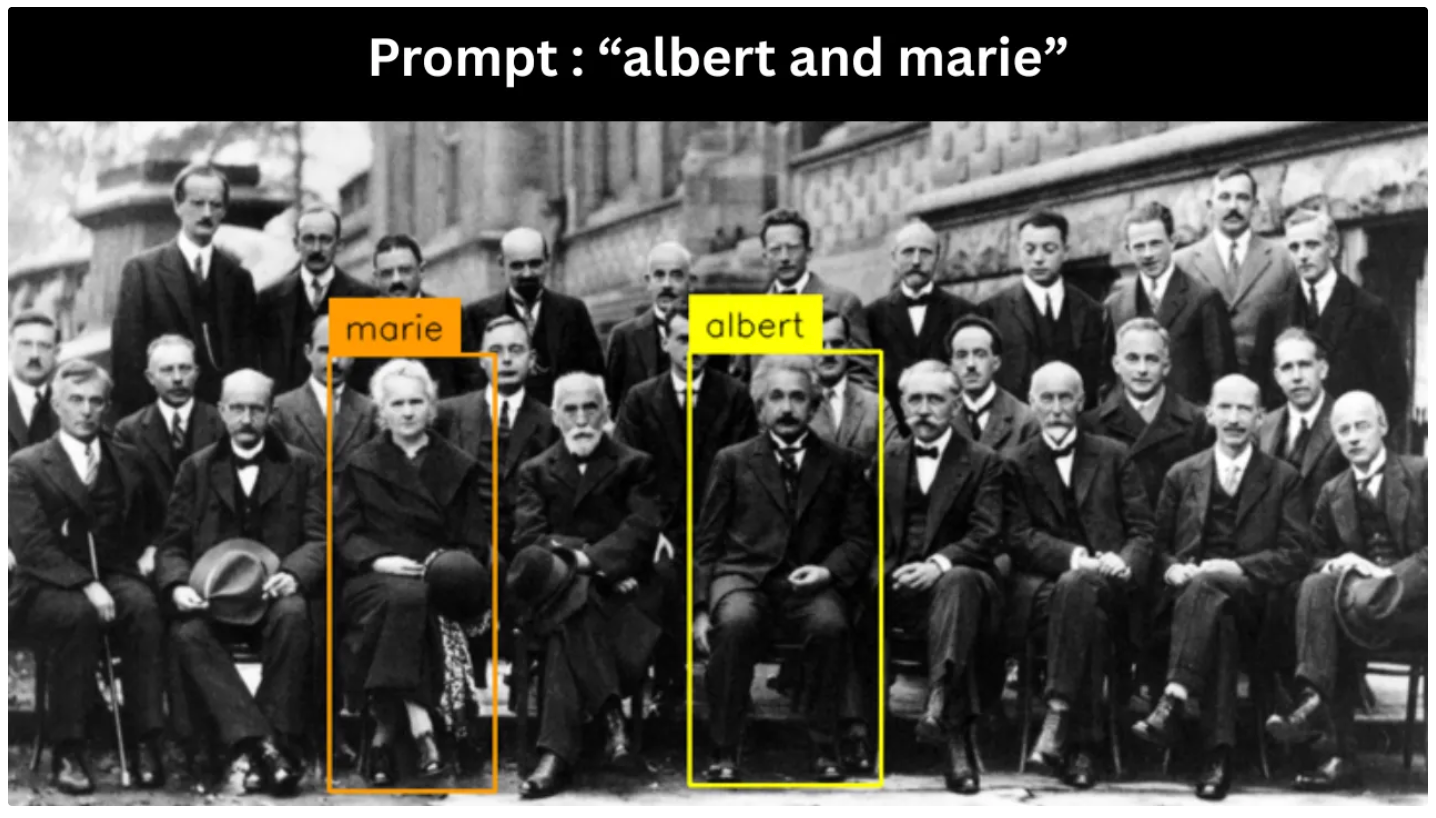
Qwen3-VL, the latest vision-language model in Alibaba Cloud’s Qwen series (as of January 2026), supports open-vocabulary object detection through a strong omni-recognition layer. It can recognize a wide range of entities, including celebrities, anime characters, products, landmarks, animals, and plants, even in dense scenes.
The model returns structured JSON with labels and bounding boxes for a given object detection target, allowing you to provide an image, ask high-level questions, and seamlessly use the output in detection-style workflows.
In this blog, I will demonstrate how to perform open-vocabulary object detection with Qwen3-VL by running it step by step in Google Colab to generate examples similar to those shown below. I will also show how to run Qwen3-VL using a ready-to-use notebook available in the Roboflow repository.
Step-by-Step Guide to Running Qwen3-VL in Google Colab
The steps below walk you through running Qwen3-VL in Google Colab. These same steps are also included in Roboflow’s ready-to-use Qwen3-VL notebook on GitHub.
If you’d like to open the notebook directly from GitHub in Google Colab, see the “Running Ready-to-Use Roboflow Qwen3-VL Notebook Directly in Google Colab” section of this blog.
Step 1: Create a New Notebook
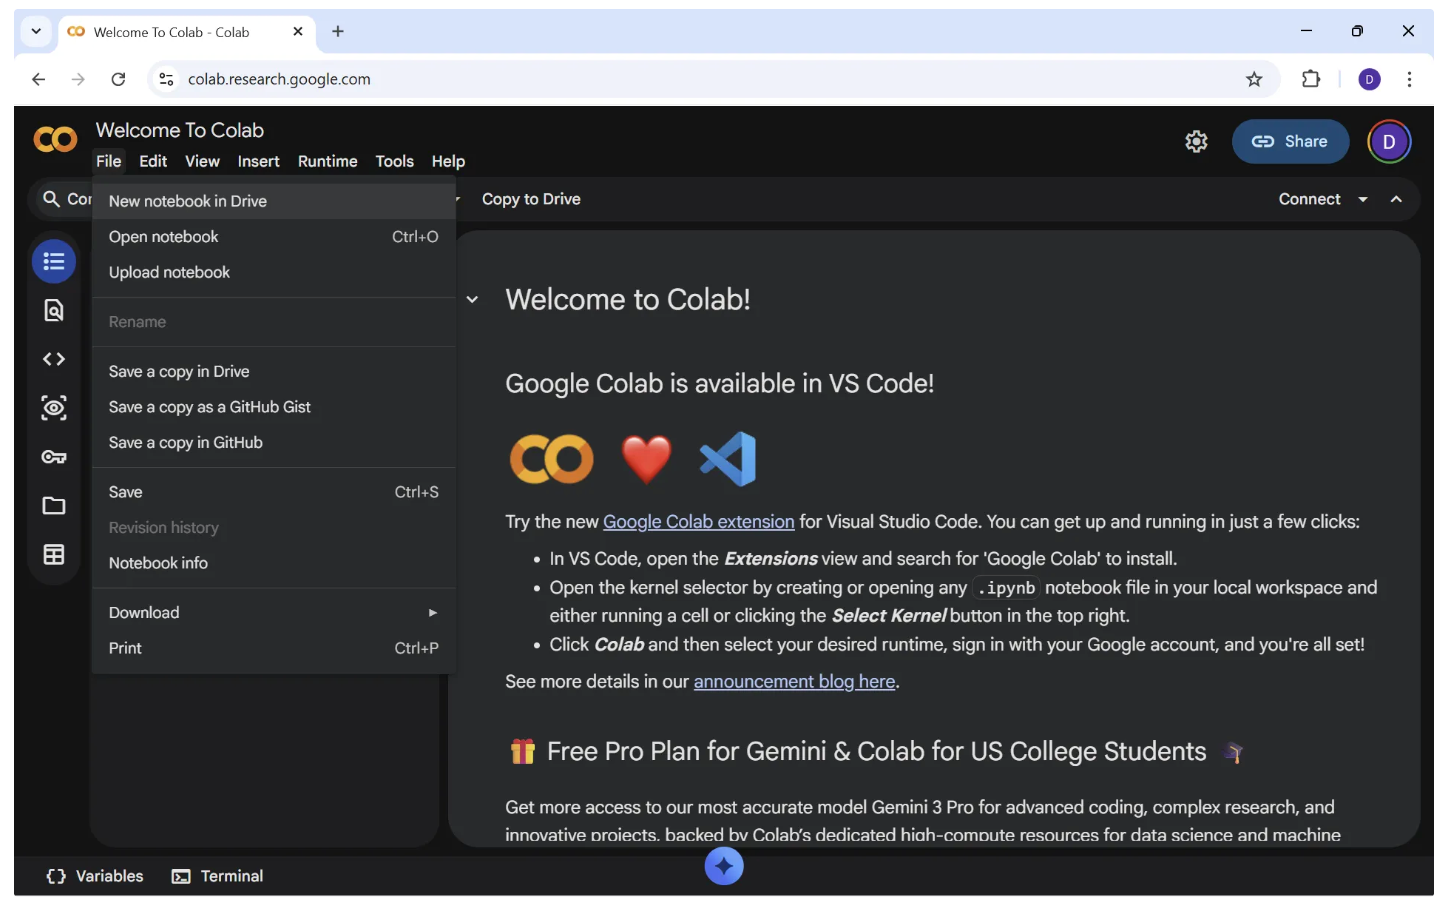
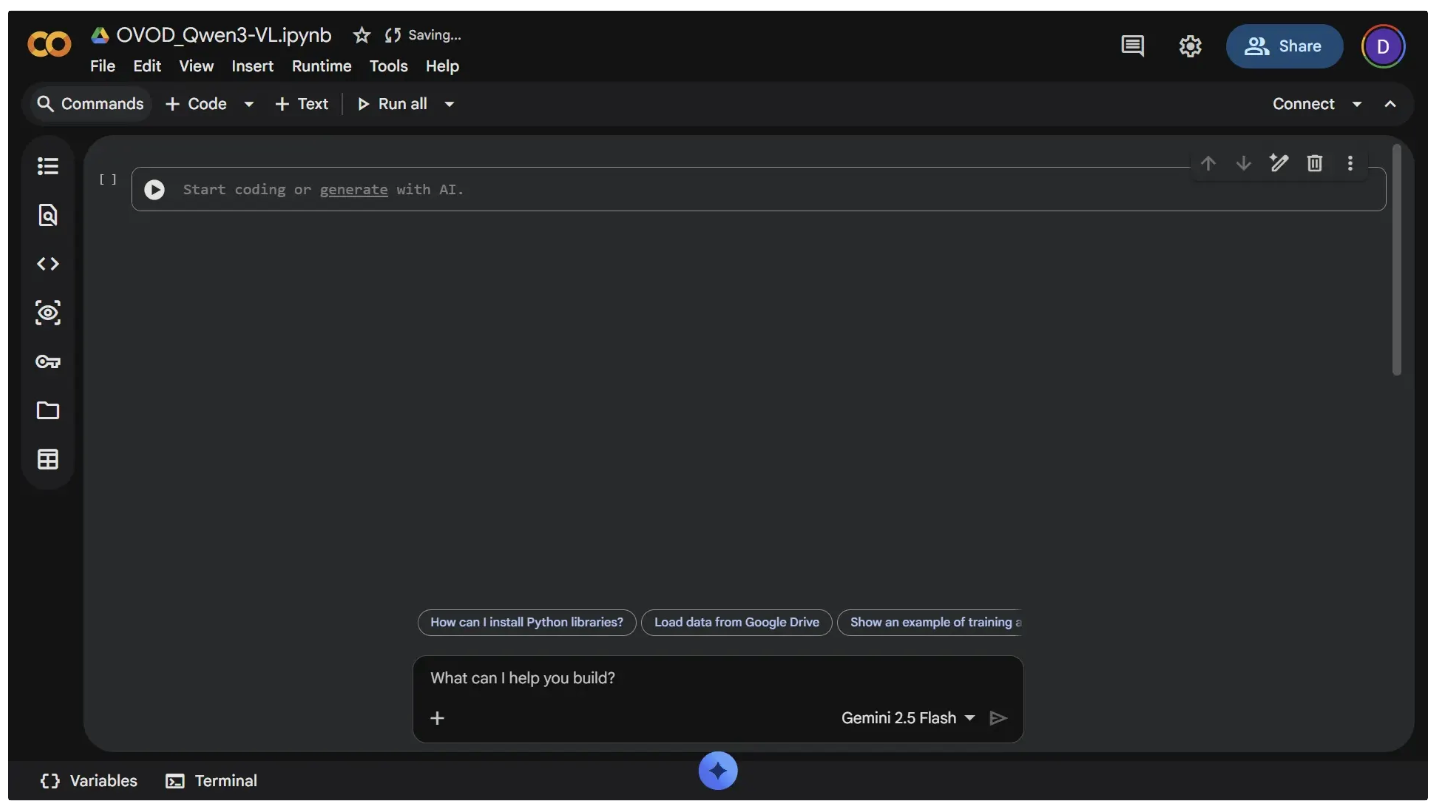
Go to https://colab.research.google.com and sign in to your Google account. After signing in, you’ll see the Colab homepage (similar to the one shown below). From the top menu, click File → New notebook in Drive.
After doing this, a new notebook named “Untitled.ipynb” will open in a new tab, as shown below:
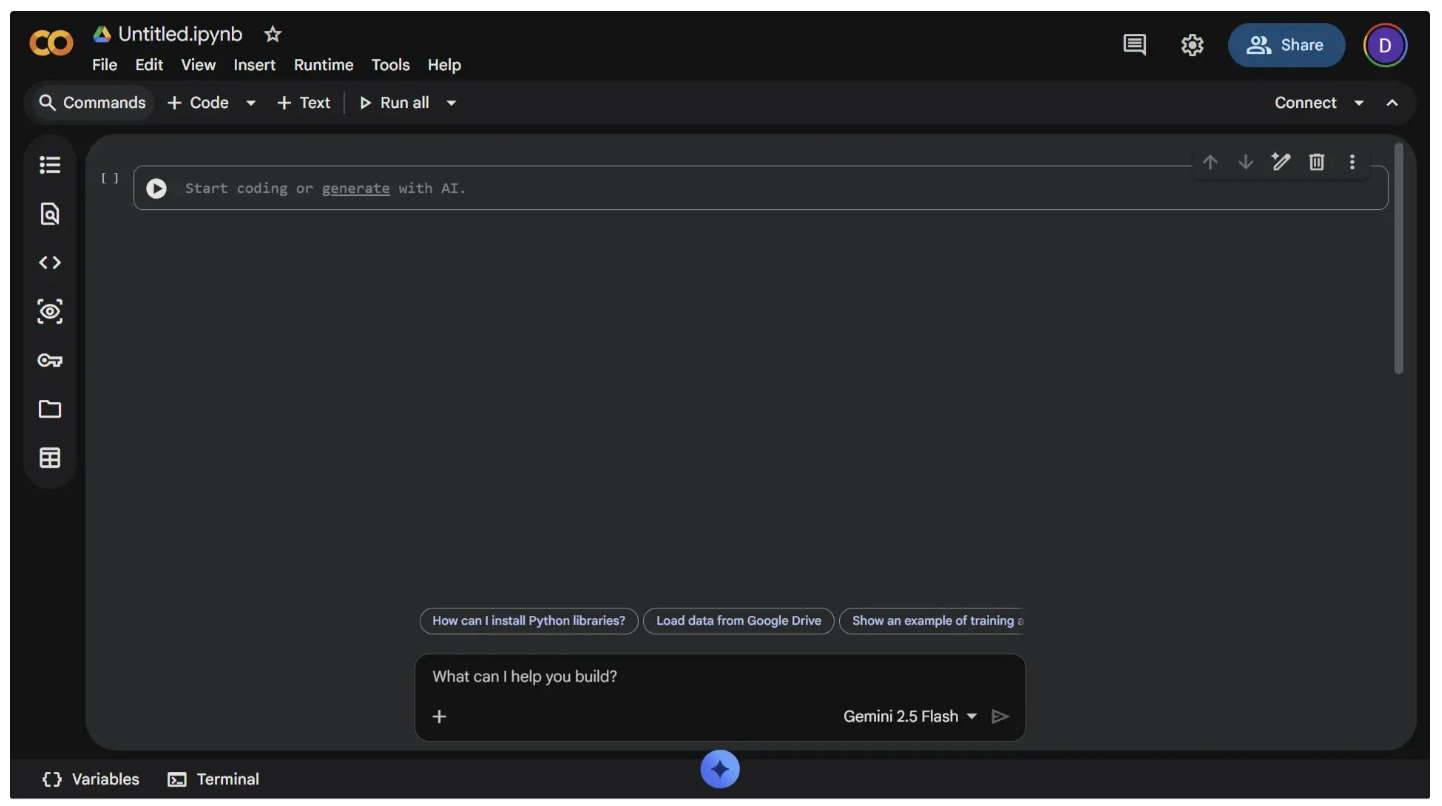
You can rename the notebook by clicking “Untitled.ipynb” in the top-left corner. This opens a text field where you can enter a new name, as shown below.
Step 2: Pick a Runtime Environment
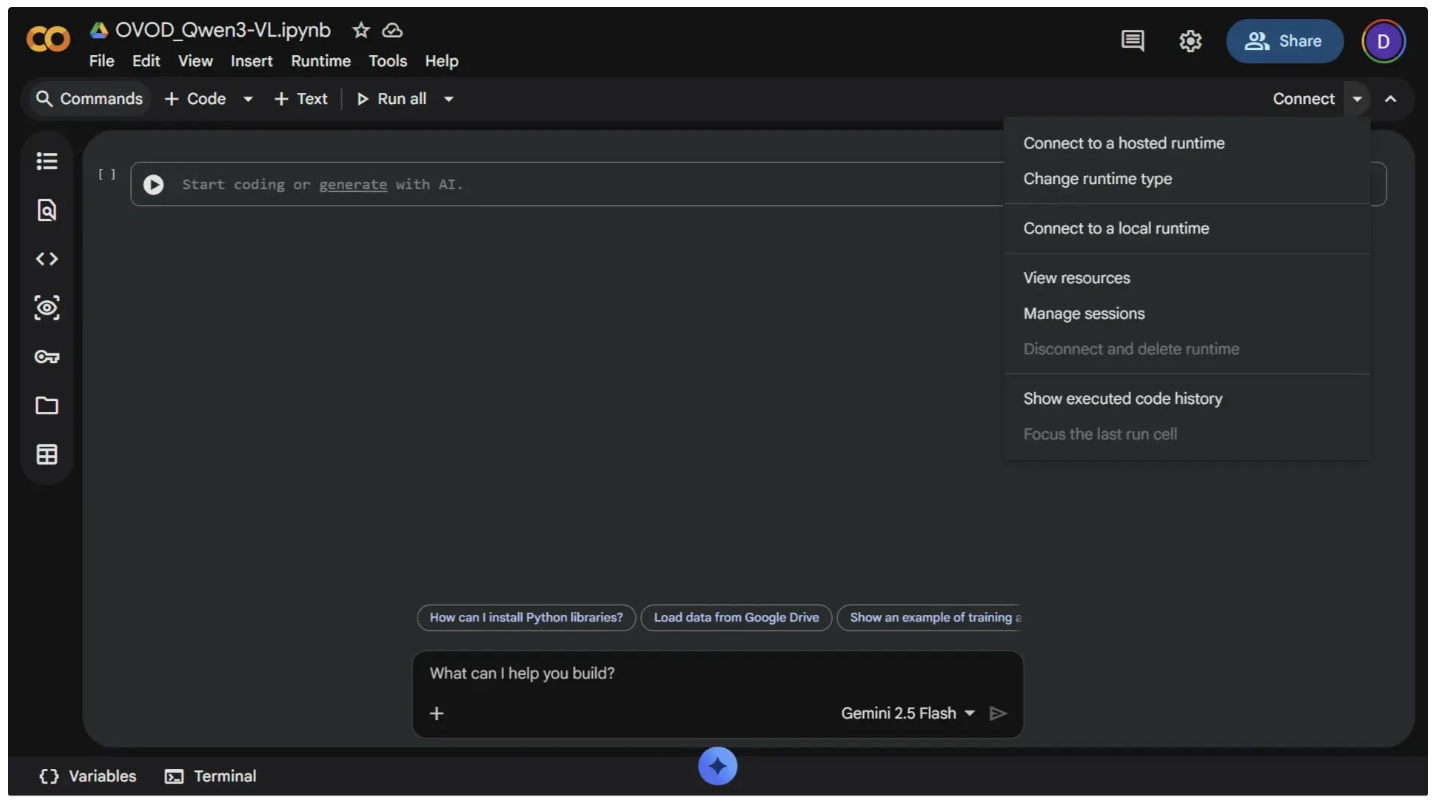
Qwen3-VL requires a GPU to run. To enable GPU access, click the dropdown arrow next to the "Connect" button in the top-right corner, then select "Change runtime type," as shown below:
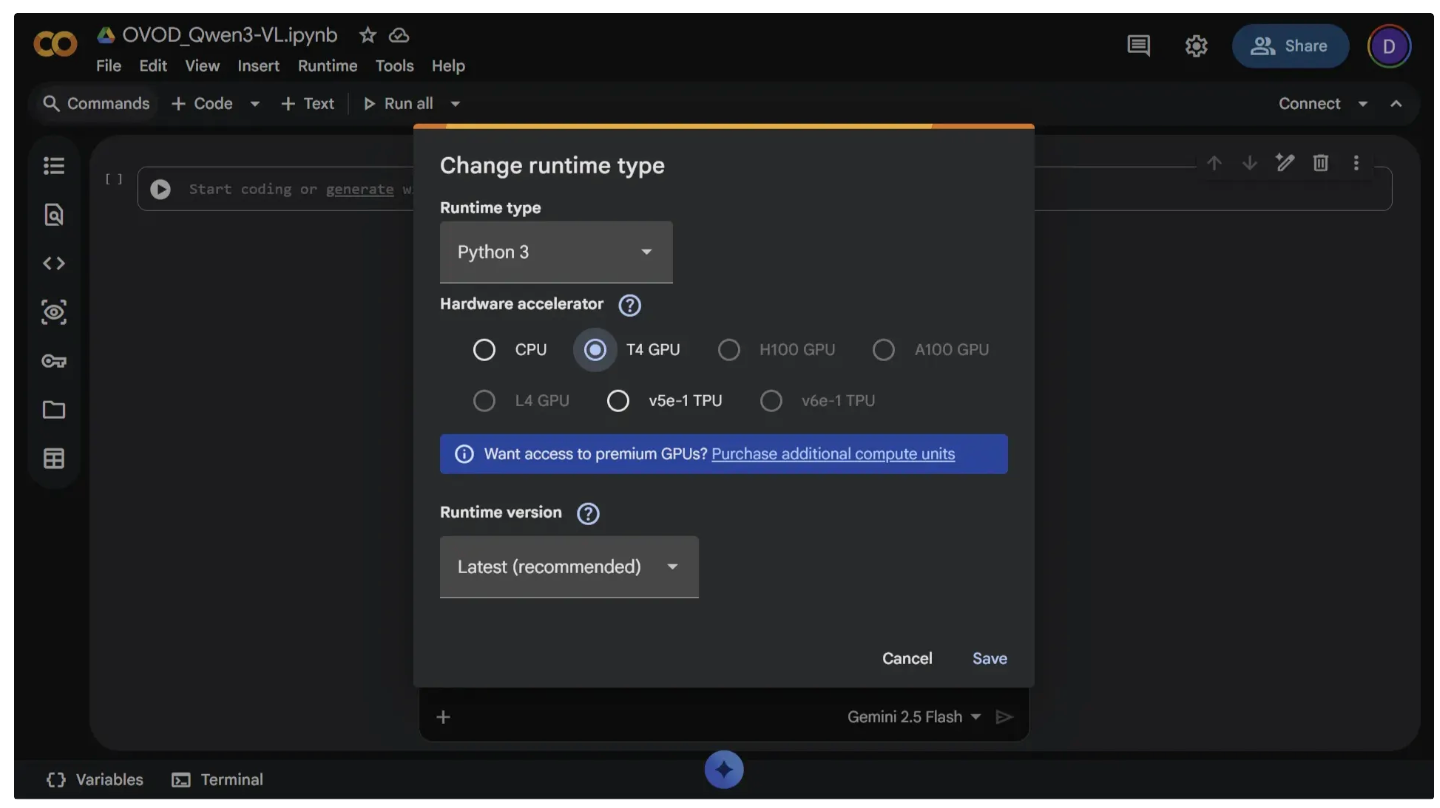
Next, set the runtime to T4 GPU and click Save. It’s free and widely available, making it a great option for running Qwen3-VL.
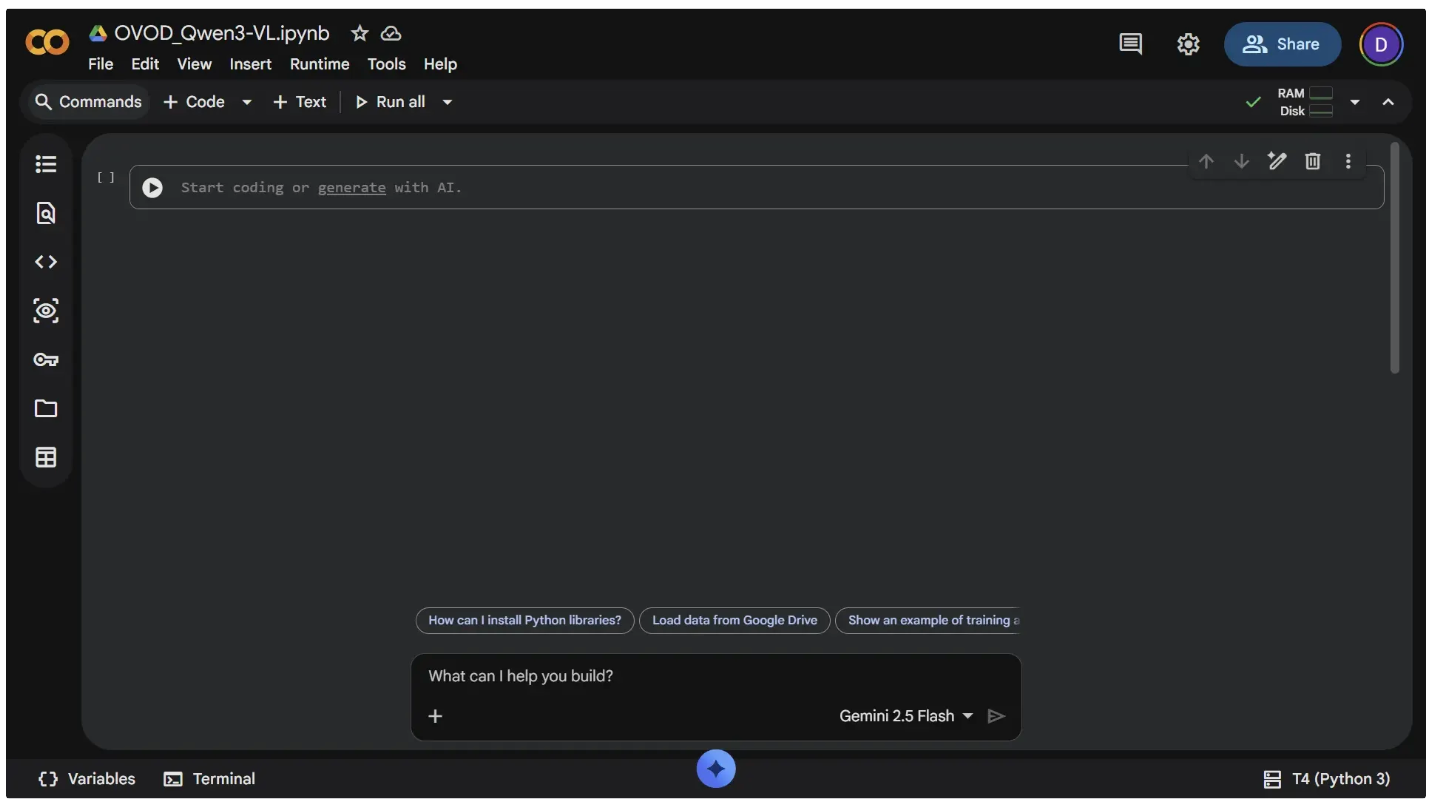
Once you’ve switched the runtime type to T4 GPU, click “Connect” to start the runtime. After it connects, the button will change to display a RAM and Disk usage chart, as shown below:
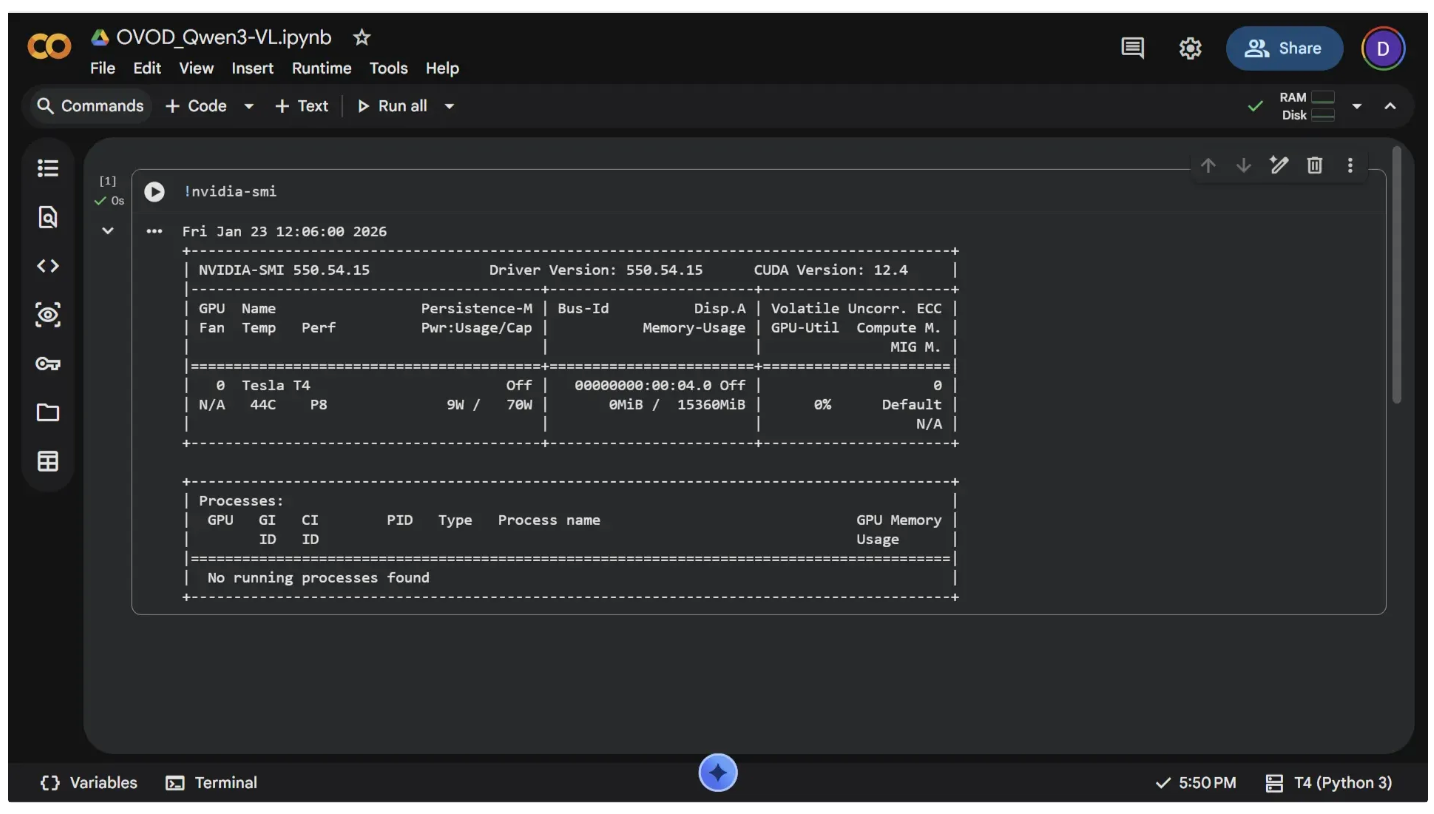
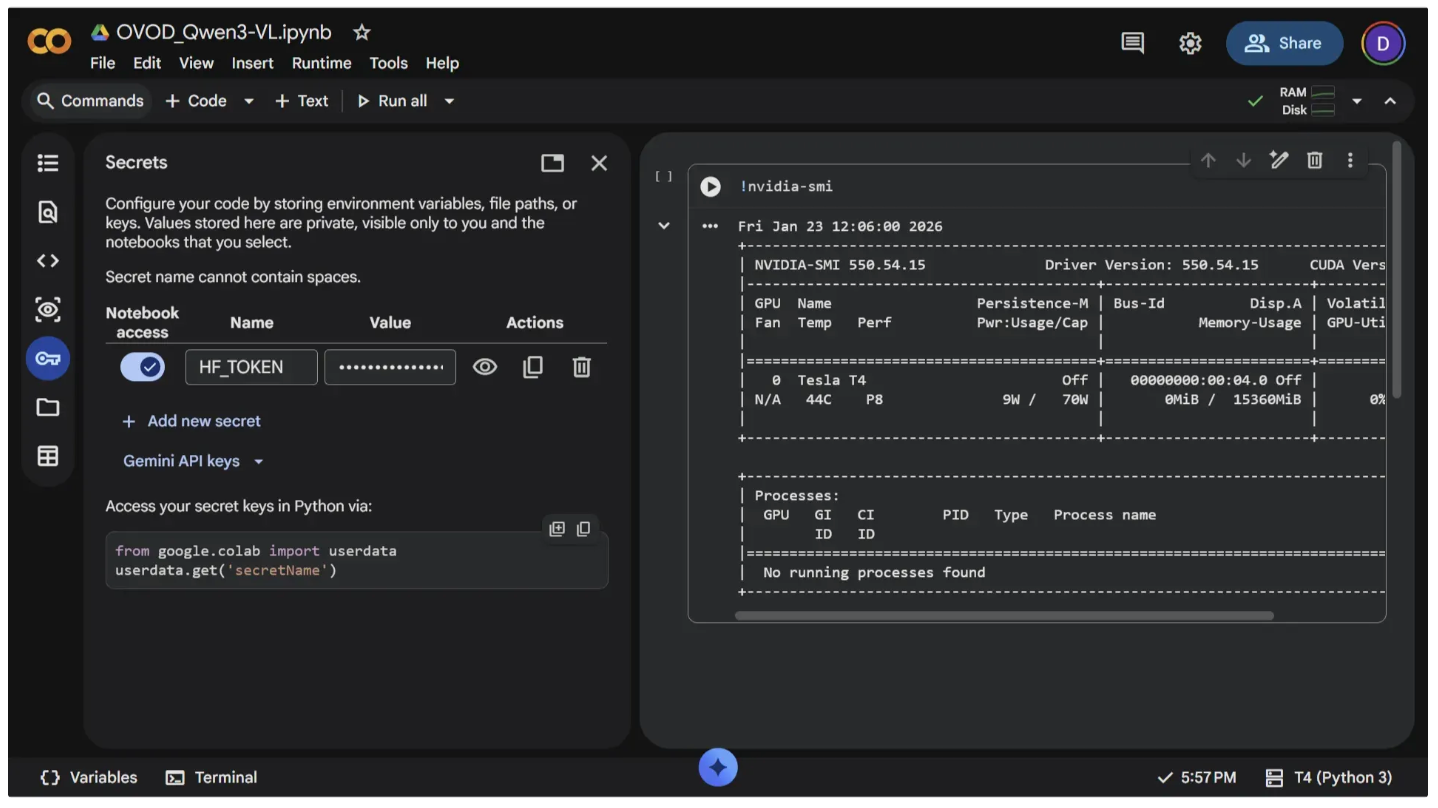
You can verify that GPU access is enabled in your notebook by running the following command:
!nvidia-smi
To execute a command, paste the code above into a code cell and press “Ctrl+Enter” or click the Run icon (⏵), as shown below:
If no code cells are displayed in the notebook, you can add one by clicking “+ Code” near “Commands” in the top-left corner.
Step 3: Download the Qwen3-VL Model from Hugging Face
Hugging Face provides a model hub and the ‘transformers’ library, making it easy to download and run the Qwen3-VL model with just a few lines of code. To access the model, however, you’ll need a Hugging Face access token.
To get your token, go to https://huggingface.co and log in. After logging in, a window like the one shown below will appear:
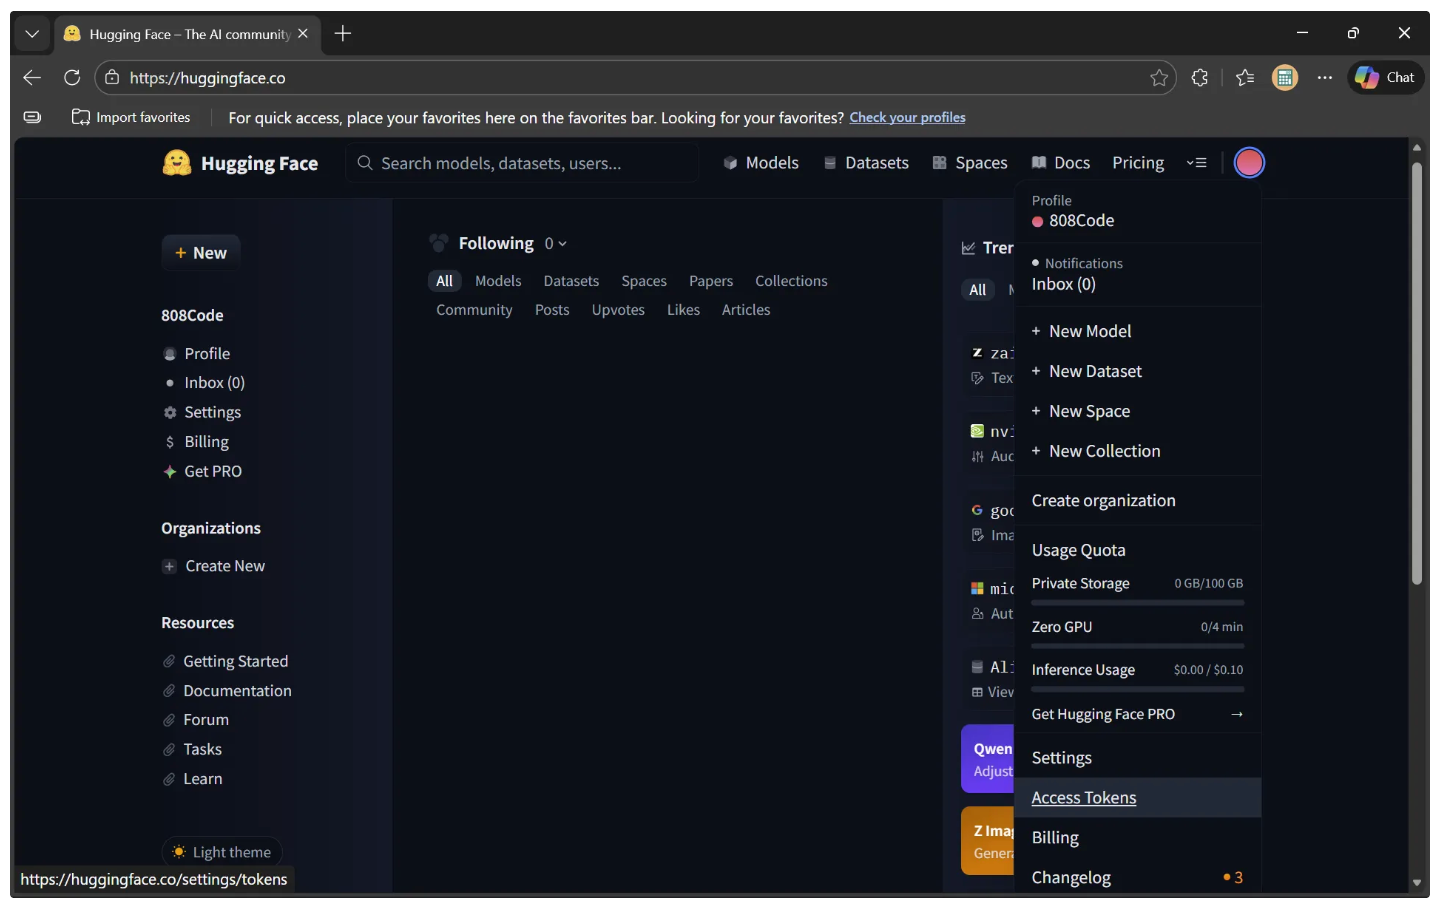
Next, navigate to Settings in the left sidebar. This will open a new page where “Access Tokens” is listed in the sidebar.
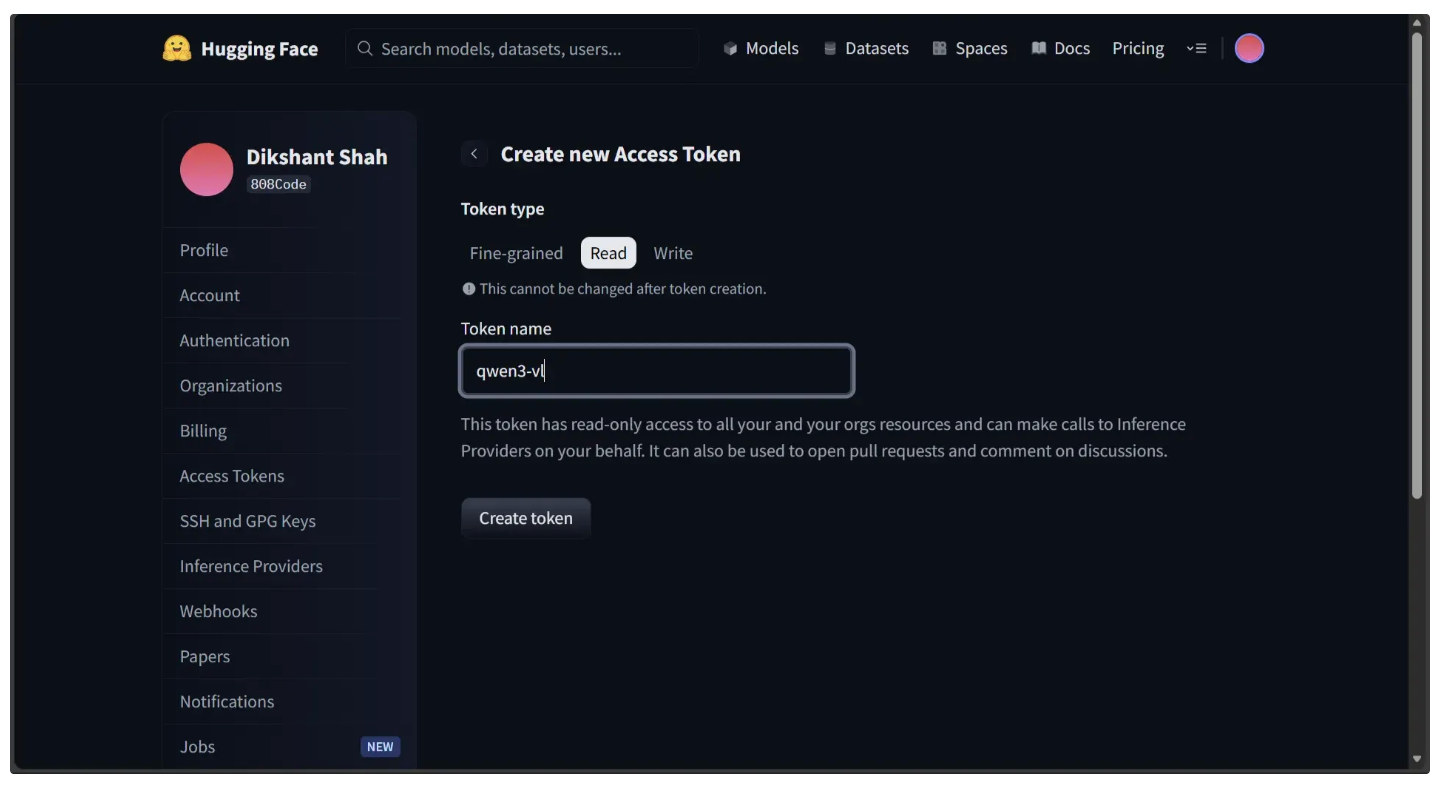
Click “Access Tokens” to open the “Create new Access Token” section. Then, select “Read” as the token type, enter a name for your token, and click “Create Token”, as shown below.
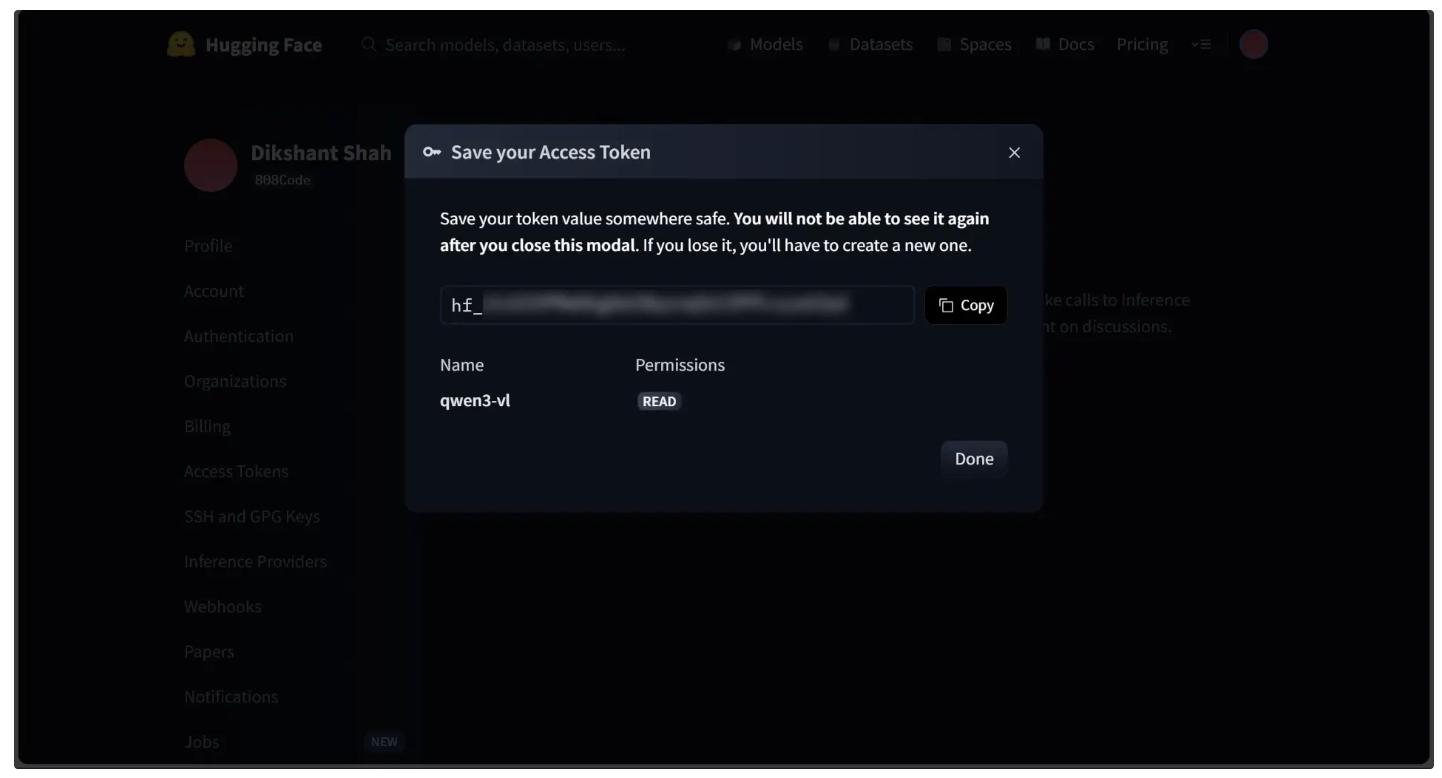
This will open a modal displaying your newly generated access token, as shown below. Be sure to copy the token:
Now, in Google Colab, add your Hugging Face access token to the notebook under the name "HF_TOKEN." To do this, open the left panel and click Secrets (🔑). Store your Hugging Face access token with the name "HF_TOKEN" and make sure to toggle it on, as shown below.
You can run the code below in a code cell to verify that the token is accessible in the notebook. If the token is available, the script will print it; otherwise, it will return nothing:
from google.colab import userdata

print(userdata.get("HF_TOKEN"))
To download the Qwen3-VL model from Hugging Face, start by installing the 'transformers' library. This Python toolkit from Hugging Face allows you to easily use, train, and run pretrained models for text, images, and multimodal tasks. Run the following command in a new code cell to install it.
!pip install -q transformers
Next, add the following code to a new code cell and run it. This script downloads the 2B Qwen3-VL model and loads it onto the GPU for faster inference:
from transformers import AutoModelForImageTextToText

# Select which Qwen3-VL model to use
MODEL_ID = "Qwen/Qwen3-VL-2B-Instruct"
# MODEL_ID = "Qwen/Qwen3-VL-4B-Instruct"
# MODEL_ID = "Qwen/Qwen3-VL-8B-Instruct"


# Load the model and move it to GPU for faster inference
# The model can now take images + text prompts and generate text outputs
model = AutoModelForImageTextToText.from_pretrained(MODEL_ID).to("cuda")
For Qwen3-VL-8B-Instruct, an A100 GPU runtime is recommended for optimal performance, while a T4 GPU is sufficient for running Qwen3-VL-2B-Instruct.
Step 4: Qwen3-VL Inference
Before passing prompts and images to the model for inference, the inputs need to be processed. This is done using an 'AutoProcessor'. The 'AutoProcessor' class in the Hugging Face Transformers library automatically loads the appropriate preprocessing tools for the selected model, ensuring that text and image inputs are formatted in a way the model can understand.
To use 'AutoProcessor', add the following code to a new code cell and run it. The code below initializes a processor for the loaded Qwen3-VL model:
from transformers import AutoProcessor

# Load the processor for the selected model
# This prepares text and image inputs to be fed into the model
processor = AutoProcessor.from_pretrained(MODEL_ID)
You can now pass both text and image inputs to the model after converting them into tensors using the processor, which formats the data in a way the model can understand.
The function below, called ‘qwen_detect’, demonstrates this process. It takes an image and a target object, creates a chat-style prompt asking Qwen3-VL to locate the object, preprocesses the inputs using the processor, and sends them to the GPU. The model then generates a text output containing the object’s positions, which are returned as JSON coordinates.
To use the function in subsequent code, add the following code to a new code cell and run it:
import torch
from PIL import Image

def qwen_detect(image: Image, target: str, max_new_tokens: int = 1024):

    prompt = (
        f"Outline the position of {target} and output all the coordinates in JSON format."
    )

    messages = [
        {
            "role": "user",
            "content": [
                {"type": "image", "image": image},
                {"type": "text", "text": prompt},
            ],
        }
    ]

    inputs = processor.apply_chat_template(
        messages,
        tokenize=True,
        add_generation_prompt=True,
        return_dict=True,
        return_tensors="pt",
    ).to("cuda")

    with torch.inference_mode():
        gen = model.generate(
            **inputs,
            max_new_tokens=max_new_tokens,
        )

    trimmed = [g[len(i):] for i, g in zip(inputs.input_ids, gen)]
    text = processor.batch_decode(trimmed, skip_special_tokens=True)[0]
    return text
To test the function above for Qwen3-VL inference, first download a test image into the notebook’s file environment by running the following command in a new code cell:
!wget -q https://storage.googleapis.com/com-roboflow-marketing/notebooks/examples/traffic_jam.jpgNext, add a new code cell and run the following code in it:
# Path to the test image saved in the Colab environment
IMAGE = "/content/traffic_jam.jpg"
# Object you want Qwen3-VL to detect in the image
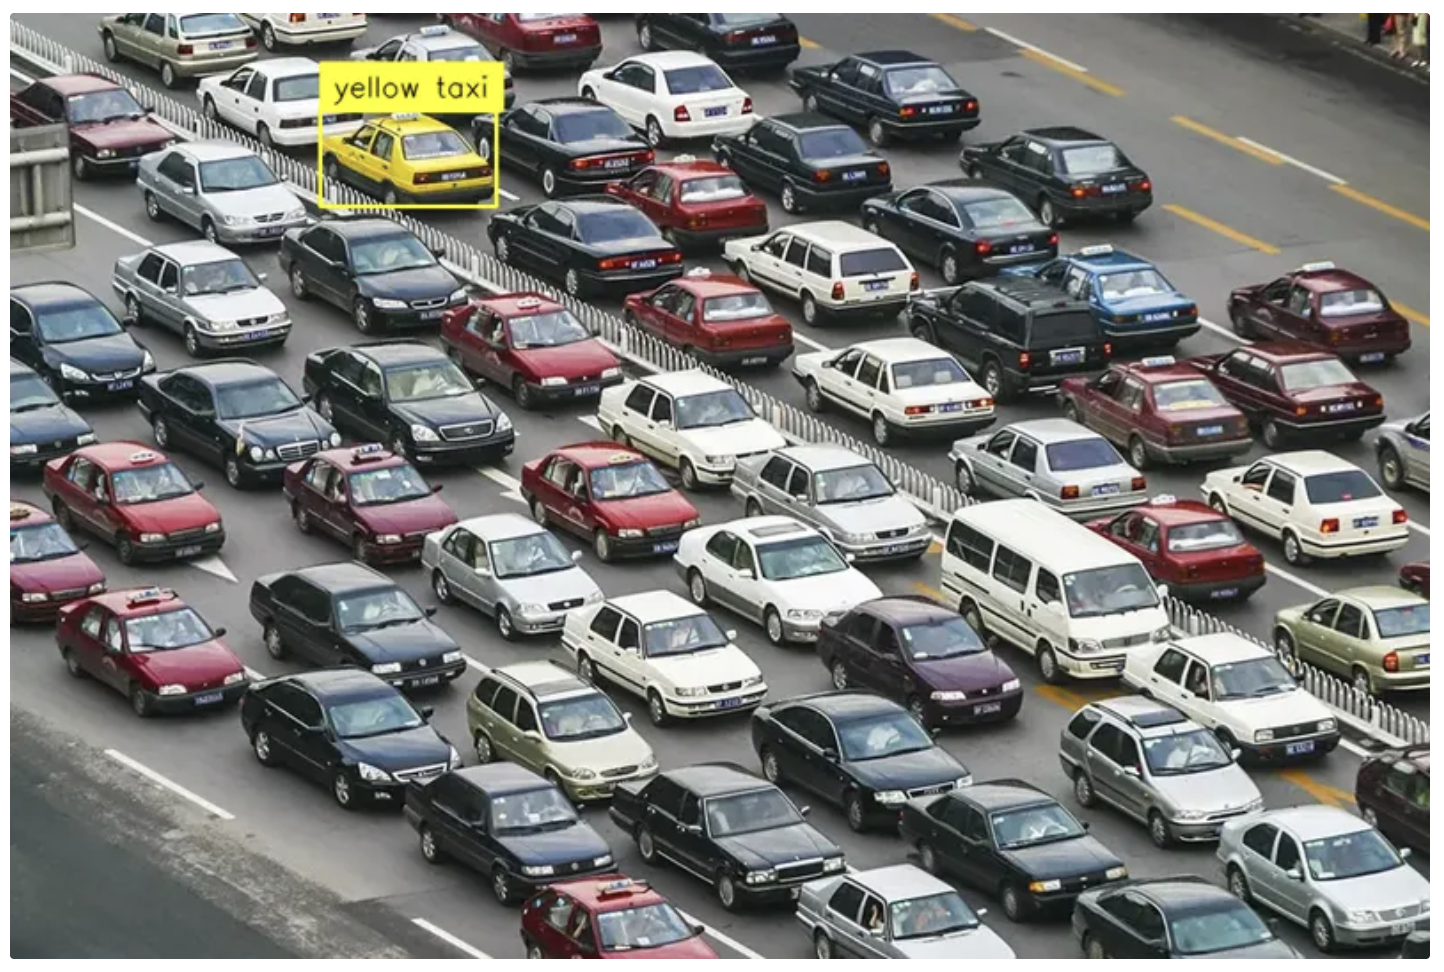
TARGET = "yellow taxi"
# Load the image and convert it to RGB
image = Image.open(IMAGE).convert("RGB")
# Run open-vocabulary detection with Qwen3-VL
response = qwen_detect(image, TARGET)
# Print the model's JSON-style coordinate output
print(response)Once you run the cell above, the ‘qwen_detect’ function should produce output similar to the following:
```json
[
    {"bbox_2d": [218, 103, 343, 205], "label": "yellow taxi"}
]
```
Step 5: Draw Bounding Boxes
Now that Qwen3-VL has produced object detection results, you can visualize them by drawing bounding boxes on the image.
First, convert the JSON output from Qwen3-VL into 'sv.Detections', a Supervision data structure designed to store object detection results. To use the Supervision library in Colab, install it by running the following command in a code cell:
!pip install -q supervision==0.27.0rc6Next, run the following code in a new cell to convert the JSON output into a Supervision Detections object:
import supervision as sv

# Convert the Qwen3-VL JSON output into a Supervision Detections object
detections = sv.Detections.from_vlm(
    vlm=sv.VLM.QWEN_3_VL,
    result=response,
    resolution_wh=image.size
)
After that, use these detections to annotate the image. The ‘annotate_image’ function below takes an image and its detections, then draws bounding boxes and labels using the Supervision library.
To use the function in later code, add the following to a new code cell and run it:
import supervision as sv
from PIL import Image

COLOR = sv.ColorPalette.from_hex([
    "#ffff00", "#ff9b00", "#ff66ff", "#3399ff", "#ff66b2", "#ff8080",
    "#b266ff", "#9999ff", "#66ffff", "#33ff99", "#66ff66", "#99ff00"
])

def annotate_image(image: Image, detections: sv.Detections, smart_position = True) -> Image:
    text_scale = sv.calculate_optimal_text_scale(resolution_wh=image.size)
    thickness = sv.calculate_optimal_line_thickness(resolution_wh=image.size)

    color_by_class = detections.class_id is not None
    box_annotator = sv.BoxAnnotator(
        color=COLOR,
        color_lookup=sv.ColorLookup.CLASS if color_by_class else sv.ColorLookup.INDEX,
        thickness=thickness
    )
    label_annotator = sv.LabelAnnotator(
        color=COLOR,
        color_lookup=sv.ColorLookup.CLASS if color_by_class else sv.ColorLookup.INDEX,
        text_color=sv.Color.BLACK,
        text_scale=text_scale,
        text_thickness=thickness - 1,
        smart_position=smart_position
    )

    annotated_image = image.copy()
    annotated_image = box_annotator.annotate(annotated_image, detections)
    return label_annotator.annotate(annotated_image, detections)
Finally, add the following code to a new code cell and run it to apply the ‘annotate_image’ function and display the annotated image.
# Create a copy of the original image for annotation
annotated_image = image.copy()

# Draw bounding boxes + labels on the image using the detections
annotated_image = annotate_image(image=annotated_image, detections=detections)

# Resize the image for easier viewing in the notebook output
annotated_image.thumbnail((800, 800))

# Display the annotated image in the notebook
annotated_image
Running the cell above produces an image with bounding boxes and labels as shown below:
Running the Ready-to-Use Roboflow Qwen3-VL Notebook in Google Colab
Roboflow maintains a GitHub repository with numerous computer vision tutorial notebooks, including one for running Qwen3-VL:
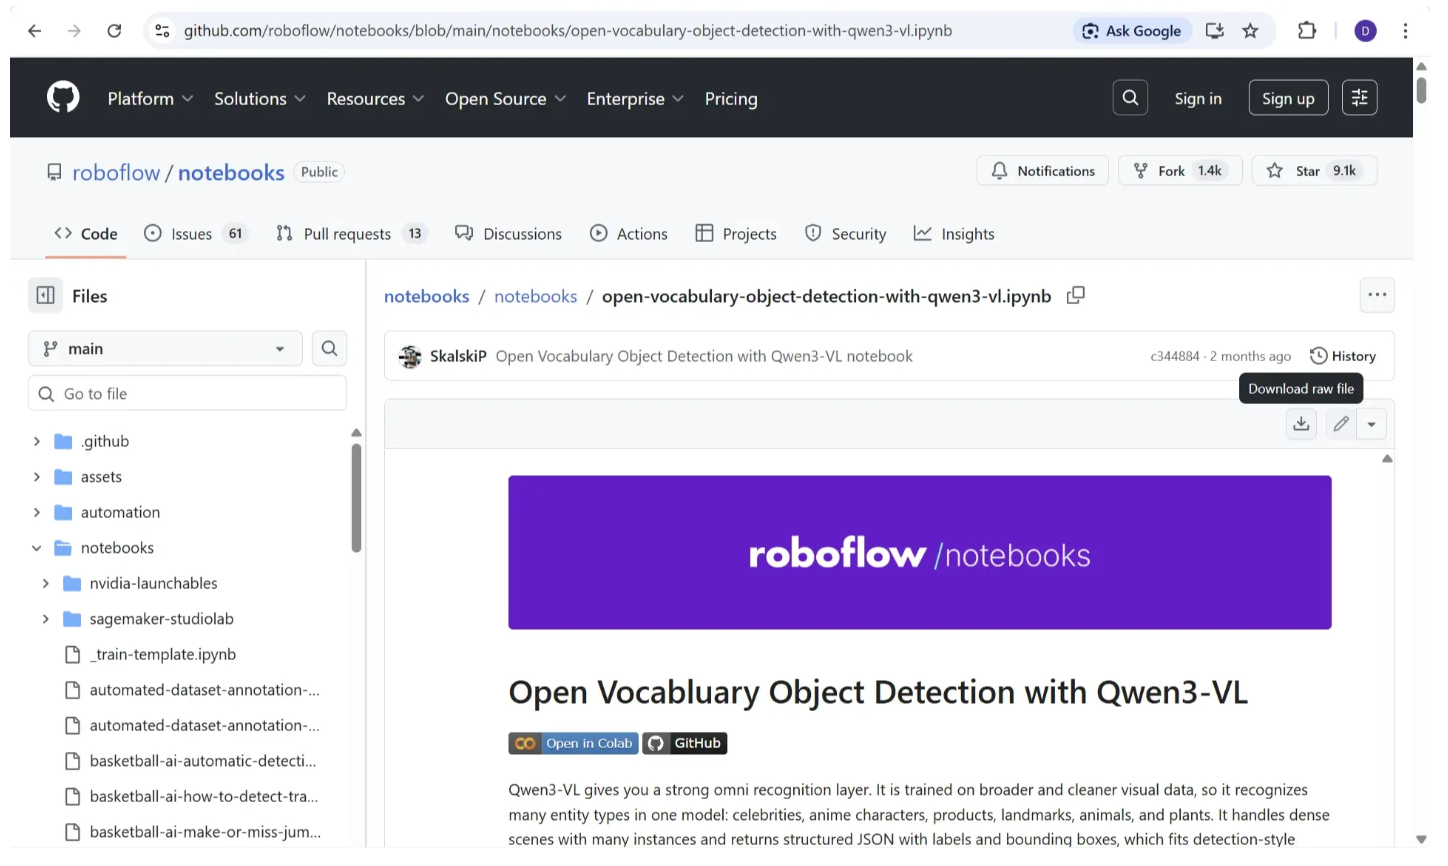
This notebook includes pre-populated cells with the code from the steps above to download the model and run inference on images using Qwen3-VL, as well as additional open-vocabulary object detection examples.
To open the notebook directly in Colab, either replace ‘github.com’ in the notebook link with ‘colab.research.google.com/github’ or visit this link. The notebook will automatically load in Google Colab, as shown below:
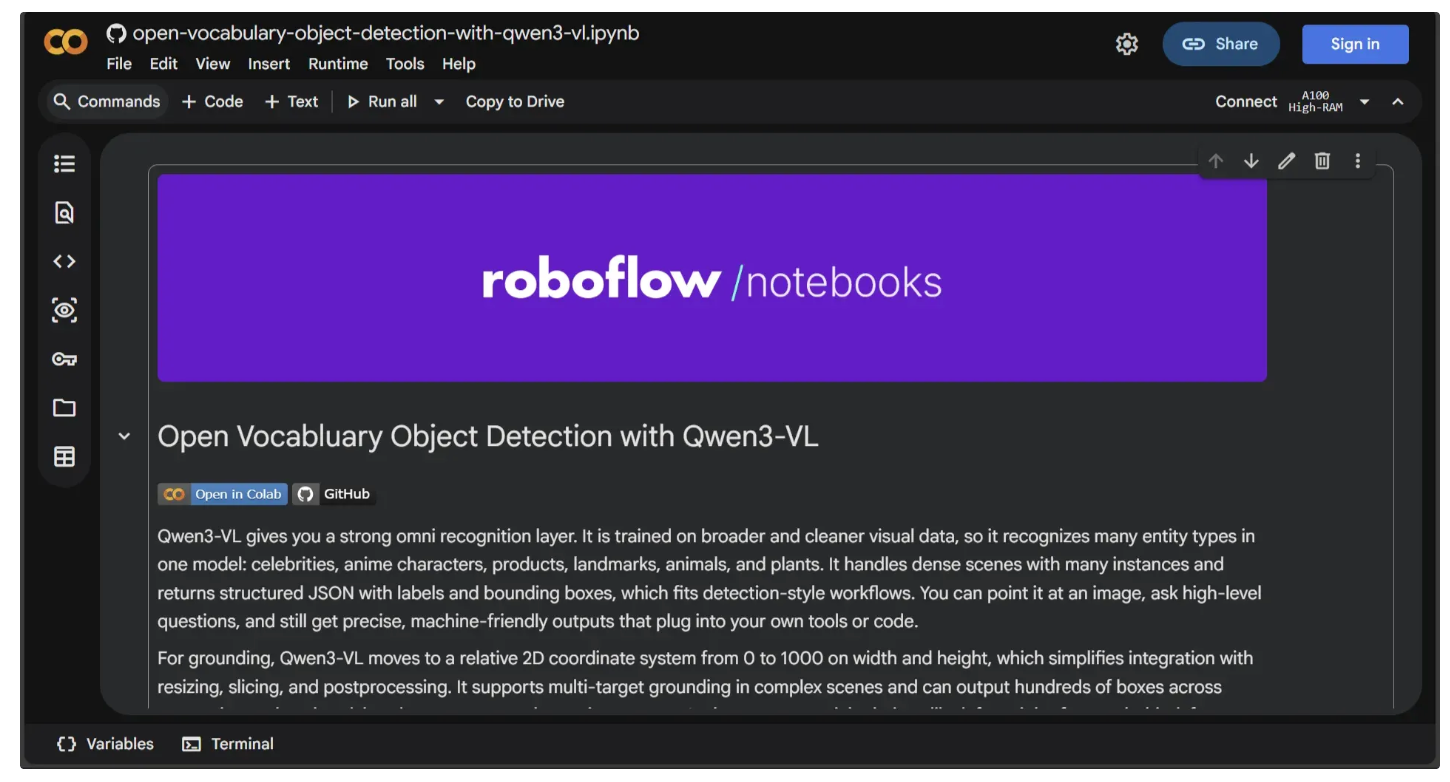
If you are not signed in, sign in to Google. Once signed in, click “Connect” to start the runtime, which will automatically switch to a T4 GPU.

After connecting, make sure your Hugging Face access token is added and enabled in the notebook’s Secrets (🔑) under the name “HF_TOKEN.” You can follow the instructions in Step 3 of the “Step-by-Step Guide to Running Qwen3-VL in Google Colab” section to do this.
Since you are using a T4 GPU, switch to the 2B Qwen3-VL model in the “Load Qwen3-VL model” section by uncommenting the 2B model and commenting out the 8B model. By default, the notebook uses the 8B model, which requires an A100 GPU.
Once set up, you can run each cell from top to bottom to explore the notebook’s inference examples with Qwen3-VL using different prompts and image inputs.
Conclusion: Qwen3-VL on Google Colab
Qwen3-VL brings human-like understanding and remarkable flexibility to object detection. Its open vocabulary approach lets you detect anything, from a yellow taxi to famous celebrities, without retraining or being limited to a fixed set of categories.
Running Qwen3-VL in Google Colab allows you to quickly experiment with real-world images, visualize results, and seamlessly integrate the outputs into your Roboflow Workflows. This makes it easier than ever to explore the full potential of prompt driven object detection.
Roboflow’s GitHub repository offers many computer vision tutorial notebooks, featuring models like YOLOv11, SAM 2, and Qwen for tasks from object detection and segmentation to OCR. Check them out!
Written by Dikshant Shah
Cite this Post
Use the following entry to cite this post in your research:
Contributing Writer. (Jan 26, 2026). Open-Vocabulary Object Detection Using Qwen3-VL in Google Colab. Roboflow Blog: https://blog.roboflow.com/use-qwen3-vl-in-google-colab/