
Vertex AI on Google Cloud Platform provides tools for training and deploying object detection, classification, and segmentation models, but requires labeled data before training can begin. This guide walks through labeling a solar panel detection dataset in Roboflow (including SAM-powered automated annotation), exporting it to Vertex AI, starting a training job, and deploying a test endpoint, with a note that Roboflow also offers its own training and deployment path that skips manual endpoint setup.
Vertex AI is a suite of computer vision solutions available on the Google Cloud Platform. With Vertex, you can label data for, train and deploy computer vision models. Vertex also offers support for working with language models.
In this guide, we are going to show how to train a computer vision model that detects solar panels using Vertex AI. We will:
- Label data in Roboflow, which provides tools for precisely annotating images for use in vision models.
- Import our data into Vertex AI.
- Train a computer vision model in Vertex AI.
- Test the trained model.
You can train object detection, classification, and segmentation models with Vertex AI. For this guide, we will focus on object detection, a task type that lets you find the location of objects in an image or video.
Without further ado, let’s get started!
Train a Model with Vertex AI
To train a model in Vertex AI, you will need a Google Cloud Platform account. You can sign up to Google Cloud on their website.
For this guide, you will also need a Roboflow account, which we will use to label data. Roboflow is a computer vision platform that enables you to find data for a vision project, label and organize data, train models, and deploy models with developer-friendly SDKs. Roboflow is used by 250,000 developers and enterprises like Rivian Automotive, USG, and Cardinal Health for vision.
By labeling data in Roboflow, you can access powerful annotation tools such as automated labeling powered by Segment Anything (SAM), collaborative annotation, annotation comments, and more. You can seamlessly export your data from Roboflow to Vertex (and other platforms) for use in training your model without platform lock-in.
Step #1: Label Data for Use in Model Training
Before we can train a model, we need images to label. If you need images, check out Roboflow Universe, a community of public data for use in training computer vision models. You can find over 150 million images across 200,000 datasets on Universe.
In addition, you can use Roboflow Collect to collect data on the edge. Roboflow Collect provides an intelligent data gathering solution with which you can:
- Collect images that match a provided text prompt (i.e. “car”).
- Collect images that are similar to an image you have already collected.
- Prevent gathering duplicate images.
When you have images to use in training your model, create a Roboflow account and open the Roboflow dashboard. On the dashboard, click the “Create a Project” button.
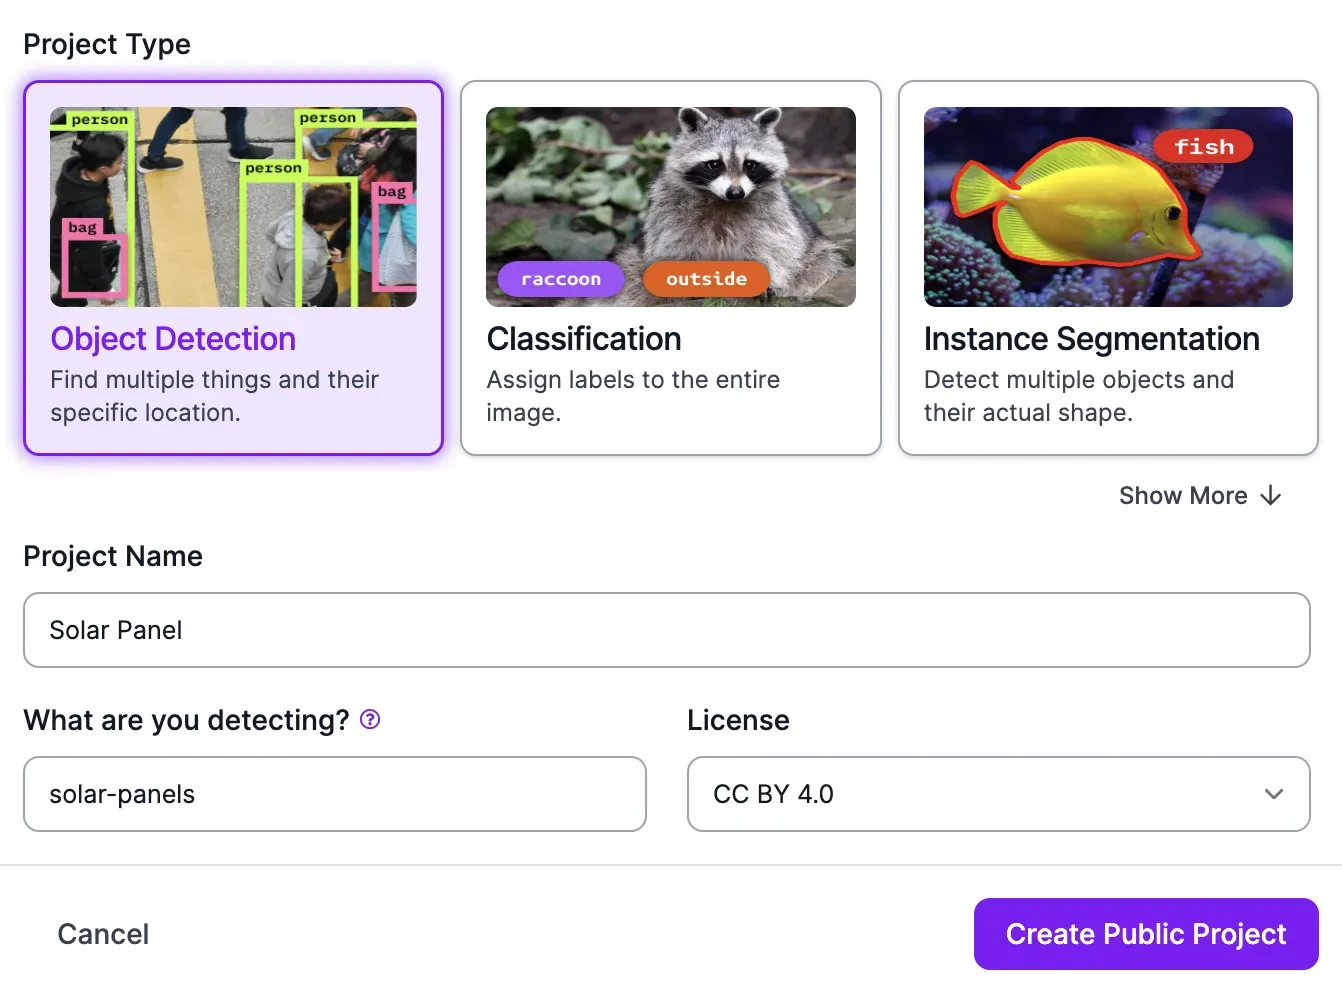
Fill in the pop up that appears with the name of your project, the type of object you want to identify, and the model type you want to train. (Note: You can only train object detection and classification models in Custom Vision. With that said, you can train segmentation models in Roboflow.)
Next, upload your images and any annotations you have to the Roboflow platform. You can label unannotated images in Roboflow and inspect and adjust annotated images. Roboflow supports annotations in over 30 different formats.
To upload your images, first drag in a folder of your images to the Roboflow web interface:
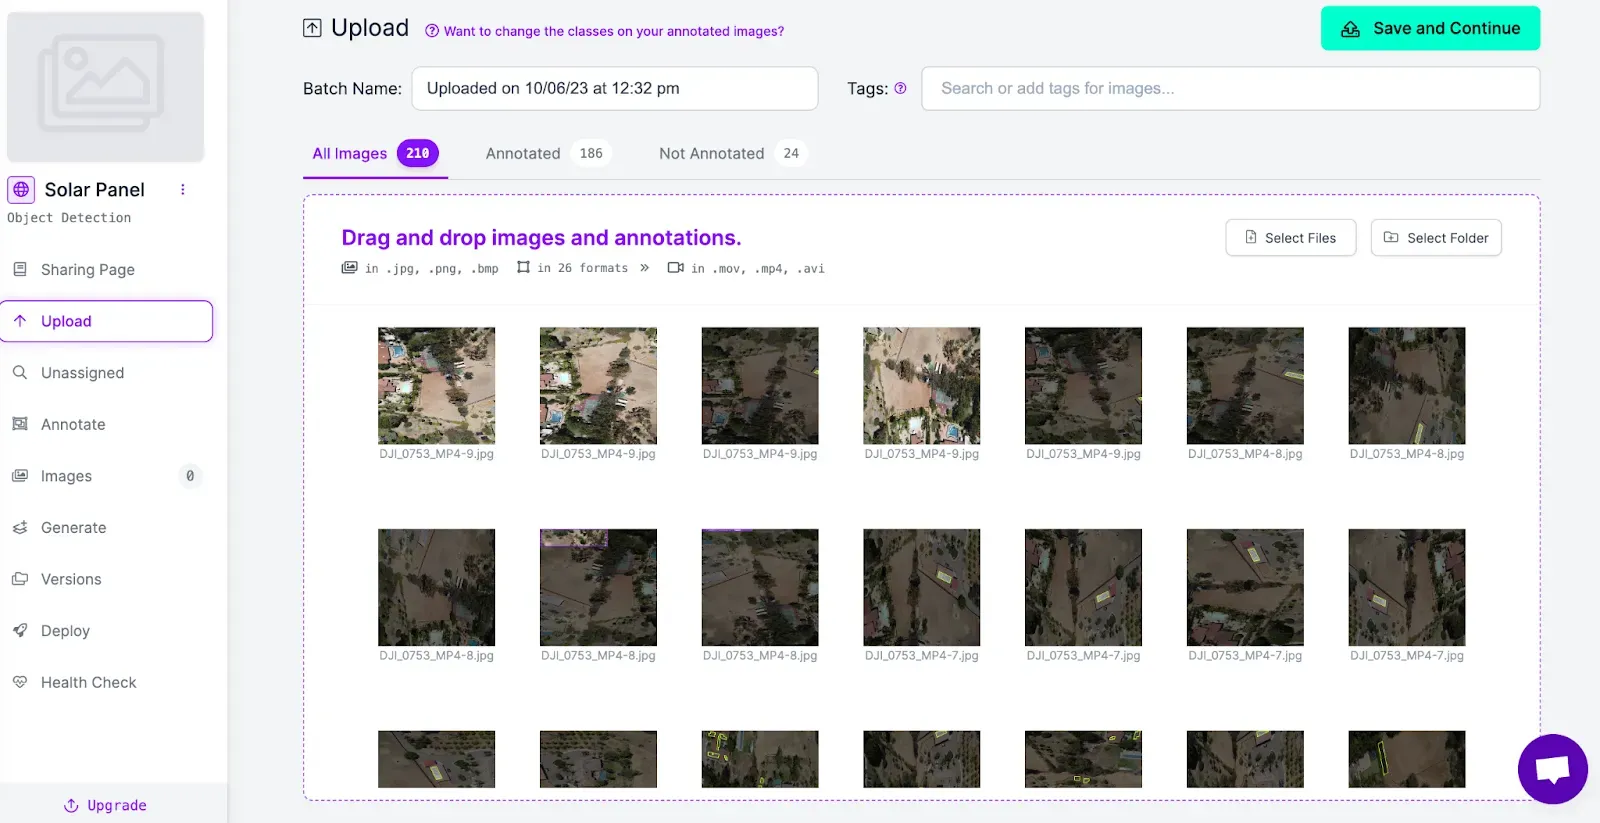
Once you have dragged your images into the web interface, click “Save and Continue”. Your images will then be uploaded to the Roboflow platform. The amount of time this process takes depends on the number of images in your dataset.
After your images have been uploaded, you can start annotating your data. Click on an image to start annotating.
To draw a bounding box, press “b” on your keyboard or select the bounding box tool in the right control panel. Then, click where you want to start drawing a box and drag until you have finished drawing the box. You can then create or choose a class to assign to the box.
To learn more about the Roboflow annotation tool, check out the complete guide to using Roboflow to annotate data.
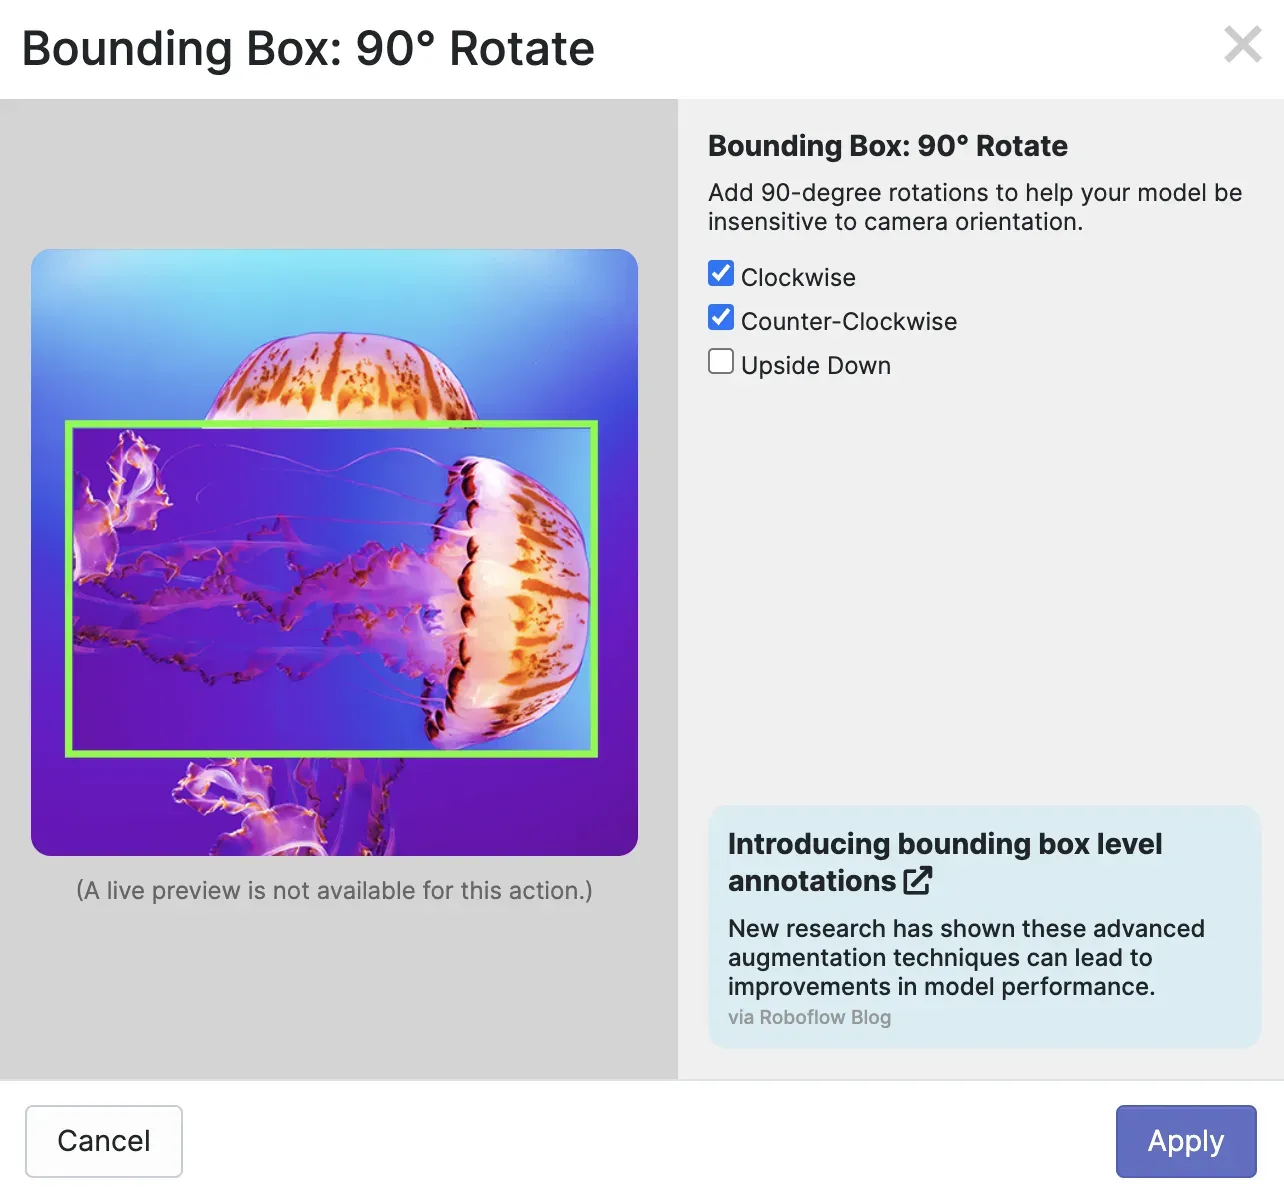
Once you have labeled your data, click “Versions” in the sidebar of the Roboflow product to generate a project version. Here, you can preprocess your data and apply augmentations. Learn more about preprocessing and augmentation best practices.
We recommend leaving the preprocessing steps as defaults for your first model version, and reading our guidance on augmentations to evaluate which ones may be appropriate for the model you are training.
For this guide, we will apply a 90 degree rotate augmentation. This augmentation will help our model to perform effectively at different angles, a key consideration for aerial imagery like we are using in the example solar panel dataset in this guide.
Click “Generate” at the bottom of the page to generate a dataset.
Your dataset will be generated. We will come back to the dataset in the next step.
Step #2: Create a Vertex AI Dataset
Once you have labeled all of your data, open up Google Cloud Platform (GCP). Enable Vertex AI if you have not used Vertex before on your GCP account. To do so, search for Vertex AI in the search bar at the top of GCP and click the Vertex AI option. Click “Enable API” to enable Vertex on your account.
Next, search for Vertex AI in the search bar and select Vertex AI again. This will take you to the Vertex AI dashboard where we will train a model.
For this guide, we will be using two parts of Vertex AI:
- Datasets, where we will store and manage our data, and;
- Training, where we will train our object detection model.
Click the “Datasets” link in the sidebar then click “Create dataset”. You will be asked to select a name for your dataset and a project type. Choose a name then select the “Image object detection” data type. If you are training a classification or segmentation model, click the appropriate option for the model you want to train.
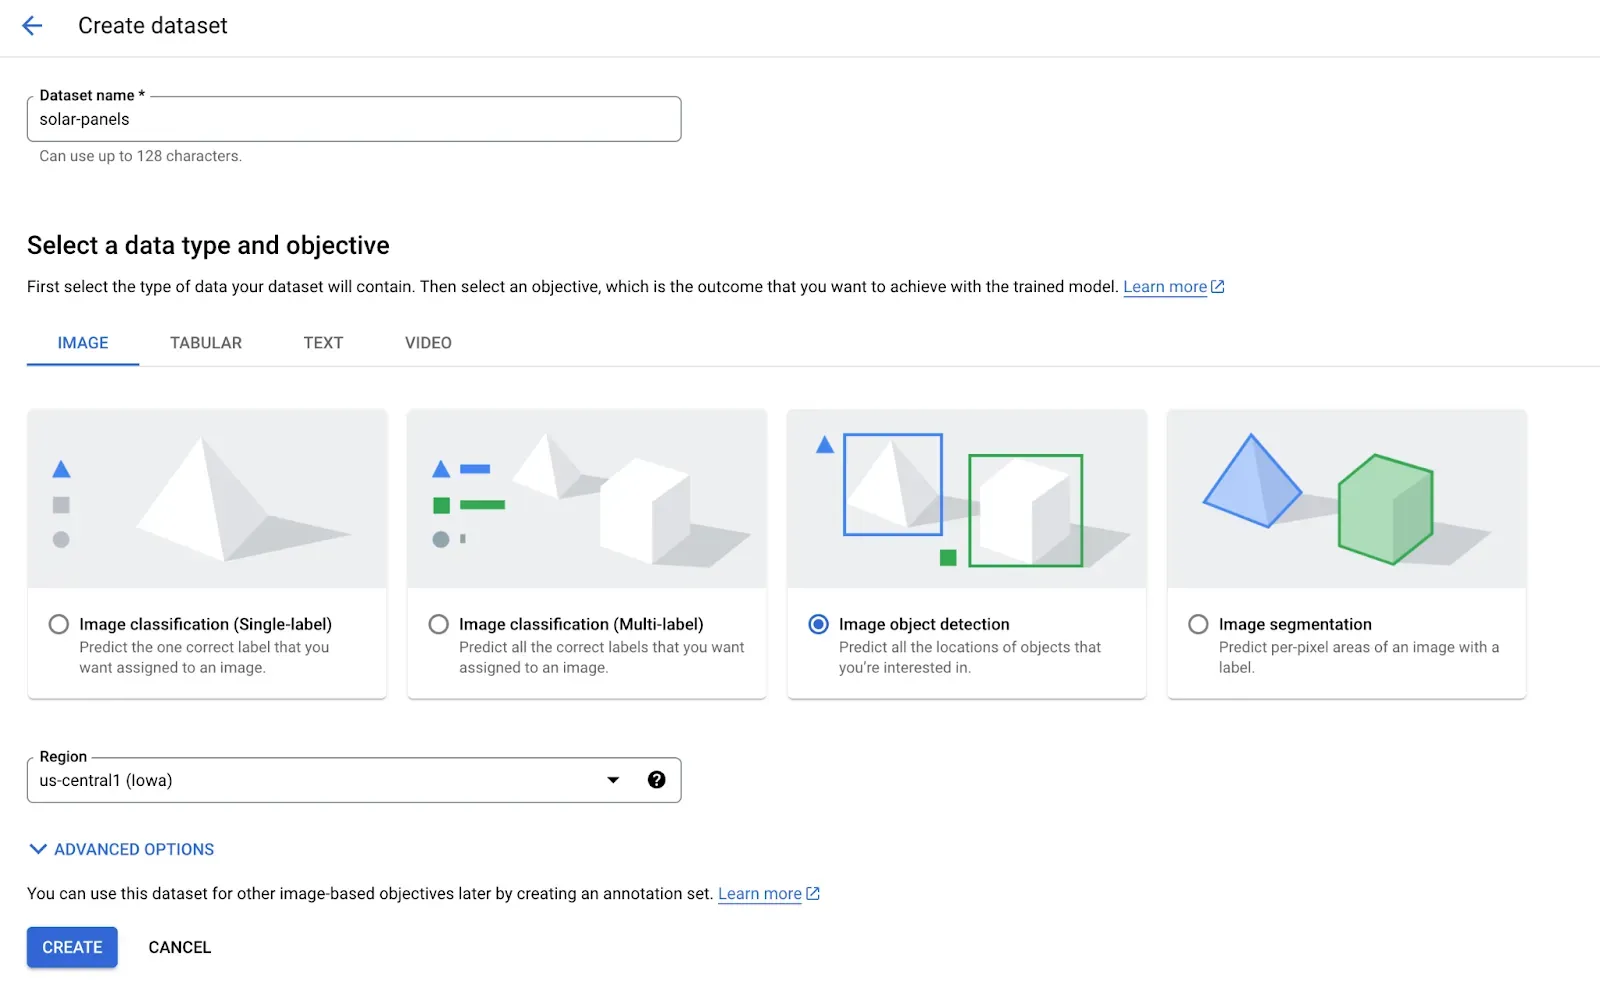
Then, click “Create”. You will be taken to a page that invites you to upload your data to Vertex.
Step #3: Import Labeled Data
Roboflow supports exporting annotated data directly into Vertex. Select the “Select import files from Cloud Storage” option.
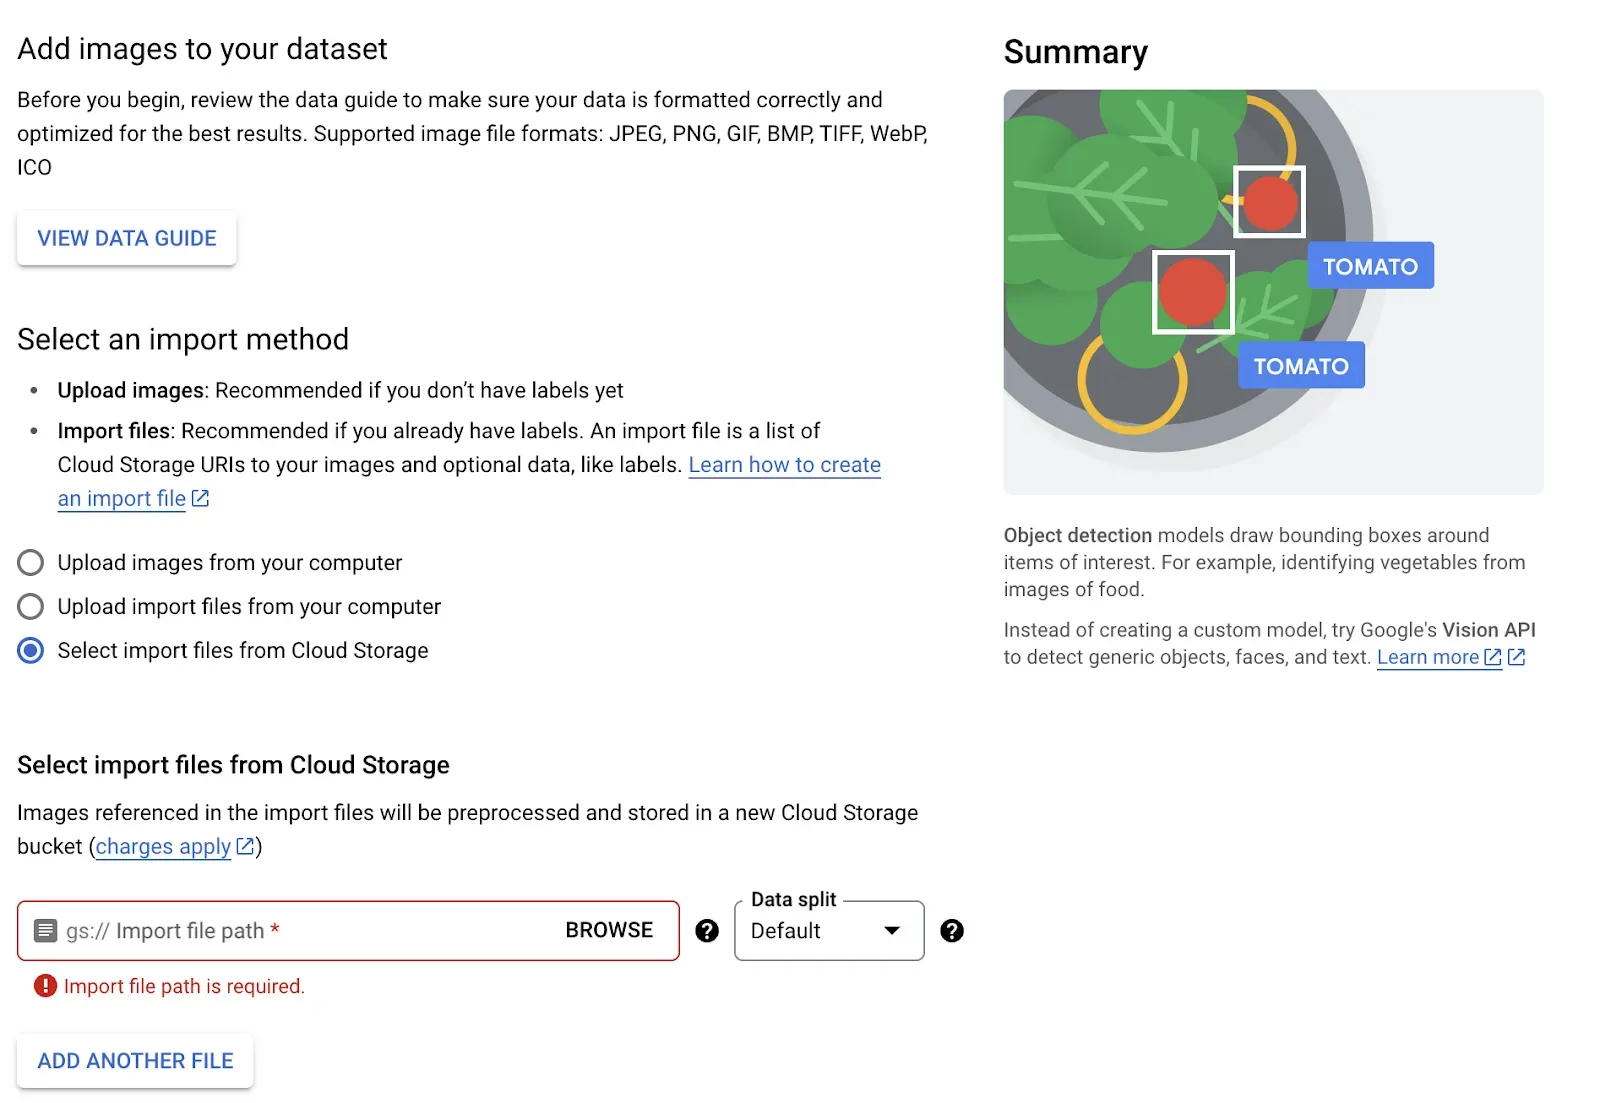
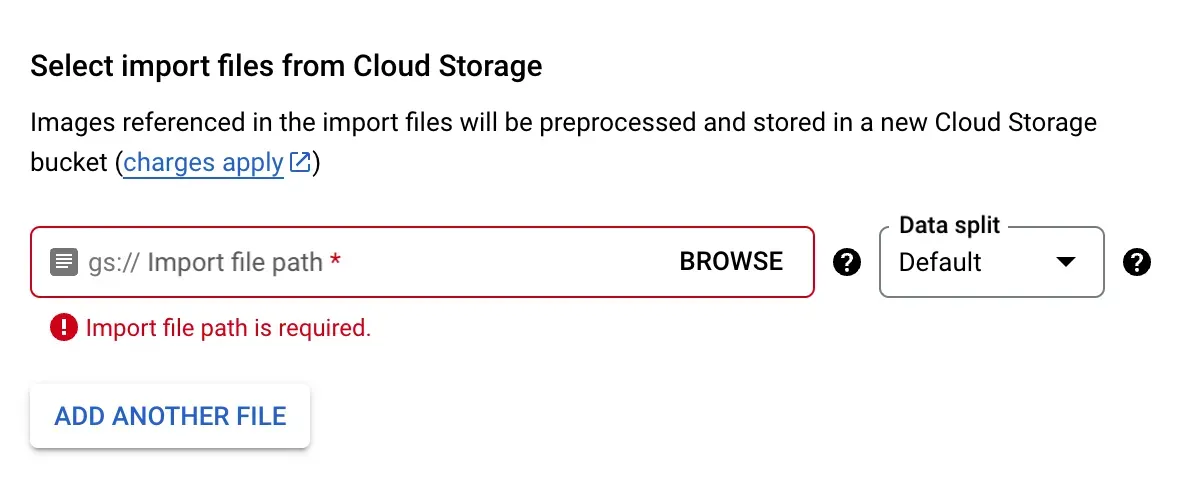
Once you select this option, a form field will appear asking for an import file path:
To retrieve this form field, go back to the Roboflow Version page for the dataset you just created. Click “Export Dataset” on the page. Select the Google Cloud AutoML option:
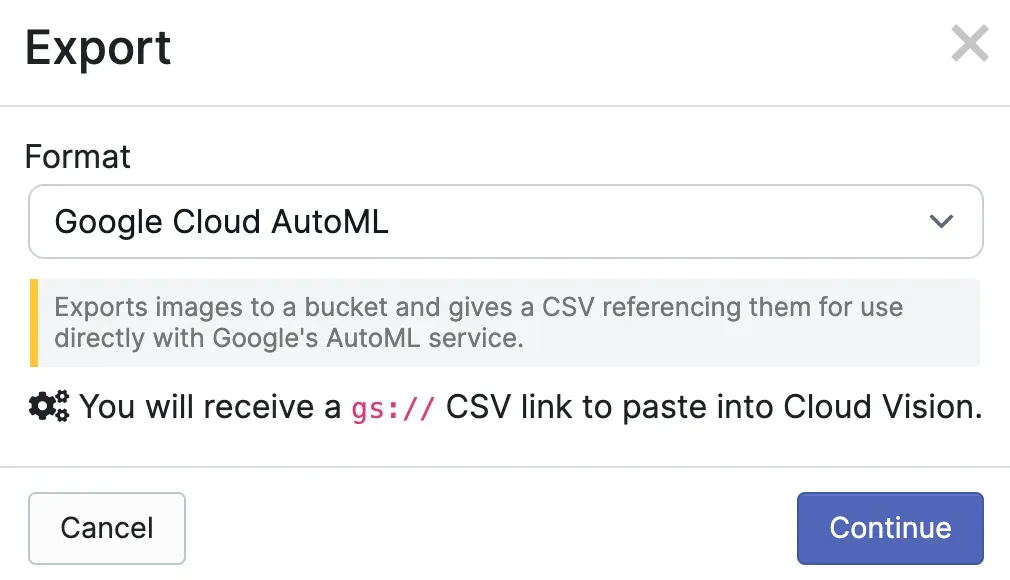
A link will appear that you need to copy into the “Select import files from Cloud Storage” form field on Vertex AI. Copy the link and paste it into Vertex. Then, click “Create” at the bottom of the Vertex AI page to create your dataset.
The data import step can take some time. Google Cloud will send you an email when your data has been imported into the platform and is ready for use. When your dataset is ready, you will be able to view all of your images and annotations.
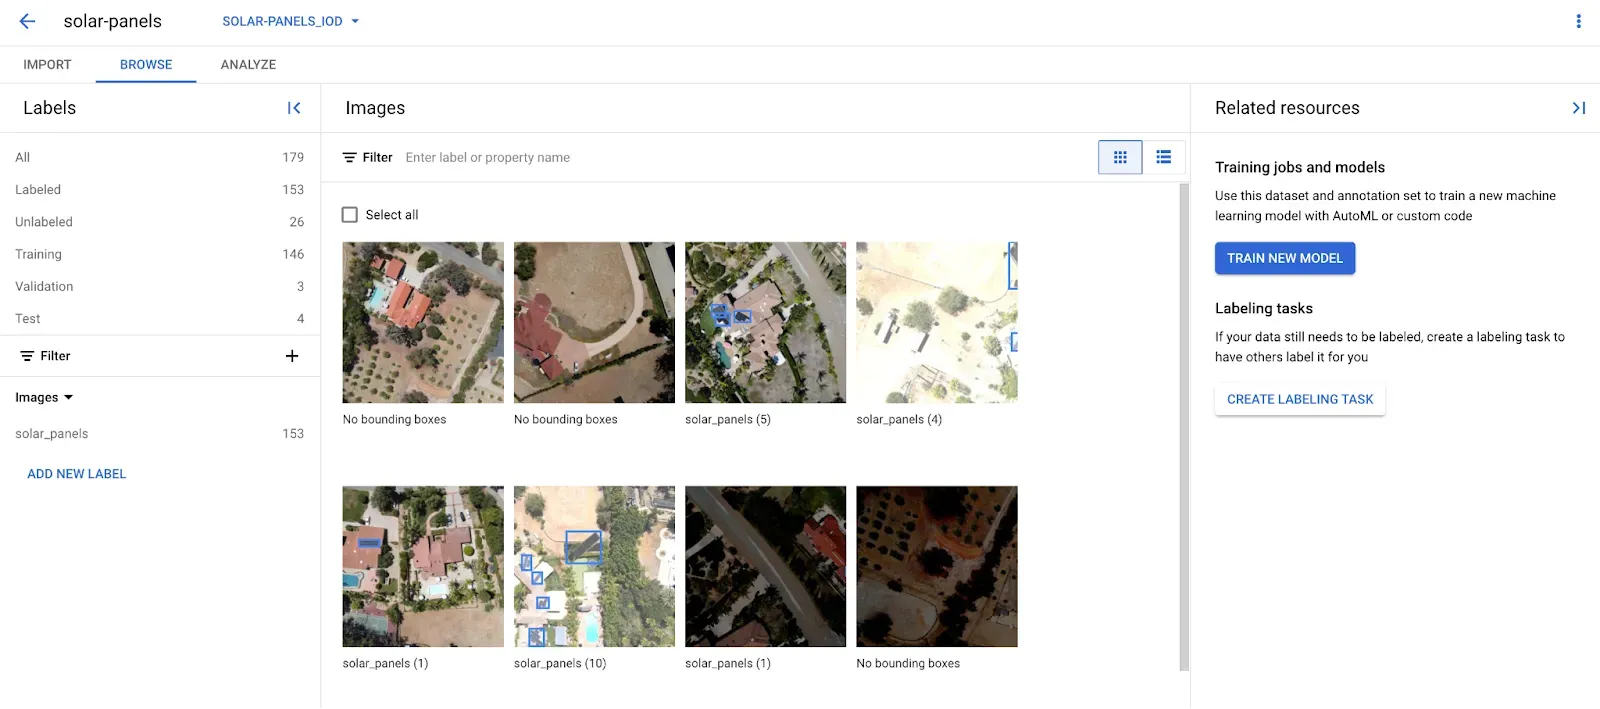
You can click into each image to see your annotations.
Step #4: Start a Training Job
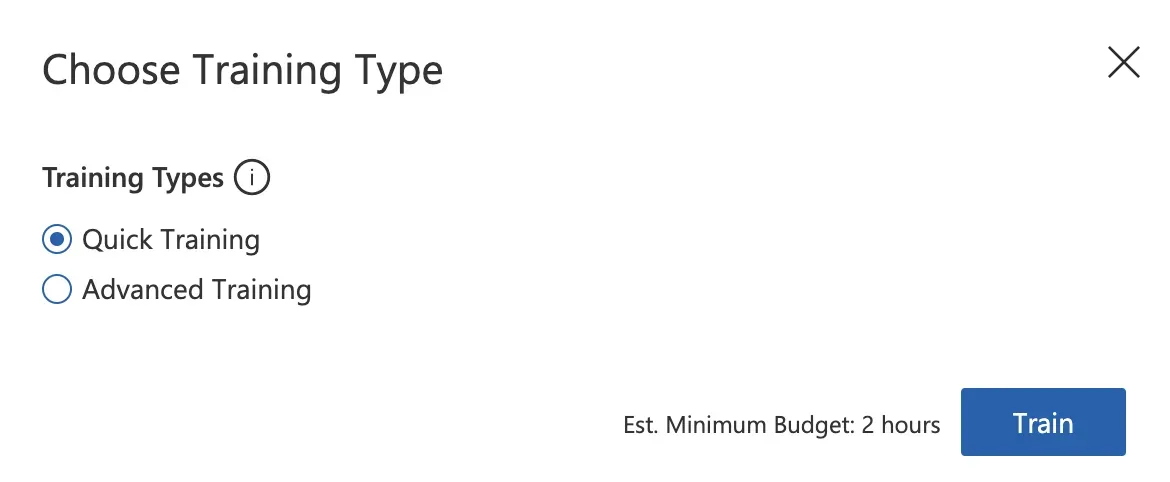
When you are ready to train your model, click the “Train New Model” button on the left side of the screen. A pop up will appear with four steps that you need to complete to configure and set up a training job.
On the first screen, choose “AutoML” as your model training method. For the deployment method, choose “Edge” or “Cloud” depending on where you plan to deploy your model.
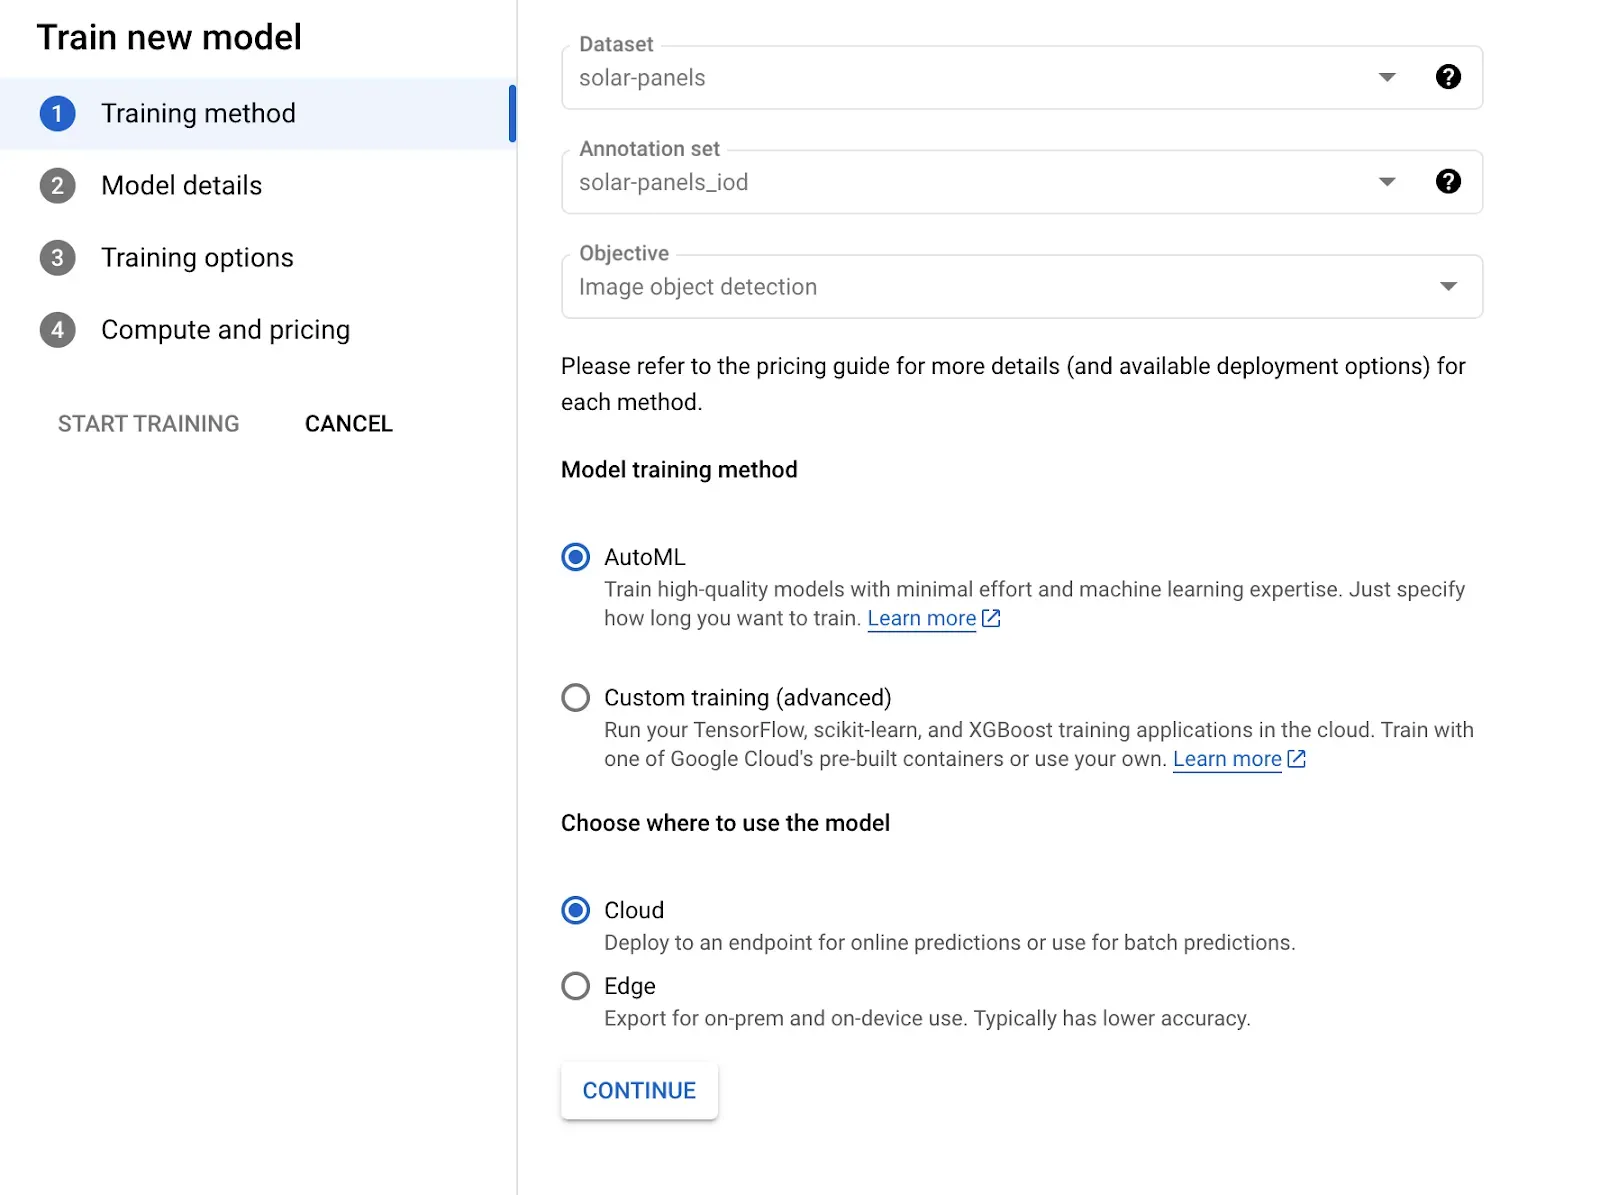
Click “Continue” and follow the on-screen instructions to configure the rest of your training job.
When you have finished completing the form, click the “Start Training” button. The training process will begin. You will receive an email once the training process has completed.
You can see how your model performed from the Model Registry entry associated with your model:
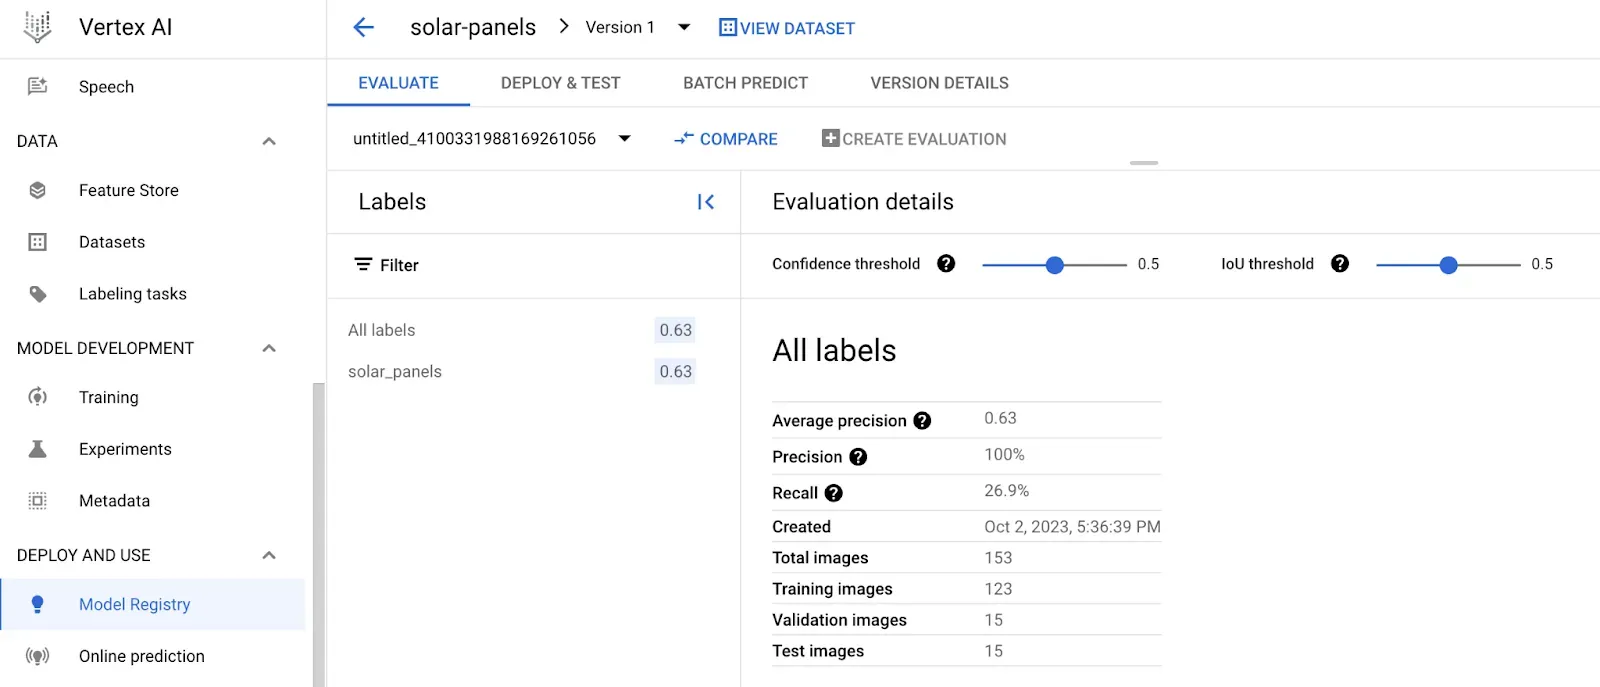
In this training job, we achieved a 63% average precision.
Step #5: Deploy and Test Your Model
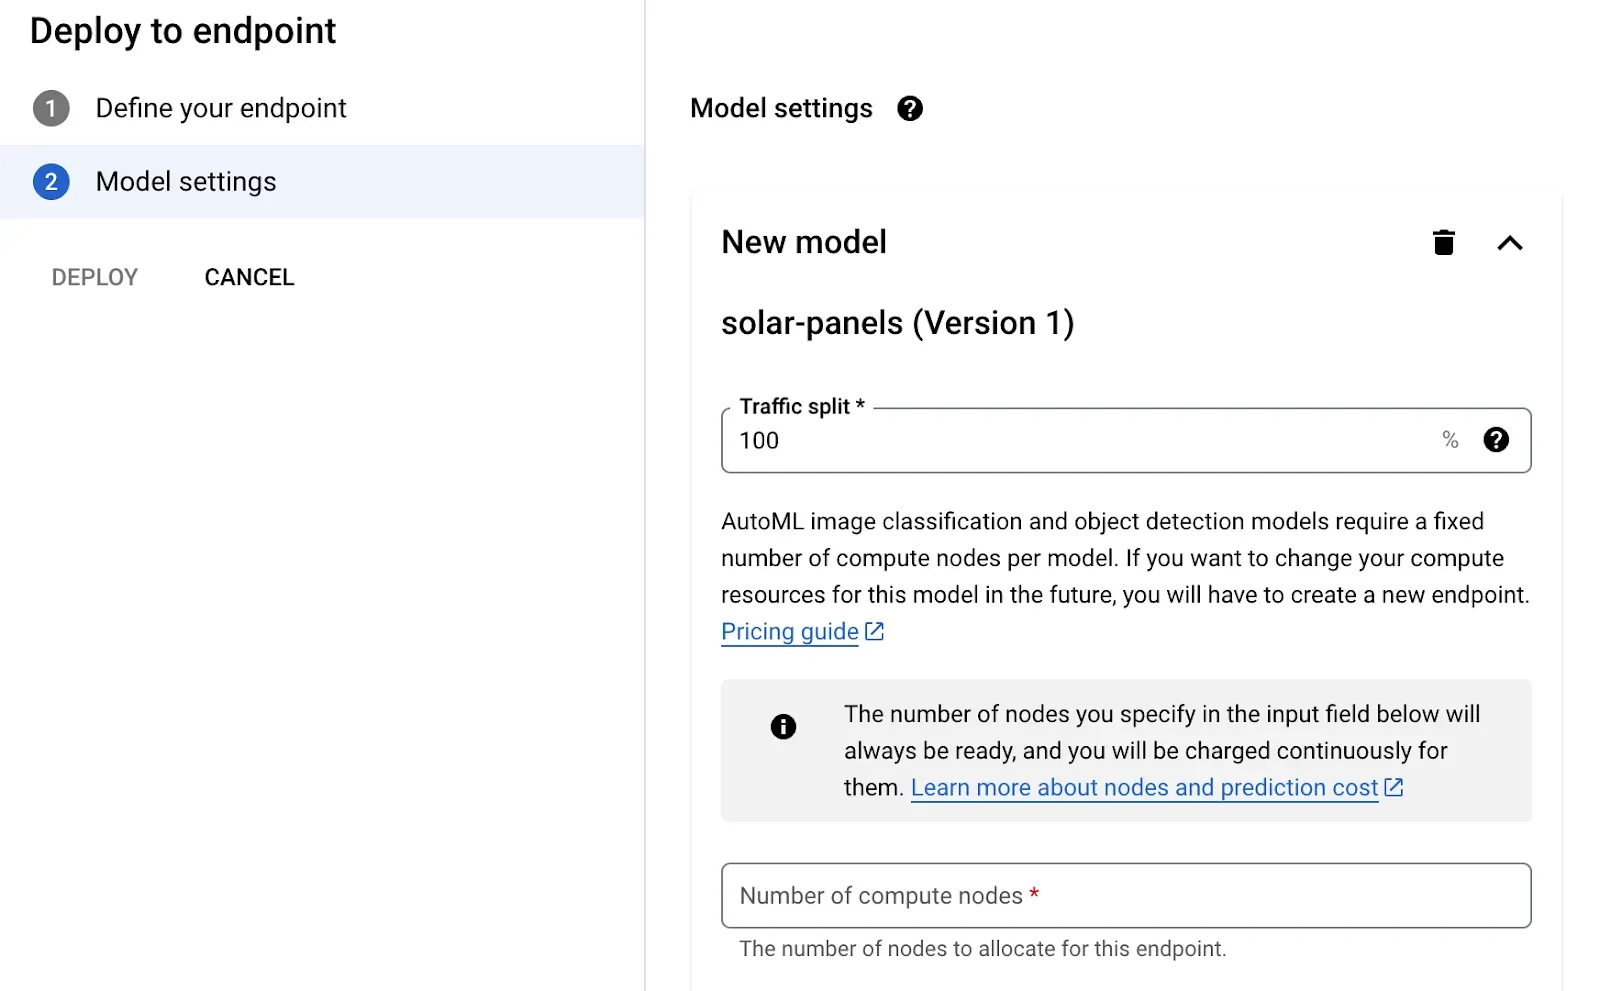
To test your model on Vertex AI, you need to first deploy the model. Click the Deploy & Test link in the top navigation bar. Then, click the “Deploy to Endpoint” button.

You will be asked to choose a name for your endpoint and the number of nodes on which the endpoint should be deployed. For testing, you should deploy one node, the minimum. Note that you will be billed for the node while it is deployed.
Once you complete the form, an endpoint will be deployed through which you can use your model. This process will take some time. Once your endpoint is ready, a button will appear that lets you upload an image to test your model in the browser:
Click the button and choose an image to upload. The image will be passed through your model and predictions will appear on screen.
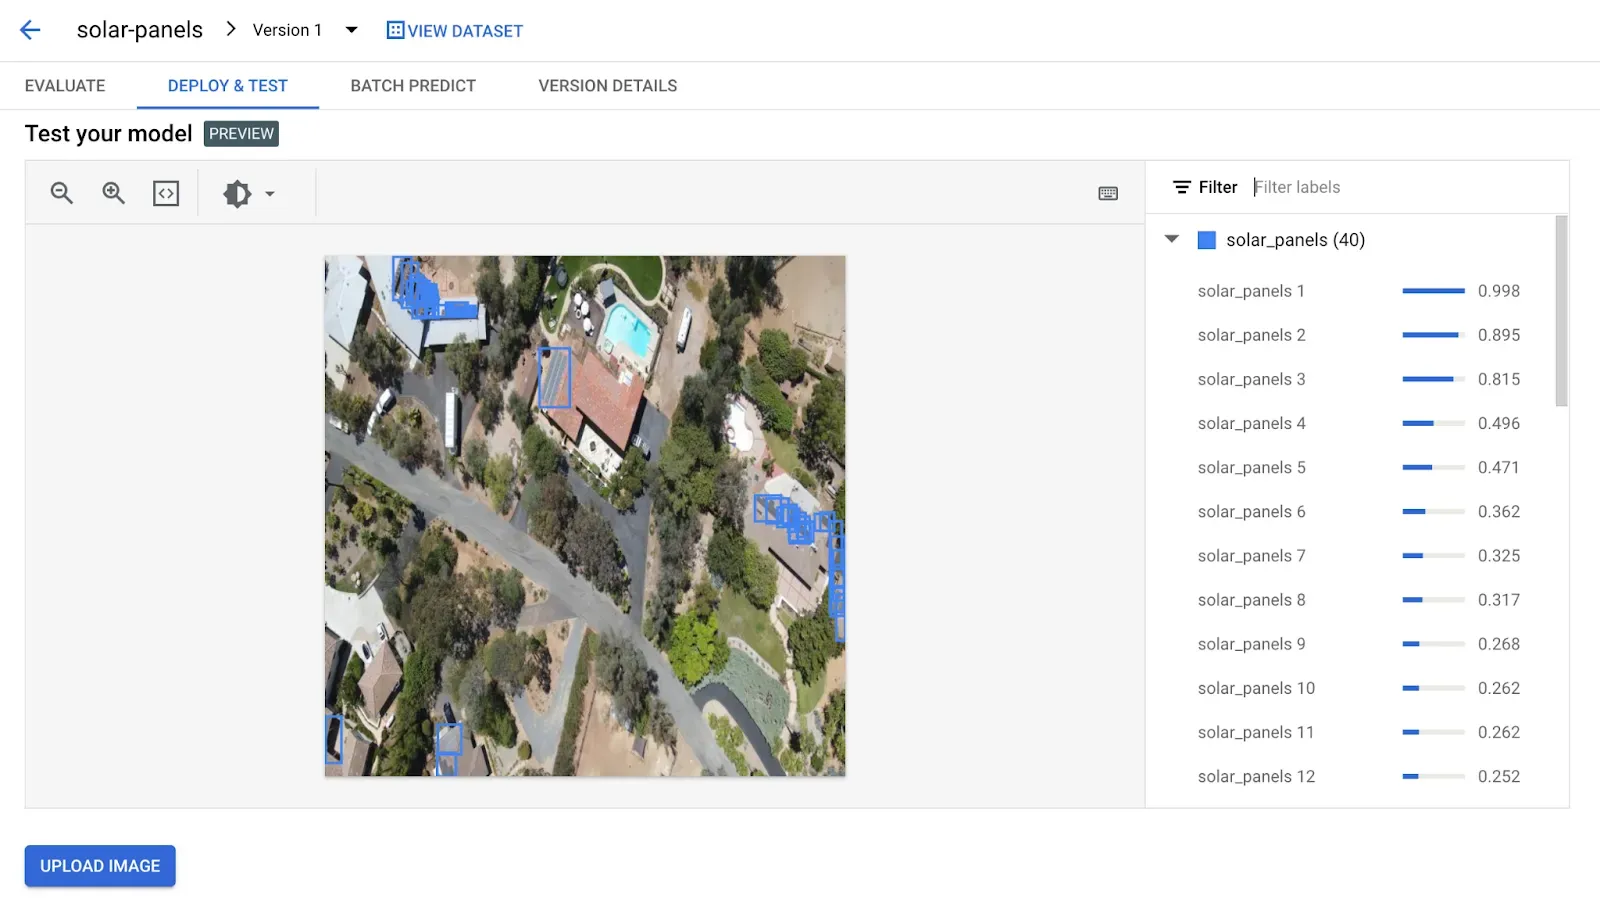
Our model identified solar panels in the image. There were a lot of predictions with a confidence under 0.3 which are inaccurate, but we could filter those out in post-processing.
Conclusion
Google’s Vertex AI offers tools to label data for, train, and deploy vision models. In this guide, we showed how to label data in Roboflow, generate augmentations for your data, and import your data into Vertex AI for use in training and deploying a model.
Roboflow also offers tools to train and deploy your model. It only takes a few clicks to train a model with Roboflow and you can test your model without having to deploy an endpoint manually. You can train models using the dataset you uploaded and annotated in Roboflow earlier in the guide. Learn more about Roboflow’s model training and deployment offerings.
Cite this Post
Use the following entry to cite this post in your research:
James Gallagher. (Sep 28, 2023). Train a Computer Vision Model with Vertex AI. Roboflow Blog: https://blog.roboflow.com/vertex-ai-vision-how-to-train/