
Vision-Language Models (VLMs) are multimodal large language models capable of jointly understanding and reasoning over both images and text.
They include proprietary models such as Gemini 3 and GPT-5, as well as open-source alternatives like Qwen 3 and LLaMA 3. These models combine visual perception with language understanding to enable more contextual and flexible AI systems.
A Vision-Language Pipeline builds on top of these VLMs to power a broad range of computer vision applications, including object detection, visual question answering, image captioning, and multimodal reasoning.
Instead of treating vision and language as separate components, such pipelines integrate them into a unified workflow, enabling systems that are more adaptive, interactive, and capable of handling complex real-world tasks.
In this blog, we will explore different ways to run VLMs on Roboflow Workflows, as well as build a Vision-Language pipeline using VLMs with the help of Roboflow Workflows.
Building Vision-Language Pipelines with VLMs
Here are some commonly used vision–language pipelines:
- Image Captioning Pipelines: Generate contextual image descriptions for accessibility and automated tagging
- Visual Question Answering (VQA) Pipelines: Answer natural language questions about images to support analytics, education, and AI-driven customer support
- Grounded Detection + Language Reasoning Pipelines: Combine object detection models like YOLO, RF-DETR with vision-language reasoning to enable safety monitoring and industrial inspection
- OCR + Vision-Language Reasoning Pipelines: Extract and interpret text from images to automate document processing, invoice analysis, and compliance checks.
Different Ways to Run Vision-Language Models in Roboflow Workflows
Roboflow Workflows is a web-based tool for building visual AI workflows, allowing you to seamlessly chain multiple computer vision tasks such as object detection, depth estimation, bounding box visualization, and more.
Roboflow Workflows provides various methods for running and performing inference on VLMs. These techniques are detailed below:
1. Using Pre-Deployed VLM Blocks
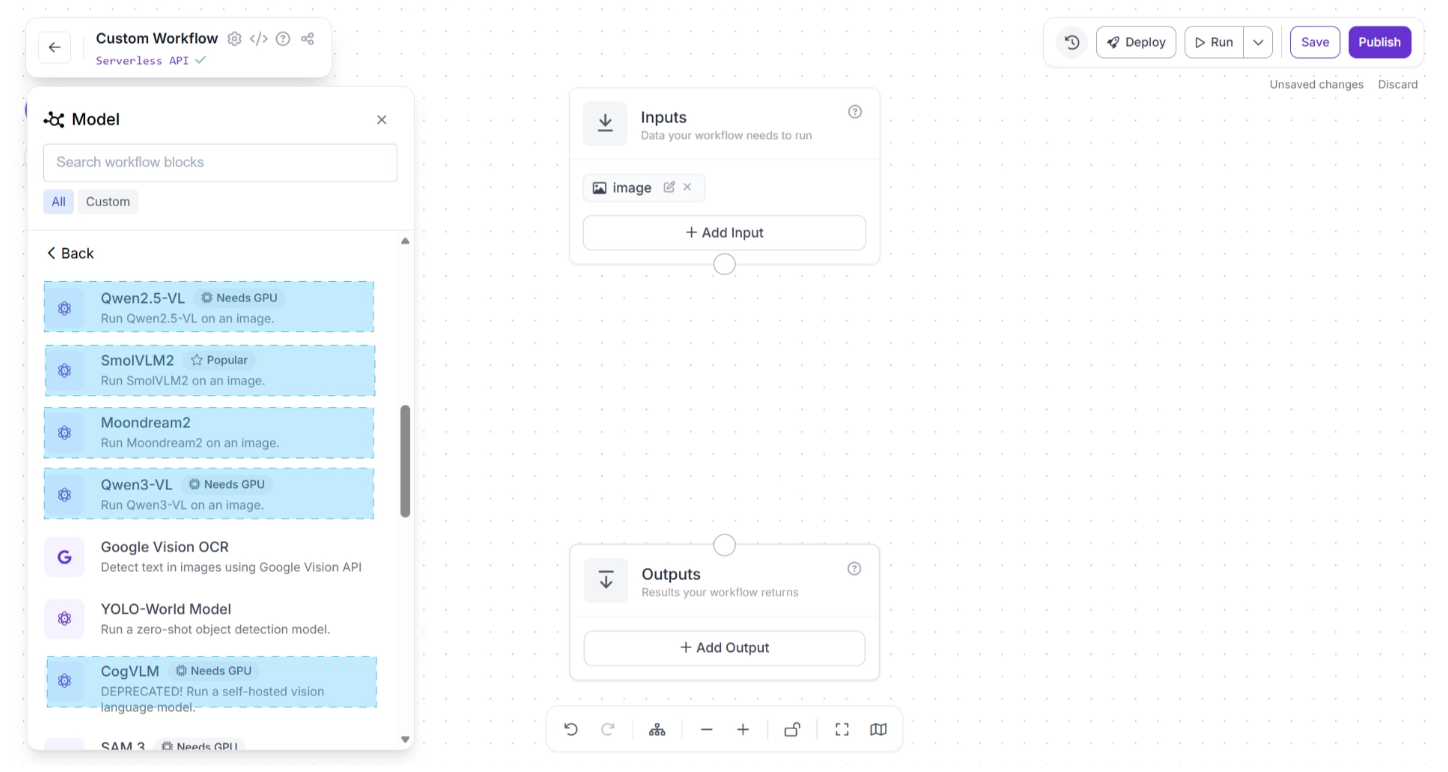
Roboflow provides pre-deployed Workflow blocks for several open-source Vision-Language Models (VLMs), including Qwen 3-VL, SmolVLM 2, and Moondream 2.
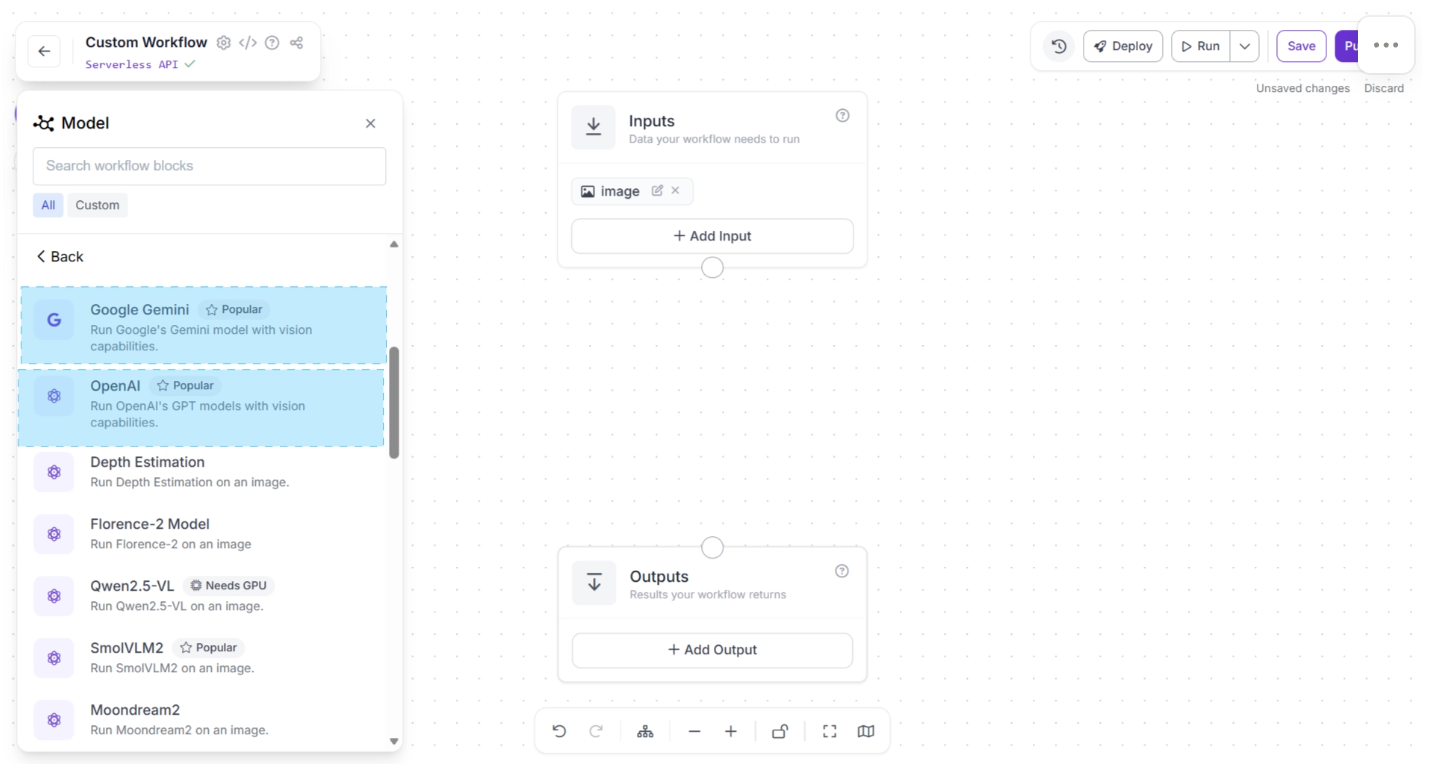
These models are ready to use, allowing you to integrate them into your workflow with just a few clicks without requiring manual deployment, as shown below in the Workflow Editor. You can choose from various pre-deployed models.
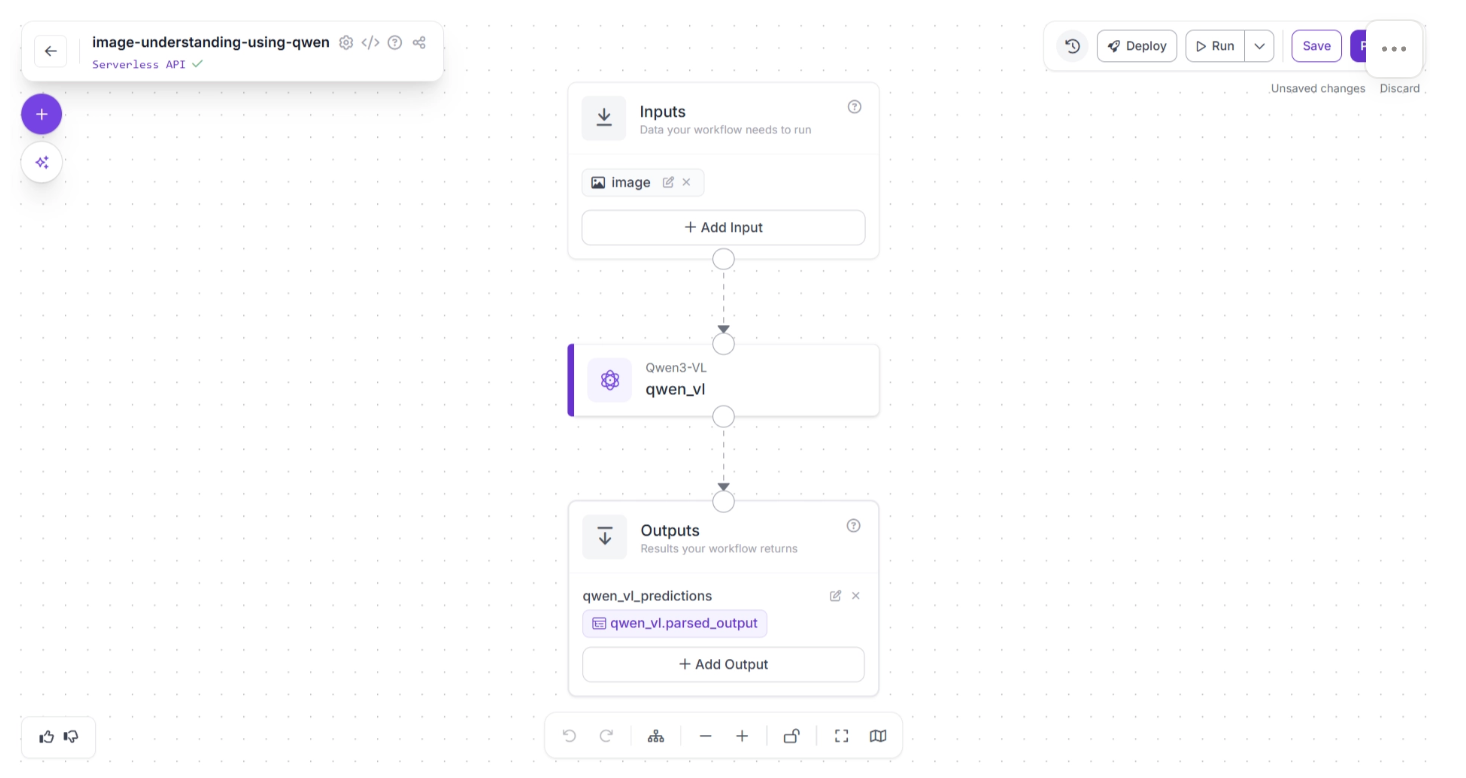
To add a model, simply click on it. The model will then be added as a workflow block. Once added, you can connect upstream and downstream blocks to it to control how inputs are passed to the VLM and how outputs are handled, transformed, or routed to other components, as shown below:
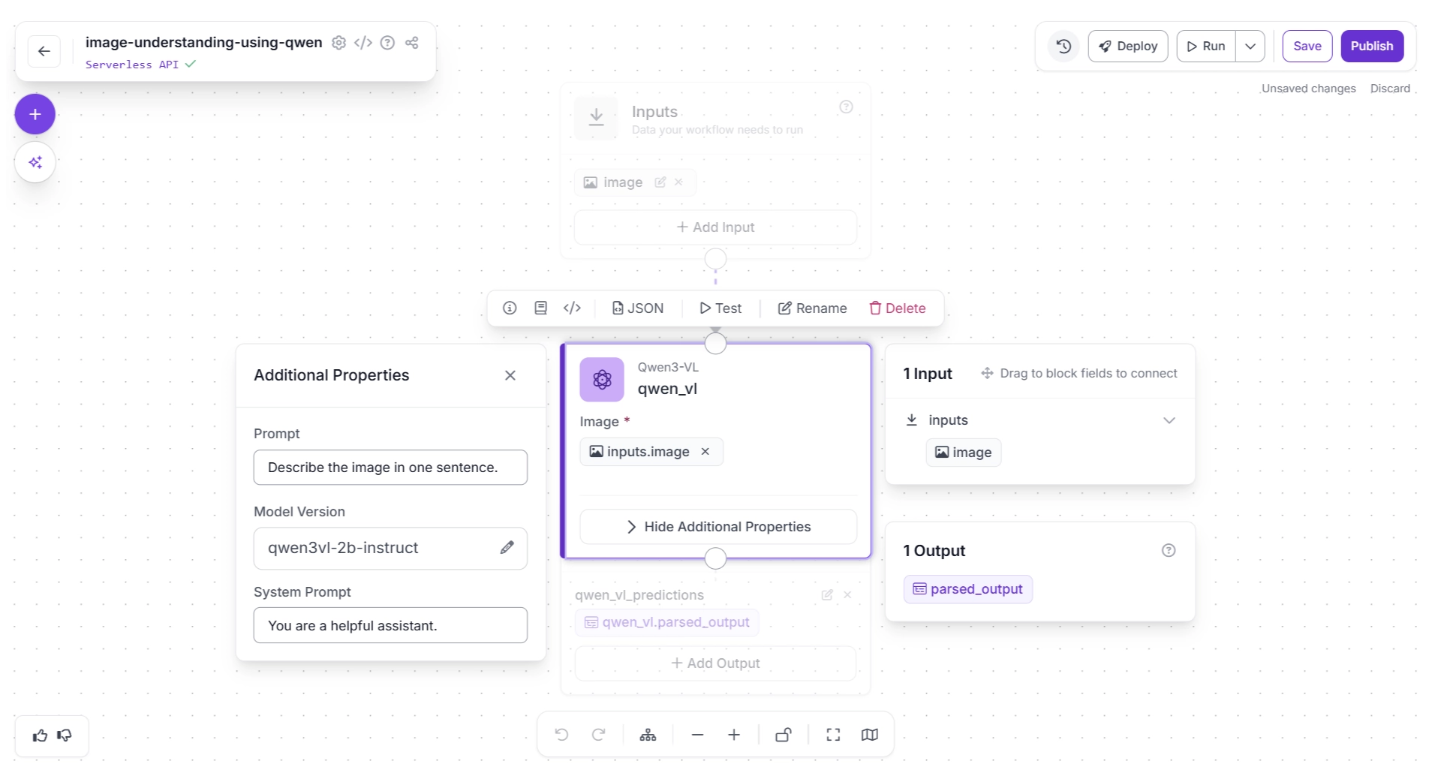
Each VLM block added is fully configurable, as shown below, where you can customize:
- The specific model version
- The system prompt to guide behavior and reasoning style
- The user prompt for task-specific instructions
You can try the Qwen3-VL workflow demonstrated above here.
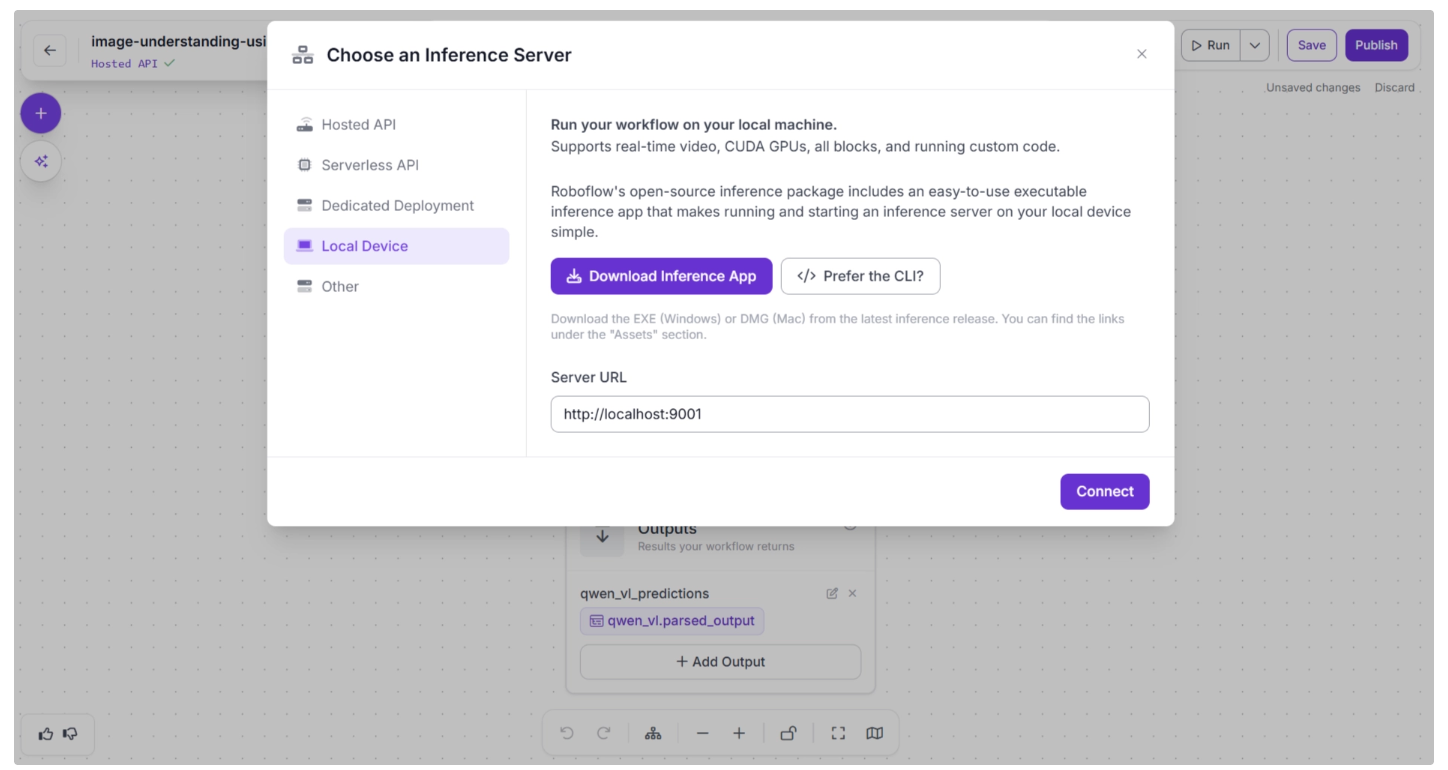
You can also configure where to run the model by selecting one of the Inference Server options for your workflow. This determines where the workflow is executed, which in turn determines where the model runs.
To change this setting, click the blue “Serverless API” or “Hosted API text” in the top-left corner.
A pop-up menu will appear, as shown below, allowing you to select your preferred inference server.
- If you choose Serverless API or Hosted API, the model runs on Roboflow’s cloud infrastructure.
- For larger or more resource-intensive VLMs, the Serverless or Hosted options may not be sufficient. In such cases, you can use Dedicated Deployments, which provides a cloud GPU at the cost of Roboflow credits.
- Alternatively, you can run the model locally on your own device.
2. Using Pre-Built API Integration Blocks
Several proprietary Vision-Language Models (VLMs), such as Google Gemini and OpenAI models, are available exclusively through API access.
Roboflow Workflows provides dedicated API integration blocks, as shown below, which allow you to use these models in your workflow without writing any boilerplate code.
Once added to your workflow, you can easily connect upstream and downstream blocks to control how inputs are sent to the VLM and how outputs are processed.
Roboflow Workflows also includes a JSON Parser block, which allows you to convert structured JSON string outputs from the VLM into JSON objects. JSON parser includes built-in validation and error handling (for example, detecting missing keys).
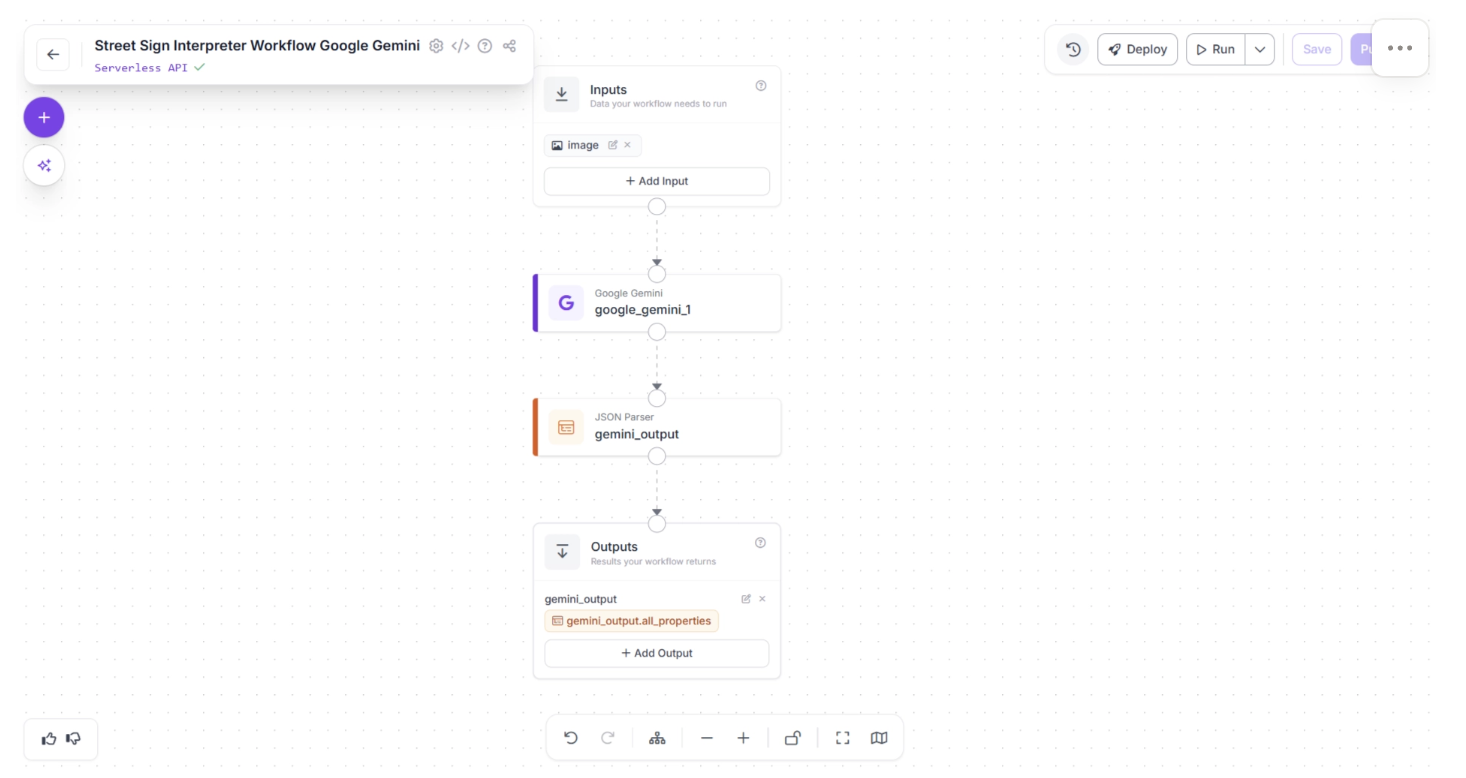
In the example below, a Google Gemini block is connected directly to a JSON Parser for structured output handling:
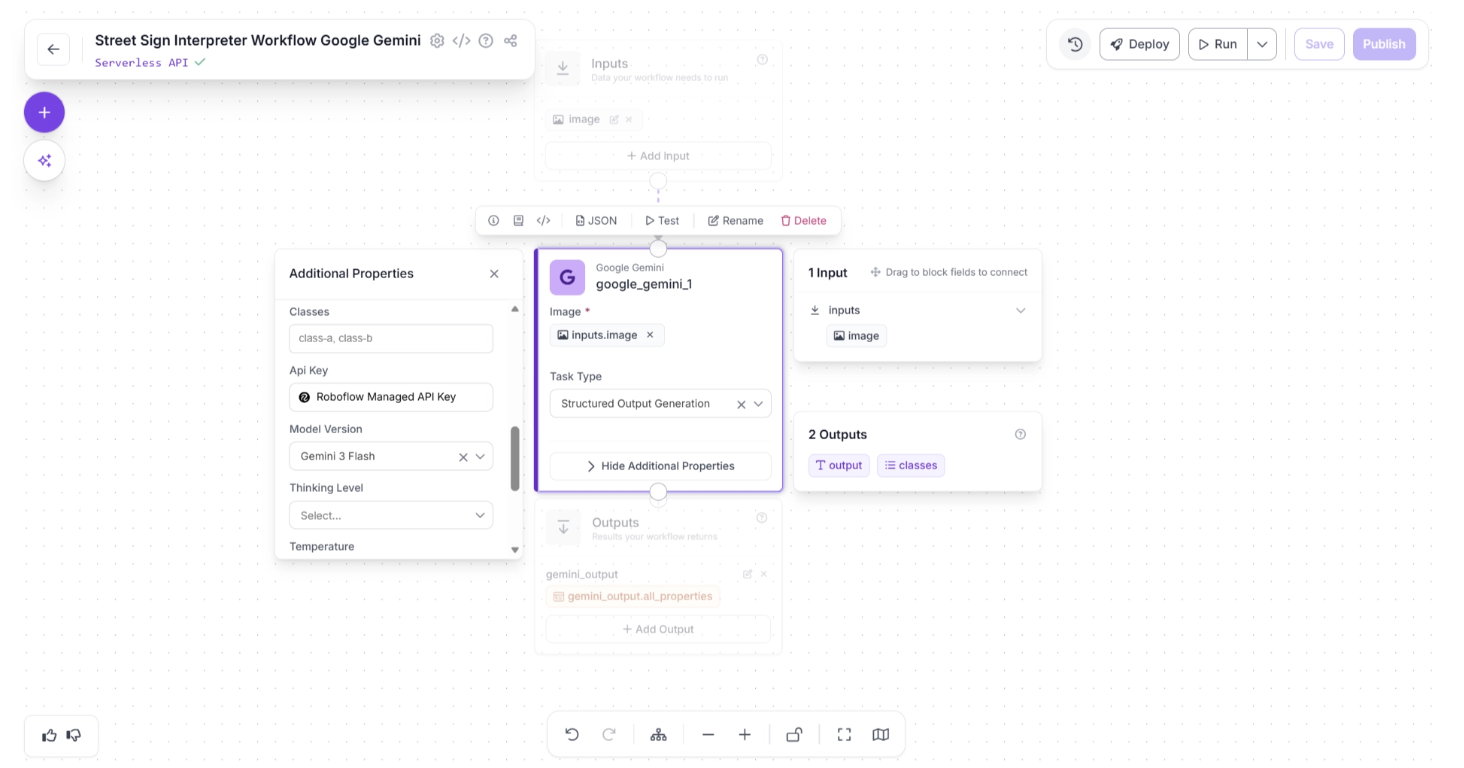
The Google Gemini block exposes configurable API parameters such as:
- Temperature (controls randomness)
- Thinking level (reasoning depth)
- Other model-specific generation settings
Additionally, you can choose between:
- Using a Roboflow-managed API key (no need to provide your own Gemini API key), or
- Providing your own Google Gemini API key for direct usage.
These parameters are shown below:
This flexibility makes it easy to integrate powerful proprietary VLMs into your workflows while maintaining full control over configuration and output handling.
You can try the Google Gemini workflow (Street Sign Interpreter) demonstrated above here.
3. Using Direct API Calls via Custom Code Blocks
Vision-Language Models (VLMs) are evolving rapidly, with new models frequently introduced that outperform previous ones on various benchmarks. To support this fast-paced ecosystem, Roboflow Workflows provides a flexible solution: the Custom Python Block.
This block allows you to write your own API calls directly inside the workflow, enabling you to integrate any VLM, even if it is not available as a pre-deployed block.
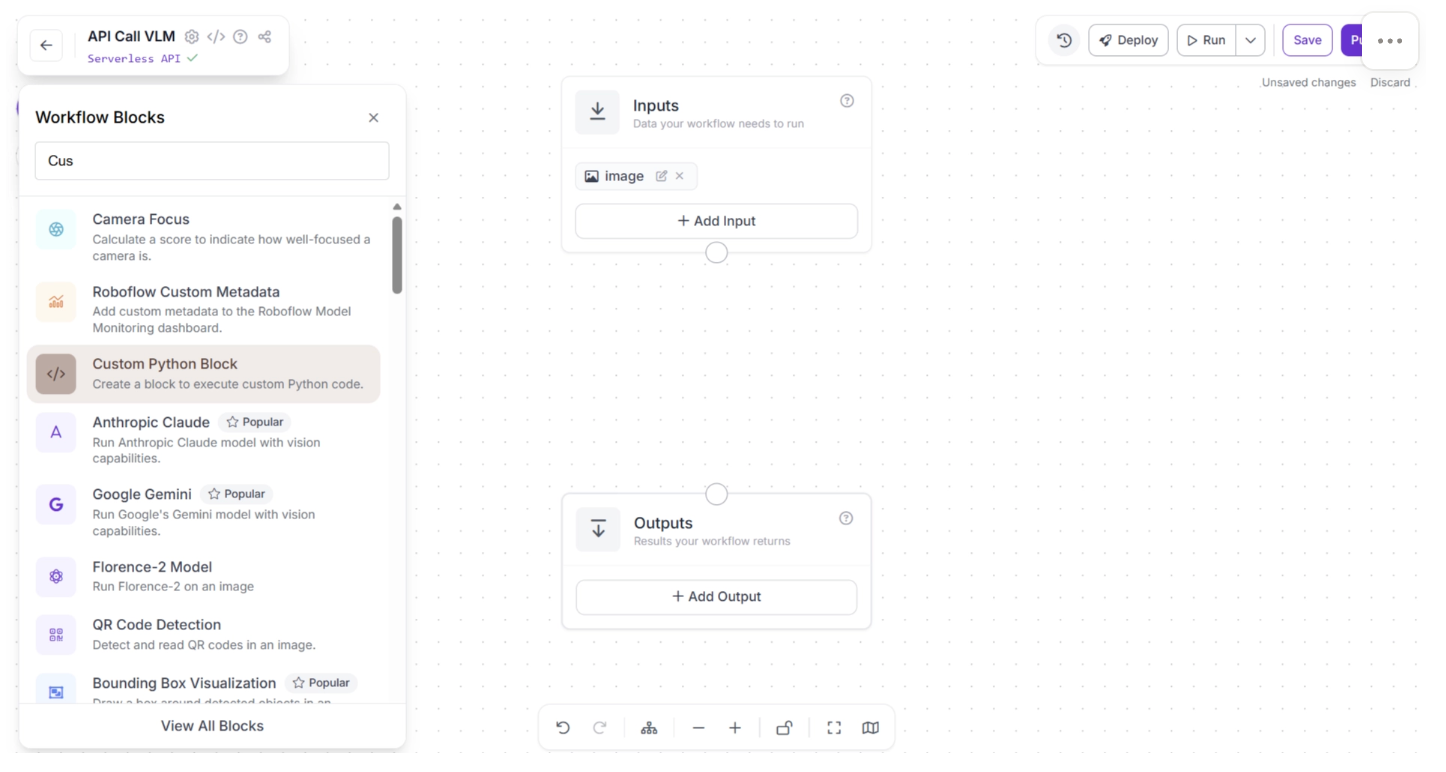
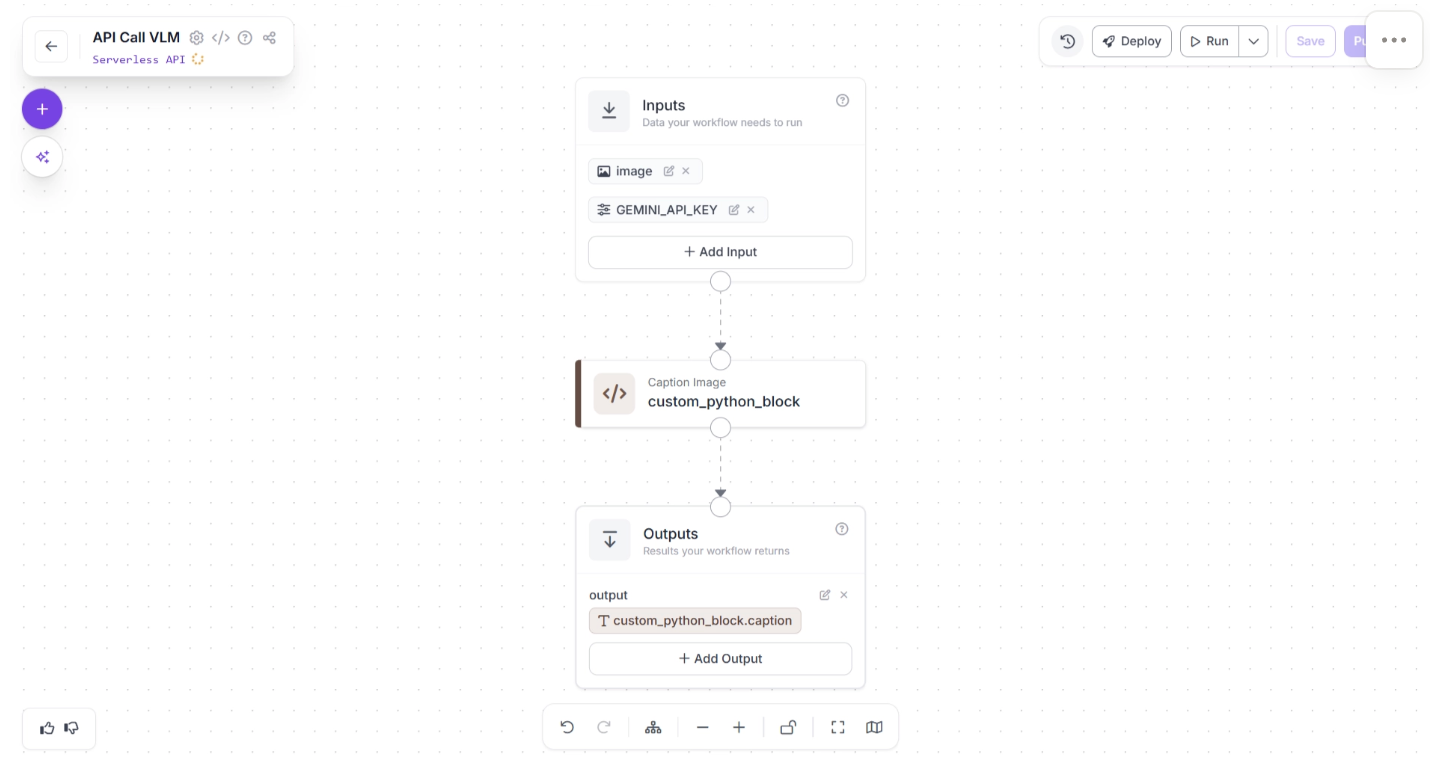
You can add the “Custom Python Block” by searching for it in the Workflow Blocks, as shown below:
Once the block is added to your workflow, you can connect it to upstream and downstream components to control how data flows through your pipeline. By clicking the Edit Code button, you can customize the behavior of the block:
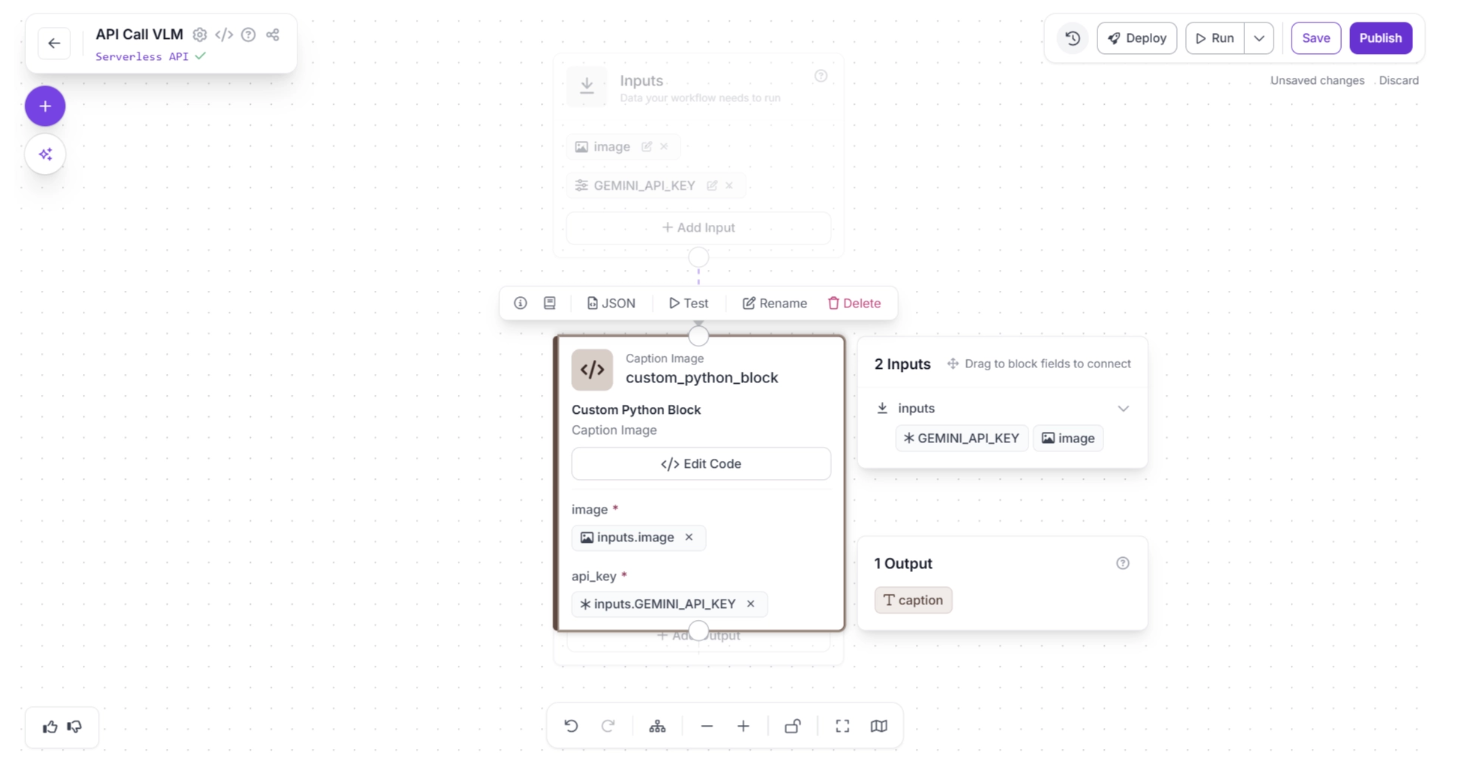
The “Edit Code” interface allows you to configure:
- Block name
- Description
- Inputs and outputs
- The Python logic that transforms inputs into outputs

For example, the code below, used in the “Python Code” section shown in the image above, demonstrates how to make an API call to Google Gemini.
import requests
import base64
import json

def run(self, image, api_key) -> BlockResult:
    model_id = "gemini-3-flash-preview"
    url = f"https://generativelanguage.googleapis.com/v1beta/models/{model_id}:generateContent?key={api_key}"

    payload = {
        "contents": [
            {
                "role": "user",
                "parts": [
                    {"text": "Generate a caption for this image."},
                    {
                        "inlineData": {
                            "mimeType": "image/jpeg",
                            # "data": image_base64
                            "data": image.base64_image
                        }
                    }
                ]
            }
        ],
        "generationConfig": {
            "thinkingConfig": {
                "thinkingLevel": "MINIMAL"
            },
            "responseMimeType": "application/json",
            "responseSchema": {
                "type": "object",
                "properties": {
                    "caption": {"type": "string"}
                },
                "required": ["caption"]
            }
        }
    }

    headers = {"Content-Type": "application/json"}

    response = requests.post(url, headers=headers, json=payload)
    response.raise_for_status()

    result = response.json()
    caption_json = json.loads(
        result["candidates"][0]["content"]["parts"][0]["text"]
    )

    return {"caption" : caption_json["caption"]}
Similarly, you can write API calls to integrate other VLMs that are not natively available as workflow blocks.
You can also configure the block to accept the API key as an input parameter. This makes it easy to securely pass credentials into the Custom Python block when making external API calls.
This approach gives you maximum flexibility, allowing you to integrate any external VLM into your Roboflow Workflow while maintaining full control over request structure, response parsing, and data flow.
You can try the Direct API Calls via Custom Code Blocks workflow (Image Captioning) demonstrated above here.
Building an Automated Image Renaming Pipeline with a Vision-Language Model in Roboflow Workflows
With Roboflow Workflows, integrating a VLMs into our pipeline is easier than ever. To demonstrate this, we will use a VLM in Roboflow Workflows to create a workflow that generates filenames based on the context of the provided images and use it to rename random screenshots into organized, human-readable filenames that accurately reflect each image's content.
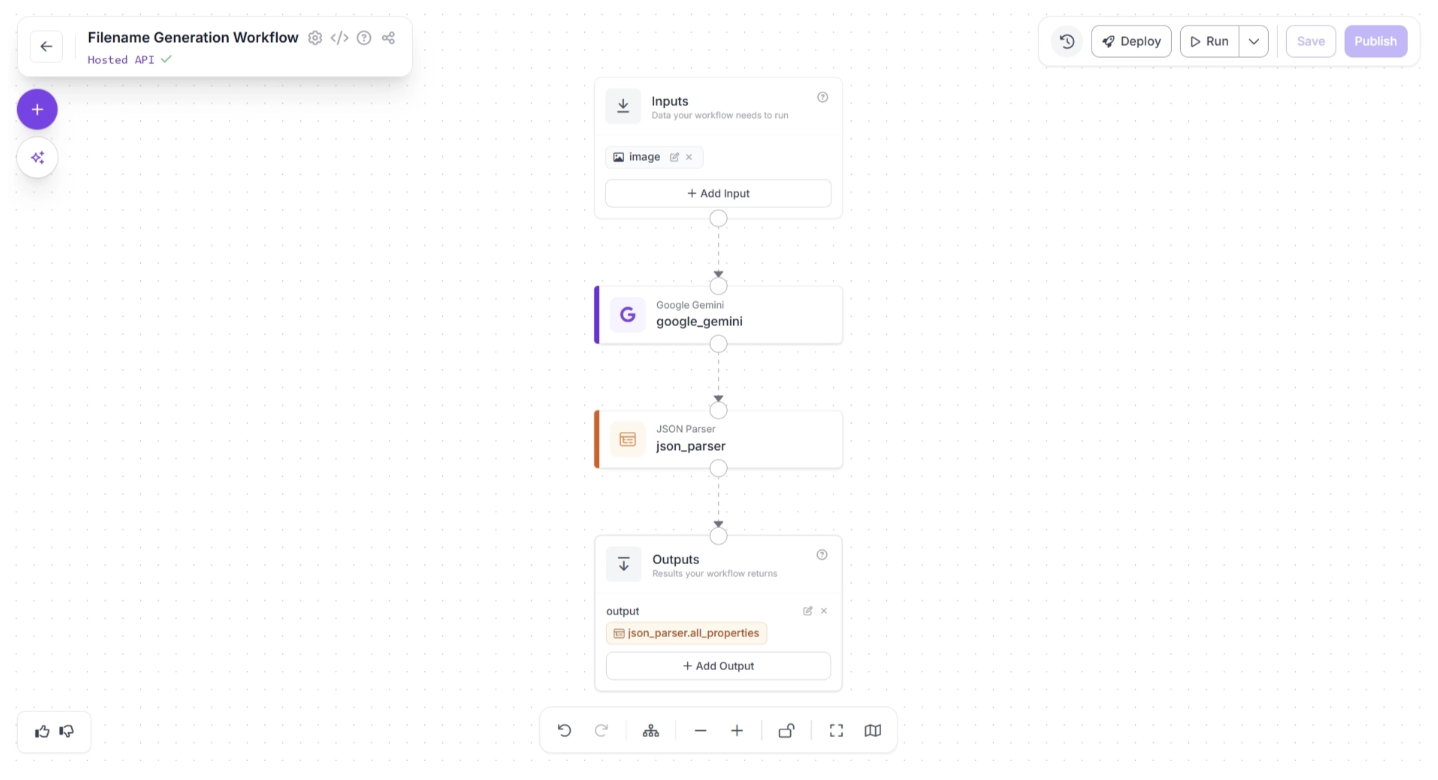
This is the filename generation workflow we will create.
Step 1: Setup Your Roboflow Workflow
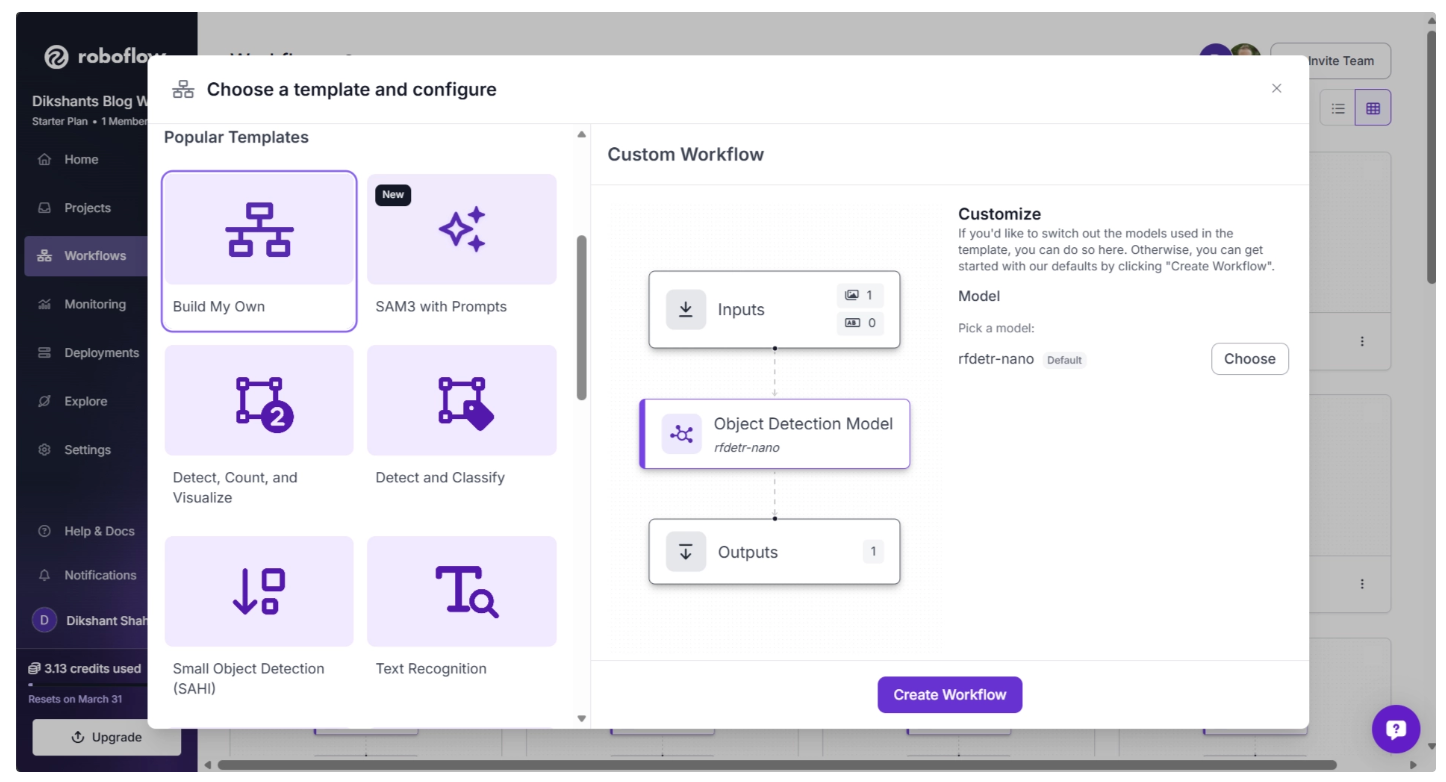
To get started, create a free account on Roboflow and log in. Then create a workspace, select “Workflows” from the left sidebar, and click the “Create Workflow” button.
This will open a modal like the one shown below, where you can choose from various templates for segmentation, OCR, background removal, and more.
In our case, we select “Build My Own,” which comes pre-integrated with an object detection model by default, as shown below:
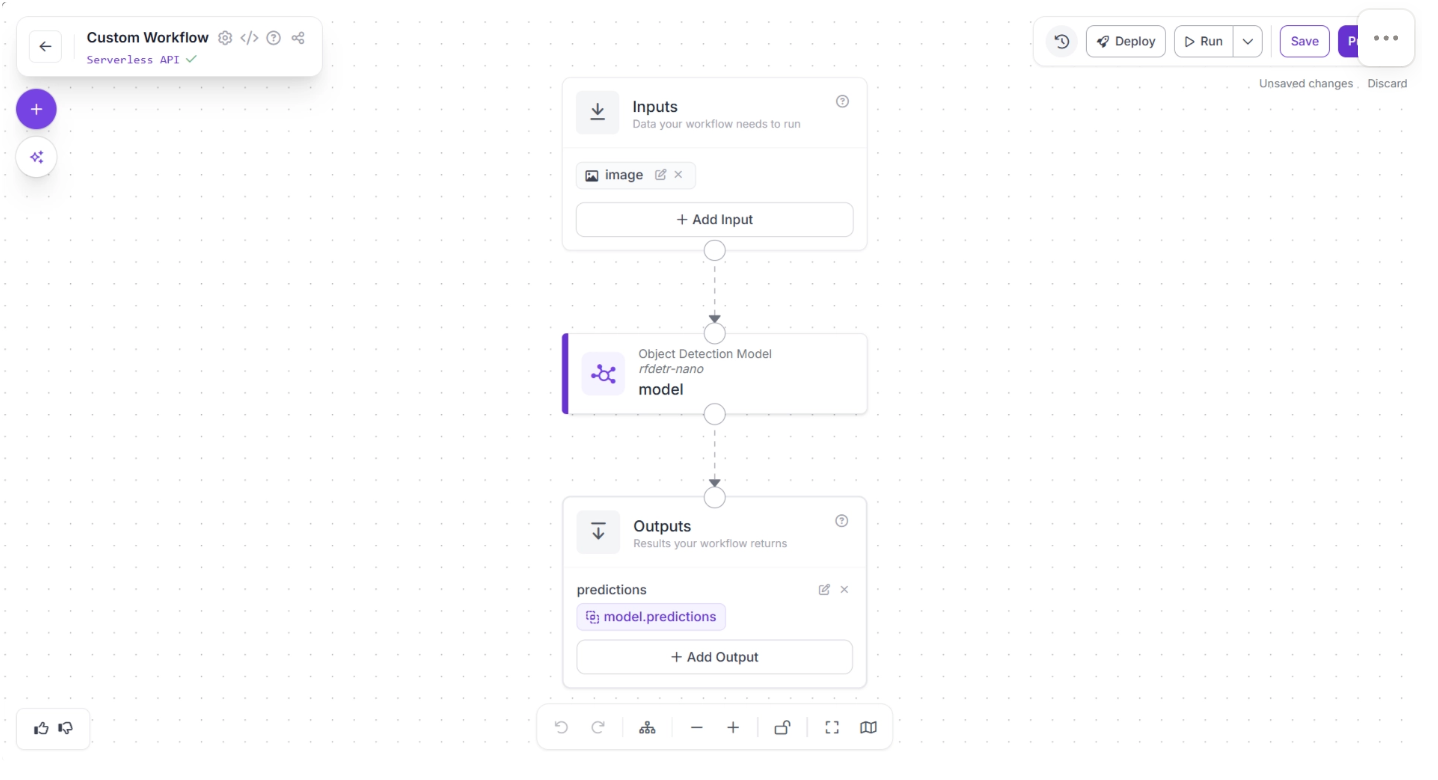
Then you’ll be taken to a blank workflow editor, ready to build your AI-powered workflow, where you’ll see three workflow blocks: Inputs, Outputs, and an Object Detection Model as shown below:
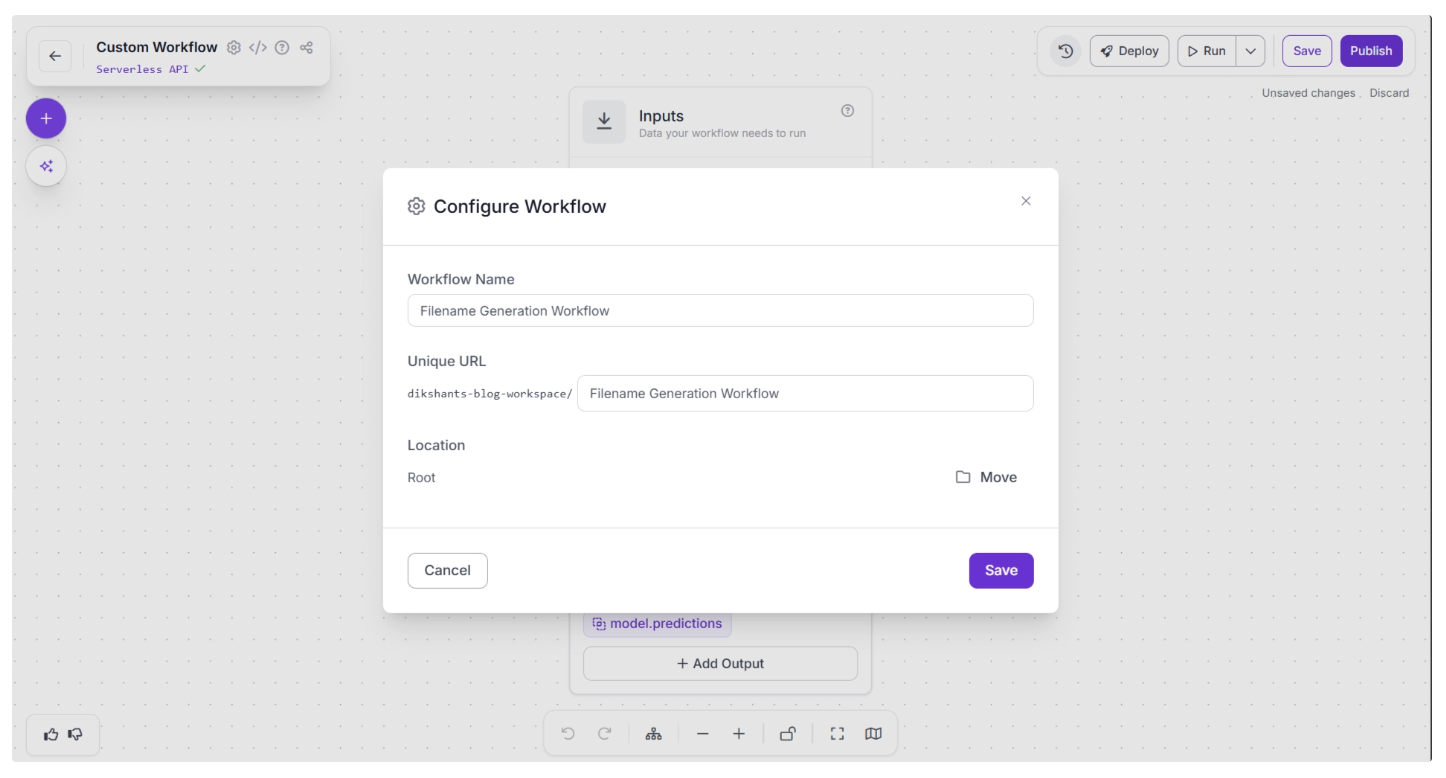
You can also configure the workflow name by clicking the ⚙️ icon in the top-left corner. This opens the workflow configuration modal, as shown below:
You can then return to the home page and, in the left sidebar under “Workflows,” open the renamed workflow to continue building.
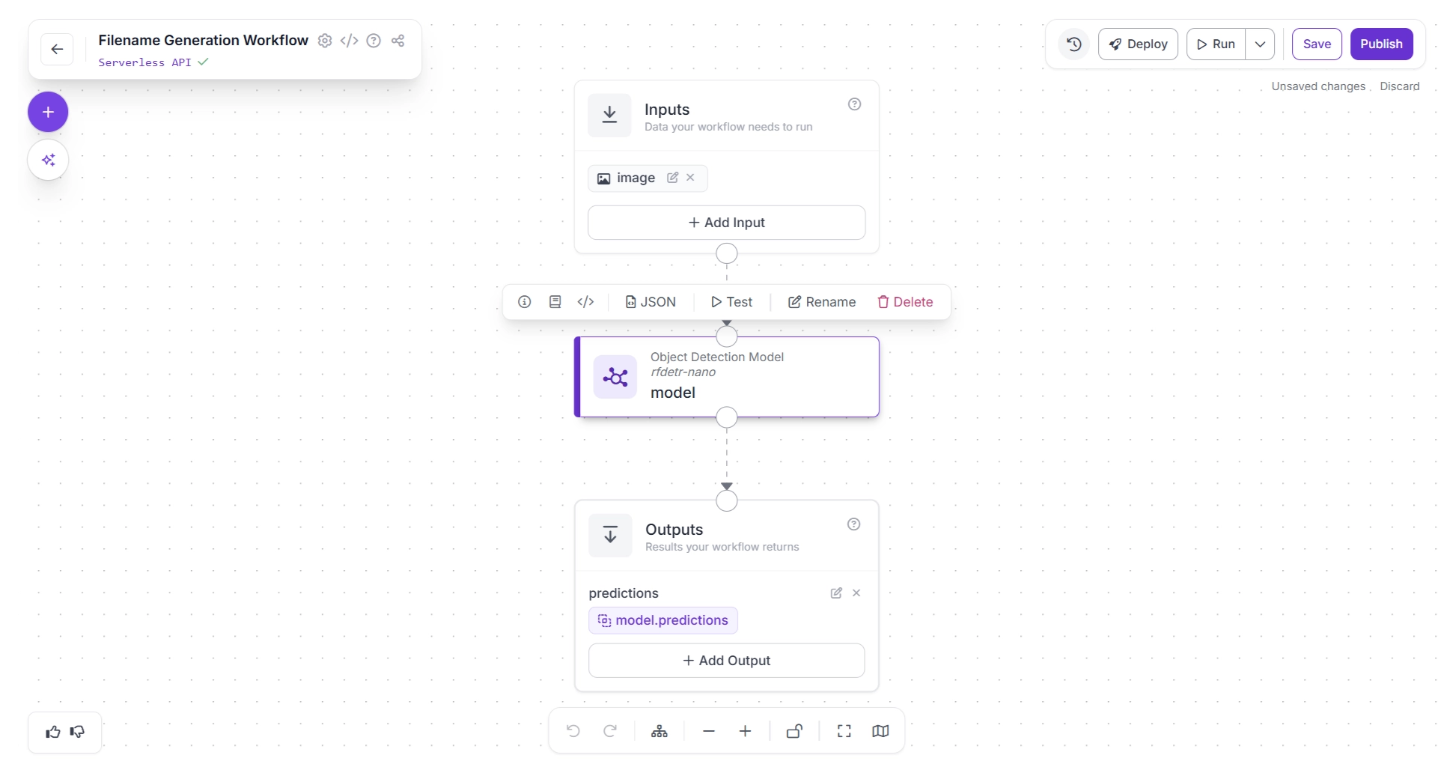
In our workflow, we do not require an Object Detection model, so you can delete it by selecting it and clicking the “Delete” button, as shown below:
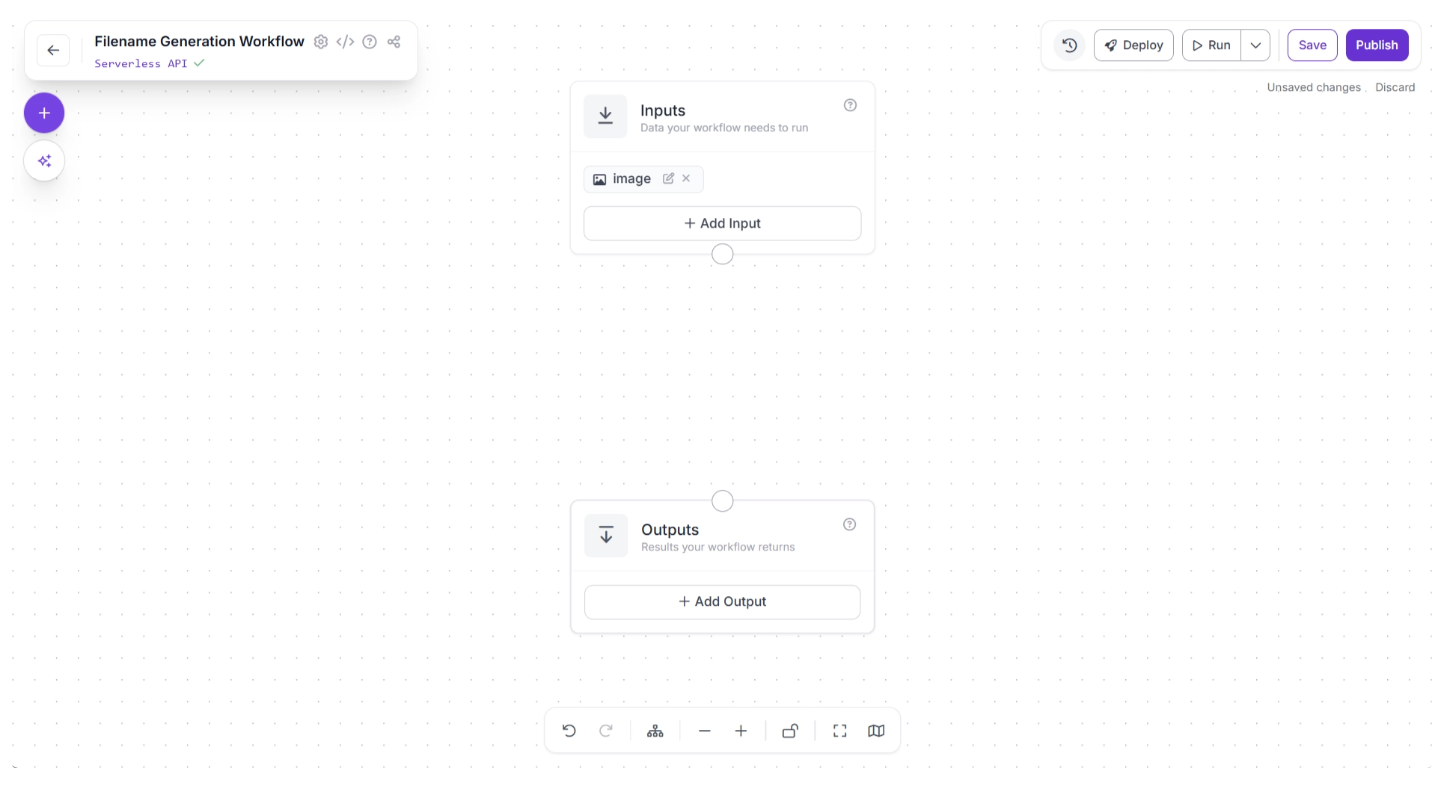
Once deleted your workflow should look like the one shown below:
Step 2: Add a Google Gemini Block
To generate a potential filename for an image, we will use Google Gemini. In Roboflow Workflows, Google Gemini is available as a pre-built workflow block, making it easy to integrate into your pipeline.
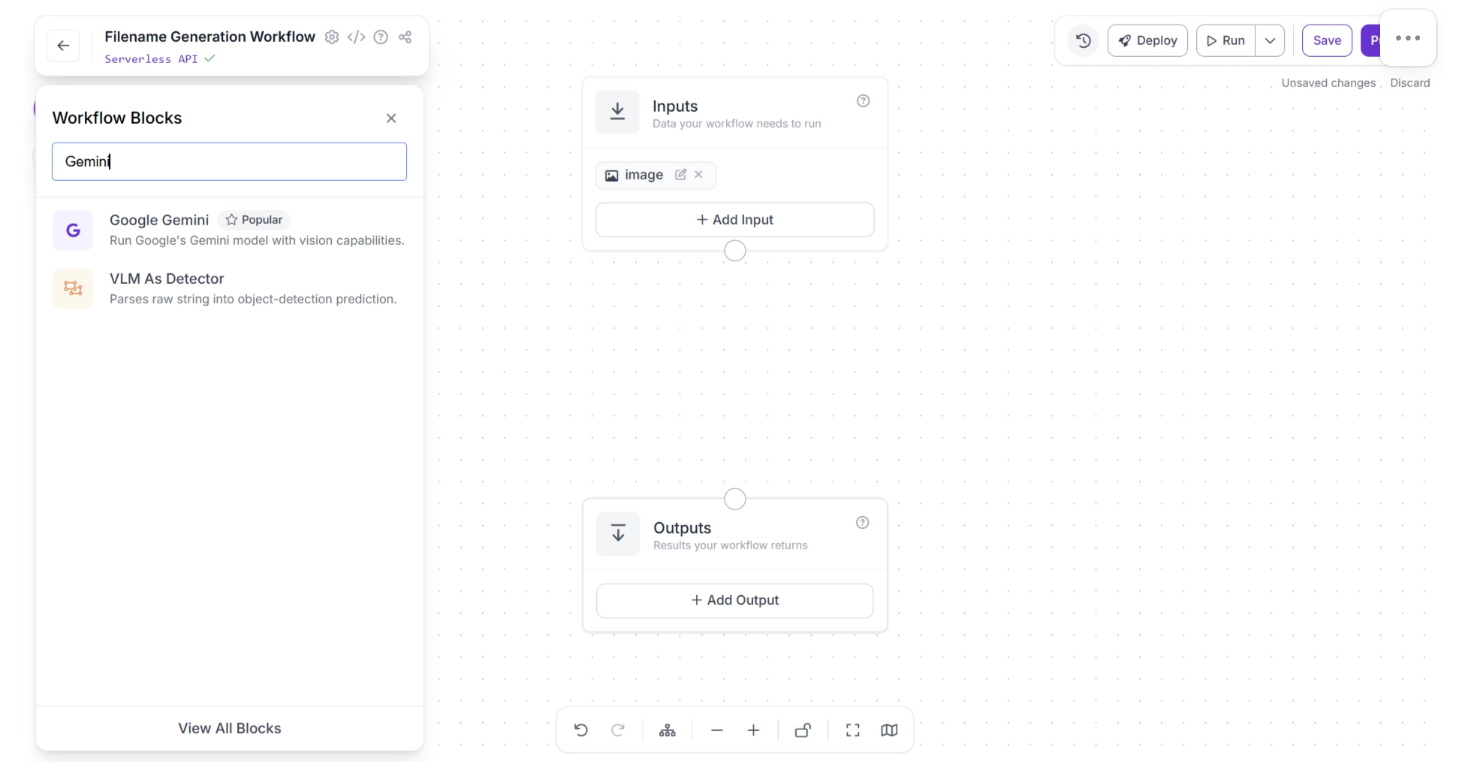
To add the block, click the “+” button in the top-left corner of the workflow editor. A pop-up menu showing the available workflow blocks will appear, as shown below. Search for “Google Gemini” and select it to insert it into your workflow.
Once added, the block will appear in the editor, as shown below.
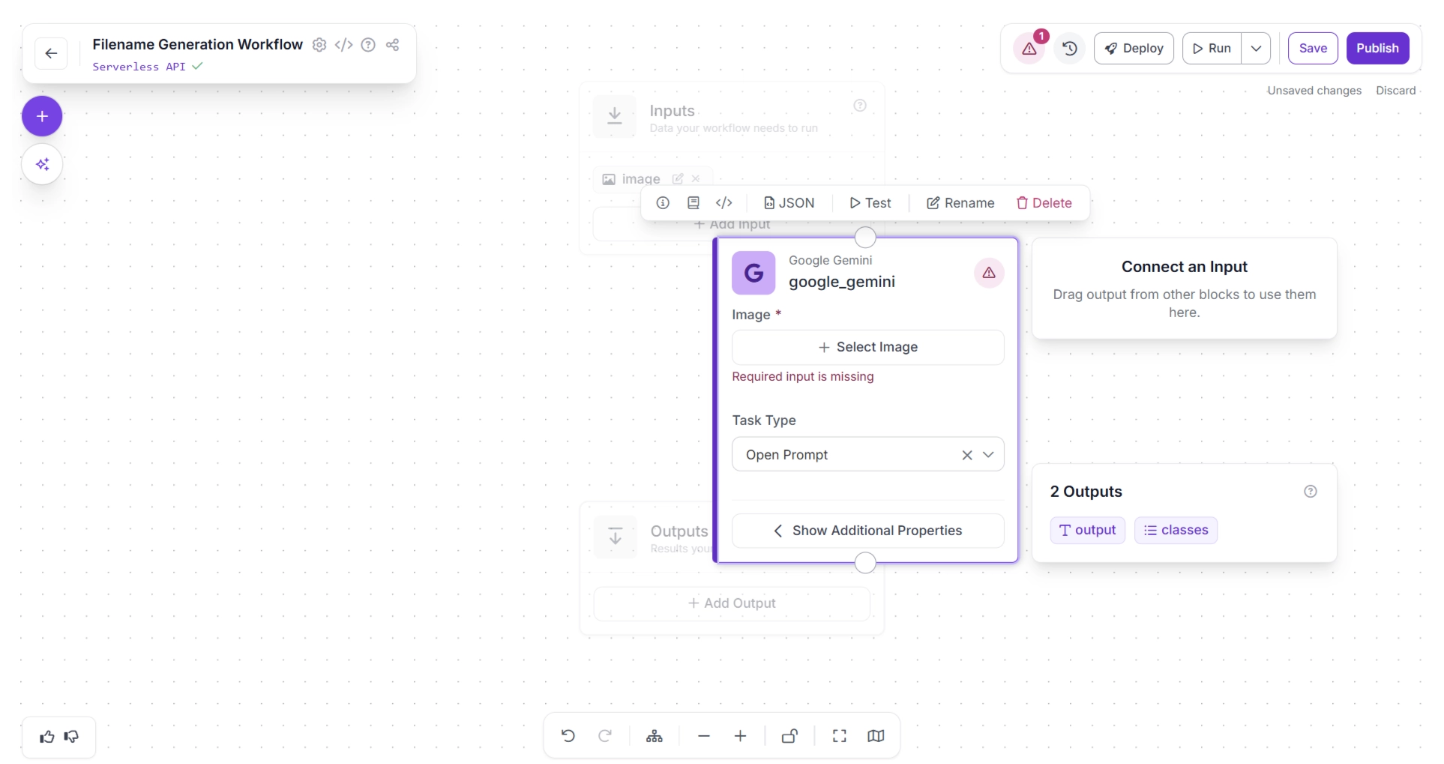
Next, create:
- A connection from the Inputs block to the Google Gemini block.
- Another connection from Google Gemini to the Outputs block.
This ensures that the predictions generated by Google Gemini are passed through the workflow and exposed as final outputs.
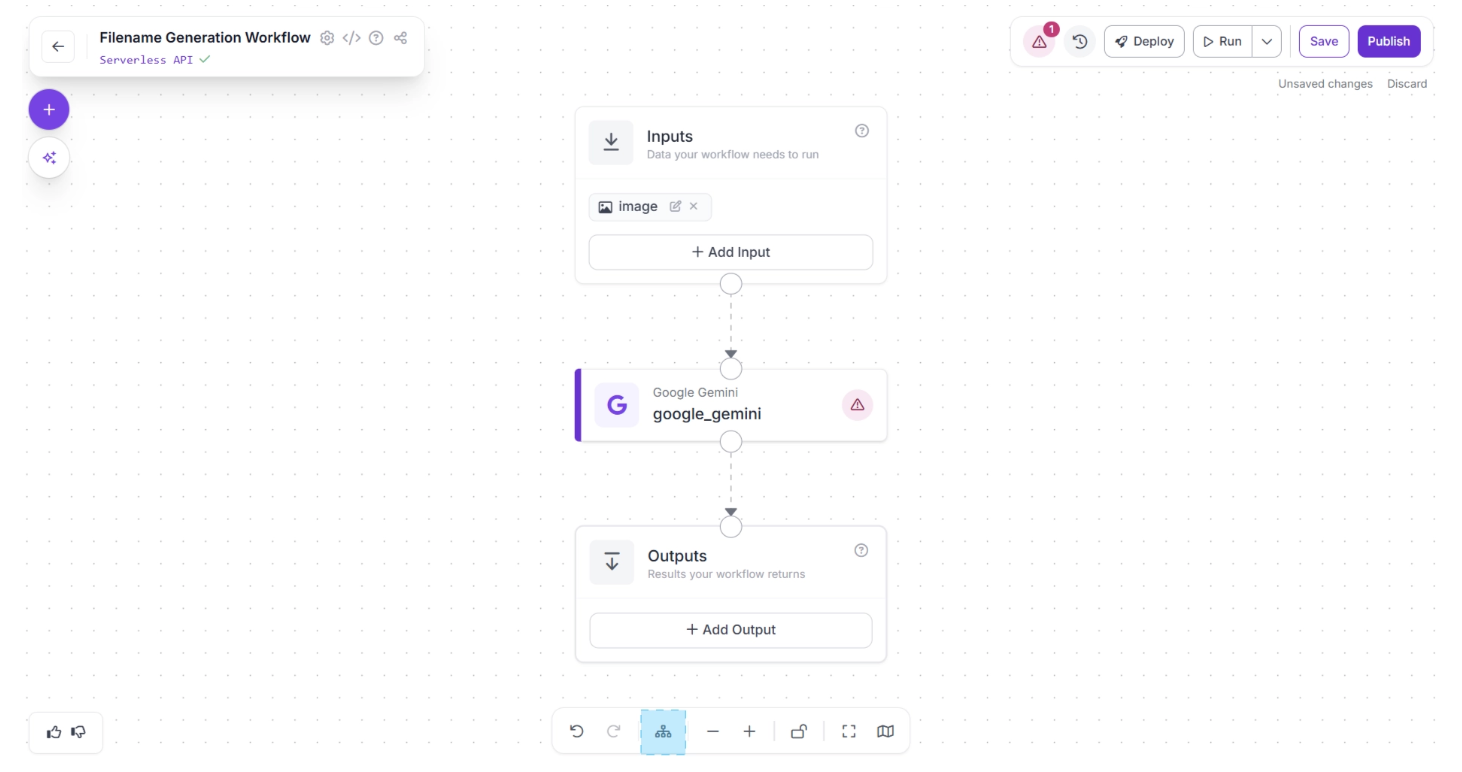
Next, click the Auto Layout button, located to the left of the Zoom In and Zoom Out controls in the bottom menu, to automatically organize your workflow layout. Your workflow should now appear as shown below:
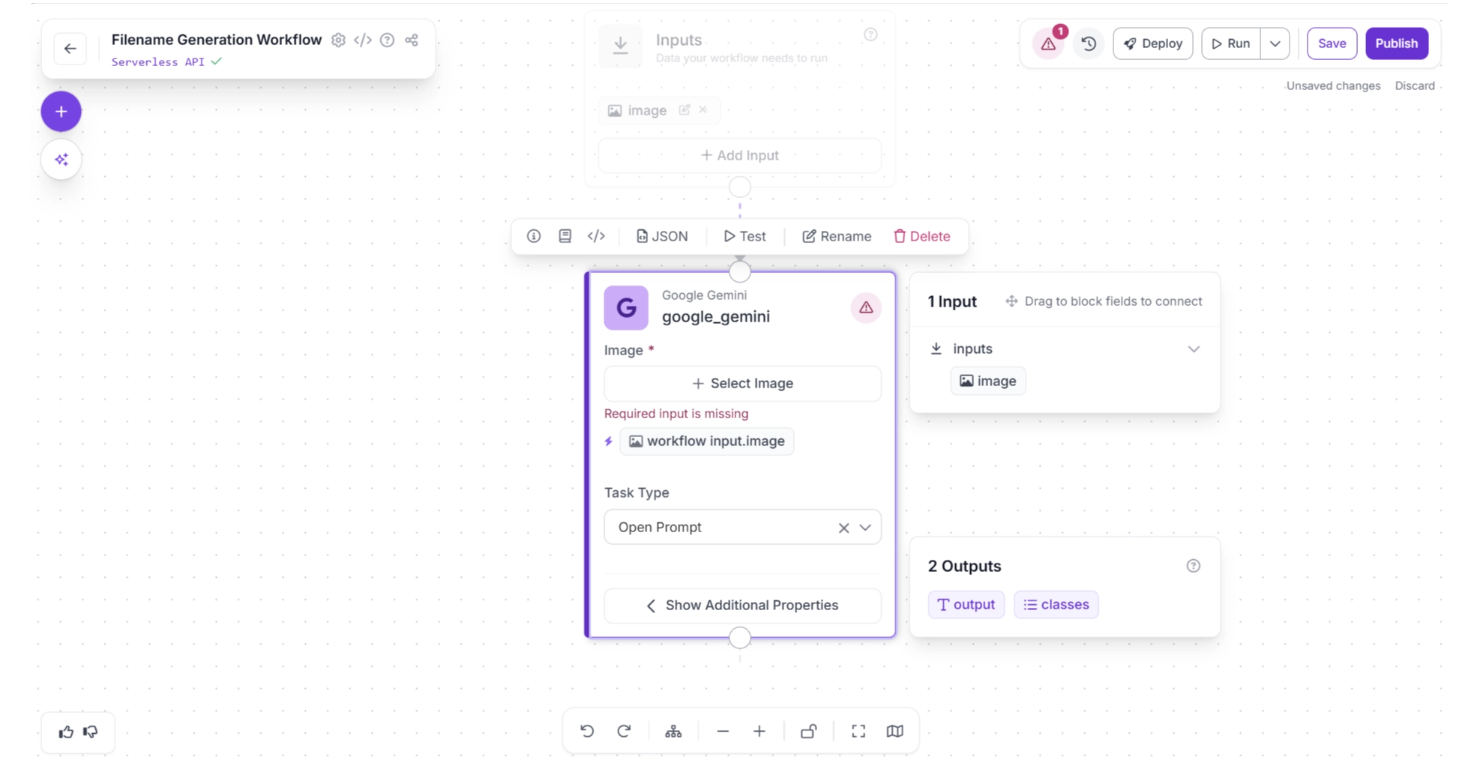
We want Gemini to return a structured response so the result can be easily consumed by downstream logic. To do this:
- Select the Google Gemini block.
- Set the Task Type to Structured Output Generation.
- Click “Show Additional Properties.”
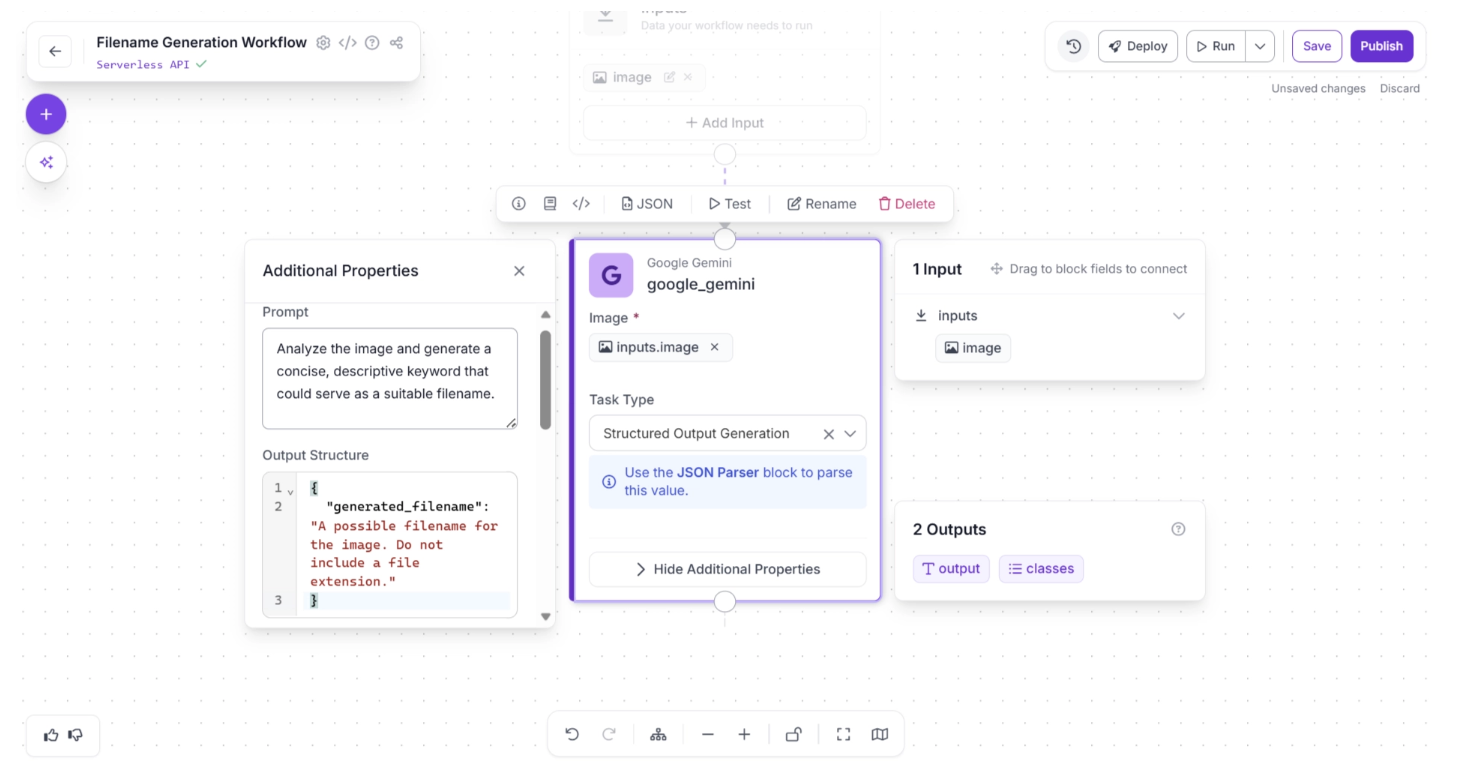
Now configure the prompt as: “Analyze the image and generate a concise, descriptive keyword that could serve as a suitable filename.”
Then define the Output Structure as:
{
  "generated_filename": "A possible filename for the image. Do not include a file extension."
}
This ensures that the model returns a clean, structured JSON response containing a usable filename without a file extension, as shown below:
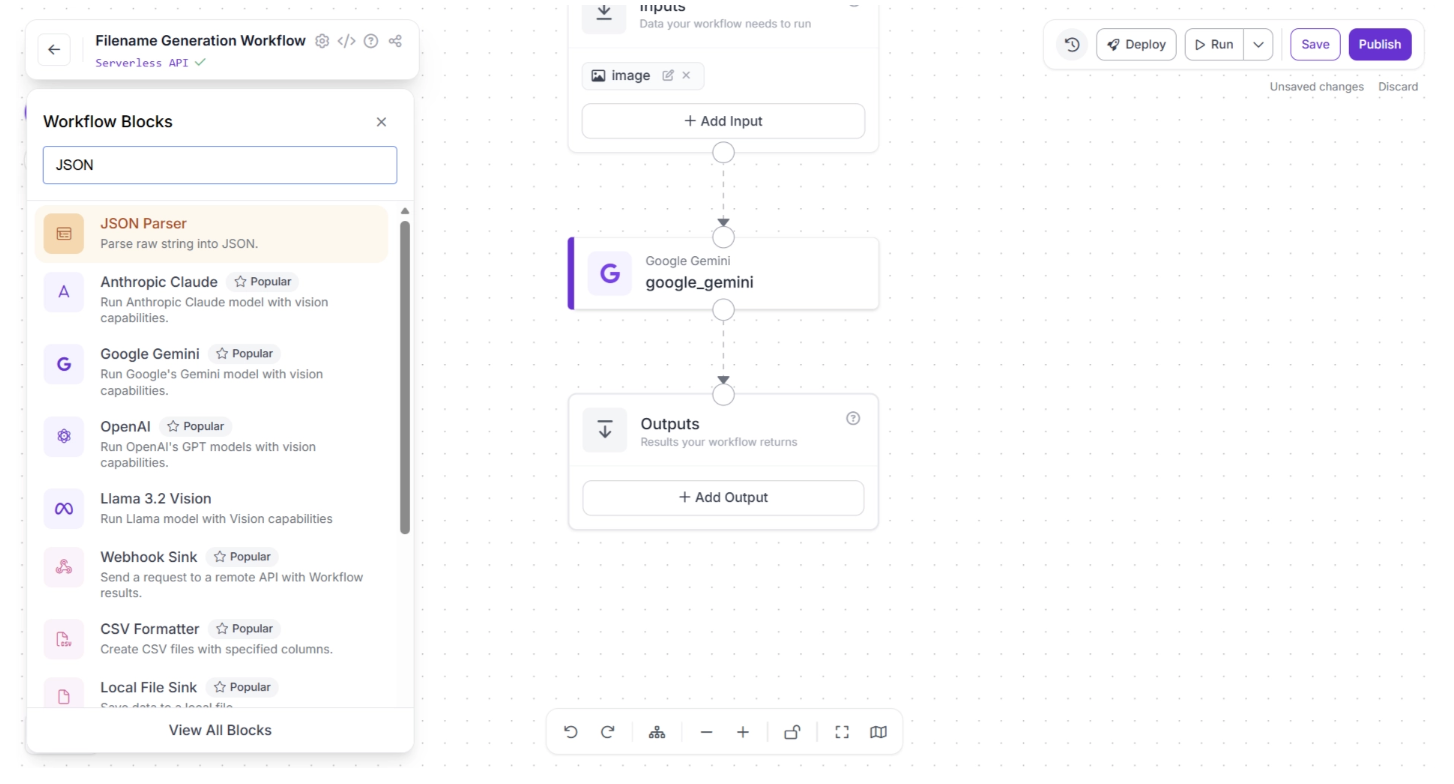
Step 3: Add a JSON Parser Block
The output from the Google Gemini block is returned as a raw string. To work with it as structured data, you need to parse it into JSON. Roboflow provides a JSON Parser block specifically for this purpose.
To add the block, click the “+” button in the top-left corner of the workflow editor. A pop-up menu displaying the available workflow blocks will appear. Search for “JSON Parser” and select it to insert it into your workflow, as shown below:
Once added, connect the Google Gemini block to the JSON Parser block, and then connect the JSON Parser block to the Outputs block, as shown below:
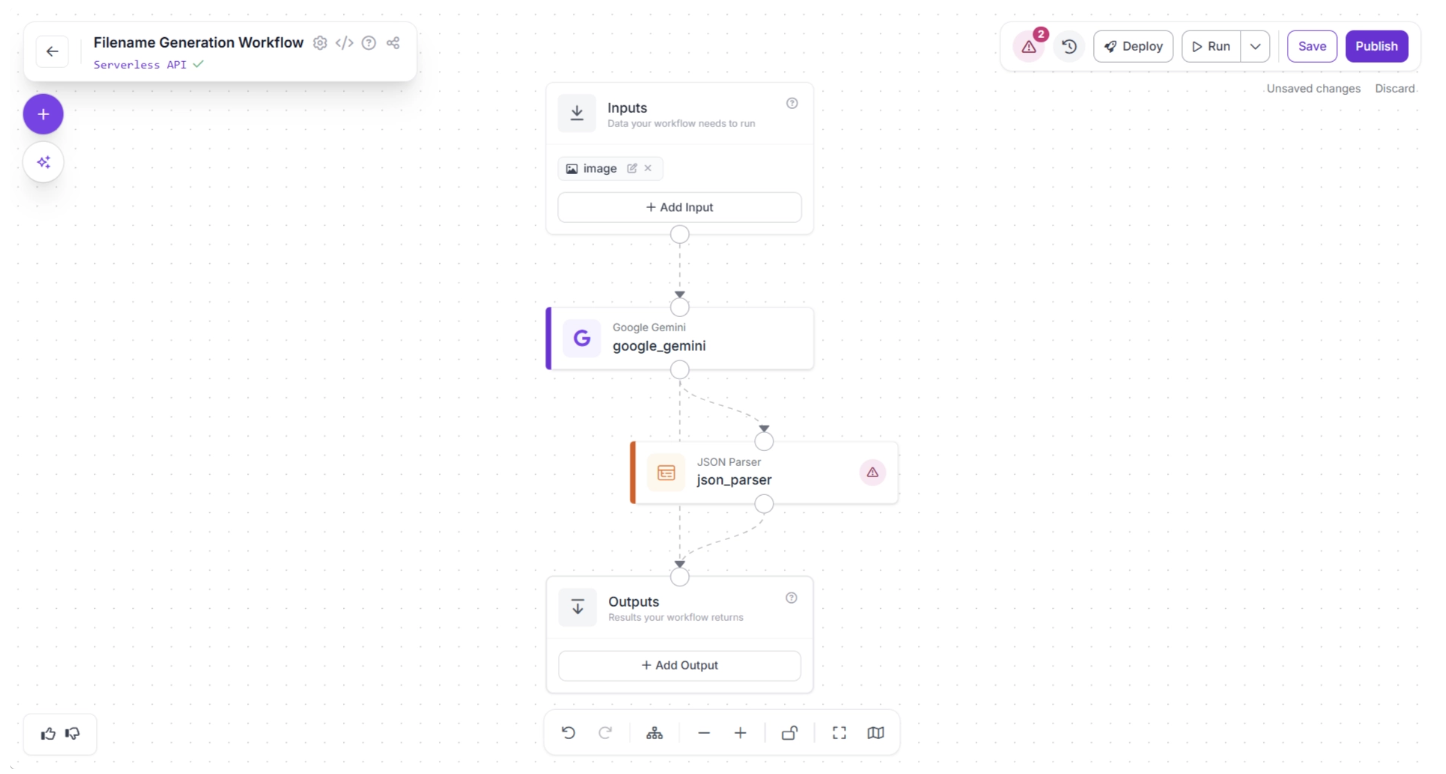
In the top-right corner of the workflow editor, to the left of the “Deploy” button, a warning (⚠️) icon may appear. This indicates that there may be errors in your workflow.
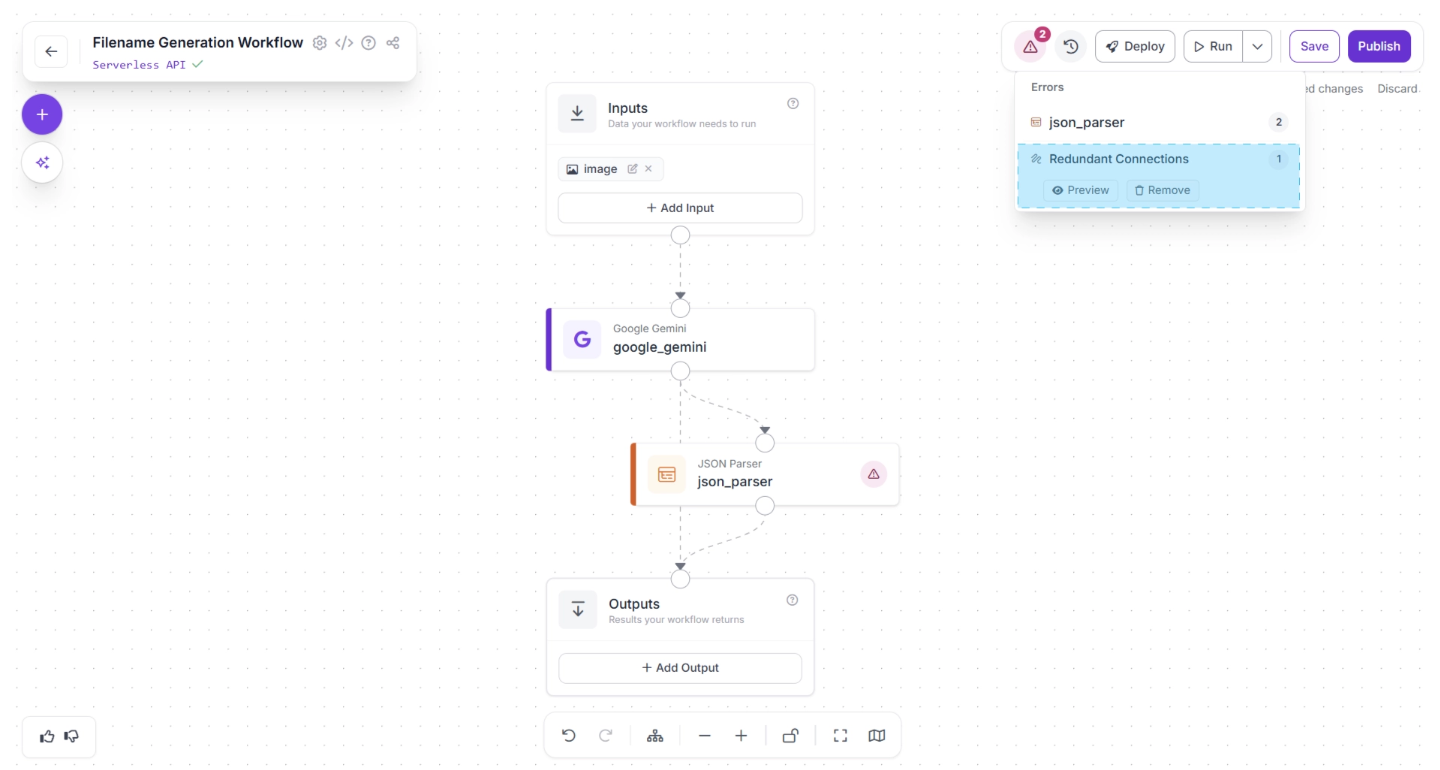
For example, in our case, clicking the warning icon shows a “Redundant connection” message. In Roboflow Workflows, the output of all upstream blocks is automatically available to downstream blocks.
Therefore, the output of the Google Gemini block is already available to the Outputs block through the JSON Parser block. A direct connection from the Google Gemini block to the Outputs block is redundant.
You can automatically remove the redundant connection by clicking the “🗑️ Remove” button, which appears in the warning popup menu when you click the warning (⚠️), as shown below:
Next, click the Auto Layout button to automatically organize your workflow layout. Your workflow should now appear as shown below:
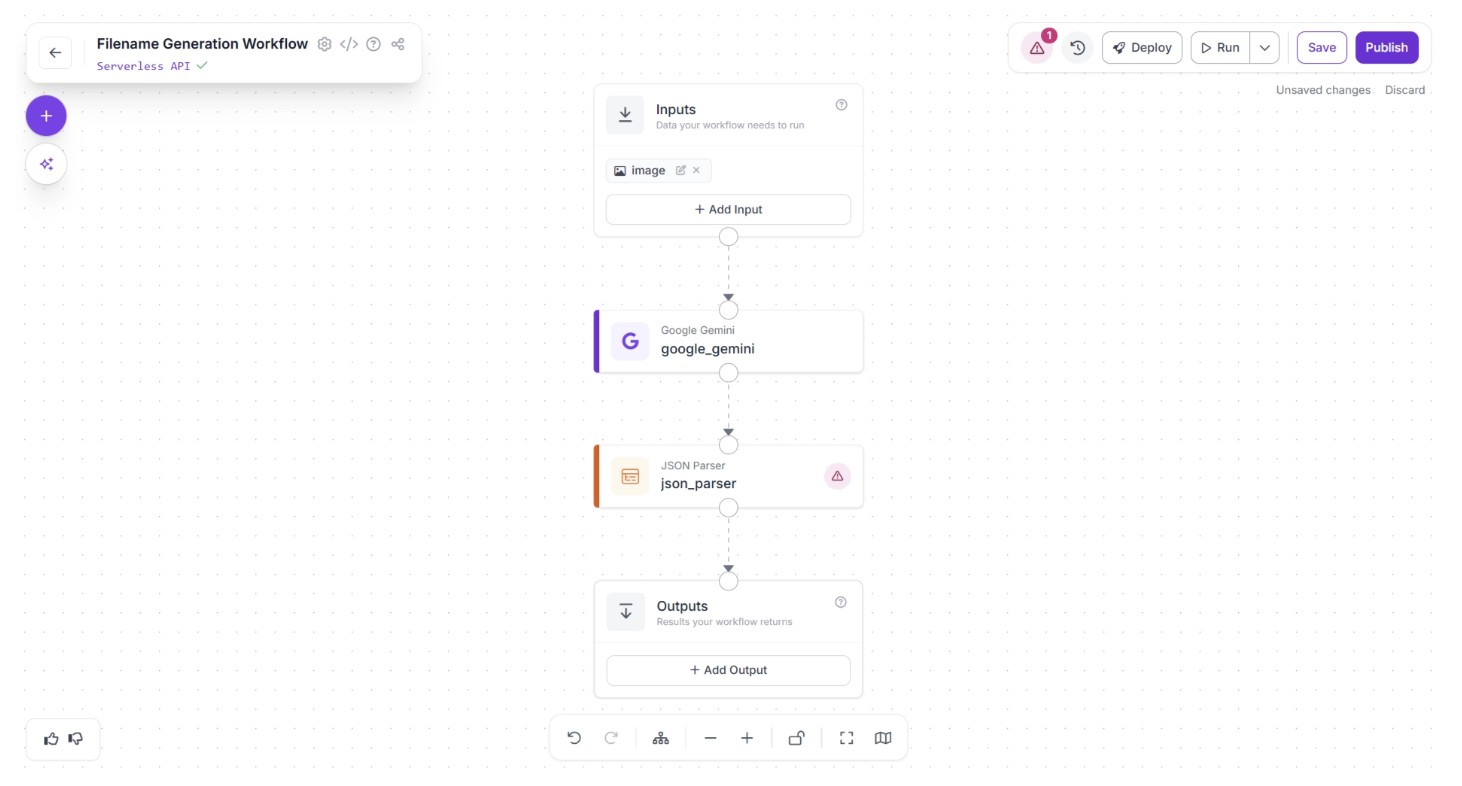
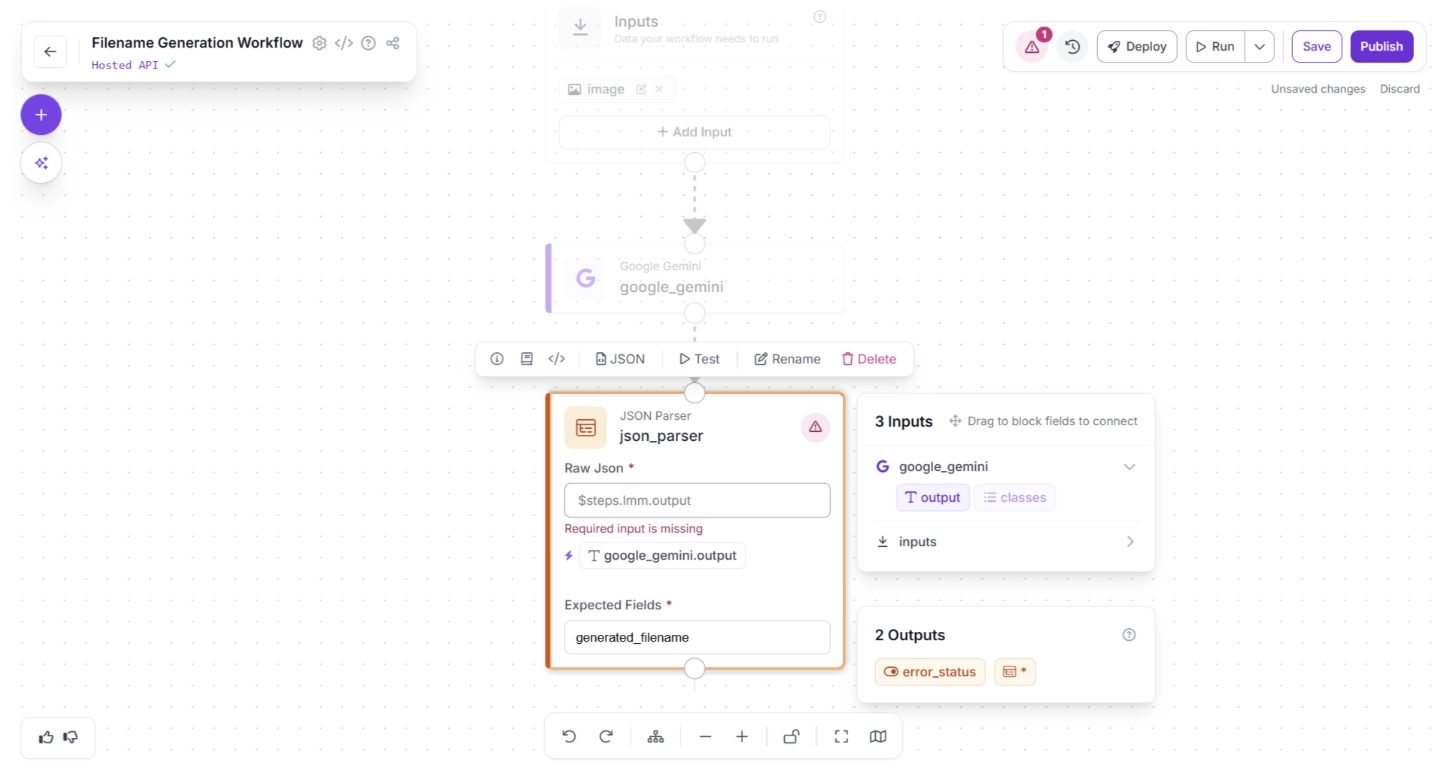
Another warning (⚠️) icon may appear on the JSON Parser block. This indicates that some required values have not yet been assigned.
Click the JSON Parser block to open its configuration panel. You need to assign the output of the Google Gemini block to the “Raw Json” input parameter of the JSON Parser.
You can do this by clicking the auto-suggested value ‘google_gemini.output’ within the JSON Parser settings, indicated by a (⚡) icon.
Next, define the “Expected Fields” from the parsed JSON value. Since we prompted Google Gemini to return a ‘generated_filename’ key, add this key as an expected field, as shown below. If it is not detected in the parsed output, the JSON Parser will throw an error.
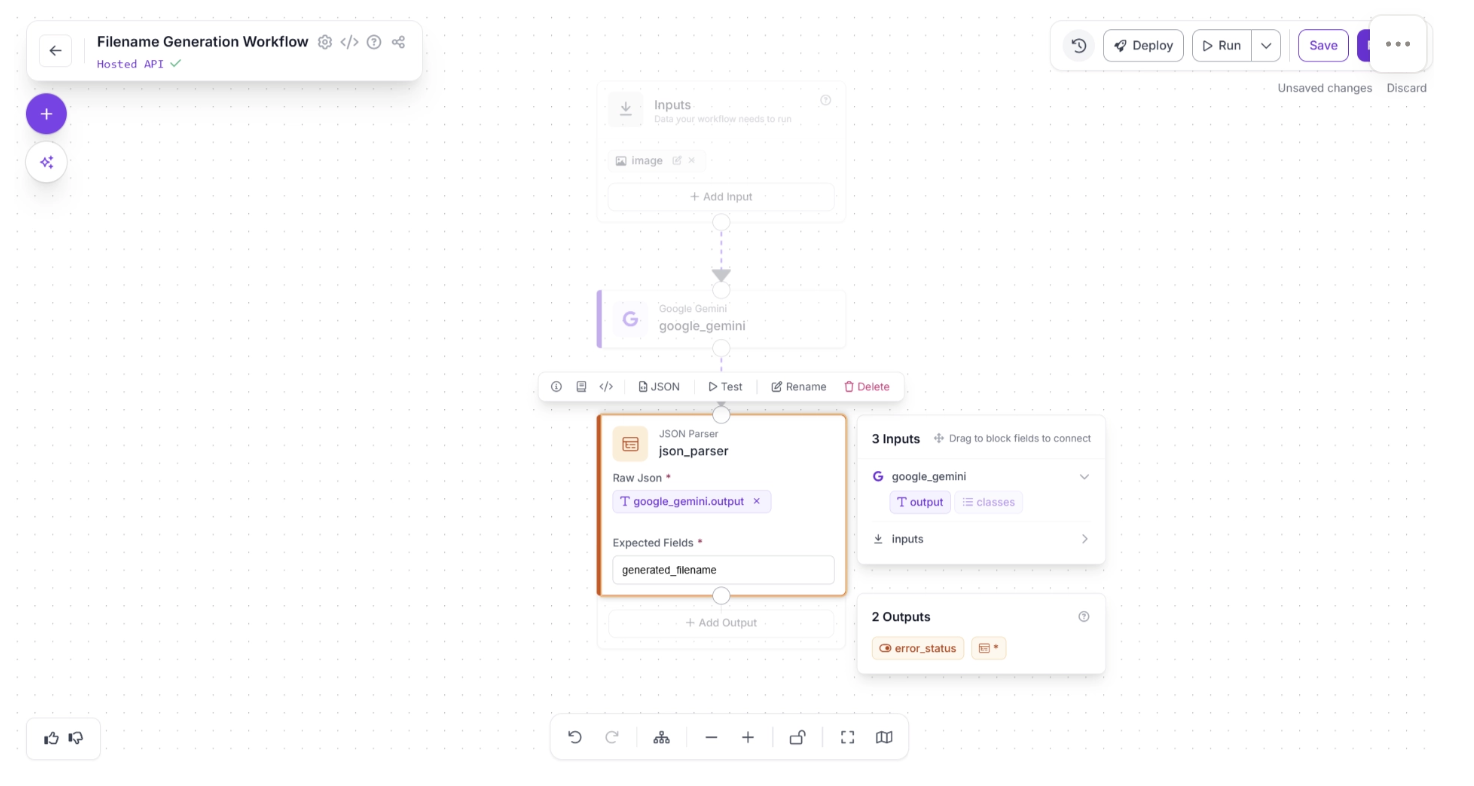
Once assigned the JSON parser block should look like the one shown below:
Step 4: Setup Outputs
The Outputs block has access to all data produced by upstream blocks and defines the final output of your workflow. In this case, the workflow should return the generated image filename in JSON format.
To configure this, click “+ Add Output” inside the Outputs block. This will open a form where you can define the keys that will store the output values, allowing you to set the workflow outputs, as shown below:
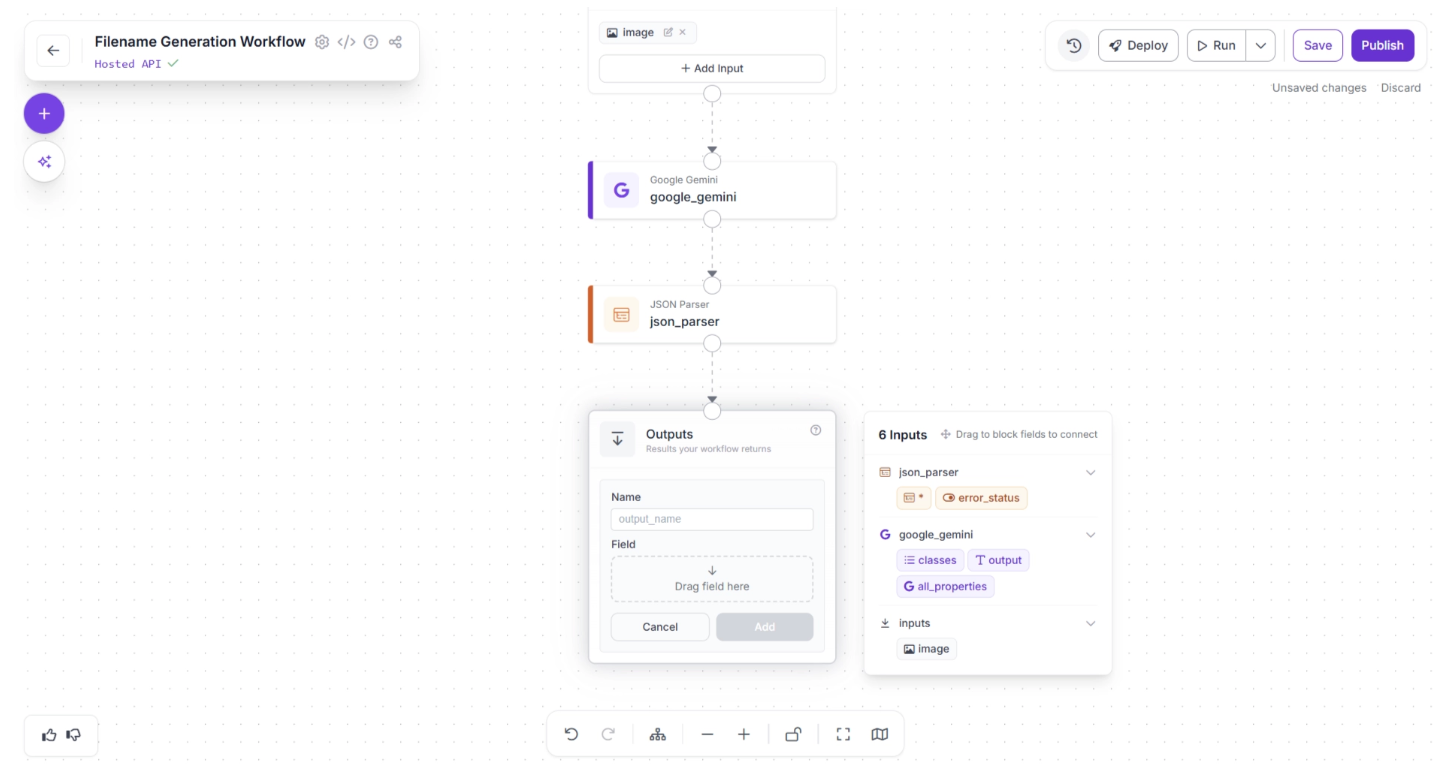
Set the key name to “output” and assign the result from the JSON Parser block to this key. This ensures that the parsed JSON becomes the final output of the workflow.
To do this, enter “output” in the ‘Name’ field, then drag and drop the first available option under the ‘json_parser’ section in the pop-up menu, which lists the six available inputs. Finally, click Add, as shown below:
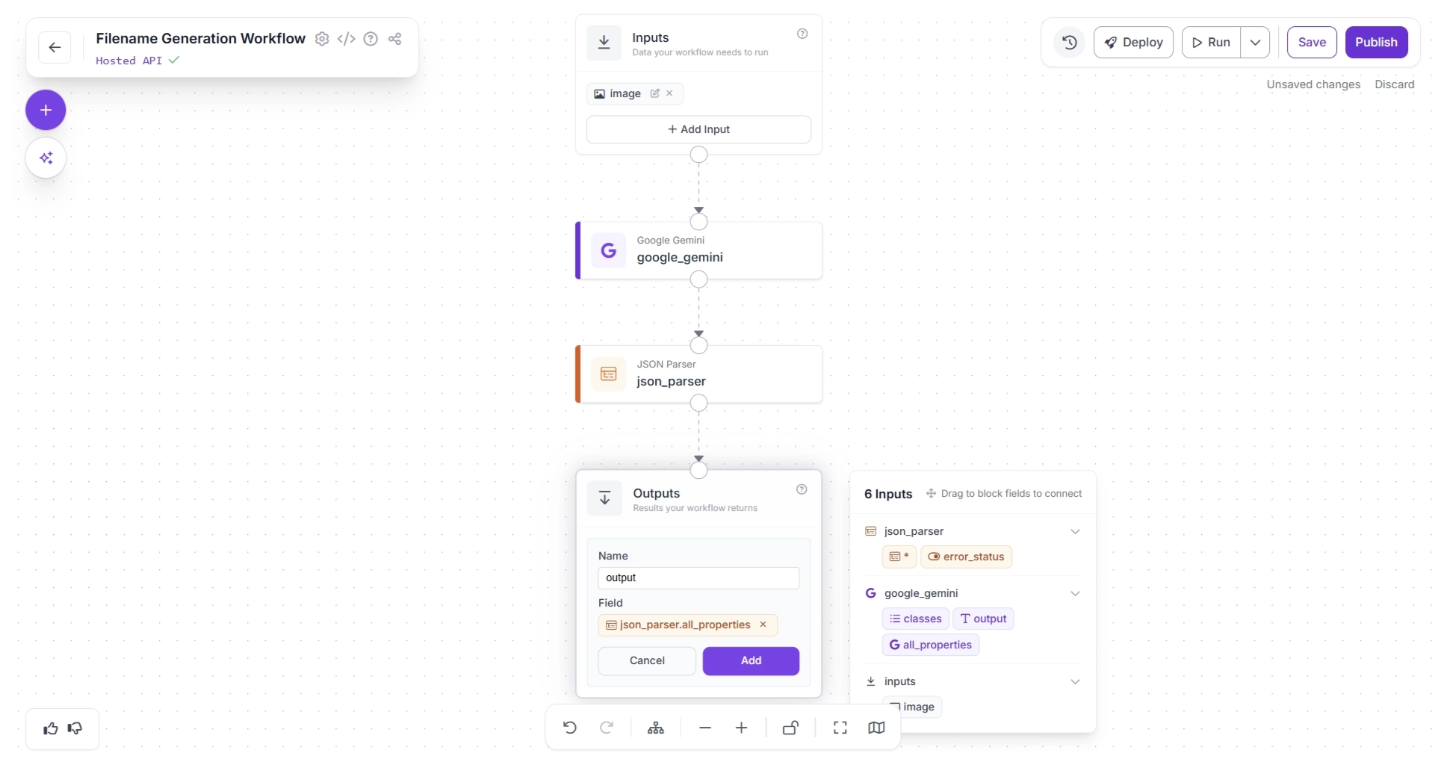
Once configured, your workflow should look like this:
Step 5: Running the Workflow
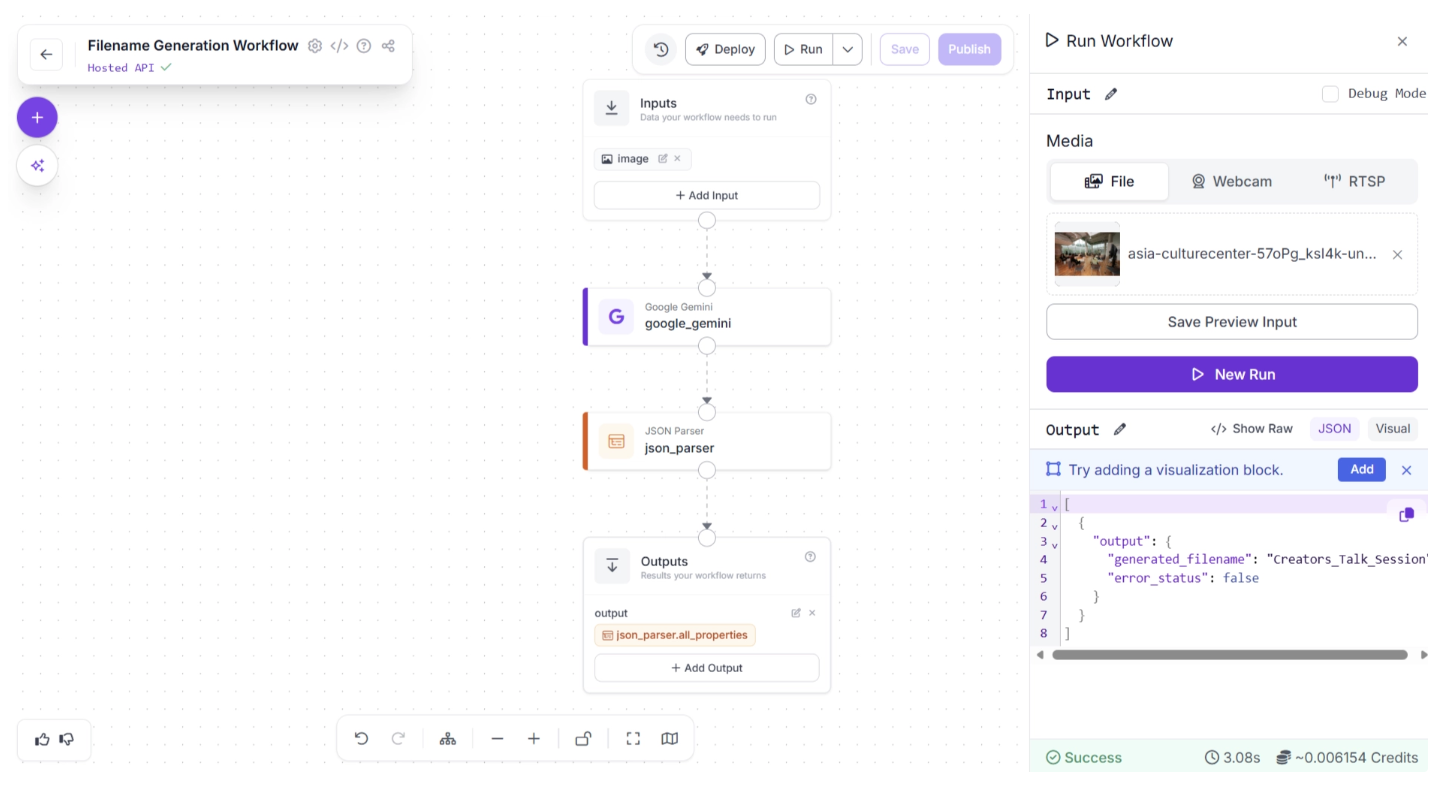
With your workflow complete, you can now test it. Click the “Run” button in the top-right corner of the editor. This opens a sidebar where you can upload an image and execute the workflow:

For example, for the below image:
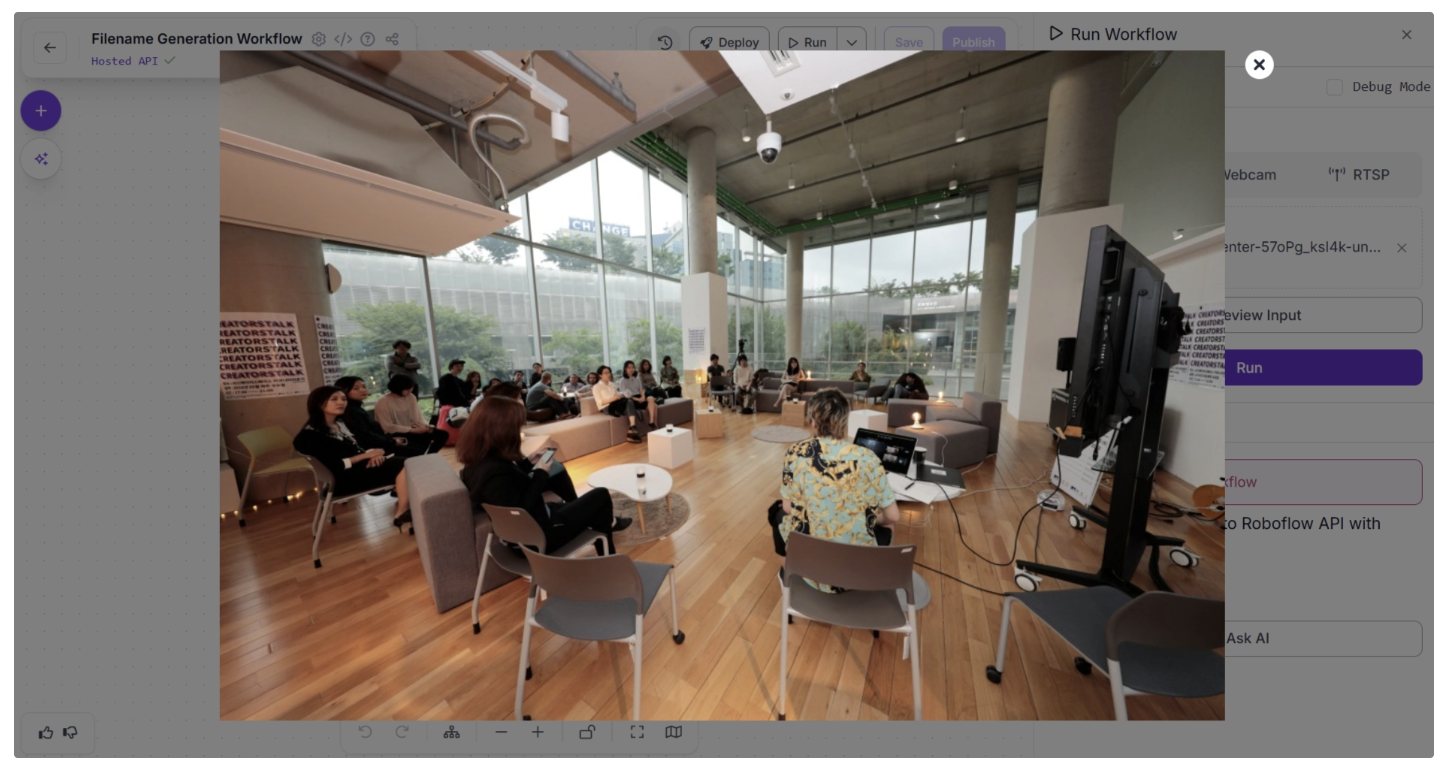
The workflow processes it and displays the output in the bottom-right corner of the window:
Once you have verified that everything works as expected, you can run the workflow from anywhere. Click the “Deploy” button to view the code snippets for running the workflow locally, on a server, or inside another application.
For example, the Python script below runs the workflow on all images in a folder and automatically renames them using the generated filenames. This is especially useful for organizing screenshots with meaningful and relevant file names.
import os
from inference_sdk import InferenceHTTPClient

# Connect to Roboflow
client = InferenceHTTPClient(
    api_url="https://serverless.roboflow.com",
    api_key="YOUR_ROBOFLOW_API_KEY"
)


image_folder = "screenshot_folder"  # path to your folder

for filename in os.listdir(image_folder):
    file_path = os.path.join(image_folder, filename)

    # Skip non-files
    if not os.path.isfile(file_path):
        continue

    # Optional: filter image extensions
    if not filename.lower().endswith((".jpg", ".jpeg", ".png", ".webp")):
        continue

    print(f"Processing: {filename}")

    # Run workflow
    result = client.run_workflow(
        workspace_name="your-workspace-name",
        workflow_id="filename-generation-workflow",
        images={"image": file_path},
        use_cache=True
    )

    # Extract generated filename
    generated_name = result[0]["output"]["generated_filename"]
    error_status = result[0]["output"]["error_status"]

    if error_status:
        print(f"Error generating filename for {filename}")
        continue

    # Preserve original extension
    ext = os.path.splitext(filename)[1]
    new_filename = generated_name + ext
    new_path = os.path.join(image_folder, new_filename)

    # Handle duplicate filenames
    counter = 1
    while os.path.exists(new_path):
        new_filename = f"{generated_name}_{counter}{ext}"
        new_path = os.path.join(image_folder, new_filename)
        counter += 1

    # Rename (this automatically deletes original name)
    os.rename(file_path, new_path)

    print(f"Renamed to: {new_filename}")

print("Done.")
The output generated by the script looks like this:
Processing: screenshot-512.jpg
Renamed to: bolts_and_nuts_in_container.jpg

Processing: screenshot-513.jpg
Renamed to: Helicopter_on_Snow_Tracks.jpg

Processing: screenshot-514.jpg
Renamed to: depth_map_fluffy_animal.jpg

Processing: screenshot-515.jpg
Renamed to: two_raccoons_in_grass.jpg

Processing: screenshot-516.jpg
Renamed to: woman_cooking_in_kitchen.jpg

Done.
As shown above, the script automatically assigns meaningful, descriptive filenames based on the content of each image.
Conclusion: Building Vision-Language Pipelines with VLMs
Vision-Language Models (VLMs) represent a shift from traditional computer vision pipelines to systems that can understand and reason about images. By combining visual perception with language reasoning, VLMs enable AI applications that are more adaptive, contextual, and interactive.
With Roboflow Workflows, integrating VLMs becomes fast and accessible, requiring no boilerplate code, complex environment setup, or heavy infrastructure management, and allowing you to easily switch VLMs in and out.
The image-renaming pipeline we built is just a starting point. The same design principles can power intelligent inspection systems, automated document analysis, multimodal chat agents, content moderation pipelines, and more. Get started today.
Written by Dikshant Shah
Cite this Post
Use the following entry to cite this post in your research:
Contributing Writer. (Mar 4, 2026). Building Vision-Language Pipelines with VLMs. Roboflow Blog: https://blog.roboflow.com/building-vision-language-pipelines-with-vlms/