
This tutorial uses Roboflow Workflows and the Supervision library to build a danger zone monitor that detects pedestrians and vehicles at an intersection and colors each bounding box conditionally: green when a pedestrian is inside the defined polygon zone, red when a vehicle is. The SAM 3 block handles segmentation for both classes, and the Python script uses the zone polygon coordinates exported from the Workflow to drive the conditional annotation logic frame by frame. The pattern is straightforward to adapt to other safety contexts such as factory floors or construction sites where the response to a detection depends on where in the scene it occurs.
Computer vision models tell you what is in a frame. But in real-world applications, you also need to know what to do about it. This is relevant when considering things like danger zones in places like construction sites, intersections, and factories. This makes the use of computer vision highly relevant and efficient for various safety tools. In this guide, we’ll use Roboflow’s Supervision library and Roboflow Workflows to build a tool that highlights pedestrians as they walk across a busy intersection.
Let’s get started.
How to Use Roboflow's Supervision Library to Create Conditional Annotators
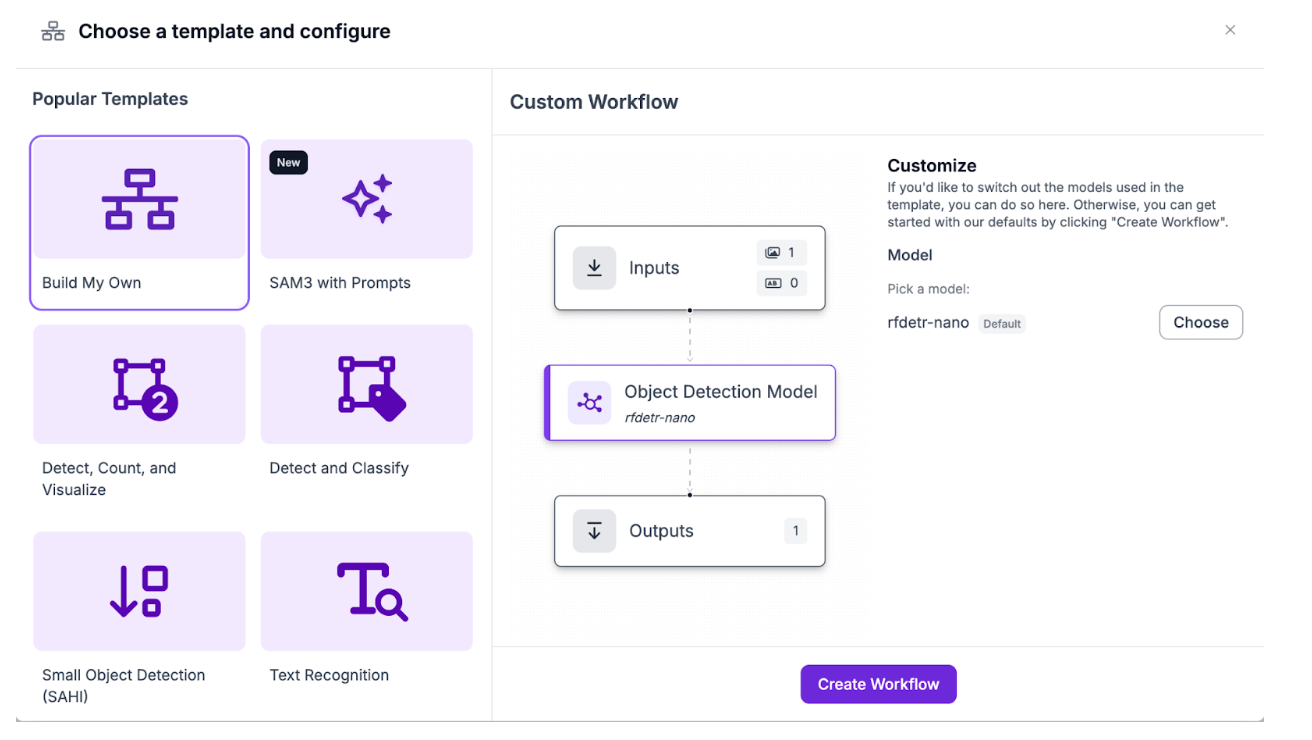
We’ll start by creating a new Workflow (finished version) already. If you haven't already, create a Roboflow account, with an API key, and a new workspace. From there, create a new Workflow with the “Build My Own” template:
Building a Danger Zone and Detection Workflow
The first thing for conditional annotation is the danger zone that we’re going to be detecting. From the available blocks, choose the polygon zone visualization block. This block won’t be used in the output, but as an intermediate step for getting a polygon reference coordinates for the video you plan to use:
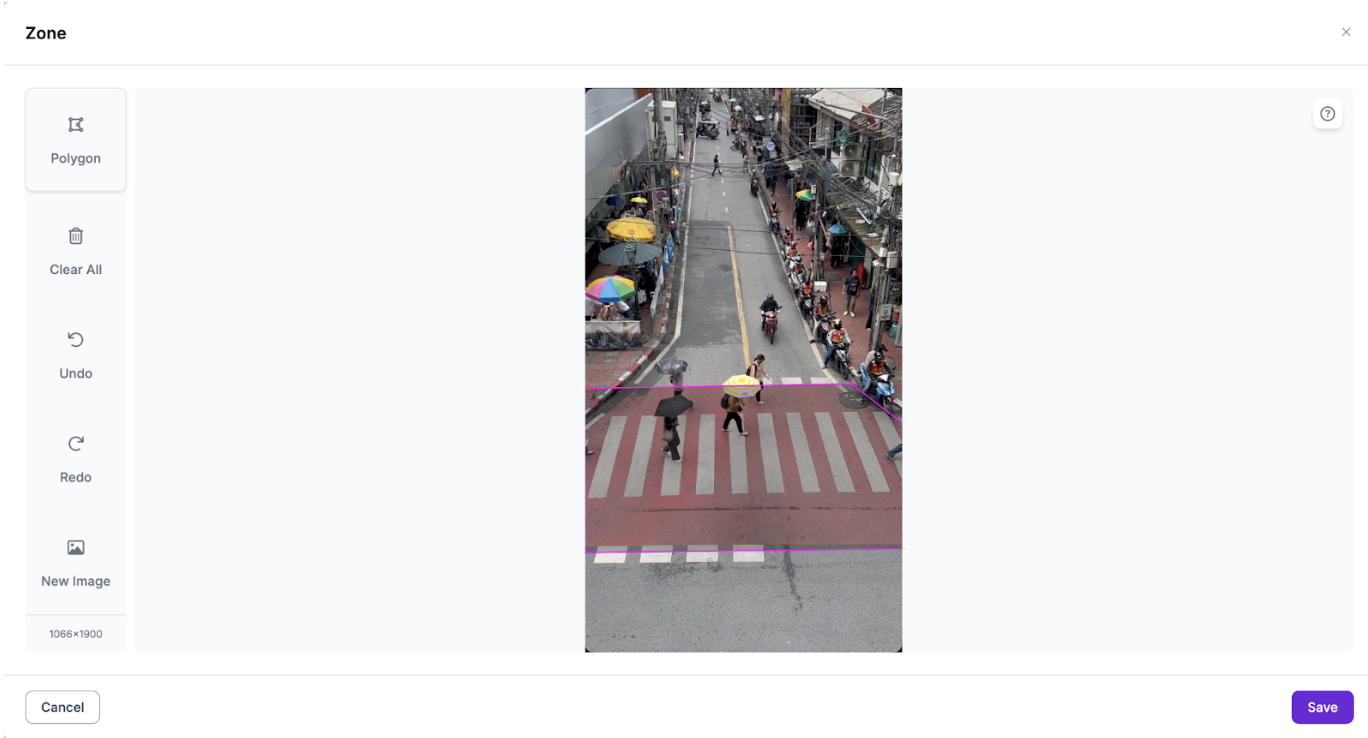
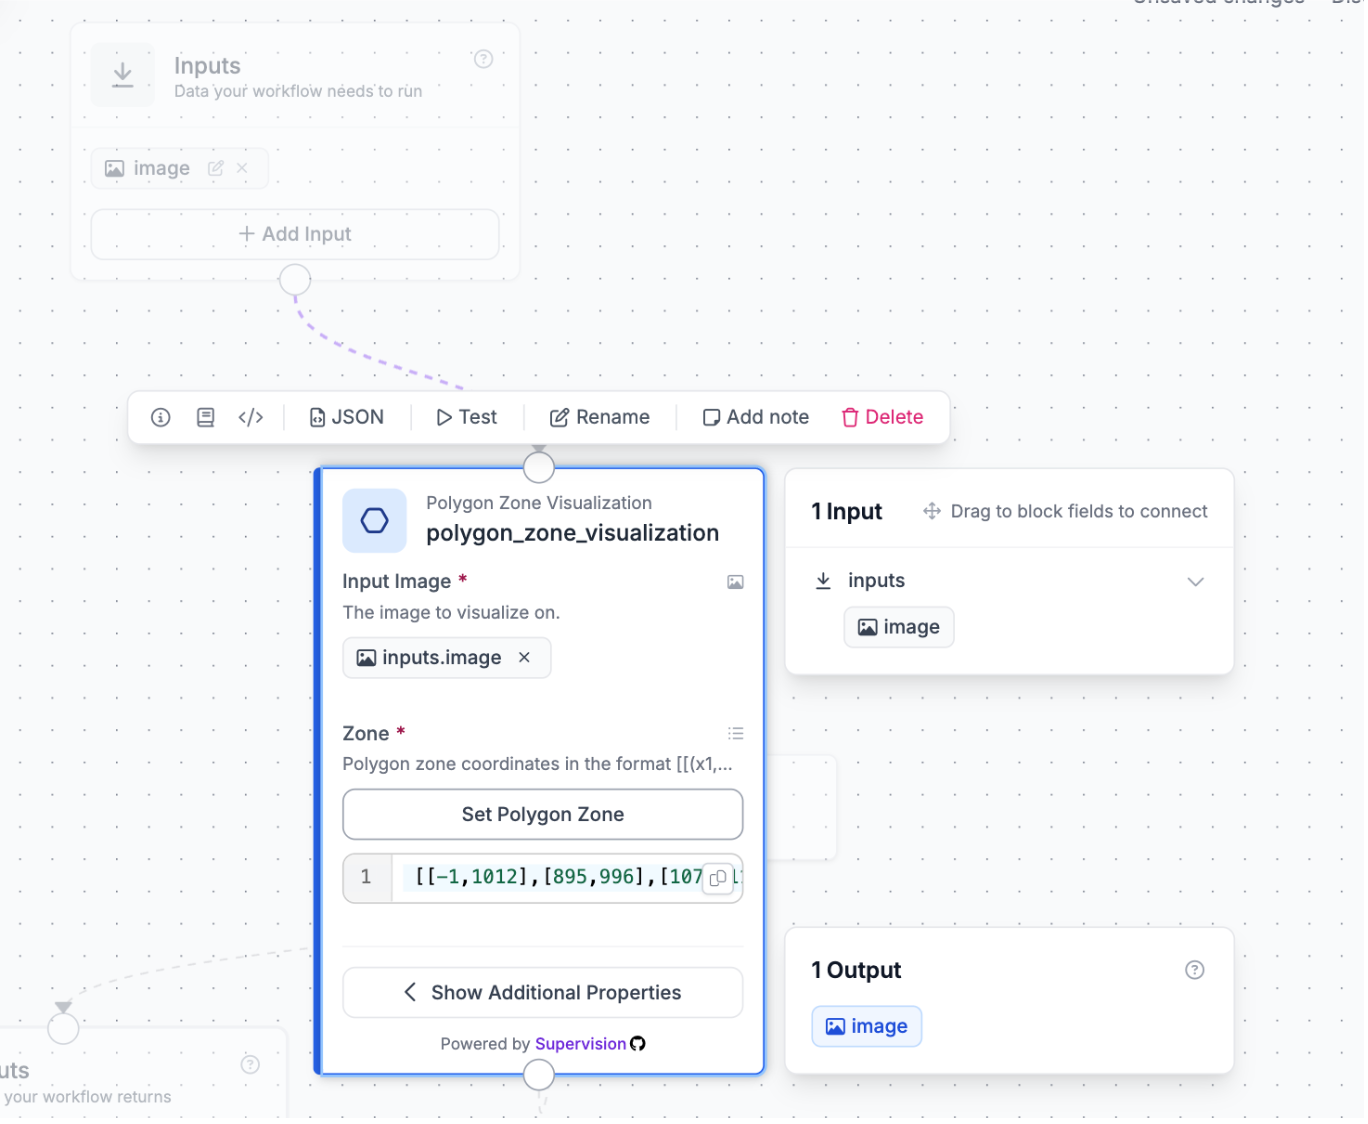
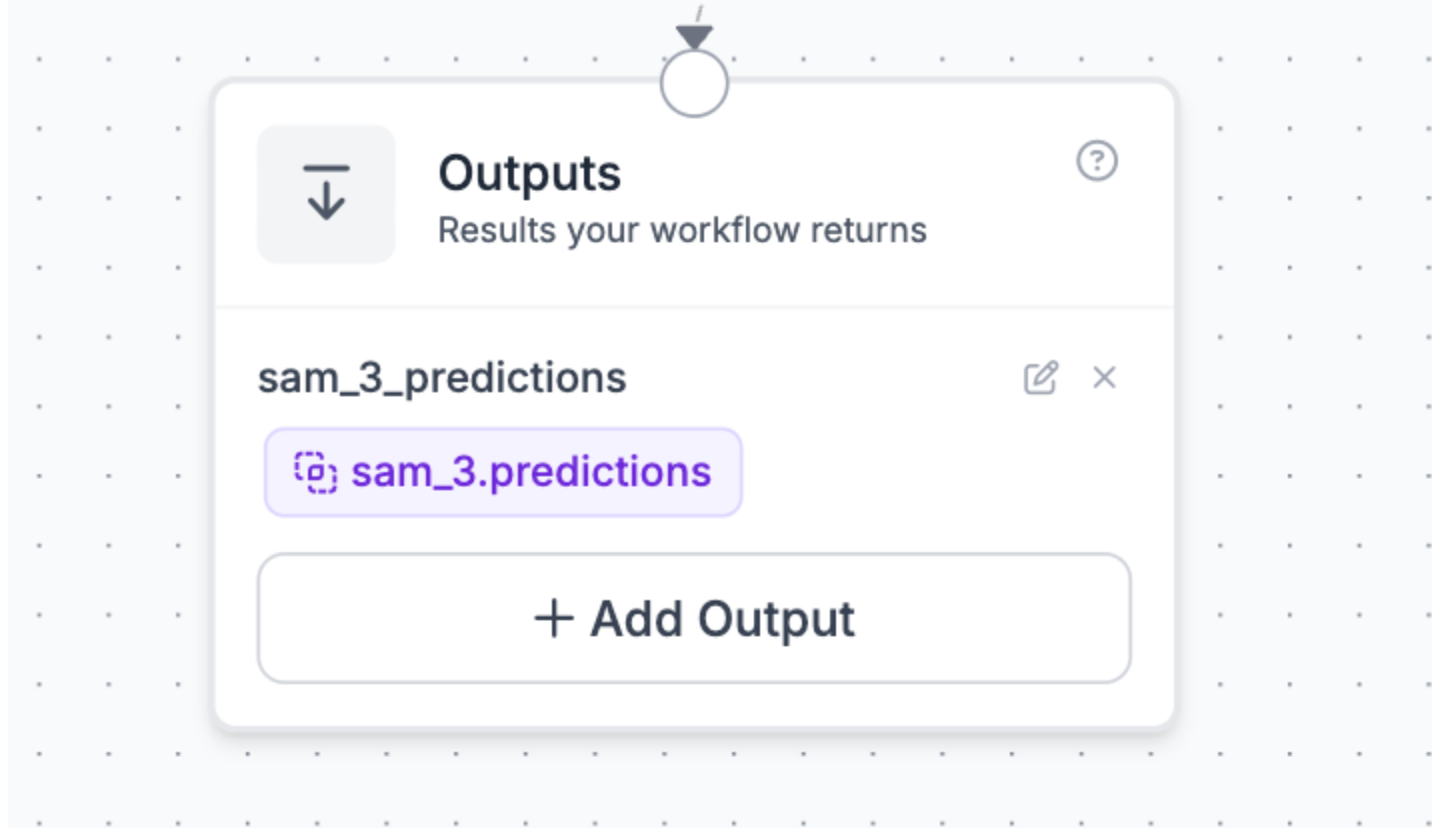
Later on, we’ll refer to these coordinates again. Next, we’ll need to get detections for both vehicles and pedestrians, so connect the SAM 3 block, and add the input image (default):
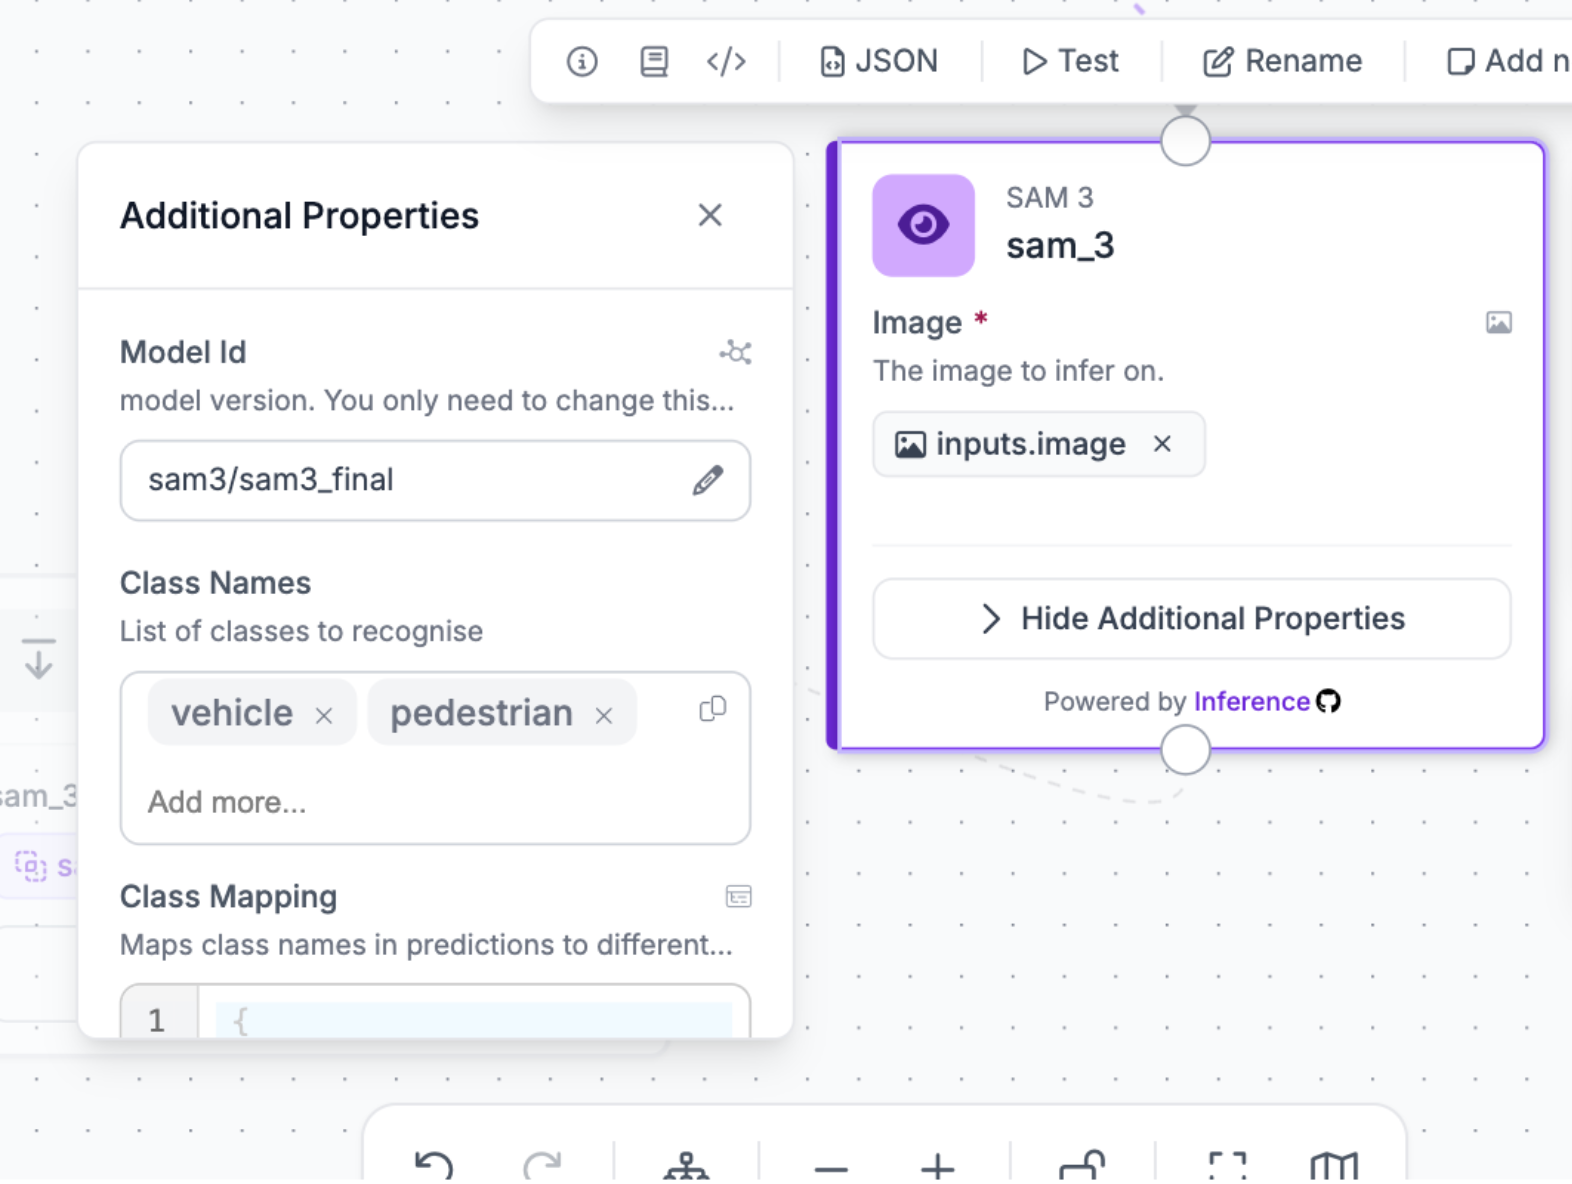
Add the class names “vehicle” and “pedestrian”. SAM 3 is excellent at detecting common things like pedestrians and vehicles and giving accurate segmentation masks (and in turn bounding boxes).
Lastly, connect it to the outputs block, and return the SAM 3 predictions.
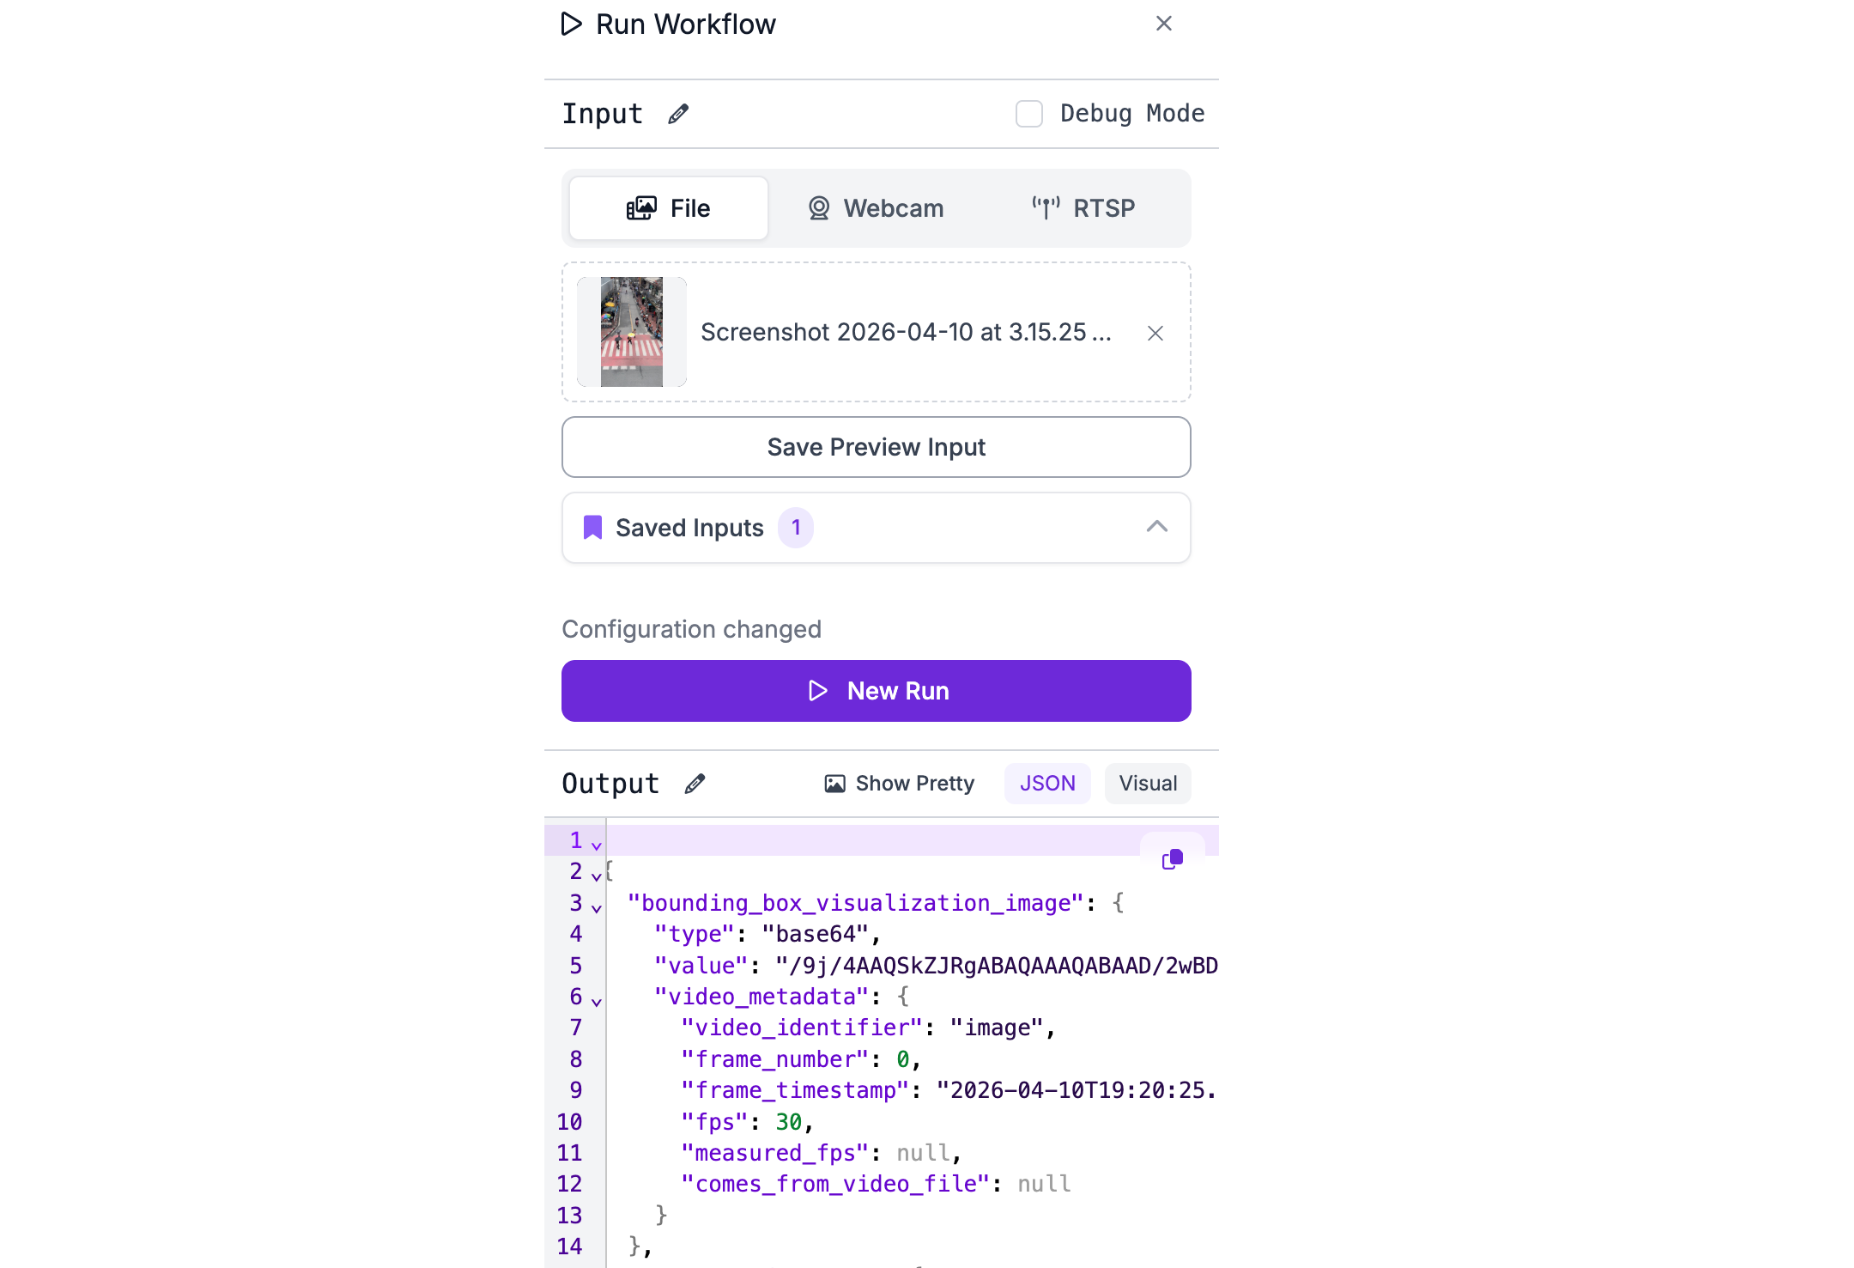
You can verify that the detections are working by running it on a test frame from the video:
The visualization later on will be done by compiling the detections from each frame together, however this kind of tool is most effective in live video footage due to the emphasis on safety.
Now, we’ll use these detections to build the tool.
Implementation
Create a new file in a new workspace called main.py, and update it to:
import supervision as sv
import numpy as np
from inference_sdk import InferenceHTTPClient
import cv2
from dotenv import load_dotenv

load_dotenv()

# Config
API_KEY    = "YOUR API KEY"
API_URL    = "https://serverless.roboflow.com"
WORKSPACE  = "YOUR WORKSPACE ID"
WORKFLOW   = "YOUR WORKFLOW ID"
VIDEO_IN   = "INPUT VIDEO PATH"
VIDEO_OUT  = "OUTPUT VIDEO PATH"
TEMP_FRAME = "/tmp/frame.jpg"

# Zone polygon vertices (x, y)
ZONE_POLYGON = np.array(ZONEPOLYGON, dtype=np.int32)

# Colors
ZONE_COLOR      = (180, 0, 180)
ZONE_OPACITY    = 0.2
VEHICLE_COLOR   = sv.Color.from_hex("#FF0000")
PEDESTRIAN_COLOR = sv.Color.from_hex("#00FF00")
DEFAULT_COLOR   = sv.Color.from_hex("#FFFFFF")

client = InferenceHTTPClient(api_url=API_URL, api_key=API_KEY)

video_info      = sv.VideoInfo.from_video_path(VIDEO_IN)
frame_generator = sv.get_video_frames_generator(VIDEO_IN)
tracker         = sv.ByteTrack(frame_rate=video_info.fps)

zone               = sv.PolygonZone(polygon=ZONE_POLYGON)
box_vehicle        = sv.BoxAnnotator(color=VEHICLE_COLOR, thickness=3)
box_pedestrian     = sv.BoxAnnotator(color=PEDESTRIAN_COLOR, thickness=3)
box_default        = sv.BoxAnnotator(color=DEFAULT_COLOR, thickness=2)

out = cv2.VideoWriter(
    VIDEO_OUT, cv2.VideoWriter_fourcc(*"mp4v"),
    video_info.fps, (video_info.width, video_info.height)
)

print(f"Video: {video_info.width}x{video_info.height} @ {video_info.fps:.0f}fps")

for frame_count, frame in enumerate(frame_generator, 1):
    print(f"Processing frame {frame_count}...")
    detections = sv.Detections.empty()

    try:
        cv2.imwrite(TEMP_FRAME, frame)
        result = client.run_workflow(
            workspace_name=WORKSPACE,
            workflow_id=WORKFLOW,
            images={"image": TEMP_FRAME},
            use_cache=False,
        )

        predictions = result[0]["sam_3_predictions"]["predictions"]

        if predictions:
            boxes = [[p["x"] - p["width"]/2, p["y"] - p["height"]/2,
                      p["x"] + p["width"]/2, p["y"] + p["height"]/2] for p in predictions]
            detections = sv.Detections(
                xyxy=np.array(boxes, dtype=np.float32),
                confidence=np.array([p["confidence"] for p in predictions], dtype=np.float32),
                class_id=np.array([p["class_id"] for p in predictions], dtype=int),
            )

    except Exception as e:
        print(f"  Error: {e}")

    detections = tracker.update_with_detections(detections)
    in_zone = zone.trigger(detections)

    annotated = frame.copy()

    # Shaded zone fill
    overlay = annotated.copy()
    cv2.fillPoly(overlay, [ZONE_POLYGON], ZONE_COLOR)
    annotated = cv2.addWeighted(overlay, ZONE_OPACITY, annotated, 1 - ZONE_OPACITY, 0)

    # Zone border
    cv2.polylines(annotated, [ZONE_POLYGON], isClosed=True, color=ZONE_COLOR, thickness=3)

    # Bounding boxes colored by class + zone membership
    annotated = box_default.annotate(scene=annotated, detections=detections[~in_zone])
    annotated = box_vehicle.annotate(scene=annotated, detections=detections[(detections.class_id == 0) & in_zone])
    annotated = box_pedestrian.annotate(scene=annotated, detections=detections[(detections.class_id == 1) & in_zone])

    out.write(annotated)

out.release()
print(f"Done! {frame_count} frames -> {VIDEO_OUT}")
This script runs the workflow on each frame of an input video, and then uses basic if statements along with the supervision lib to check when the output predictions are in the zone polygon found over. If a pedestrian is hence in the zone, it colors their bounding box green, and if it's a vehicle, it colors it red.
To use this script, make sure to replace all the constants at the top with your proper credentials and ids. This structure of script makes it applicable to plenty of other similar use cases. However, it’s important to note that here we ran it on a pre-recorded video, but it's very easy to transform into something that can work directly from traffic camera footage.
Before running, it is also essential that you’ve installed the necessary dependencies by running:
pip install supervision inference-sdk opencv-python python-dotenv numpy
After that, run the file on your demo video.
And with that the tool is complete.
Conclusion: Using Supervision to Create Conditional Annotators
Conditional annotators unlock a new level of insight from your computer vision pipelines by turning raw detections into actionable, context-aware visualizations. With Roboflow Workflows and supervision, you can extend this pattern to virtually any safety or monitoring use case, from factory floors to retail spaces.
Cite this Post
Use the following entry to cite this post in your research:
Contributing Writer. (Apr 15, 2026). How to Use Roboflow to Create Conditional Annotators. Roboflow Blog: https://blog.roboflow.com/create-conditional-annotators/