
Data annotation is the foundation of every successful computer vision project, and getting it right is critical. This is important to keep in mind from the start, as teams might ignore detailed annotation rules until gaps start causing trouble with their model.
So here's everything you need to know about data annotation, from what it is and how it works, to common challenges, best practices, and the tools that can streamline the process. We'll also explore a specific use case - medical image annotation - to show how high-quality labels drive real-world AI performance.
What Is Data Annotation?
Data annotation, also known as data labeling or tagging, is the process of attaching meaningful attributes, tags, or labels to the whole or part of your raw data to help AI algorithms realize and classify the information. This process is an important part of data preprocessing, paving the way for the training phase where supervised learning models comprehend information from text, images, video footage, and audio files. Any supervised machine learning project runs on labeled data, and model performance rises or falls with label quality, so clear and consistent annotation practices are essential for stronger results.
How To Do Data Annotation
In terms of speed and quality, there are many different ways to annotate data. Below summarizes common data annotation methods widely used in AI projects:
1. Manual annotation
This is a boring and time-consuming method, and it's also considered the hardest. In this case, those with subject matter knowledge annotate and review data manually. This method is still very common for projects where high quality annotated data is not available.
2. Semi-automatic annotation
For this method, human experts annotate a small portion of the dataset and fine-tuned large language models do the rest. Semi-automatic annotation is suitable for projects where the data is simple and reliable models are available.
3. Automatic annotation
Automatic annotation saves a lot of time, at the cost of low-quality annotated data. This method requires powerful models, massive resources, and can handle large volumes of simple datasets.
4. Others
This category contains anything in between, such as using semi-supervised learning, zero-shot learning, active learning, transfer learning, etc. to annotate data. We briefly mention active learning in the next section.
With Roboflow, you can label data quickly with a suite of AI-assisted annotation tools to augment human labeling or fully automate your data labeling pipeline. Start free.
How to Choose the Right Data Annotation Method
The next you have to choose the right data annotation type for your project. Here I'll share different types of image annotation to consider:
Image level label data annotation
The simplest form of image annotation is assigning a single label to an image as a whole, and not a specific part of it. For example, you may assign a general category like “Fruit” to an image that includes a basket of apples, oranges, and grapes.
Use image-level labels when you only care about the overall content of an image. It's ideal for image classification tasks where localization doesn’t matter. Image classification models are useful when you need to answer a question in this form: "In what category or categories should the image be placed?" Specific use cases might include:
- Quality control ("defective" vs. "non-defective")
- Content moderation ("safe" vs. "not safe")
- Medical image triage (“abnormal” vs. “normal” scans)

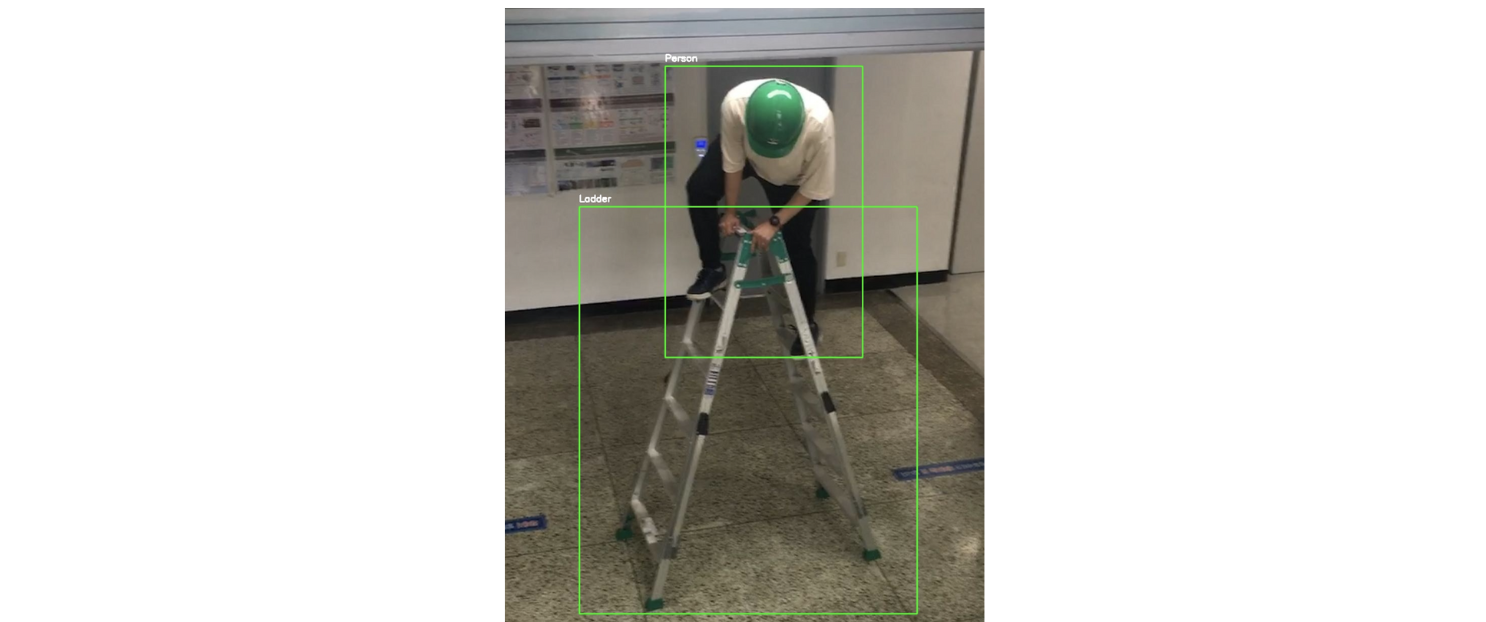
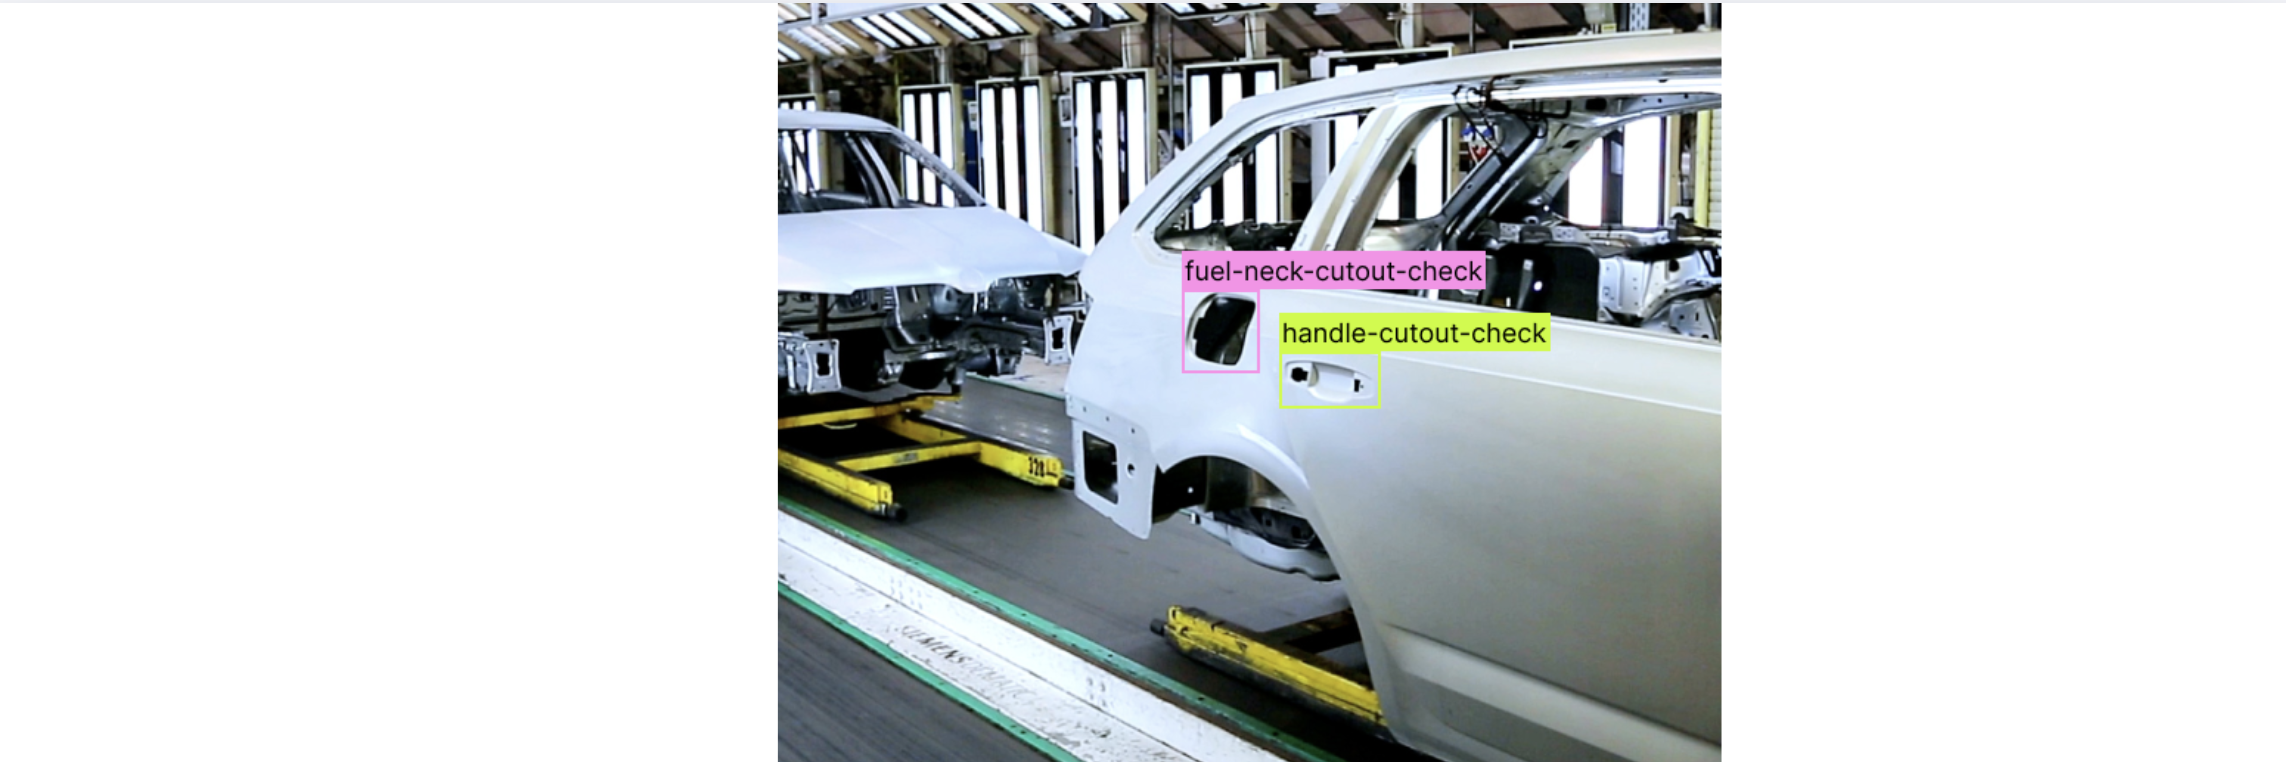
Bounding box data annotation
This is one of the most common and efficient annotation types for object detection tasks. This data annotation type involves drawing a rectangular box around a region of interest or specific objects.
Use bounding boxes when you need to detect and localize individual objects, but don't require pixel-perfect accuracy. Some examples include:
- Counting items on a conveyor belt
- Detecting people, cars, or animals in surveillance footage
- Spotting tumors or anomalies in medical scans
Polyline/Spline data annotation
These are lines that are joined at vertices and used for tracing linear structures or measuring distances. Polylines are helpful to use when you need to annotate paths or boundaries that don’t form closed shapes, like lanes on a road or blood vessels in a scan. It's great for measurement, tracking, or when precision along a curve is important, such as for:
- Lane detection in autonomous driving
- Measuring cracks in materials

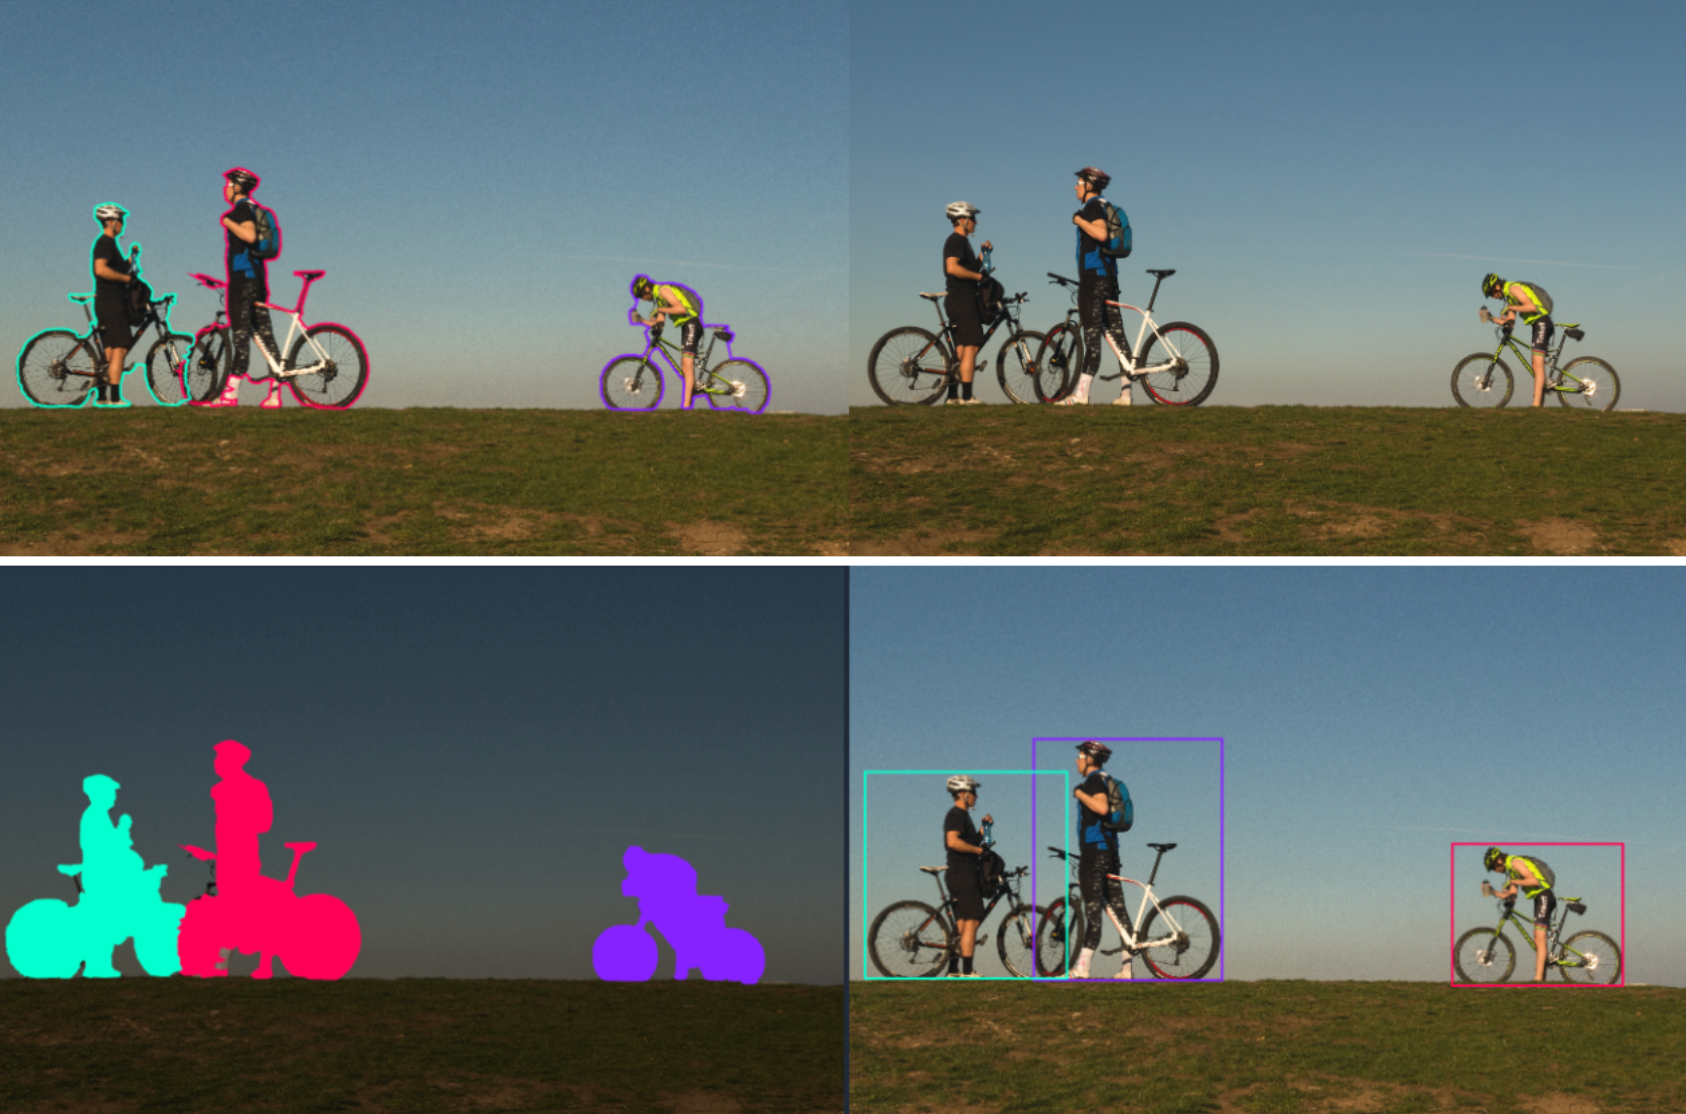
Polygon data annotation
This data annotation method includes picking a large set of (x,y) coordinates to annotate the edges of asymmetric objects. Use polygons when your object has irregular shapes or requires precise outlines. This is common in segmentation tasks where you want pixel-level accuracy. It's effective for:
- Outlining animals, organs, or clothing
- Separating overlapping objects (e.g., leaves or cells)
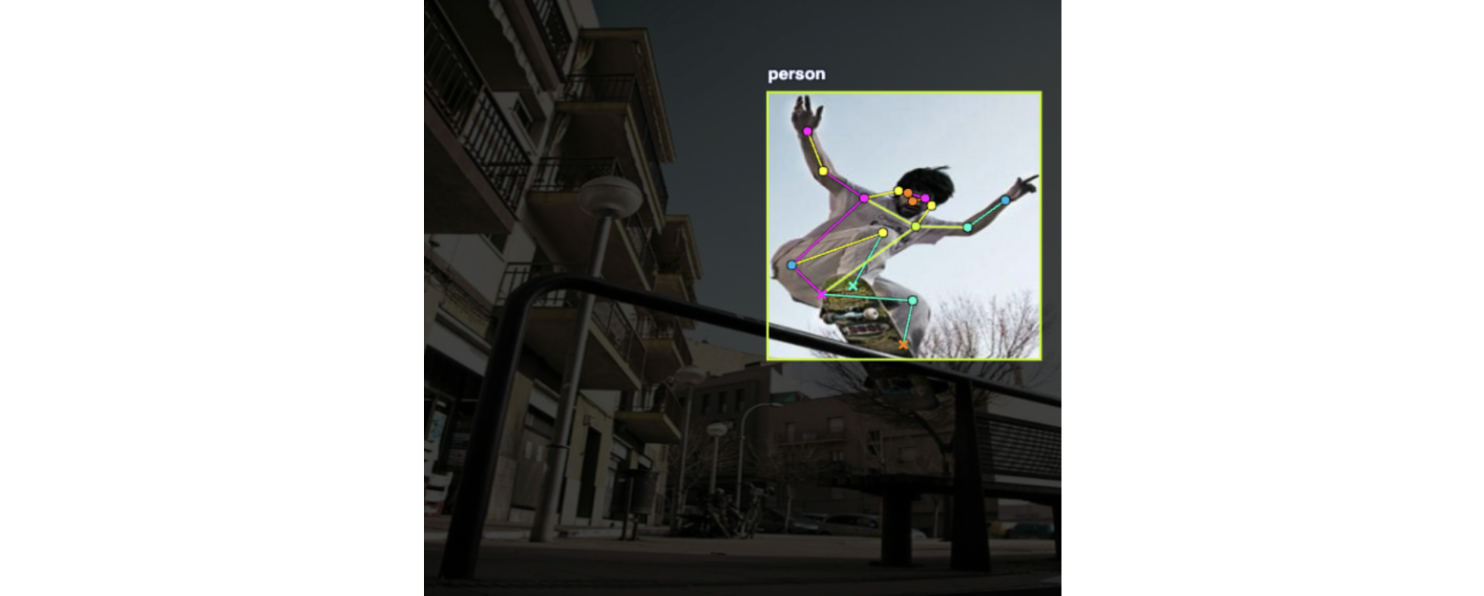
Key points or landmarks data annotation
This type involves annotating a handful of very specific points or features on a target object. For instance, you may annotate the location of eyes and ears on a cat face. Use key points when you want to track fine-grained features or motion, or if your model needs to understand object orientation or pose. This method is often used in pose estimation, facial recognition, or biometric analysis.
Segmentation
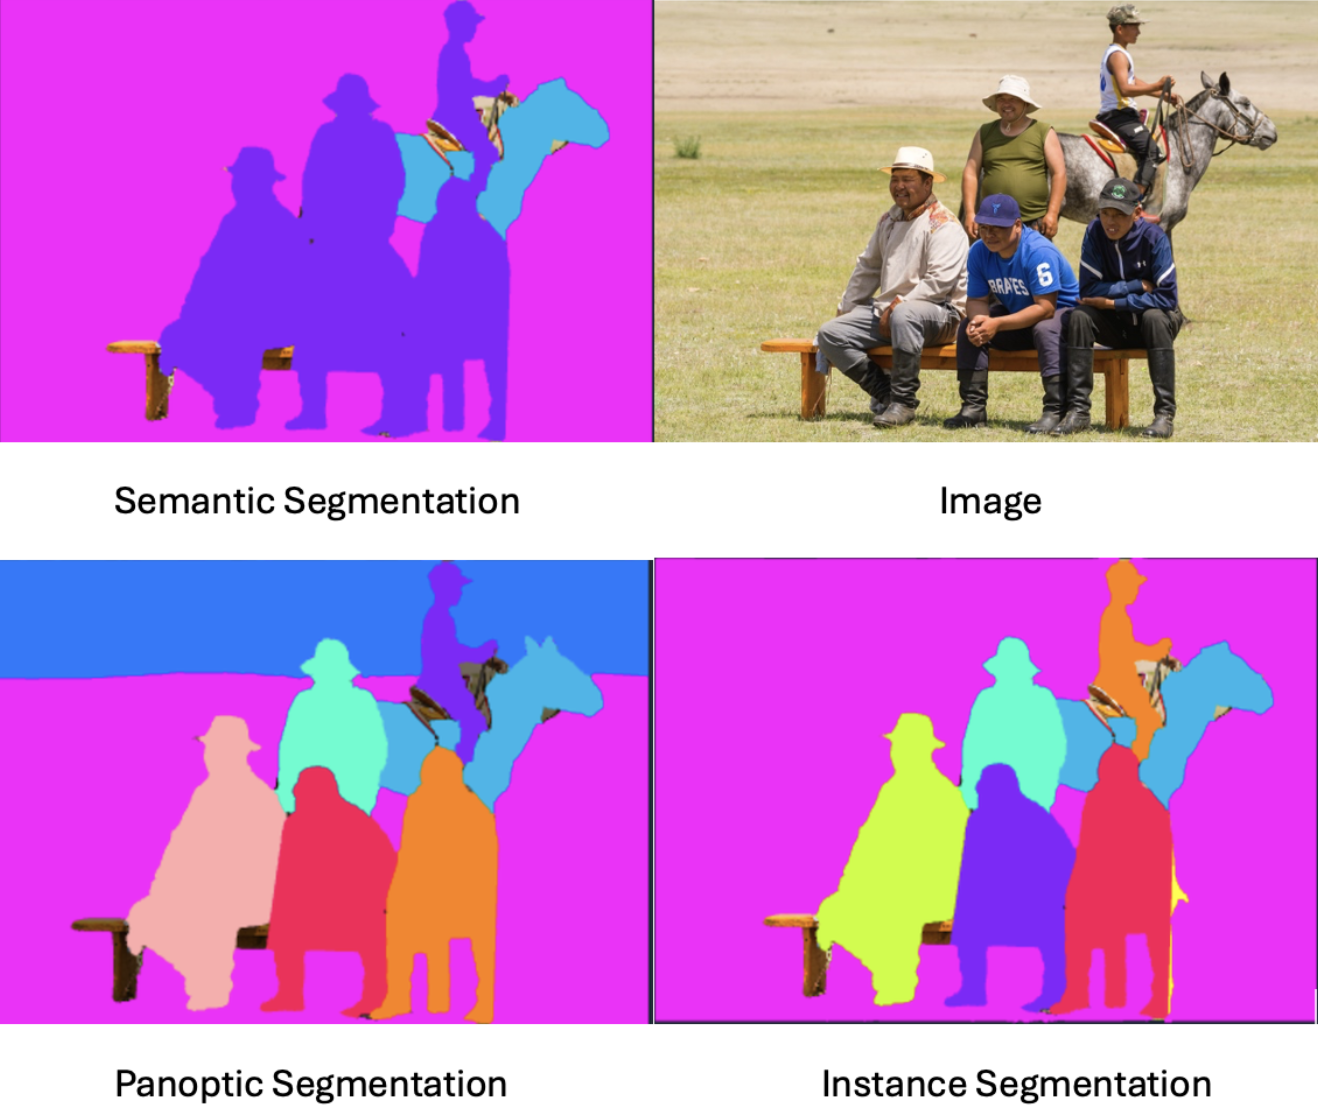
Understanding different types of segmentation would open doors to options you have for image annotating. Segmentation is defined as a granular annotation where pixels are labeled as a particular class. To better understand this method, let’s discuss semantic, instance, and panoptic segmentation.
Semantic segmentation is the process of excluding an object from the rest and assigning a tag to all of them. In this method, all pixels should be labeled and belong to a cluster. For instance, imagine you have an image of 5 cats in a bush and you are interested in finding cats. Using this method, all pixels that include each of 5 cats are all labeled as “cat”, and the rest of the image is labeled as “environment”.
In instance segmentation, each instance of an object is identified, and their limit is determined. Let’s get back to our previous example. Using instance segmentation, you select each of 5 cats and label them separately as “cat_1”, “cat_2”, … “cat_5”.
Panoptic segmentation is a combination of semantic and instance segmentation. In this method, not only are all pixels labeled, but also different instances of an object are labeled separately.
Best Practices for Data Annotation
Here are a few tips to keep in mind as you label images for the best results.
1. Label every object
Computer vision models learn by recognizing patterns in pixel data that represent specific objects. So to train a model to detect an object, you need to label that object every time it occurs across your dataset. If you skip labeling it in some images, the model learns that the object isn't there - introducing false negatives that hurt performance.
2. Label the entire object
Your bounding boxes should include the entirety of an object of interest, and nothing more. Labeling only a portion of the object confuses our model for what a full object constitutes.

3. Label occluded objects
Occlusion is when an object is partially out of view in an image due to something blocking it in a photo. It is best to label even occluded objects. Moreover, it is commonly best practice to label the occluded object as if it were fully visible – rather than drawing a bounding box for only the partially visible portion of the object.

4. Create tight bounding boxes
Bounding boxes should be tight around the objects of interest, to help your model learn very specifically which pixels are the object vs. irrelevant. But also be sure not to cut off any part of the object.
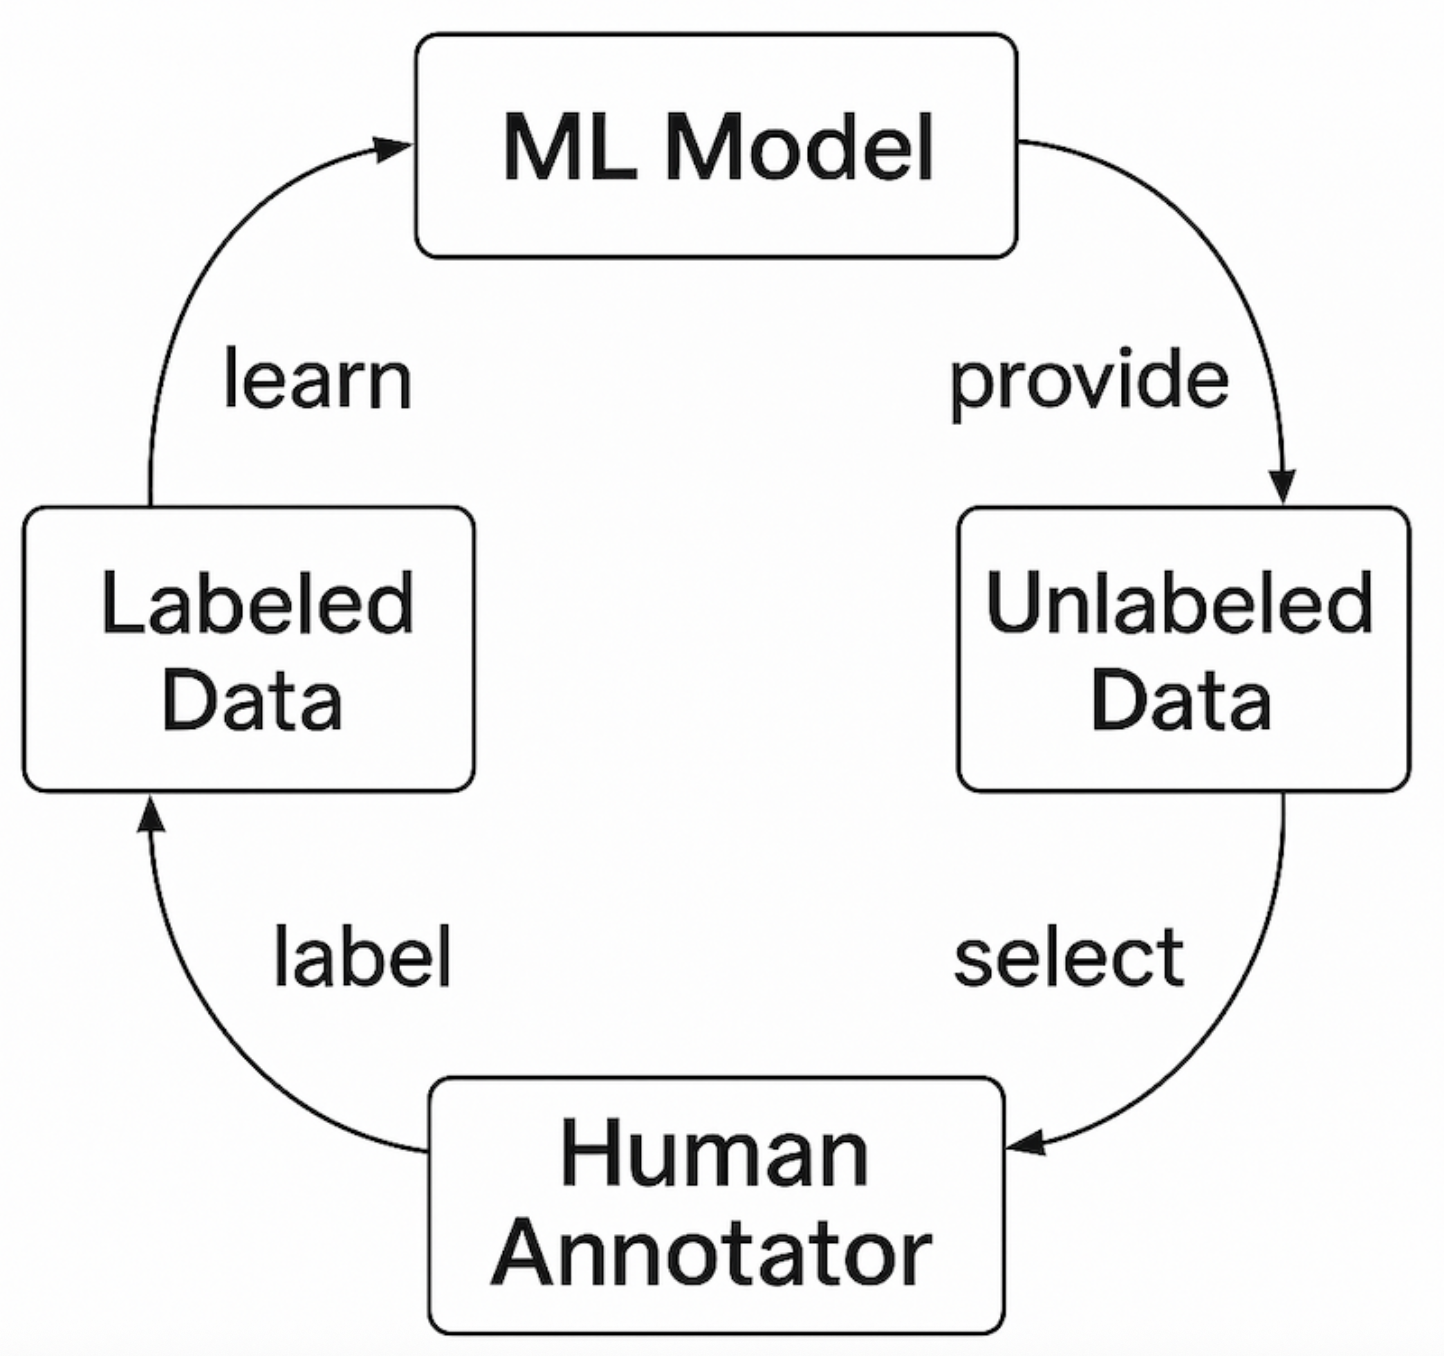
5. Use active learning
Active learning is a subset of human in the loop method, where you use a combination of human expertise and machine learning power to annotate a dataset. I personally use this powerful method in many projects. Using this method, researchers annotate a small portion of the dataset and train a machine learning model on them. Next, use the model to annotate the rest of the dataset, separate poorly labeled data, and annotate them manually. Finally, feed properly labeled data into the model for the next round of training and repeat this process until all data is labeled properly.
The figure below illustrates a typical active learning workflow.
Get more tips for how to label images.
Data Annotation Tools
With those annotation levels in mind, the next step is choosing software that can actually create them. In general, data annotation tools are either open-sourced and free to use, or commercial and offer more features. In what follows, we go over two of the best data annotation tools in the market.
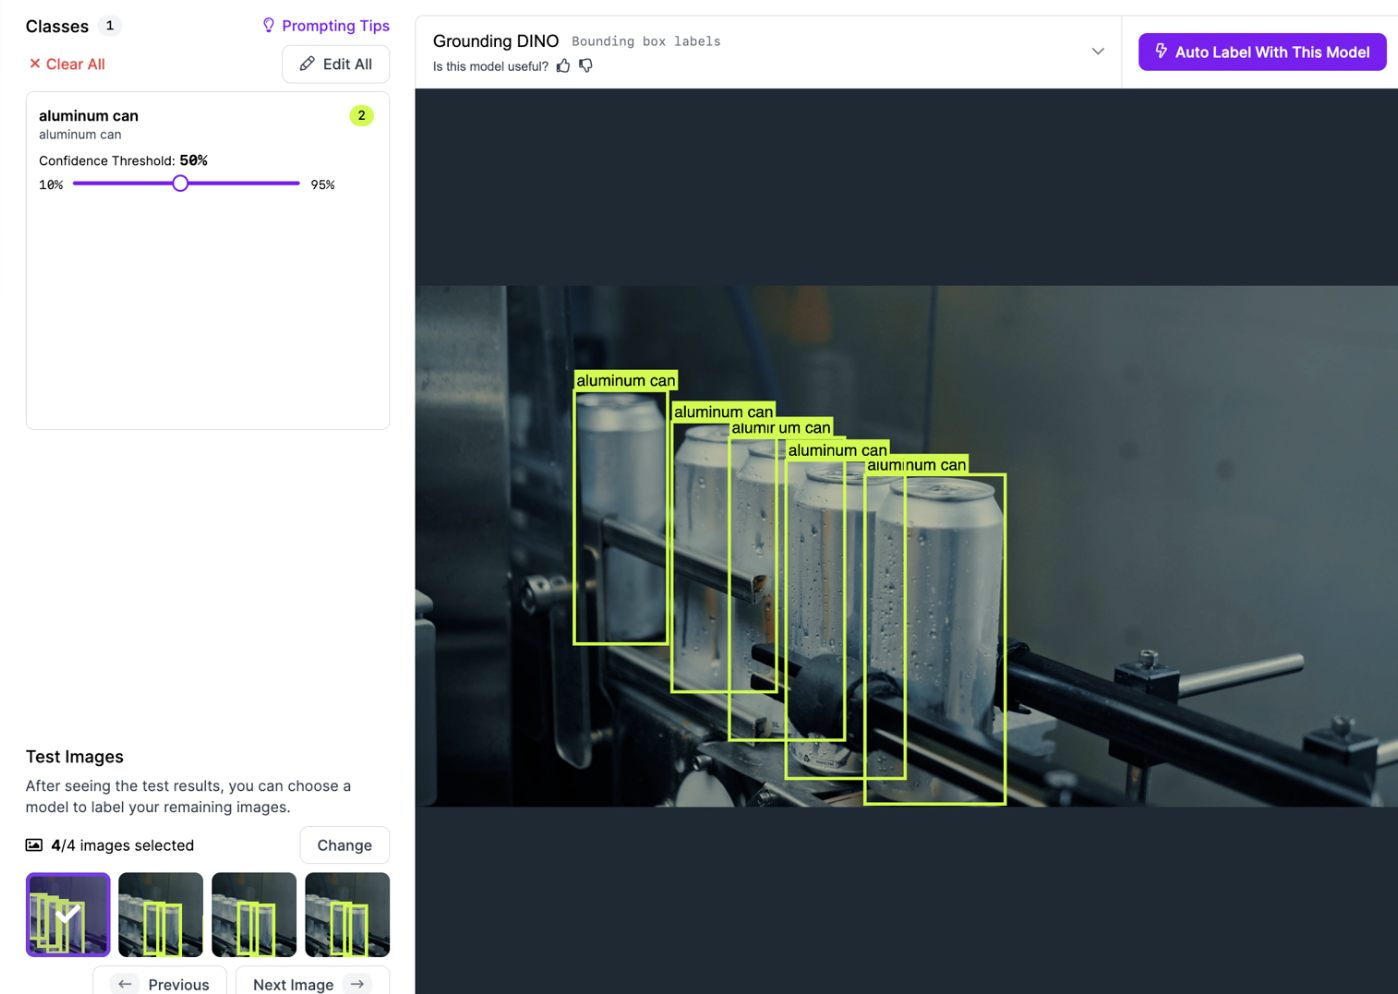
Roboflow
Roboflow's computer vision platform has a suite of annotation tools to make the process of labeling data more efficient and accurate.
- Label Assist: a tool that uses model checkpoints (i.e. a previous version of your model) to recommend annotations.
- Smart Polygon: a tool that leverages the Segment Anything Model to create polygon annotations with a few clicks.
- Auto Label: a tool that leverages large foundational models to label images based on prompted descriptions of each Class.
- Commenting: a feature that allows for seamless cross-team collaboration throughout the labeling process.
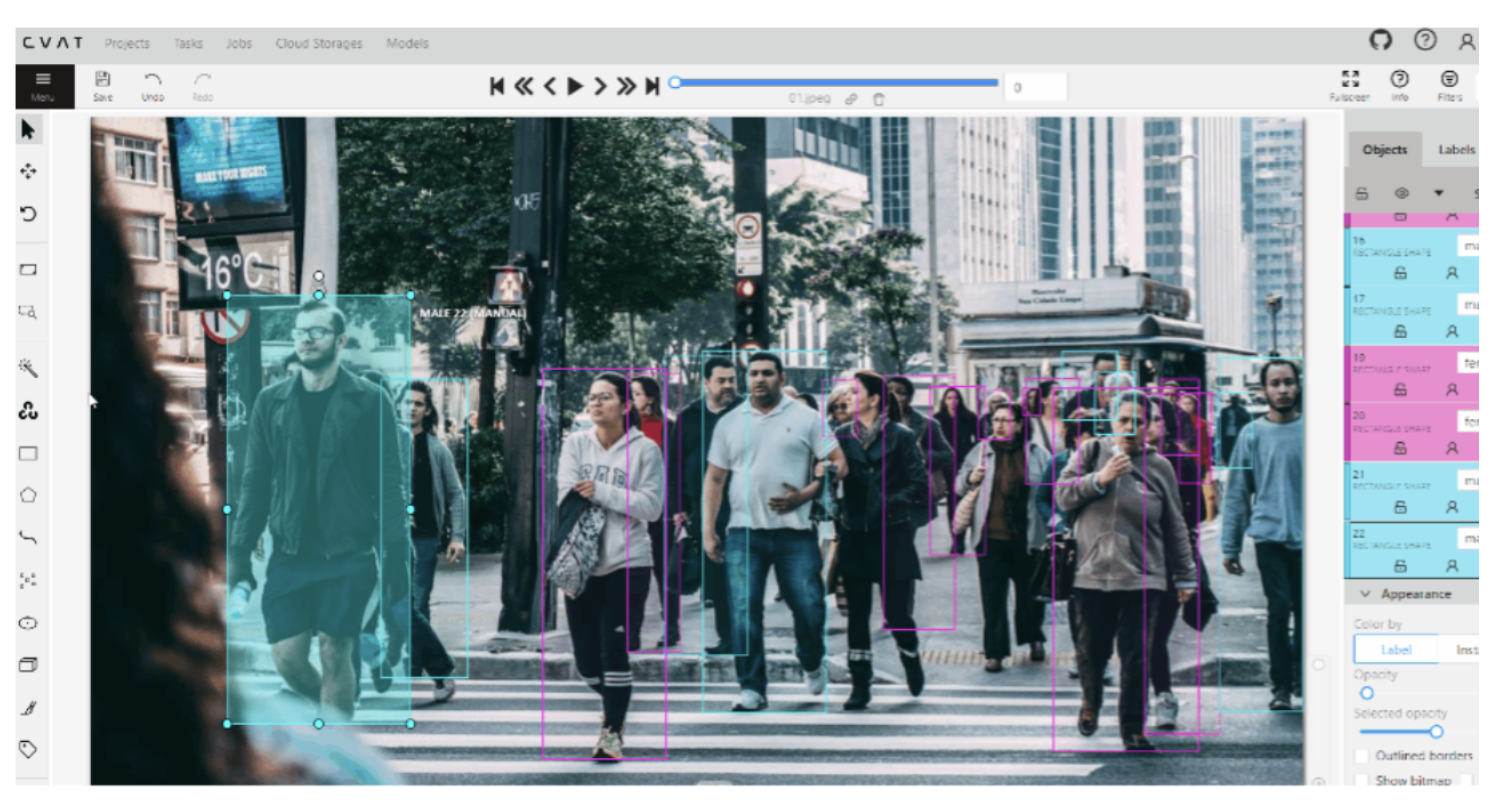
CVAT
CVAT which stands for computer vision annotation tool is a well-developed and powerful labeling tool that is open sourced under MIT license since 2022. It supports many annotation types (bounding boxes, polygons, polylines, key points, and 3D cuboid annotations) for images. CVAT also has automation support which allows you to plug in machine learning models to pre-label images or integrate with segmentation models for semi-automated labeling.
How to Provide Detailed Labeling Instructions to Outsourced Labelers
Don't want to label yourself? Through Roboflow’s Outsourced Labeling service, you can work directly with professional labelers to annotate projects of all sizes. Here are some best practices to follow which will help ensure that your outsourced labelers receive a high quality set of instructions to reference throughout their work.
Provide positive examples
Examples of well annotated images are the most informative way to explain to other labelers how to annotate your data. By providing examples of what the correct outcome should look like, labeling teams have a source of truth that can be referenced at all times.
As a general rule of thumb: the larger that source of truth is, the less confusion or need for communication throughout the labeling process there is. Here are some examples of well annotated images:
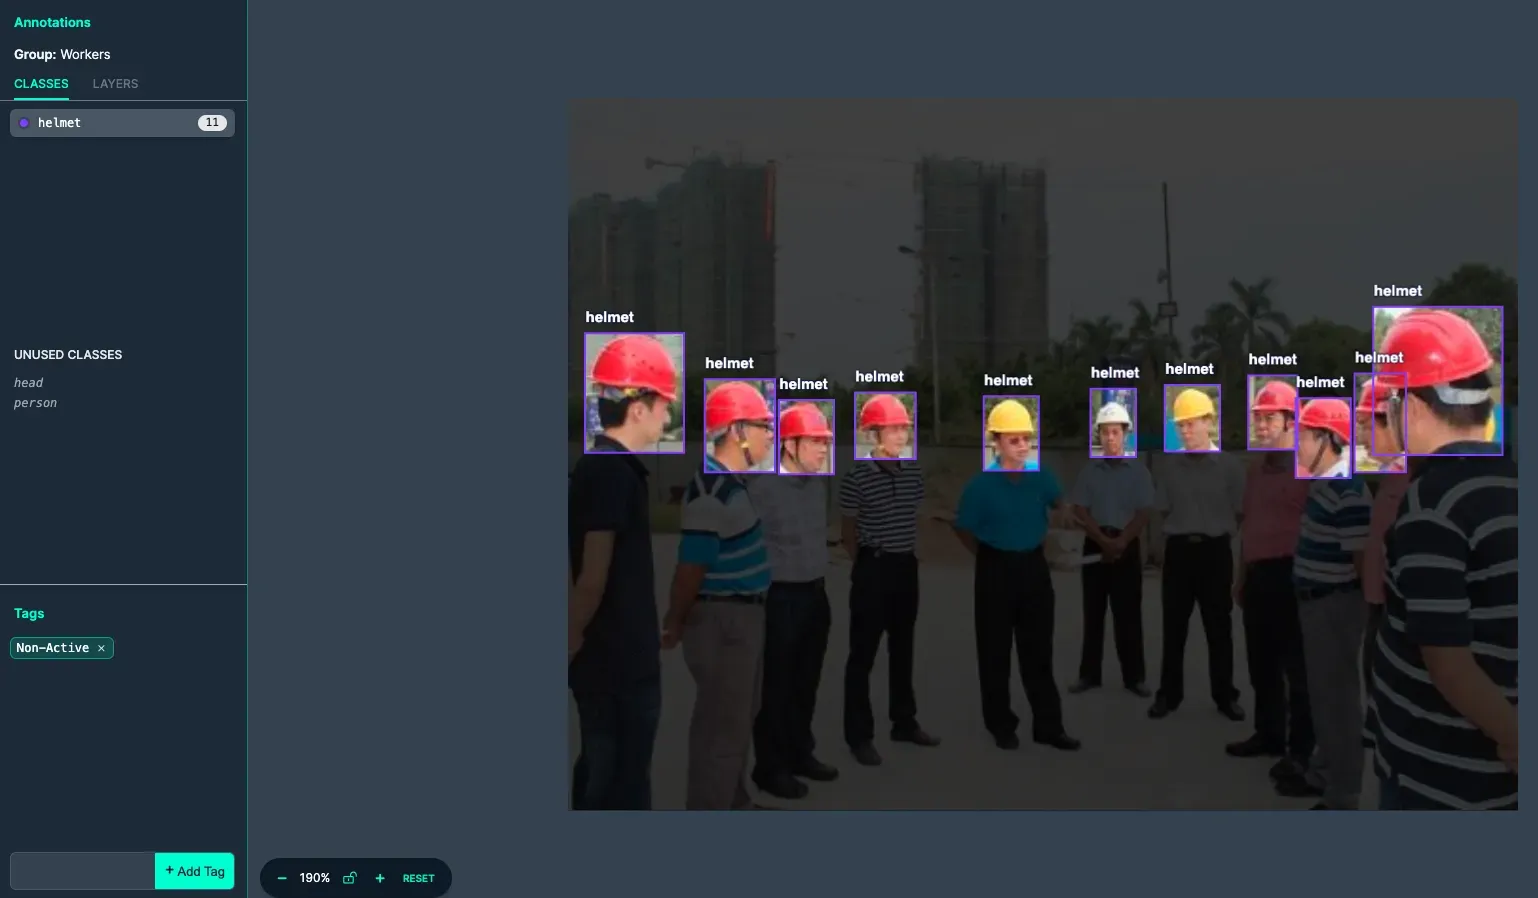
The image above has all its classes labeled properly. The image is also tagged to help with filtering and organization once added to the dataset.
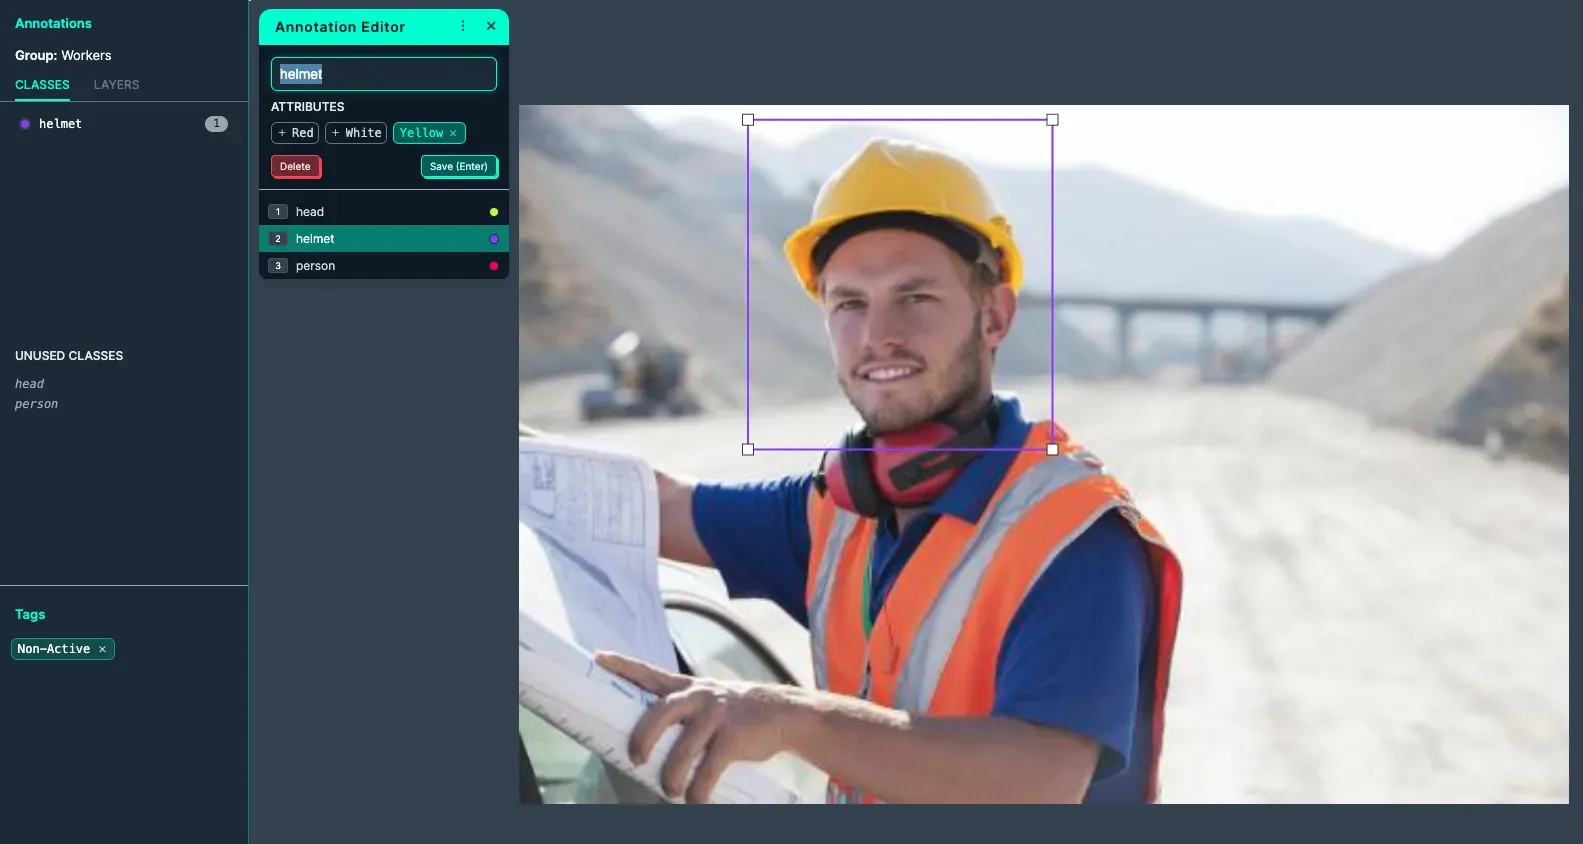
The image above is labeled with an Annotation Attribute to help increase labeling granularity (Yellow) within the class (Helmet). The image is also tagged to help with filtering and organization once added to the dataset.
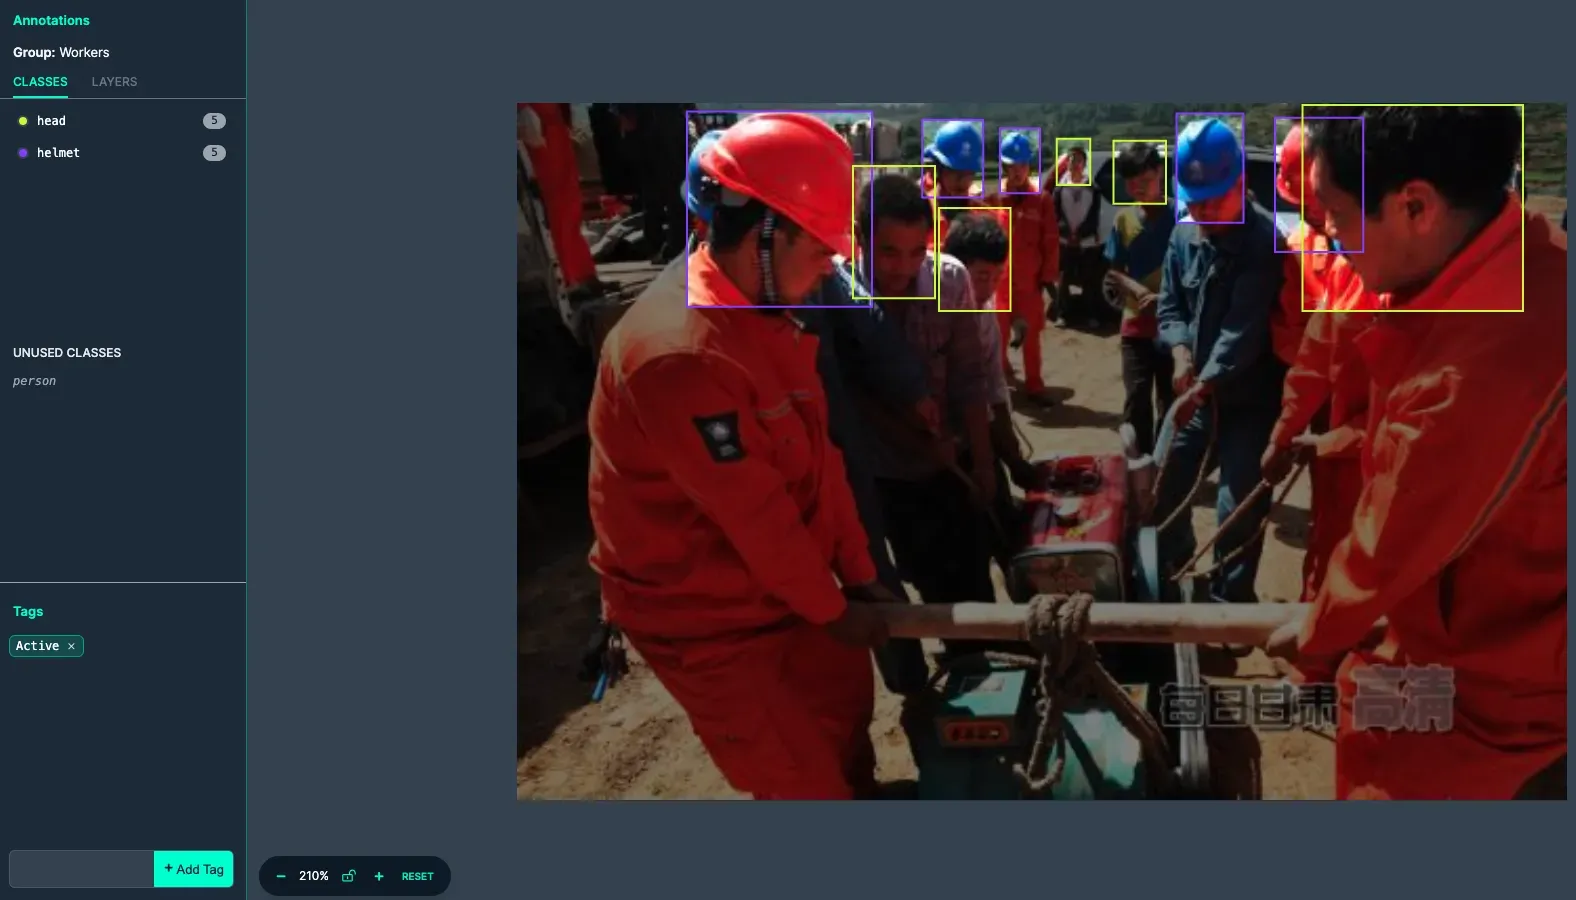
This image includes multiple classes that are all labeled correctly. The image is also tagged to help with filtering and organization once added to the dataset.
Provide negative examples
Negative examples, where you feature an image that has been annotated incorrectly, can also help labelers navigate annotation jobs. Negative examples are particularly useful when there is an element of subjectivity to the classes which lends itself to mislabelling. Alternatively, if there are many objects in the image that can get missed, including insufficient examples is also helpful.
Here are some examples of poorly annotated images:
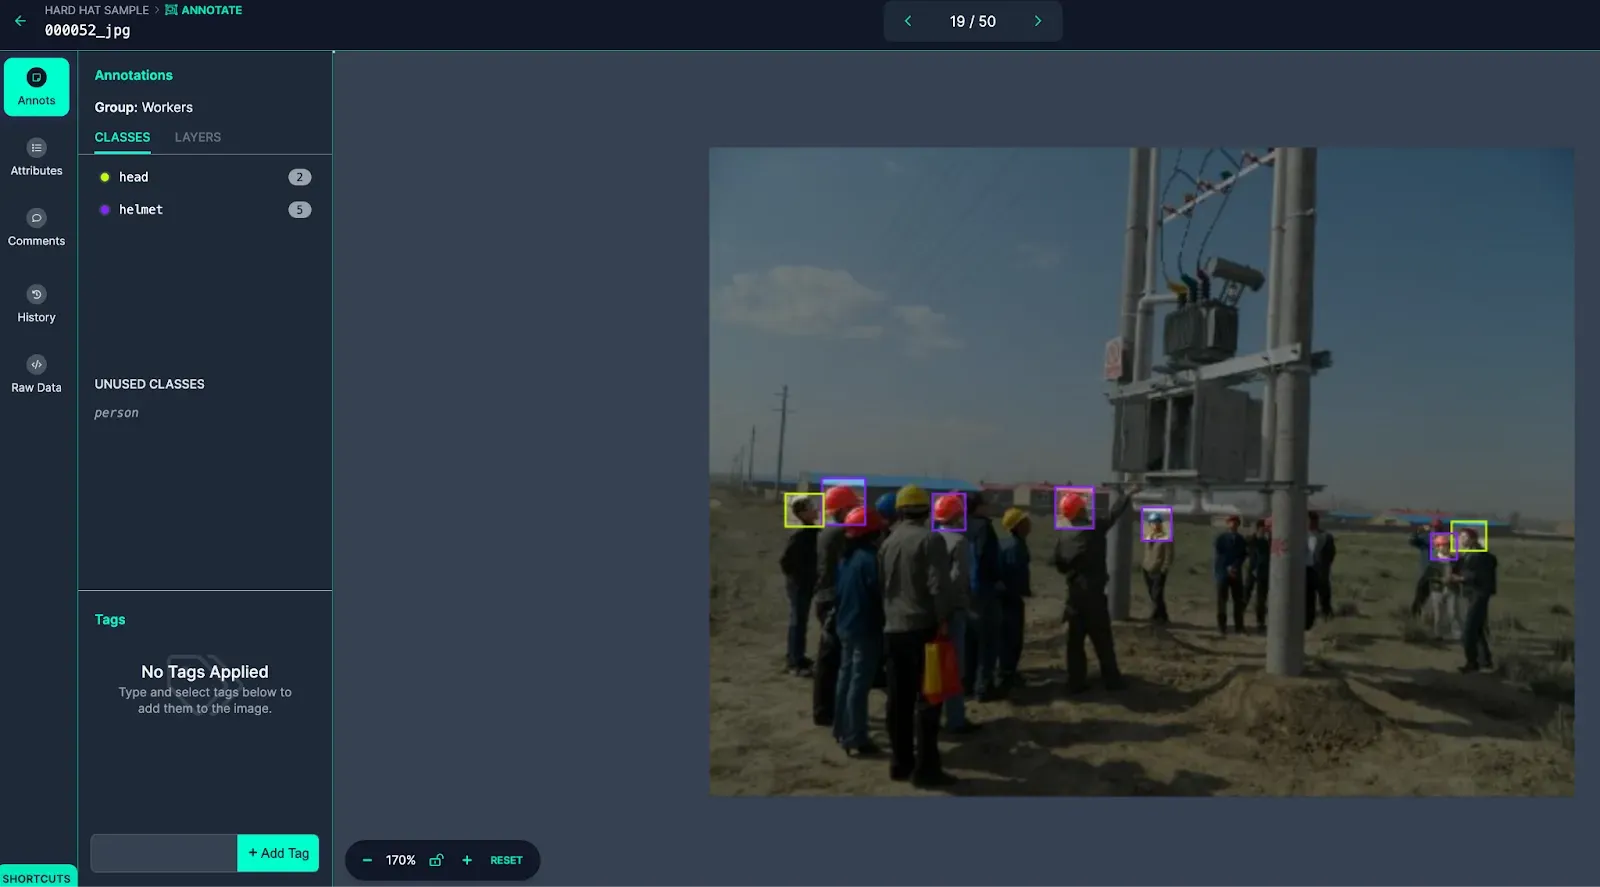
The image above is missing annotations of visible objects, making it an insufficiently labeled image.
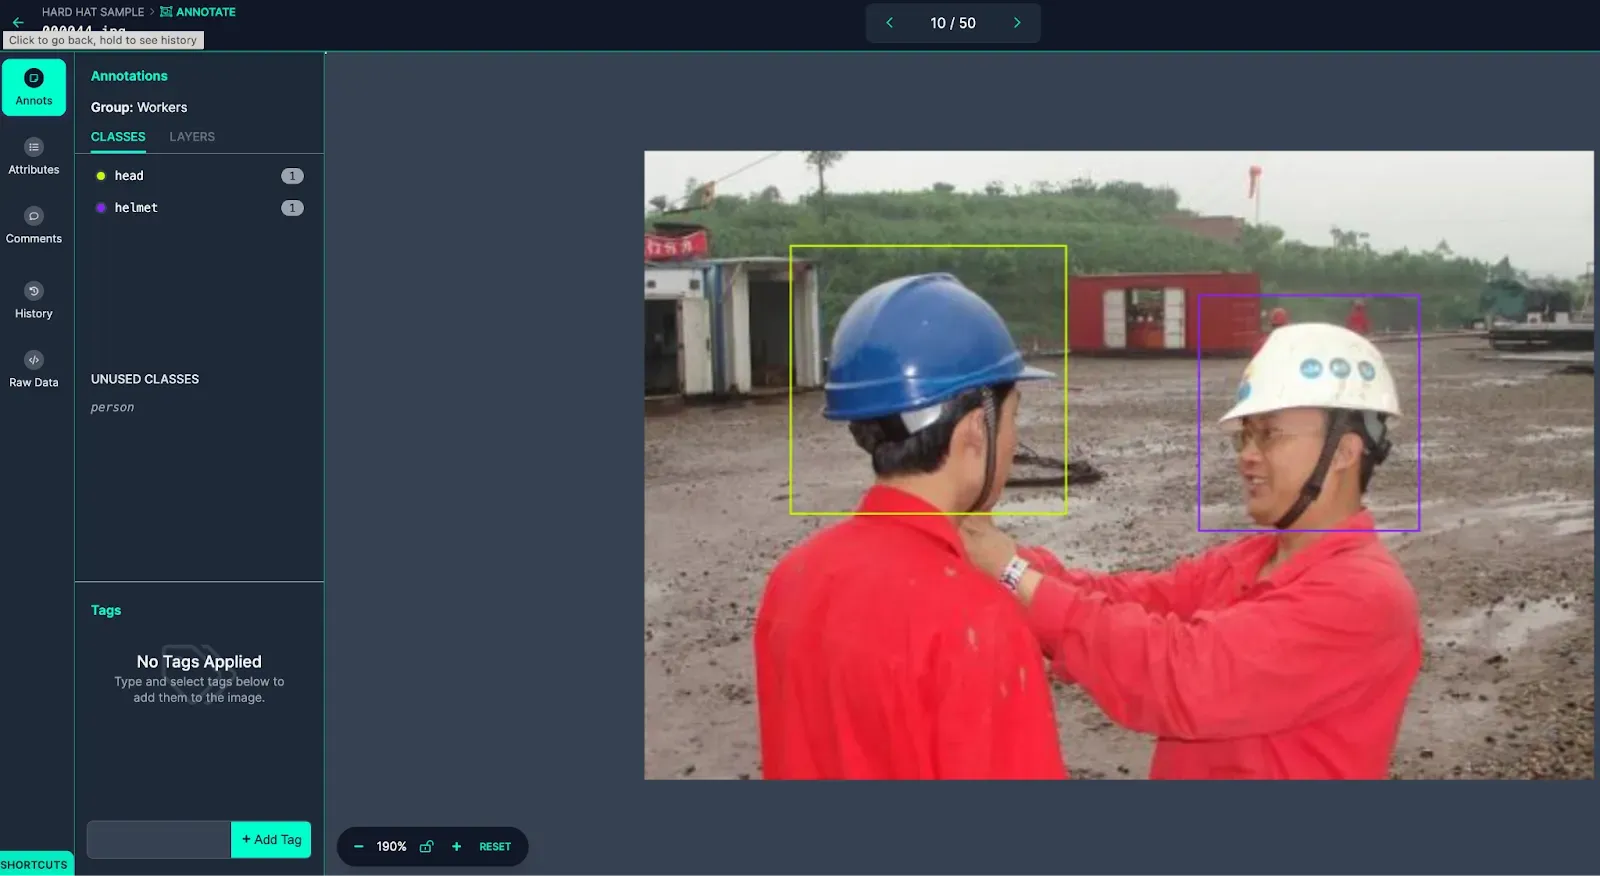
The image above is labeled incorrectly as both people pictured are wearing helmets, despite only one of them being labeled as Helmet. This image would be rejected and not added to the dataset.
Regardless or whether or not the instructions are positive or negative, explaining why they are examples is just as important as the images themselves.
Provide guidance on unannotated images
As you lay the foundation for labeling your data through positive and negative examples, including unannotated images in the instructions can be helpful for labelers to confirm they are properly understanding how the data should be interpreted. If you provide positive and negative examples and labelers still have questions on how to label the unannotated data, that can be a strong signal that the instructions have not been clear enough.
Share context for your project
Providing context at a high level regarding the problem you are solving with computer vision can fill in the “why” behind the project. This allows labelers to not only look at annotations through the lens of what is being annotated but also why it is being annotated. This may spark more informed questions throughout the labeling process or make sure details do not get missed.
Adding project context can be as simple as explaining “we are labeling whether or not workers at construction sites are wearing hard hats to help improve worker safety and reduce workplace injury.”
How to Do Data Annotation with Roboflow: Medical Image Annotation
From agriculture and retail to autonomous driving, you may find use cases of data annotation for image classification, face recognition, and many other tasks. Medical image annotation has also developed at a fast pace. From radiology scans and pathology slides to retinal photographs, labeling abnormalities in these images is a critical step in developing reliable models. This simple project shows you how to use Roboflow to annotate lower and upper lesions on a pathology image from this article.
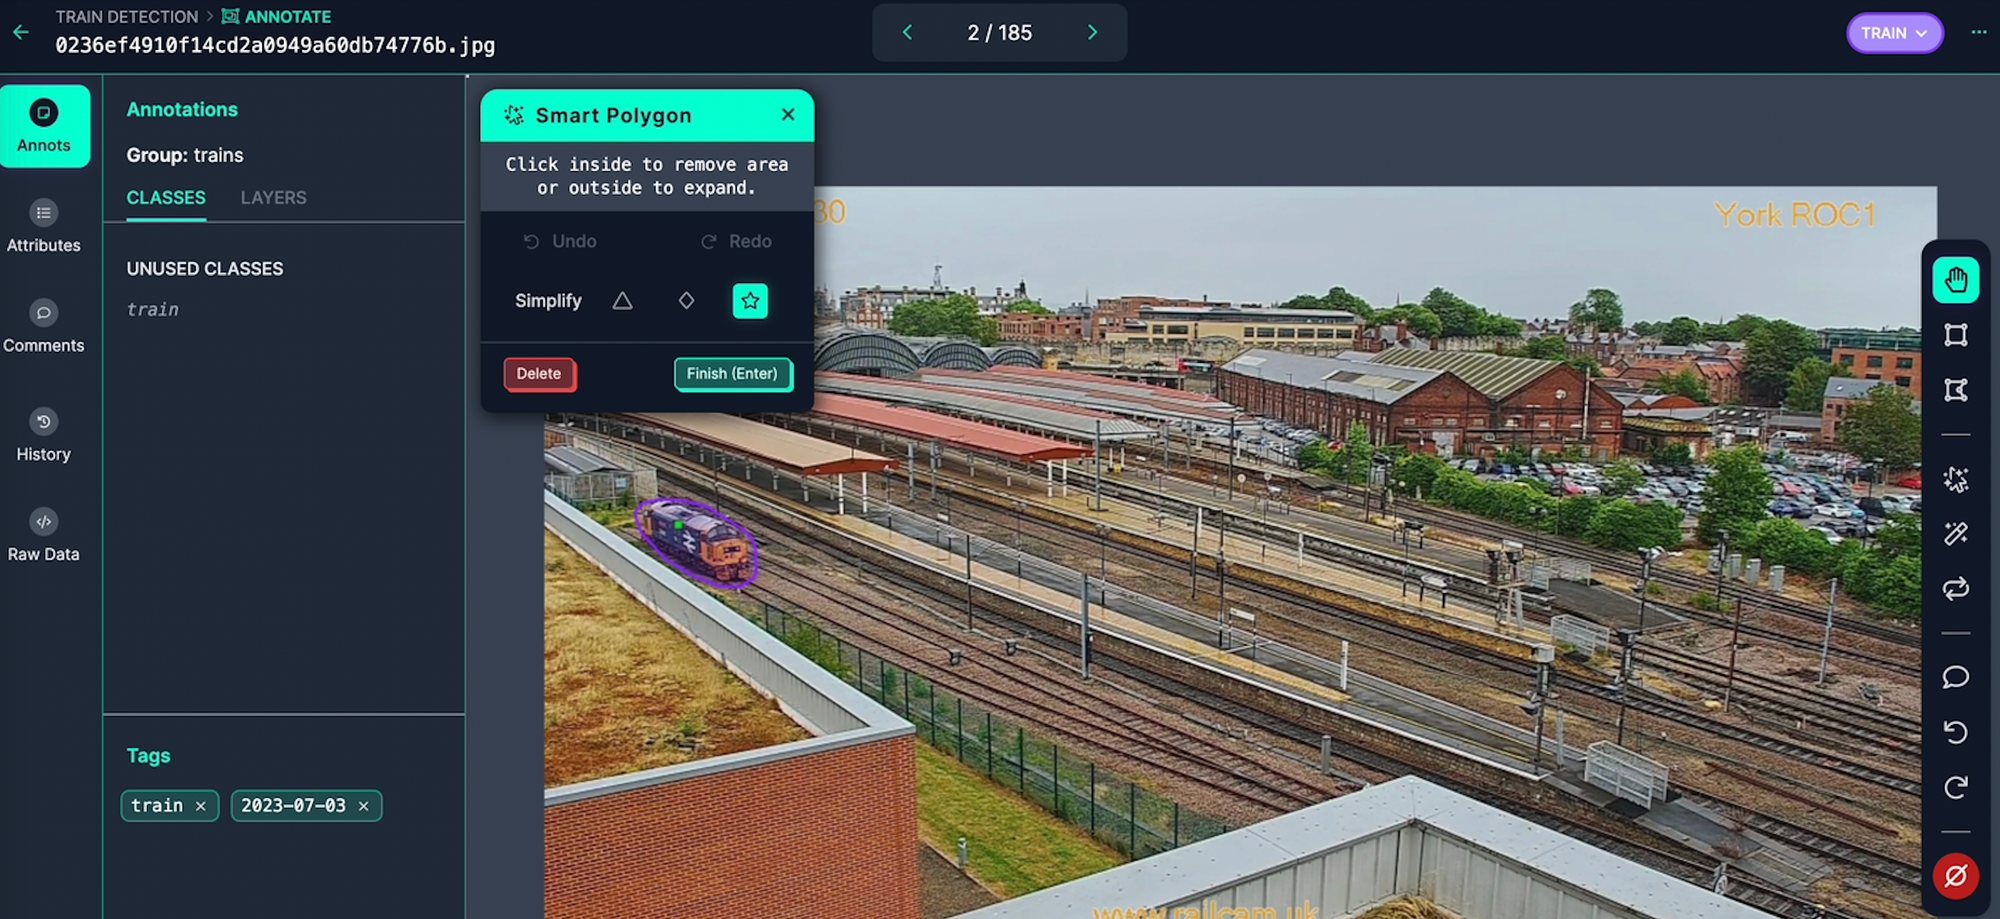
First step is to create a free account at Roboflow. For the scope of this project, a free account is more than enough. After creating a new project and uploading the images, I choose Smart Polygon - a feature that creates polygon annotations with a few clicks - to be able to annotate the region with AI assistance. It took me around a minute to realize how this works and annotate the image below:

Smart Polygon allows you to draw new Smart Polygon annotations. In this mode, you see a green dot when you are selecting a new area of interest (new label); a red dot when selecting areas to remove from the area of interest (parts of the object or image that you don't want to label/enclose with the polygon); and options to adjust the polygon by Convex Hull, Smooth, and Complex settings.
When you take on a new labeling project, the task’s full scope and subtleties usually become clearer over time. Work such as semantic segmentation, and other computer-vision efforts often encounter changing hurdles like surprising edge cases, label disputes among downstream users, or guidelines that feel subjective to annotators. These challenges are normal and are best resolved through an iterative, collaborative approach. Roboflow streamlines that process with its built in annotation workspace and programmatic labeling tools, making it easier to manage data and record assumptions.
Get Started with Data Annotation
Data annotation might not be the most fun or flashy thing to do, but it's where real computer vision progress begins. From bounding boxes to segmentation masks, manual methods to AI-assisted labeling, every decision you make at this stage directly impacts how your model performs down the line.
The good news? You don’t have to do it all by hand. Roboflow gives you the power to label smarter, iterate faster, and collaborate with ease. So you can spend less time drawing boxes, and more time building models that work. Get started free.
Written by Daniel Safavisohi
Cite this Post
Use the following entry to cite this post in your research:
Contributing Writer. (May 22, 2025). Data Annotation for High-Performing Computer Vision Models. Roboflow Blog: https://blog.roboflow.com/data-annotation/