
CVAT (Computer Vision Annotation Tool) is a web-based, open-source annotation platform for building computer vision datasets. Originally developed at Intel and later stewarded by OpenCV, it spun out in 2022 as CVAT.ai Corporation, which maintains it today.
CVAT annotates images, video, and 3D point clouds with bounding boxes, polygons, masks, keypoints, cuboids, and tags, covering object detection, classification, tracking, and segmentation tasks.
CVAT comes in three tiers: CVAT Community is the free, self-hosted open-source version; CVAT Online is the hosted cloud edition, with a free tier (up to 10 tasks and 500 MB of storage) and paid Solo and Team plans from $23 and $46 per month; CVAT Enterprise adds private hosting, SSO, and dedicated support for larger organizations.
Today, I'll focus on how to annotate images for object detection in CVAT. I'll also cover AI-assisted labeling, exporting, local installation, and how CVAT compares to alternatives.
I recommend trying to label a batch of images (50+) and training a state of the art model like RF-DETR, to see if your computer vision task is already solved with current technologies.
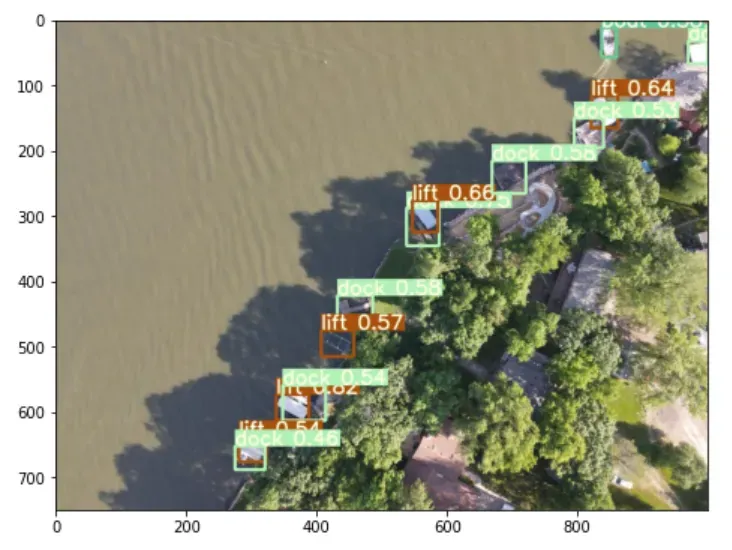
We will be showing the steps used to annotate the public aerial maritime object detection dataset taken from a drone. Although a specific dataset is used, this post is meant to be a general guide on how to label an object detection dataset and how to use labeling tools for object detection. Feel free to use another similar aerial imagery dataset.
CVAT labeled image for computer vision
How to Annotate Images with CVAT
If this is the first time you have encountered CVAT, then you want to start by launching the CVAT website, which is the quickest way to start labeling your data.
Once into the CVAT website, you will see a page like this:
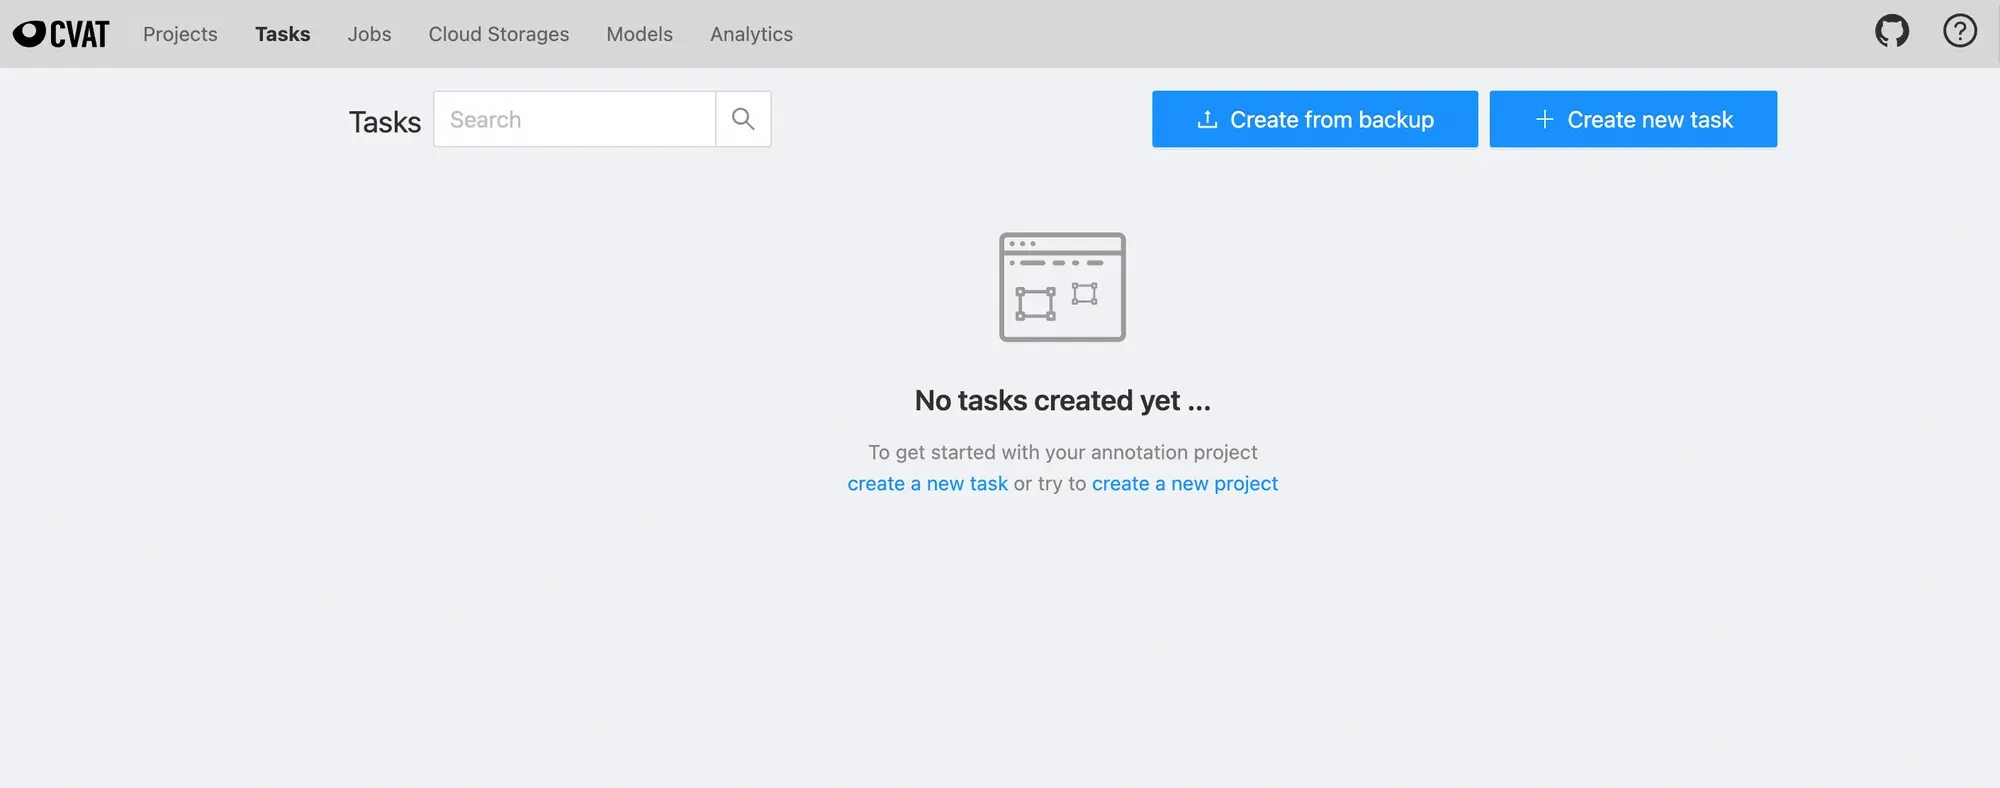
Launch New CVAT Task
From there, you can launch a new task in CVAT and drag your images in for labeling. You are prompted to specify the class labels of the objects that you would like to detect. Carefully specify these because you'll want to ensure you have all the needed classes before you start labeling.
Once your data is uploaded, navigate back to tasks. From there, you will see a task page.
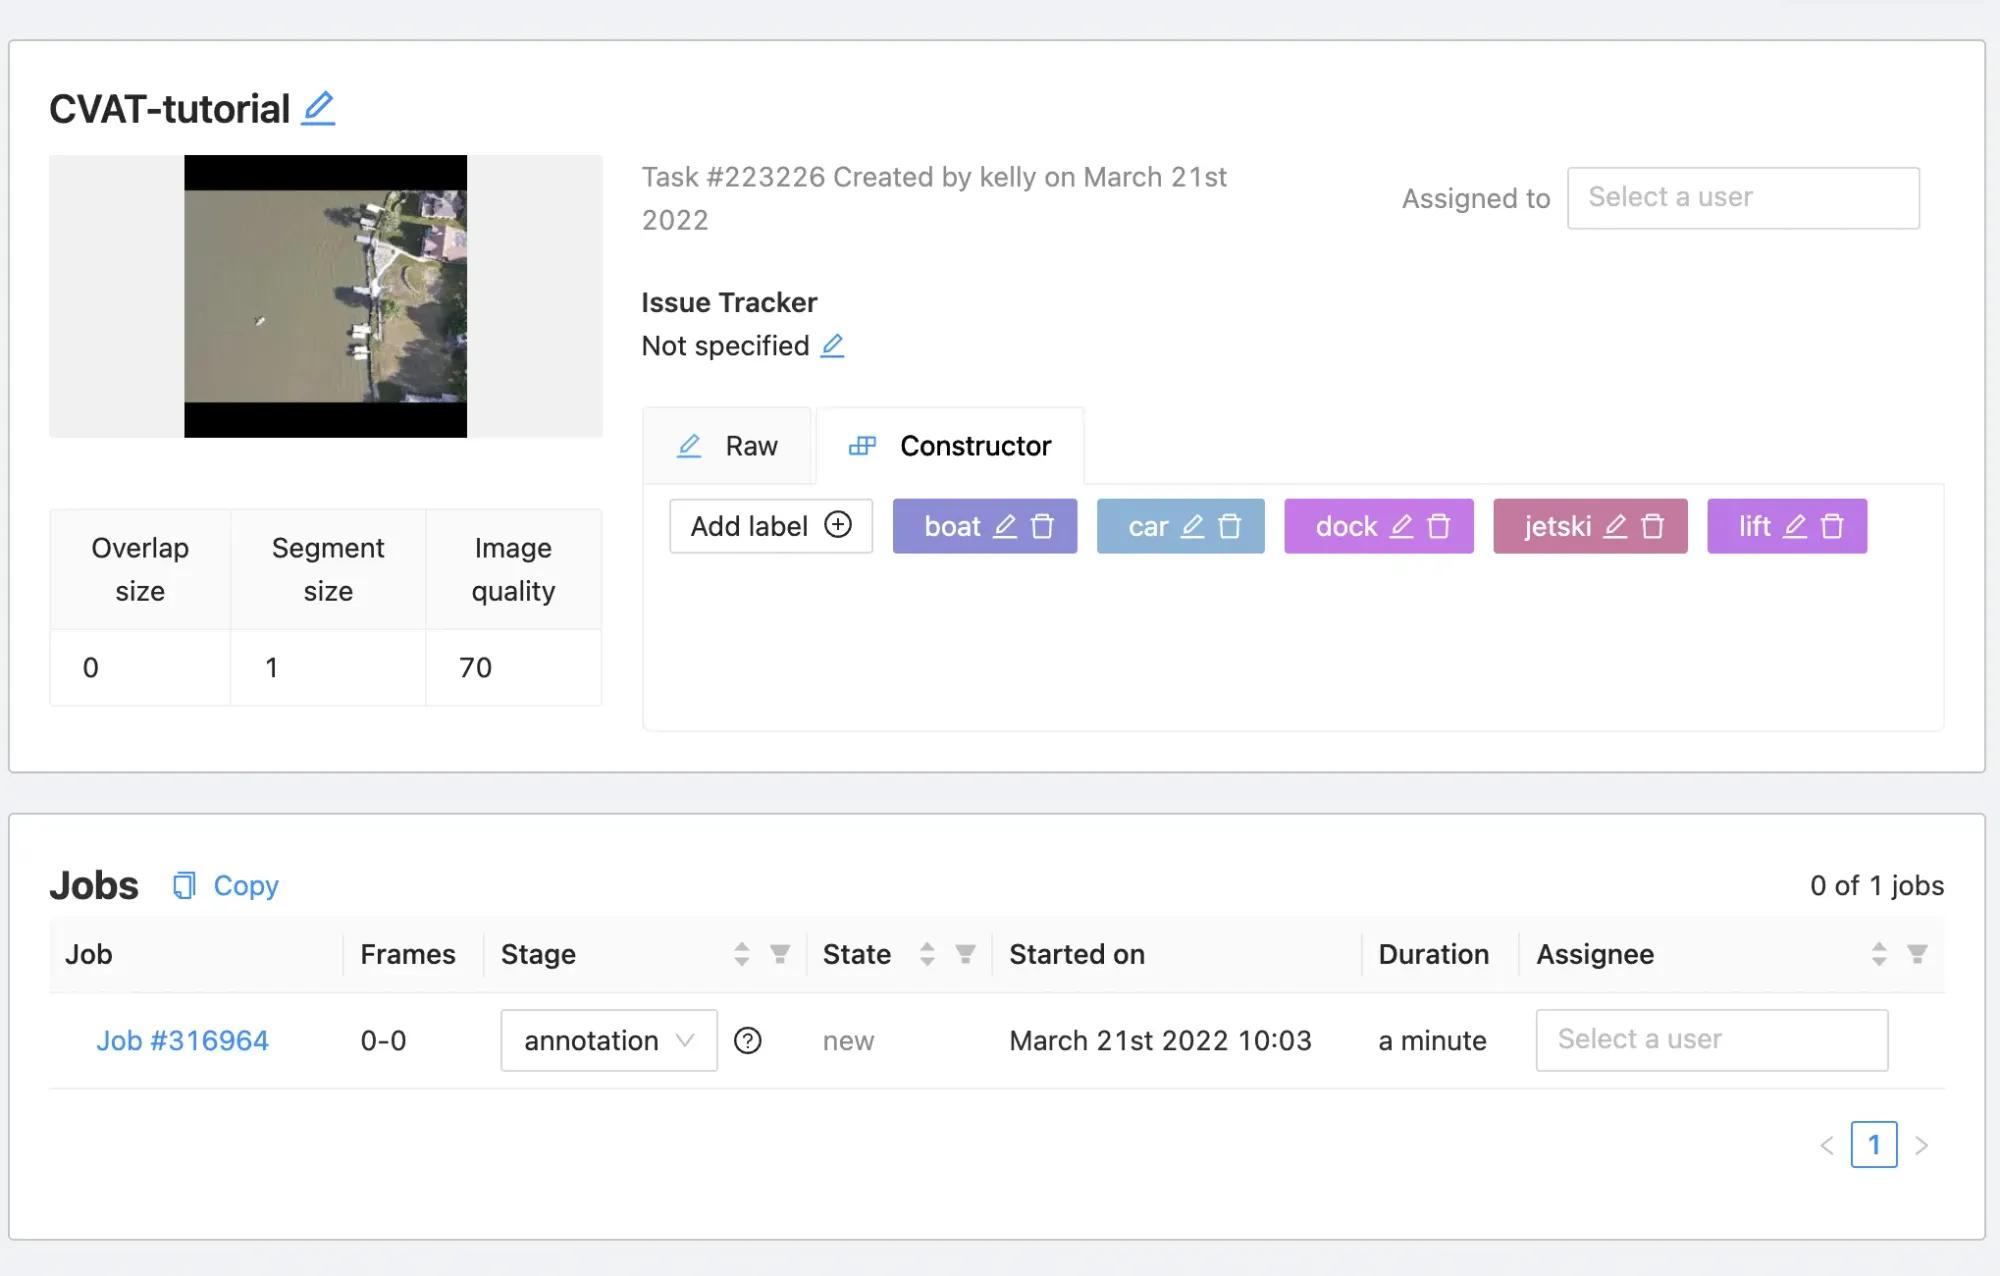
Enter CVAT Labeling Job
You can create jobs to annotate this dataset and you will have automatically set up the CVAT labeling job when you created the task. Note the task/job semantic hierarchy.
Now you can click into your labeling task and get to work. When you're in the labeling screen you will see the following.
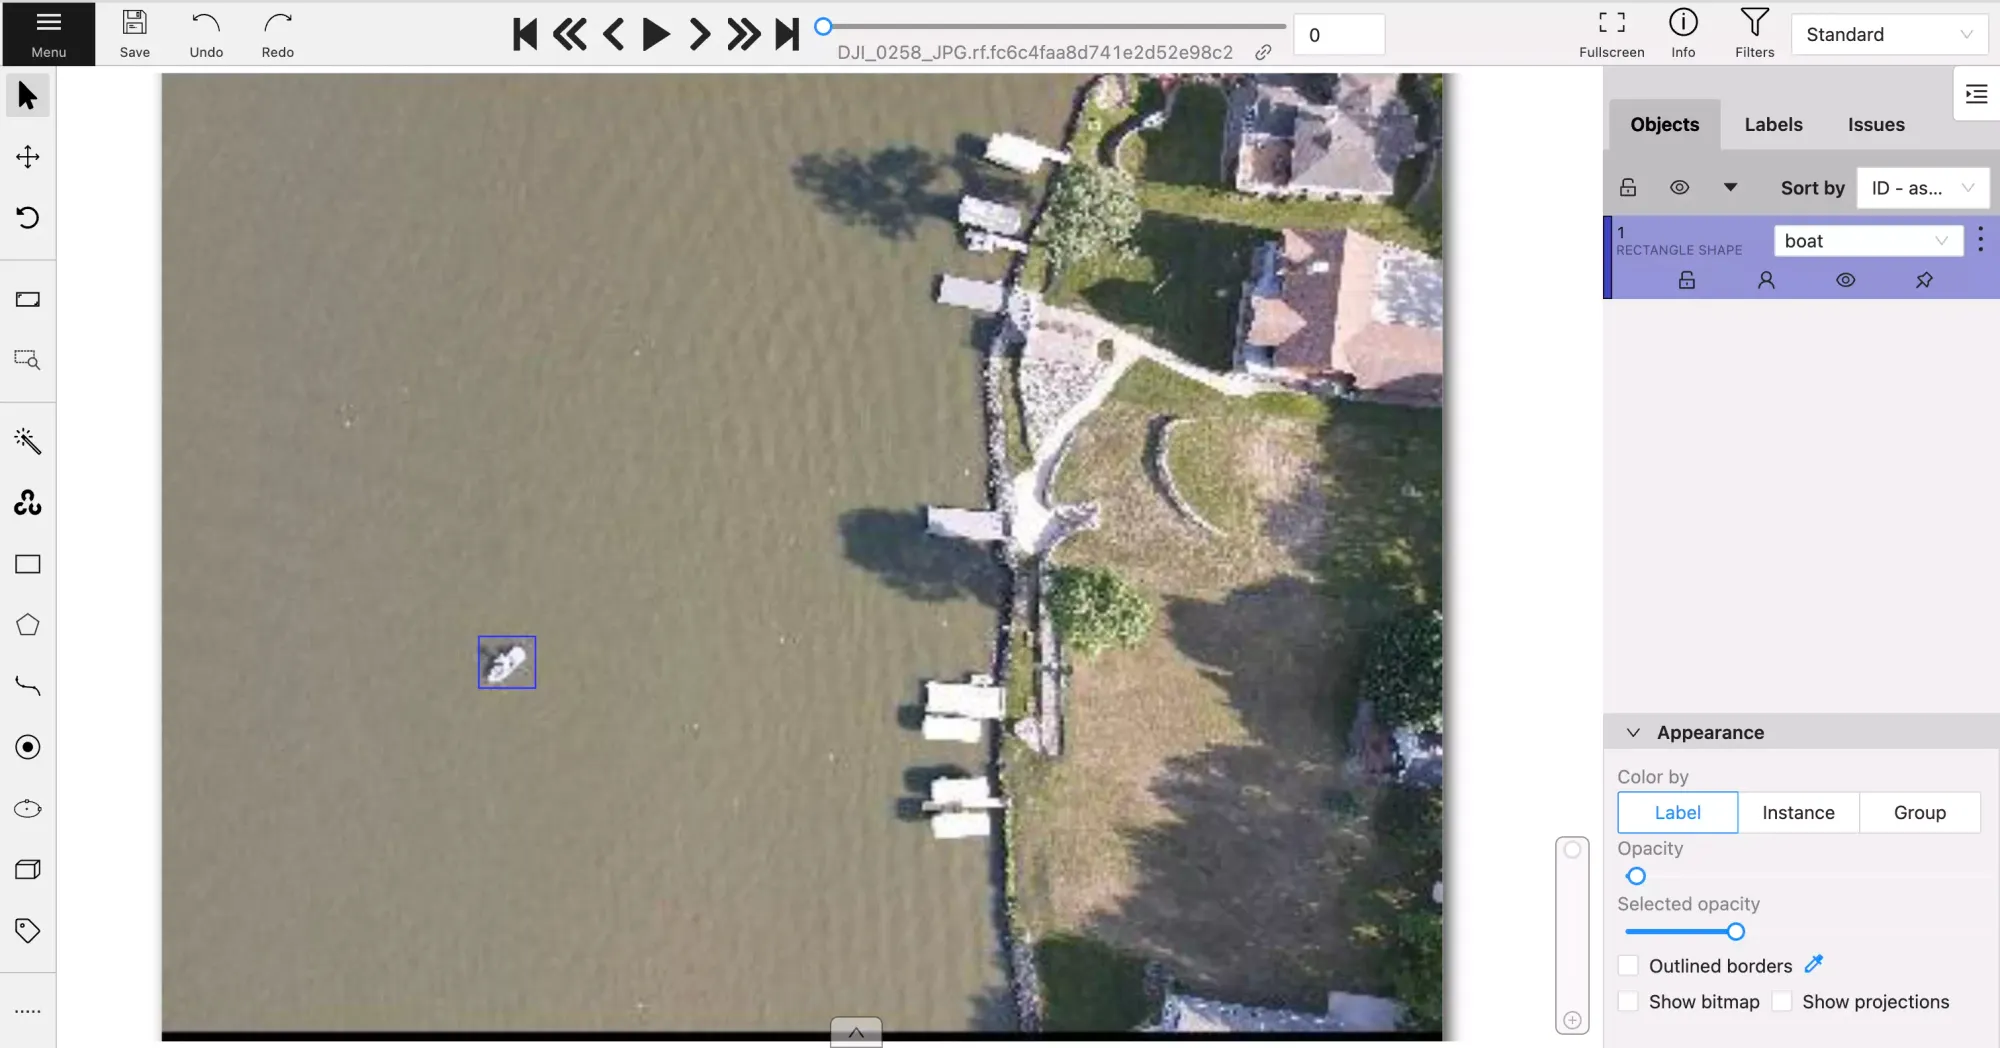
Draw Annotations in CVAT
CVAT offers multiple types of shapes for annotation: rectangle (bounding box), polygon, polyline, points, ellipse, cuboid, and tag. Below are examples of how those tools can be used.
You can click "Create Shape" and draw a box around the object you want your detector to detect.
Labeling in CVAT with a rectangle
Bounding boxes may work for your project but if you need a tighter outline of your objects for better performance, you can use the polygon tool. Similar to the polygon tool, you also have the option of using the polyline annotation tool. Below is a video of the polygon option.
Labeling in CVAT with the polygon tool
AI-Assisted Labeling in CVAT
Manual annotation is the slowest part of any dataset build, and CVAT's AI Tools section is where most of the time savings live. Modern CVAT ships with Segment Anything (SAM and SAM 2) built in: click an object and SAM generates a polygon or mask around it, turning multi-click polygon work into a single click plus adjustments. Detector models like YOLO and Mask R-CNN can pre-label whole images automatically when your classes overlap with what those models know.
CVAT also supports external models through native integrations, including Roboflow models and Hugging Face, plus custom models via CVAT AI Agents. That means a model you've already trained on Roboflow (or any of the 250,000+ models on Roboflow Universe) can pre-annotate your new images inside CVAT, so labeling becomes reviewing and correcting rather than drawing from scratch.
Export Annotations From CVAT
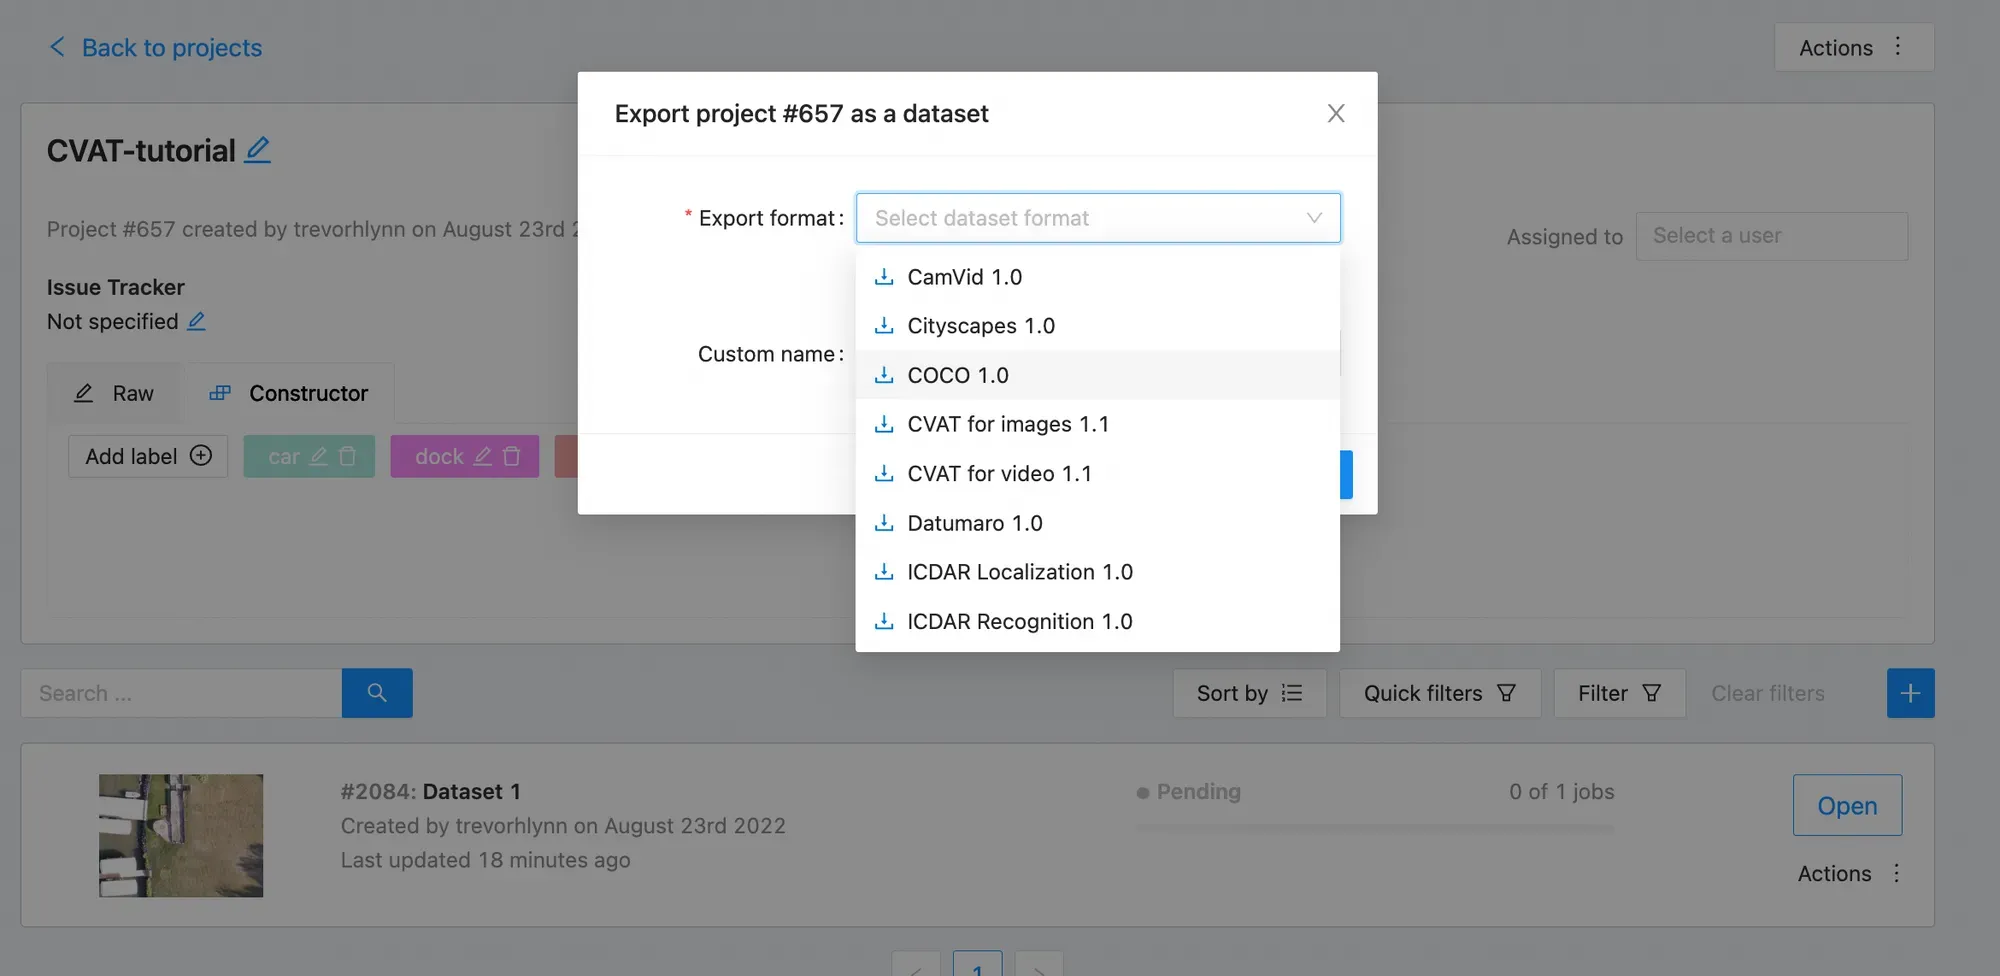
You first want to click "Save". CVAT does not automatically save work.
Then click "Menu", in CVAT. Then you want to click "Export task dataset" and you can choose among different formats: label VOC XML, label COCO JSON, label YOLO annotations, etc. Before exporting, be sure to know the format needed to train your specified model of choice.
In the event you need to convert your annotations to a format CVAT does not support, Roboflow offers free dataset conversions to 26+ formats.
Congrats! Now you have a labeled dataset.
CVAT vs. Other Annotation Tools
CVAT's strength is annotation depth and deployment control: it supports more shape types than most tools, handles video and 3D natively, and the Community edition runs entirely on your own infrastructure at no cost, which matters for sensitive data.
The tradeoff is that CVAT is an annotation tool, not a pipeline. Labeled data leaves CVAT as an export file, and training, augmentation, deployment, and monitoring happen elsewhere.
Roboflow Annotate takes the integrated approach: AI-assisted labeling (including auto-labeling with foundation models) feeds directly into hosted training, deployment, and active learning in one platform, with no export step. Label Studio sits in a third lane, covering non-vision data types (text, audio) alongside images.
A common production pattern uses both: annotate in CVAT where labeling teams already work, then convert the export and train in Roboflow. If you're starting fresh and want labeling connected to training, starting in Roboflow Annotate removes the conversion step entirely.
CVAT Pros and Cons
Pros: Free and open source with a self-hosted option; broad shape support (boxes, polygons, masks, keypoints, cuboids); native video and 3D annotation; SAM-powered AI-assisted labeling; exports to all major formats (COCO, VOC, YOLO); large community and active development.
Cons: Self-hosting requires Docker setup and maintenance; the free cloud tier is capped at 10 tasks and 500 MB; no built-in model training or deployment, so labeled data must be exported to another platform; the interface has a steeper learning curve than lighter-weight tools.
Install CVAT on Your Local Machine
If you are serious about CVAT, you can configure it on local. The CVAT website has these limitations:
- No more than 10 tasks per user
- Uploaded data is limited to 500Mb
On local you will not be subject to these limitations because your machine will be doing the heavy lifting.
To launch CVAT on local, first clone the CVAT repository in your terminal window.
git clone https://github.com/opencv/cvat.git
cd cvat
Then, if you don't have Docker, install Docker. See that Docker is successfully installed:
docker versionNow we build CVAT on local and launch with the following commands:
docker compose build
docker compose up -d
This will take a while to run. It is building CVAT dependencies in your local machine. Then you create your username within your local CVAT service by executing into it:
docker exec -it cvat_server bash -ic 'python3 ~/manage.py createsuperuser'Now, navigate to your browser and type
http://localhost:8080/This will navigate to your local CVAT!
You can come back later and restart the service. If you are having trouble logging into CVAT, you can rebuild with no-cache:
docker compose build --no-cache
docker compose up -d
CVAT Labeling Best Practices
When you're operating in CVAT, carefully annotate objects with your downstream model in mind. Keep these labeling best practices in mind while working through your dataset:
- Label entirely around the object
- For occluded objects - label them entirely
- Generally label objects that are partially out of frame
- Beware of labeling many boxes that overlap or are entirely contained within each other. This can really confuse your model.
- Start your labels list with the most represented class. It will be the default when you draw a box
- Label all objects in each class first - you can focus on them and change all of their labels at once
- Type "N" to draw a new box
Create a Model with CVAT-Labeled Data
Once your dataset is labeled in CVAT, it is time to move to the creation of your computer vision model.
Roboflow makes it easy to load in your data. Just drag and drop your images and your annotation file from CVAT. You can generate even more data with augmentations such as flipping images, random cropping, and creating synthetic computer vision data.
Use Roboflow Train to train a model with one-click and quickly test your model using our web app or your webcam. Learn more in how to train RF-DETR.
Is CVAT free?
Yes, in two ways. CVAT Community is fully free and open source if you self-host it. CVAT Online's free cloud tier allows up to 10 tasks and 500 MB of storage, with paid Solo ($23/month) and Team ($46/month) plans above that.
Who maintains CVAT?
CVAT.ai Corporation, which spun out of Intel in 2022. CVAT was originally developed at Intel and was previously maintained under OpenCV. The repository now lives at github.com/cvat-ai/cvat.
Can CVAT annotate video?
Yes. CVAT annotates video natively with frame-by-frame labeling, object tracking across frames, and interpolation between keyframes, plus 3D point cloud annotation for tasks like autonomous driving datasets.
What formats does CVAT export?
CVAT exports to the major annotation formats including COCO JSON, Pascal VOC XML, and YOLO. For formats CVAT doesn't support, Roboflow offers free conversion between 26+ annotation formats.
Cite this Post
Use the following entry to cite this post in your research:
Jacob Solawetz. (Mar 21, 2026). What Is CVAT (Computer Vision Annotation Tool)?. Roboflow Blog: https://blog.roboflow.com/cvat/