
YOLOv10, released in May 2024, is an object detection model architecture developed by researchers from Tsinghua University.
At its release, YOLOv10 achieved state of the art accuracy on object detection tasks, evaluated using the industry-standard COCO benchmark dataset. YOLOv10 also runs faster than other object detection models such as YOLOv8 and YOLOv9.

You can now deploy YOLOv10 models with Roboflow in the cloud, or on device using Inference.
Inference is an open source computer vision inference server with which you can run vision models at high speeds. Inference can run in a Docker container, ideal for deploying your model as a microservice, or with a Python package that you can integrate directly into your applications.
In this guide, we are going to walk through how to deploy YOLOv10 models with Roboflow both in the cloud and on device with Inference.
Without further ado, let’s get started!
Step #1: Create a Dataset
To deploy a model with Roboflow, you need to upload a dataset. You can export your data for use in training YOLOv10 models on your own hardware. By uploading your dataset to Roboflow, you can apply augmentations and preprocessing steps to images and control different versions of your data.
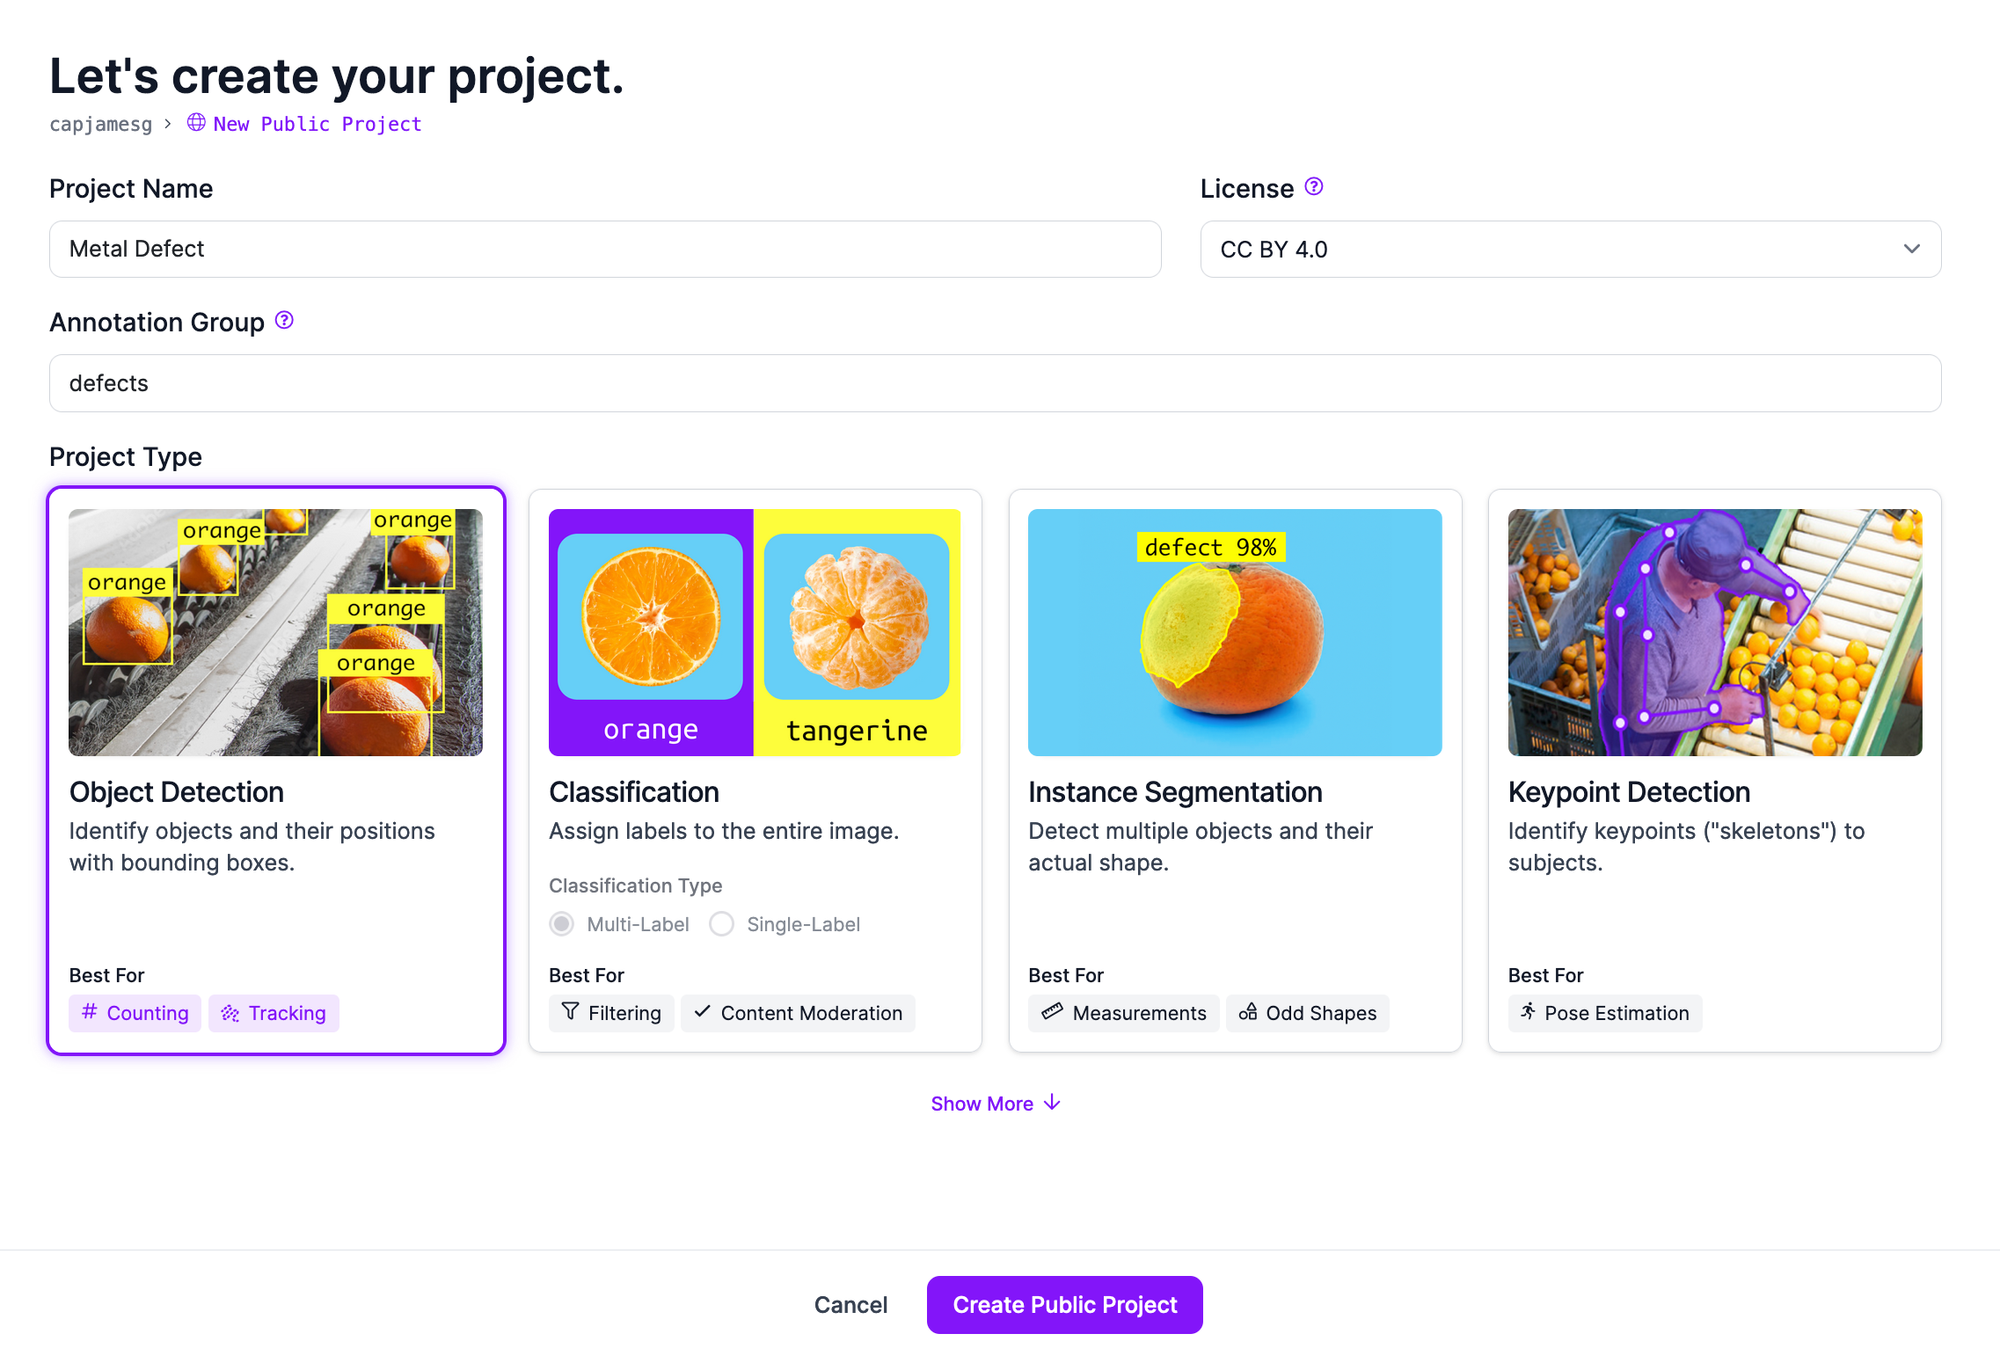
First, create a free Roboflow account. Then, go to your Roboflow dashboard and click “Create a Project”.
Select “Object Detection” as your project type, and choose a name for your project. When you are ready, click “Create Project” at the bottom of the page to create your project.
You will then be asked to upload your data. You can upload labeled or unlabeled images. If you have any unannotated data, you can label those images with Roboflow Annotate, a web-based suite of annotation tools for computer vision.
To upload your data, drag and drop your images and annotations:
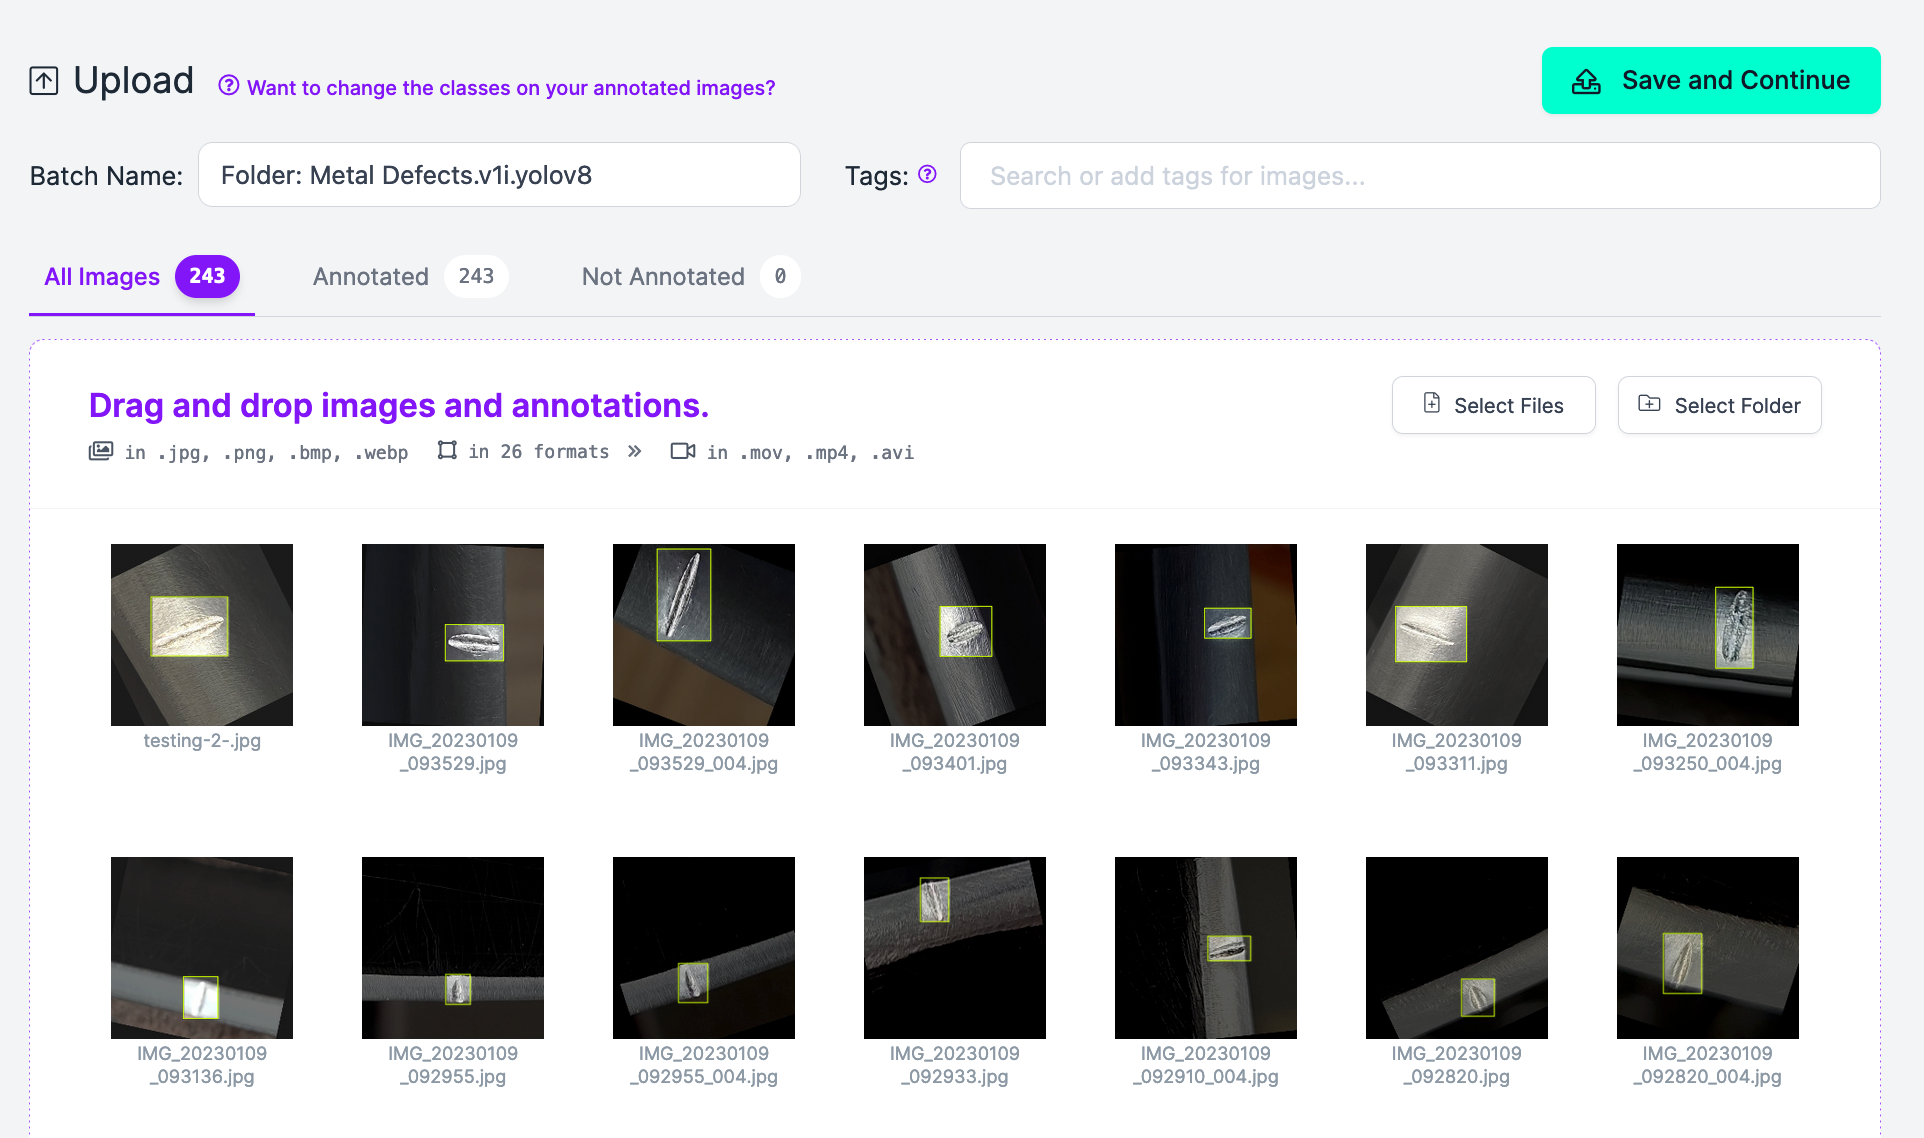
Click “Save Continue” to upload your data.
Your data is now available in Roboflow.
Next, you need to create a dataset version. This is a snapshot of your dataset, frozen in time. You can apply augmentations and preprocessing steps to images in your dataset, which may help you boost model performance.
To create a dataset version, click “Generate” in the Roboflow sidebar. You will then be able to configure your dataset generation job. Refer to our preprocessing and augmentation guide to learn more about the processing steps available and which ones may be right for your project.
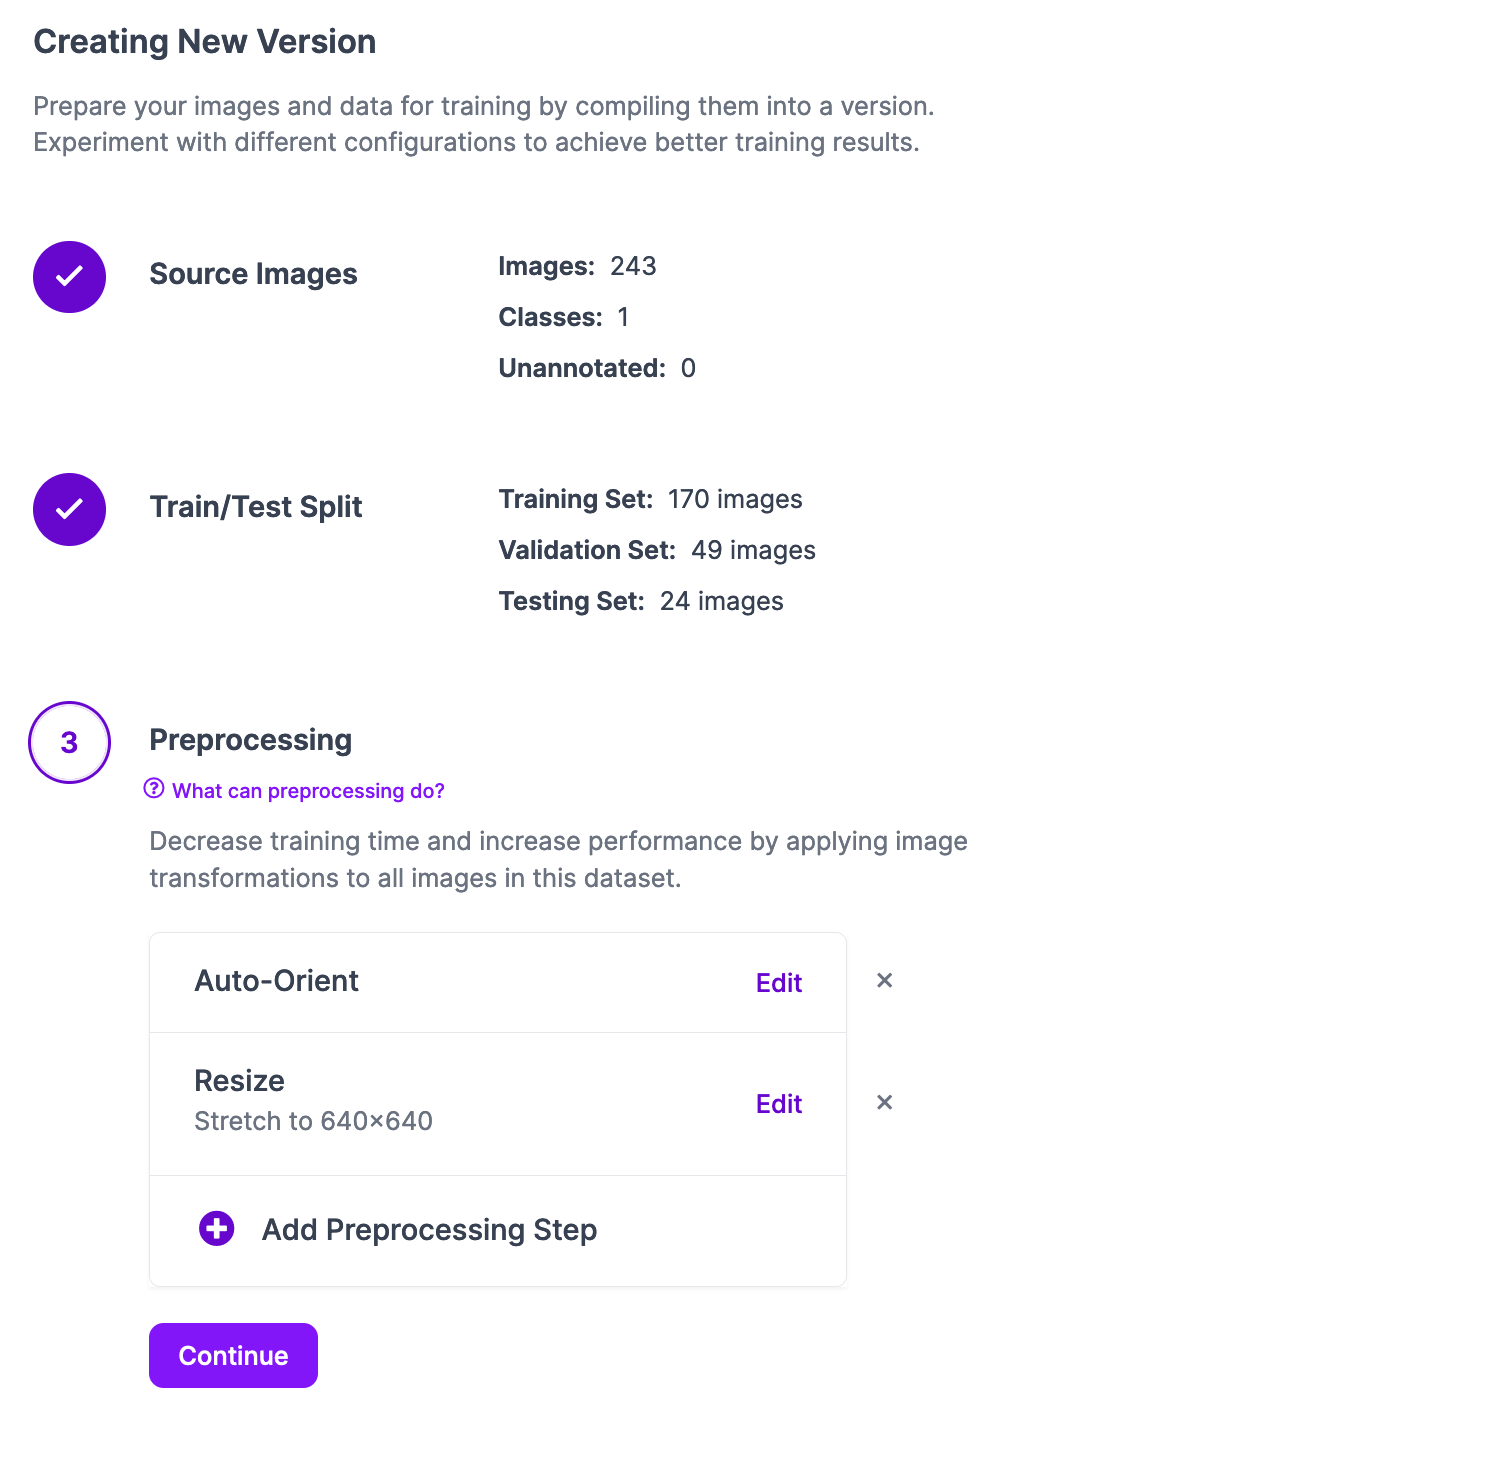
Once you have configured your dataset version, click “Create”. A version of your dataset will be generated with which you can train your model.
Step #2: Train a Model
You can deploy YOLOv10 models to Roboflow that have been trained using any compute source and uploaded to Roboflow.
We have prepared a notebook that you can use to train your model. This notebook walks through everything you need to know, from downloading your dataset from Roboflow to training a model with the YOLOv10 project.
Step #3: Deploy a YOLOv10 Model
With your model trained, you can deploy it in the Roboflow cloud or on your own hardware.
Whether you want to deploy your model in the cloud or on your hardware, you must first upload your weights to Roboflow. These weights can then be downloaded by Roboflow Inference, which lets you run vision models in a Docker container or through a Python package on your hardware.
To upload your YOLOv10 model, use the following code:
!pip install roboflow

from roboflow import Roboflow
rf = Roboflow(api_key="API_KEY")
project = rf.workspace().project("model-name")
version = project.version(1)
version.deploy("yolov8")
Above, replace:
model-namewith your Roboflow model ID.API_KEYwith your Roboflow API key.1with your project version ID.
Once you run this code, your model weights will be uploaded to Roboflow.
You will then be able to use your model through the Roboflow web interface, in the cloud, and on your own hardware.
To deploy your model in the cloud, you can use the Inference SDK, which accepts an image and runs inference on Roboflow’s servers. To use the SDK, first install it:
pip install inference-sdkThen, create a new file and add the following code:
# import the inference-sdk
from inference_sdk import InferenceHTTPClient

# initialize the client
CLIENT = InferenceHTTPClient(
	api_url="https://detect.roboflow.com",
	api_key="API_KEY"
)

# infer on a local image
result = CLIENT.infer("YOUR_IMAGE.jpg", model_id="model-name/1")
Above, replace:
model-namewith your Roboflow model ID.API_KEYwith your Roboflow API key./1with your project version ID.YOUR_IMAGE.jpgwith the name of the image on which you want to run inference.
When you run this code, your model will run on your image in the cloud and the results will be available in the result variable.
You can also deploy your model on your own hardware, such as an NVIDIA Jetson, a Raspberry Pi, or a server. To do so, first install Inference and set your Roboflow API key in your environment:
pip install inference
export ROBOFLOW_API_KEY=””
Then, create a new file and add the following code:
import inference
import supervision as sv
import cv2

image_file = "image.jpg"
image = cv2.imread(image_file)

model = inference.get_model("model-name/1")

results = model.infer(image)

detections = sv.Detections.from_roboflow(results[0].dict(by_alias=True, exclude_none=True))

bounding_box_annotator = sv.BoundingBoxAnnotator()
label_annotator = sv.LabelAnnotator()

annotated_image = bounding_box_annotator.annotate(
    scene=image, detections=detections)
annotated_image = label_annotator.annotate(
    scene=annotated_image, detections=detections)

sv.plot_image(annotated_image)
Above, replace:
model-namewith your Roboflow model ID./1with your project version ID.YOUR_IMAGE.jpgwith the name of the image on which you want to run inference.
When you run this code for the first time, the model weights for your YOLOv10 model will be downloaded onto your system. They will then be loaded into memory and used to run inference on your image. With this method, all inference runs on your device.
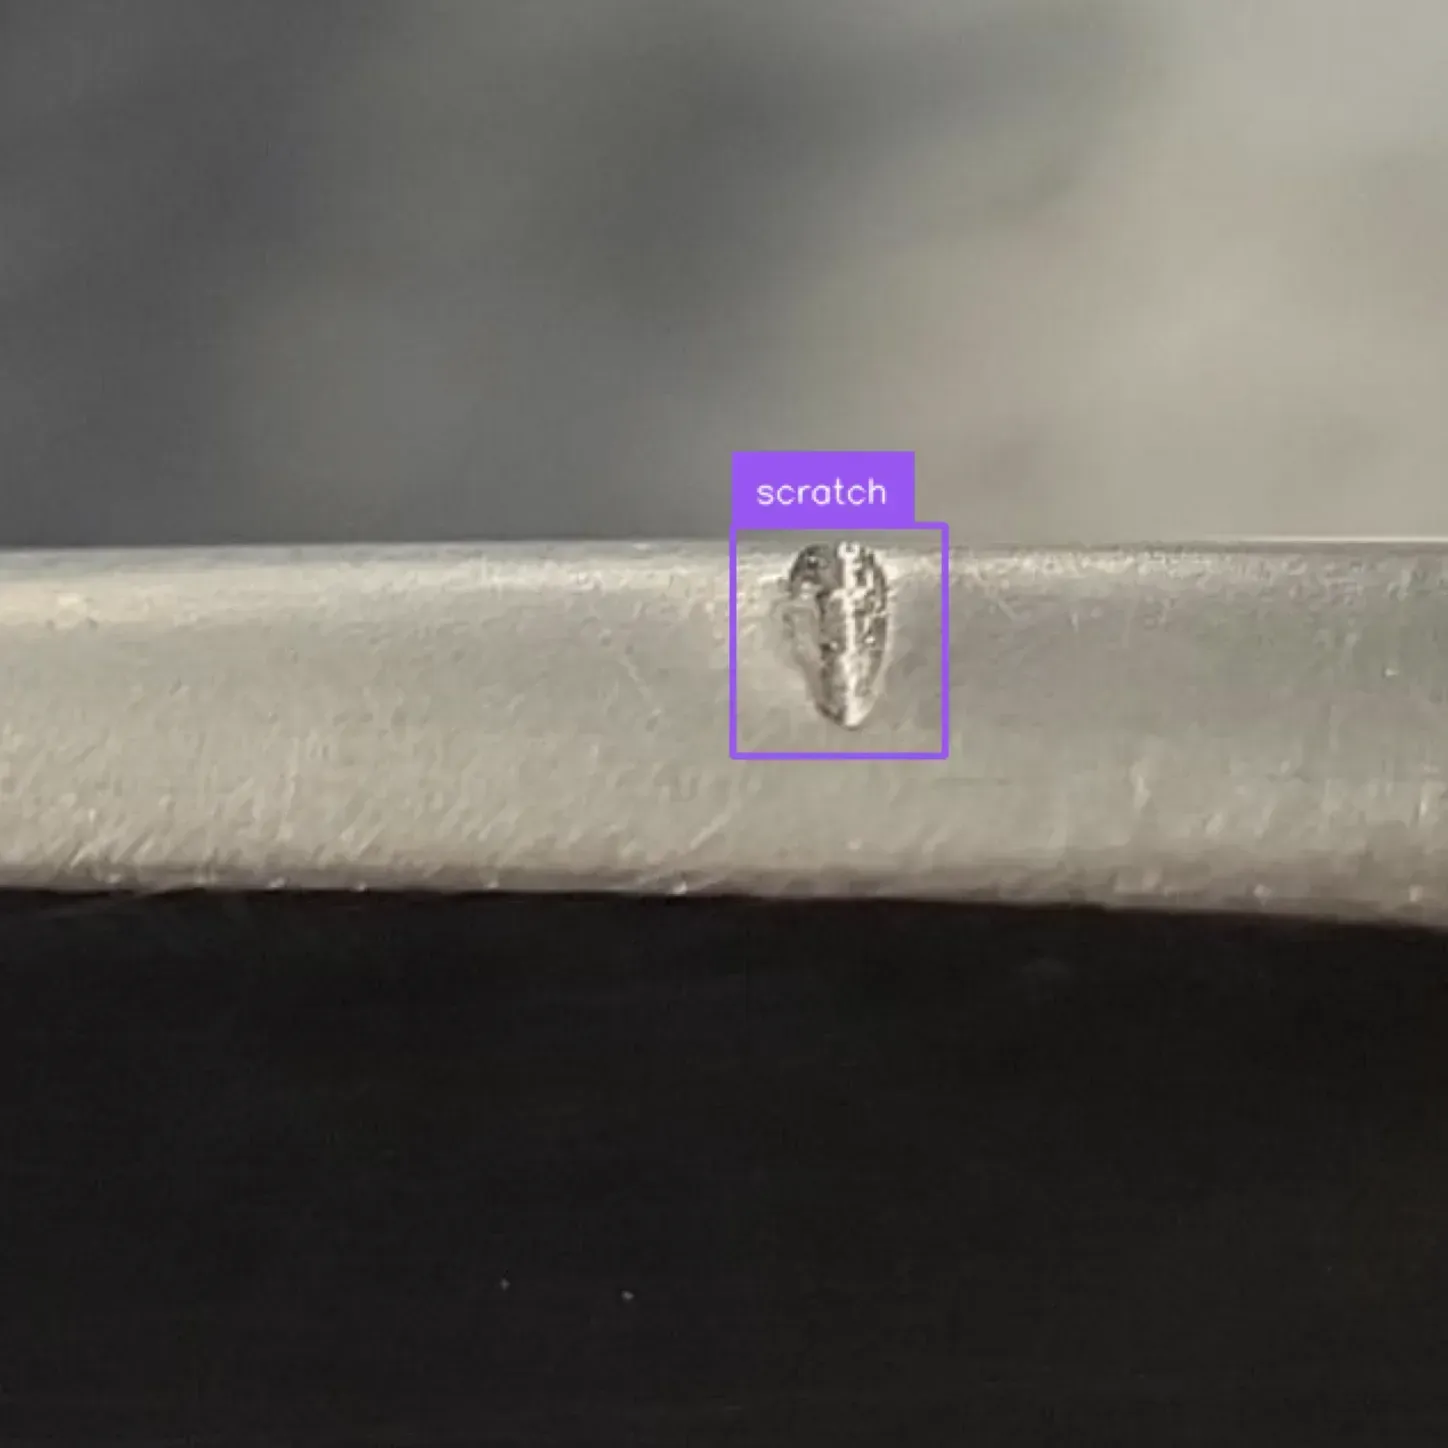
You can see the results of inference in the results object:
Conclusion
YOLOv10 is a state-of-the-art object detection model. YOLOv10 achieves higher accuracy than previous YOLO models, such as YOLOv8 and YOLOv9, while running faster.
In this guide, we walked through how to deploy a YOLOv10 model with Roboflow. First, we created a dataset in Roboflow. Then, we trained a model. Finally, we uploaded the model weights to Roboflow for use in cloud and on device deployment.
To learn more about the architecture of YOLOv10, refer to our What is YOLOv10? guide.
Cite this Post
Use the following entry to cite this post in your research:
James Gallagher. (Jun 14, 2024). Launch: Deploy YOLOv10 Models with Roboflow. Roboflow Blog: https://blog.roboflow.com/deploy-yolov10-model/