
Introduction
Computer vision is a useful tool when it comes to understanding and quantifying real-world activity happening in real-time. Tracking human movements with pose estimation is a common way to evaluate athletics or general body movement to help gain insight into proper form and technique. This guide will show you how to use keypoints or pose estimation models for building custom computer vision applications.
You’ll learn how to build your own computer vision model and effectively implement a computer vision workflow.
Before we start, let's break down the steps for the project.
The steps:
- Create a custom vision model
- Create a workflow
- Download needed libraries
- Import Libraries
- Get Keypoints
- Get the Mediapipe detections
- Add deployment code
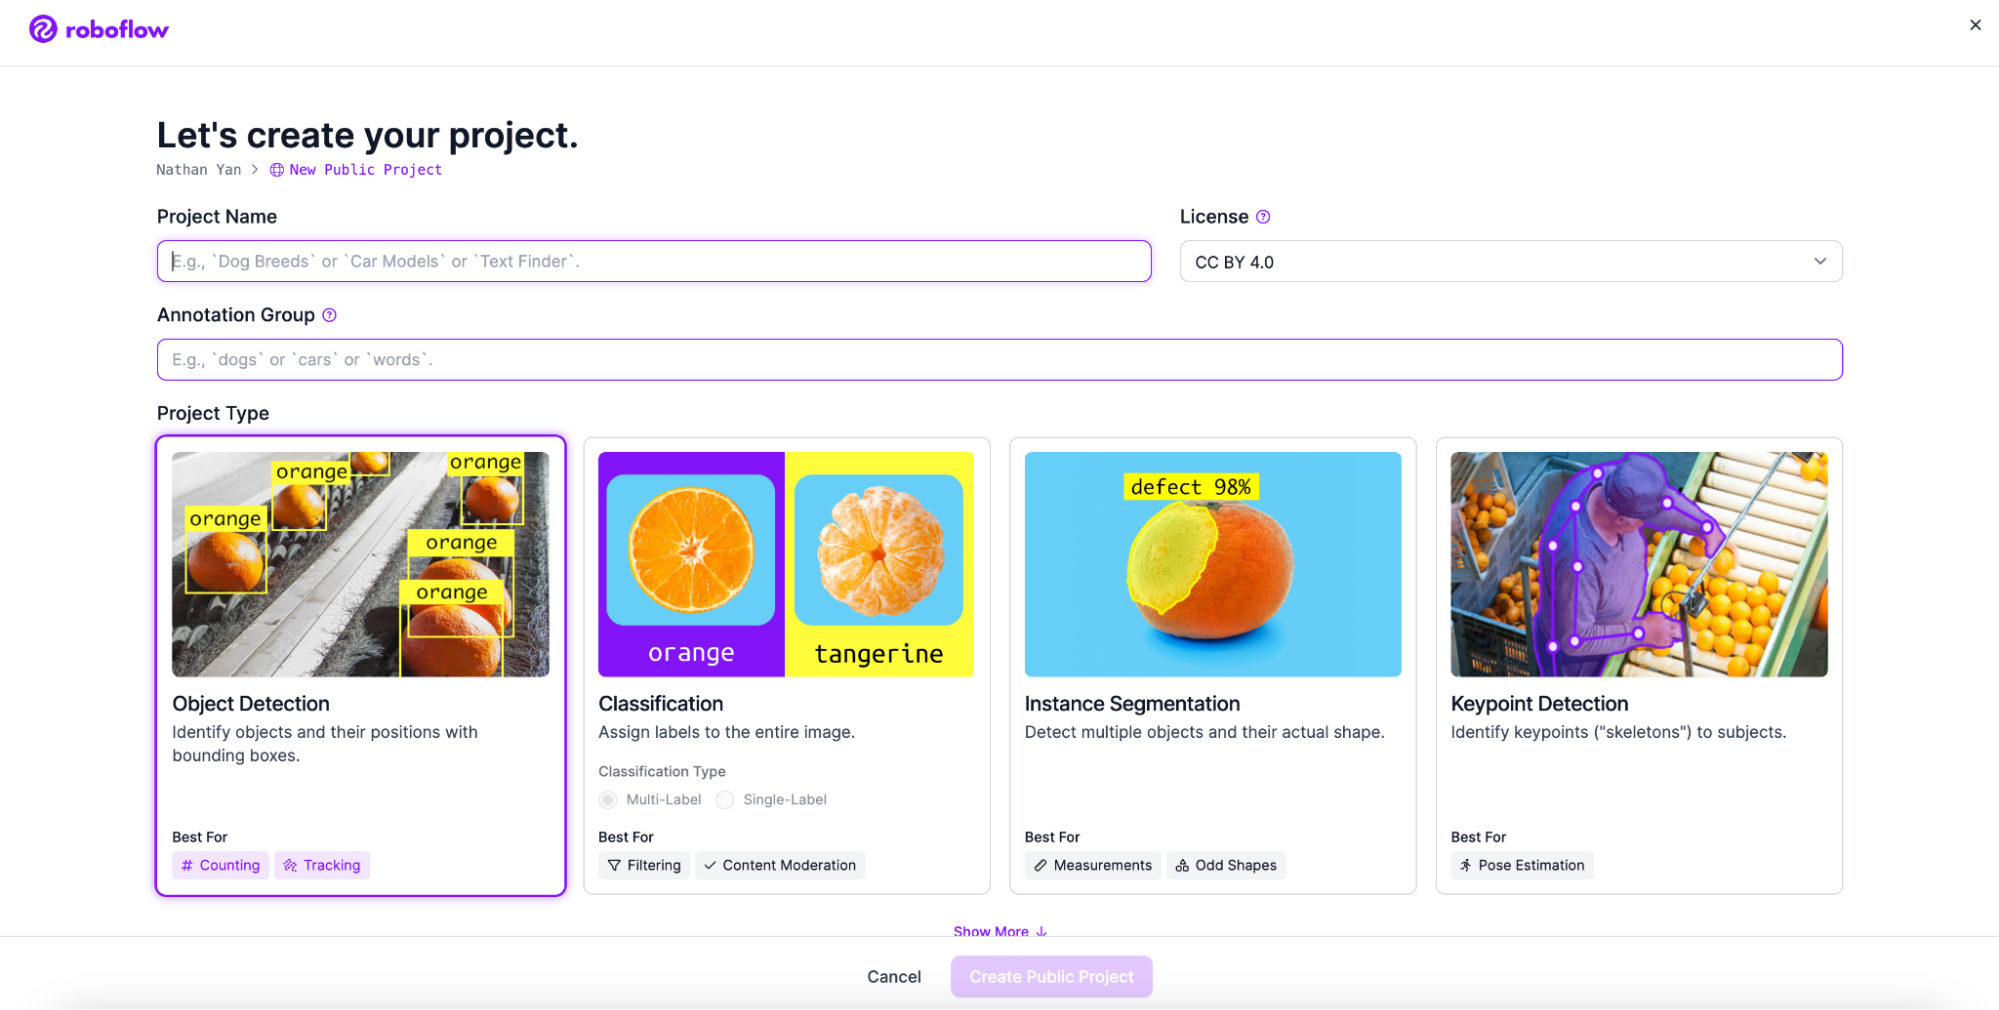
Step 1. Create a Roboflow Model
First, sign up for Roboflow and create a free account.
Next, go to Workspaces and create a Project. Customize the project name and annotation group to your choice. Make sure to make a keypoint detection project.
Next, add your images. Use Roboflow Universe, the world's largest collection of open source computer vision datasets and APIs, to find a dataset if you don’t have time to gather your own data.
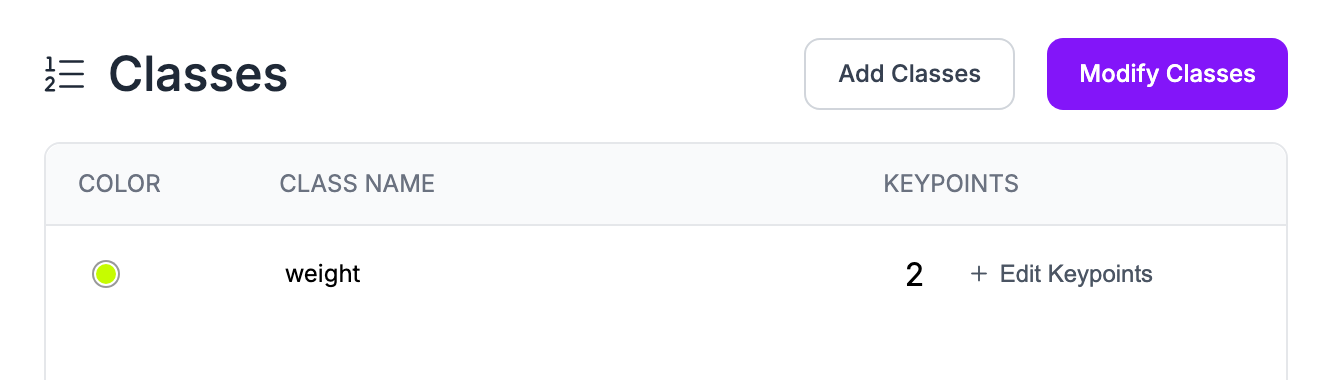
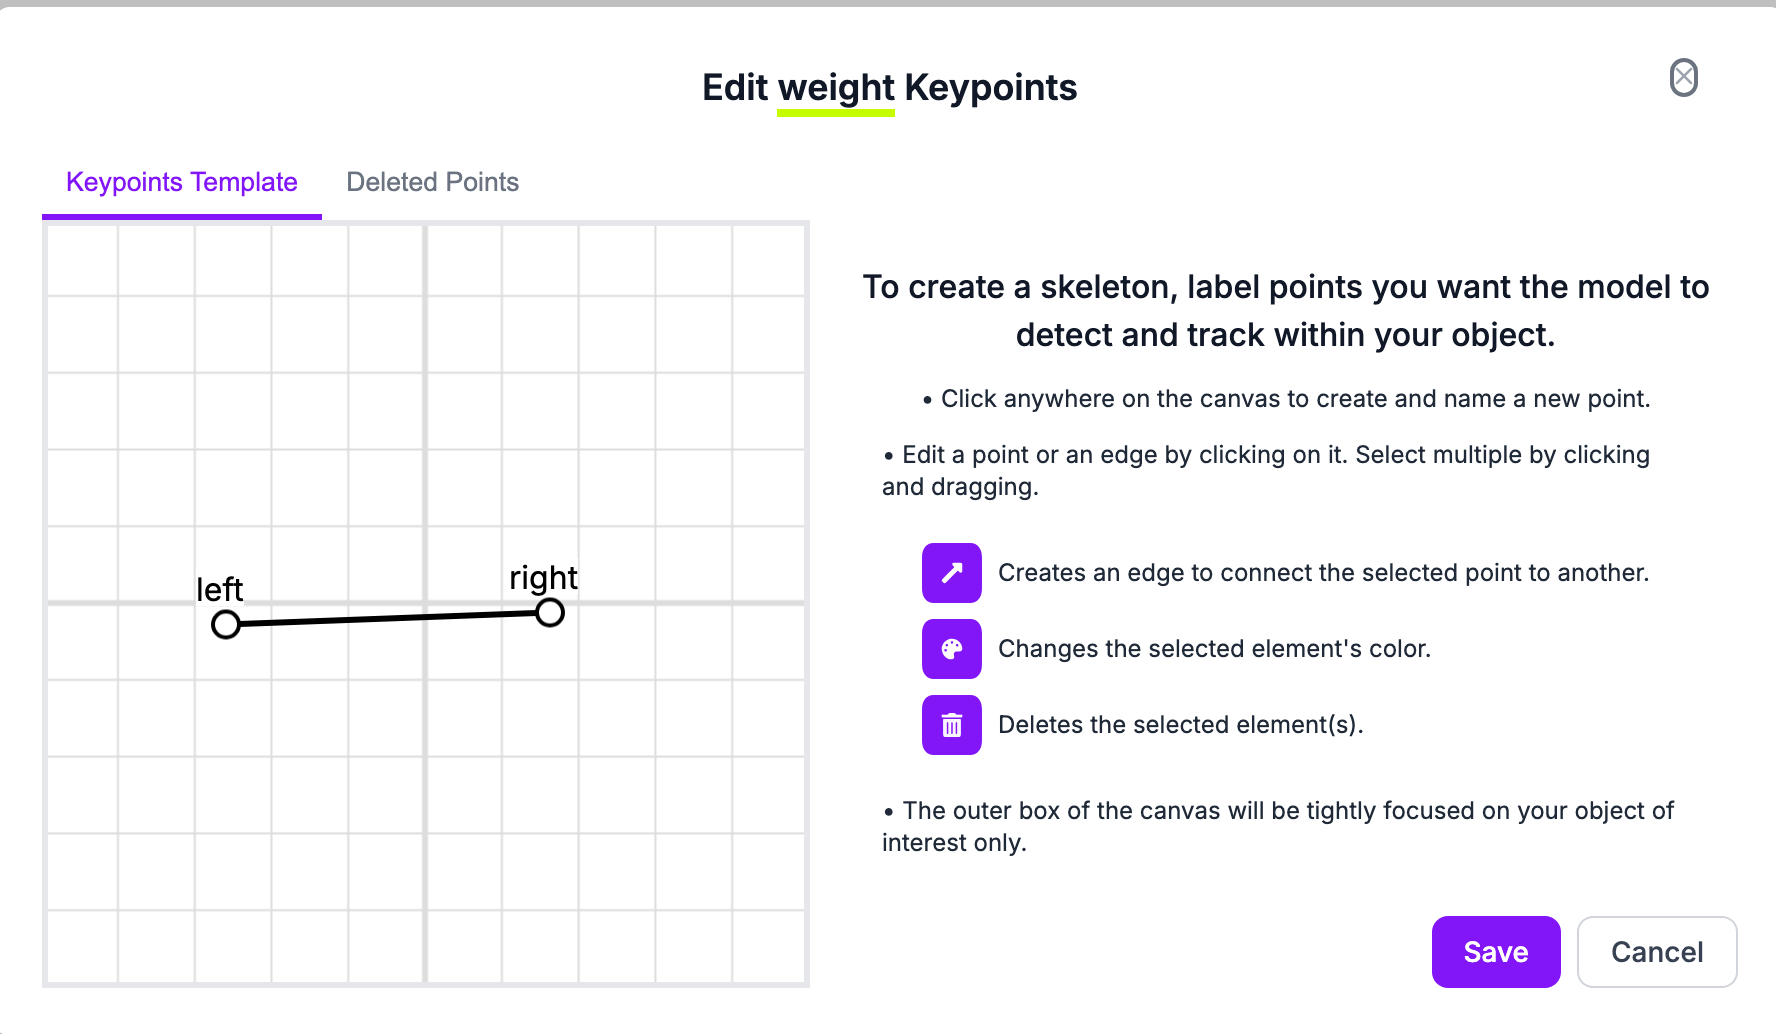
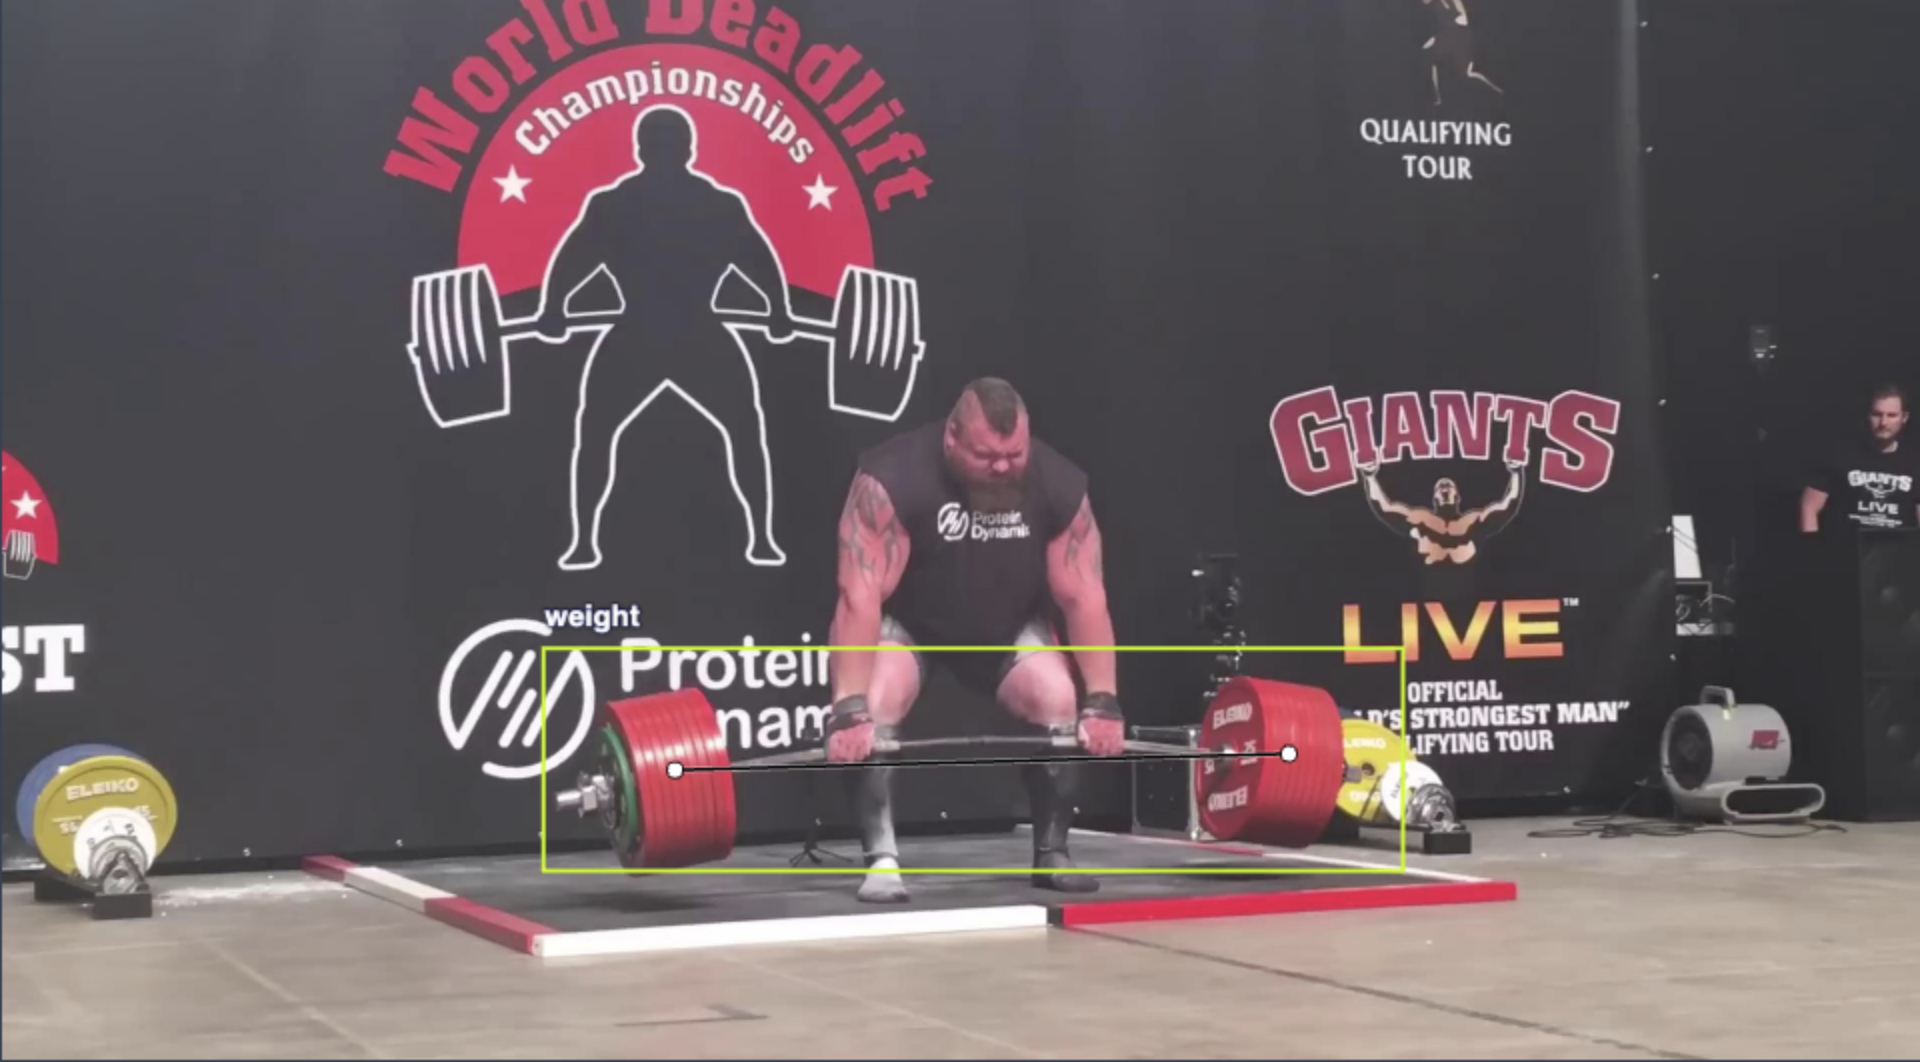
Then, add the classes you want your model to detect. Name the class then create the two points you need for your project. These are my two points. Left is the left side of the weight. Right is the right side.
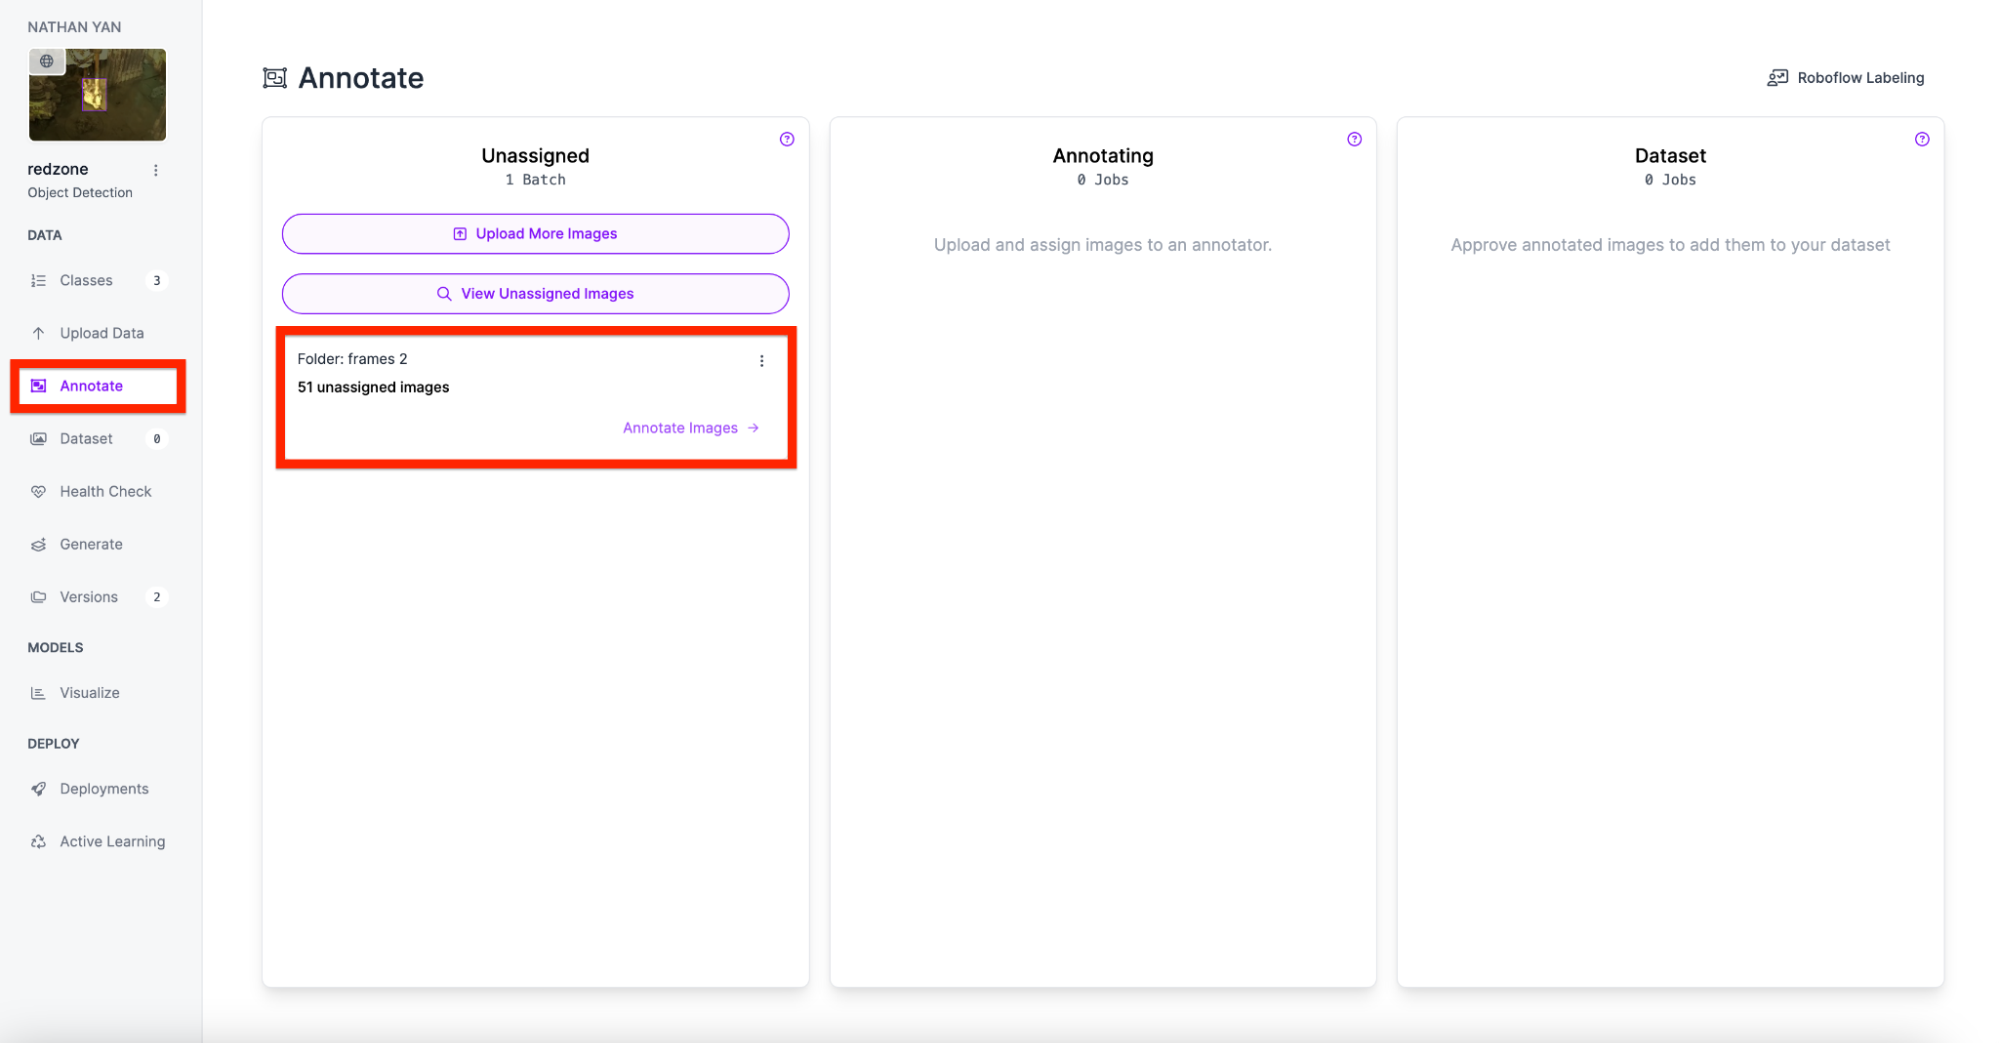
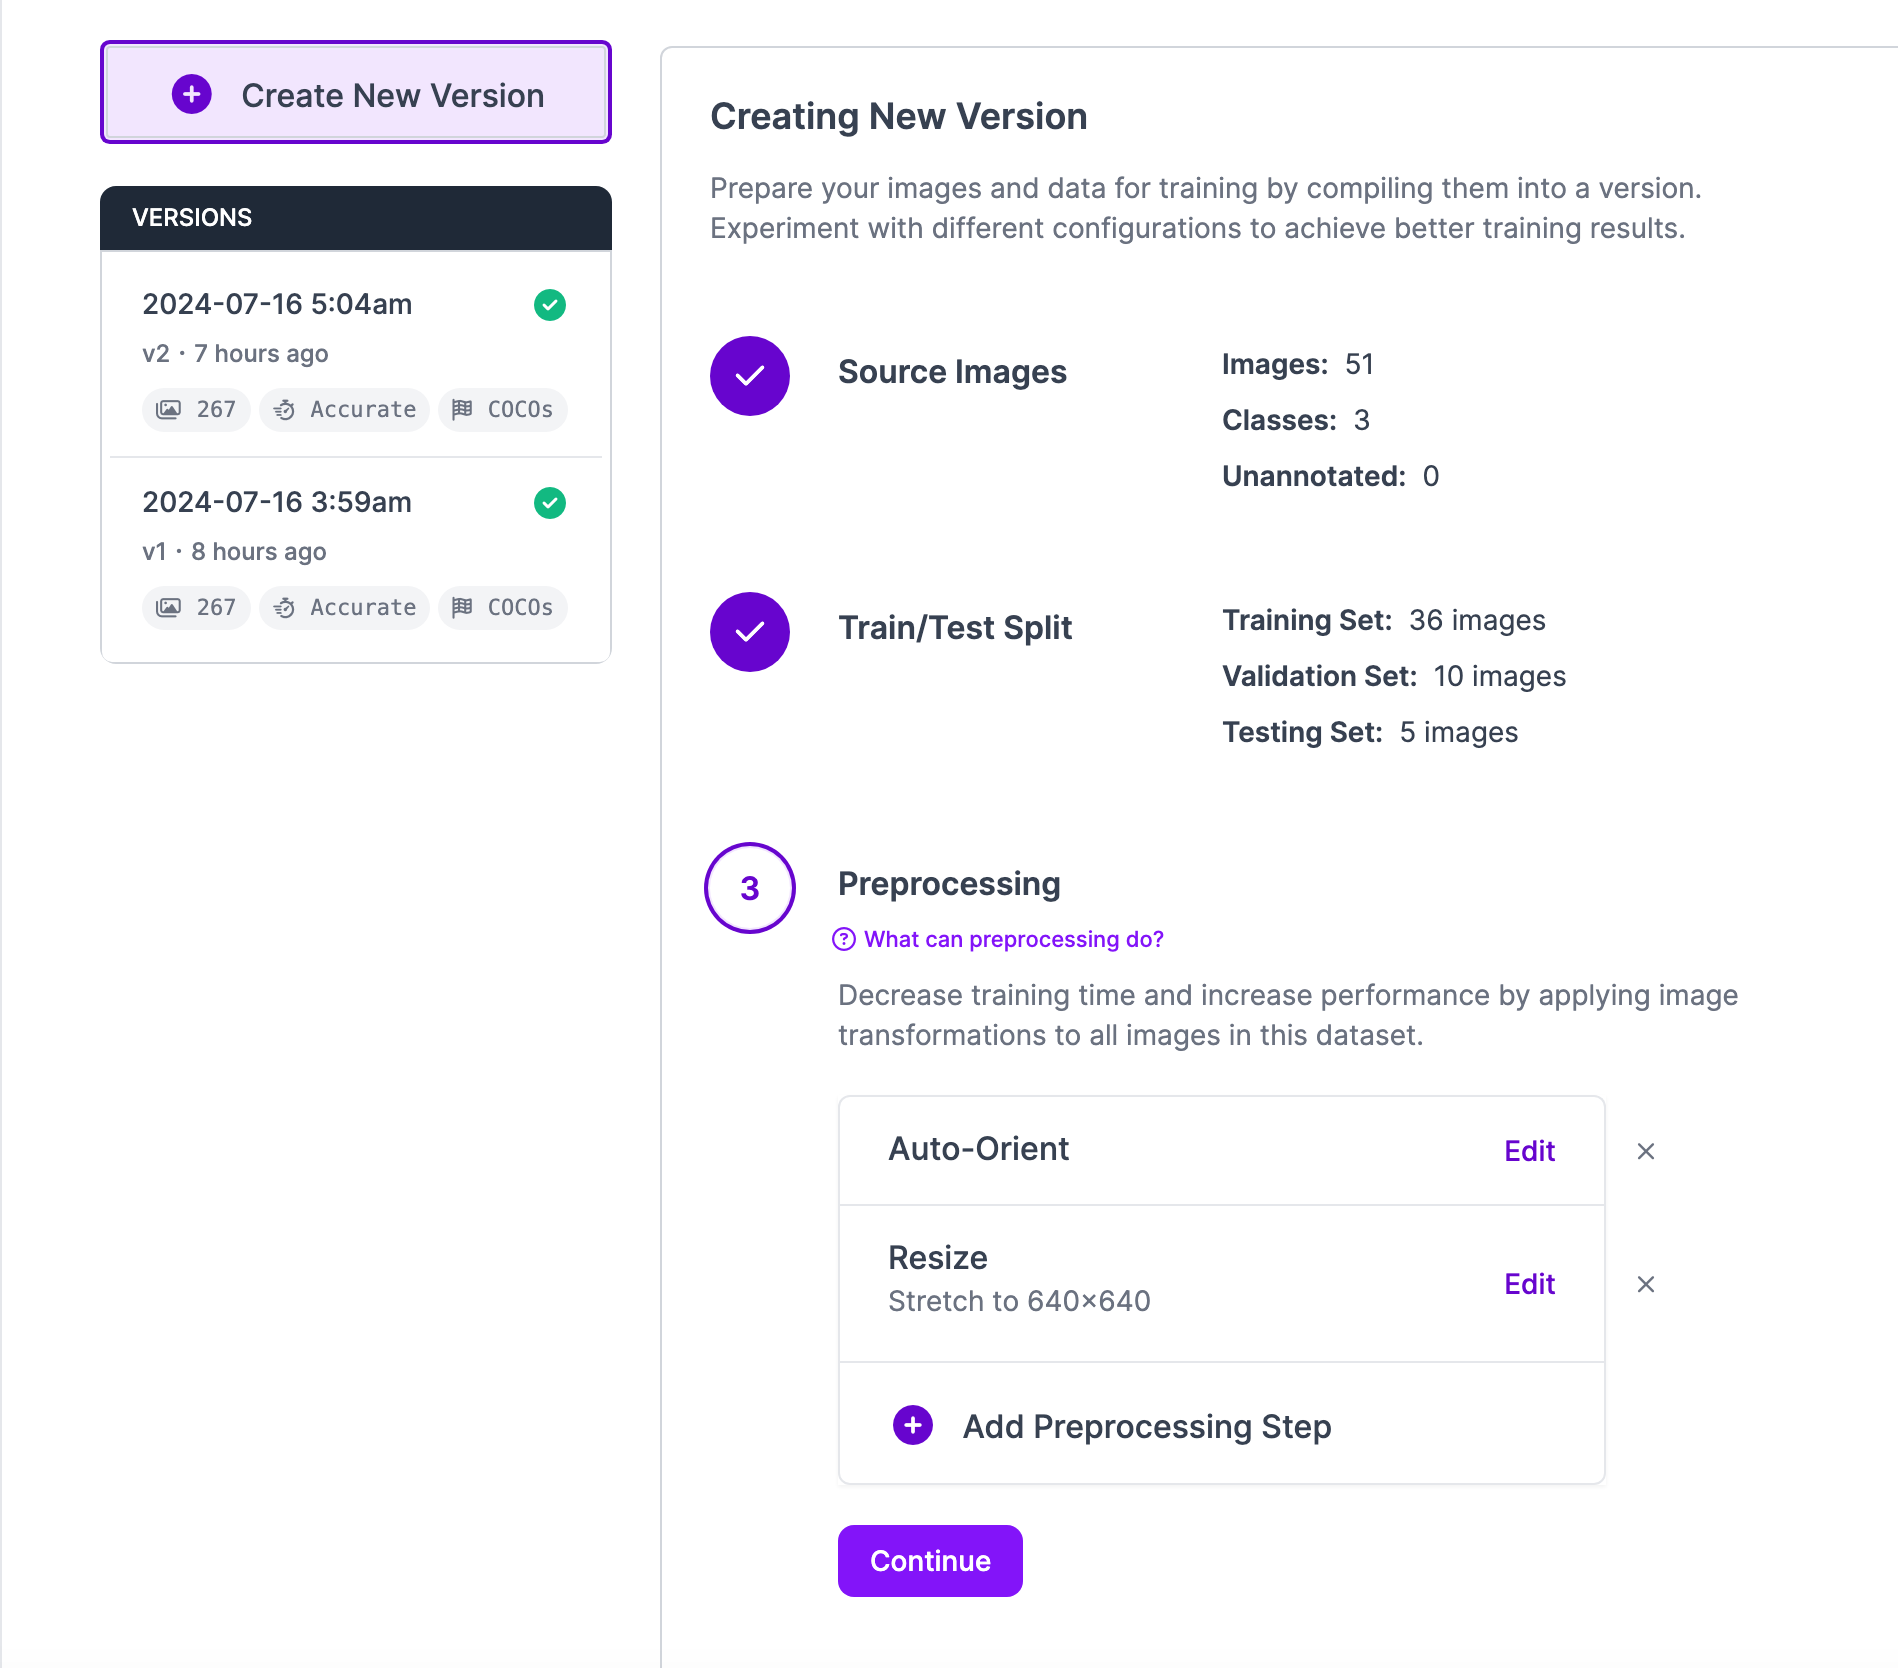
Next, start annotating your dataset. We recommend getting at least 50 annotated images before training your first model.
Draw the annotations and repeat this step for each image. Make sure the key points are on each side of the weights.
Lastly, generate a dataset version of your labeled images. Each version is unique and associated with a trained model so you can iterate on augmentation and data experiments.
Step 2. Create a workflow
Using the model we created, we can use Roboflow Workflows, the low-code tool for building computer vision pipelines. Workflows help streamline the application building process by making it easy to combine models and custom logic.
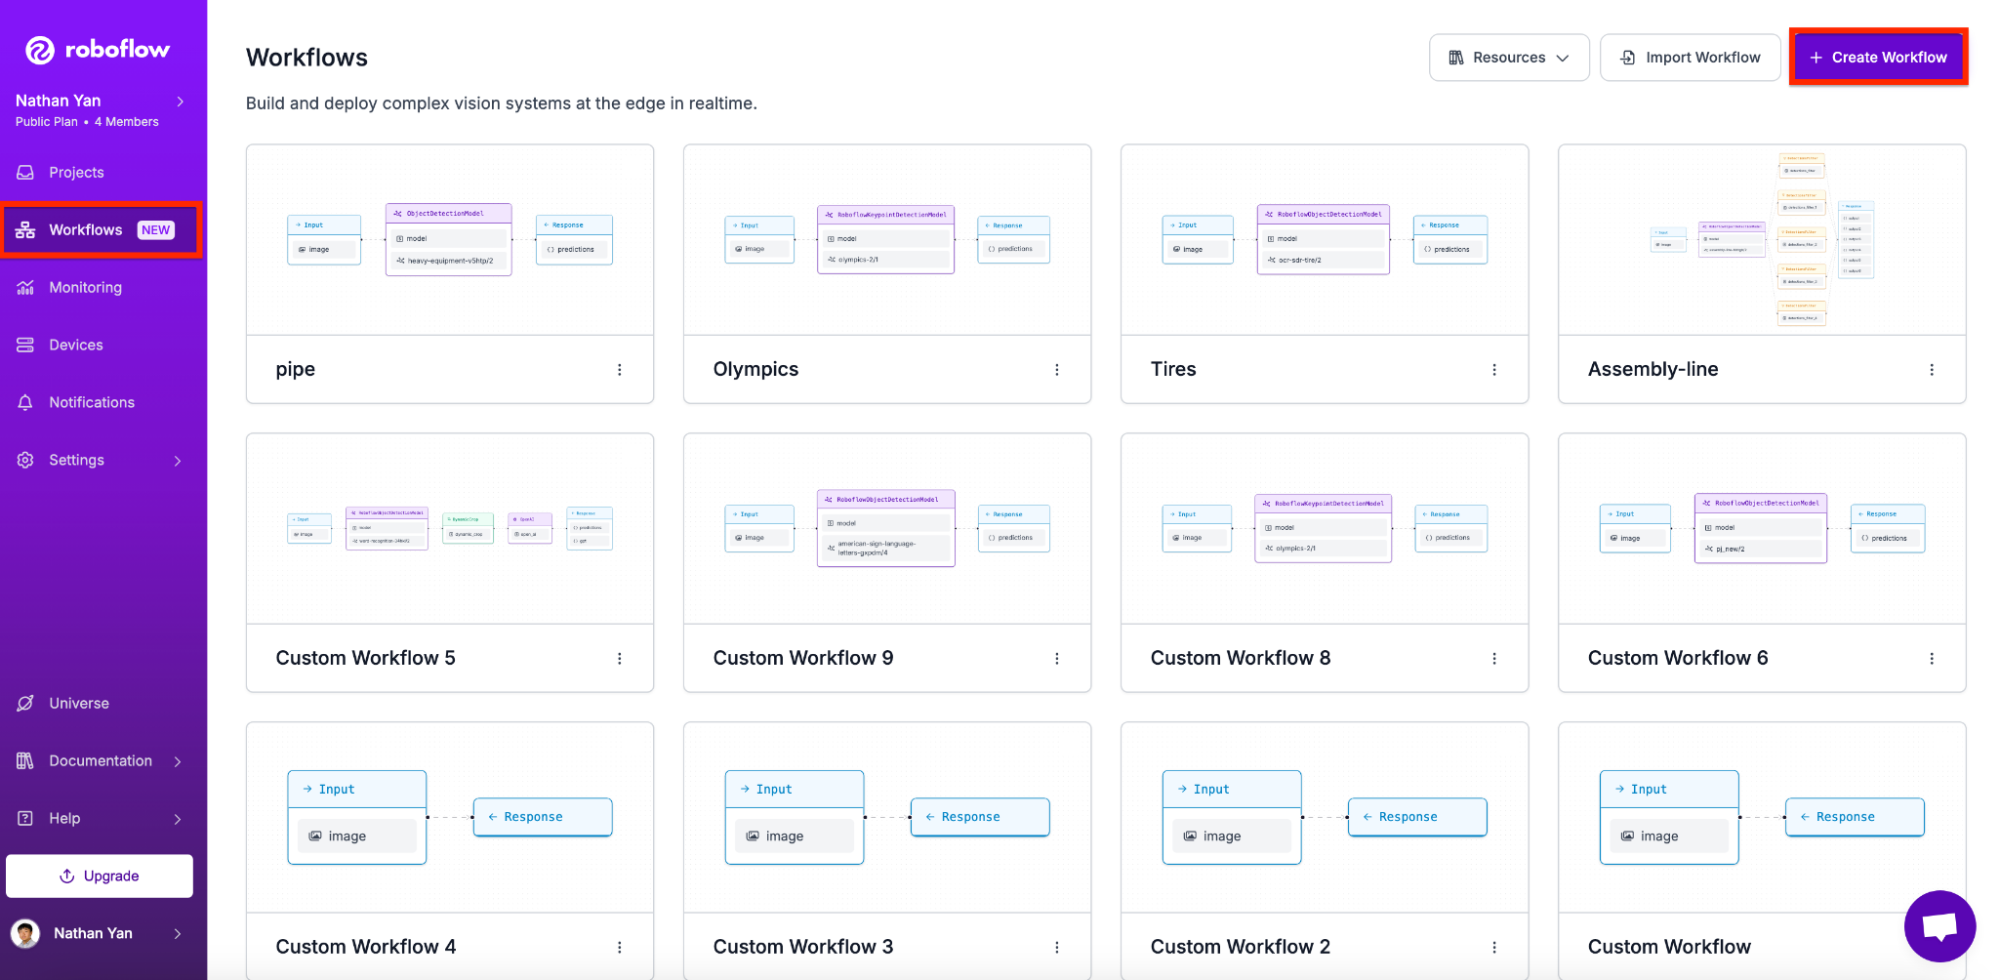
To start, navigate to the workflows tab on the dashboard and create a workflow.
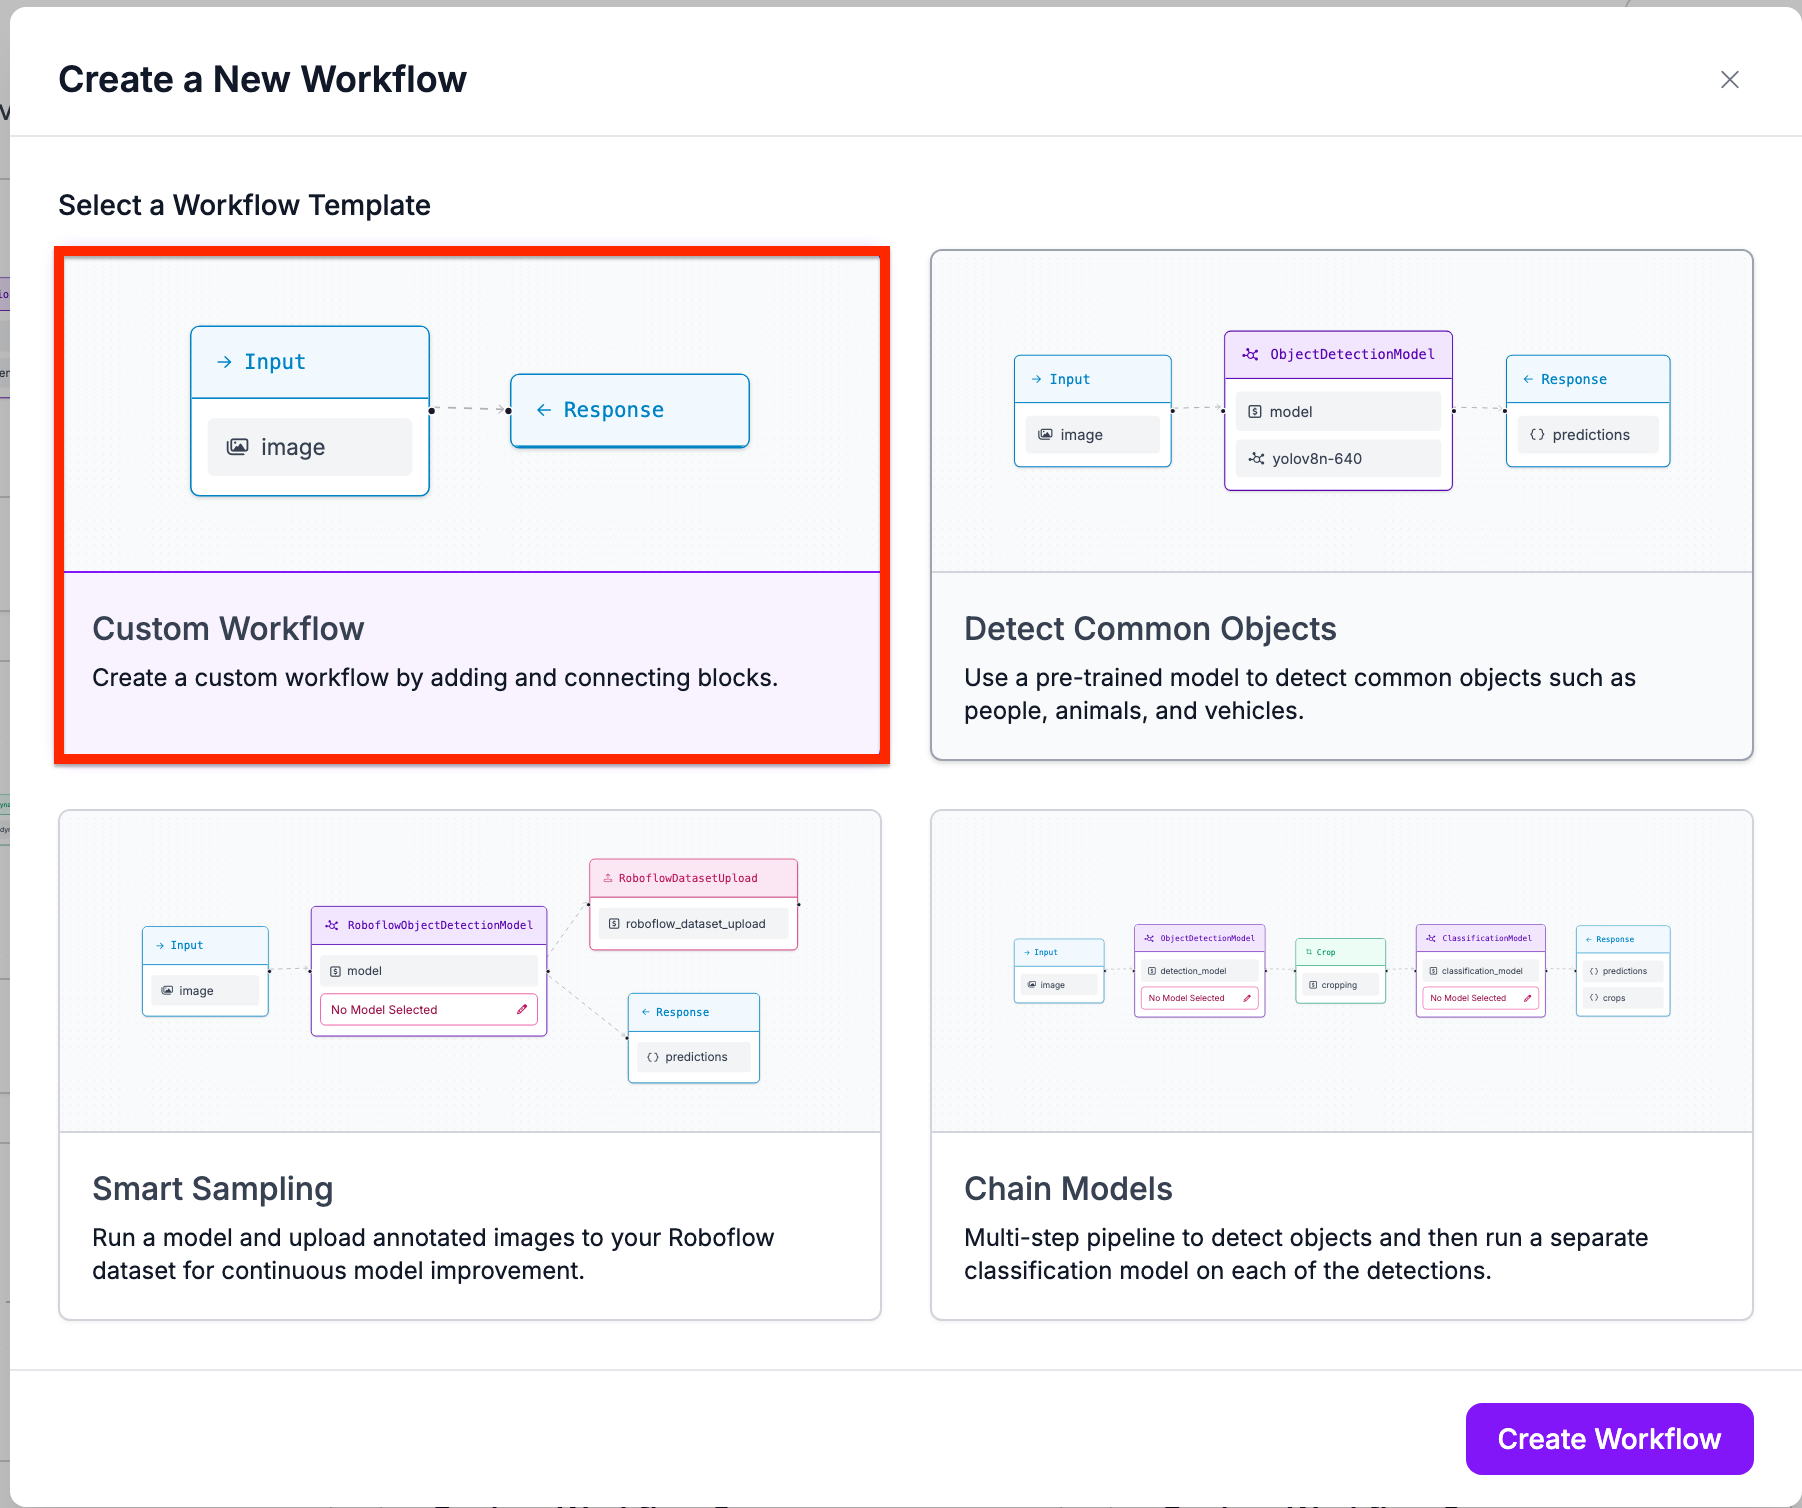
Select the option to create a custom workflow.
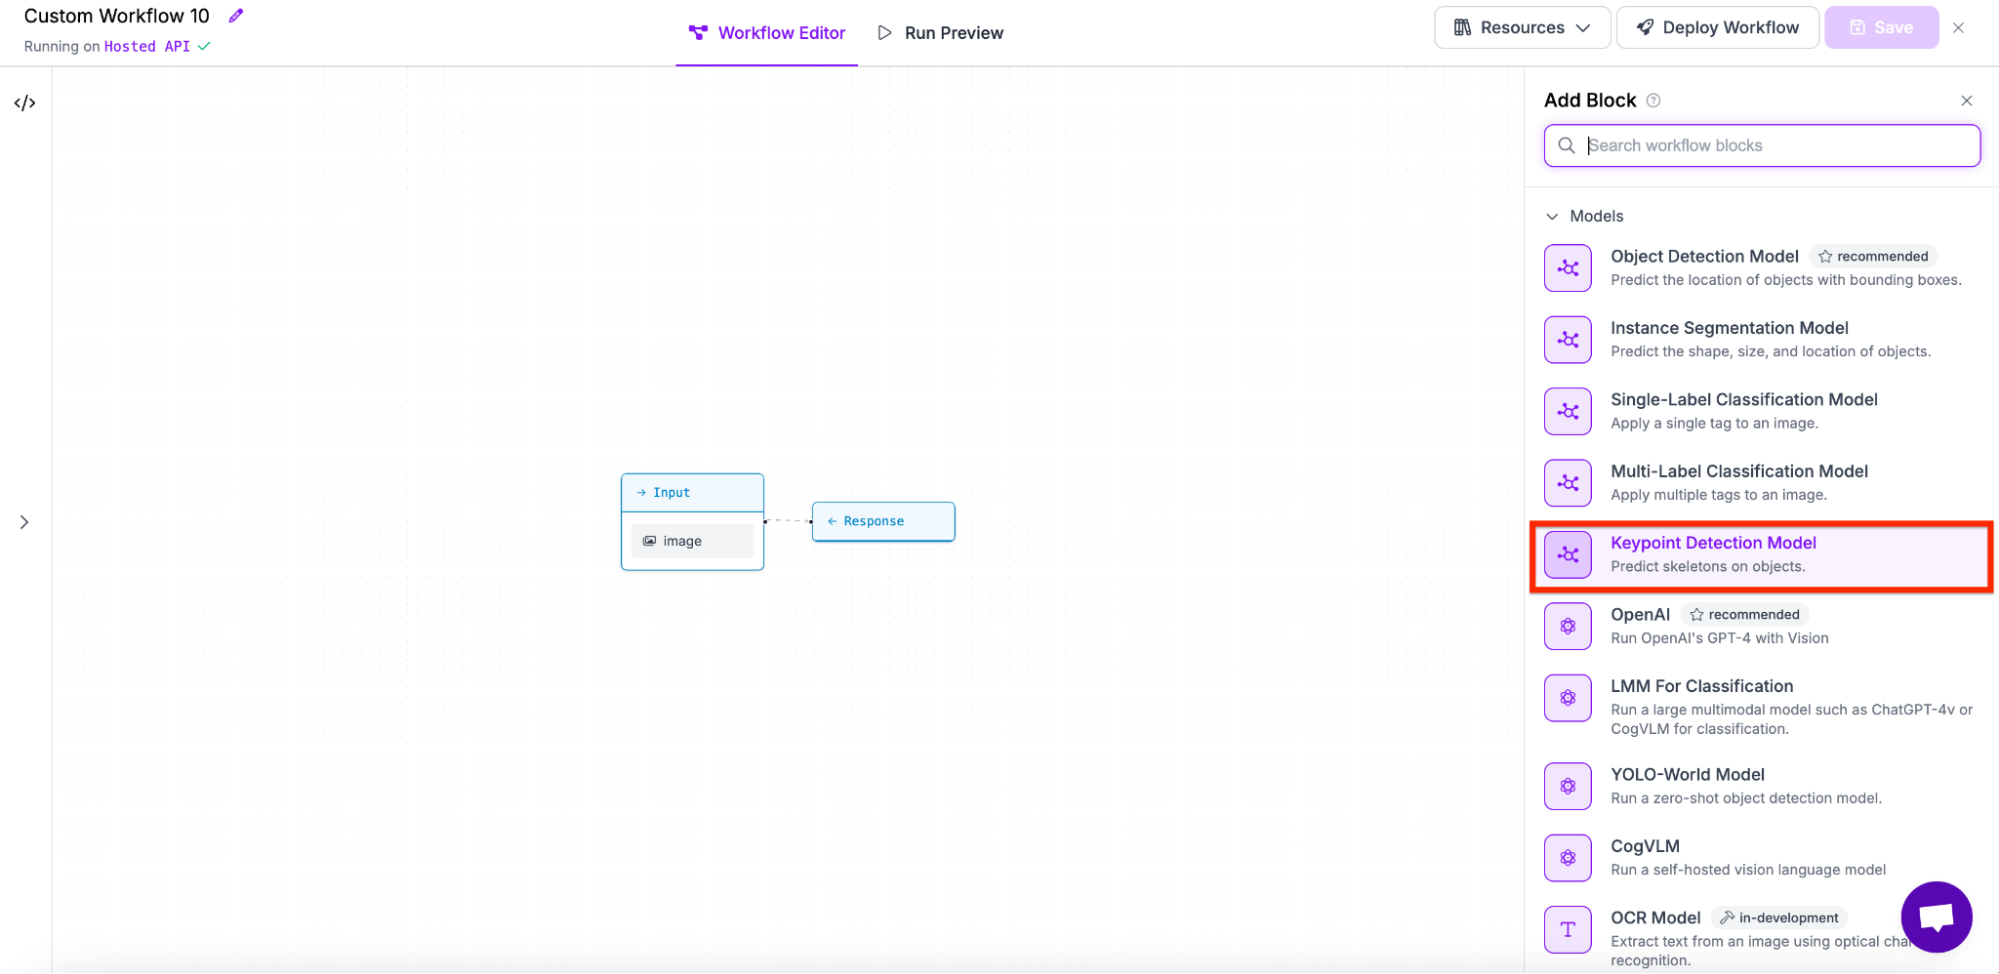
Next, select a keypoint detection model on the sidebar.
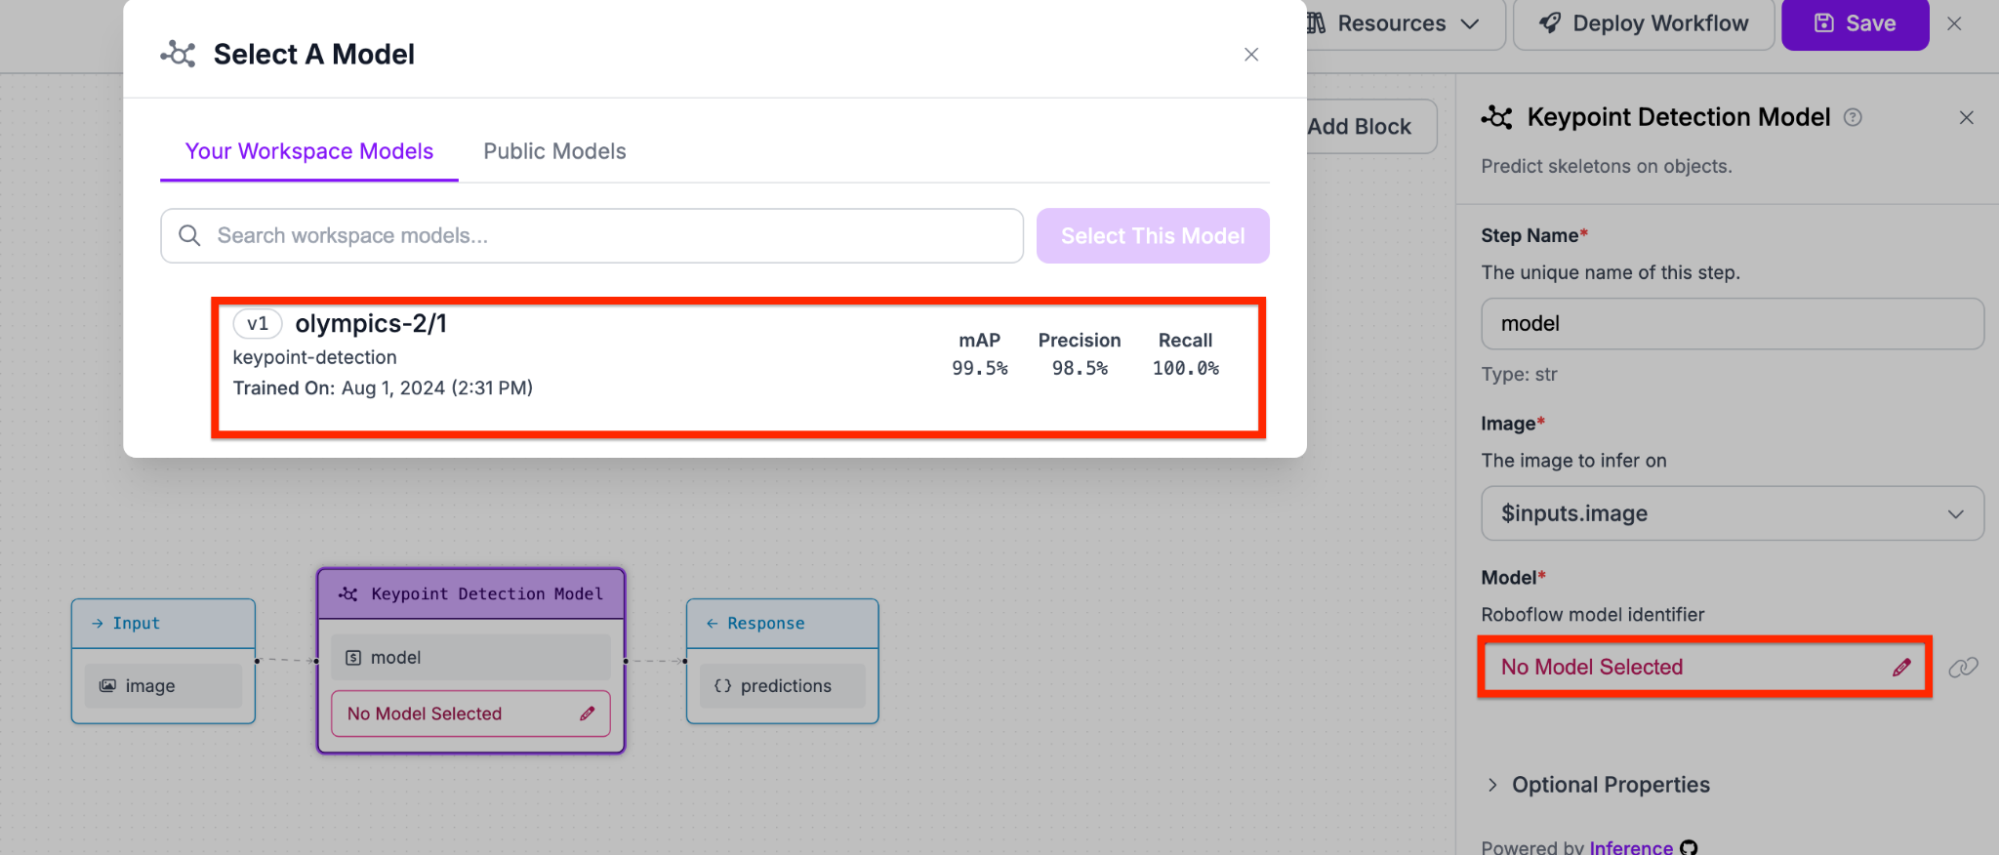
Lastly, select the model you want to use. In my case, we will be using olympics-2/1.
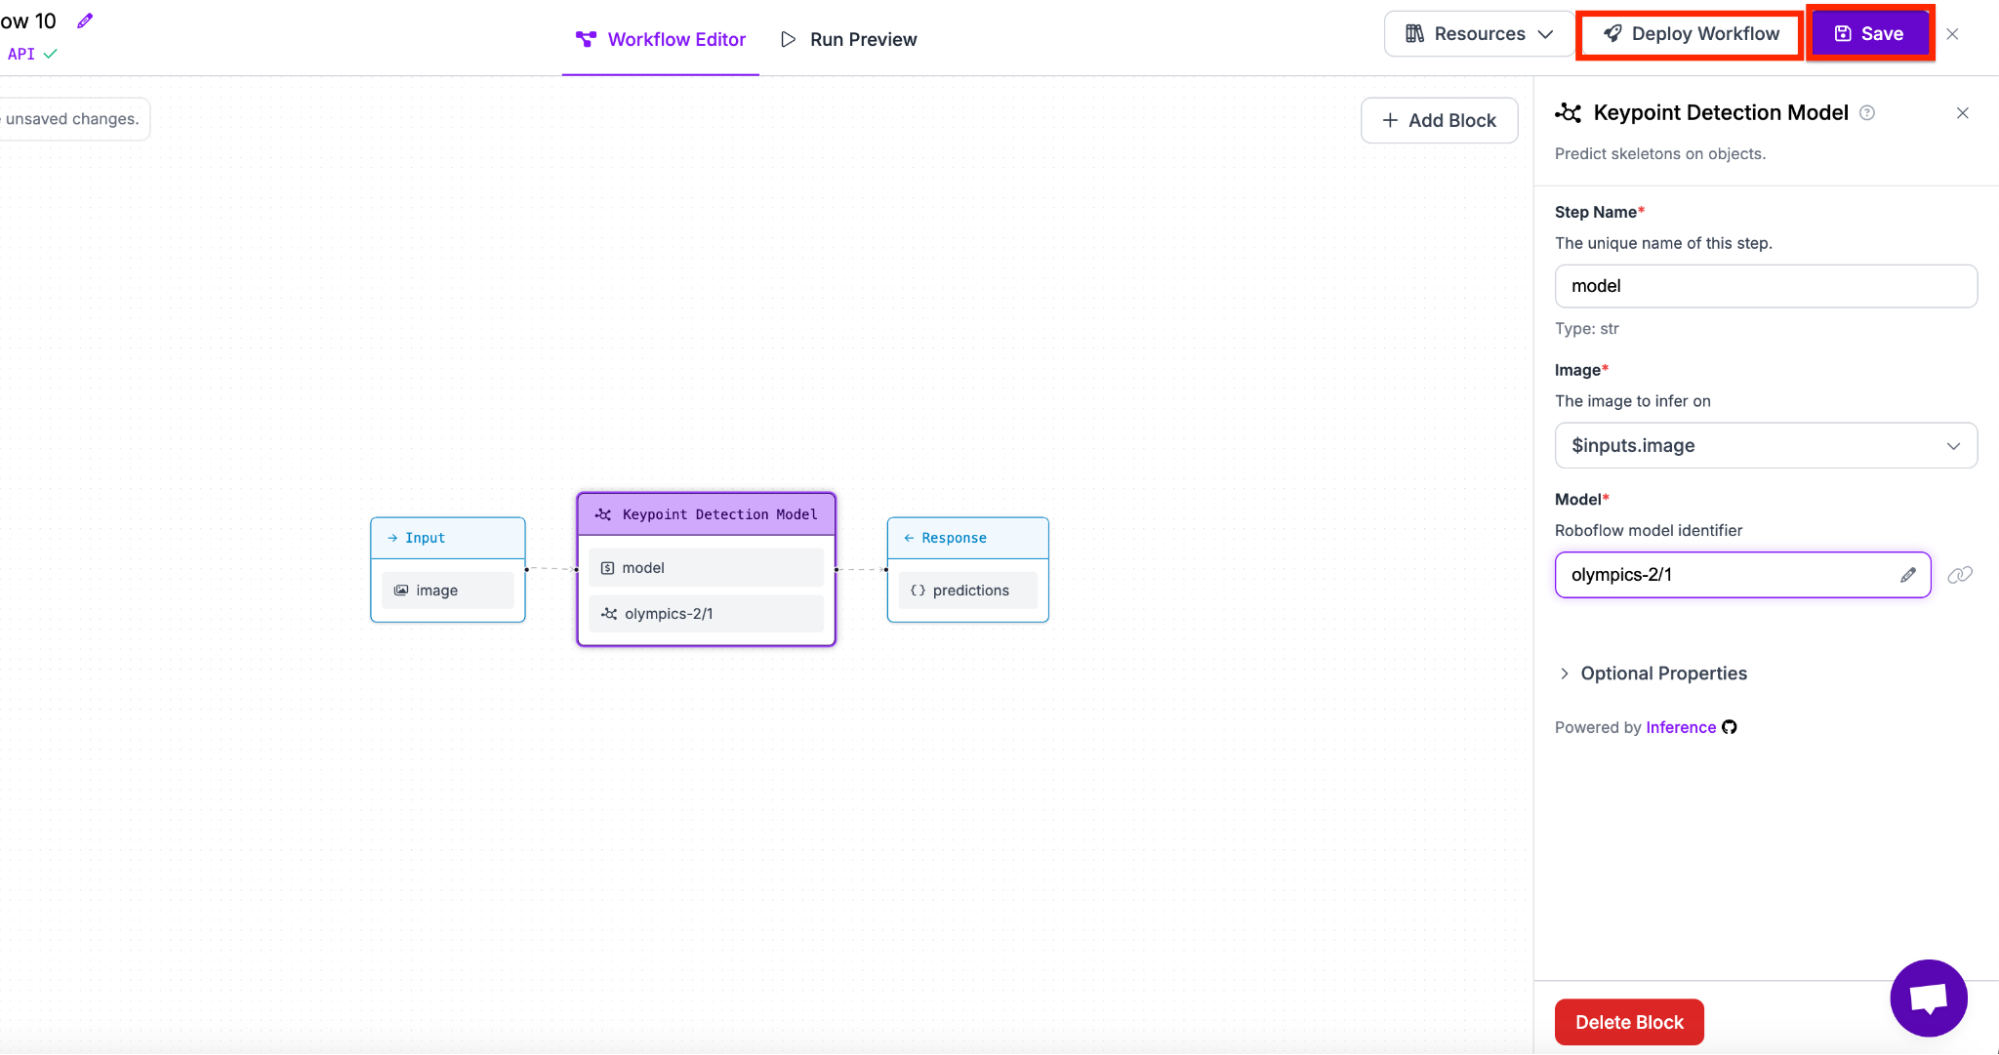
Lastly, save the model and get the deployment code (both available at the top right of the screen).
Step 3. Download needed libraries
Now that we have the model, we can download helpful libraries. Make sure they are in the latest version to avoid any errors. Note that installing opencv may take a while due to wheel installation.
!pip install opencv-python numpy supervision inference mediapipeStep 4. Import needed libraries
After downloading the libraries, we now need to import the ones we need.
import cv2
from inference.core.interfaces.camera.entities import VideoFrame
from inference import InferencePipeline
import supervision as sv
import mediapipe as mp
import numpy as np
Step 5. Get Model Keypoints
Using the model we previously created, we now need to extract useful data out of it. We can accomplish this through the following code snippet.
This function:
- Takes the result of our model
- Gets the detection information (position, class, confidence, etc.)
- Returns the values using sv.KeyPoints
def from_workflows(result):
    # Not sure if this is what happens when no keypoints are detected.
    if "predictions" not in result:
        return sv.KeyPoints.empty()
    detections = result["predictions"]["predictions"]
    xy = detections.data["keypoints_xy"].astype(np.float32)
    class_id = detections.data["keypoints_class_id"].ravel().astype(np.int_)[: len(xy)]
    confidence = detections.data["keypoints_confidence"].astype(np.float32)
    return sv.KeyPoints(
        xy=xy,
        confidence=confidence,
        class_id=class_id,
    )
Step 6. Get Mediapipe Detections
Mediapipe will help us graph out the joints of the human. Through the recent release of Supervision 22.0, we can seamlessly integrate mediapipe detections onto our frame with little code.
The following code snippet:
- Initiates the mediapipe model (different from the one we created) as well as the edge annotator
- Gets the results from model
- Graphs the joints on the frame using Supervision’s edge annotator
- Gets the left hip and right hip values for future pose calculations
mp_pose = mp.solutions.pose
model = mp_pose.Pose()
edge_annotator2 = sv.EdgeAnnotator(color=sv.Color.BLACK, thickness=5)
def Get_Mediapipe(image):
    results = model.process(image)
    key_points = sv.KeyPoints.from_mediapipe(results, resolution_wh=image.shape[1::-1])
    image = edge_annotator2.annotate(
        scene=image, key_points=key_points
    )
    left_hip = results.pose_landmarks.landmark[mp_pose.PoseLandmark.LEFT_HIP]
    right_hip = results.pose_landmarks.landmark[mp_pose.PoseLandmark.RIGHT_HIP]
    left_hip.x = int(left_hip.x * 1920)
    left_hip.y = int(left_hip.y * 1080)
    right_hip.x = int(right_hip.x * 1920)
    right_hip.y = int(right_hip.y * 1080)
Step 7. Create Main Prediction Function
By creating one main function, we make our prediction code much more organized. With this step, we combine both the previous functions as well as additional logic.
This code snippet:
- Defines needed annotators
- Gets the image through the video frame
- Calls both functions
- Graphs the keypoints gotten from the previous function
- Shows all the code with cv2.imshow
vertex_annotator1 = sv.VertexAnnotator(radius=8)
edge_annotator1 = sv.EdgeAnnotator(thickness=4, edges=[(0, 1)])
def on_prediction(res: dict, frame: VideoFrame) -> None:
    image = frame.image
    annotated_frame = image.copy()
    Get_Mediapipe(annotated_frame)
    keypoints = from_workflows(res)
    annotated_frame = edge_annotator1.annotate(
        scene=annotated_frame, key_points=keypoints
    )
    annotated_frame = vertex_annotator1.annotate(
        scene=annotated_frame, key_points=keypoints
     )
    # Show the annotated frame
    cv2.imshow("frame", annotated_frame)
    if cv2.waitKey(1) & 0xFF == ord("q"):
        return
Step 8. Create Main Prediction Function
Lastly, grab the previously obtained deployment code from Roboflow Workflows.
By adding it and starting the pipeline, we have successfully finished the project. Your outputted video frames should look similar to this:
Conclusion
In this guide, we were able to successfully deploy a Roboflow model in a Worklfow with Mediapipe integrations. We also utilized Workflows, a low-code tool to simplify the creation of computer vision applications.
Cite this Post
Use the following entry to cite this post in your research:
Nathan Y.. (Aug 14, 2024). How to Create a Workout Pose Correction Tool. Roboflow Blog: https://blog.roboflow.com/how-to-create-a-workout-pose-correction-tool/