
It’s Valentine’s Day, and your sweetheart has given you a beautiful box of chocolates. You pick out a delicious looking bonbon, bite into it, and…it’s your least favorite filling. How disappointing!
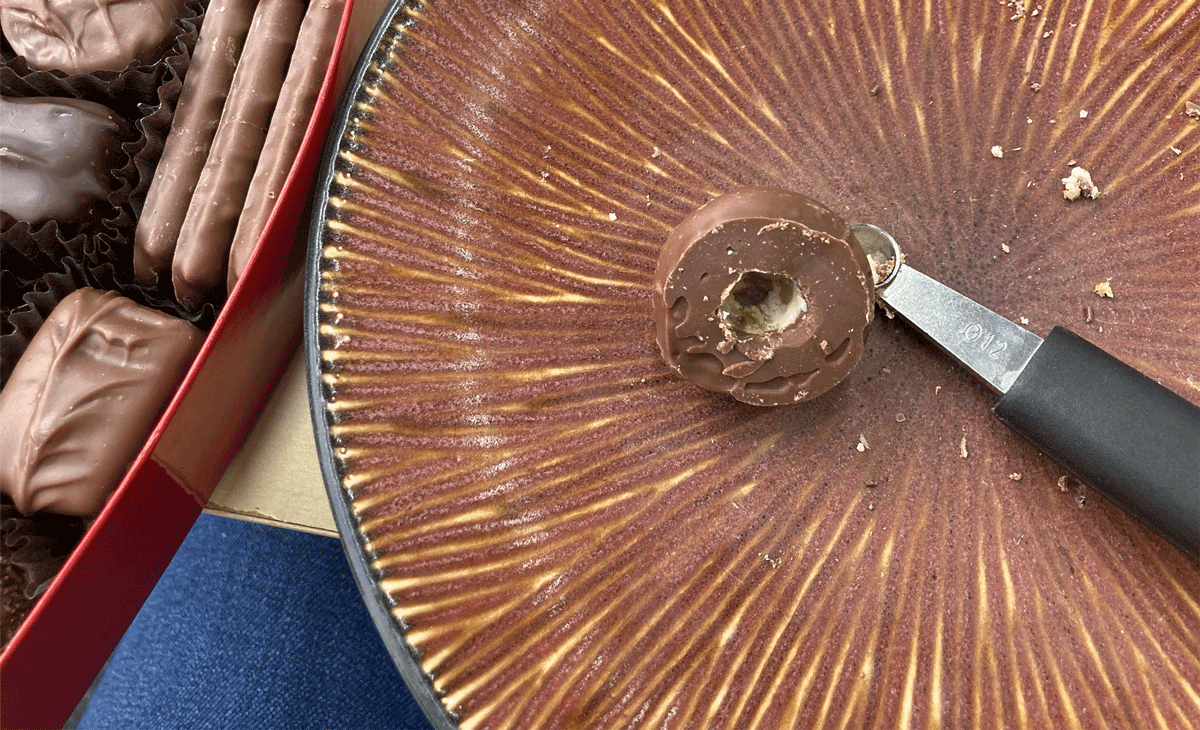
To avoid this type of heartbreak, some people resort to nibbling corners, or poking a finger in the candy, but these are destructive methods of identification. What if there was a way to identify the filling without cutting into the candy?
For Valentine’s Day, I wanted to see if I could solve this problem, using computer vision.
A preview of the final project

About Me
I’m Karen, and I’m a visual designer. Before joining Roboflow, I was an art director for a social gaming studio. I’m a bit of a nerd, but I’m not a highly technical person—this chocolate identification project was my first experience with creating a computer vision model.
About the Project
This originally started as my onboarding project when I joined Roboflow, and since chocolates are such a big part of Valentine’s Day, I thought it would be fun to try to update it for the holiday.
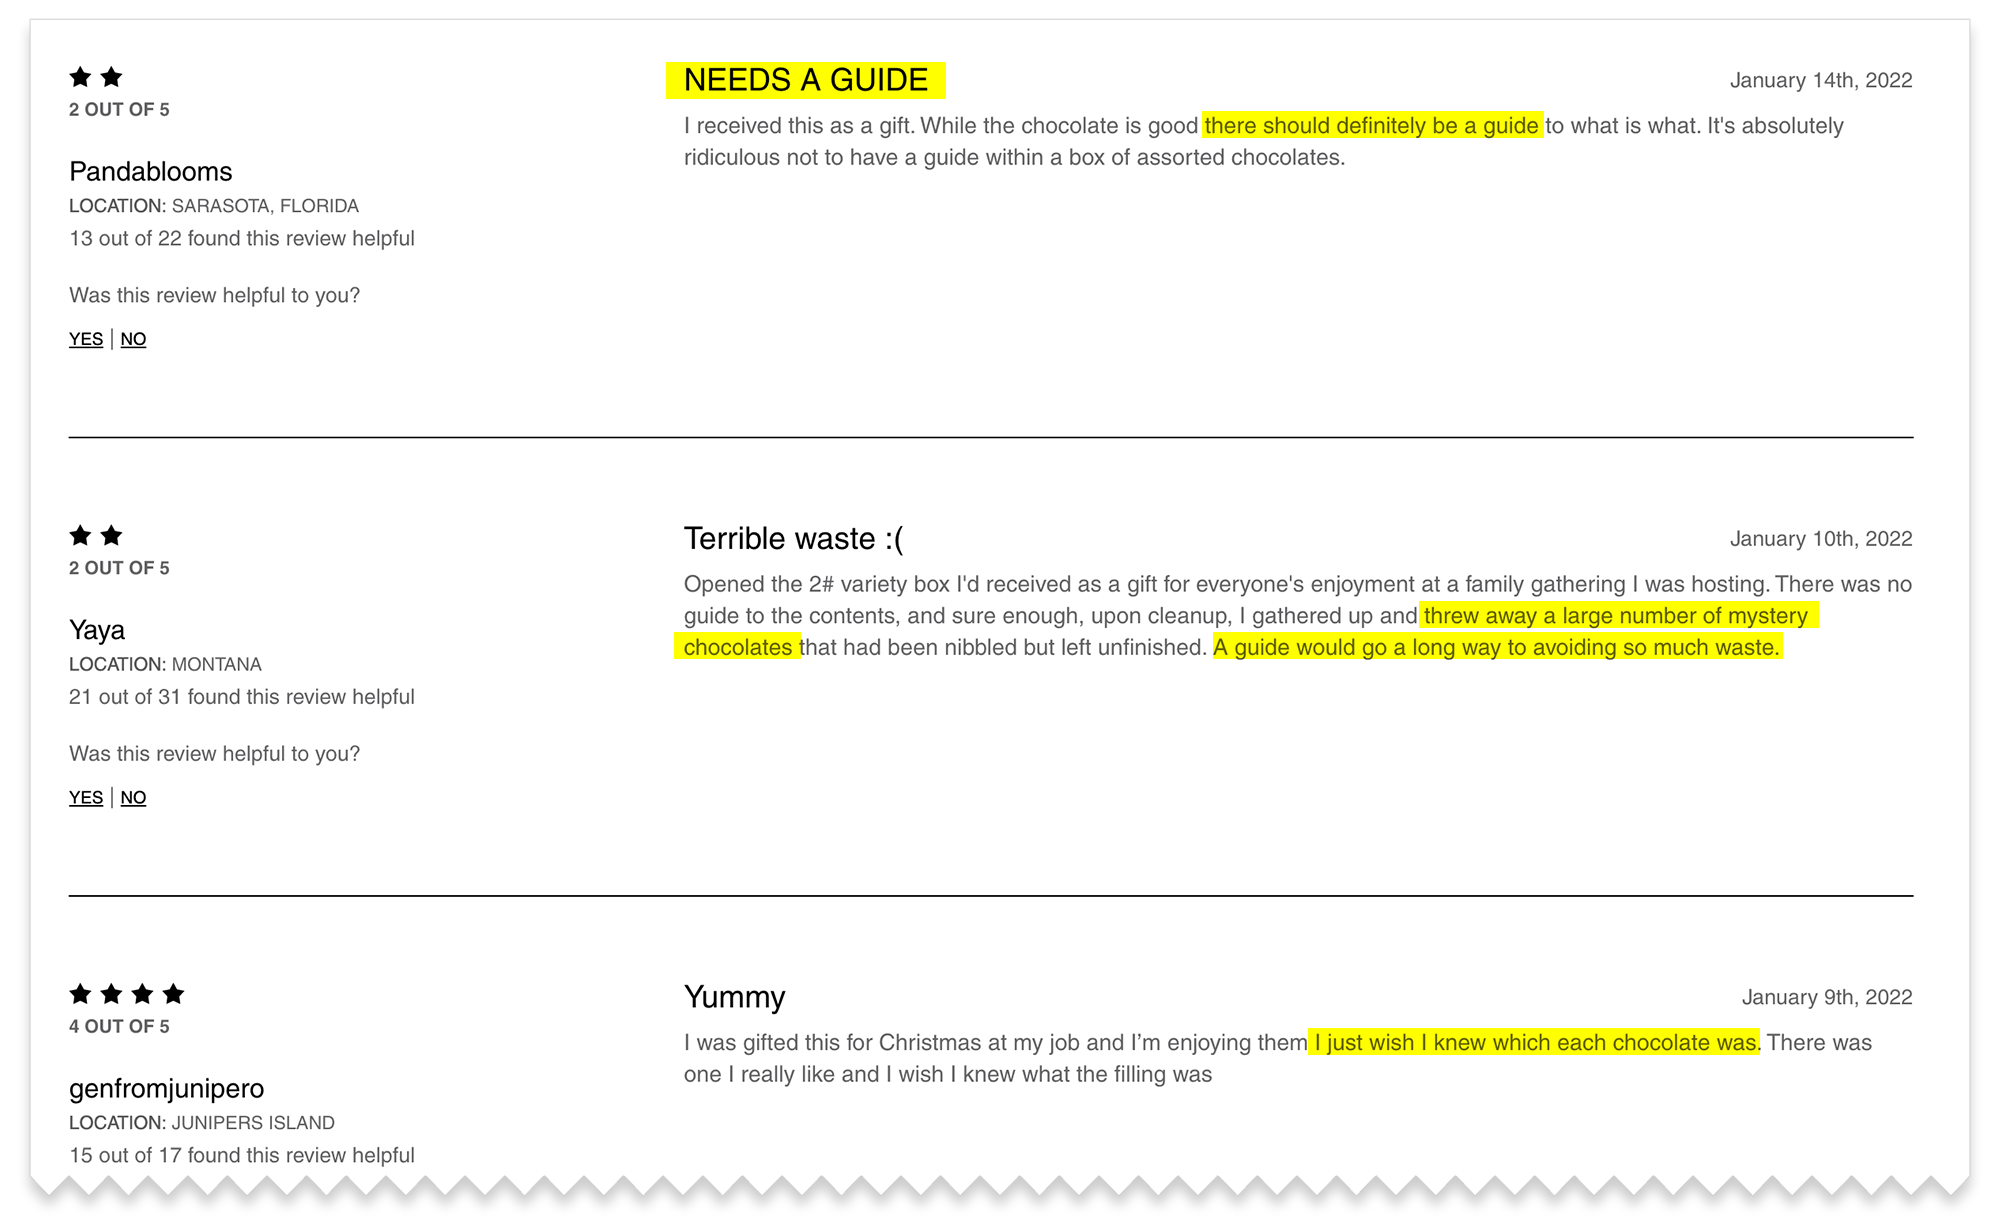
I trained my model on chocolates from See’s Candies. Why See’s? Because they’re my favorite. They’re also notorious for not including a guide with their chocolates—so unless you’re really familiar with their product, you may have no idea what’s in your box.
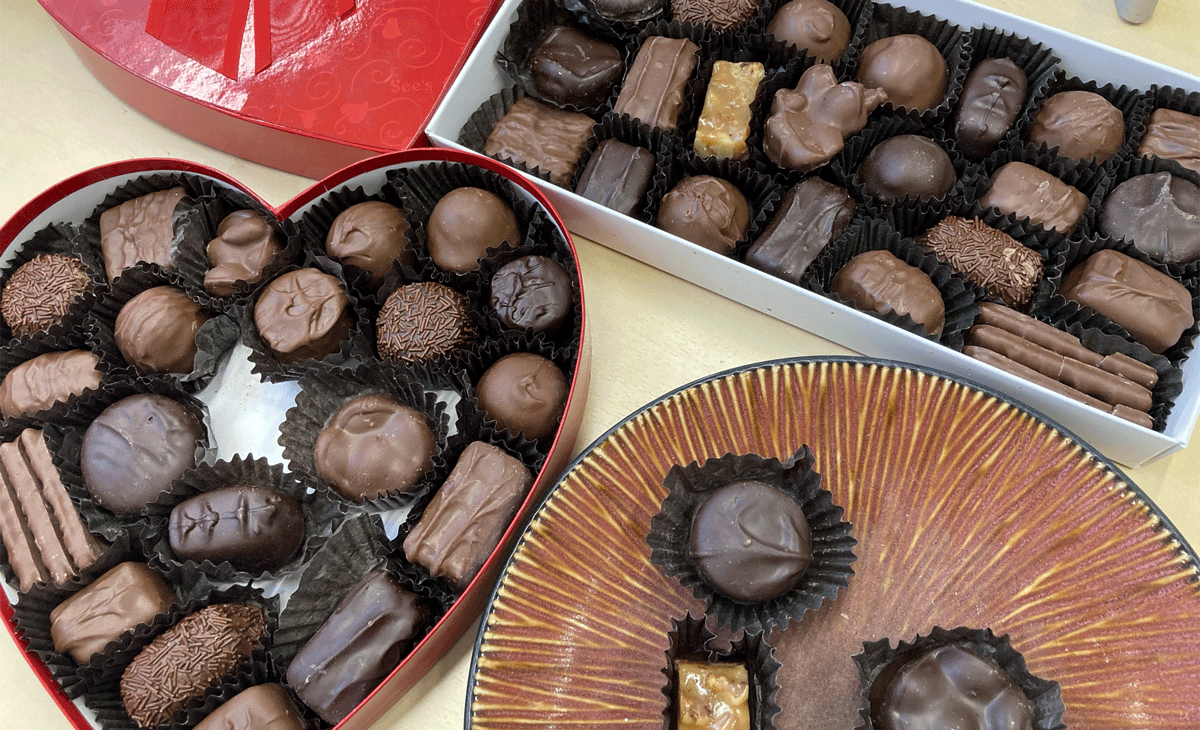
While my pie-in-the-sky dream would be to have a really robust model that could identify all See’s chocolates (or all chocolates in general!), that would involve more time and more boxes of chocolates than I have access to right now. So for this project, I limited my scope to the contents of a See’s 1lb Classic Red Heart - Assorted Chocolates.
Project Steps
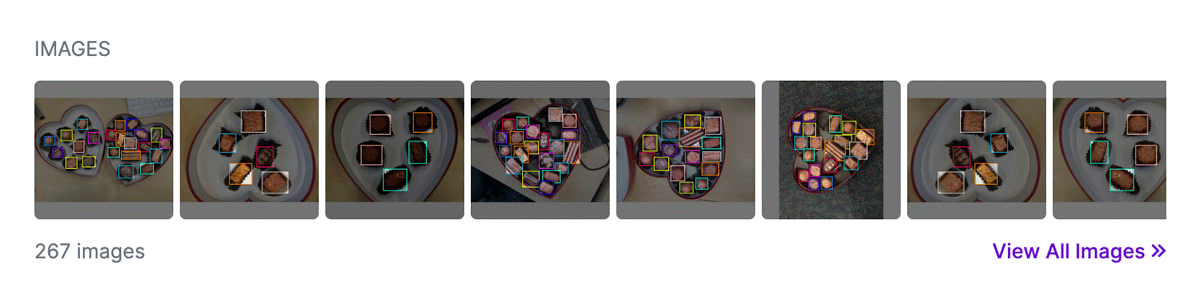
Gathering Images
Because I was focusing on a specific assortment of chocolates, I found it difficult to source images online, and opted instead to take my own photos.
While I only had a limited number of chocolates, I tried to get as much variety in photos as I could. I took photos on different surfaces with different lighting conditions. I rearranged the chocolates to different positions in the box. I took photos with chocolates missing, as if some had been eaten.
Before I could train my model to recognize chocolates, I had to train myself. This was unexpectedly challenging, because See’s doesn’t guarantee an exact assortment (“Replacements may be made depending on candy availability.”), and they don’t include a guide. This meant I had to do some detective work before I could start annotating.
Annotating
Since I wanted my model to identify the specific types of chocolate, I had to create a different class for each type of chocolate. This meant I had over 20 classes, and 20+ things to annotate in each photo. That meant it took me a little while to annotate each image.
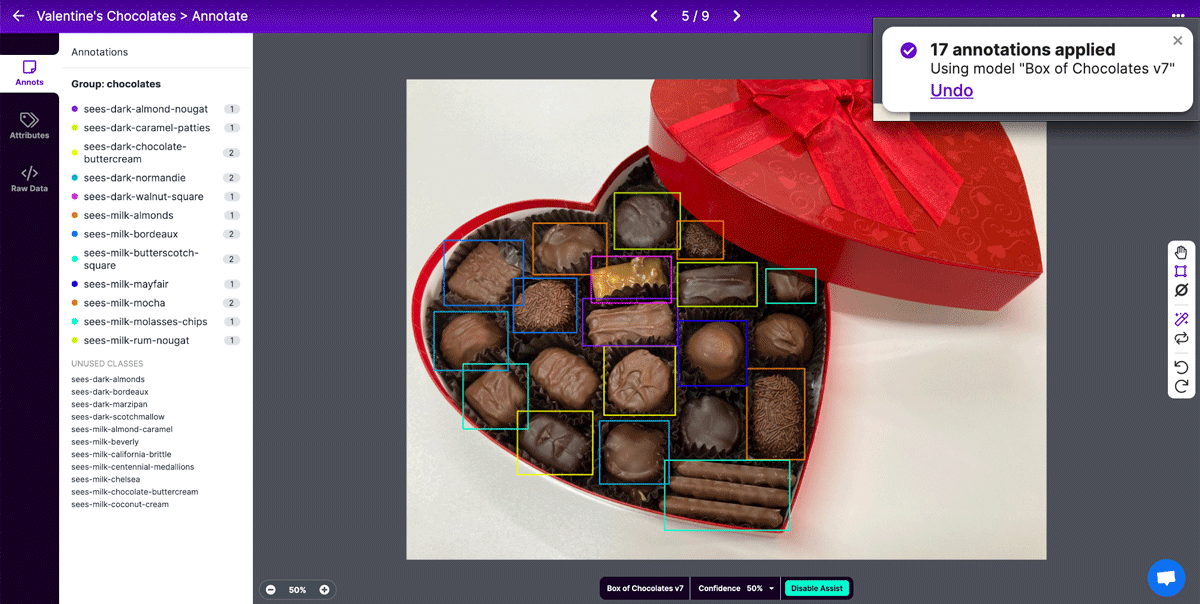
Thankfully, I was able to get help from Label Assist. I discovered that using my original chocolates project model with Label Assist was only so-so at labeling the chocolates correctly, but it was pretty good at drawing boxes for me, which I could relabel. Once I’d trained a model for my Valentine’s Chocolates project, it was better at labeling the chocolates correctly, and annotating got much faster.
After annotating my images, I checked out the Dataset Health Check to make sure I had an ok balance of the different chocolates in my dataset. It also helped me catch annotation mistakes a couple of times—the old model I initially used for Label Assist had a couple classes for chocolates that weren’t in this box, and seeing those in the Health Check helped me discover and fix some random background items that were accidentally labeled.

Preprocessing & Augmentation
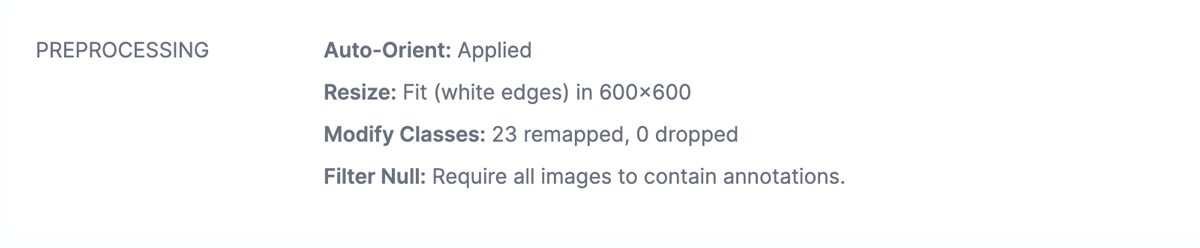
I applied a few basic preprocessing options:
- Auto-Orient: it seems like a good idea.
- Resize: my original photos were huge, so I resized them to 600x600. I chose to “Fit (white edges)” so that the photos would be resized without stretching or squashing the image.
- Modify Classes: I renamed my classes to be more readable, “human” names (ex.
sees_milk_bordeauxtoMilk Bordeux), so they’d display better when I tested my model with the web app and webcam examples. - Filter Null: I don’t have any unannotated images, so I didn’t need to include this, but my previous project did, so I included it out of habit.
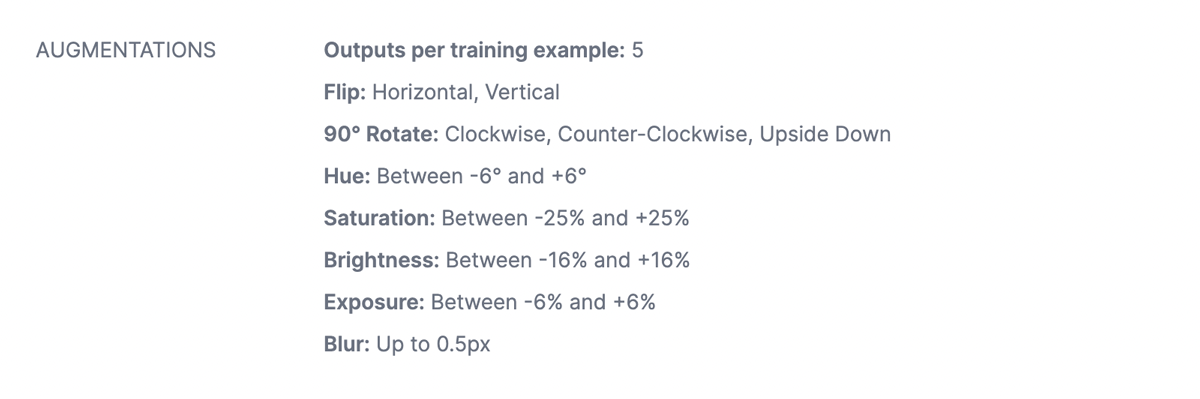
To help get a little more data, I applied some augmentations: flipping and rotation to simulate different views of the chocolates box; hue, saturation, brightness and blur to simulate different conditions one might experience when scanning a box of chocolates with their phone.
Training
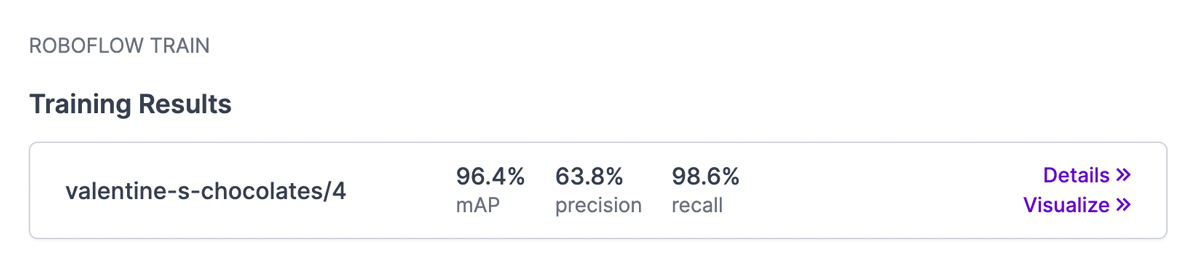
I trained my Valentine’s Chocolates dataset using my original Box of Chocolates model as a checkpoint, and got the following result.
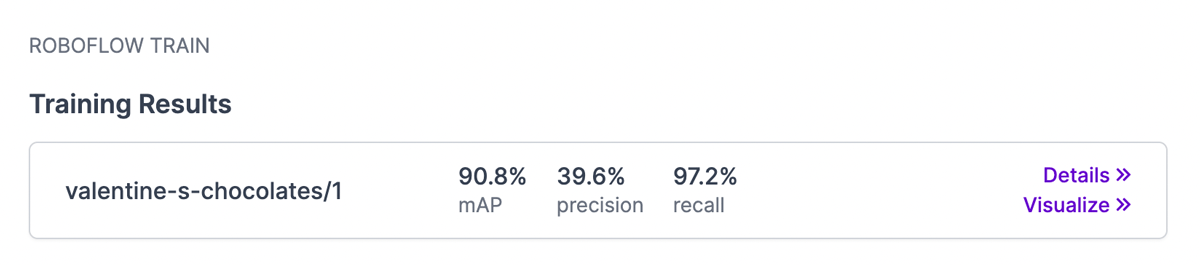
Because my original dataset was created with such a small number of images (32 photos, before augmentations), I wanted to see if I could improve my model if I added more data, so I added and annotated 55 more photos, applied the same augmentations, and trained my new model.

The new data seemed to improve the accuracy. I was pretty happy with that result, but I noticed a couple annotation errors, so I fixed those, but I may have messed something else up because the precision went down.
Deploy & Use
This is the fun part—trying out the model, and seeing how well it works. I took a new photo, ran it through the Example Web App, and it didn’t do too bad!
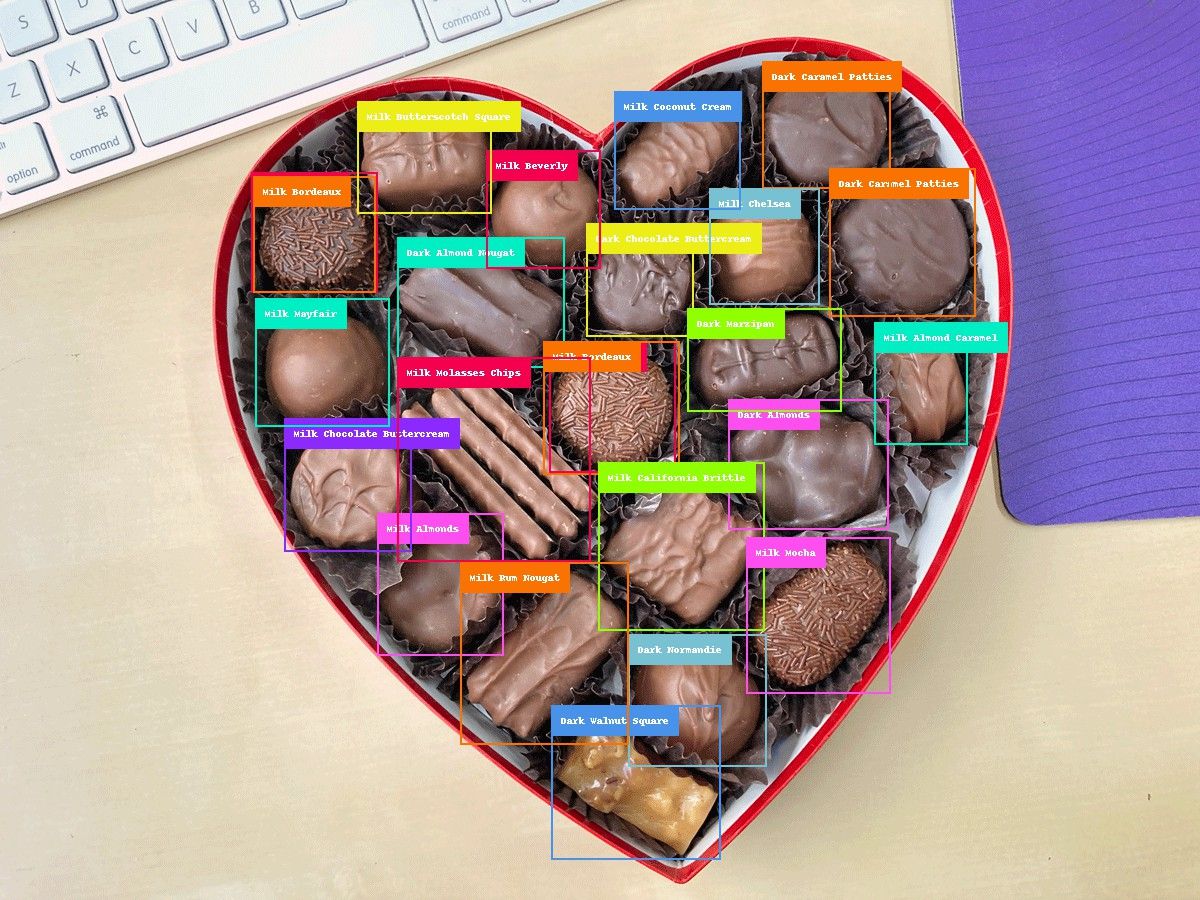
It managed to correctly identify the majority of the chocolates, although it struggled a little with some of the chocolates with similar appearances. (To be fair, even I have to look closely to see the difference between a Milk Bordeaux and Dark Bordeaux...)
Testing out the model using the Roboflow Universe widget
Summary
There are definitely some limitations to my model, the biggest one being the limited source of my images. See’s bonbons are hand-dipped, and aren’t perfectly uniform, but my dataset doesn’t really include that variety. I may have only really trained a model to identify one specific box of chocolates...but I’m still proud of it.
Before joining Roboflow, creating datasets and training computer vision models seemed confusing and beyond my abilities. I’ll admit that it was a little confusing, at first, but it wasn’t hard to learn how to use Roboflow’s tools. Computer vision no longer seems outside my reach.
Really, the hardest part of this project was trying not to eat the data.
Try it Yourself
Happy Valentine’s Day! You can check out this dataset and model on Roboflow Universe. See if the model can recognize your See’s Candies, or try using my dataset as a starting point for your own chocolate identifier.
Cite this Post
Use the following entry to cite this post in your research:
Karen Weiss. (Feb 9, 2022). Identifying Chocolates With Computer Vision. Roboflow Blog: https://blog.roboflow.com/identifying-chocolates-with-computer-vision/