
Autodistill can auto-label product SKU datasets by chaining Grounding DINO (to locate objects) with CLIP (to classify them by category) on your own hardware, reducing the manual labeling burden to a review-and-correction pass. This tutorial walks through the full pipeline using 42 images of vinyl record covers across six classes, from data gathering on Roboflow Universe through auto-labeling, human review, and training an object detection model via Roboflow. The resulting model correctly identified most record instances in test images, with misses attributable to limited per-class examples.
Consider an application that lets a user scan an item in a store and retrieve more information about the product. You could build this application using computer vision today. With computer vision, you can train a model to identify specific product SKUs for automated checkout solutions, building interactive museum applications that can identify paintings, and more.
Traditionally, you would need to label individual product SKUs all manually, or use an outsourced labeling service to assist with labeling. Using the open source Autodistill framework, you can auto-label a dataset of images, on your own hardware (with some human review of the results required). This enables you to get to production with a trained model you can use in your application faster than ever.
In this guide, we are going to show you how to train a vision model to identify product SKUs with no labeling. We will walk through an example of auto-labeling vinyl record covers.
Without further ado, let’s get started!
Step #1: Gather Data
To get started, we will need data. For this example, we will label 42 images of vinyl records. In total, our dataset covers six classes. We recommend starting with a few classes and having at least five images that feature examples of each class.
For this guide, we will use a vinyl records dataset on Roboflow Universe, a community that has shared over 250,000 computer vision datasets:
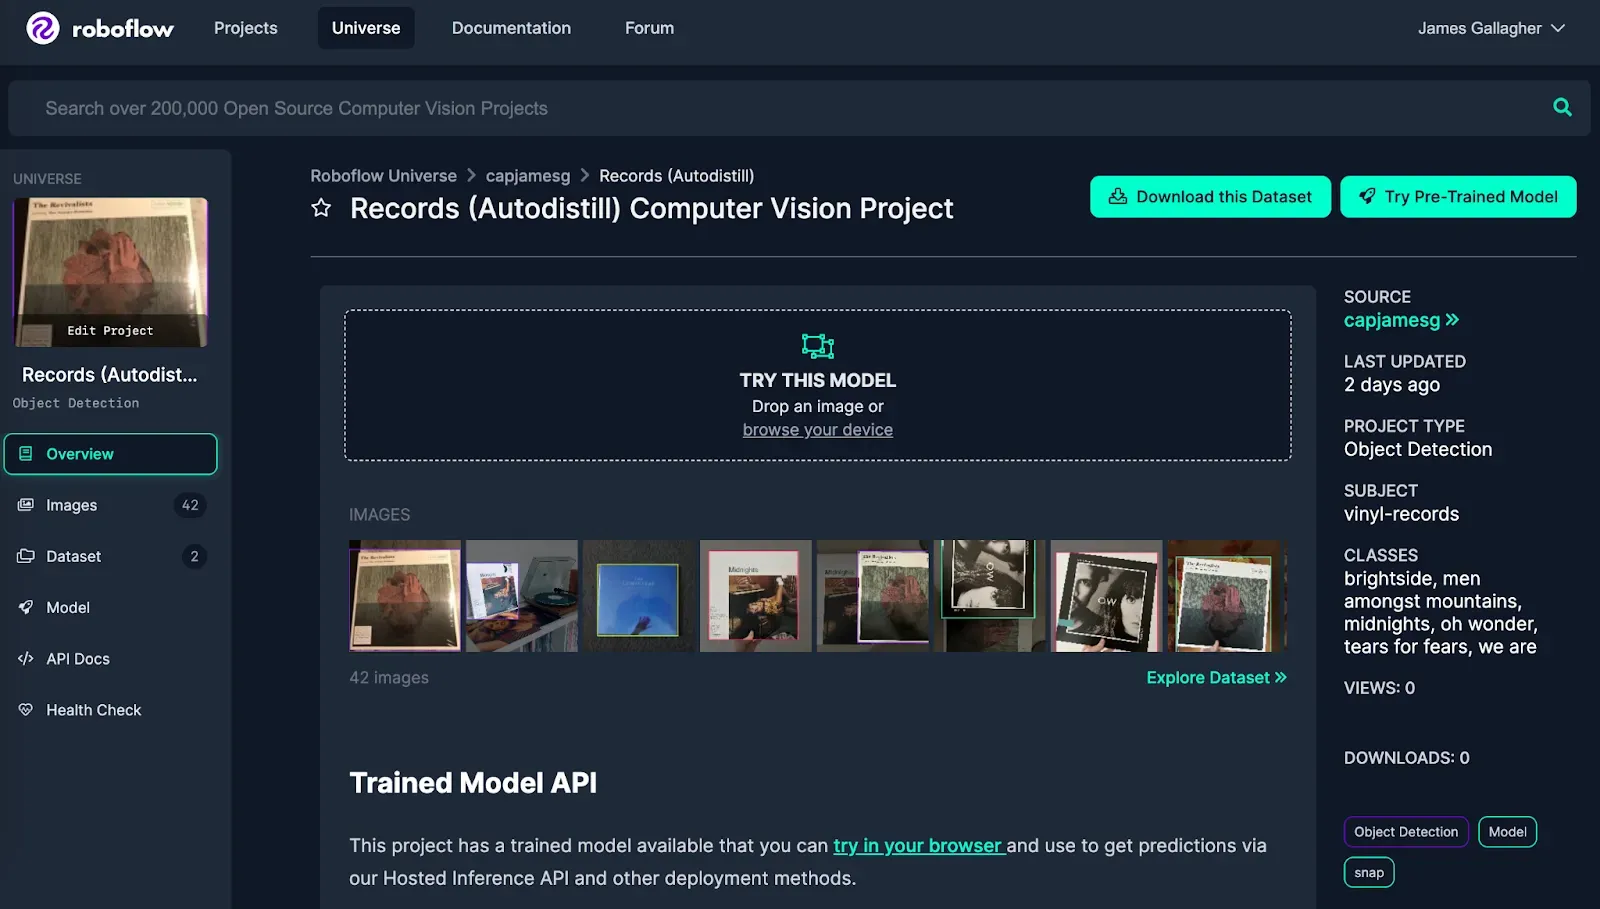
To download the dataset with which we will be working, go to the vinyl dataset page on Universe. Then, click “Download this Dataset”. Follow the on-screen instructions. Select the “Download ZIP” option to download a ZIP file of images.

When you have the data you need, you are ready to move on to the next step.
Step #2: Install Required Dependencies
To label data for training a model, we will use Autodistill. Autodistill is a framework that lets you use large, foundation vision models to auto-label data for use in training smaller, real-time models. We will use two models in the auto-labeling process: Grounding DINO and CLIP. We will talk more about these models and how they work in the next section.
Run the following command to install the dependencies we will use in our project:
pip install autodistill autodistill-grounding-dino autodistill-clipStep #3: Auto-Label Data
In the previous section, we mentioned we would be using two models to auto-label data: Grounding DINO and CLIP.
Grounding DINO is a zero-shot object detection model. Grounding DINO will identify the location of a general object (i.e. a record cover). Then, we will use CLIP to classify the general object and assign a more specific label.
Our auto-labeling process involves three steps:
- Set up Grounding DINO to identify record covers.
- Configure CLIP to classify record covers.
- Run Grounding DINO and CLIP over all images in our dataset.
With Autodistill, we can complete the above steps in a few dozen lines of code, with a bit of manual work involved to configure CLIP.
You may be wondering: how will our model know how to classify record covers without training? This is a process with which CLIP will help.
First, our code will use Grounding DINO and cut out all vinyl record covers. Then, CLIP will classify each cover and assign a label.
We need to calculate CLIP embeddings for one image that contains each class (SKU) we want to use in classification. Embeddings are numeric representations of an image that encode semantic information about the image. We can use these embeddings to classify objects. The class associated with the embedding that is closest to an image can be used as a label.
The reference images we use should primarily feature the SKU you want to detect. Featuring multiple products will confuse the model and result in sub-par results.
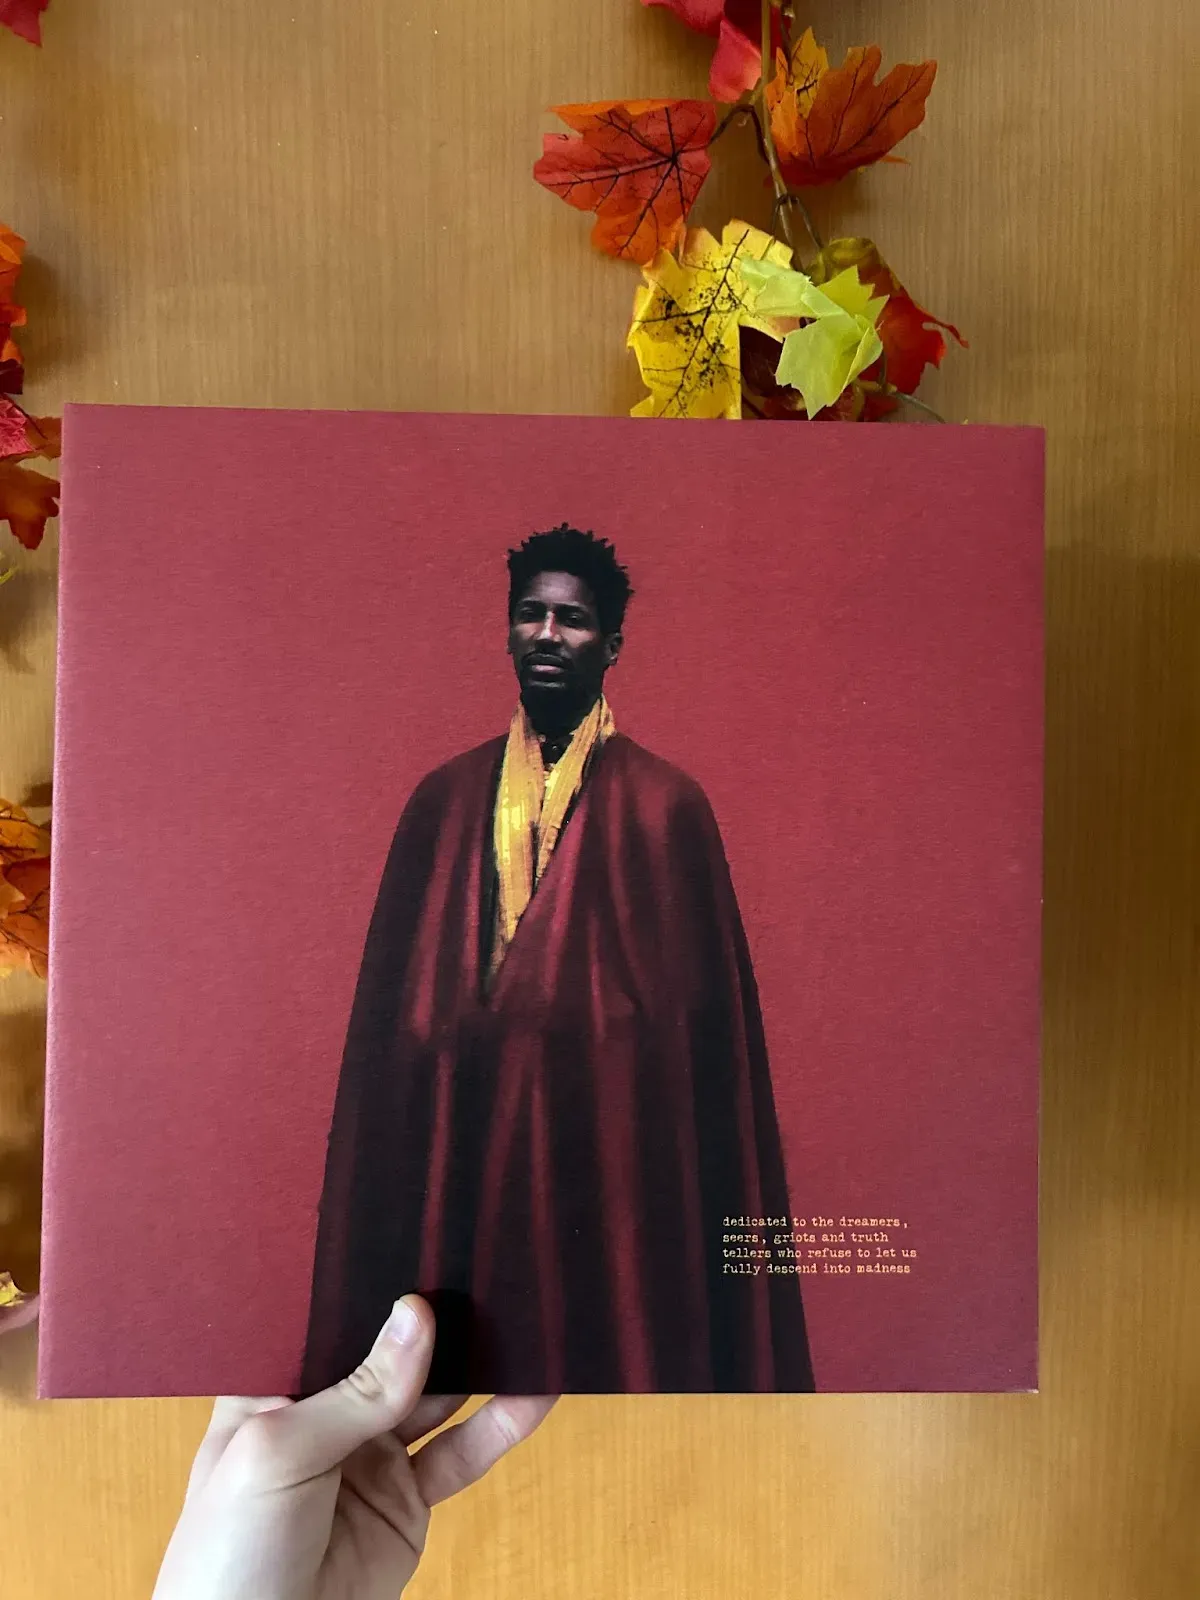
For example, we can use the following image as a reference for the “we are” album, since it contains no other vinyl records or similar objects:
For this guide, we will use CLIP to calculate embeddings, since we are auto-labeling data with CLIP (Note: Only CLIP is supported with embedding classification in Autodistill.)
We can use the embeddings for each SKU in the classification process. For each image we want to label, we can compare each SKU embedding to the embedding associated with the image to label. We can take the SKU that is closest to the image as the class that represents the contents of an image.
Create a new Python file and add the following code:
from autodistill_clip import CLIP
from autodistill.detection import CaptionOntology
from autodistill_grounding_dino import GroundingDINO
from autodistill.core import EmbeddingOntologyImage
from autodistill.core.combined_detection_model import CombinedDetectionModel

import torch
import clip
from PIL import Image
import os

device = "cuda" if torch.cuda.is_available() else "cpu"
model, preprocess = clip.load("ViT-B/32", device=device)

INPUT_FOLDER = "samples"
DATASET_INPUT = "./images"
DATASET_OUTPUT = "./dataset"
PROMPT = "album cover"

images = os.listdir("samples")

images_to_classes = {
    "midnights": "IMG_9022.jpeg",
    "men amongst mountains": "323601467684.jpeg",
    "we are": "IMG_9056.jpeg",
    "oh wonder": "Images (5).jpeg",
    "brightside": "Images (4).jpeg",
    "tears for fears": "Images (3).jpeg"
}

model = CombinedDetectionModel(
    detection_model=GroundingDINO(
        CaptionOntology({PROMPT: PROMPT})
    ),
    classification_model=CLIP(
        EmbeddingOntologyImage(images_to_classes)
    )
)

model.label(input_folder=DATASET_INPUT, output_folder=DATASET_OUTPUT, extension=".jpeg")
This code will use Grounding DINO and CLIP to automatically label data.
Above, replace:
INPUT_FOLDERwith the name of the folder that contains the reference images that you will use in the classification process.DATASET_INPUTwith the name of the folder that contains all images you want to auto-label.DATASET_OUTPUTwith the name of the folder in which you want to save your new dataset.PROMPTwith the object you want Grounding DINO to identify.
Then, replace the images_to_classes dictionary with a dictionary that maps a class to the reference image in the INPUT_FOLDER.
Our code will:
- Calculate embeddings for all images in the
images_to_classesdictionary. - Identify all album covers using Grounding DINO.
- Classify all images using the embeddings for images in the
images_to_classesdictionary. - Save the results in an object detection dataset.
Run the code above to auto-label your dataset.
Step #4: Review Data
Once you have labeled your dataset, we recommend auditing the quality of your data. You can do so in the Roboflow platform, which provides an annotation tool you can use to review and correct annotations.
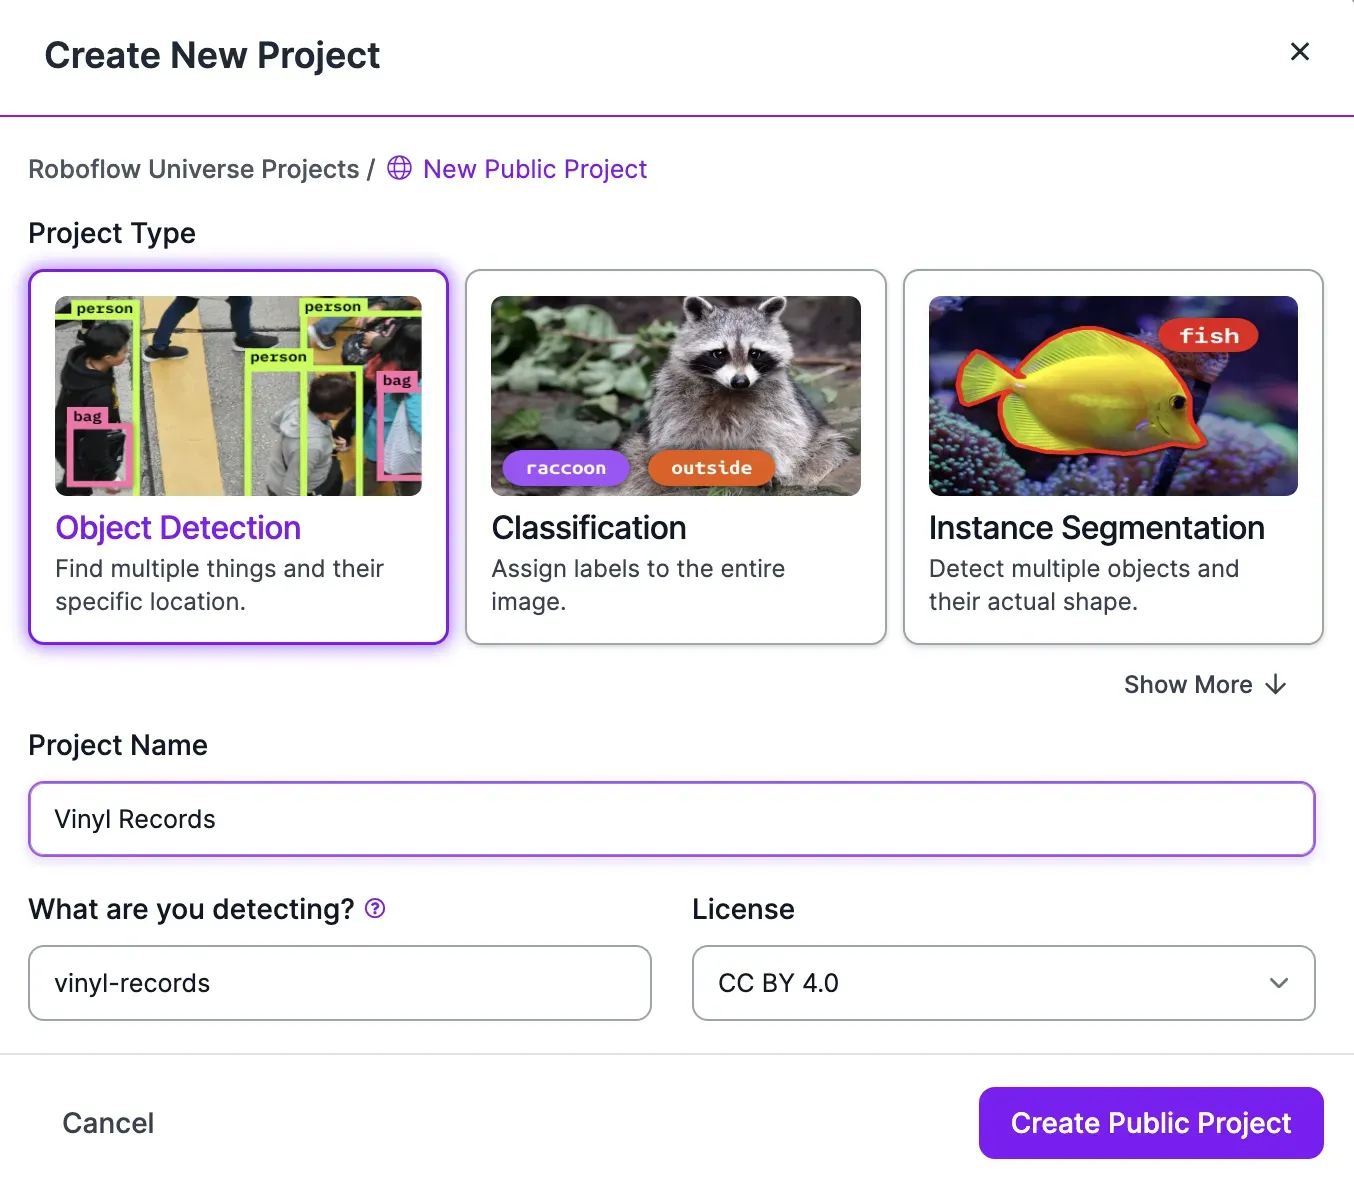
Create a new object detection project in the Roboflow dashboard:
Then, upload the dataset returned by Autodistill:

Click “Save and Continue” to upload and save the images and annotations.
Next, click “Annotate” in the sidebar. Click on an image to start reviewing all the annotations. Here is an example annotation from the image:
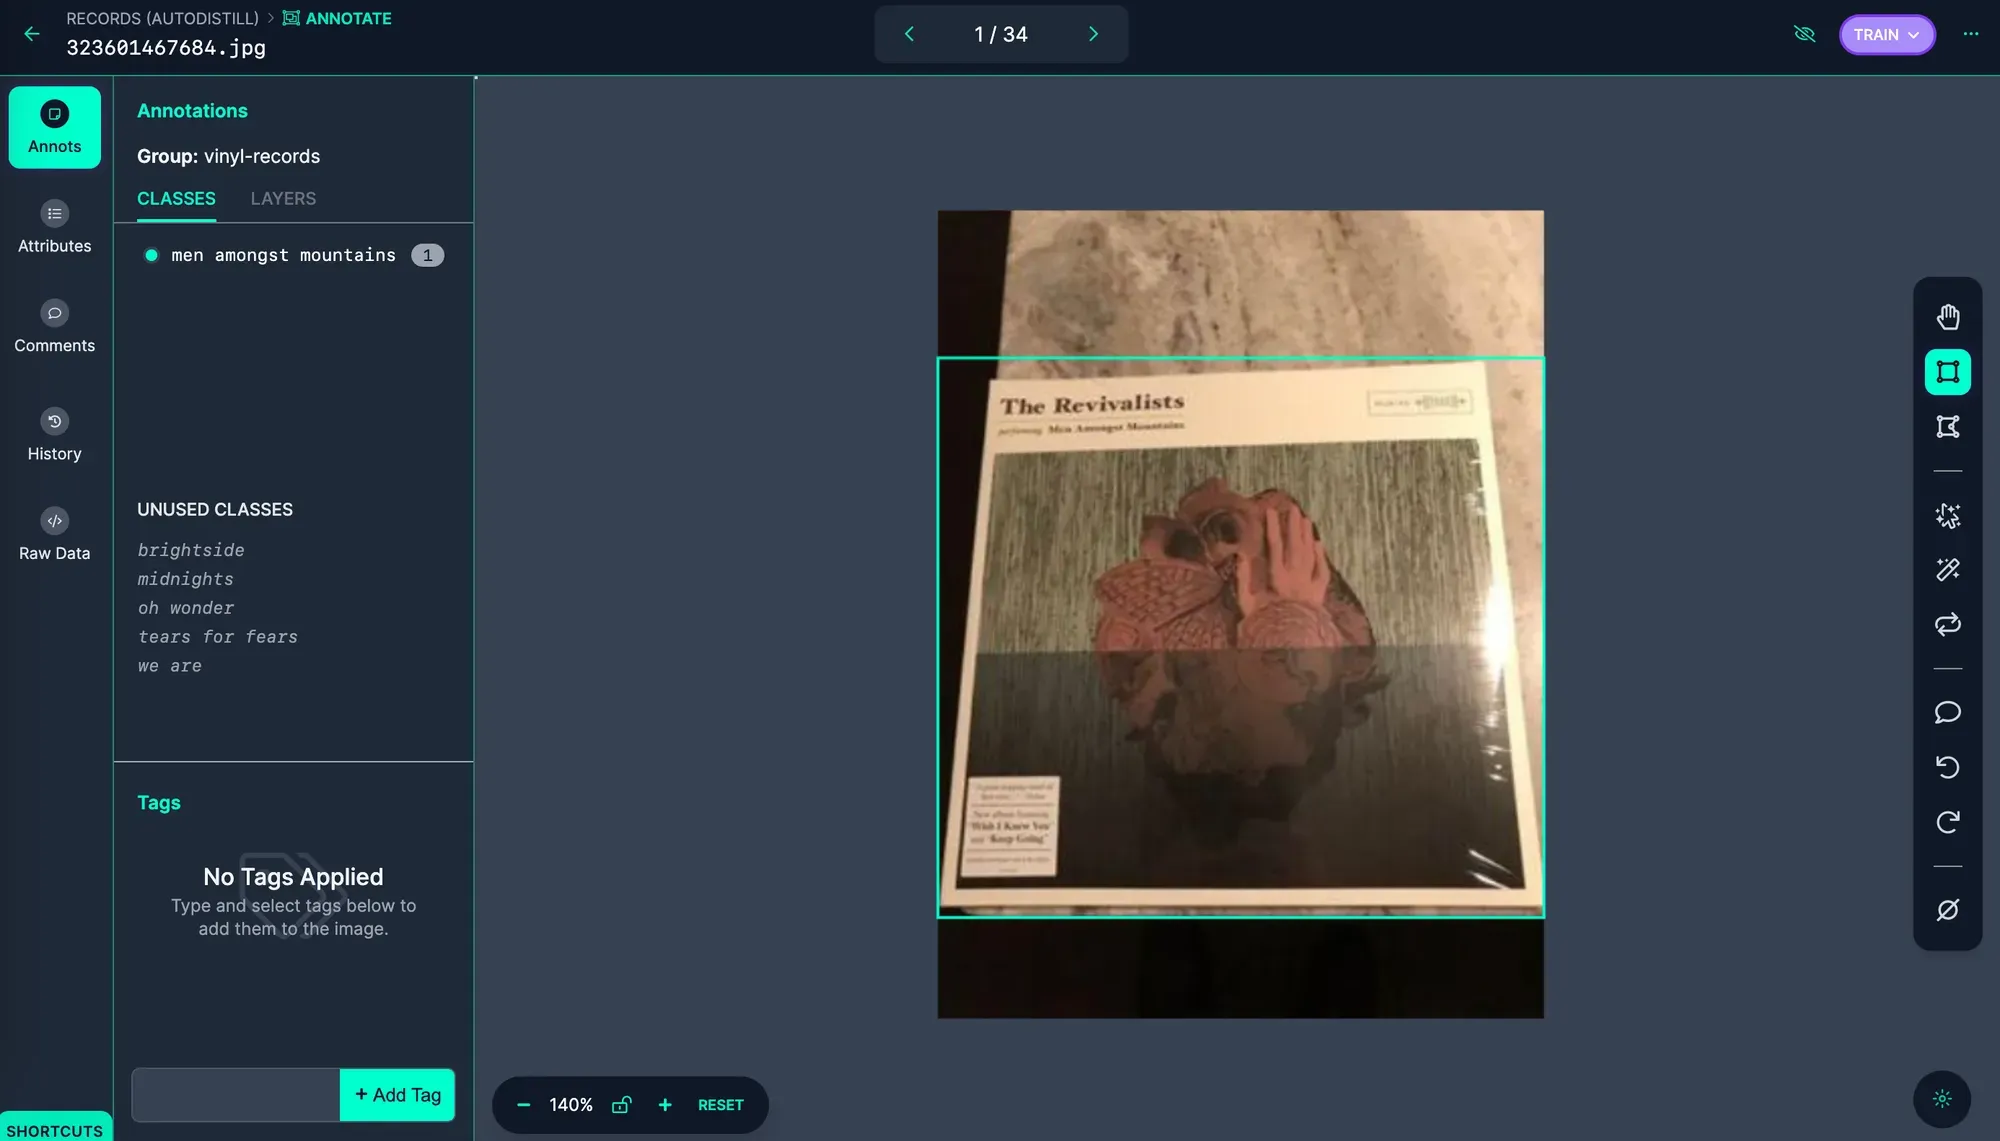
In this case, Autodistill was able to successfully label the image. If Autodistill has mis-labeled any data, use Roboflow Annotate to make the requisite changes.
For this particular dataset, we spent around two minutes making manual corrections to annotations.
Step #5: Train an Object Detection Model
If you have not already, upload your data to Roboflow following the instructions in the following step.
Once you are ready to train a model, click “Generate” in the Roboflow sidebar. At this stage, you can choose augmentation and preprocessing steps to apply to your dataset. For your first model version, we recommend leaving the default augmentation and preprocessing steps.
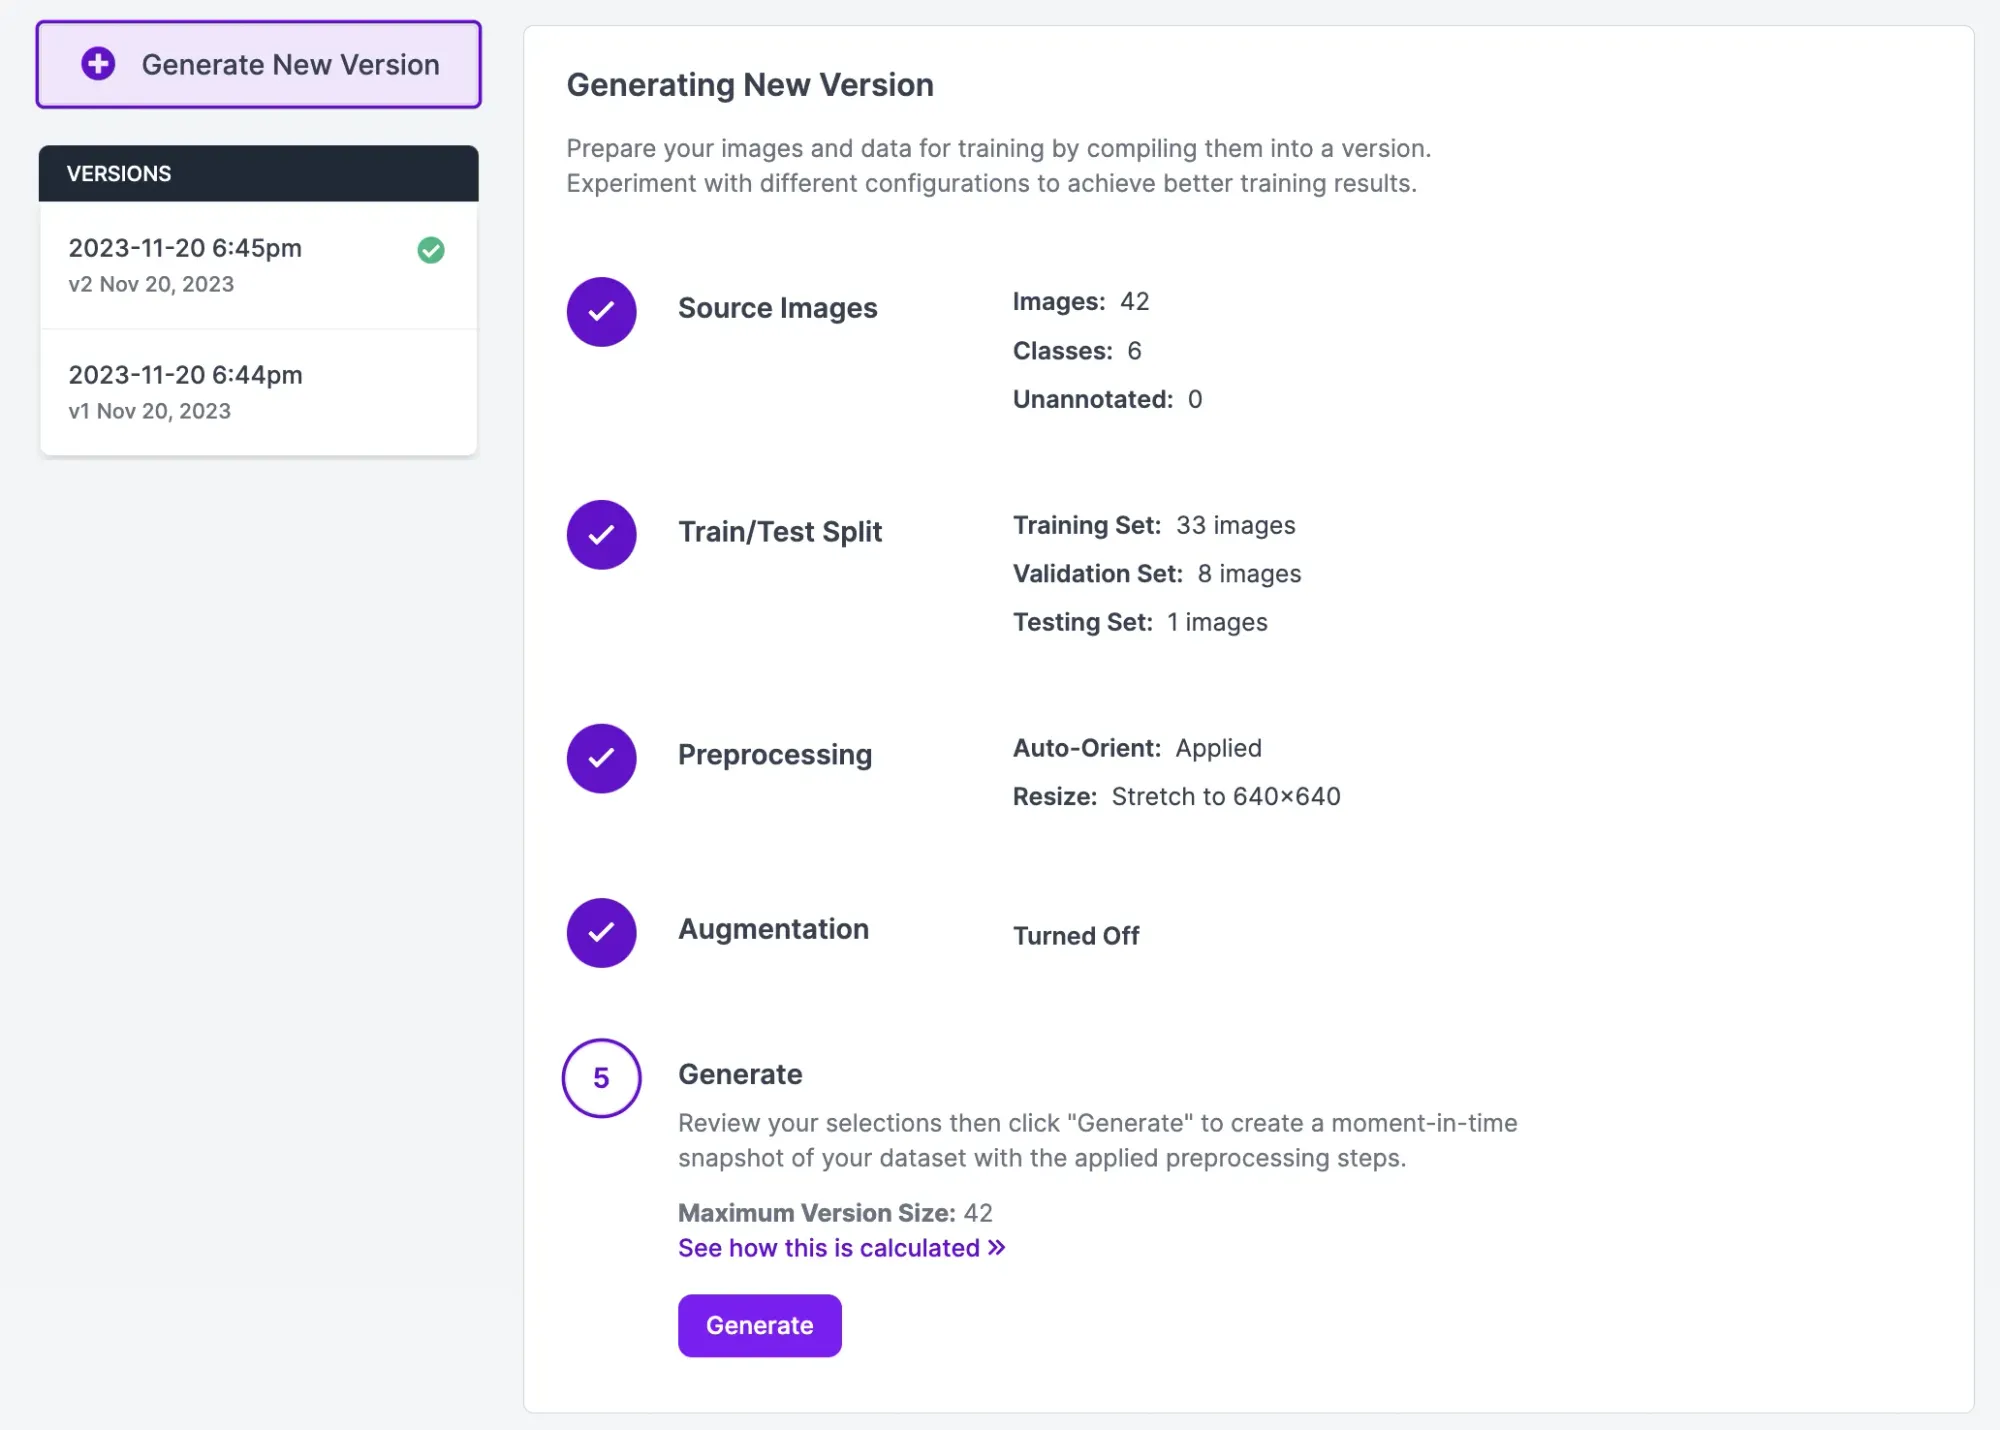
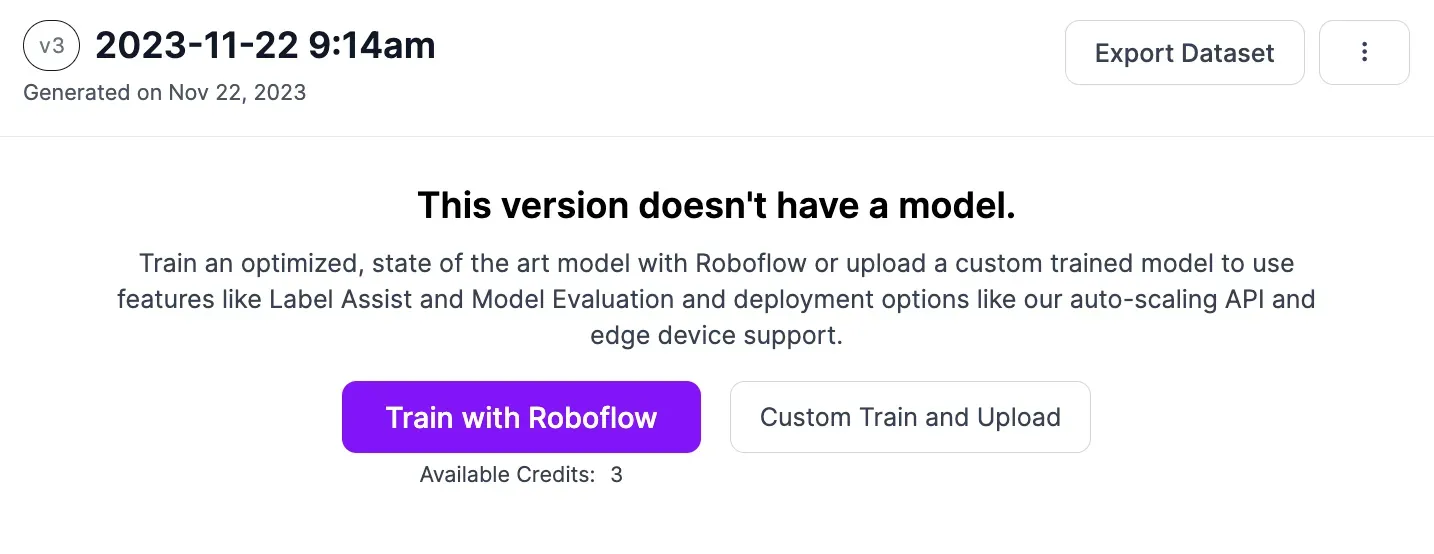
Click “Generate” at the bottom of the page to generate a dataset version. A checkpoint with all your image data will be created. Click “Train with Roboflow” and follow the on-screen instructions to train an object detection model:
An object detection model training job will start. A graph will appear that shows the progress made in your training job. You will receive an email once your model has been trained.
Step #5: Test the Vision Model
With a model trained, now comes the fun part: testing the model.
Here is how the vinyl record model we trained earlier performs on an example image:
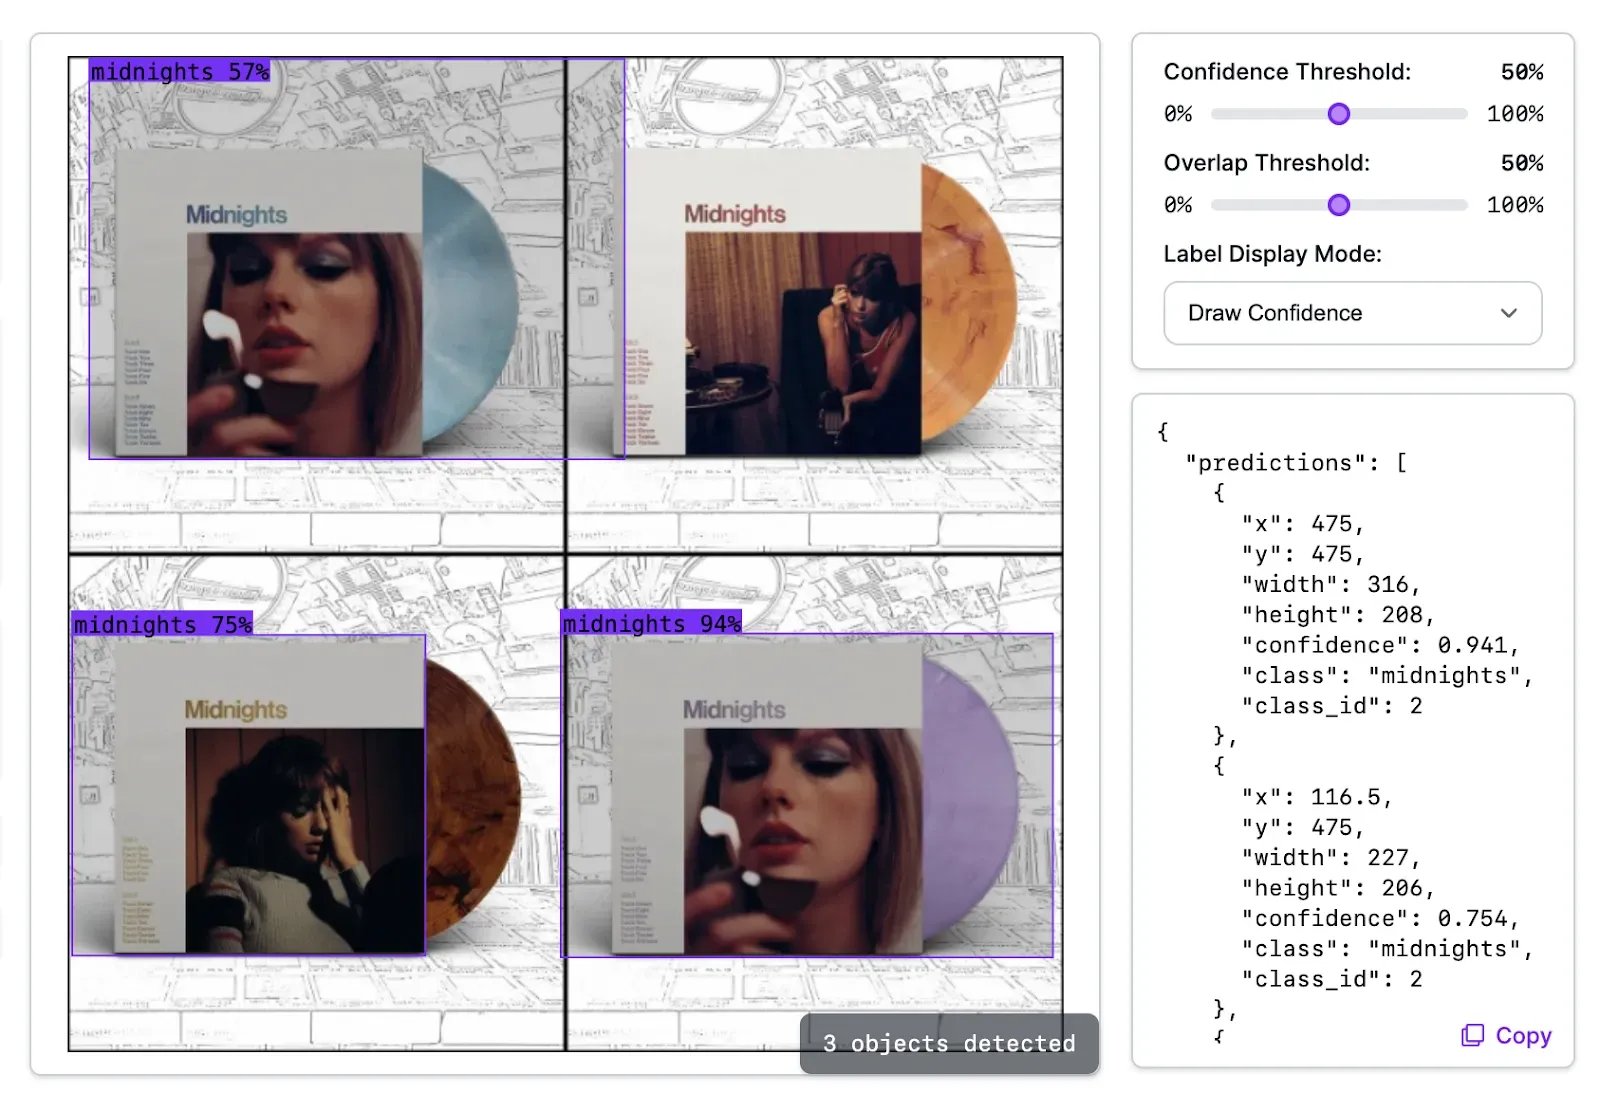
Our model successfully identified three of four instances of the “midnights” class in our dataset. One of the bounding boxes is larger than ideal and one instance of the “midnights” record was missed. This could be addressed by adding more examples of images to our dataset.
Conclusion
In this guide, we used Autodistill to auto-label product SKUs, using the example of vinyl records. We auto-labeled 42 images. Most of the work was done by Autodistill, with humans auditing labels and making a few manual corrections where necessary.
Grounding DINO identified all record covers, then CLIP classified them given examples of each record cover.
Cite this Post
Use the following entry to cite this post in your research:
James Gallagher. (Dec 1, 2023). Automatically Label Product SKUs with Autodistill. Roboflow Blog: https://blog.roboflow.com/label-product-skus/