In computer vision, there are a number of general, pre-trained models available for deployment to edge devices (such as the OAK). However, the real power in computer vision deployment today lies in custom training your own computer vision model on your own data to apply to your custom solution on your own device.
To train your own custom model, you must gather a dataset of images, annotate them, train your model, and then convert and optimize your model for your deployment destination. This machine learning pathway is wrought with nuance and slows development cycles. What's more - mistakes do not manifest themselves not as blatant errors, but rather, quietly degrade your model's performance.
With the mission of streamlining computer vision development and deployment, Roboflow and Luxonis are partnering to provide a one-click custom training and deployment solution to the OAK-1 and OAK-D.
In this blog, we'll walk through the Roboflow custom model deployment process to the OAK and show just how seamless it can be.
And the best part is, you do not need to have your OAK device in hand yet to develop your project, today. You can develop and test in Roboflow’s cloud environment first, then deploy the trained model to your OAK later on.
Step 1: Gather Your Dataset
In order to train your custom model, you need to gather images that are representative of the problems your model will solve in the wild. It is extremely important to use images that are similar to your deployment environment. The best course of action is to train on images taken from your OAK device, at the resolution you wish to infer at. You can automatically upload images to Roboflow from your OAK for annotation via the Roboflow Upload API.
To just get a feel for a problem you will need 5-100 images. To build a production-grade system, you will likely need many more.
***Using Your Own Data***
To export your own data for this tutorial, sign up for Roboflow and make a public workspace, or make a new public workspace in your existing account. If your data is private, you can upgrade to a paid plan for export to use external training routines like this one or experiment with using Roboflow's internal training solution.
Step 2: Annotate Your Dataset
The next step is to upload and annotate your images in Roboflow.
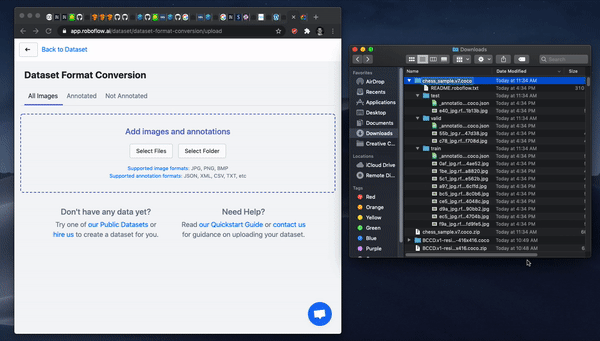
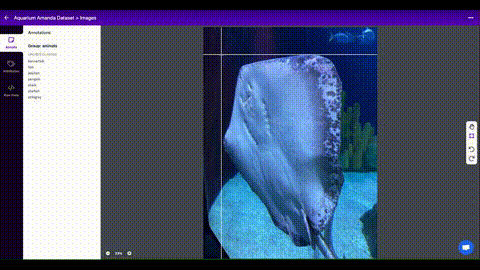
You will be drawing bounding boxes around objects that you want to detect. See our tips on labeling best practices.
Step 3: Version Your Data
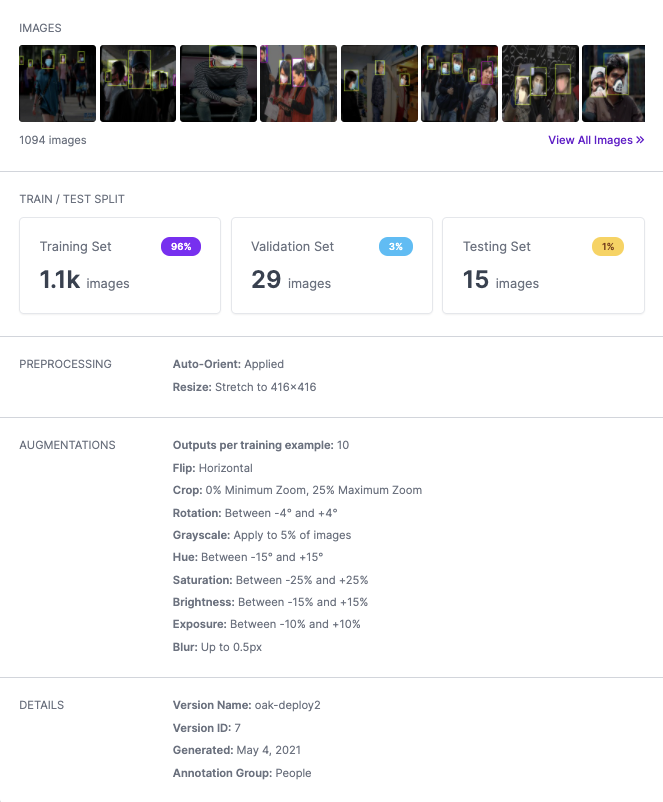
Once you are satisfied with your dataset's annotations, you can create a dataset version in Roboflow to prepare for training. A dataset version is locked in time allowing you to iterate on experiments, knowing that the dataset has been fixed at the point of the version.
In creating a dataset version, you will be making two sets of decisions:
- Preprocessing - image standardization choices across your dataset such as image resolution. For OAK deployment, we recommend the 416x416 image resolution.
- Augmentation - image augmentation creates new, transformed images from your training set, exposing your model to different variations of data.
Step 4: Train and Deploy Your Model to the OAK
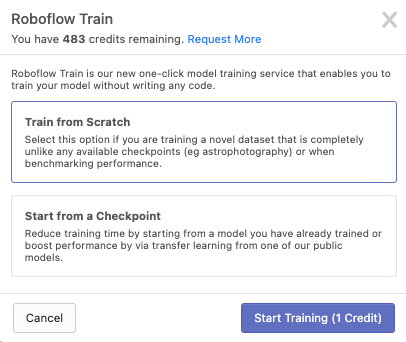
Roboflow Train offers single-click training and deployment to your OAK device. After you've created a version, click Start Training and choose a checkpoint to start from. If you don't have a checkpoint to start from, just choose Train from Scratch or Public Models --> COCO.
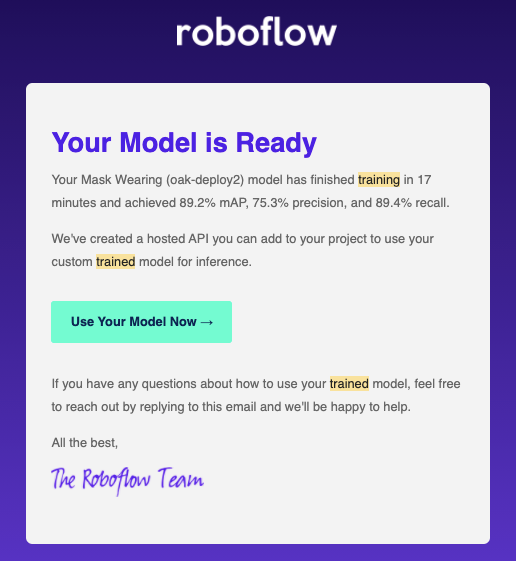
Depending on the size of your dataset, training and conversion will take anywhere from 15min-12hrs, and you will receive an email when it has completed training.
Step 5: Test Your Model on the Hosted API
After Step 4, your model is ready for OAK deployment (Step 6), but we recommend taking a moment to test your model against the Roboflow Hosted Inference API, before deploying. The Hosted Inference API is a version of your model, deployed to a cloud server. You can get a feel for the quality of your inference on test images, and develop your application against this API.
When you need edge deployment, you can move forward to setting up the OAK Inference Server.
This also means that you do not need your OAK in hand yet to start iterating on your model and testing deployment conditions.
Step 6.1: Deploy a Roboflow Train Model to Your OAK Device
We're excited to announce the launch of our newest pip package, providing an easier way for you to natively interface with your Roboflow workspace through your Python scripts and easily deploy a model to an OAK device.
Setting up DepthAI in your Python environment
We will need to set up DepthAI and OpenCV - In your Terminal, enter:
python3 -m pip install depthai opencv-python
Installing the Roboflow OAK Python pip Package
python3 -m pip install roboflowoak
If you are using Anaconda:
# enter the line below in your terminal within your chosen python environment
pip install roboflowoak
If you're using Anaconda, you will first need to install pip
# enter the line below in your terminal within your chosen python
# environment
conda install pip
# upon completion of installation, install the Roboflow OAK Python
# pip package
pip install roboflowoak
If you installed python with conda, don't forget to activate the python environment you installed the package to if you haven't already.
# change replace-with-env-name to the environment you installed
#roboflowoak to
# example: environment name is roboflowoak --
# change replace-with-env-name to roboflowoak
conda activate replace-with-env-name
Python Script for Running Inference with your Model
- Copy/paste the script below into VSCode, XCode, PyCharm, Spyder (or another code editor)
- Update the values for model/project [name], model version, api_key, and device_name within the "rf" object. Locating Your Project Information.
- Save the python file to a directory - be sure to note the directory name and file name as we'll need these later for the deployment to work.
from roboflowoak import RoboflowOak
import cv2
import time
import numpy as np
if __name__ == '__main__':
# instantiating an object (rf) with the RoboflowOak module
rf = RoboflowOak(model="YOUR-MODEL-ID", confidence=0.05,
overlap=0.5, version="YOUR-MODEL-VERSION-#",
api_key="YOUR-PRIVATE_API_KEY", rgb=True, depth=True,
device=None, device_name="CHOOSE-A-DEVICE-NAME", blocking=True)
while True:
t0 = time.time()
result, frame, raw_frame, depth = rf.detect()
predictions = result["predictions"]
#{
# predictions:
# [ {
# x: (middle),
# y:(middle),
# width: ,
# height: ,
# depth: ###->,
# confidence: ,
# class: ,
# mask: { }
# }
# ]
#}
#frame - frame after preprocs, with predictions
#raw_frame - original frame from your OAK
#depth - depth map for raw_frame, center-rectified
# to the center camera
# To access specific values within "predictions" use:
# p.json()[a] for p in predictions
# set "a" to the index you are attempting to access
# Example: accessing the "y"-value:
# p.json()['y'] for p in predictions
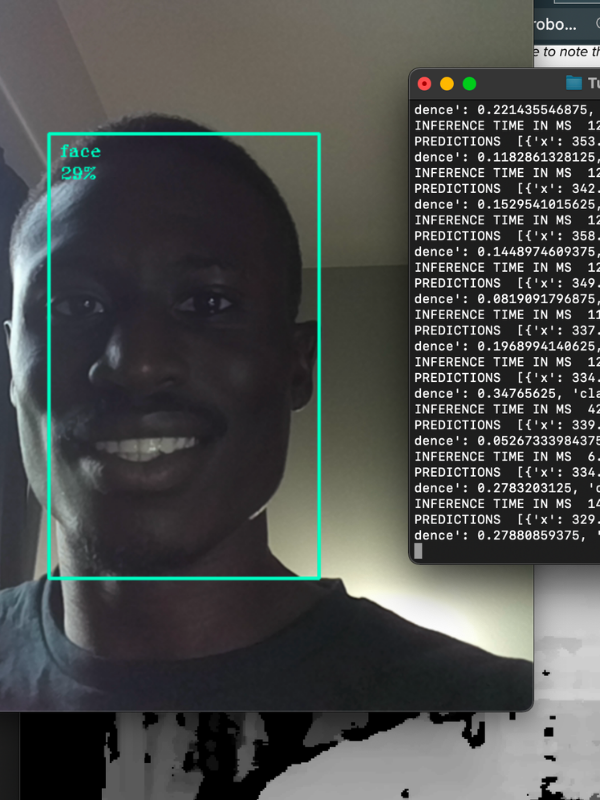
t = time.time()-t0
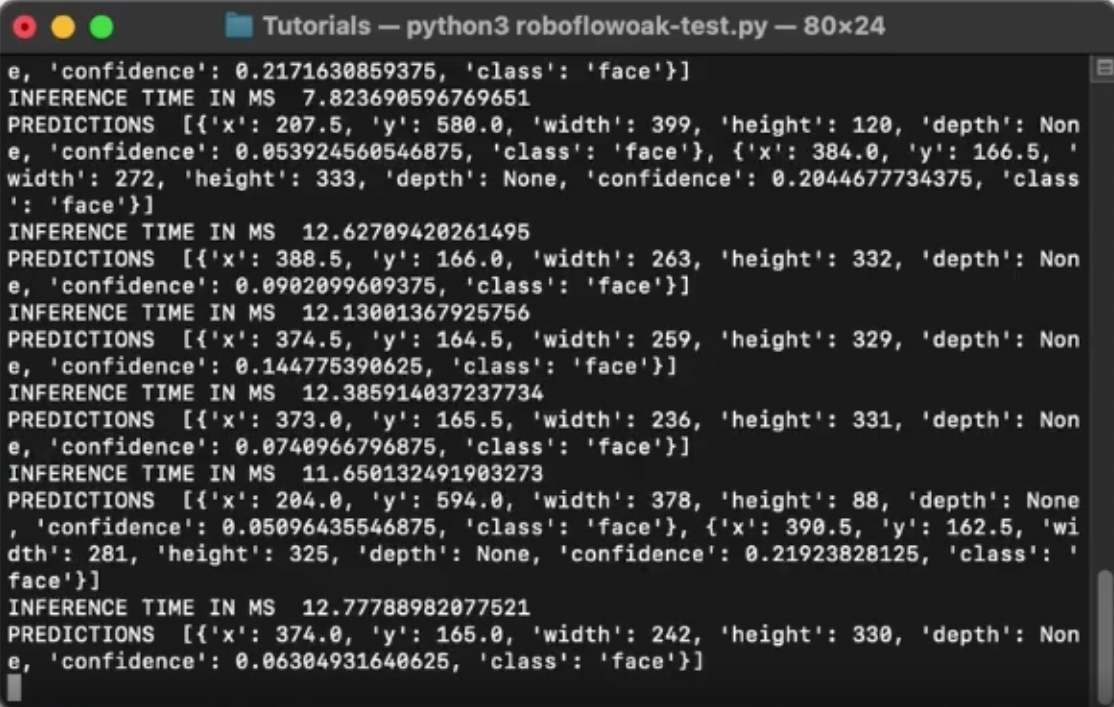
print("INFERENCE TIME IN MS ", 1/t)
print("PREDICTIONS ", [p.json() for p in predictions])
# setting parameters for depth calculation
max_depth = np.amax(depth)
cv2.imshow("depth", depth/max_depth)
# displaying the video feed as successive frames
cv2.imshow("frame", frame)
# how to close the OAK inference window/stop inference:
# CTRL+q or CTRL+c
if cv2.waitKey(1) == ord('q'):
break
Remember: Do not reveal your private API Key to anyone. You can revoke your API key to receive a new one if it is compromised.

Running Inference: Deployment
- On your host device, re-open your terminal and change to the directory (within your terminal) in which you saved your Python script (file).
- Connect your OAK device to the host system with a USB-C to USB-C or USB-C to USB-A cable (or with an ethernet cord if you're using an OAK PoE device).
- Enter the code below (after replacing the placeholder text with the path to your Python script)
python3 [YOUR-PYTHON-FILE].py
Voilà! It works!
Step 6.2: Deploy a Model Library Model to Your OAK Device
Once your model has finished training, it is ready to deploy to the edge on your OAK Device.
Supported Devices
The Roboflow Inference Server runs on the following devices:
- DepthAI OAK-D (LUX-D)
- Luxonis OAK-1 (LUX-1)
The host system requires a linux/amd64 processor. arm65/aarch64 support is coming soon.
Inference Speed
In our tests, we observed an inference speed of 20FPS at 416x416 resolution, suitable for most real-time applications. This speed will vary slightly based on your host machine.
Serving Your Model
On your host machine, install docker. Then run:
sudo docker run --rm \
    --privileged \
    -v /dev/bus/usb:/dev/bus/usb \
    --device-cgroup-rule='c 189:* rmw' \
    -e DISPLAY=$DISPLAY \
    -v /tmp/.X11-unix:/tmp/.X11-unix \
    -p 9001:9001 \
    roboflow/oak-inference-server:latest
This will start a local inference server on your machine running on port 9001.
Use the server:
- Validate that you've stood up the OAK correctly by visiting in your browser
http://localhost:9001/validate - Validate that inference is working by invoking the pre-trained COCO model that comes built-in
http://localhost:9001/coco - Invoke your custom model by get request to
http://localhost:9001/[YOUR_ENDPOINT]?access_token=[YOUR_ACCESS_TOKEN]
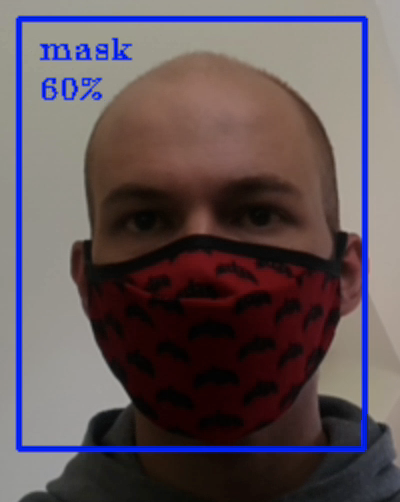
On invocation, you cant get an image or json response.
{
    'predictions': [
                {
                       'x': 95.0,
                       'y': 179.0,
                       'width': 190,
                       'height': 348,
                       'class': 'mask',
                       'confidence': 0.35
                }
         ]
   }
And with that, you are off to the races! The real challenge begins in implementing your computer vision model into your application.
- For more information on developing against your OAK inference server, see the Roboflow OAK Inference Server Docs.
Conclusion
Congratulations! Now you know how to deploy a custom computer vision model to the edge with a battle-hardened machine learning pipeline in a few clicks.
Where do we go from here? - Model Improvements
You may notice low confidence or false detections when you first begin using your model. Use Roboflow's Python package for help in implementing active learning to programmatically sample new images and increase the size of your dataset and improve your model. This will help you to quickly reduce the occurrence of false detections and improve the confidence level of detections in a more seamless process.
- More on Active Learning: Roboflow's Python Package for Computer Vision
Getting Access
If you already have an OAK, you can get started for free. Simply request Roboflow Train directly in Roboflow and reply to the email with your OAK serial number. (If you don't yet have an OAK, email us for a discount.)
import depthai
for device in depthai.Device.getAllAvailableDevices():
    print(f"{device.getMxId()} {device.state}")
Happy training! And more importantly, happy inferencing!