
Instance segmentation goes beyond bounding boxes by drawing the precise outline of each detected object, which is essential when downstream applications need exact object boundaries rather than just location. This tutorial trains a Detectron2 instance segmentation model on the public American Sign Language dataset from Roboflow Universe, walking through dataset registration, training pipeline configuration, and evaluation on test images. For teams starting a new project, RF-DETR Segmentation is now the faster and more accurate alternative for real-time instance segmentation on standard benchmarks.
In this post, we will walk through how to train Detectron2 to segment your custom objects from any image by providing our model with example training data.
We will follow these steps to train our custom instance segmentation model:
- Assemble a Custom Instance Segmentation Dataset
- Download and Register a Custom Instance Segmentation Dataset
- Configure a Custom Instance Segmentation Training Pipeline
- Run our Custom Instance Segmentation model
- Evaluate Model Performance on Test Imagery
We will be using the public American Sign Language instance segmentation dataset and the open source How to Train Detectron2 Custom Instance Segmentation Notebook.
We recommend having the notebook up alongside this blog post as you work through the tutorial.
What is Instance Segmentation?
If you have followed our tutorials before, you have probably trained a custom object detection model. Object detection draws a bounding box and makes an object class classification around objects of interest.
Instance segmentation takes object detection a step further and draws the outline around the object of interest.
Polygon annotations can make for highly accurate instance segmentation data
As a result, modeling is slightly more difficult and instance segmentation should only be used when the exact outline of the object is needed for your downstream application.
Assembling A Custom Instance Segmentation Dataset
In our version of this training tutorial, we use the public American Sign Language instance segmentation dataset from Roboflow Universe. You can download this dataset for free with the Roboflow pip package after authenticating with your Roboflow API key.
from roboflow import Roboflow

VERSION = 2
rf = Roboflow(api_key="YOUR API KEY HERE")
project = rf.workspace("paul-guerrie-tang1").project("asl-poly")
dataset = project.version(VERSION).download("coco")
To apply this tutorial to your own use case, you will need to gather a representative labeled instance segmentation dataset. Labeling instance segmentations with Roboflow Annotate makes this process easy. Select "Instance Segmentation" as your project type when creating a new project in Roboflow and use the "Polygon tool" to draw shapes.
After labeling, you can generate a dataset version and then export your dataset in COCO JSON format to receive a similar pip package code snippet as above, containing your custom objects.
Register Custom Instance Segmentation Dataset
In order to train Detectron2 on our custom dataset, we must first register our dataset in the Detectron2 dataset registry:
register_coco_instances("asl_poly_train", {}, f"./american-sign-language-poly-{VERSION}/train/_annotations.coco.json", f"./american-sign-language-poly-{VERSION}/train/")
register_coco_instances("asl_poly_valid", {}, f"./american-sign-language-poly-{VERSION}/valid/_annotations.coco.json", f"./american-sign-language-poly-{VERSION}/valid/")
register_coco_instances("asl_poly_test", {}, f"./american-sign-language-poly-{VERSION}/test/_annotations.coco.json", f"./american-sign-language-poly-{VERSION}/test/")
Registering our training, validation, and test sets in Detectron2
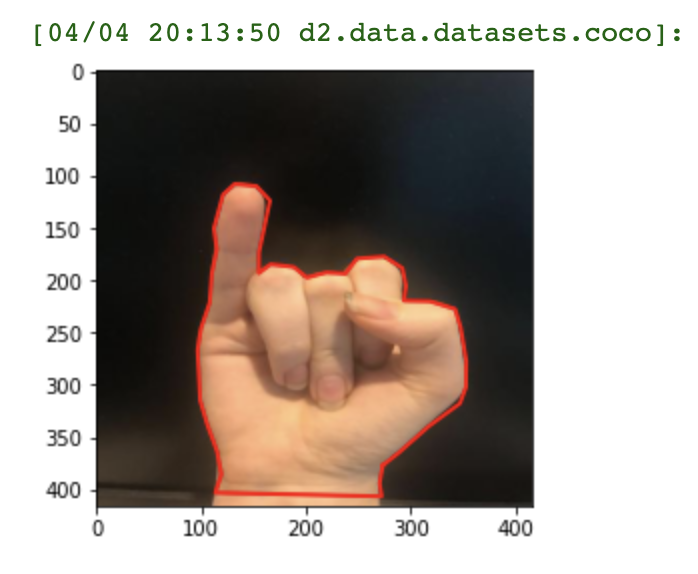
We then run a quick test to make sure that our dataset annotations registered properly:
Configure Custom Instance Segmentation Training Pipeline
Now that we have our dataset properly recognized by the Detectron2 library, we can proceed with configuring our custom training pipeline. From the Detectron2 model zoo, we select the COCO-InstanceSegmentation/mask_rcnn_R_50_FPN_3x.yaml model, which is a basic, tried and true, model for making instance segmentations.
Then we define our evaluator and training loop and kick off training.
#subset of training code

        optimizer.zero_grad()
        losses.backward()
        optimizer.step()
Subset of training routine for PyTorch Detectron2 model
For more details on the custom training routine, you can refer to the custom instance segmentation training notebook.
Run Custom Instance Segmentation Training
In our example notebook, we kick off training for 10,000 iterations - you can experiment with shortening and lengthening this number to shorten or extend your model's training time. The routine should early stop if it has found a saturated performance model state.
While the network is training, you can see if your network is learning from your dataset by watching the loss metrics converge (lower is better).
[04/04 20:59:58 d2.utils.events]:  iter: 19  total_loss: 4.261  loss_cls: 3.378  loss_box_reg: 0.1482  loss_mask: 0.6935  loss_rpn_cls: 0.006544  loss_rpn_loc: 0.008513  lr: 4.9953e-06  max_mem: 1863M
[04/04 21:00:02 d2.utils.events]:  eta: 0:39:20  iter: 39  total_loss: 4.011  loss_cls: 3.165  loss_box_reg: 0.1529  loss_mask: 0.6925  loss_rpn_cls: 0.01637  loss_rpn_loc: 0.008959  lr: 9.9902e-06  max_mem: 1863M
[04/04 21:00:07 d2.utils.events]:  eta: 0:36:40  iter: 59  total_loss: 3.492  loss_cls: 2.65  loss_box_reg: 0.1384  loss_mask: 0.692  loss_rpn_cls: 0.009225  loss_rpn_loc: 0.007123  lr: 1.4985e-05  max_mem: 1863M
[04/04 21:00:11 d2.utils.events]:  eta: 0:39:14  iter: 79  total_loss: 2.763  loss_cls: 1.898  loss_box_reg: 0.1391  loss_mask: 0.6903  loss_rpn_cls: 0.009702  loss_rpn_loc: 0.005554  lr: 1.998e-05  max_mem: 1863M
[04/04 21:00:16 d2.utils.events]:  eta: 0:38:04  iter: 99  total_loss: 1.645  loss_cls: 0.7657  loss_box_reg: 0.1575  loss_mask: 0.6865  loss_rpn_cls: 0.007176  loss_rpn_loc: 0.005717  lr: 2.4975e-05  max_mem: 1863M
[04/04 21:00:21 d2.utils.events]:  eta: 0:39:37  iter: 119  total_loss: 1.238  loss_cls: 0.3444  loss_box_reg: 0.1661  loss_mask: 0.6871  loss_rpn_cls: 0.01422  loss_rpn_loc: 0.008913  lr: 2.997e-05  max_mem: 1863M
[04/04 21:00:26 d2.utils.events]:  eta: 0:39:07  iter: 139  total_loss: 1.14  loss_cls: 0.2717  loss_box_reg: 0.1607  loss_mask: 0.6848  loss_rpn_cls: 0.008151  loss_rpn_loc: 0.006352  lr: 3.4965e-05  max_mem: 1863M
[04/04 21:00:30 d2.utils.events]:  eta: 0:38:16  iter: 159  total_loss: 1.2  loss_cls: 0.3063  loss_box_reg: 0.1763  loss_mask: 0.6818  loss_rpn_cls: 0.0112  loss_rpn_loc: 0.007497  lr: 3.996e-05  max_mem: 1863M
Training our network ⏰
You will also see average precision evaluation metrics in aggregate on your dataset.
[04/04 21:14:15 d2.evaluation.coco_evaluation]: Per-category segm AP:
| category   | AP     | category   | AP     | category   | AP     |
|:-----------|:-------|:-----------|:-------|:-----------|:-------|
| Signs      | nan    | A          | 66.109 | B          | 95.050 |
| C          | 92.525 | D          | 96.634 | E          | 75.149 |
| F          | 61.674 | G          | 92.525 | H          | 90.858 |
| I          | 92.079 | J          | 64.901 | K          | 50.000 |
| L          | 90.000 | M          | 90.000 | N          | 28.511 |
| O          | 81.634 | P          | nan    | Q          | 60.297 |
| R          | 90.099 | S          | 83.498 | T          | 75.248 |
| U          | 49.158 | V          | 68.985 | W          | 71.446 |
| X          | 80.000 | Y          | nan    | Z          | 80.198 |
Evaluation metrics on validation set during training
Evaluate Model Performance on Test Imagery
After training completes, we can load our model in order to test our model's prediction on example imagery.
cfg.MODEL.WEIGHTS = os.path.join(cfg.OUTPUT_DIR, "model_final.pth")  # path to the model we just trained
cfg.MODEL.ROI_HEADS.SCORE_THRESH_TEST = 0.2   # set a custom testing threshold
predictor = DefaultPredictor(cfg)
Loading our trained model for inference
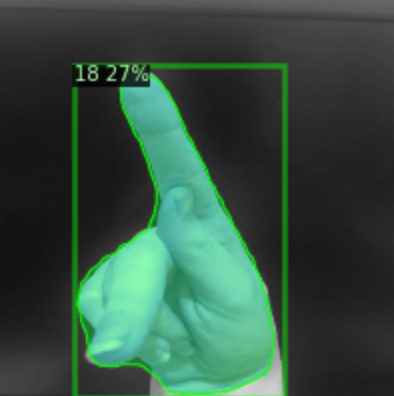
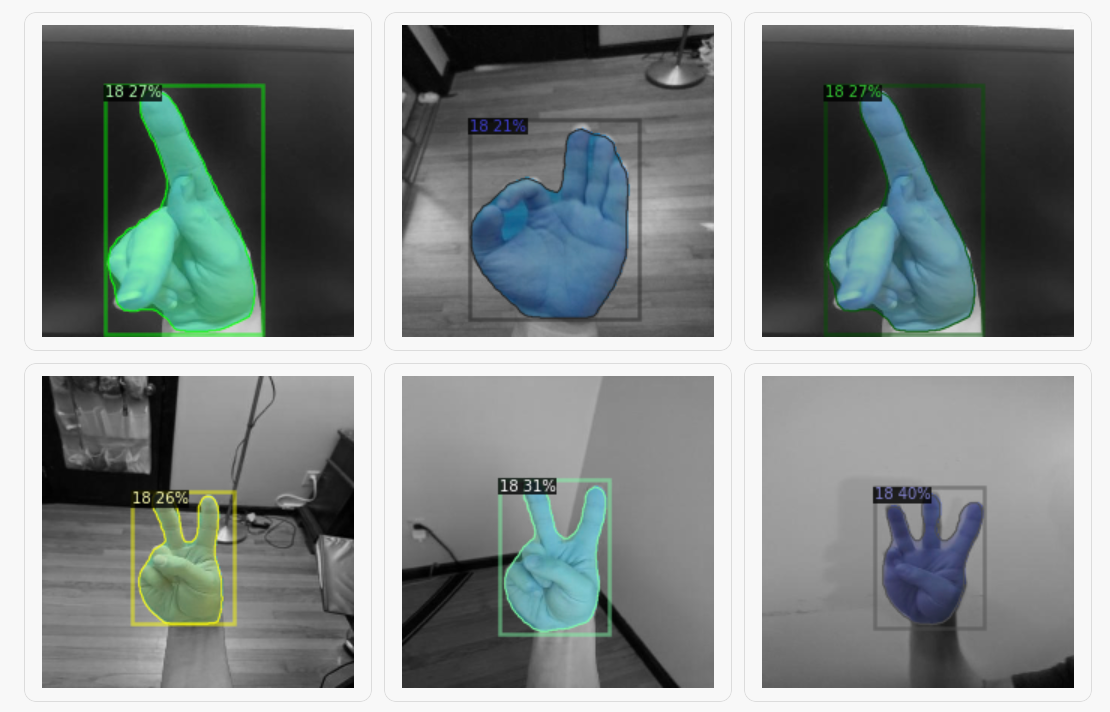
After invoking our model on test images, we can indeed see that it learned how to segment our custom objects.
Downloading Our Custom Instance Segmentation Model
As a final step, we download the weight artifacts of our custom instance segmentation model for future use in deployment. After rebuilding the Detectron2 library at the deployment location of your choosing, you can load and invoke your model with the same commands we used for test inference above.
from google.colab import files
files.download(os.path.join(cfg.OUTPUT_DIR, "model_final.pth"))
Conclusion
Now you know how to train Detectron2 to recognize your custom objects with the fine granularity provided by instance segmentation. If you're looking for more information on training Detectron2, we have an additional guide for you to checkout.
There are alternative options to training instance segmentation models with this method. Roboflow offers an AutoML solution which lets you train a model in one-click.
We hope you enjoyed this tutorial - happy training, and of course, happy inferencing.
Cite this Post
Use the following entry to cite this post in your research:
Paul Guerrie, Jacob Solawetz. (Apr 13, 2022). How to Train Detectron2 for Custom Instance Segmentation. Roboflow Blog: https://blog.roboflow.com/detectron2-custom-instance-segmentation/