
Early in the process of nearly every industrial computer vision project, a decision must be made that dictates the entire trajectory of the project. Teams must determine whether to invest in training a custom model or utilize an off-the-shelf solution (a pre-made model).
The answer isn't always obvious. Off-the-shelf models have gotten impressive. Running one used to mean a lot of compromise, and that's less true now than it was a few years ago. However, "good in general" and "good enough for your factory floor" are different standards, and they don't always overlap.
Off-the-Shelf vs. Custom Models for Industrial Computer Vision
This guide uses RF-DETR for both sides of the comparison, and applies it to an industrial use case involving safety helmet detection on a construction site.
What Off-the-Shelf Actually Means Here
In this context, “off-the-shelf” means taking the RF-DETR base model (pretrained on Microsoft COCO) and running it directly on your domain without any fine-tuning.
COCO contains 80 common object classes. Helmets aren't one of them and neither are safety vests, hard hats, or the specific visual context of a construction site (equipment, scaffolding, workers in high-vis gear at varying distances). Therefore, a base RF-DETR model has’t seen any of it. It was built for general-purpose detection across everyday scenes, and it's excellent at that. The question is whether "excellent at general scenes" is useful enough for a specific industrial deployment.
What Custom Means Here
A custom model, in this framing, is RF-DETR fine-tuned on a labeled dataset of your specific domain having the same architecture (RF-DETR small). The difference is that the weights have been updated through additional training on images that actually reflect your environment, your workers, your lighting conditions, your angles, and your object classes.
Setting Up the Off-the-Shelf vs. Custom Models for Industrial Computer Vision Comparison
Safety compliance monitoring is a straightforward but also demanding industrial CV task. You need the model to tell you, in real time and reliably, where helmets are present in a frame. Missed detections (a worker wearing a helmet that the model fails to flag) undercut the reliability of the whole system. False positives waste supervisor time and erode trust in the system.
For this comparison, we're keeping it simple with a single class: helmet. A focused, single-class detector is often the right call for an initial deployment since it's faster to label, faster to train, and easier to debug than a multi-class system, and you can always expand classes later once the core detection is solid.
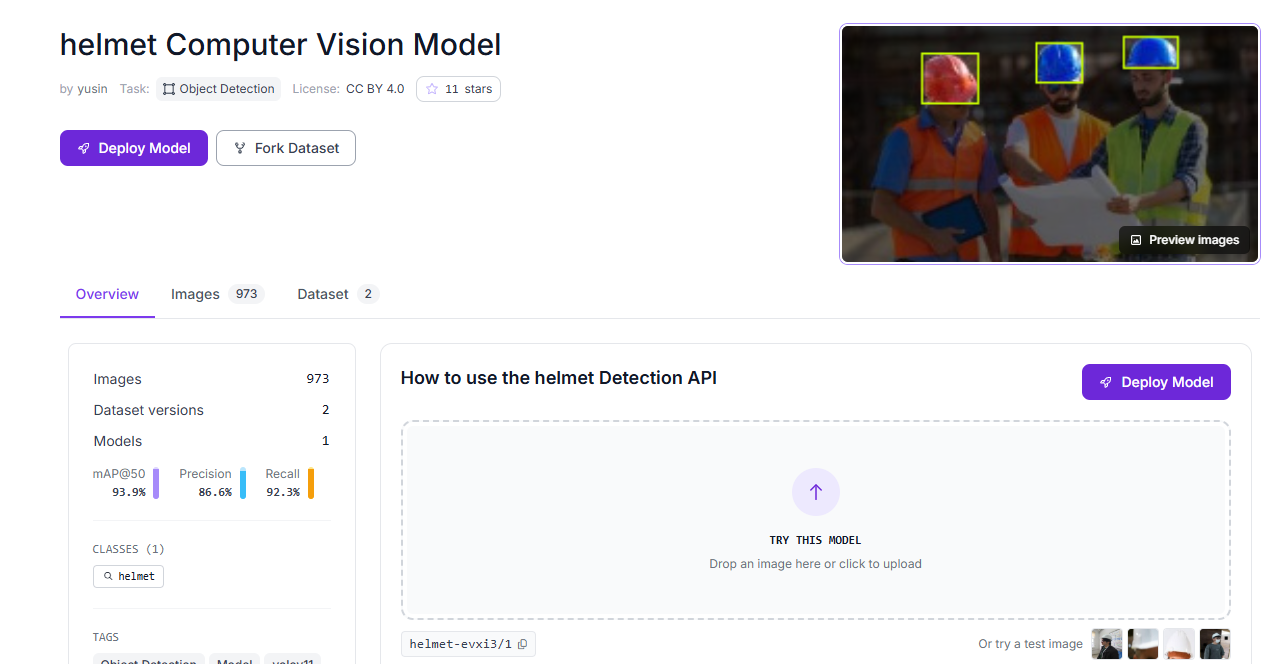
Sourcing a Helmet Dataset
Roboflow Universe has a solid collection of labeled safety datasets to work with. We can use a standard helmet detector for this project.
Fork whichever dataset fits your use case directly into your workspace, or upload your own site imagery and annotate it with Roboflow's labeling tools.
Running the Off-the-Shelf Model
Before any training, it's worth actually running the base RF-DETR model on your domain imagery to see what you're starting from. Rather than reaching for a separate tool, you can do this directly inside Roboflow Workflows.
Firstly, start at roboflow.com and log into your workspace. If you're new, a free account gives you everything you need to get started.
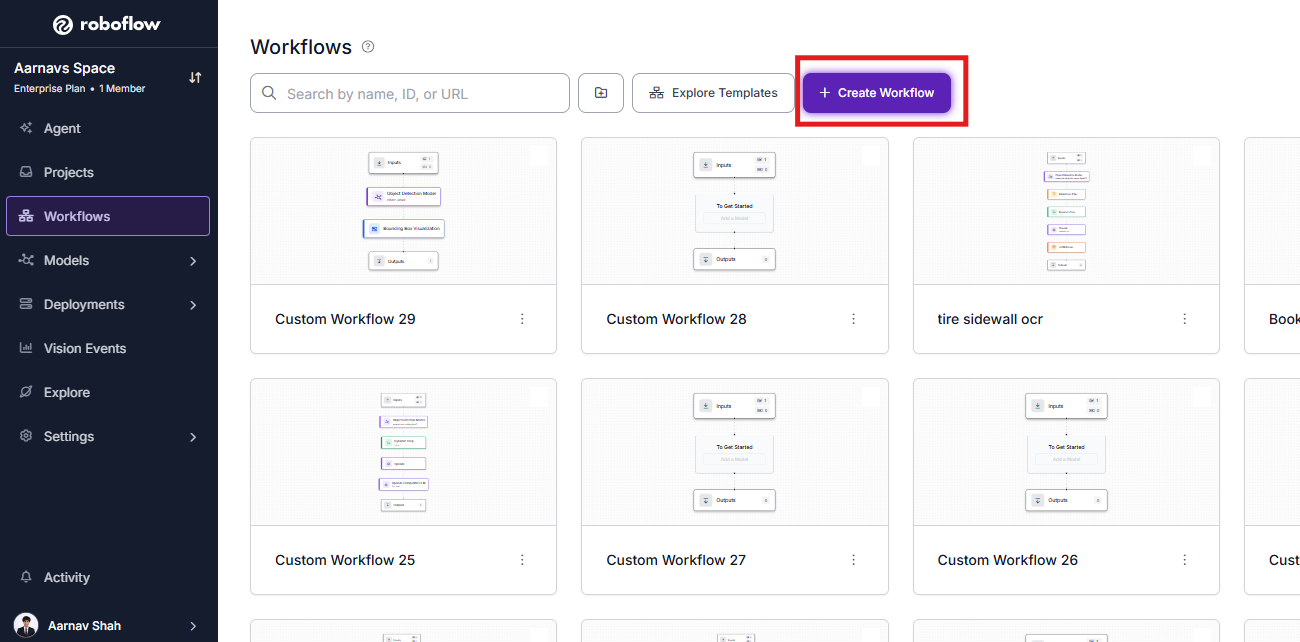
Next, create your workflow.
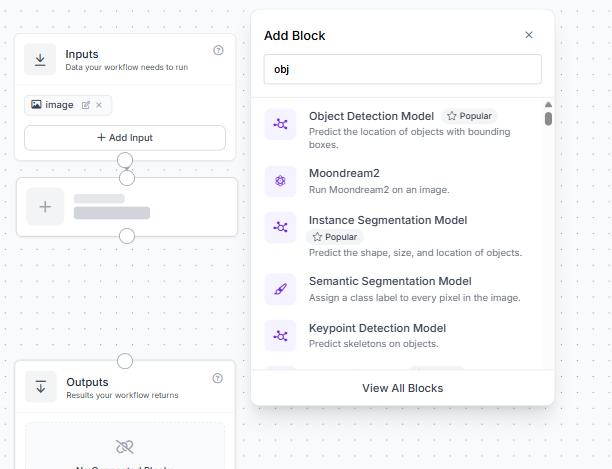
Then, drag in an Object Detection Model block.
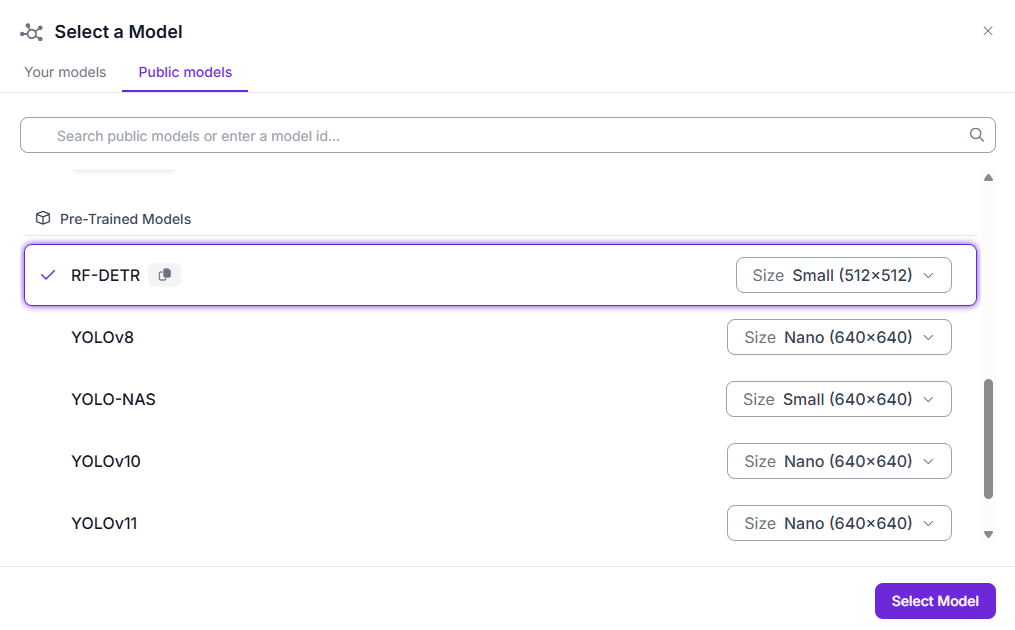
Lastly, configure it to use a pre-trained, COCO-checkpoint RF-DETR (no custom model ID, no training). You want to use just the stock RF-DETR Small checkpoint running as-is:
If you want to see the boxes visually, you can also add a bounding box visualization block.

What you'll typically observe on a construction site once you run a frame through that block:
- The model will likely detect person reasonably well since people are well-represented in COCO.
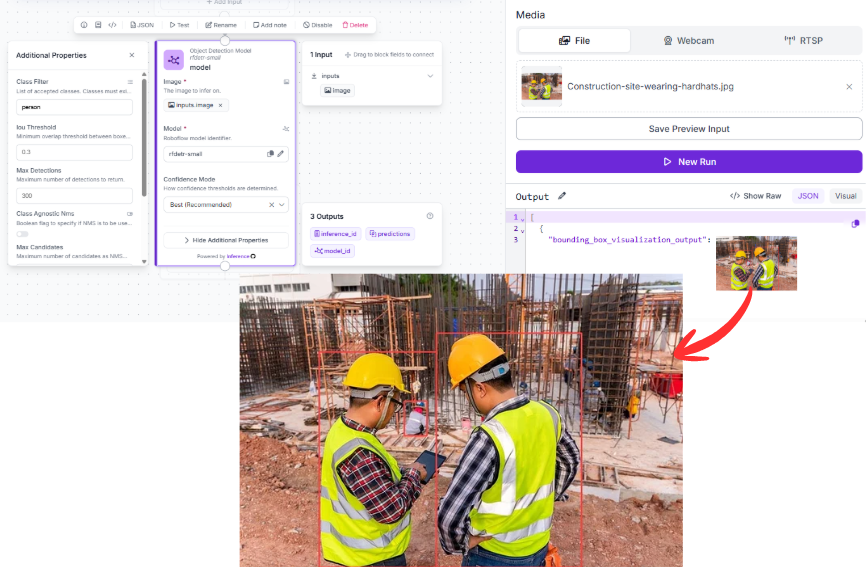
- It will not detect helmet as a distinct class, because it doesn't exist in COCO's 80-class vocabulary.
- In favorable conditions (clear view, single worker, bright lighting), some proxy detections might fire on overlapping COCO classes like sports equipment, but these are inconsistent and cannot be relied on for compliance monitoring.
- In realistic site conditions (crowded frames, partial occlusion, distance, glare off hard hats), even those proxy detections degrade quickly.
This is the core structural limitation of the off-the-shelf approach for specialized industrial tasks: the model lacks a concept of the thing you actually need to detect, since it likely wasn’t trained on that data. Furthermore, it's not a matter of tuning a threshold or adjusting confidence since you could add a Detections Filter block right after it, and it still wouldn't help, because the class simply doesn't exist in the model's output space to begin with.
When off-the-shelf is still worth trying
If your task happens to involve objects that are well-represented in COCO (vehicles, people in general, common equipment), pointing a Workflow's Object Detection Model block at a stock RF-DETR Medium checkpoint can give you a rough baseline in minutes, with no training run required. It's also a quick way to gut-check whether your problem is even tractable before committing to a labeling effort. Since it's already a Workflow, you can iterate on it directly once you have a custom model to swap in.
Training the Custom Model
This is where RF-DETR earns its reputation for domain adaptability. Fine-tuning on the RF100-VL benchmark, which tests generalization across 100 real-world domains, including industrial, medical, and aerial contexts, RF-DETR consistently outperforms comparable architectures. That benchmark performance directly translates to how quickly it adapts to a narrow domain like helmet detection.
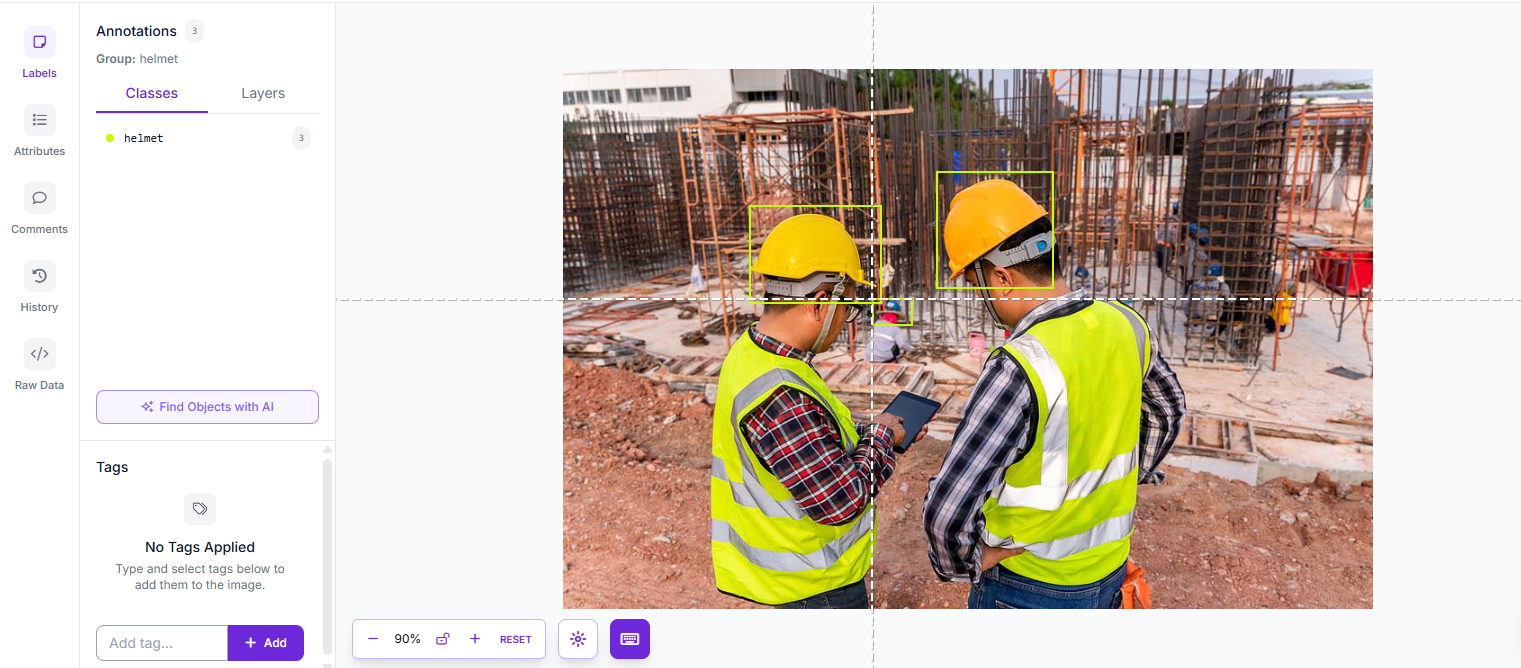
Step 1: Source or Build Your Dataset
Fork a helmet dataset from Roboflow Universe, or upload your own site images and label them.
Draw tight bounding boxes around each helmet in frame. Be specific with your labels and capture variety including different helmet colors, distances from the camera, partial occlusion, and lighting conditions all matter for generalization.
Step 2: Train RF-DETR Small
Navigate to the Train dashboard and select the RF-DETR Small architecture. It's the practical choice for this kind of deployment for a few reasons:
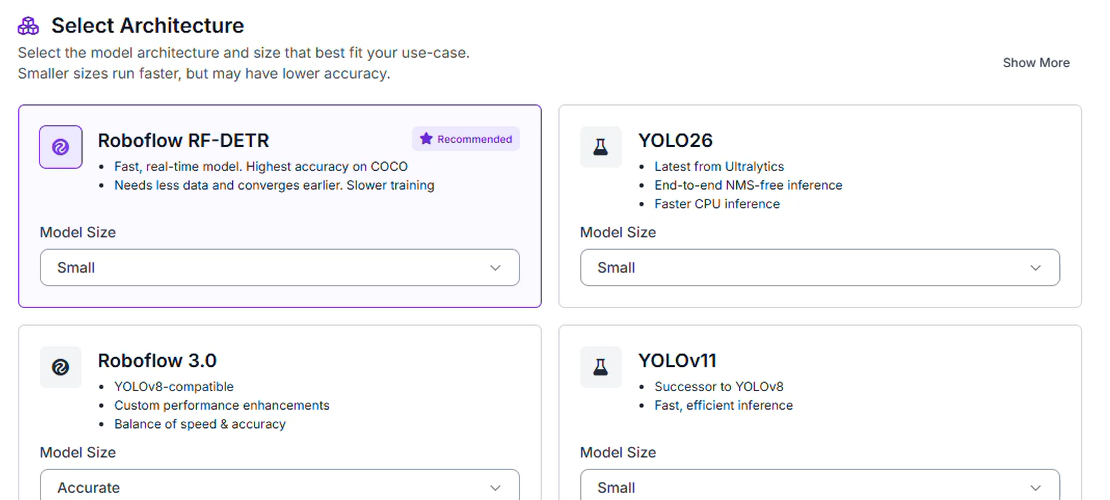
- Edge-Ready: Small enough to run on an NVIDIA Jetson or similar on-site hardware, keeping footage processing local rather than streaming to the cloud.
- Fast Inference: Safety monitoring needs to work in real time. RF-DETR Small keeps per-frame latency low enough that you won't drop detections between frames.
- Strong Fine-Tuning: Despite its compact size, the DINOv2 backbone brings enough representational depth that fine-tuning on even a few hundred labeled examples produces reliable results.
Step 3: Set Your Train/Test Split
A 70/20/10 split works well here:
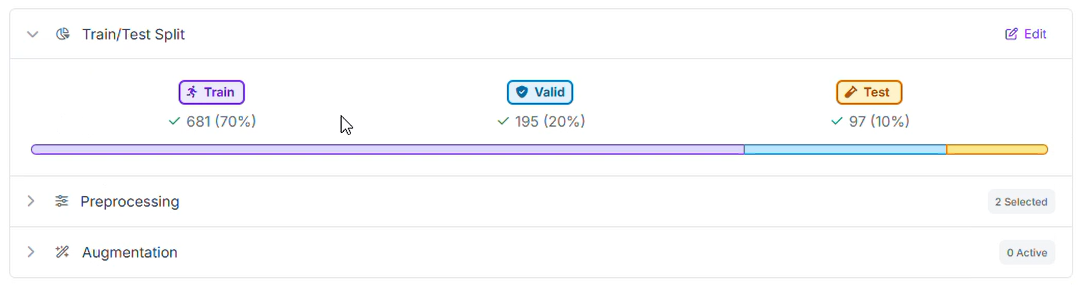
- 70% Training: The core examples the model learns from.
- 20% Validation: Catches overfitting during training. The model should generalize to helmets it hasn't memorized, not just patterns from specific images.
- 10% Testing: Your honest read on performance. These images are held out entirely until after training is complete.
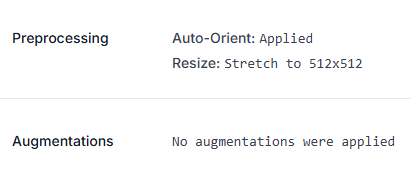
Step 4: Configure Preprocessing
For this model, we kept preprocessing minimal:
Preprocessing
- Auto-Orient: Strips camera metadata so images arrive consistently regardless of how the device was held.
- Resize (Stretch to 512×512): Balances helmet-sized object detail with training and inference efficiency.
No augmentations were applied for this training run. That's a reasonable choice when your source dataset already covers a decent range of lighting, angles, and distances on its own. Augmentation is most valuable when your raw image variety is thin, not a mandatory step for every project. If your own dataset is narrower (say, footage from a single camera at a single site), adding augmentations like brightness, exposure, and rotation variance is worth revisiting to help the model generalize beyond what it's literally seen.
Step 5: Evaluate Results
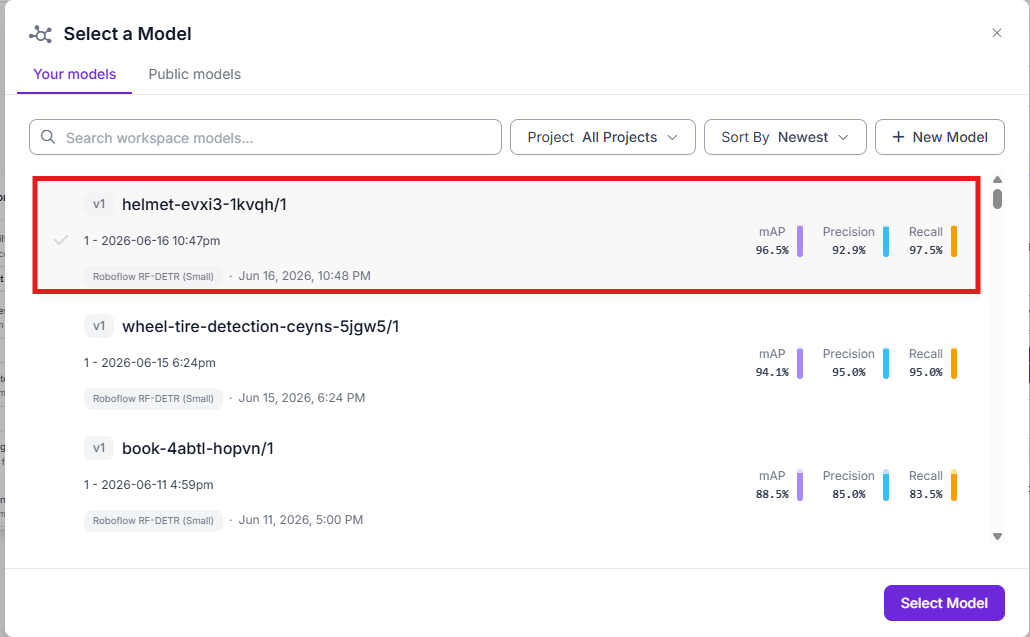
Once training completes, review performance in the Production Metrics Explorer. Here's what our fine-tuned helmet detector actually achieved on the held-out test set:
- mAP@50: 96.5%
- Precision: 92.9%
- Recall: 97.5%
- F1: 95.1%
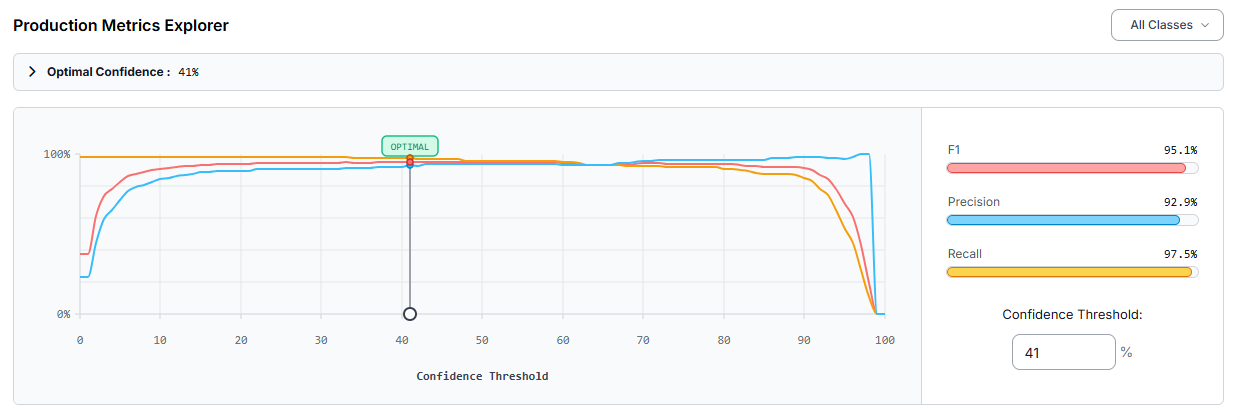
These numbers come from a model trained on RF-DETR Small with no augmentations and a straightforward Auto-Orient plus 512×512 resize preprocessing pipeline. That’s proof that you don't always need a heavy augmentation strategy to get strong results, provided your source dataset already has reasonable variety.
At the optimal confidence threshold of 41%, the model balances precision and recall well: a 97.5% recall means almost every helmet in frame gets caught, which is exactly the priority for a safety system, while 92.9% precision keeps false alarms manageable.
Real improvement recommendations from this training run:
- Helmet class is frequently missed at lower confidence thresholds. At 41% confidence, the model missed 3 ground-truth helmet instances on the test set. The standard fix is adding more training images containing helmets, particularly ones similar to the missed cases, so the model learns the pattern more reliably.
- Confidence threshold tradeoff. Lowering the confidence threshold in the Matrix Explorer reduces missed detections (raises recall) but increases false positives (lowers precision). Since this is a safety application where missed detections are costlier than false alarms, it's worth testing whether a slightly lower threshold than the platform's optimal 41% better serves the actual use case.
- Check whether helmet is a small object in your frames. If your deployment camera is positioned far from workers, helmets will occupy a small fraction of the frame. If that's the case, adding a tiling preprocessing step and running inference through a SAHI workflow helps the model pick up on small instances. Alternatively, training a larger RF-DETR variant can also improve small-object detection. See this breakdown of the accuracy/latency tradeoffs between model sizes.
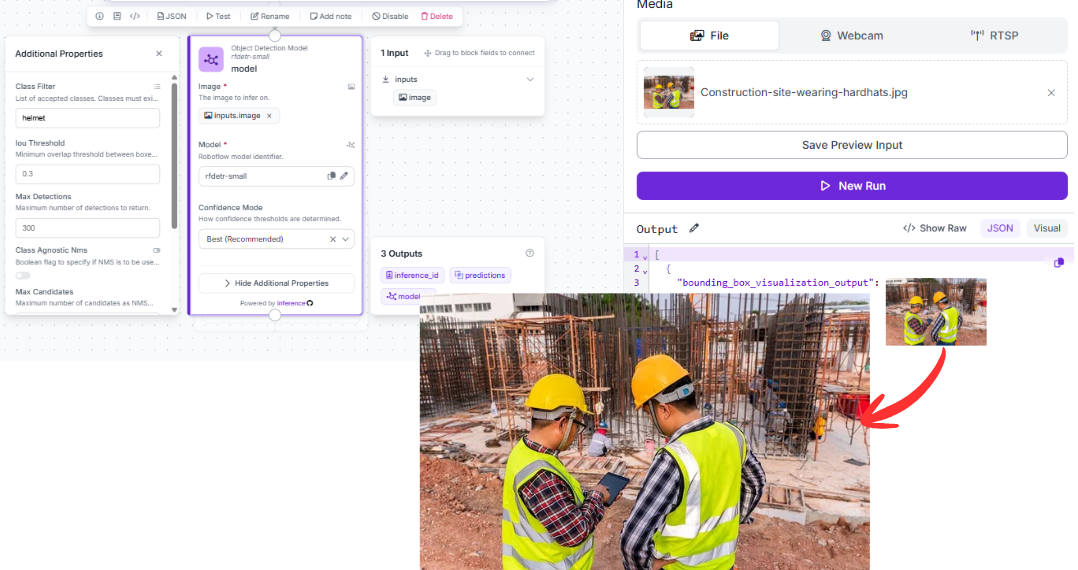
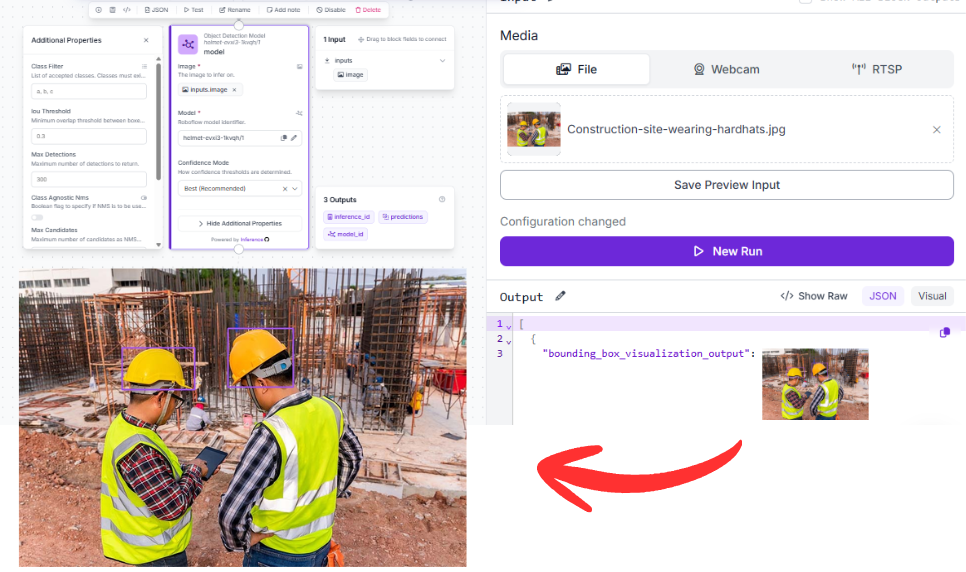
Step 6: Test Results on Workflows
To test the model, you can return to the same workflow and simply swap out the off-the-shelf model with your newly trained model in the object detection block.
Then you can once again run the workflow:
Conclusion: Comparing Off-the-Shelf vs. Custom Models for Industrial Computer Vision
| Off-the-Shelf RF-DETR | Fine-Tuned RF-DETR | |
|---|---|---|
| Setup time | Minutes | Hours to days (labeling + training) |
| Domain-specific classes | Not available | Fully customizable |
| Performance on COCO objects | Strong | Strong (retained from pretraining) |
| Performance on industrial objects | Unreliable | High, with sufficient training data |
| Edge deployment | Yes | Yes |
| Ongoing cost | Low | Low after initial setup |
| Best for | Prototyping, generic tasks | Production, specialized tasks |
The off-the-shelf model is the right starting point if you're not sure yet whether computer vision will work for your problem, or if your objects happen to align with COCO classes. It's also a useful auto-labeling tool. You can use a base model (or a zero-shot detector like Grounding DINO through Autodistill) to pre-label images, then manually review and correct, dramatically reducing annotation time before fine-tuning.
The fine-tuned model is what you actually deploy. In this case, going from "no helmet class exists" to a 96.5% mAP@50 detector with 97.5% recall didn't require a massive dataset, heavy augmentation, or exotic architecture choices. It needed just a labeled dataset, RF-DETR Small, and a straightforward training run. For any task where you have domain-specific classes like helmets, defects, parts, specialized equipment, fine-tuning is what closes the gap between "works in demos" and "works in production."
RF-DETR makes this transition unusually smooth. The same architecture serves both roles. You prototype with the base model, collect and label data informed by what you saw, fine-tune, and deploy, without switching tools or frameworks with Roboflow.
Ready to get started? Create a free Roboflow account, explore safety and industrial datasets on Roboflow Universe, and train your first fine-tuned model today.
Cite this Post
Use the following entry to cite this post in your research:
Aarnav Shah. (Jun 18, 2026). Off-the-Shelf vs. Custom Models for Industrial Computer Vision. Roboflow Blog: https://blog.roboflow.com/off-the-shelf-vs-custom-models/