
Rabbits were eating all of my vegetables. I decided to take a stand and implement a computer vision enabled system to automatically spook them away from my garden.
My system is a Raspberry Pi-battery powered device that uses an object-detection model to detect rabbits and play a sound via a bluetooth speaker when a rabbit is detected.

Computer vision has so many applications both for industrial and personal use. For this project, we will explore using computer vision for personal use to build a rabbit detection model to create a rabbit deterrence system. In this tutorial you will learn how to:
- Collect and annotate data using Roboflow
- Preprocess and add augmentations to data
- Train an object detection model via Roboflow Train
- Deploy your project to a Raspberry Pi
- Add active learning to your project via Roboflow's upload API
- Setup the Raspberry Pi for outdoor monitoring
- View Rabbit Detections Remotely
- Integrate a bluetooth speaker for the deterrence process
Collect and Annotate Data using Roboflow
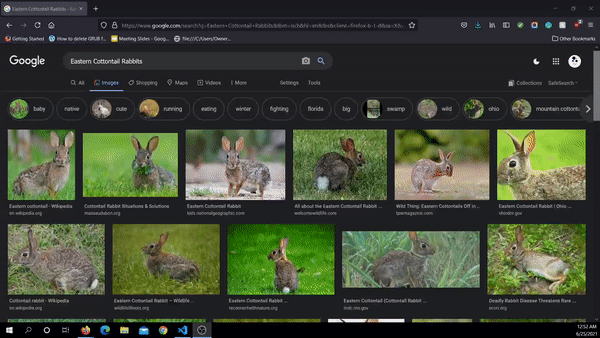
To collect data, we will be using CC4.0 Licensed pictures from Google Images. To ensure that your model will detect the correct type of rabbit in your region, you will want to research the types of rabbits that appear in your area. For example, in North Texas where I live, there are many Eastern Cottontail Rabbits and therefore I will want to gather pictures for Eastern Cottontail Rabbits:
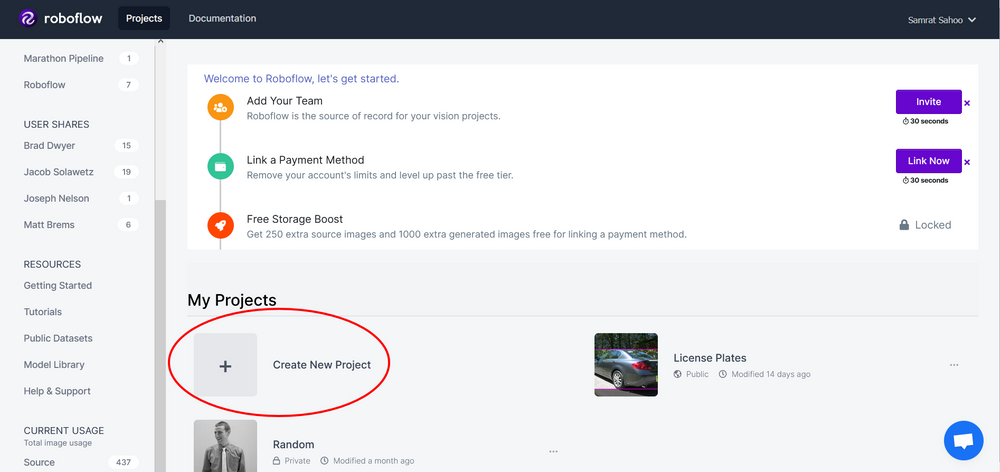
Next, you will want to create a Roboflow account if you haven't already and then create a new project:
We will then import these images into Roboflow and start annotating with Roboflow's annotation tools:

Alternatively, if you are planning to create a model based on Easten Cottontail Rabbits, you may use the dataset used in this tutorial.
Preprocess & Augment Data and Train a Model
Real-world data can oftentimes be inconsistent, messy, and overall difficult to work with when developing machine learning models. Preprocessing helps ensure data is consistent but oftentimes can be difficult to implement and time-consuming to write code for.
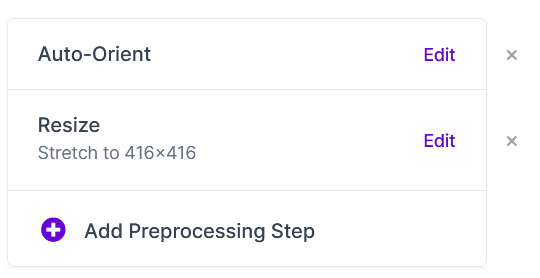
Fortunately, Roboflow has automatic preprocessing tools! Roboflow offers a wide variety of preprocessing settings ranging from resizing to applying a grayscale. For this tutorial we will apply the following preprocessing steps:
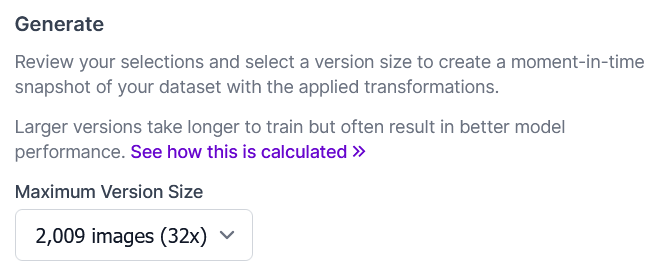
Augmentation is a step commonly used in machine learning to apply transformations to your data to increase the size and variety of the dataset. We will apply the following augmentations to our dataset:
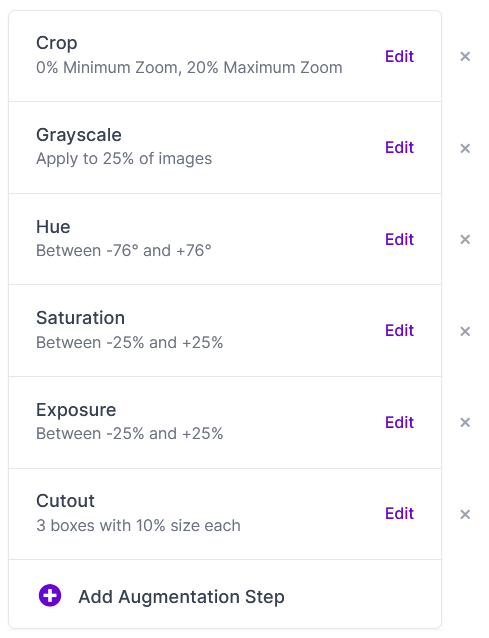
Our new dataset will have an image count of over 2000 images, meaning we will multiply the amount of images currently in the dataset by 32.
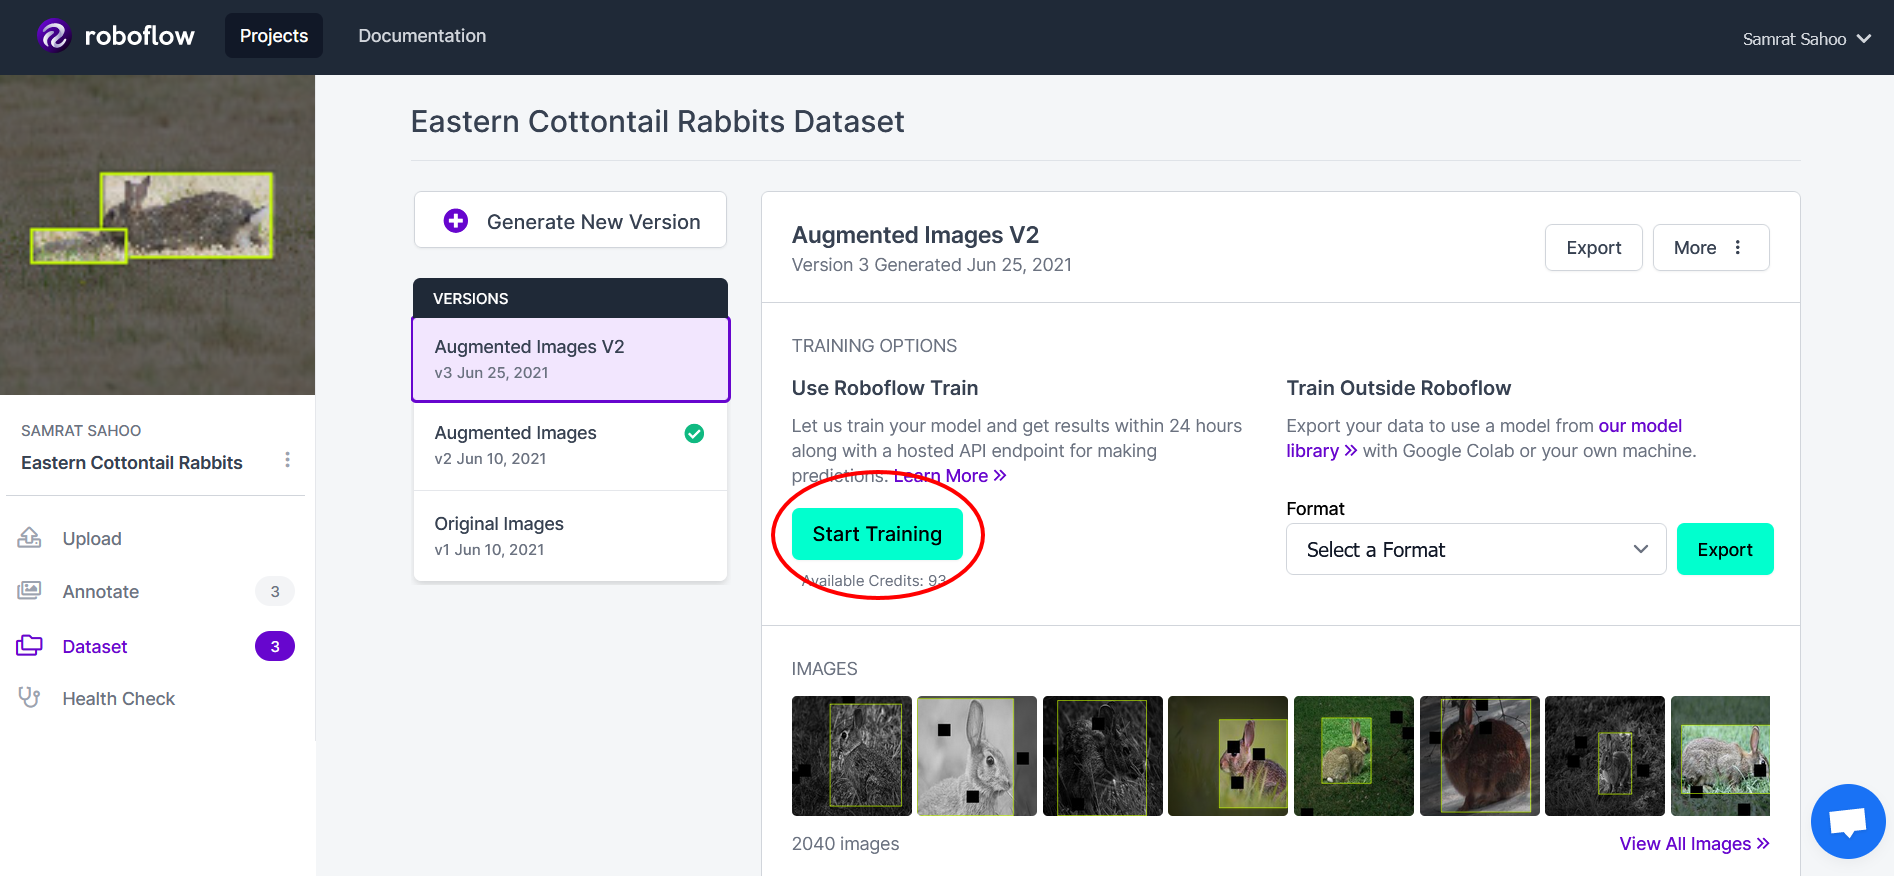
Train an Object Detection Model via Roboflow Train
Model training can be a difficult task with so many different frameworks and settings to tune. Roboflow Train makes it easy to overcome this by allowing a one-click training process resulting in an optimal model.*
*Note: Roboflow Train is a Pro feature. To learn more about Roboflow Pro, click here. If you would like to train a model without Roboflow Pro, consider using our model library--here is a great tutorial on RF-DETR to get you started!
To use Roboflow Train, simply click on the train button that can be found on the dataset version dashboard and train the model from scratch:
After training the model, we achieved the following results:
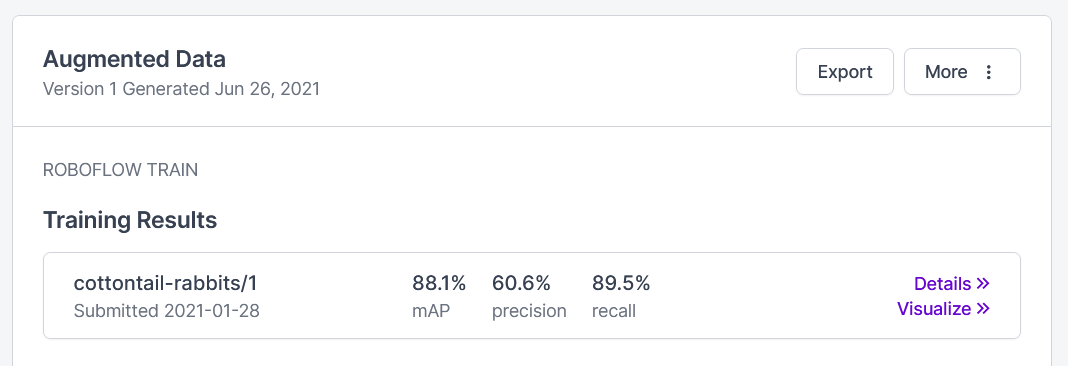
Not bad but also not the best; we will improve upon this later in the tutorial via active learning.
Deploy the Project to a Raspberry Pi
To deploy the project to a Raspberry Pi, you can download the code for this project as follows:
git clone https://github.com/roboflow-ai/rabbit-deterrence.git
Create a virtual environment and install the required dependencies as follows:
cd rabbit-deterrence
python3 -m venv venv
source venv/bin/activate
pip3 install -r requirements.txt
You will then want to edit the roboflow_config.json file which looks something like this:
{
  "__comment1": "Obtain these values via Roboflow",
  "ROBOFLOW_API_KEY": "xxxxxxxxxx",
  "ROBOFLOW_MODEL": "xx-name--#",
  "ROBOFLOW_SIZE": 416,
  "DATASET_NAME": "your-dataset",
  "LOCAL_SERVER": false,
  "LAPLACIAN_THRESHOLD": 300,
  "CONFIDENCE_THRESHOLD": 0.4
}
For this project, we will be using the Roboflow Hosted Inference API. To use this, you will want to get the model ID and your account access token--this can be found if you click on "Use curl command." You should have a link that looks something like https://detect.roboflow.com/xx-name/#?access_token=[ACCESS_TOKEN]
- xx-name/# is your model ID
- ACCESS_TOKEN is your access token
Change the following values for the keys ROBOFLOW_API_KEY , DATASET_NAME, and ROBOFLOW_MODEL. Your dataset name is whichever dataset you want to upload future data in for active learning (in our case, it would be the dataset with all of the source images. If your dataset link is https://app.roboflow.com/project/eastern-cottontail-rabbits/2 then your dataset name would be eastern-cottontail-rabbits.
If xx-name/# is your model ID, ACCESS_TOKEN is your access token, and eastern-cottontail-rabbits is your dataset name, then your JSON file would look like this:
{
  "__comment1": "Obtain these values via Roboflow",
  "ROBOFLOW_API_KEY": "ACCESS_TOKEN",
  "ROBOFLOW_MODEL": "xx-name/#",
  "ROBOFLOW_SIZE": 416,
  "DATASET_NAME": "eastern-cottontail-rabbits",
  "LOCAL_SERVER": false,
  "LAPLACIAN_THRESHOLD": 300,
  "CONFIDENCE_THRESHOLD": 0.4
}
Now to run the application, simply run:
python3 main.py
And you will get an ourput that looks something like this:
 * Debugger is active!
 * Debugger PIN: 101-550-878
 * Running on all addresses.
   WARNING: This is a development server. Do not use it in a production deployment.
 * Running on http://192.168.1.30:5000/ (Press CTRL+C to quit)
If you take the address from the output (in this case http://192.168.1.30:5000/)and put it into your browser, you will be able to see the complete camera interface where you will see all detections and the live feed. This project has a couple of different features that are important to highlight.
Active Learning with Roboflow Upload API
In order to conduct active learning using Roboflow's Upload API, there are two steps:
- Upload the image via Roboflow Image Upload API
- Upload the annotation file via Roboflow Annotation Upload API
To upload the image, we take three primary steps:
- Convert the image into a Base64 Encoding
- Construct the upload endpoint URL
- Post the Base64 encoded image to the endpoint
Convert the image into a Base64 Encoding: This is very easily done in Python as follows.
pilImage = Image.fromarray(frame)
# Convert to JPEG Buffer
buffered = io.BytesIO()
pilImage.save(buffered, quality=90, format="JPEG")

# Base 64 Encode
img_str = base64.b64encode(buffered.getvalue())
img_str = img_str.decode("ascii")
Construct the upload endpoint URL: Constructing the endpoint is also very easy; it takes the following form:
image_upload_url = "".join([
    "https://api.roboflow.com/dataset/", DATASET_NAME, "/upload",
    "?api_key=", ROBOFLOW_API_KEY,
    "&name=rabbit.jpg",
    "&split=train"
])
Post the Base64 Encoded Image to the Endpoint: We can simply do this through using Python's requests library as follows:
r = requests.post(image_upload_url, data=img_str, headers={
    "Content-Type": "application/x-www-form-urlencoded"
})
The entire upload image method can be found here.
Uploading the annotation follows a very similar process with some caveats. This process looks something like this:
- Create annotations for an image in CreateML format
- Construct annotation upload endpoint URL
- Post annotation to annotation upload endpoint
Create annotations for an image in CreateML format: First, to create the annotations, we choose a format we want our annotations to be in. For the sake of simplicity, this tutorial will use the CreateML format. We can then write up some code to convert the json predictions from Roboflow's inference API to fit in the CreateML format:
# CreateML Dataset Format
data = []
annotations = []
for prediction in apiResponse:
    annotations.append({"label": prediction['class'],
            "coordinates": {
            "x": prediction['x'],
            "y": prediction['y'],
            "width": prediction['width'],
            "height": prediction['height']
    }})

data.append({
    "image": "rabbit.jpg",
    "annotations": annotations
})

with open('activeLearning.json', 'w') as outfile:
    json.dump(data, outfile)

annotationFilename = "activeLearning.json"

# Read Annotation as String
annotationStr = open(annotationFilename, "r").read()
Construct annotation upload endpoint URL: This endpoint looks very similar to the image upload endpoint URL with minor changes; the image id in this URL is given by the response from the image upload API:
annotation_upload_url = "".join([
    "https://api.roboflow.com/dataset/", DATASET_NAME, "/annotate/", imageId,
    "?api_key=", ROBOFLOW_API_KEY,
    "&name=", annotationFilename
])
Post annotation to annotation upload endpoint: Similar to the image upload process, you can simply use the requests library to post the annotation to the endpoint:
r = requests.post(annotation_upload_url, data=annotationStr, headers={
    "Content-Type": "text/plain"
})
The complete method to upload the annotation can be found here
Setup the Raspberry Pi for Outdoor Monitoring
To setup our Raspberry Pi for outdoor monitoring, we need to do the following two things:
- Configure SSH to access the Raspberry Pi remotely
- Setup an external power supply and camera
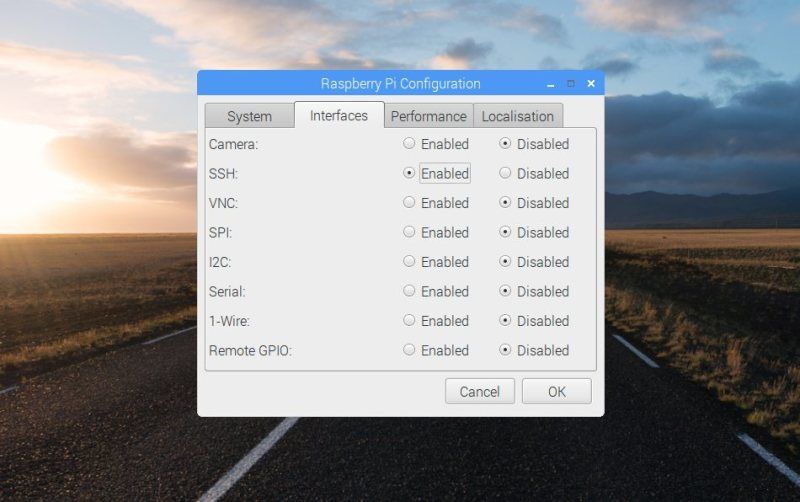
Configure SSH to access the Raspberry Pi: To configure SSH, the easiest way would be to use the Raspbian Operating System via an external monitor. Once you have logged into Raspbian, go to Menu --> Preferences --> Raspberry Pi Configuration --> Interfaces. Then simply enable SSH as shown below:
Next you need to get the IP address of the Raspberry Pi. You can do this by opening up a terminal and using this command:
hostname -I
And you should get a response similar to this:
192.168.0.41
Finally, you can connect to the Raspberry Pi using your laptop's terminal via SSH--you will need to enter your Raspberry Pi's password:
ssh pi@192.168.0.41
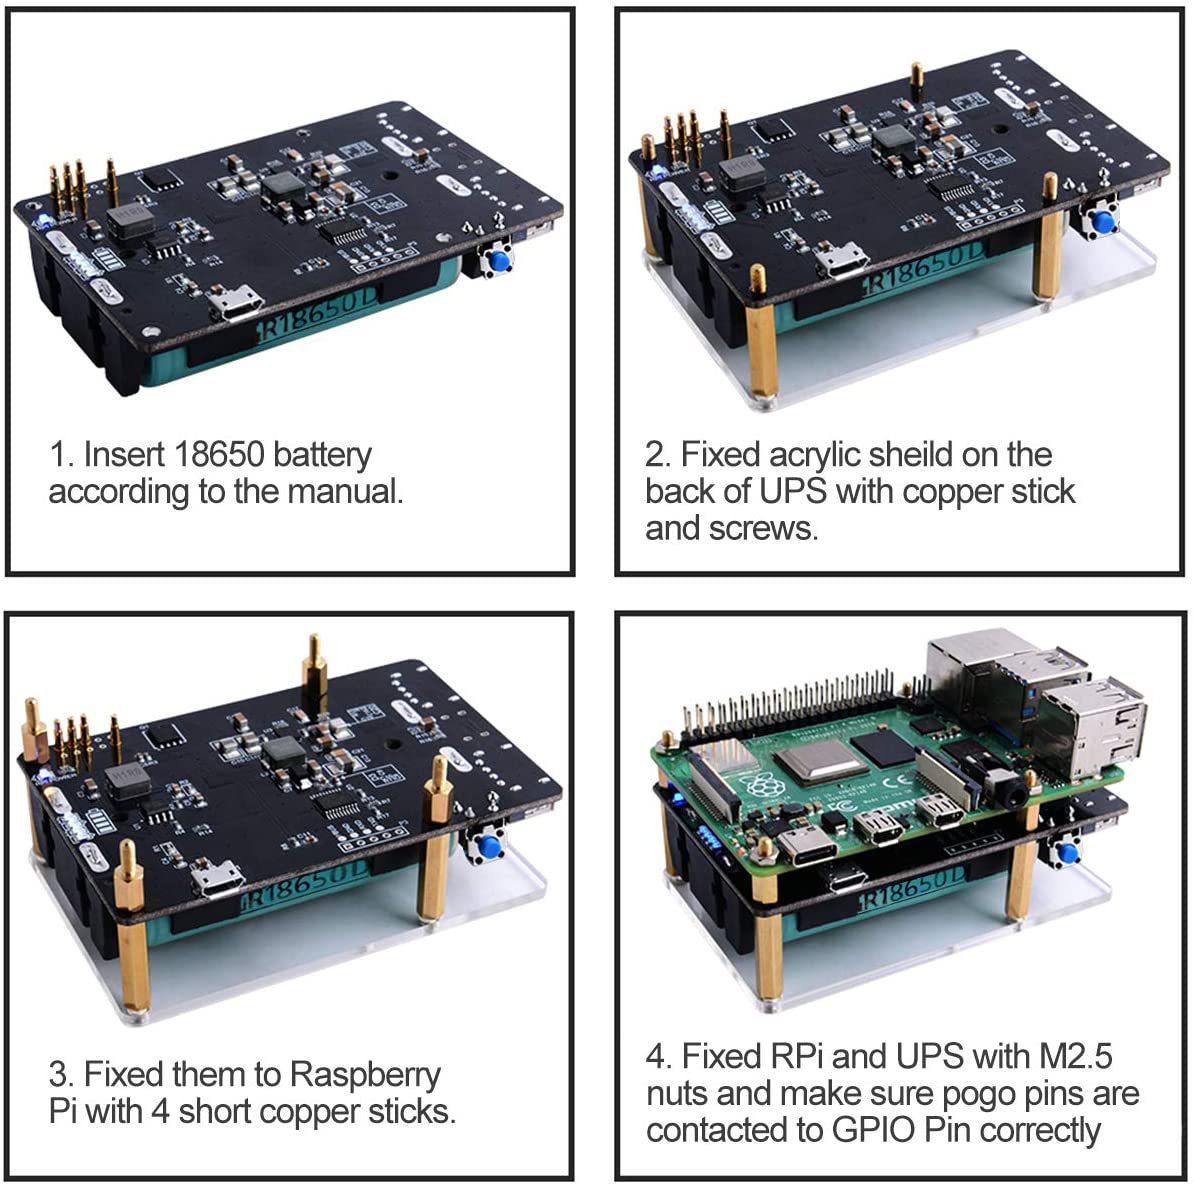
Setup an External Power Supply: There are many options for setting up an external power supply; we use and recommend this option which utilized two 18650 rechargeable lithium ion batteries. This external power supply can be setup as follows:
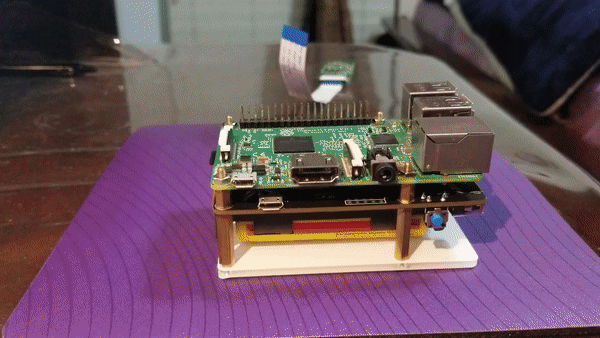
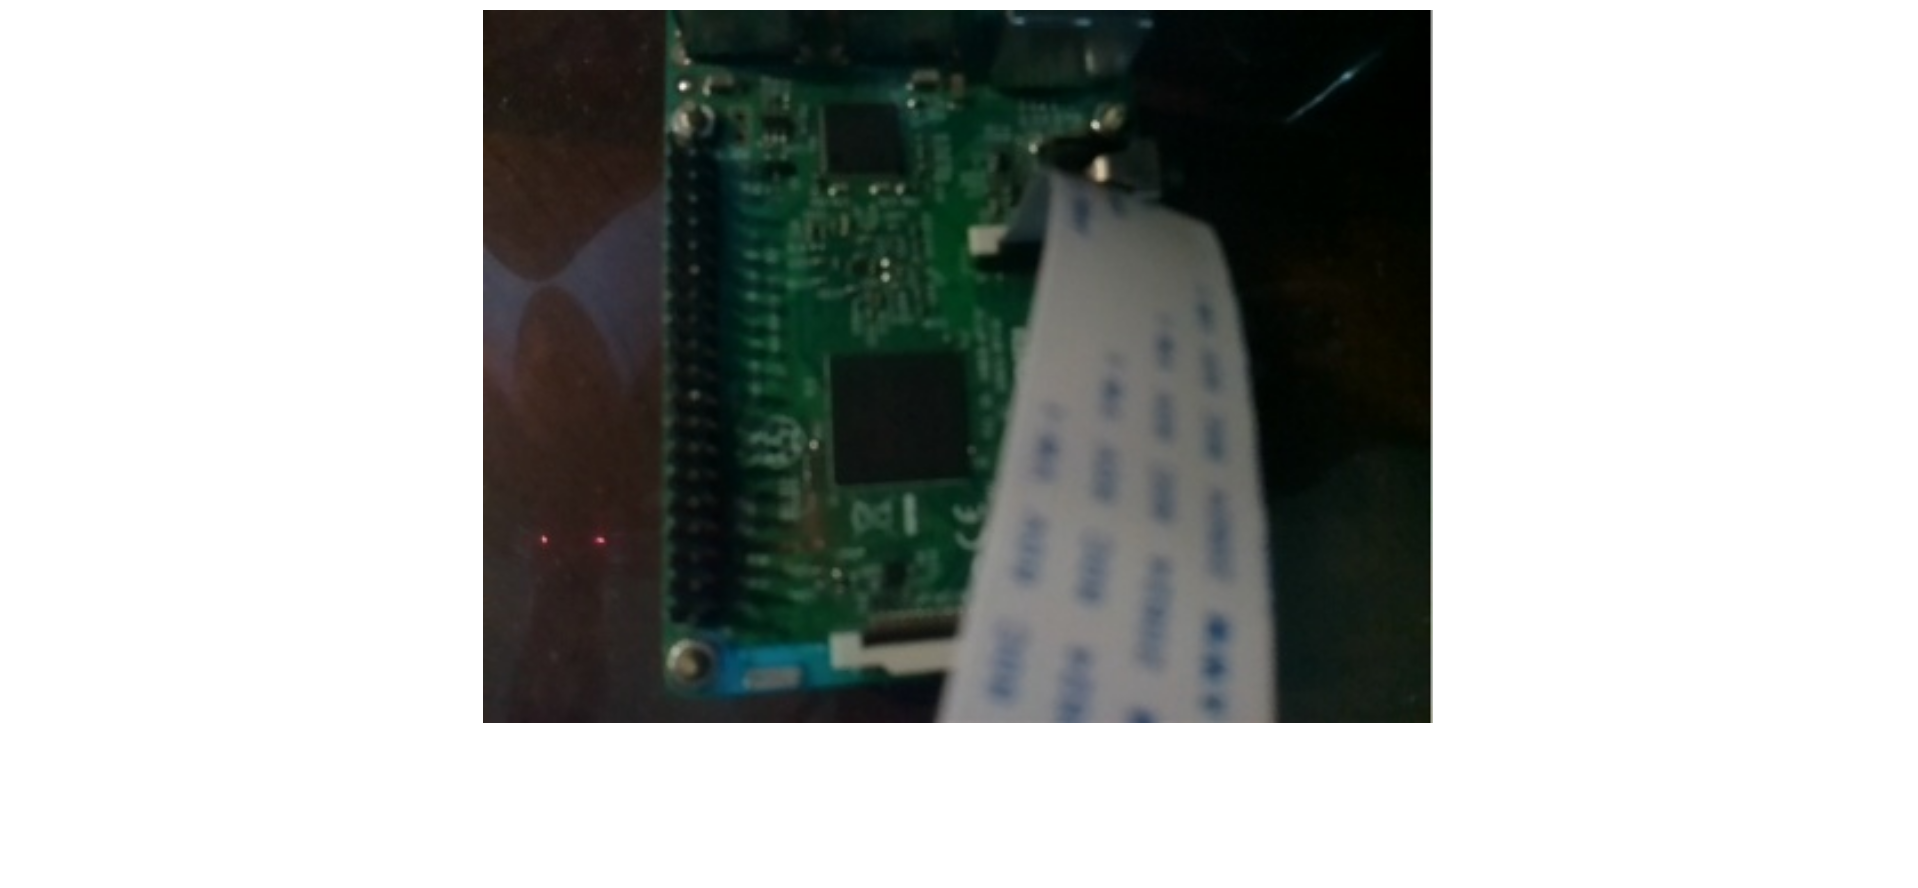
Setup Raspberry Pi Camera: The camera we recommend is the Arducam 5MP Camera for the Raspberry Pi. This can be setup very easily as shown below by inserting the camera ribbon into the camera port:
View Rabbit Detections Remotely
Once you have logged into the Raspberry Pi via SSH, you will want to go ahead and run the main.py file which will go ahead and start up a web server. We use Flask to wrap around the core camera and detection code and serve it via a browser rather than the traditional OpenCV camera window.
As aforementioned, upon running the main.py file, you will see something like this:
 * Debugger is active!
 * Debugger PIN: 101-550-878
 * Running on all addresses.
   WARNING: This is a development server. Do not use it in a production deployment.
 * Running on http://192.168.1.30:5000/ (Press CTRL+C to quit)
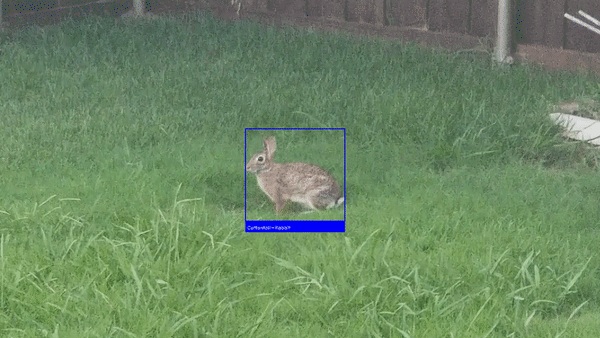
By visiting copying the address to the web server (http://192.168.1.30:5000/) into your browser, you will be able to see the camera view and detections from the Raspberry Pi all on your laptop's browser. This will look something like this:
Integrate a Bluetooth Speaker for the Deterrence Process
The final feature of this project would be to actually integrate a bluetooth speaker to play a sound such as babies crying or the sound of a car to scare away the rabbits. Luckily, the Raspberry Pi has support for Bluetooth Devices. To setup a bluetooth speaker, we can take the following steps:
Access Bluetooth Controls: To access the bluetooth controls, we can use the following command:
sudo bluetoothctl
We can then turn on Bluetooth and select the default agent via:
power on
default-agent
Next, set your Bluetooth speaker on pairing mode. You can then start scanning for devices from your Raspberry Pi:
scan on
You will see a list of devices as well as an associated address for each device that looks like xx:xx:xx:xx. Once you find the appropriate device (usually the device's name appears), take its respective address and run the following commands:
trust xx:xx:xx:xx
pair xx:xx:xx:xx
connect xx:xx:xx:xx
exit
Once you have connected to the Bluetooth speaker, you will want to change the default audio device. You can get a list of audio devices via:
pacmd list-sinks
Which will output something like this:
name: <bluez_sink.8C_DE_52_A8_C3_DE.a2dp_sink>
driver: <module-bluez5-device.c>
flags: HARDWARE DECIBEL_VOLUME LATENCY FLAT_VOLUME
state: SUSPENDED
suspend cause: IDLE
priority: 9550
volume: front-left: 32775 /  50% / -18.06 dB,   front-right: 32775 /  50% / -18.06 dB
balance 0.00
base volume: 65536 / 100% / 0.00 dB
volume steps: 65537
muted: no
current latency: 0.00 ms
max request: 5 KiB
max rewind: 0 KiB
monitor source: 1
sample spec: s16le 2ch 44100Hz
channel map: front-left,front-right
Stereo used by: 0 linked by: 0 fixed latency: 54.02 ms
card: 0 <bluez_card.8C_DE_52_A8_C3_DE>
module: 25
properties:
    bluetooth.protocol = "a2dp_sink"
    device.description = "CANZ"
    device.string = "8C:DE:52:A8:C3:DE"
    device.api = "bluez"
    device.class = "sound"
    device.bus = "bluetooth"
    device.form_factor = "speaker"
    bluez.path = "/org/bluez/hci0/dev_8C_DE_52_A8_C3_DE"
    bluez.class = "0x240414"
    bluez.alias = "CANZ"
    device.icon_name = "audio-speakers-bluetooth"
ports:
    speaker-output: Speaker (priority 0, latency offset 0 usec, available: unknown)
    properties:
    active port: <speaker-output>
Find your appropriate device and obtain the name. Then run `pacmd set-default-sink "SINKNAME". Which in this example would be equal to:
pacmd set-default-sink "bluez_sink.8C_DE_52_A8_C3_DE.a2dp_sink"
And just like that, your will have successfully connected and set the Bluetooth speaker as your default audio device. Now you can test whether you speaker connected correctly by running the sound_test.py file, which will play a baby crying sound.
Testing the System
Now that we have the complete system set up, we can go ahead and give it a test:
Conclusion
Through this tutorial we were able to build an end to end rabbit deterrence system using Roboflow. You learned how to:
- Collect and annotate data using Roboflow
- Preprocess and Augment Data to train a model
- Deploy your object detection project to the Raspberry Pi
- Integrate Active Learning using Roboflow's Upload API
- Setup the Raspberry Pi for outdoor monitoring
- Remotely view the camera stream to monitor the device's efficacy
- Integrate a Bluetooth speaker to ensure the deterrence system is fully functional
The complete code for this project can be found here.
Cite this Post
Use the following entry to cite this post in your research:
Samrat Sahoo. (Jul 12, 2021). How AI Protects My Garden from Rabbits. Roboflow Blog: https://blog.roboflow.com/rabbit-deterrence-system/