
Unity's Perception package can generate perfectly annotated synthetic images using only software, giving computer vision projects a way to bootstrap training data before real-world images are available. This tutorial walks through setting up Unity 2019.4 LTS with the Perception package, generating a labeled synthetic dataset, importing it into Roboflow, and training a model via Roboflow Train, then deploying it to a phone for real-world testing. The synthetic data handles the cold-start problem well; mixing in real production images over time is the recommended path to improving accuracy beyond the prototype stage.
Collecting images and annotating them with high-quality labels can be an expensive and time-consuming process. The promise of generating synthetic data to reduce the burden is alluring. In the past we have covered techniques such as augmentation, context synthesis, and model assisted labeling to improve the process.
In this post, we'll show another technique: using Unity's 3D engine (and their Perception package) to generate perfectly annotated synthetic images using only software and then using that generated data to train a computer vision model.
Synthetically generated data can be a great way to bootstrap a project and get a prototype running. You can then add in real world data to improve your model over time. The more closely your generated images match the scenes your model will see in the wild the better.
Setup
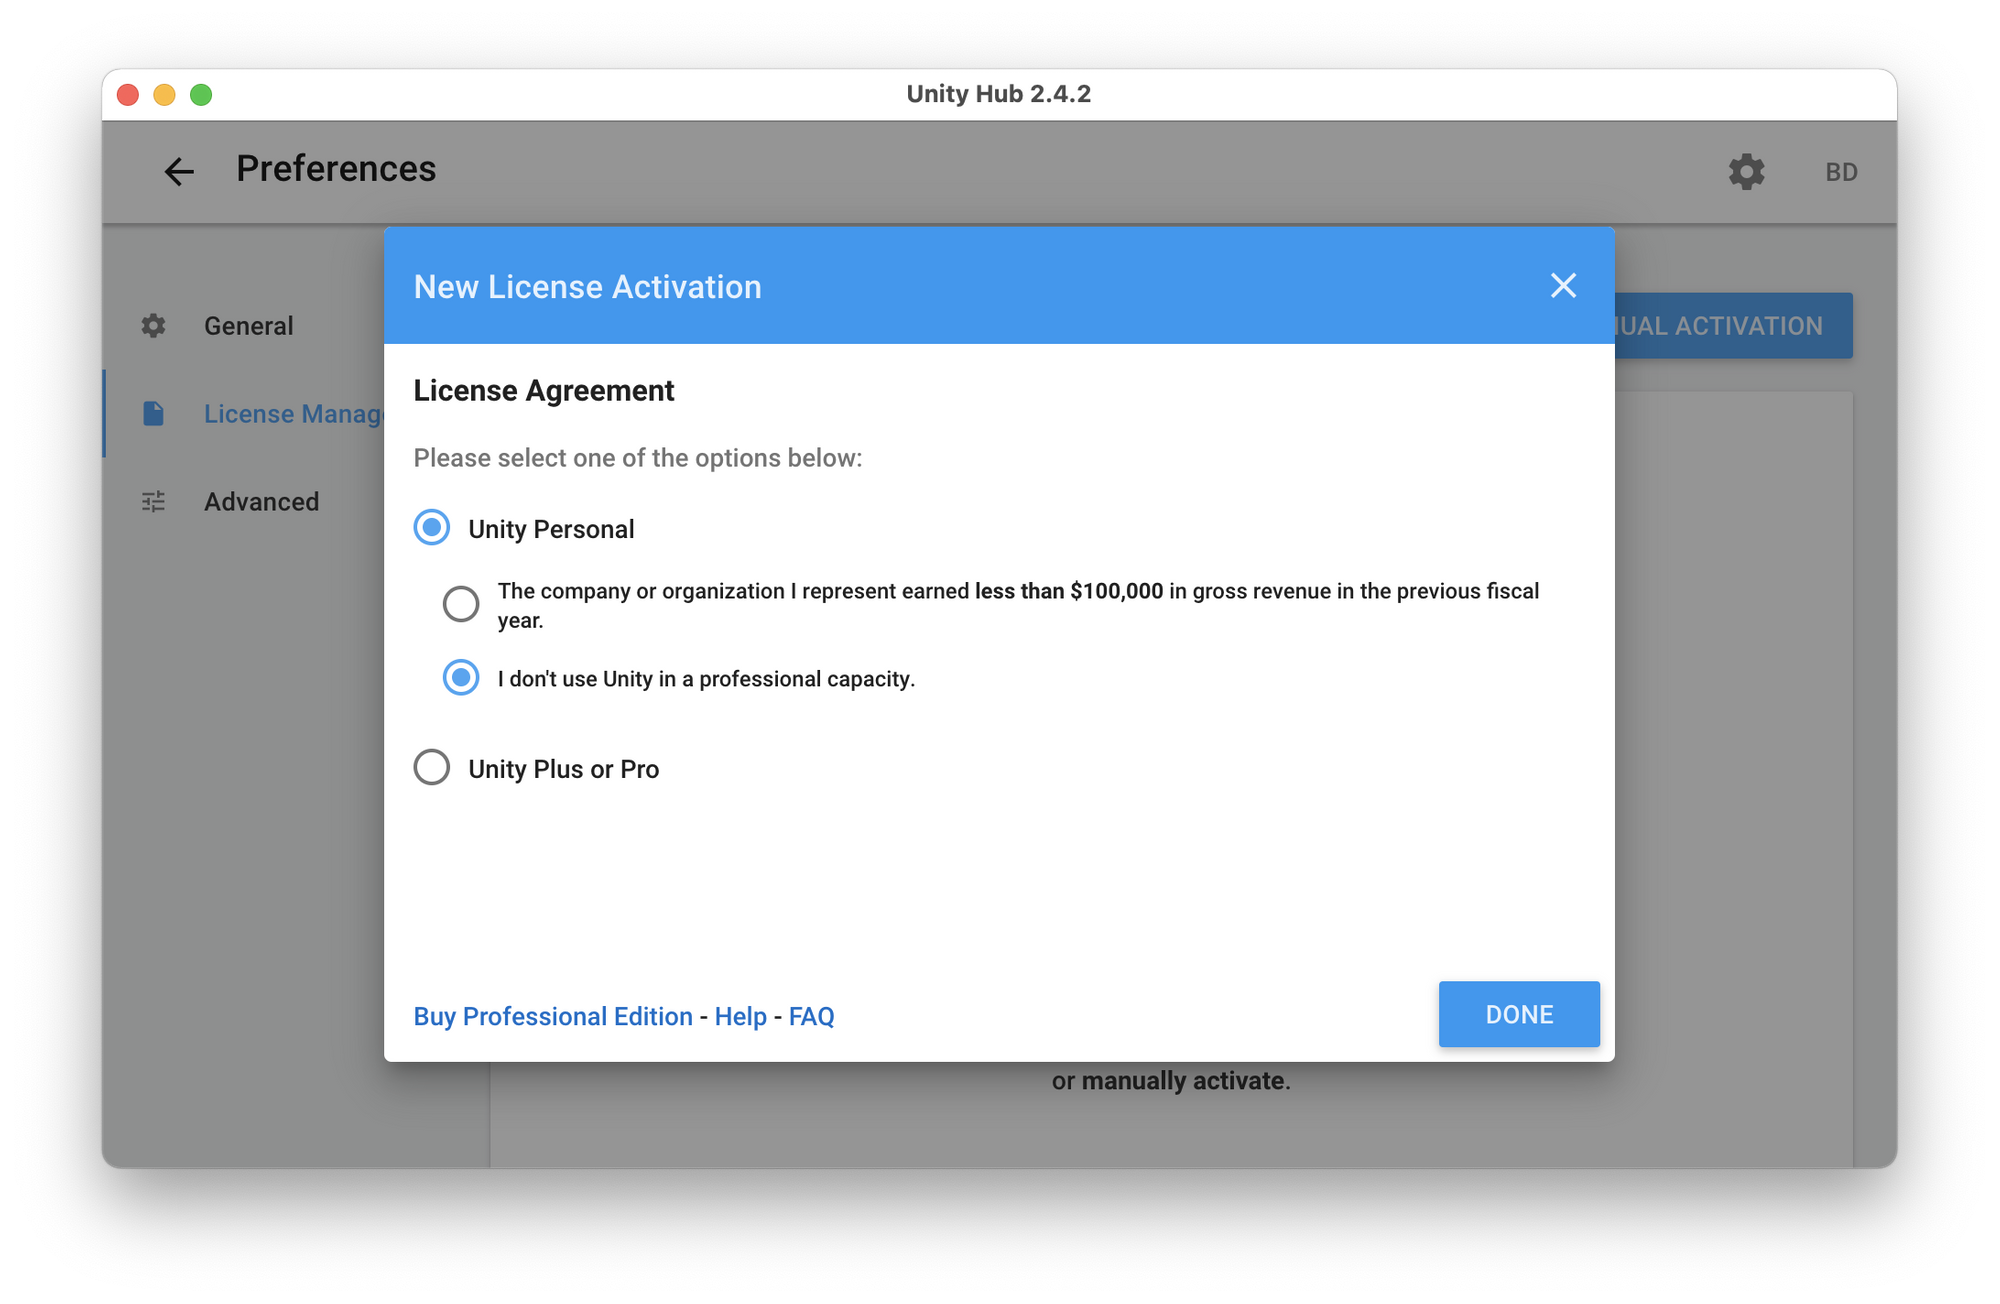
You'll need a Unity account and license to get started; this is free for hobbyists or those working at companies that had less than $100k revenue last year. You can check the full criteria here then create an account here.
After signing up we need to install Unity Hub, a management tool that will allow us to switch between versions of Unity. Since Perception is in active development we'll want flexibility to upgrade or downgrade our Unity version easily as the package matures.
Sign in to Unity Hub and activate your Unity license (this is in Preferences > License Management > Activate New License).
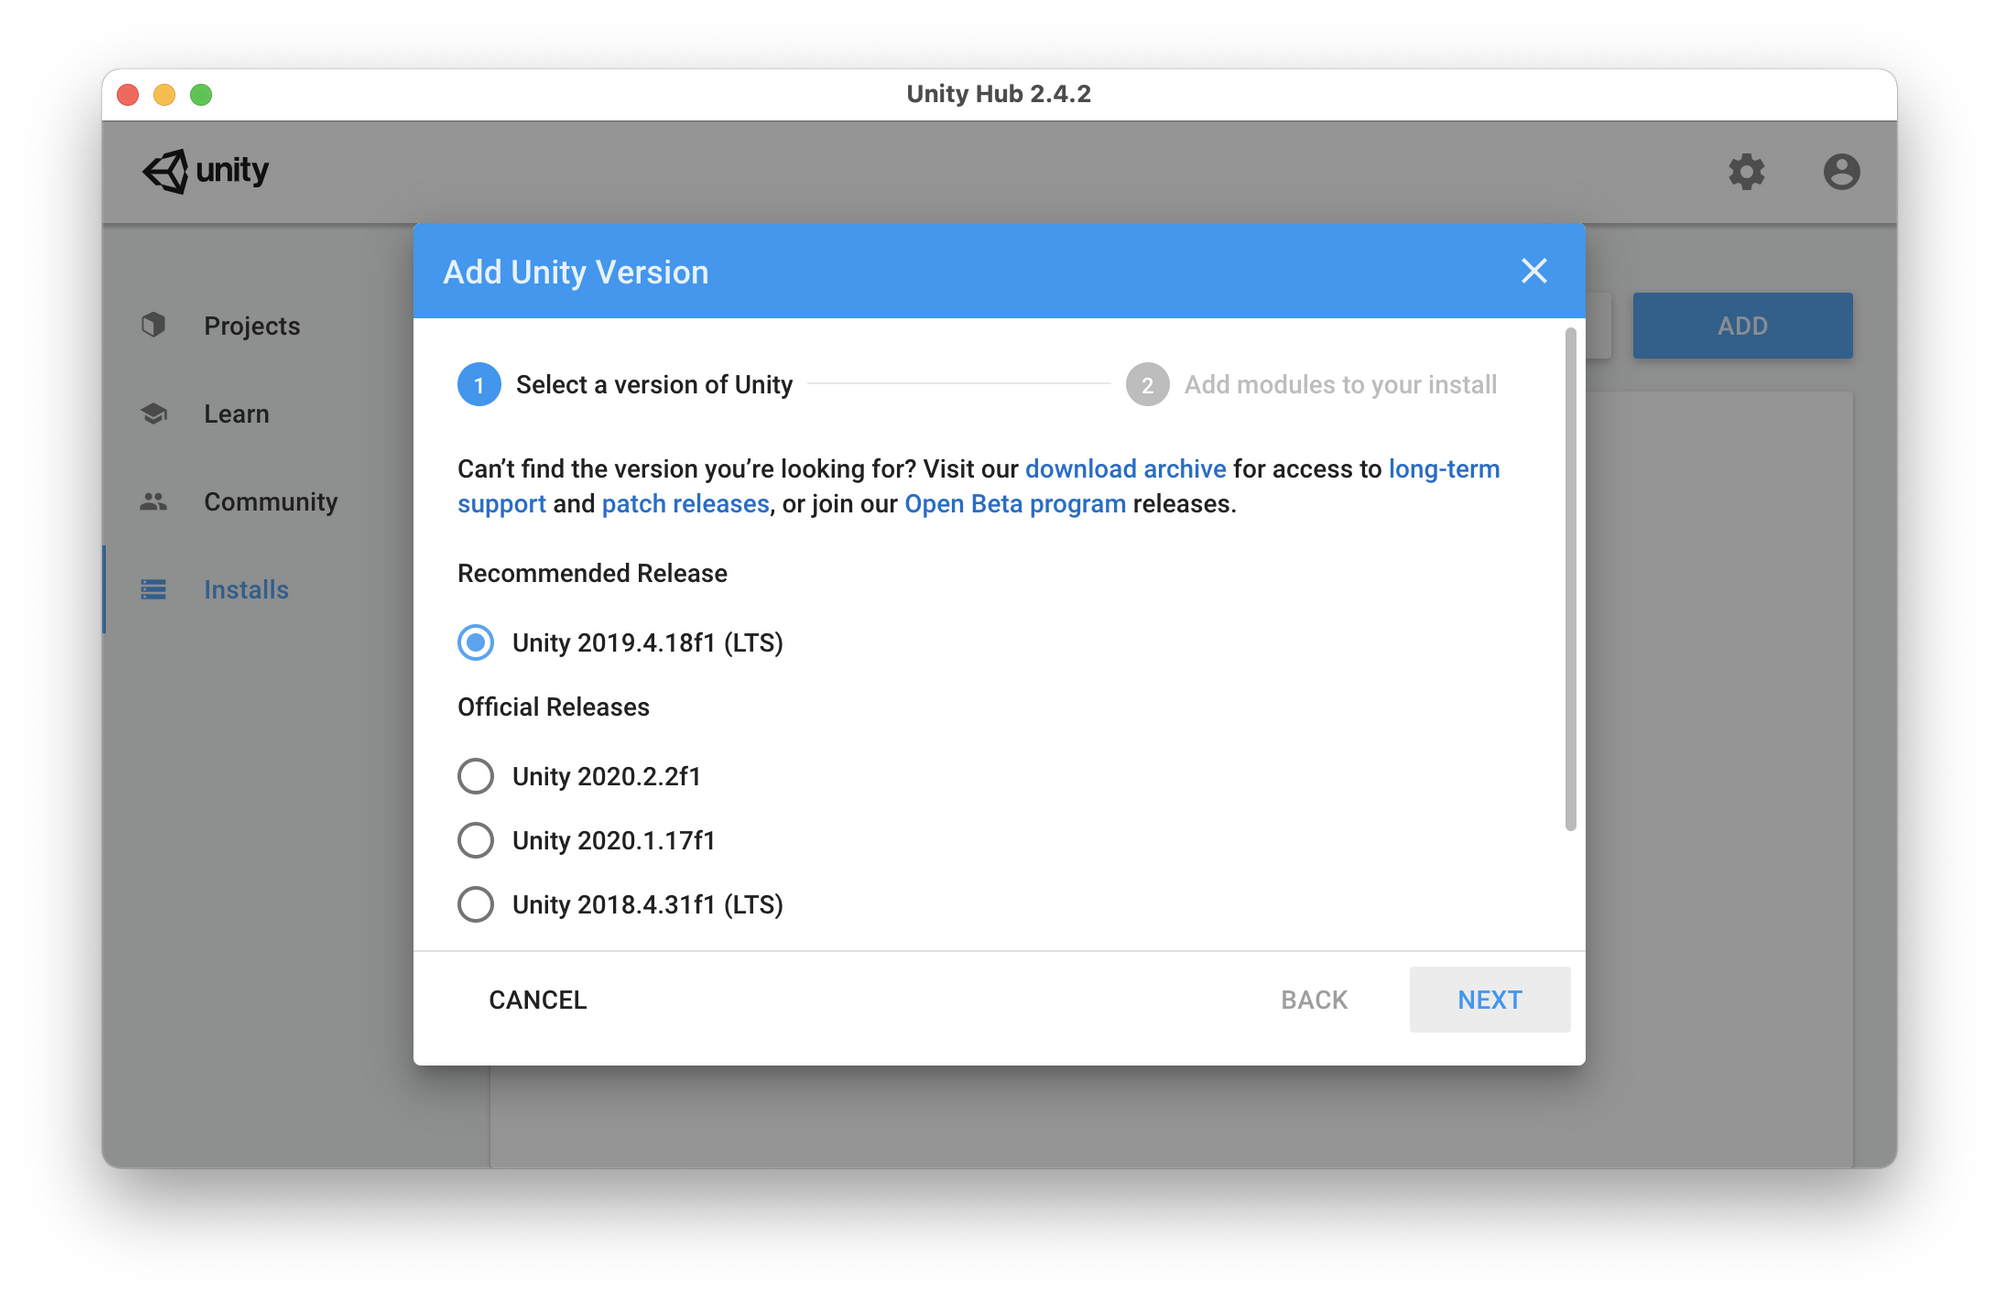
Once you have Unity Hub installed and activated, click "Installs" on the left and follow the process to install Unity 2019.4.18f1 (LTS) – this is the current "Long Term Support" version of Unity and is known to work with Perception and the rest of this tutorial.
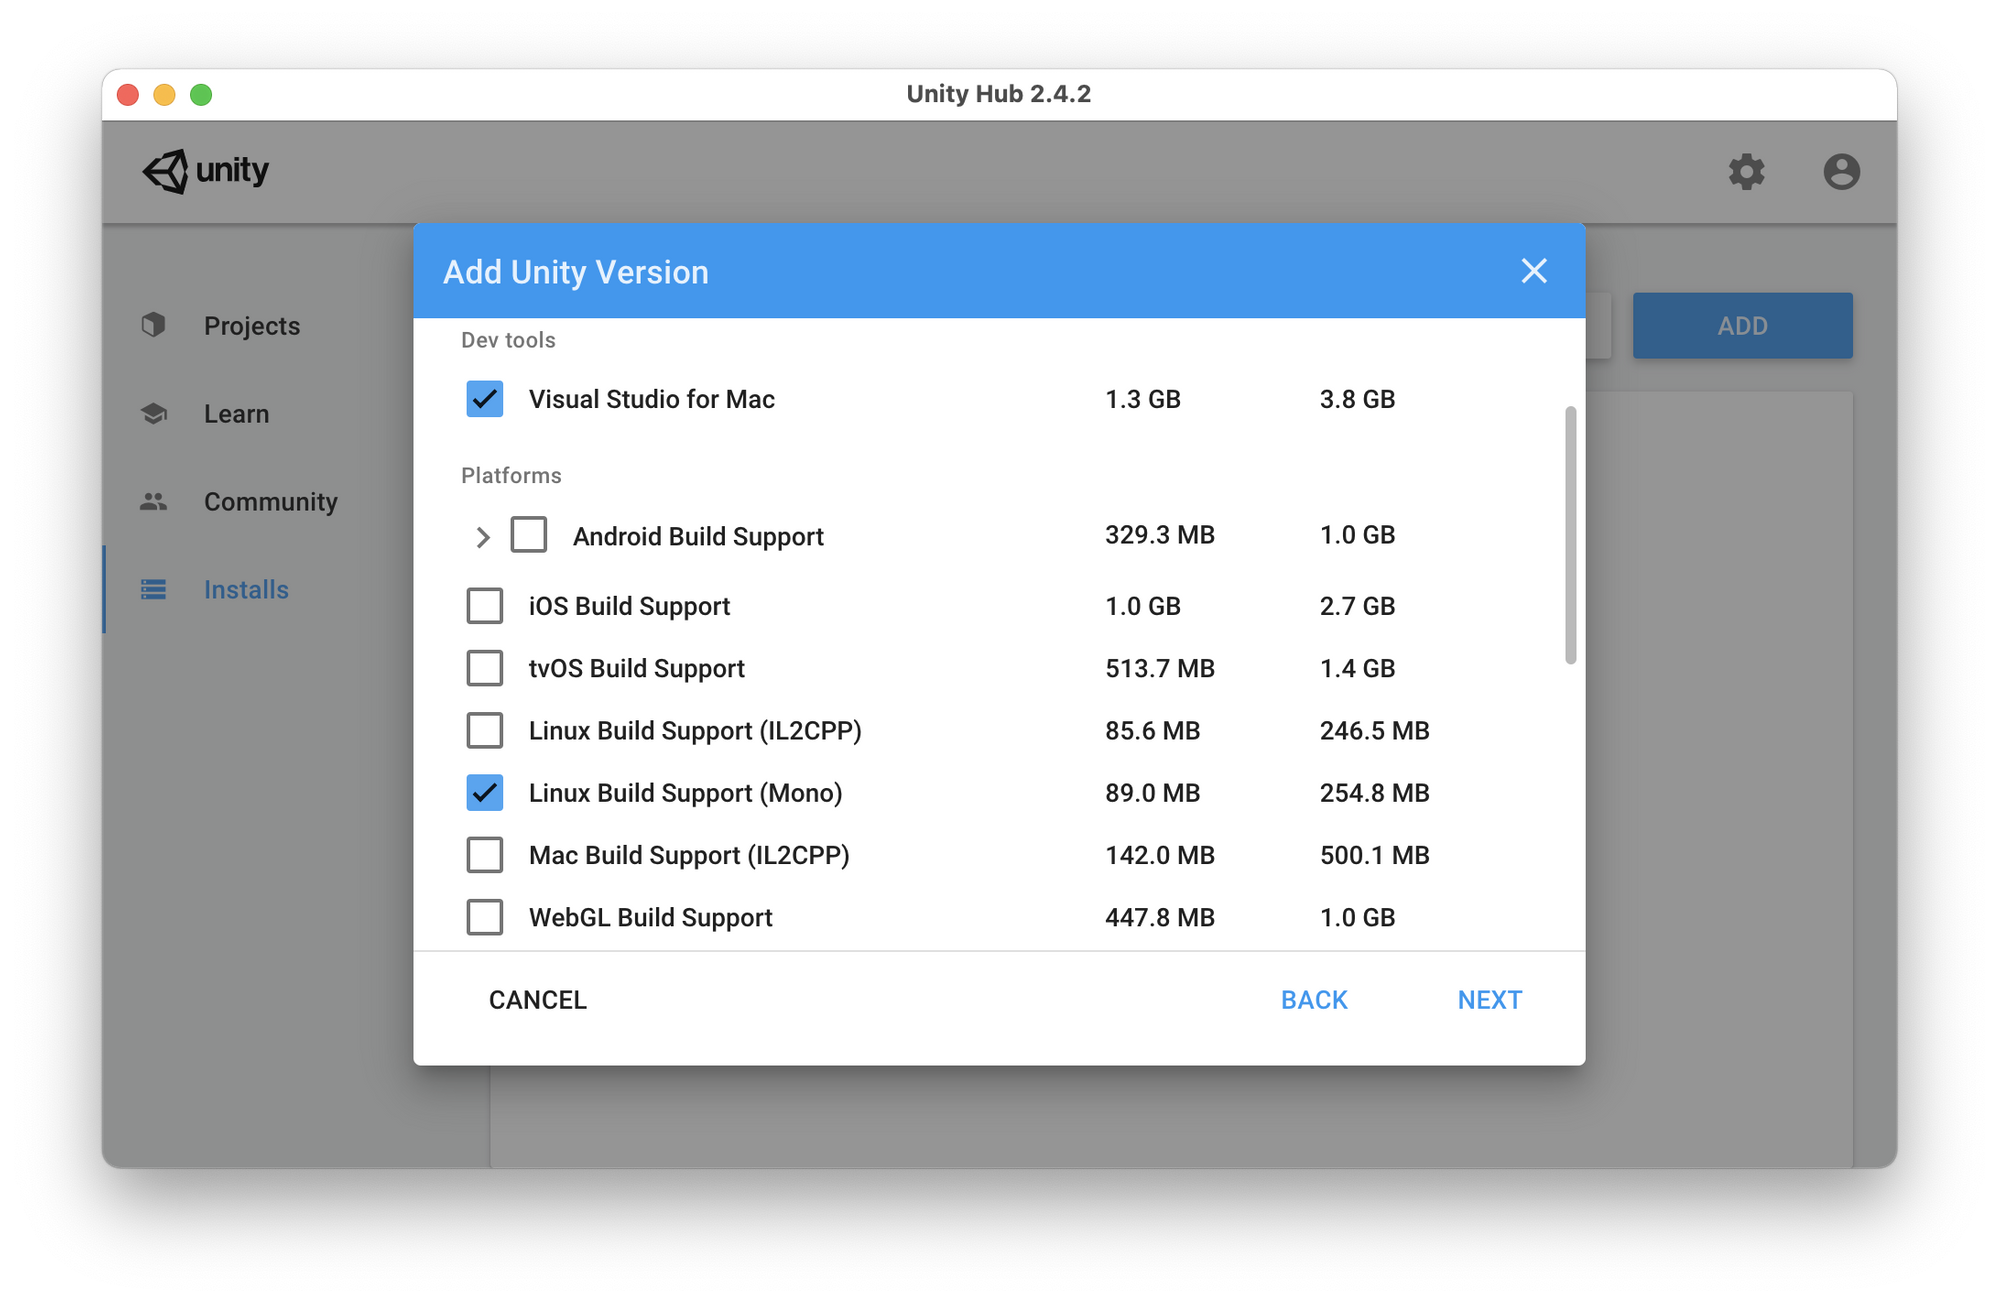
In the installation options, be sure to select Visual Studio and Linux Build Support (Mono) which we will need later.
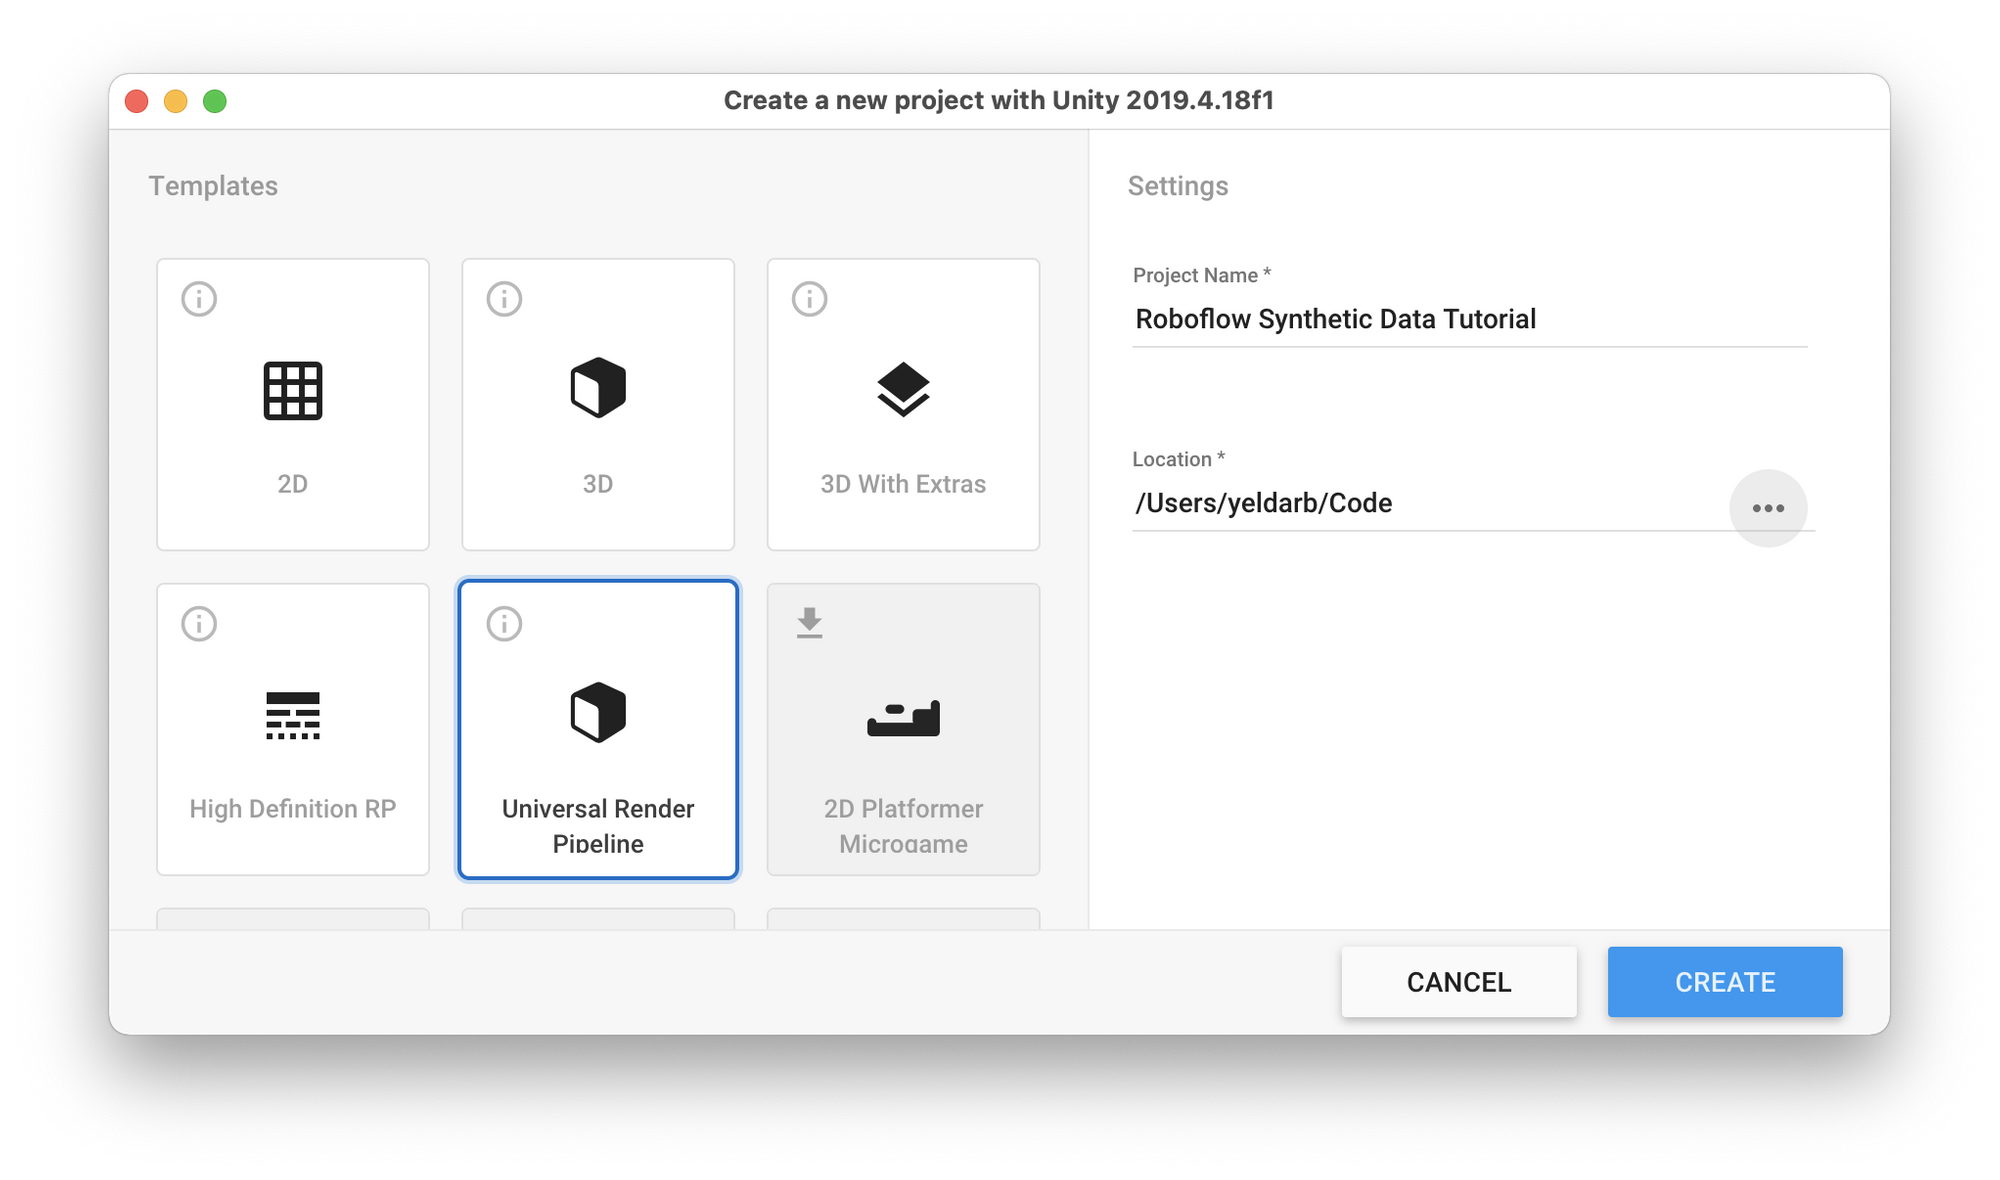
After you've accepted the license, Unity will take a few minutes to download and install. Once it's done, open your new Unity installation and create a new project starting from the Universal Render Pipeline template. You can call your project Roboflow Synthetic Data Tutorial and choose a location on your hard drive to store the project.
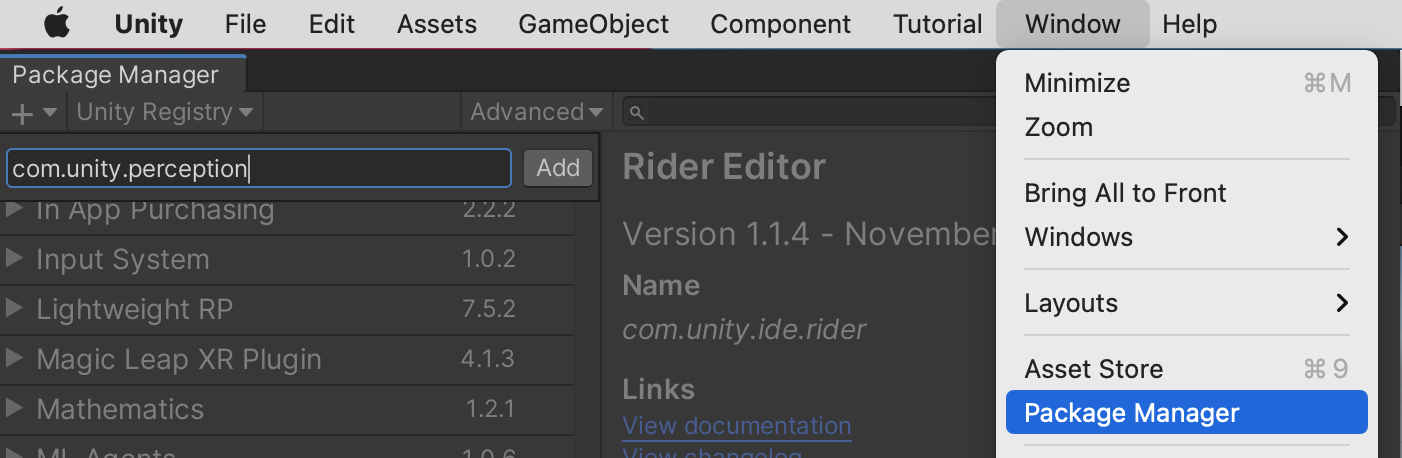
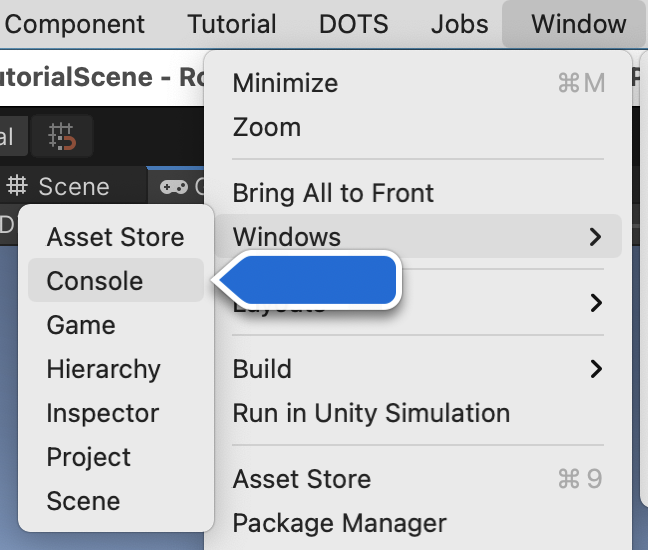
Next we need to install the Perception Package which is what we will use for generating synthetic training data. To do this go to Window > Package Manager then click the + button at the top left of the Package Manager and type com.unity.perception and click Add.
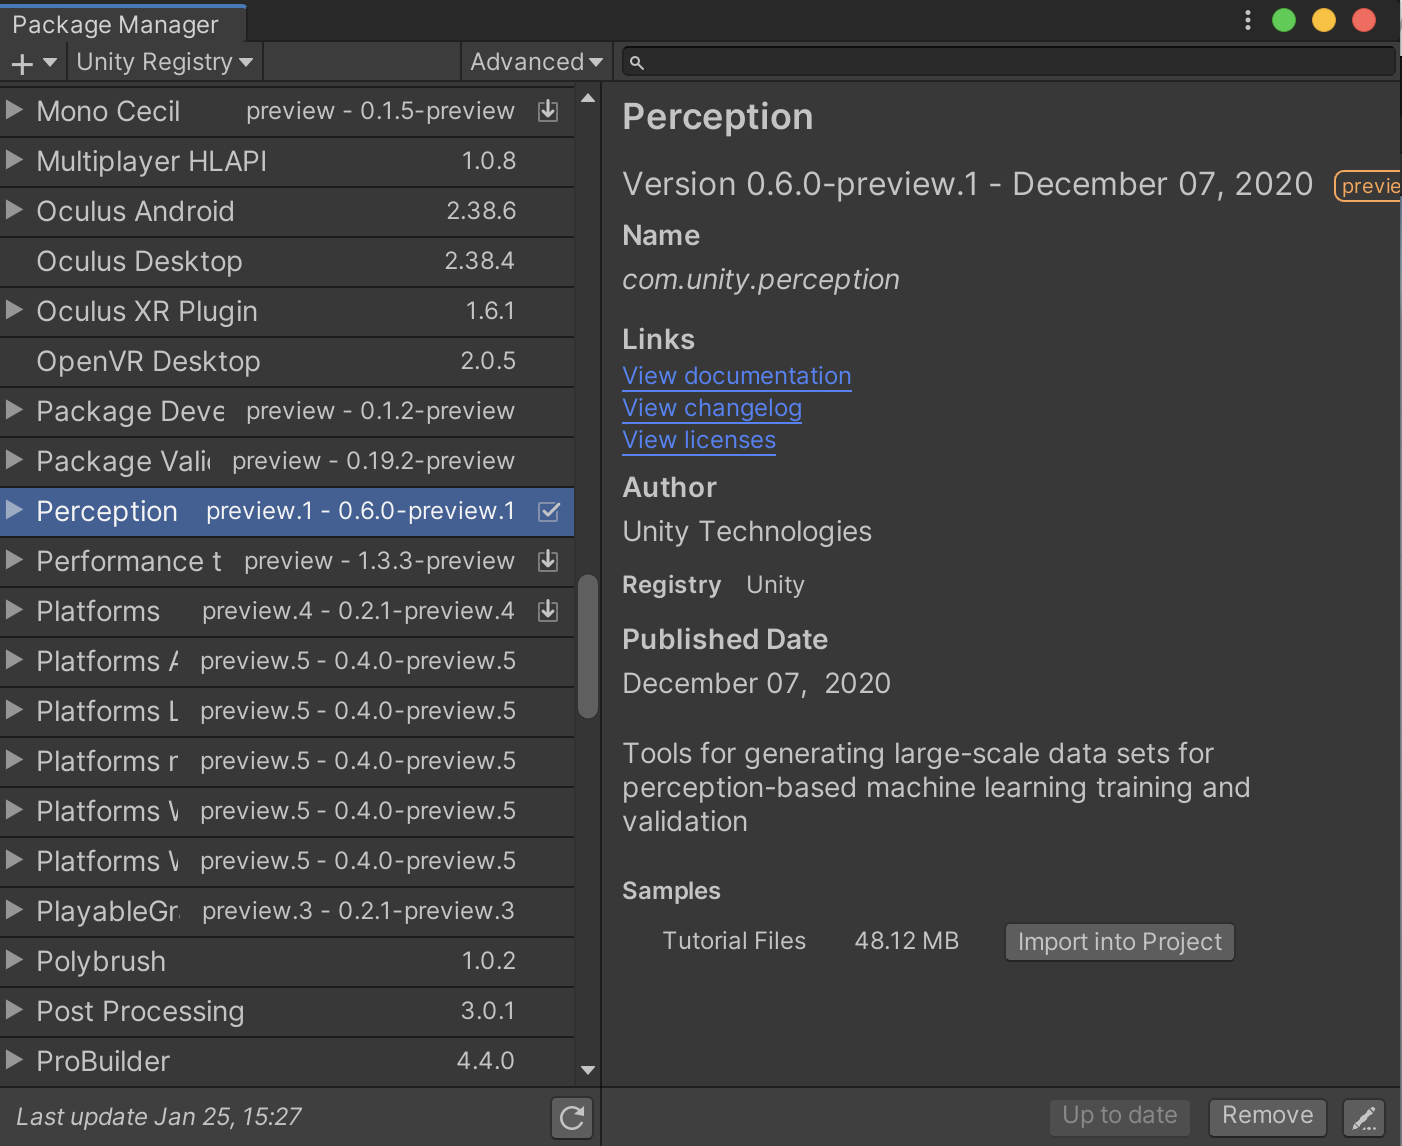
This will download and import the package which can take a few minutes. Once it's finished you'll find Perception as an option to Import into Project.
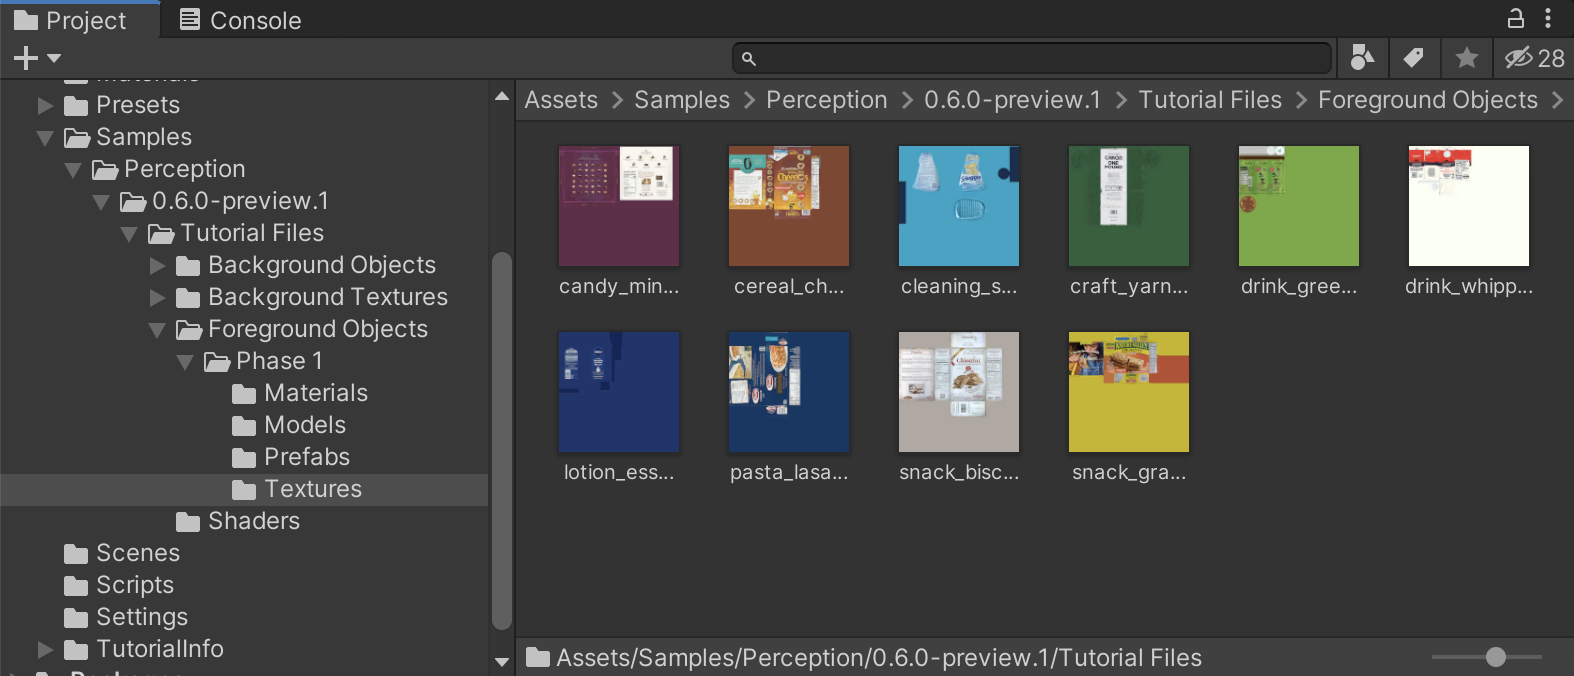
The Tutorial Files come with sample models and textures for products like tea and cereal that you can use to build a retail store item detection model.
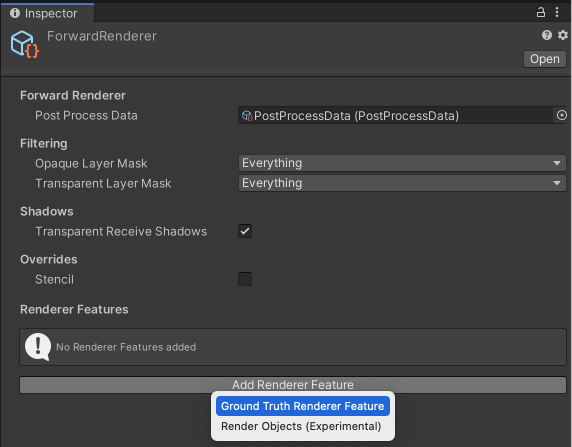
Use the search bar on this Project pane to find the ForwardRenderer then click Add Renderer Feature -> Ground Truth Renderer Feature to process the assets for use as synthetic data objects.
Creating a Simulation
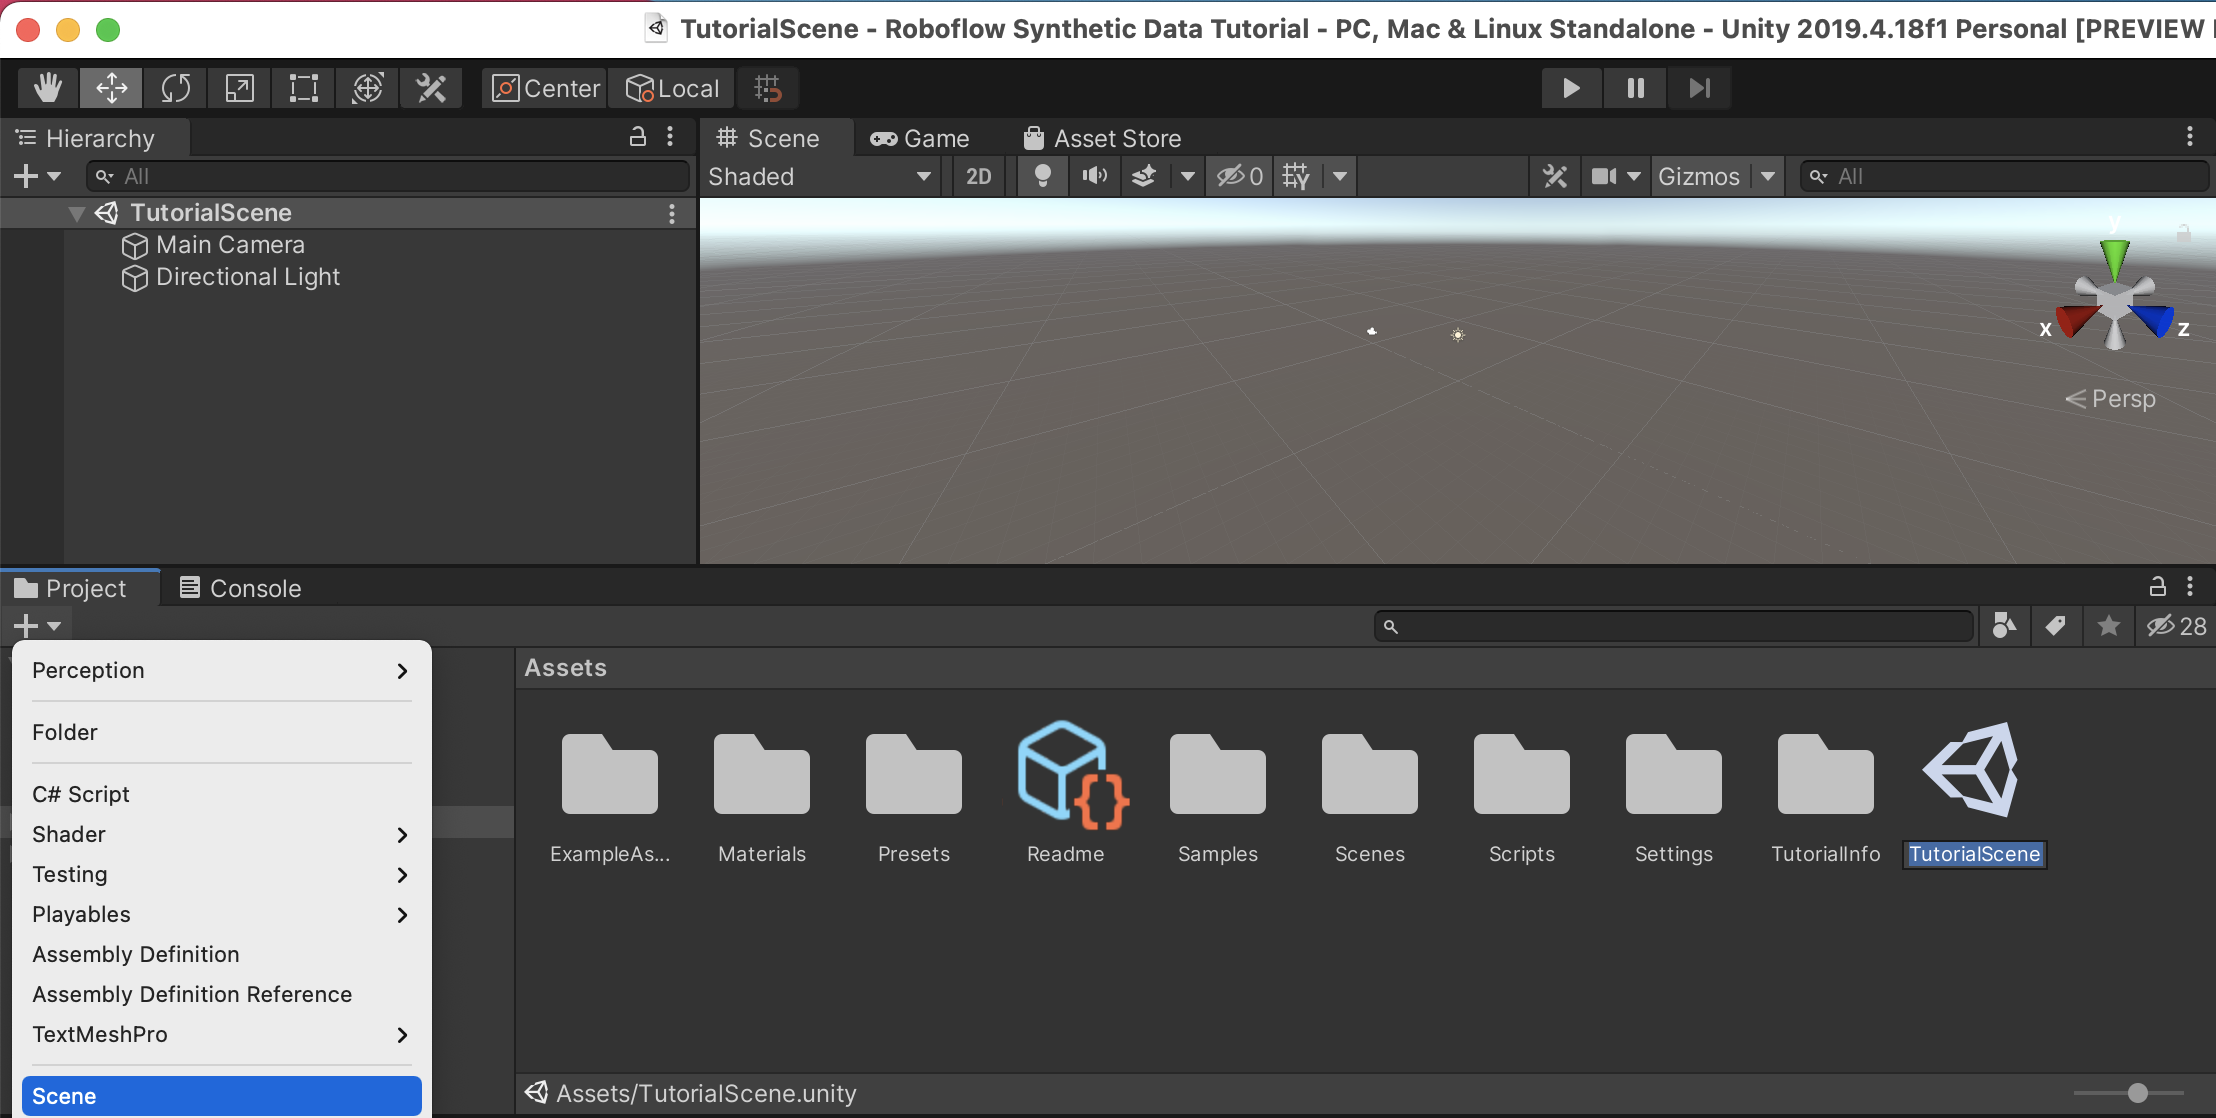
We've now performed all the setup to use this project to generate synthetic 3D training data for our object detection model. Now let's create a scene to contain our assets. Click the + in the Project window and select Scene then name it TutorialScene. Double click the newly created scene to focus it in your Hierarchy.
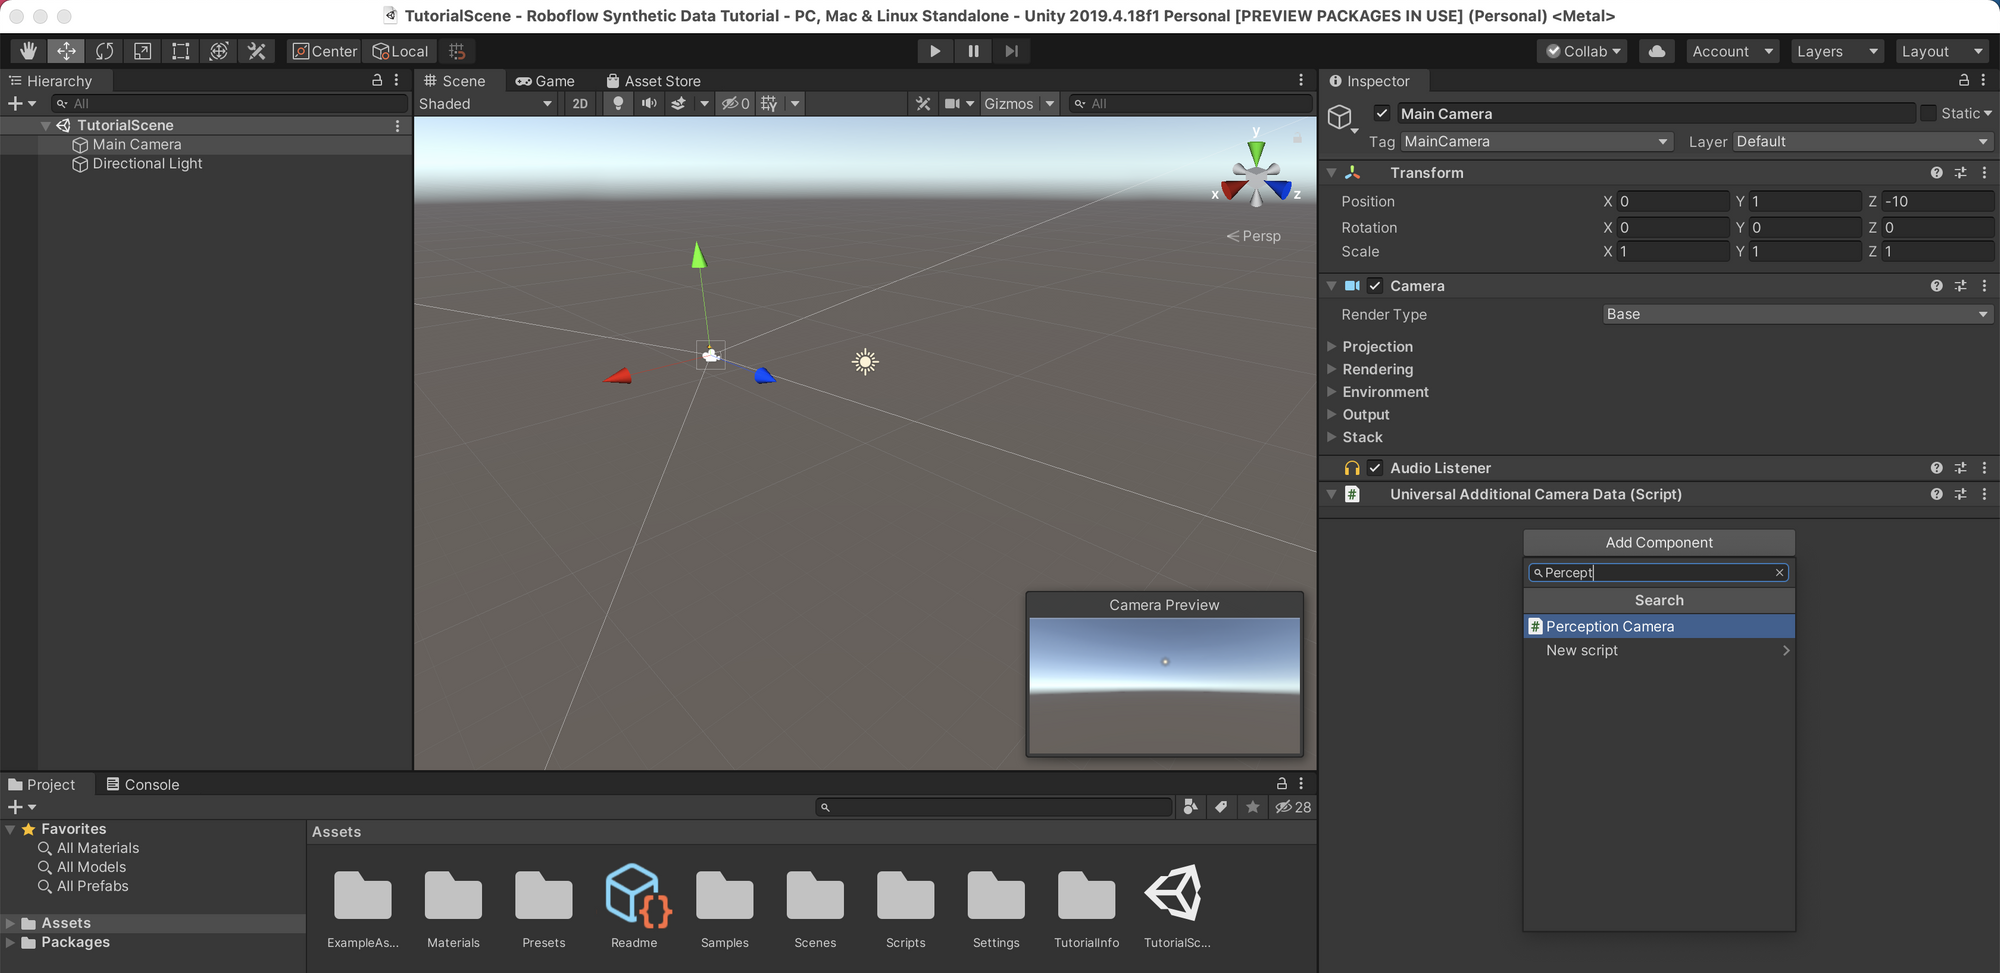
Next we need to setup our scene's Main Camera with some extra functionality so it can work with our Perception package. To do this, click on Main Camera from the Hierarchy to focus it in the Inspector. Click Add Component and find Perception Camera in the dropdown list.
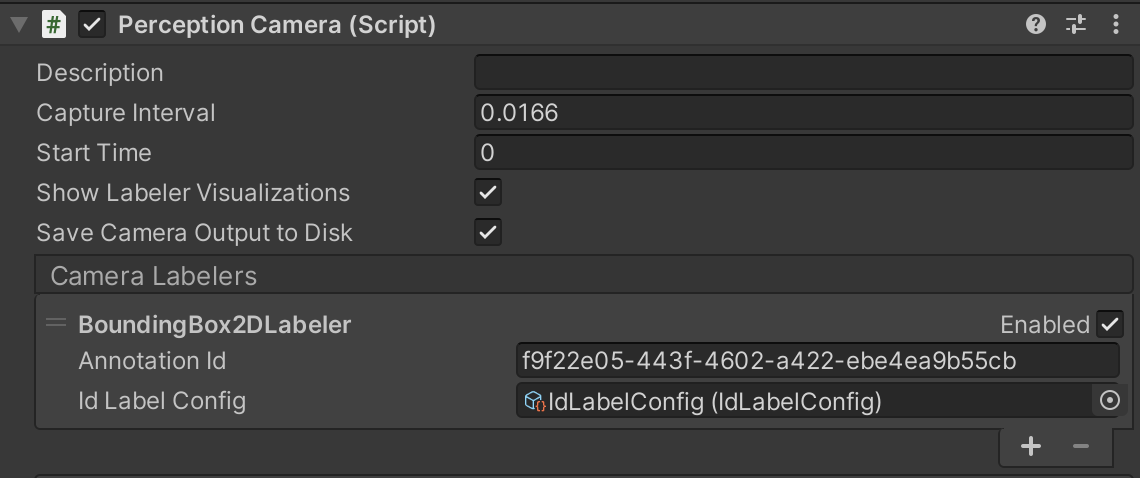
Next we need to configure this camera to label our objects' ground truth from its point of view. To do this, click the + in the Perception Camera's Camera Labelers section and choose BoundingBox2DLabeler.

Next we will configure what labels we'd like our simulation to output. In the Project tab, click the + and navigate to Perception > ID Label Config.

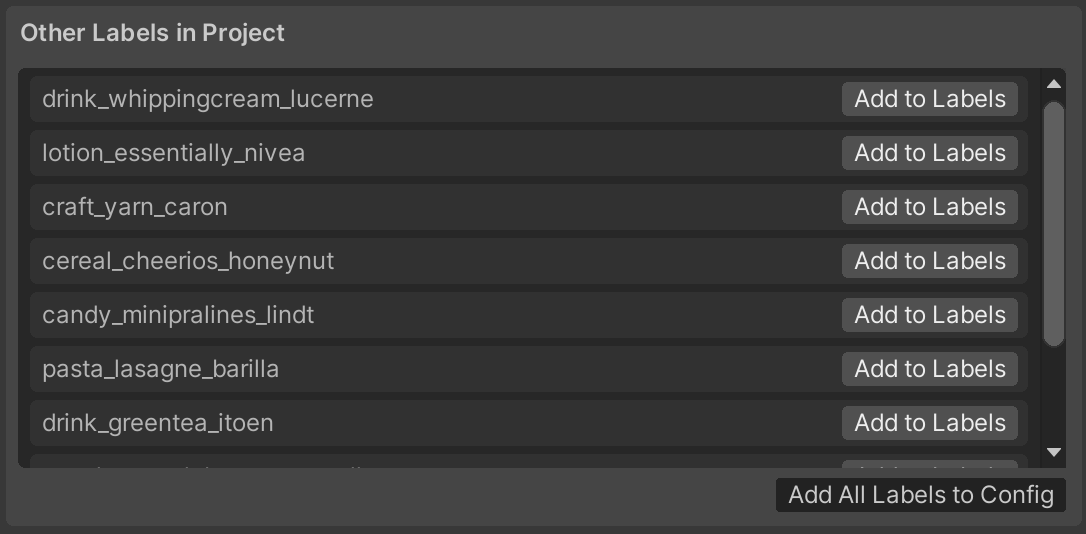
Click on your newly created configuration to focus it in the inspector. Then click the "Add All Labels to Config" button to add the labels from the included tutorial objects to your project.
If you'd like to assign different labels to the objects, find the foreground Prefabs in the project navigator and focus them into the Inspector. Some examples might be calling them all product or labeling them as breakfast, lunch, or dinner foods. Creating new prefabs and applying labels is also how you would setup your own 3D models as objects of interests.
Now that we've added our Label Config, we need to link it to our camera and enable it. So go back to the Preception Camera attached to our scene's Main Camera that we created earlier and click the circle target icon on the right side of the Id Label Config line and select the IdLabelConfig we just created. Then make sure to check the Enabled checkbox for our Camera Labeler.
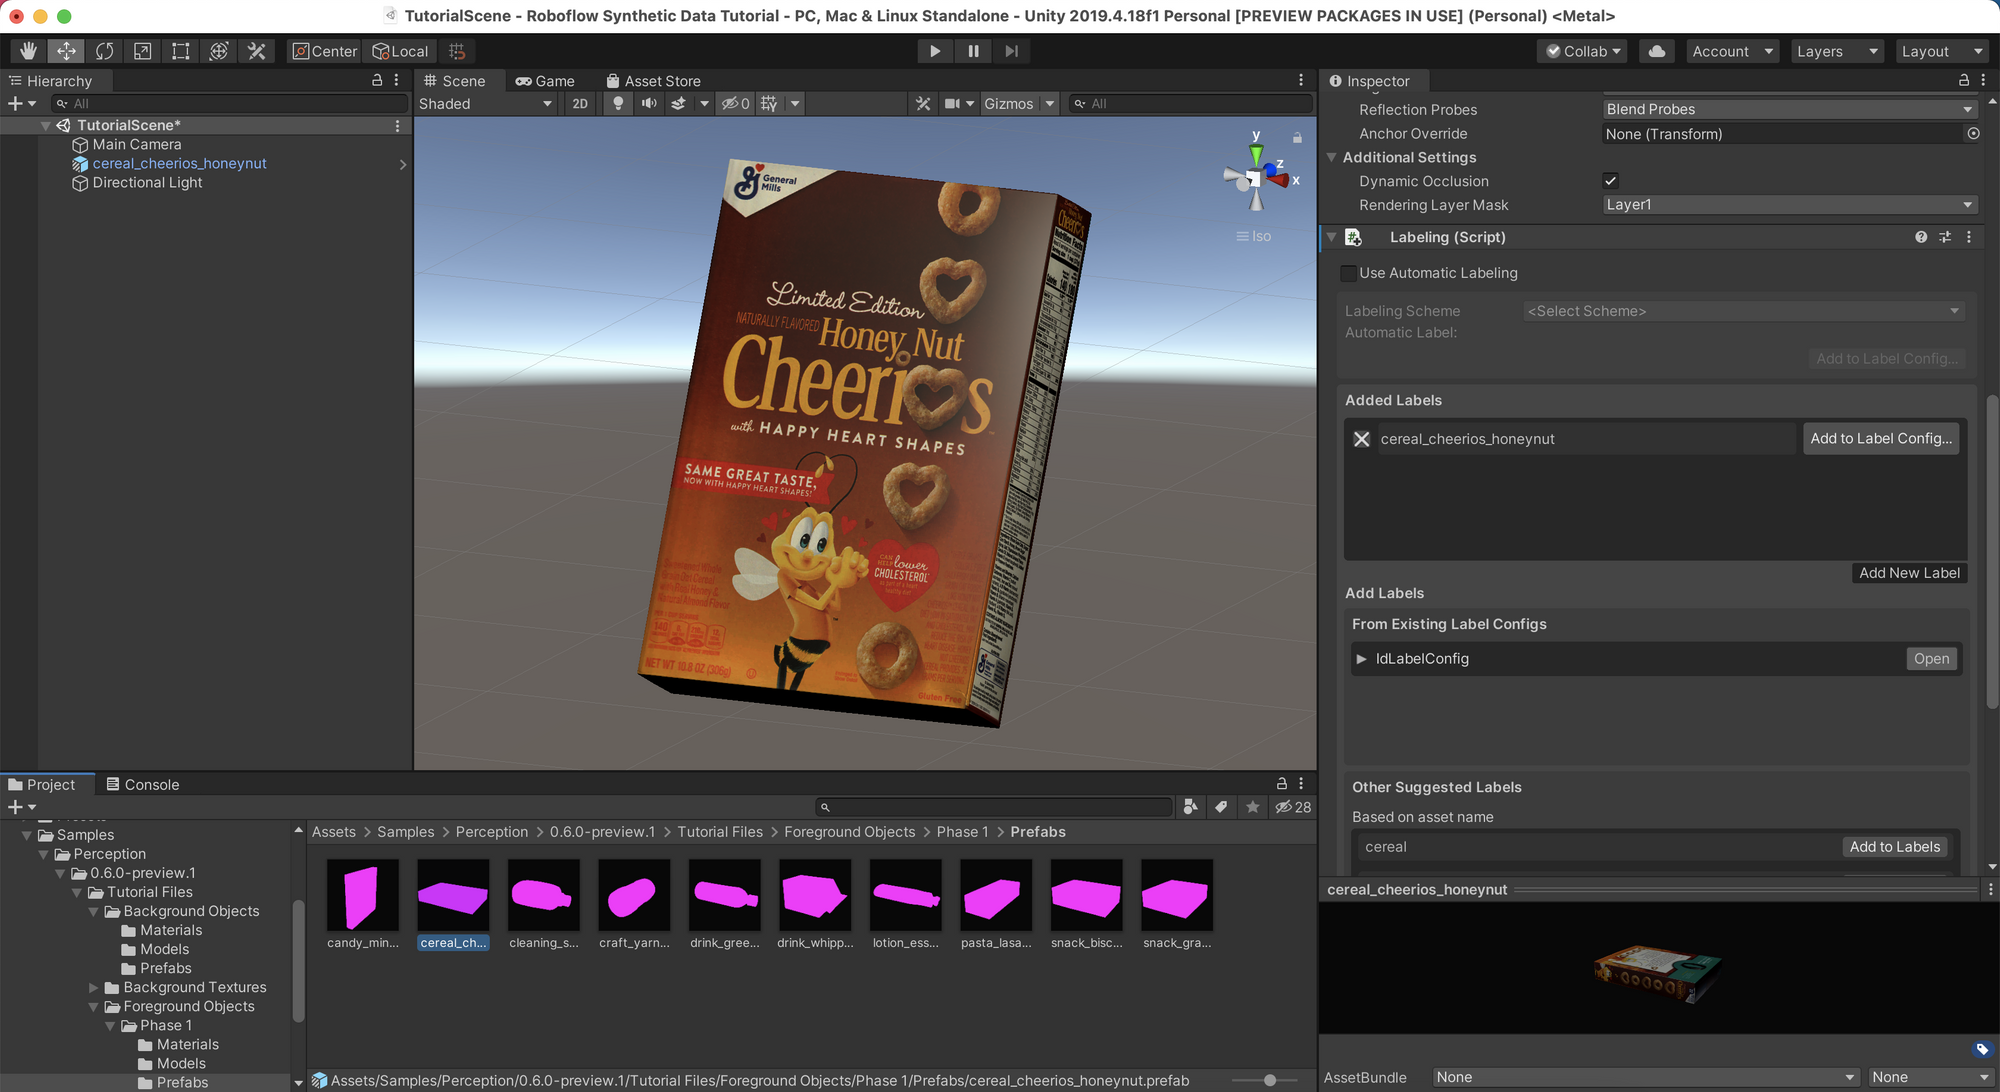
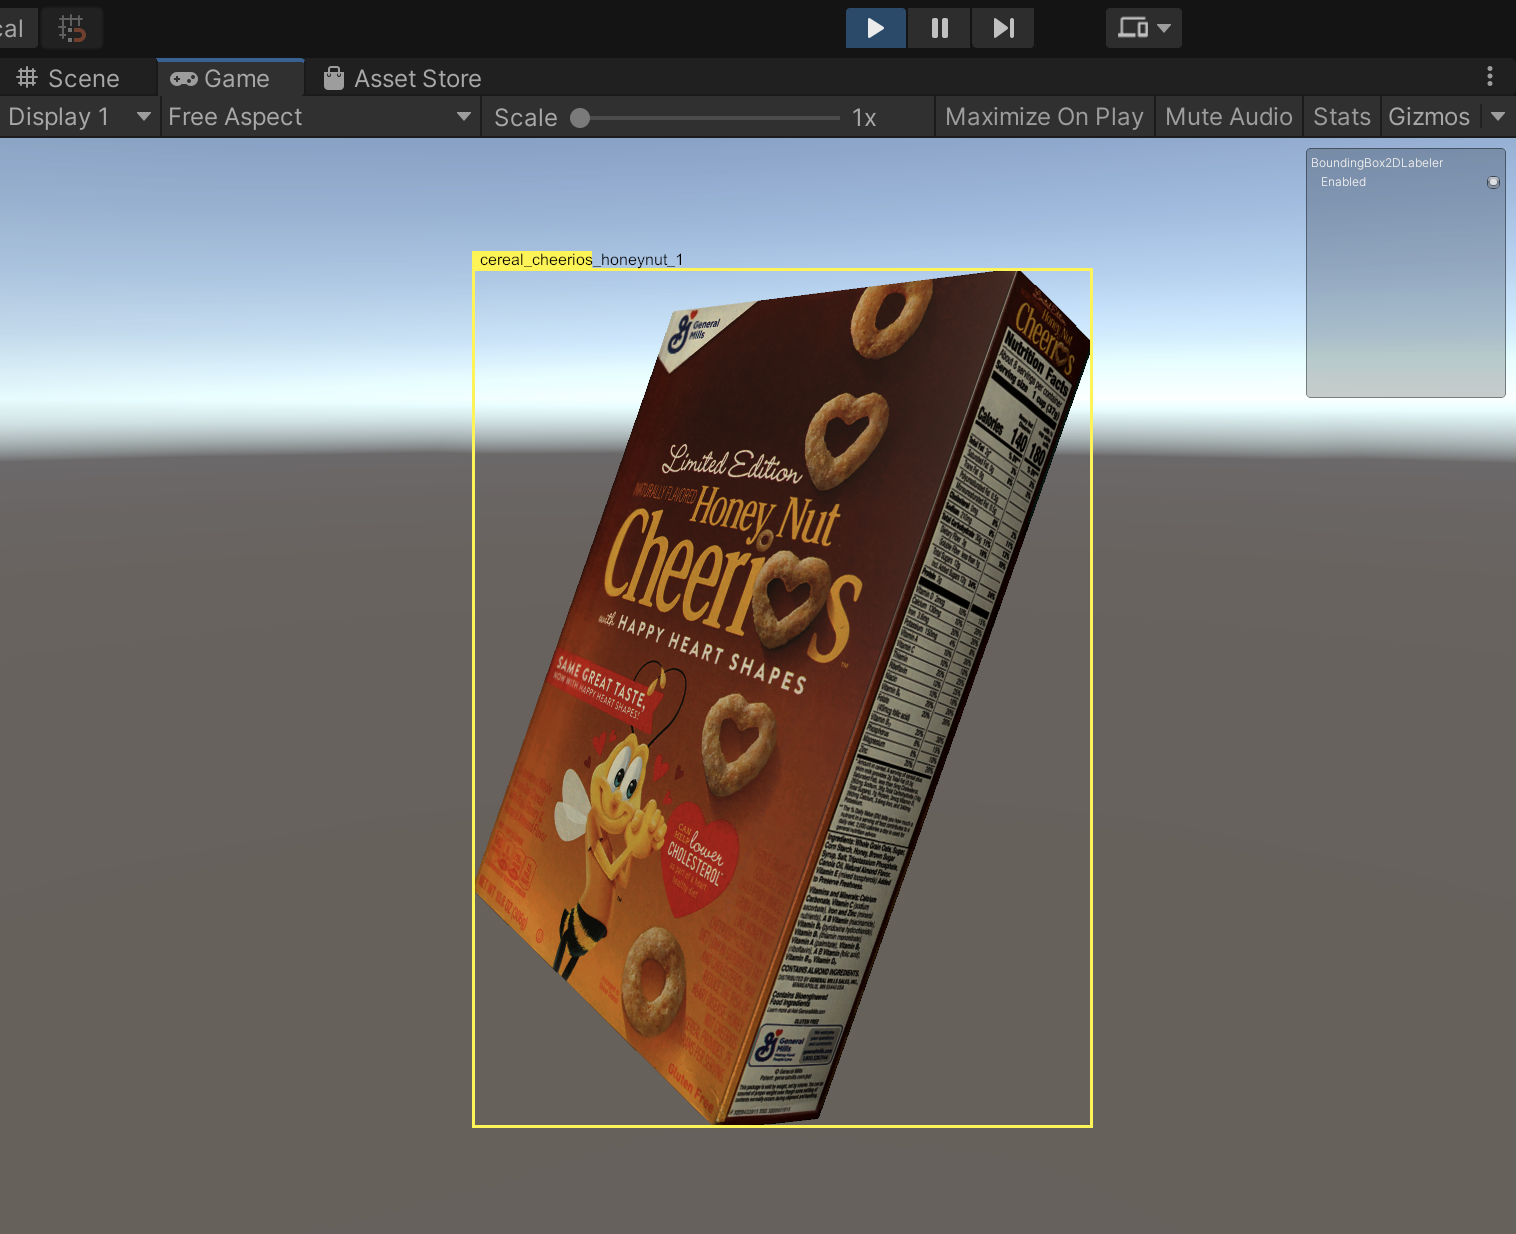
If we drop one of our prefabs into the scene and point our camera at it you can now verify that things are working by observing the bounding box around the object with the item's label:
The next step is to setup Randomizers that will control the position and placement of objects in the foreground and background. This is an essential part of the process. By generating varied training images depicting our objects overlaid on top of different backgrounds, our machine learning model will have to learn how to isolate the things we're looking for from other irrelevant objects in the images.
Perception contains several types of Randomizers (and also lets you create your own for more flexibility. Several Randomizers are composed in a Scenario (and a Simulation can be composed of one or more of these Scenarios).
We will use five Randomizers for our objects:
BackgroundObjectPlacementRandomizer- spawns randomly selected objects (from a given list) and places them at random positions.TextureRandomizer- applies a random texture to add variety to our objects.HueOffsetRandomizer- randomly alters the colors of our objects.ForegroundObjectPlacementRandomizer- exactly the same asBackgroundObjectPlacementRandomizer(but with a different list of items). We need two separately namedRandomizers because aScenariocan only contain a single instance of a givenRandomizer.RotationRandomizer- orients both our background and foreground objects randomly.
To add our Randomizers we will right click in the Hierarchy tab and select Create Empty. This creates a new GameObject; we will name ours Scenario 1.
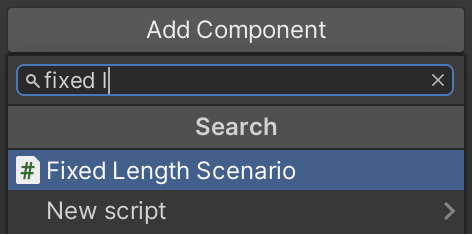
Then click on Scenario 1 to focus it in the Inspector and click Add Component then search for Fixed Length Scenario.
We will use the default options for Fixed Length Scenario (but you may want to expand the Constants and change Total Iterations to a higher number – this is the total number of labeled images we will generate when we run the simulation.
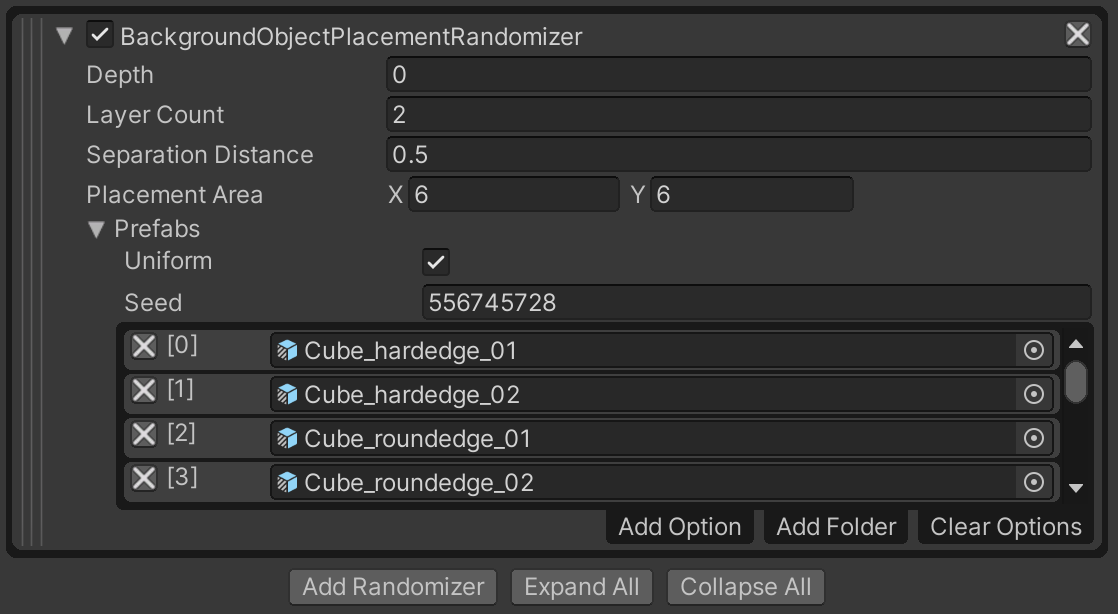
Now we need to add our Randomizers to our new Fixed Length Scenario. Use the Add Randomizer button. The first one we want to add is our BackgroundObjectPlacementRandomizer. The sample project comes with a folder of Prefabs that you can add by using the Add Folder button and navigating to Assets/Samples/Perception/0.6.0-preview.1/Tutorial Files/Background Objects/Prefabs. I used the following settings but you can experiment with things like the Separation Distance and Placement Area until you find settings that match your sensibilities.
If you run your project now you should see that your simulation is starting to do something: it has randomly positioned untextured shapes that get regenerated each frame.
We'll next add the TextureRandomizer (use Add Folder again but this time use the Background Textures folder from the sample files) and HueOffsetRandomizer (with the default settings) to give these background shapes some diversity:
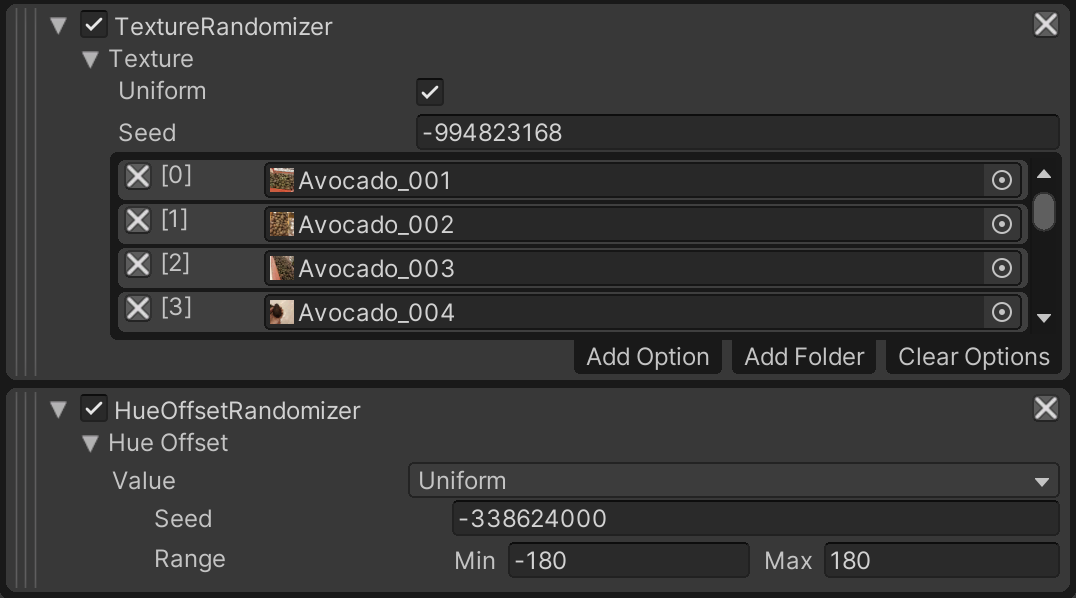
To tell these new Randomizers to apply to the random background objects, we need to apply tags to them in the inspector. Find the Background Objects Prefabs in the Project window and select them all to focus them in the Inspector. Then click Add Component and find the TextureRandomizerTag and the HueOffsetRandomizerTag settings and apply them. You should also apply the RotationRandomizerTag while you're in here because we will want it applied to these later on.
Running the simulation after applying these new settings gives us something that looks a little more like this:
Next, we'll add our ForegroundObjectPlacementRandomizer with the included Foreground Objects prefabs. Be sure to add RotationRandomizerTag to each of these Prefabs as well since we will want them to rotate randomly. But do not apply the TextureRandomizerTag or HueOffsetRandomizerTag because we want our foreground objects to keep their original texture and color.
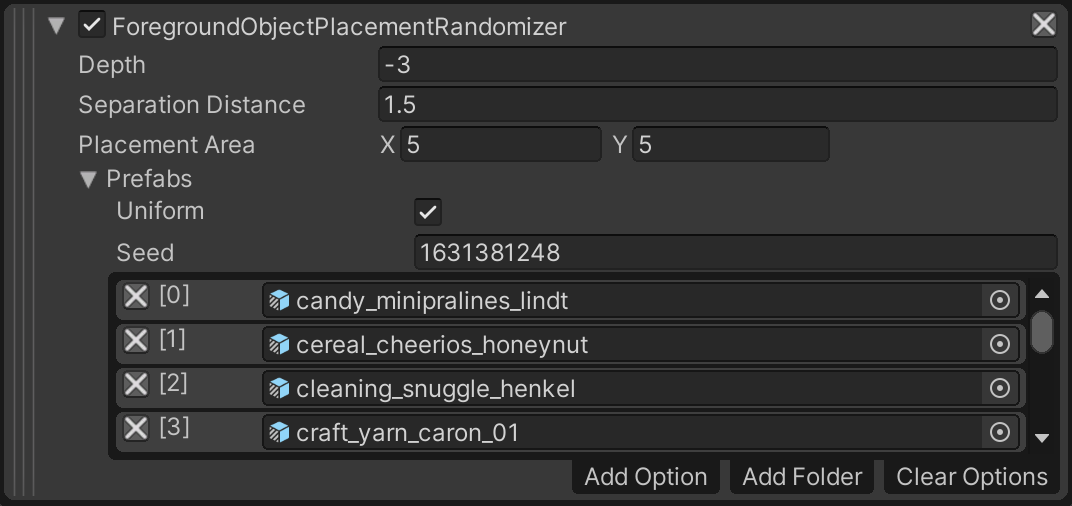
ForegroundObjectPlacementRandomizerAnd finally, we'll add our RotationRandomizer which is going to apply to both the foreground and background objects (assuming we applied the RotationRandomizerTag to all of the Prefabs already).

RotationRandomizer with the default settingsAnd there we have it, our simulation is generating randomly labeled foreground objects in front of unlabeled, randomly-textured background objects!
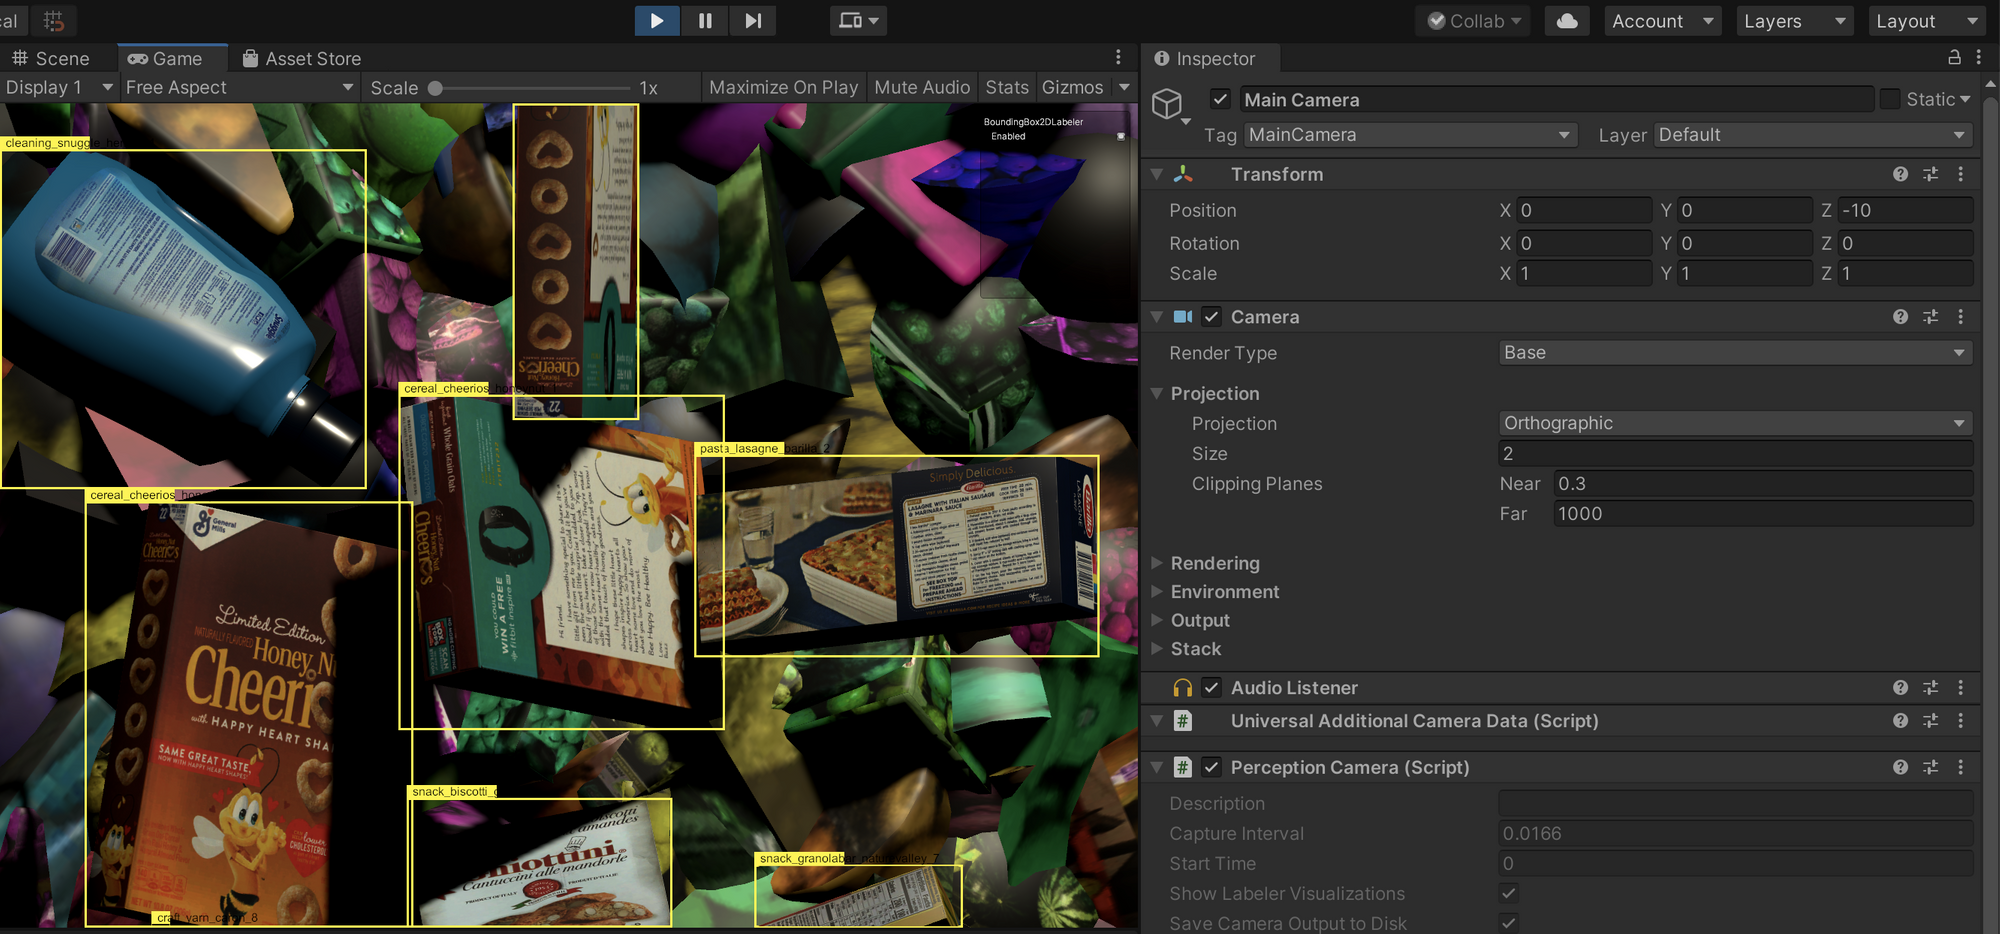
I had moved my Main Camera off to the side to give a better view of what was going on in the scene but if I move it back to a head-on position we can see the final product:
Training a Model
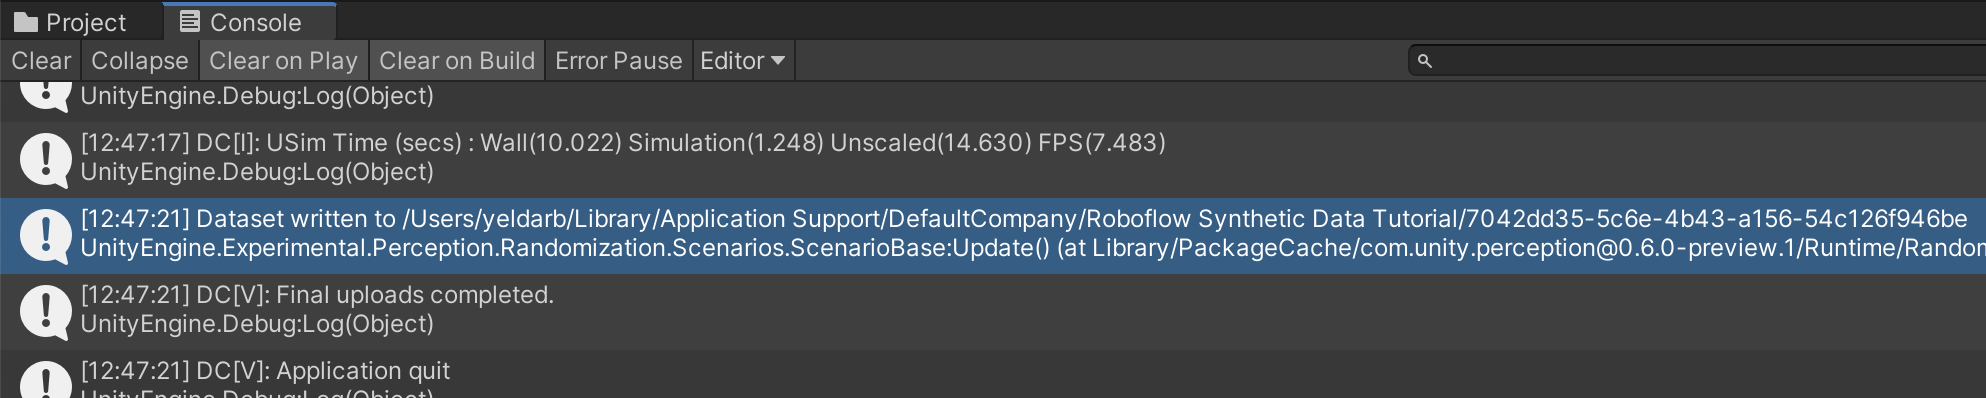
Each time we've run our simulation it has been saving the 100 generated images and separate annotation files to disk (remember: if you want to generate more images, that was an option called Total Iterations on the FixedLengthScenario we attached to our Scenario 1 GameObject – once you're ready to go to production we recommend training on at least a few thousand images). To find the outputted files, you have to look for the file path in the Unity Console.
The line you're looking for looks something like this (my files were stored in ~/Library/Application Support/DefaultCompany/Roboflow Synthetic Data Tutorial with a separate folder for each simulation run):
These files are stored in a proprietary Unity Perception JSON format. But, luckily, Roboflow supports importing and converting these files for use with any standard computer vision model. Simply sign up for a free Roboflow account, create a dataset, and drop in the generated folder to the upload screen.
Once it's done processing, check to ensure the images and annotations look good then click the Finish Upload button.
From here, the process is the same as training any other computer vision model. The decision of what model to choose depends largely on the deployment environment that you're targeting. A good first step is to try building your model with Roboflow Train to get a baseline and quickly test it in the wild; oftentimes your biggest gains in performance will come from improving your dataset rather than your model.
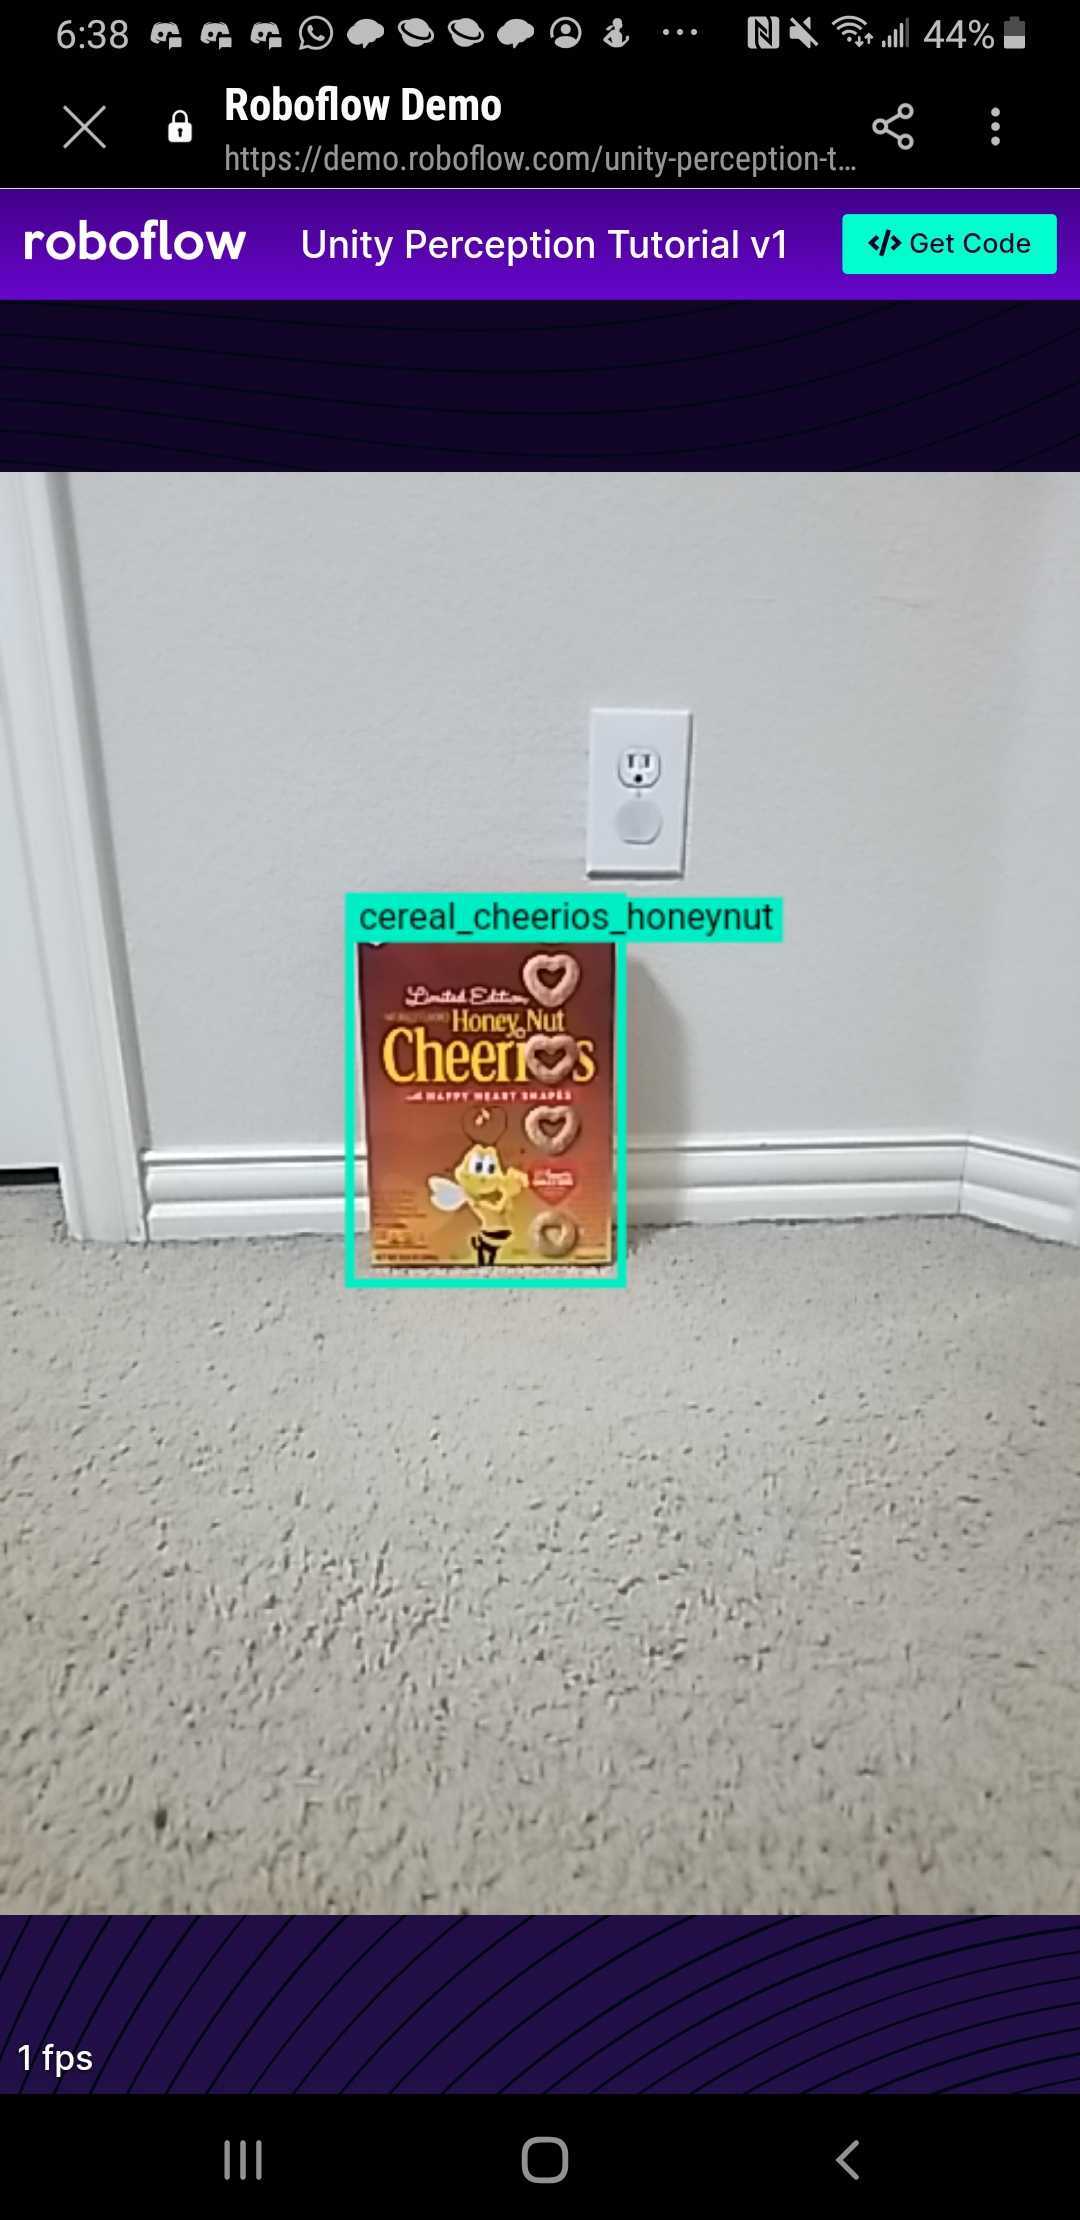
I gave this a shot and used Roboflow Train to fit a model on the synthetic dataset. It did an excellent job at predicting on the held-back images from my test set.
I then deployed the model to my phone to test out in the real world. The model demonstrates promise finding the Cheerios box in some of the environments where I tested (see results below). The synthetic data is useful for tackling the 'cold start' problem of training a model where there initially isn't any sample data.
To improve, I should begin to collect data from my production conditions and mix that data in with the synthetic data I've generated. For example, I may use the Roboflow Upload API to programmatically sample data from where my model is running and add that data to my initial dataset.
In addition, good next steps might be to use images from Open Images as the backgrounds in your scene as we did in our context augmentation tutorial and to try pulling some models from SketchFab that closely represent your objects of interest.
We're eager to see how you're using Unity and Roboflow to more quickly deploy higher quality vision models!
Cite this Post
Use the following entry to cite this post in your research:
Brad Dwyer. (Jan 26, 2021). Using Unity Perception to train an object detection model with synthetically generated images. Roboflow Blog: https://blog.roboflow.com/unity-perception-synthetic-dataset-tutorial/