
A model's published mAP score reflects performance on its training distribution, which can differ significantly from your deployment conditions. This tutorial shows how to evaluate and compare two person detection models from Roboflow Universe against a COCO-derived benchmark dataset using the supervision library's MeanAveragePrecision.benchmark utility, revealing in one example that a model with a high published mAP scored only 12.77% on the benchmark. The same approach works for any number of models and any custom evaluation dataset you build from your own images.
There are hundreds of pre-trained models that you could use when starting a computer vision solution. Whether using it to fine-tune or use it directly, when picking a model to use, it can often be difficult to see how it would handle your specific data.
Understanding how performant it is when used in your specific use case is an important piece of information that can be difficult to get. Metrics such as mAP (mean average precision) go a long way to helping understand a model’s performance, but they only give you an idea of how the model will perform on images in the dataset.
In this guide, we will go over how we can compare how two person detection models on Roboflow Universe perform using a benchmark dataset and supervision.
Step 1: Finding an evaluation dataset
For this example, we will say that we want to detect people and we want a generic model that will perform well at detecting people in all sorts of scenarios. To find a good dataset, we can search Universe for a trained object detection model with a large amount of images.
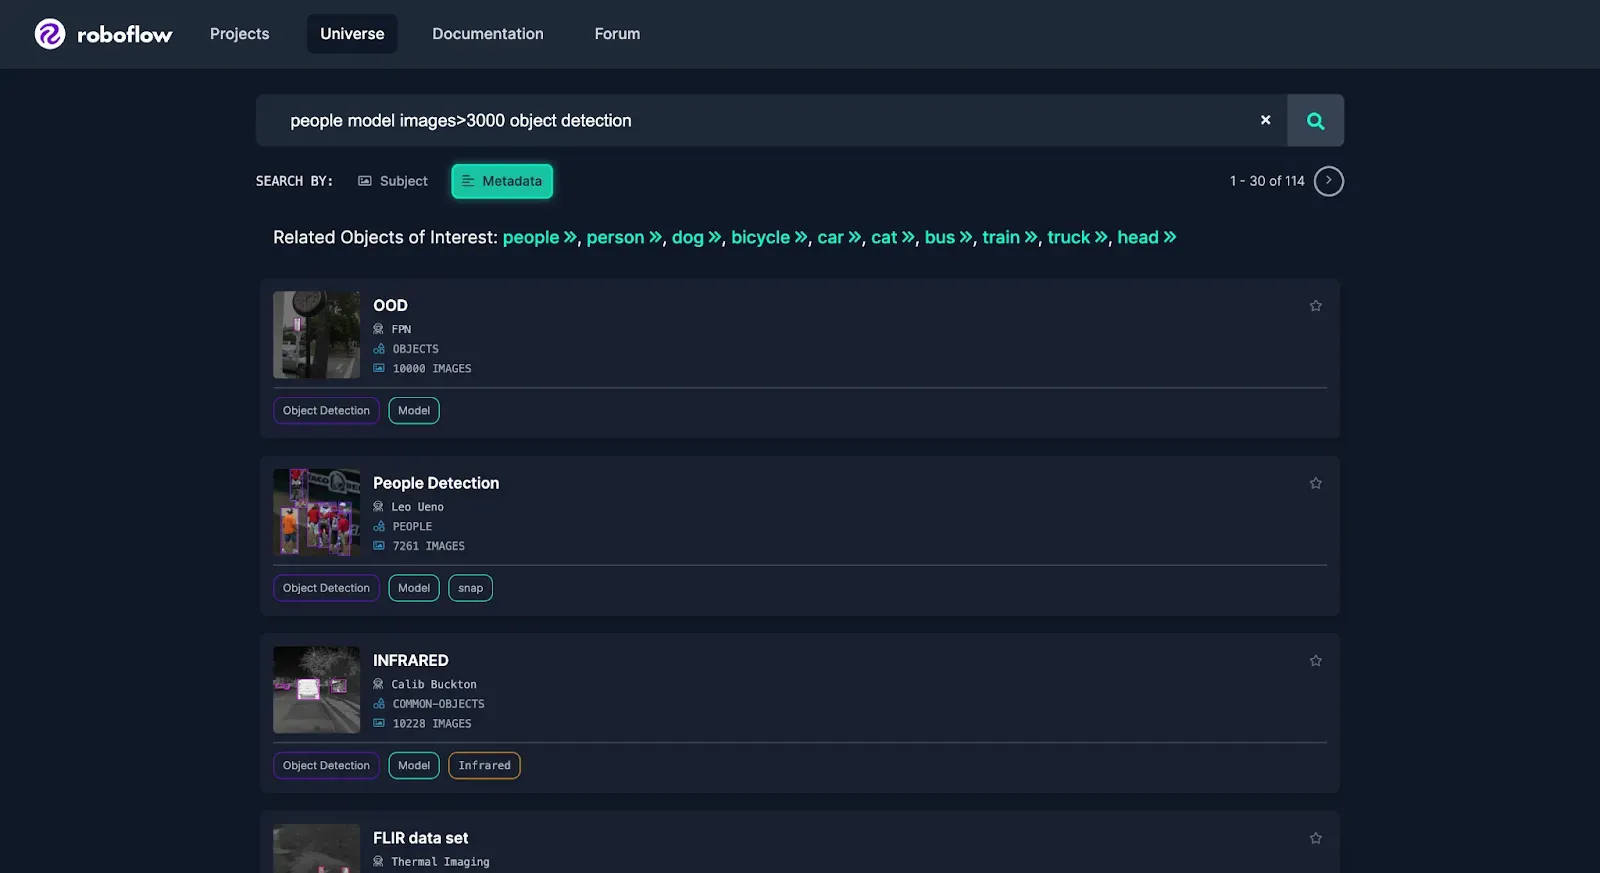
In this case, in order to evaluate how models will perform in a variety of settings it is best to use a large, generalized, diverse dataset like COCO. For this example, we’ll use a Universe dataset that has a subset of COCO limited to people.
Optional: Create your own evaluation dataset
If you want to evaluate how the model will perform in your own use case, you can try creating your own dataset without training it to see if any pre-existing models can work for you.
For example, you could capture around a hundred images or videos from where you’d like to deploy your model and then upload the images to Roboflow.
You could quickly annotate them or even have Autodistill label the images for you.
Once you have your images annotated, you can add and modify preprocessing and augmentations, then generate a version.

After creating a version, you can continue through this guide the same way, but replace the evaluation dataset download details with your own to download your project.

Step 2: Evaluate model performance
Once we have our models and an evaluation dataset, we can test the models and produce the mAP for both models using supervision’s mAP benchmark feature.
First, we’ll import the roboflow and supervision packages.
!pip install supervision roboflowDownload the Evaluation Dataset
Now, we’ll download our evaluation dataset and use the DetectionDataset.from_coco() method to get it into supervision.
from roboflow import Roboflow
rf = Roboflow(api_key="**YOUR API KEY HERE**")
project = rf.workspace("shreks-swamp").project("coco-dataset-limited--person-only")
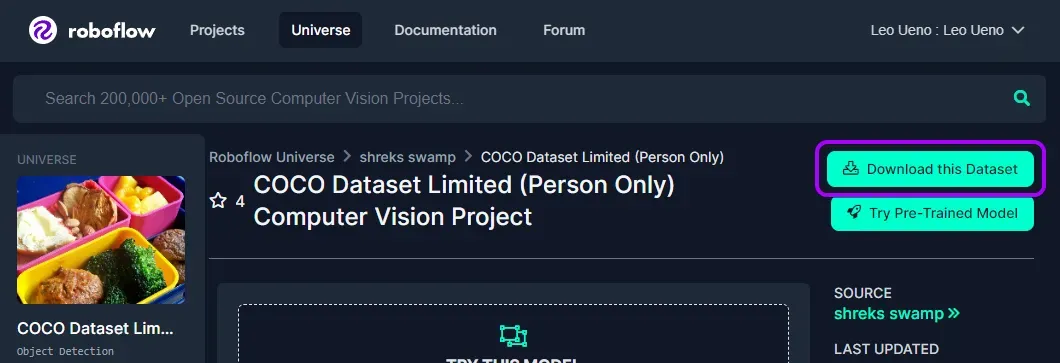
dataset = project.version(1).download("coco")To do this on your own or with your own dataset, click on the Download this Dataset button on any object detection dataset on Universe and export in COCO format.
Setting Up the Models
We can now test the models against each other. First, we will test the top result for a person detection model on Universe.
We will load our first model using our API key and project ID of the model.
api_key = "YOUR API KEY HERE"
project_id = "people-detection-o4rdr"
rf = Roboflow(api_key)
project = rf.workspace().project(project_id)
model = project.version(1).model
Then, we set up a callback function so that supervision can run the model against the images in our evaluation dataset.
def callback(image_path,ground_truth):
  image = cv2.imread(image_path)

  result = model.predict(image_path, confidence=10, overlap=30).json()
  sv_result = sv.Detections.from_inference(result)

  bounding_box_annotator = sv.BoundingBoxAnnotator()
  annotated_frame = bounding_box_annotator.annotate(
      scene=image,
      detections=sv_result
  )
  bounding_box_annotator = sv.BoundingBoxAnnotator()
  annotated_frame = bounding_box_annotator.annotate(
      scene=image,
      detections=ground_truth
  )

  sv.plot_image(image=image, size=(3, 3))
  return sv_result
Now we calculate the model’s mAP for our dataset by passing it to supervision’s benchmark.
mean_average_precision = sv.MeanAveragePrecision.benchmark(
  dataset = sv_dataset,
  callback = callback
)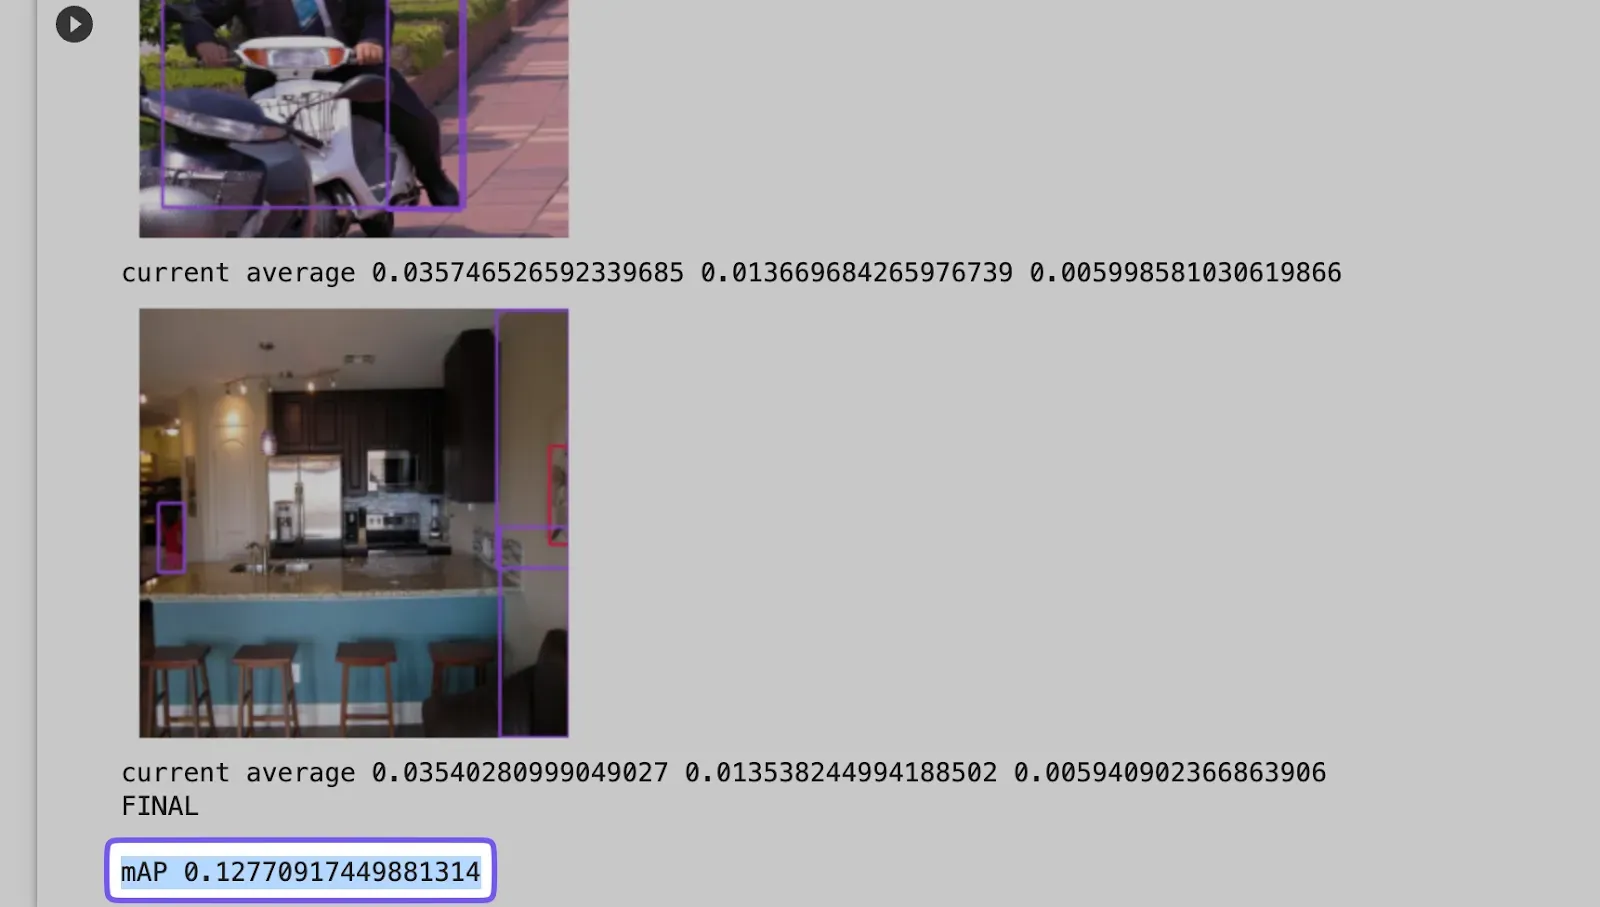
We see that despite the high mAP listed on their model page, it performed very poorly with a mAP of 12.77%.
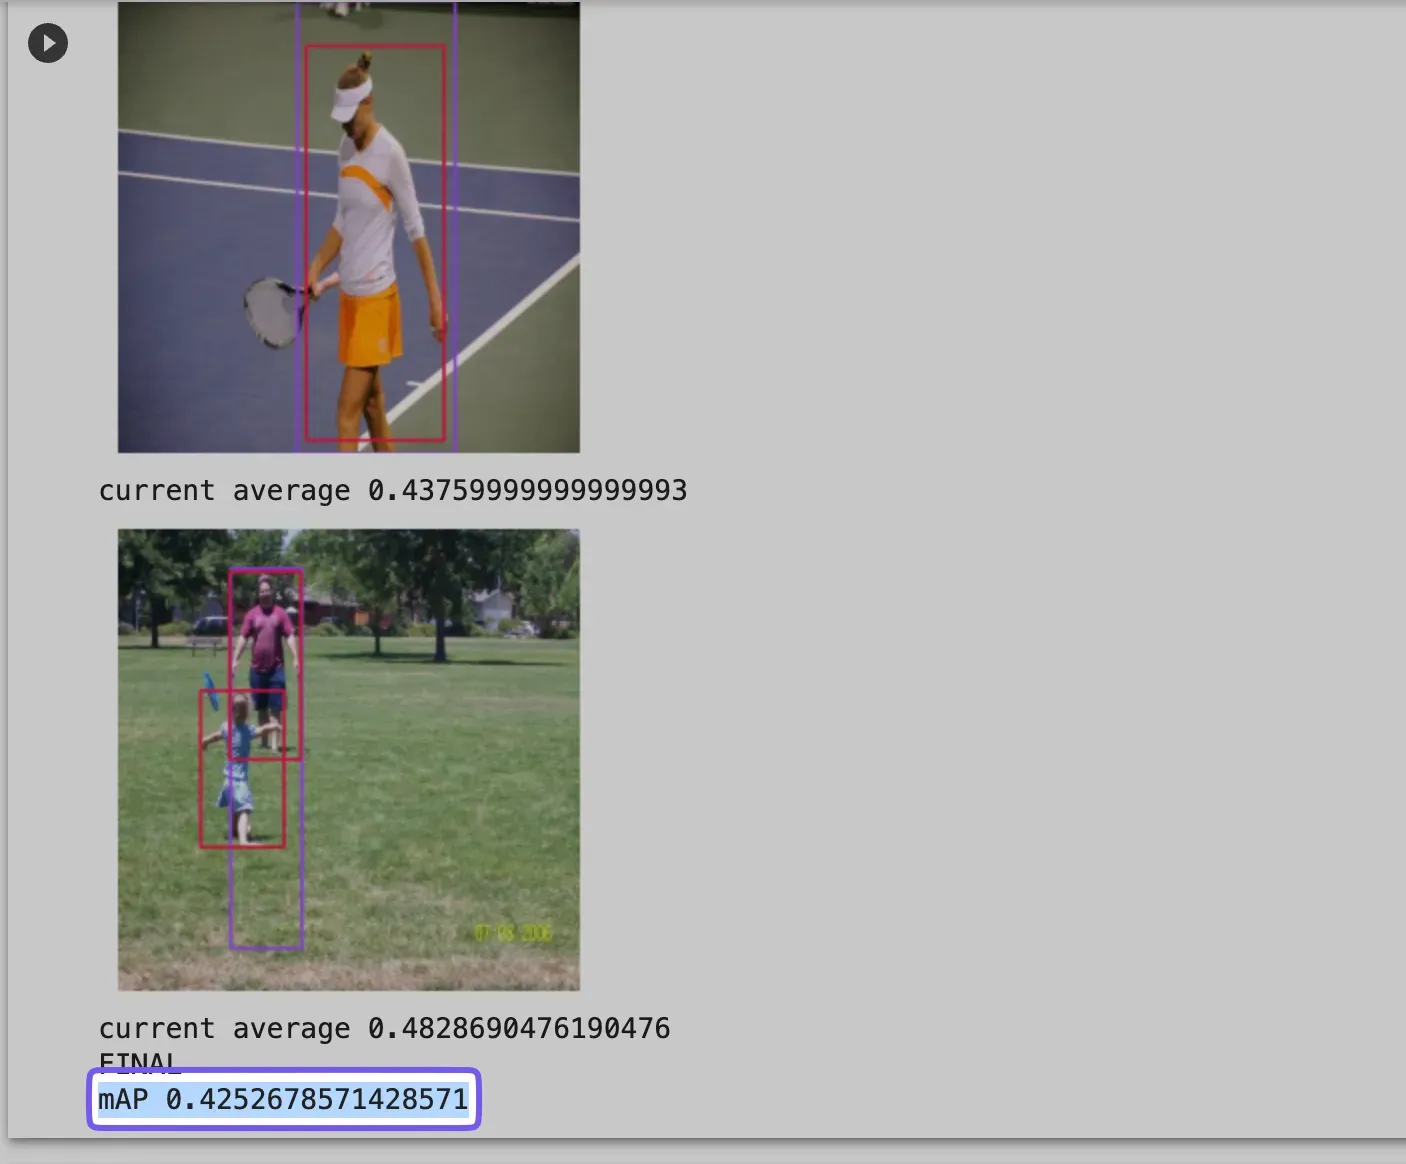
Next, we’ll compare the other model, Roboflow’s own curated person detection model. We can evaluate that model by completing the same process we just did, but by modifying the `project_id` in the first step.
Conclusion
Exploring real-world effectiveness is a difficult challenge when using computer vision, but using this process, we evaluated the performance of the two models, which revealed that one model would be ineffective for our use case.
Evaluating the datasets lets us determine how effective the models would be during real-world use without the need for testing them in the wild. Our process also lets us compare an infinite amount of models to find the best model for our use case.
Cite this Post
Use the following entry to cite this post in your research:
Leo Ueno. (Oct 24, 2023). Comparing Computer Vision Models On Custom Data. Roboflow Blog: https://blog.roboflow.com/compare-vision-models/