
Object detection can add a real-time monitoring layer to child safety by alerting caregivers when a child enters a defined hazard zone, such as the area around a swimming pool. This tutorial walks through setting up Roboflow Inference to run a trained detection model, defining polygon boundaries around the pool area in code, and triggering a visual alert when a child is detected inside those bounds. The same pattern extends to driveways, workshop areas, or any restricted zone where proximity matters.
This article was contributed to the Roboflow blog by Abirami Vina.
Introduction
Child safety is a priority for parents and caregivers, an issue society takes seriously. While traditional safety measures are indispensable, technology is opening up new avenues for enhancing our ability to ensure child safety in various environments, especially with respect to computer vision.
One standout feature of computer vision is its exceptional capability for real-time monitoring, which offers an extra layer of security that is particularly invaluable for keeping an eye on kids.
In this article, we'll explore computer vision applications aimed at child safety. We'll also walk through a comprehensive tutorial on harnessing the power of computer vision to make your pool area a safer space for little ones. Let's get started!
Computer Vision and In-Home Safety
First, let's understand what object detection is and why it's relevant for toddler safety. Object detection is a specialized technique within the expansive field of computer vision. It employs machine learning algorithms to identify specific objects - in this case, toddlers - in digital images and videos. This technology offers real-time tracking capabilities, adding a crucial layer of security that can be a game-changer in child safety scenarios.
Safety Applications
Object detection can be fine-tuned to serve as a guardian in various contexts. For example, you can set up a system that sends immediate alerts if a child gets too close to a swimming pool, dramatically reducing the risk of drowning. But it doesn't stop there.
Object detection can also monitor areas that are off-limits to children, like workshops filled with hazardous tools, and send you real-time alerts if a boundary is crossed. And, for those concerned about the dangers of traffic, systems can be installed near driveways or busy streets to notify caregivers if a child steps into these high-risk zones.

Convenience Applications
Object detection isn't just about safety; it also offers a level of convenience that can make life easier. Imagine automated baby gates that open only when an adult approaches or a smart crib monitoring system that sends text or phone alerts for unusual activity, like a baby trying to climb out. These IoT convenience features can simplify daily routines and offer parents a breather.
Well-being Applications
Beyond safety and convenience, this technology can also be employed for child activity tracking, offering valuable data that can be useful for developmental milestones. Additionally, sleep monitoring systems can be set up to provide insights into a child's sleep patterns, helping parents understand sleep quality and identify any potential issues.
Applying Object Detection for Pool Area Monitoring
Let’s use a trained object detection model to detect children and analyze an image of a kid playing in the backyard near a pool. In this guide, we’ll focus on how to apply an object detection model rather than how to train an object detection model to detect children. For more information on creating your own object detection model, take a look at our guide to RF-DETR, a real-time transformer-based object detection model.
A Trained Object Detection Model
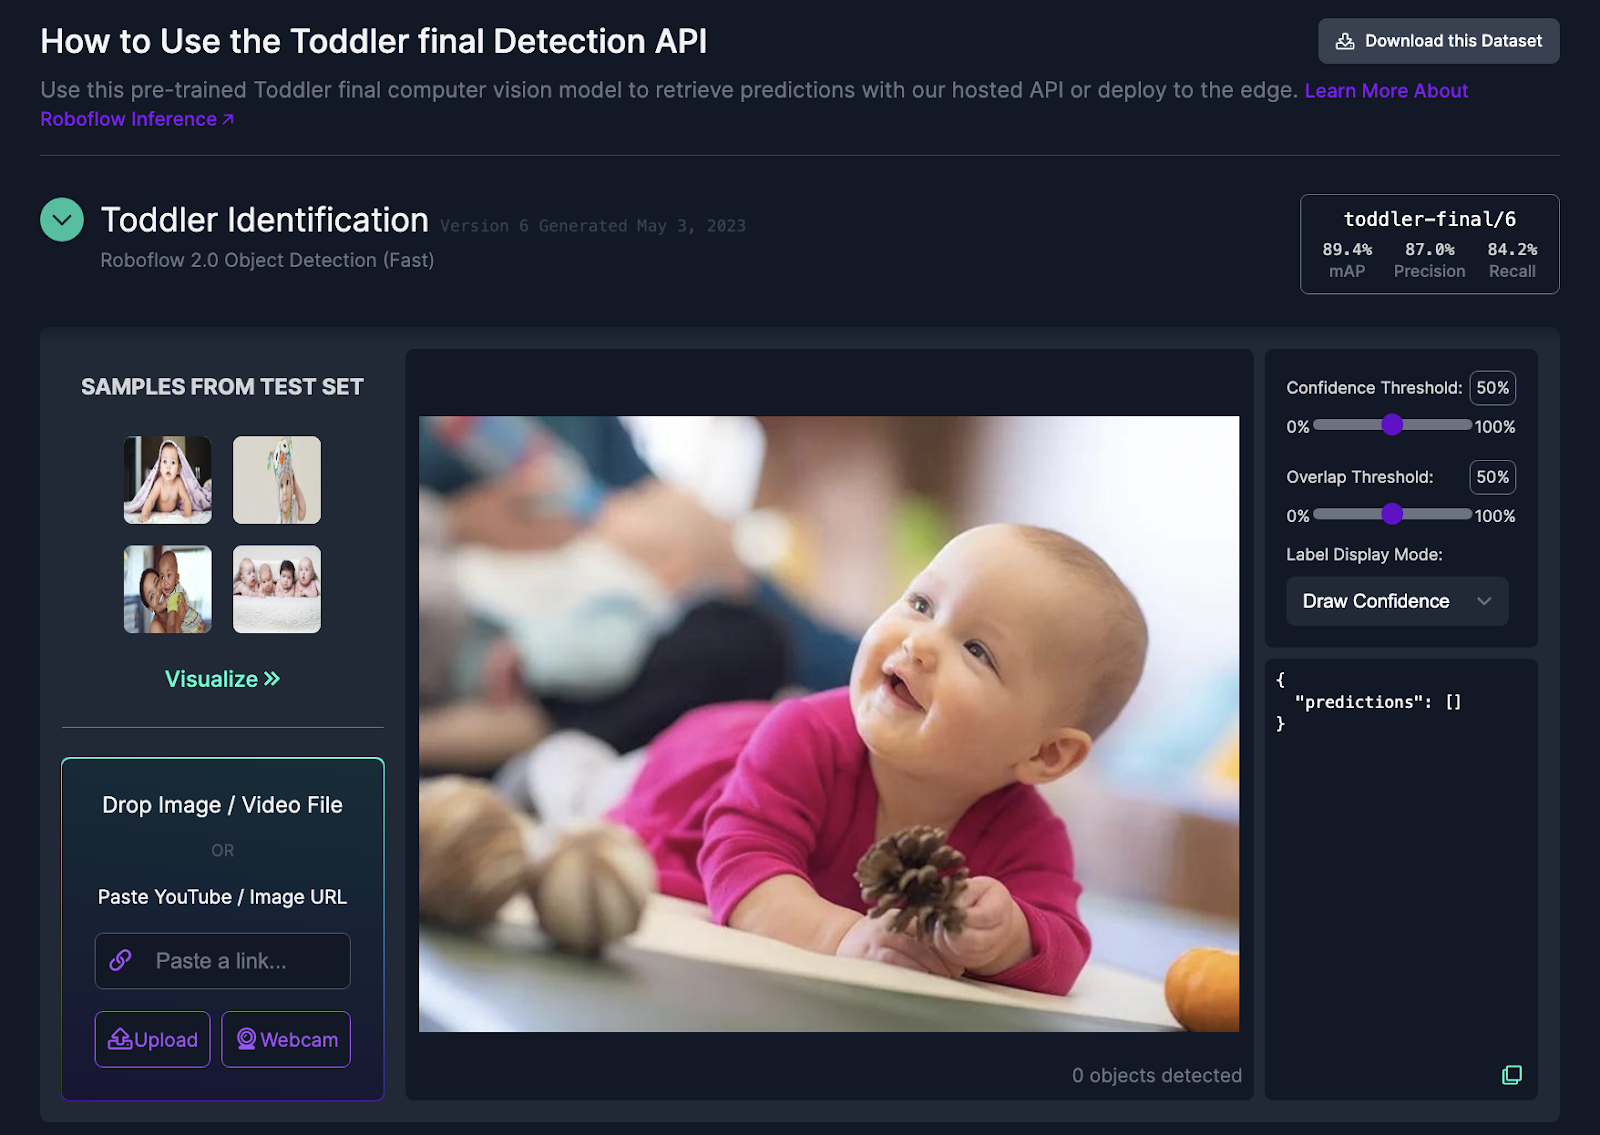
We'll be using a trained toddler object detection model from Roboflow Universe. Roboflow Universe is a platform that is a hub for open-source computer vision datasets and models, featuring an extensive library with more than 200,000 datasets and 50,000 ready-to-use models. To get started, create a Roboflow account and head over to the page where the model is deployed, as indicated below.
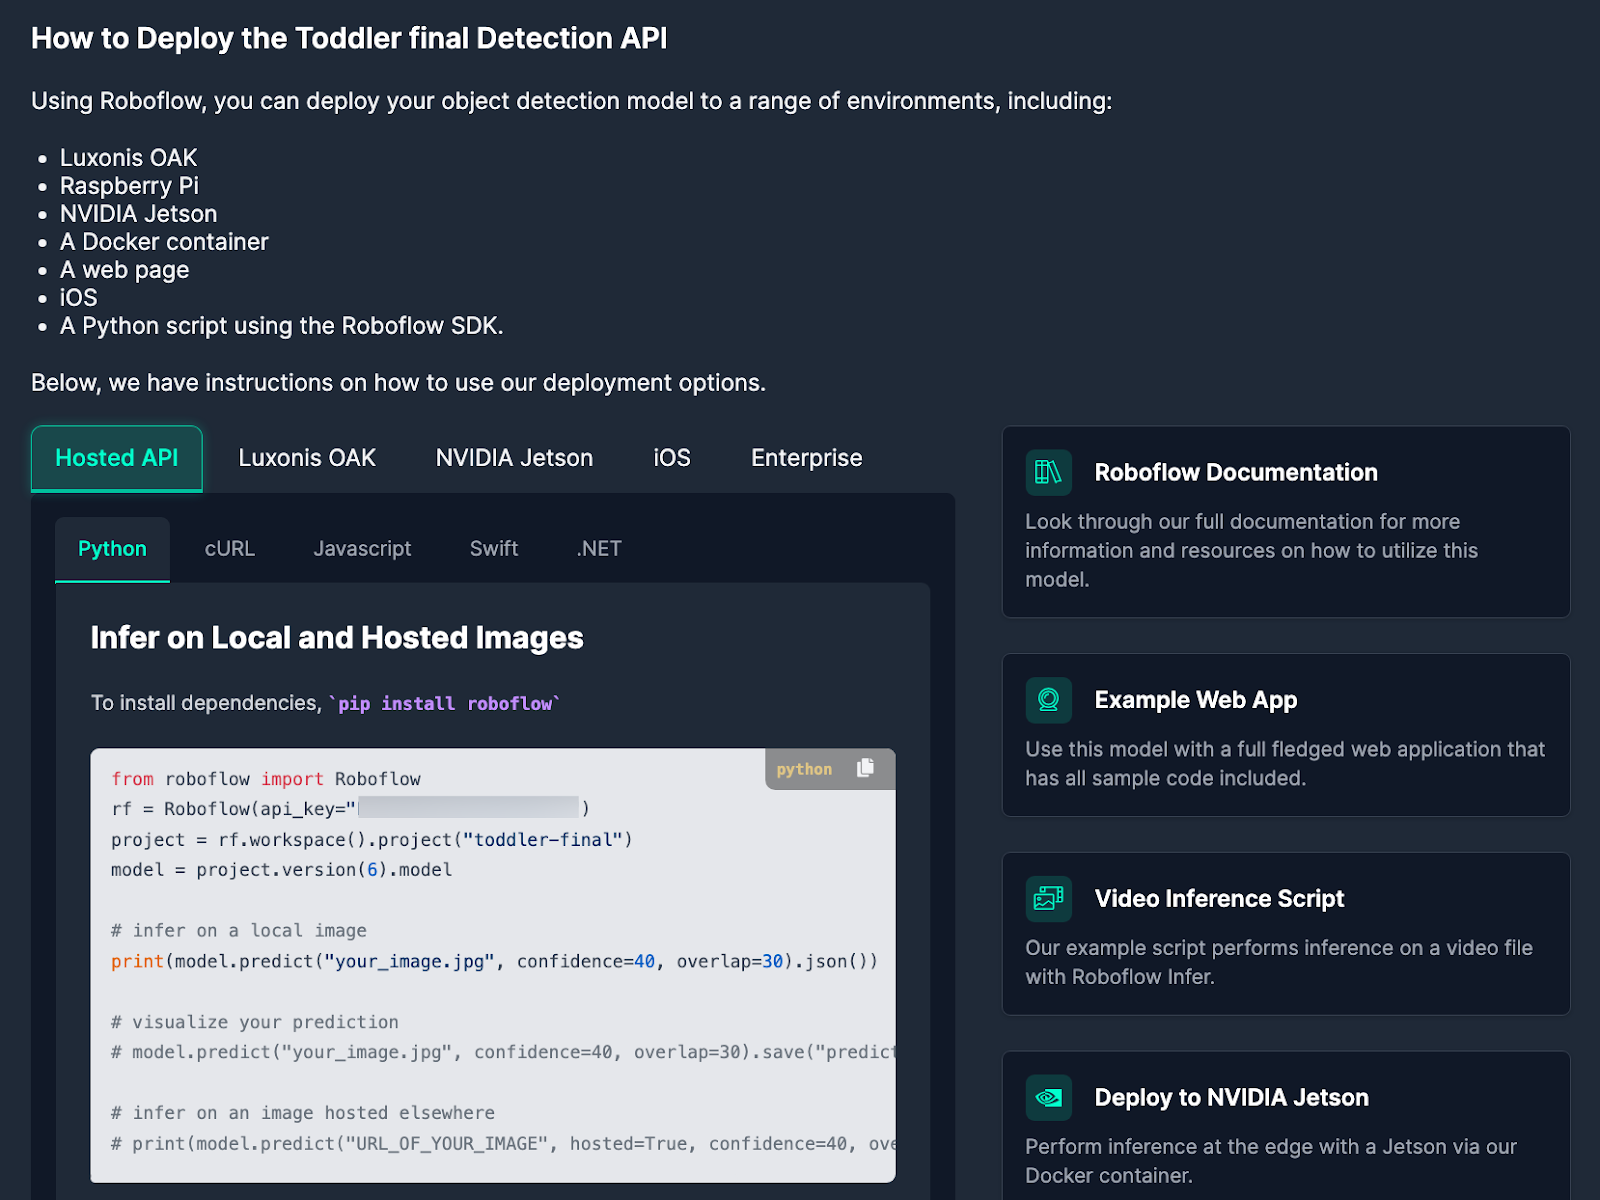
Upon scrolling down, you’ll see a piece of sample code that shows how to deploy the API for this model, as shown below. Ensure to note down the model ID and version number from the third and fourth lines of the sample code. In this case, the model ID is “toddler-final,” and it’s the sixth version of the model. This information will come in handy when we assemble our inference script.
Code Walk-through for Monitoring Kids Near a Pool
Our objective is to create a boundary around the pool that can be considered a danger zone, and if the child is within this boundary, an alert should be displayed to warn that the kid is near the pool.
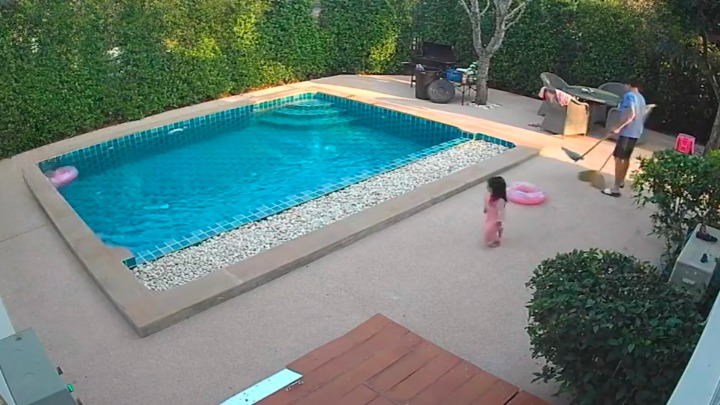
I’ve downloaded a relevant image (as shown below) from the internet to illustrate monitoring kids playing near a pool. You can do the same or use your own relevant images.
We'll use the Roboflow Inference Server, a microservice interface that operates over HTTP, for executing our inference operations. This service offers both a Python library and a Docker interface. We'll go for the Python library, as it's more streamlined and ideal for projects centered around Python.
Step1: Setting up Roboflow Inference
For CPU-based installation of Roboflow Inference, execute the following command:
For a GPU-based setup, use this command instead:
Step 2: Defining Boundaries for the Pool Area
Using the OpenCV library, we can designate specific areas as 'danger zones' for children, such as the pool area in our example. The code snippet provided below enables us to interactively draw points to form a polygon directly on a frame. By doing so, we can outline the pool area or any other region we wish to monitor.
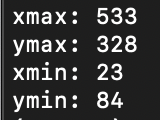
Once the polygon is drawn, the code will calculate the maximum and minimum values for both the x and y coordinates of the polygon points. These calculated values will then be used to draw a rectangular boundary around the designated pool area, marking it as a danger zone for children.
Here’s a GIF that shows what the process of defining the boundary by dragging and dropping looks like:
The output that is displayed after the boundary is drawn is shown below.
Step 3: Detecting Children in the Image
The following code helps us run inference tasks using the trained toddler object detection model.
Step 4: Checking if the Detected Children Are Inside the Danger Zone
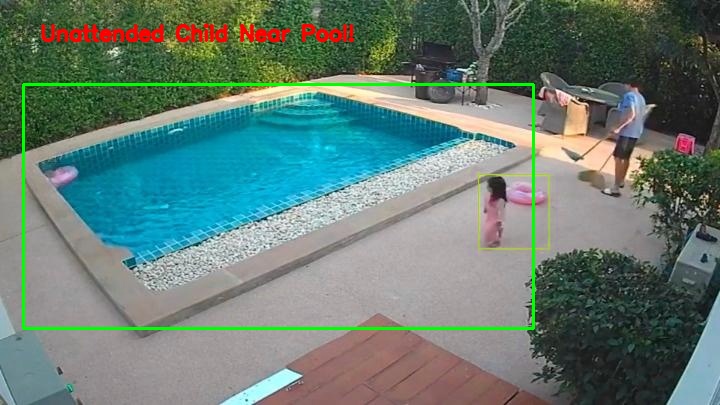
The final piece of code uses the defined boundary coordinates and the bounding box of the detected children to check if any kids are inside the danger zone.
The output is displayed as follows:

Conclusion
In this article, we've illustrated the power of object detection with respect to child safety. We've seen how this technology can be a game-changer, offering real-time monitoring capabilities that can significantly enhance our ability to keep children safe. The applications are diverse and impactful, from pool area monitoring to restricted zones and traffic safety.
With this post, we've only scratched the surface. The potential for computer vision to revolutionize child safety is immense. Whether it's predictive analytics for potential hazards or real-time alerts for caregivers, the possibilities are endless. We encourage you to dive deeper, explore these technologies, and consider implementing them in your own safety measures. After all, when it comes to the safety of our youngest, every extra layer of protection counts.
Cite this Post
Use the following entry to cite this post in your research:
Contributing Writer. (Sep 20, 2023). Enhancing Child Safety with Computer Vision. Roboflow Blog: https://blog.roboflow.com/enhancing-child-safety-with-computer-vision/