
The performance of any autonomous robotics system is only as good as the quality of visual data it learns from. Whether you're building a warehouse picking robot, an agricultural drone, a surgical assistant, or a manufacturing inspection arm, your computer vision model needs to understand the world with sub-pixel precision. This understanding starts with one critical step: high-quality image annotation.
Robotics presents unique challenges that separate it from general computer vision tasks. Robots tend to operate in dynamic, uncontrolled environments with varying lighting conditions, frequent occlusions from other objects or robot appendages, motion blur from fast-moving components, and the need for millimeter-level spatial accuracy in real time. A loose bounding box might work for a social media filter. But in robotics, it could mean the difference between a successful grasp and a crushed component, or worse, a safety incident.
In this comprehensive guide, we'll walk you through the complete professional workflow for setting up a robotics vision project. You'll learn how to establish your Roboflow workspace, choose the right annotation project type for your specific robotics application, and implement industry-standard best practices that prevent costly errors in production. By the end, you'll have a clear roadmap to build datasets that power safe, efficient, and reliable robotic systems.
See how Almond's use of foundational and purpose-built vision models results in highly adaptable robotics solutions for complex manufacturing tasks.
What Is Data Annotation for Robotics?
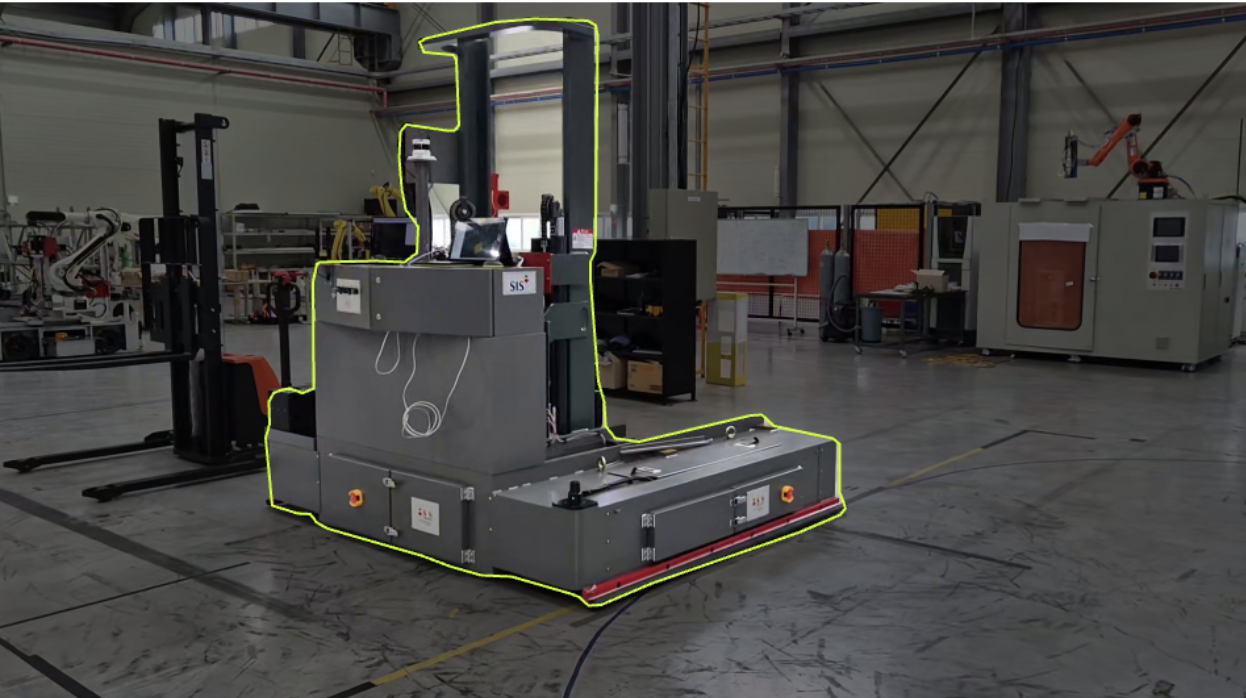
Data annotation, also known as data labeling, is the process of attaching meaningful labels, tags, or spatial information to raw visual data. For robotics applications, this means identifying and marking objects, obstacles, parts, keypoints, or regions of interest in images or video frames captured by your robot's cameras.
Think of annotation as programming your robot's visual understanding. Every bounding box, every polygon vertex, every keypoint placement is an instruction teaching the robot what to see and how to interpret its world.
How to Set Up Your Robotics Vision Environment
Before you draw a single annotation, you need a centralized platform to manage your data pipeline. Roboflow provides the end-to-end infrastructure needed to move from raw camera frames to a production-ready trained model, with built-in version control, team collaboration, and deployment tools.
Step 1: Create Your Workspace
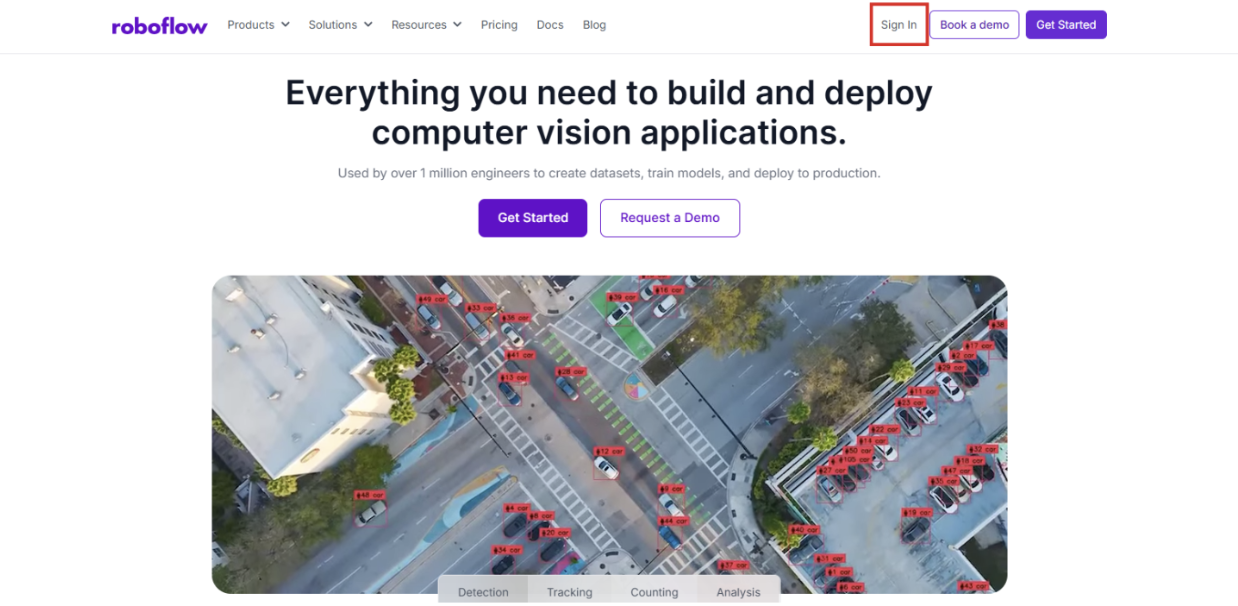
First, navigate to Roboflow and sign in to your account. If you don't have an account yet, sign up for free; it takes just a minute.
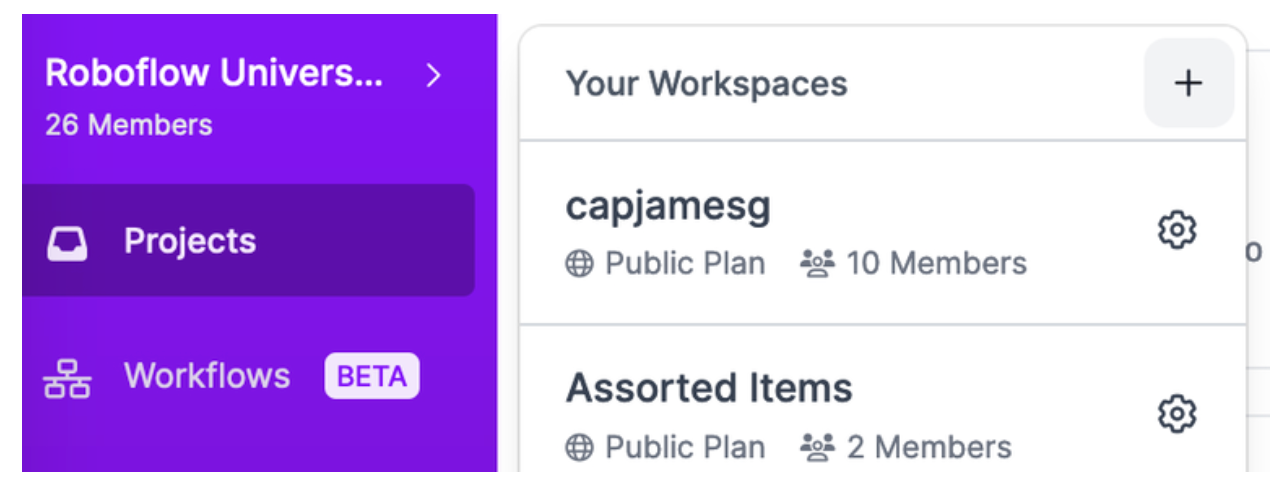
If you're working within a team, which is common in robotics engineering, establish a dedicated Workspace. This allows multiple engineers to collaborate on the same datasets, manage versions, track annotation progress, and maintain consistent labelling standards across your organization. Workspaces are crucial for maintaining data governance and ensuring that everyone is working from the same ground truth.
Step 2: Initialize a Project
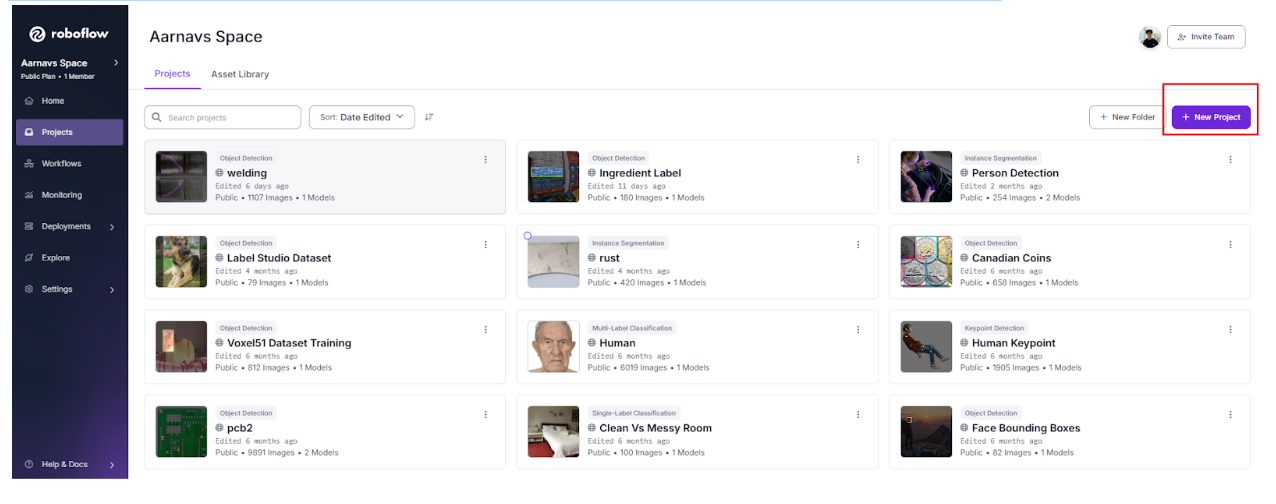
Once your workspace is ready, click "Create New Project" from your workspace dashboard. For robotics applications, naming conventions are vital for long-term project management. Use descriptive names that include the environment, robot type, or specific task.
Good naming examples:
- Bin-Picking-Warehouse-A
- Surgical-Tool-Detection-OR3
- Drone-Obstacle-Avoidance-Outdoor
- Assembly-Line-QC-Station2
Clear, consistent naming prevents confusion when you're managing dozens of dataset versions across multiple robotic platforms or deployment environments.
Step 3: Choosing and Uploading Images
Robots can generate enormous amounts of video data. However, uploading every single frame creates massive redundant datasets and slows down training. Instead, use sampling strategies:
- Temporal sampling: Extract frames every N seconds rather than every frame
- Event-based sampling: Capture frames when the robot encounters specific scenarios (e.g., failed grasps, detected anomalies)
- Diversity sampling: Select frames that represent different lighting, angles, or object configurations
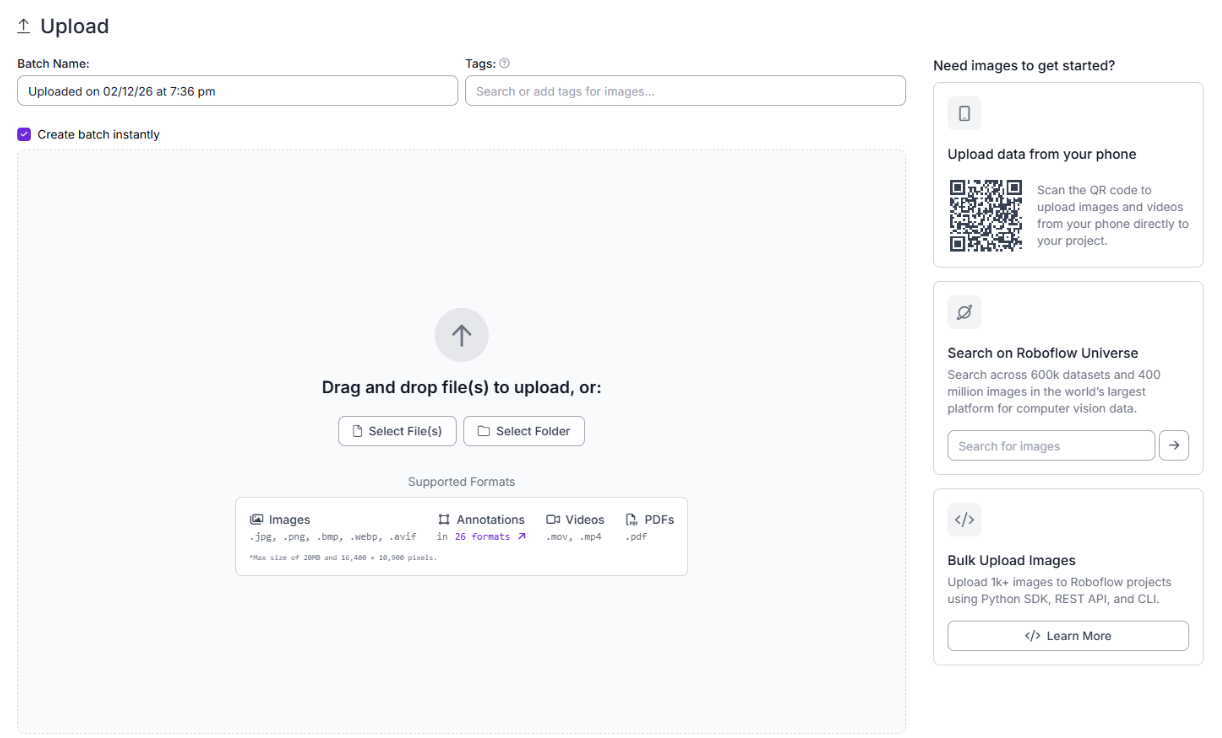
You can upload your data via the Roboflow Dashboard by dragging and dropping files, or use the Roboflow Python SDK to automate uploads directly from your robot's edge device or data collection pipeline.
Choose Your Robotics Annotation Approach
For robotics projects, you'll need to decide how to annotate your dataset. The right approach depends on your dataset size, available resources, and accuracy requirements. Here are the primary methods used in robotics vision projects:
Manual Annotation
Human annotators label every image by hand. While time-consuming, this method produces the highest-quality labels when done by domain experts who understand the robotics application.

When to use manual annotation for robotics:
- Small, critical datasets (surgical robotics, safety-critical systems)
- When you need pixel-perfect accuracy for manipulation tasks
- Initial dataset creation before any model exists
- When edge cases require expert judgment (damaged parts, unusual orientations)
Pros: Highest quality, full human oversight, excellent for edge cases
Cons: Slowest method, expensive at scale, prone to annotator fatigue
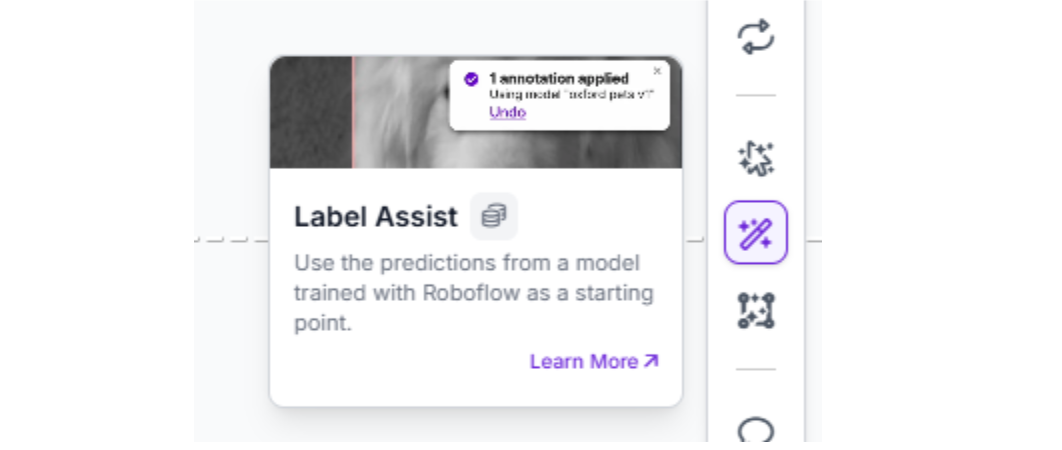
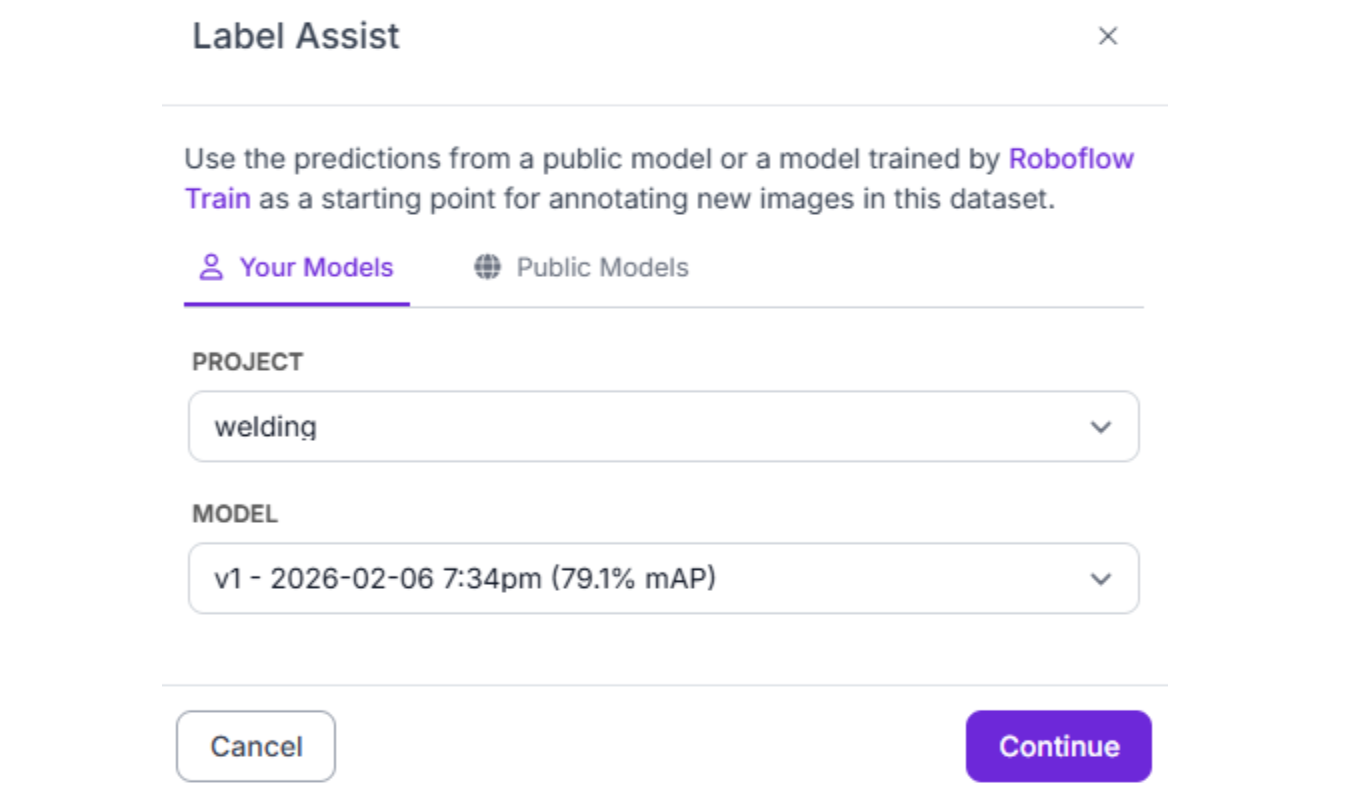
Semi-Automatic Annotation with Label Assist
Label Assist uses a pre-trained model checkpoint to generate suggested annotations that human reviewers verify and correct. This dramatically accelerates the labeling process while maintaining quality control.
When to use Label Assist for robotics:
- After training an initial model on manually labelled data
- Large-scale dataset expansion (thousands of images)
- When objects are relatively consistent but require verification
- Iterative model improvement cycles
Pros: 5-10x faster than manual, maintains quality through human review, learns from corrections
Cons: Requires an initially trained model, still needs human oversight
Robotics workflow example: Manually annotate 500 images → Train initial model → Use Label Assist to pre-annotate 5,000 more images → Annotators review and correct in minutes rather than hours → Retrain with 5,500 high-quality labels
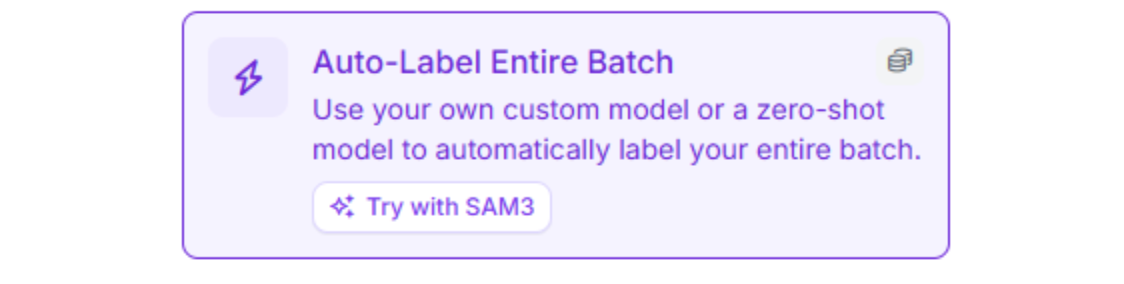
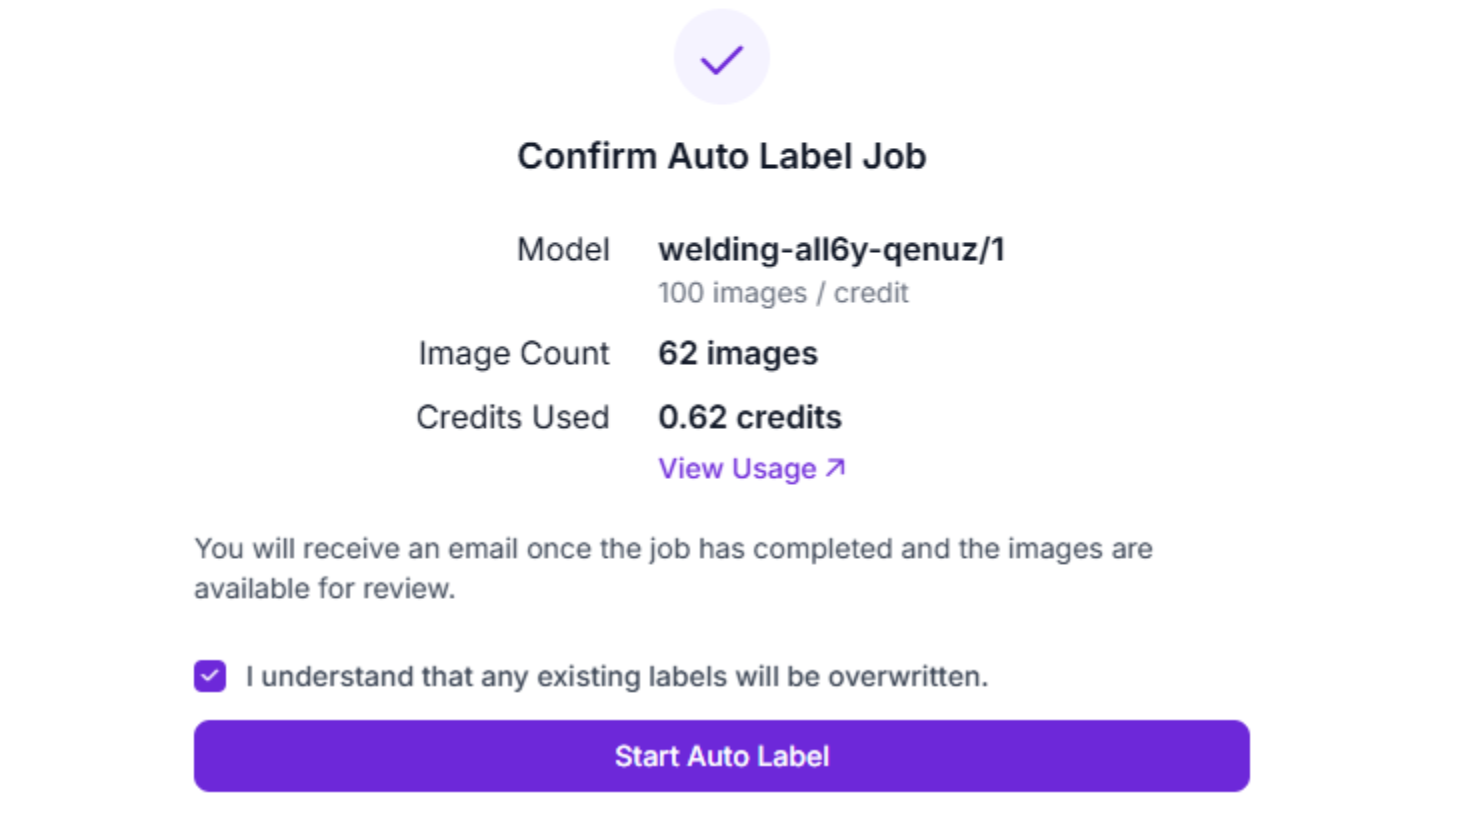
Automatic Annotation with Foundation Models
Auto Label leverages large foundation models (like Grounding DINO or Segment Anything) to automatically label images based on text prompts describing each class.
When to use Auto Label for robotics:
- Rapid prototyping or proof-of-concept projects
- When you need quick initial labels to start model training
- For common objects that foundation models recognize well
- When the annotation budget is extremely limited
Pros: Fastest method, no manual labelling required, good for common objects Cons: Lower accuracy than manual, struggles with domain-specific robotics parts, may require significant review and correction
Critical note: For production robotics systems where safety is paramount, automatic annotation should always be followed by thorough human review. A bin-picking robot trained on automatically labeled data may have acceptable performance, but a surgical robot absolutely cannot.
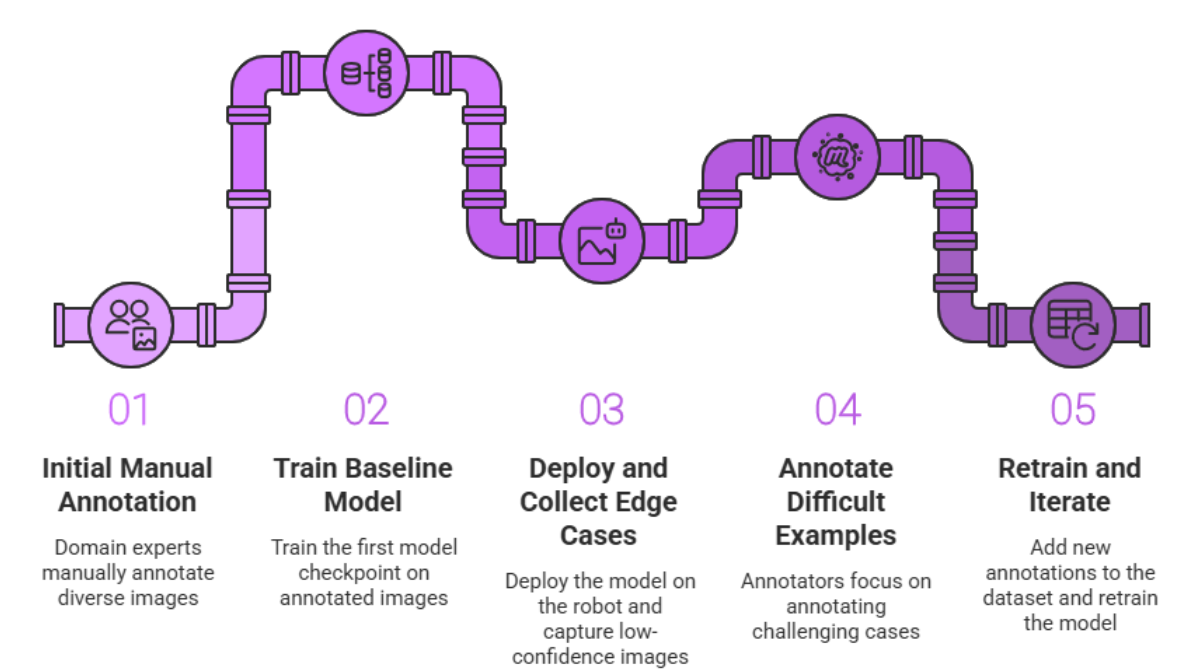
Active Learning: The Optimal Robotics Strategy
For large-scale robotics projects, active learning combines human expertise with machine efficiency to create the highest-quality datasets at scale.
Active learning workflow for robotics:
- Initial manual annotation: Domain experts manually annotate 300-1,000 diverse images representing your robot's environment
- Train baseline model: Train your first model checkpoint on this high-quality foundation
- Deploy and collect edge cases: Deploy the model on your robot and automatically capture images where the model has low confidence (<70%)
- Annotate difficult examples: Annotators focus only on these challenging cases, not random images
- Retrain and iterate: Add the newly labeled difficult examples to your dataset and retrain
- Repeat: Continue this cycle, each time targeting the model's weaknesses
Why active learning is ideal for robotics:
- Focuses human effort on the hardest, most valuable examples (unusual poses, lighting, occlusions)
- Prevents wasting time on redundant "easy" images the model already handles well
- Continuously improves model performance in real deployment conditions
- Maximizes ROI on annotation budget
For robotics applications that must operate reliably in diverse, changing environments, like warehouse robots encountering new products or agricultural robots dealing with seasonal variations, active learning is often the most cost-effective path to production-ready models.
How to Select the Right Project Type for Robotics
Robotics applications require different levels of spatial awareness depending on the task. Choosing the correct project type is the foundation of a successful deployment. Let's explore the primary project types used in robotics and when to use each one.
1. Object Detection
Object detection is the most common choice for robotics applications. It involves drawing a rectangular bounding box around objects of interest. The model learns to predict both the class of the object and its location in the image.
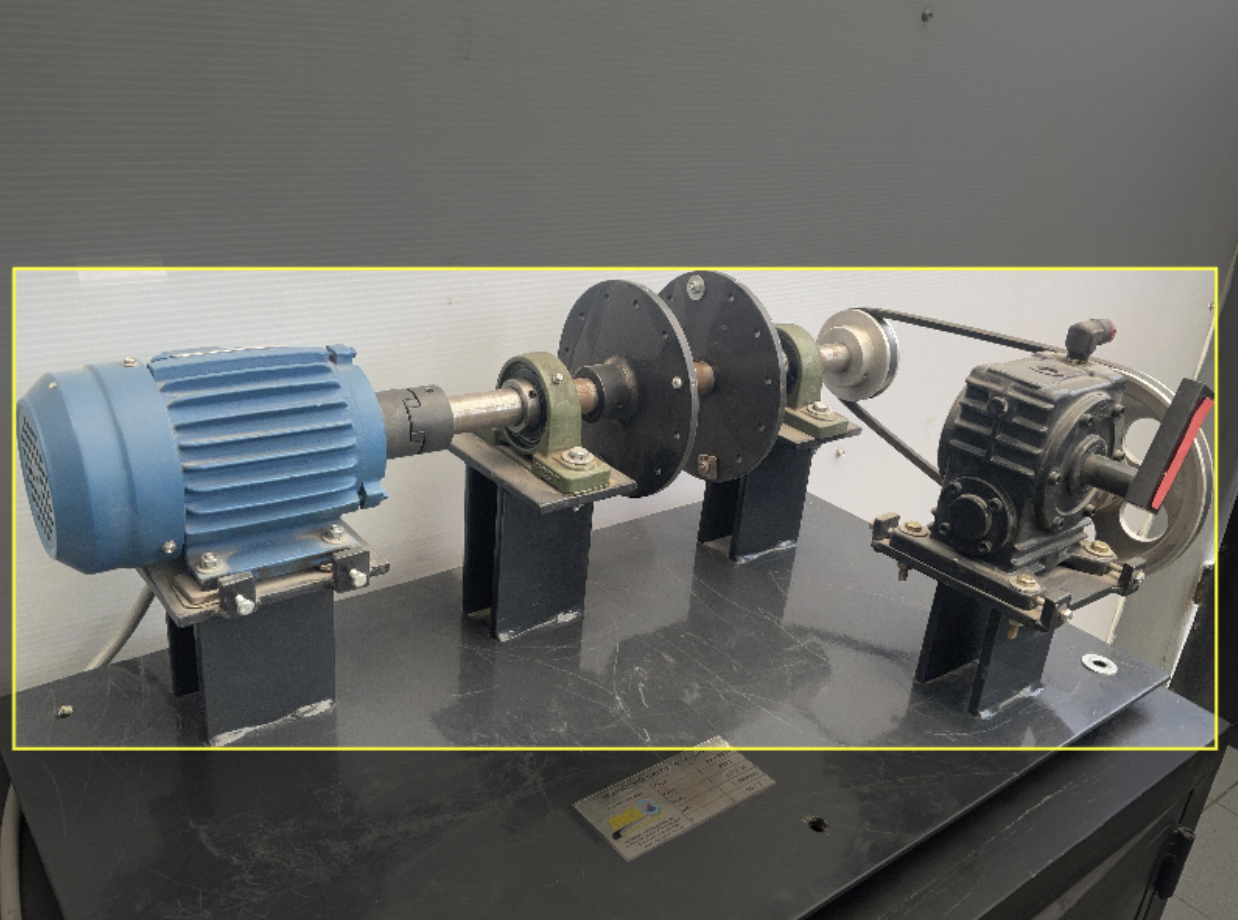
Ideal use cases for robotics:
- Obstacle Avoidance: Identifying pedestrians, walls, furniture, or other robots in a mobile robot's path
- General Navigation: Detecting doorways, charging stations, or waypoint markers
- Pick-and-Place (Simple Scenarios): When objects have regular shapes and don't overlap significantly
- Quality Control: Identifying defects, missing components, or incorrect assemblies on a production line
Recommended models: For robotics, RF-DETR offers state-of-the-art accuracy with real-time inference speeds (60+ FPS on edge GPUs). It's particularly well-suited for robotics because of its transformer-based architecture that handles occlusions and varying object scales effectively. Other excellent choices include YOLO26, YOLO11 and YOLOv8, which offer different speed-accuracy tradeoffs.
2. Instance Segmentation
For tasks requiring millimeter-level precision, instance segmentation provides a pixel-perfect mask for every individual object. Unlike object detection's rectangular boxes, instance segmentation traces the exact contour of each object.

Ideal use cases for robotics:
- Robotic Grasping: When the robot needs to know exactly where a handle starts and ends, or where to apply grip force
- Bin Picking: Segmenting individual overlapping parts in cluttered bins where objects are jumbled together
- Surgical Robotics: Identifying the exact boundaries of tissue, organs, or surgical instruments
- Agriculture: Precisely locating fruit or vegetables for selective harvesting without damaging the plant
- Deformable Object Manipulation: Handling fabric, cables, or food items that don't maintain rigid shapes
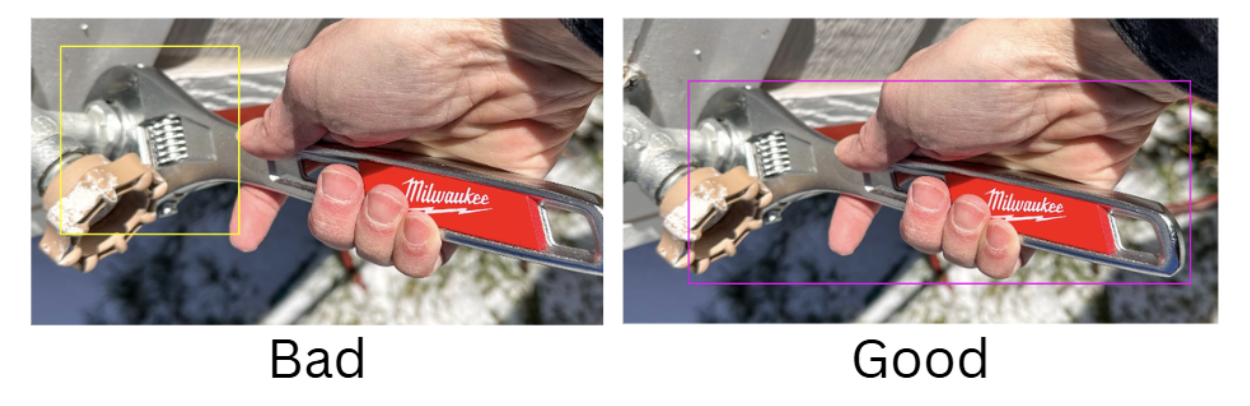
Why instance segmentation matters for robotics: A bounding box is often too coarse for manipulation tasks. If you're training a robot to pick up a wrench, it needs to know the exact pixels where the handle is, not a rectangular approximation that includes space around it. This precision is critical for calculating proper grasp poses and applying appropriate force.
Recommended models: RF-DETR Segmentation, YOLO26 Instance Segmentation, YOLOv8 Instance Segmentation, and YOLO11 Instance Segmentation all provide excellent real-time performance for robotic applications.
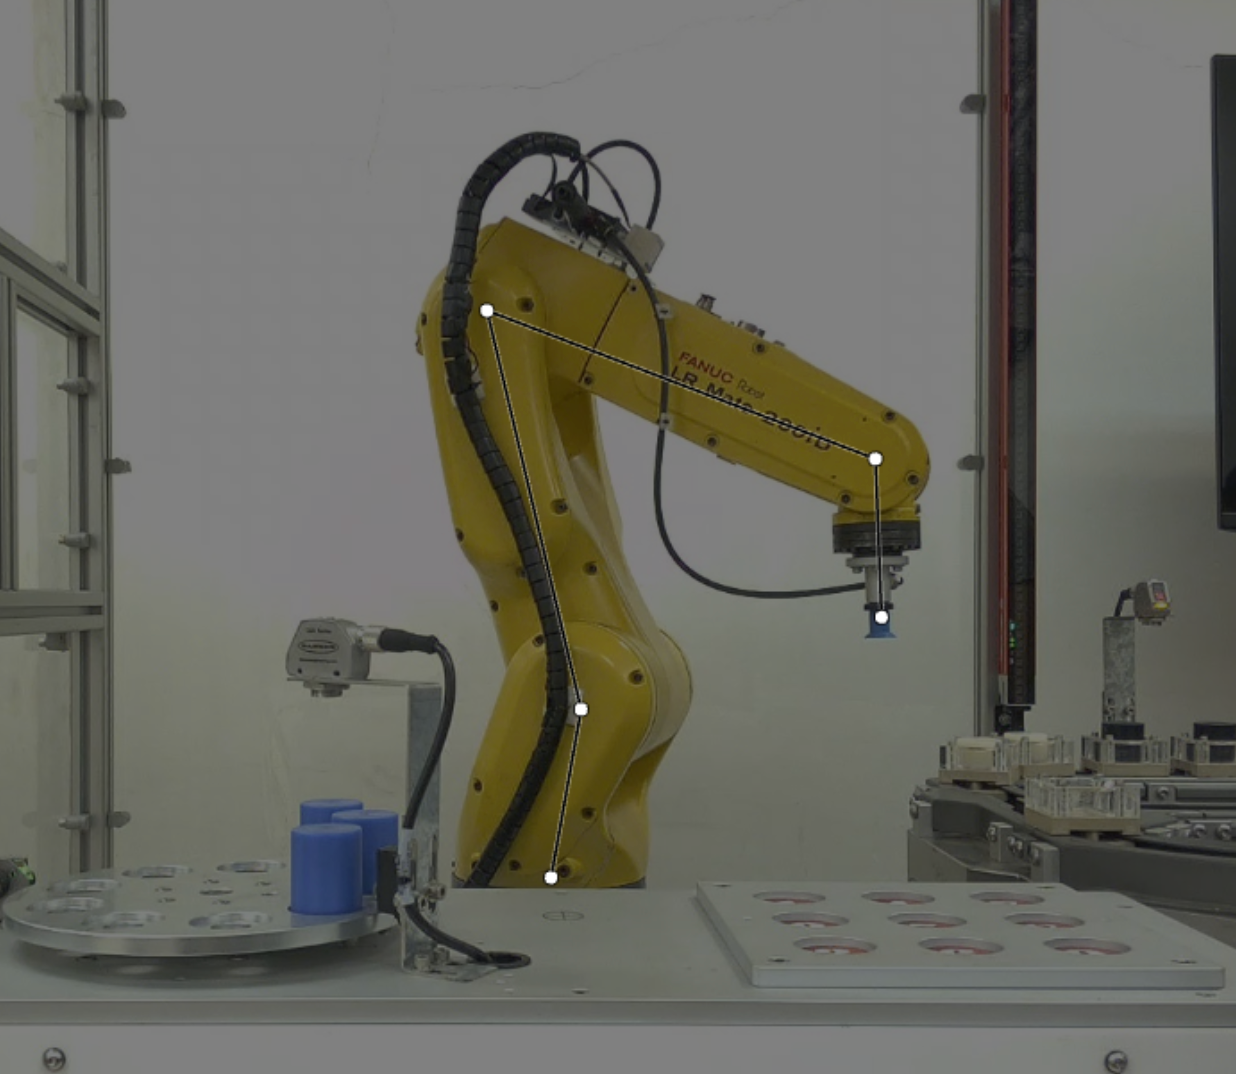
3. Keypoint Detection
Keypoint detection, also known as pose estimation, identifies specific points of interest on an object or person. Instead of outlining the entire object, you label strategic points like joints, corners, or control points.

Ideal use cases for robotics:
- Human-Robot Interaction (HRI): Tracking human body keypoints (shoulders, elbows, wrists) to understand gestures or predict motion
- Collaborative Robots (Cobots): Ensuring safe operation by monitoring where human operators are positioned
- Articulated Object Tracking: Following the state of doors, drawers, or multi-jointed mechanisms
- Tool Pose Estimation: Determining the 3D orientation of grasped tools or end effectors
- Assembly Verification: Checking if components are aligned at specific connection points
Why keypoint detection is useful: For a collaborative robot working alongside humans, knowing someone's exact elbow and wrist position allows it to predict their next movement and adjust its path to avoid collision, something a simple person bounding box cannot provide.
Recommended models: YOLO-NAS Pose Keypoint
4. Classification
While less common than the above types, classification has specific robotics use cases where you only need to know what is in the image, not where it is located.
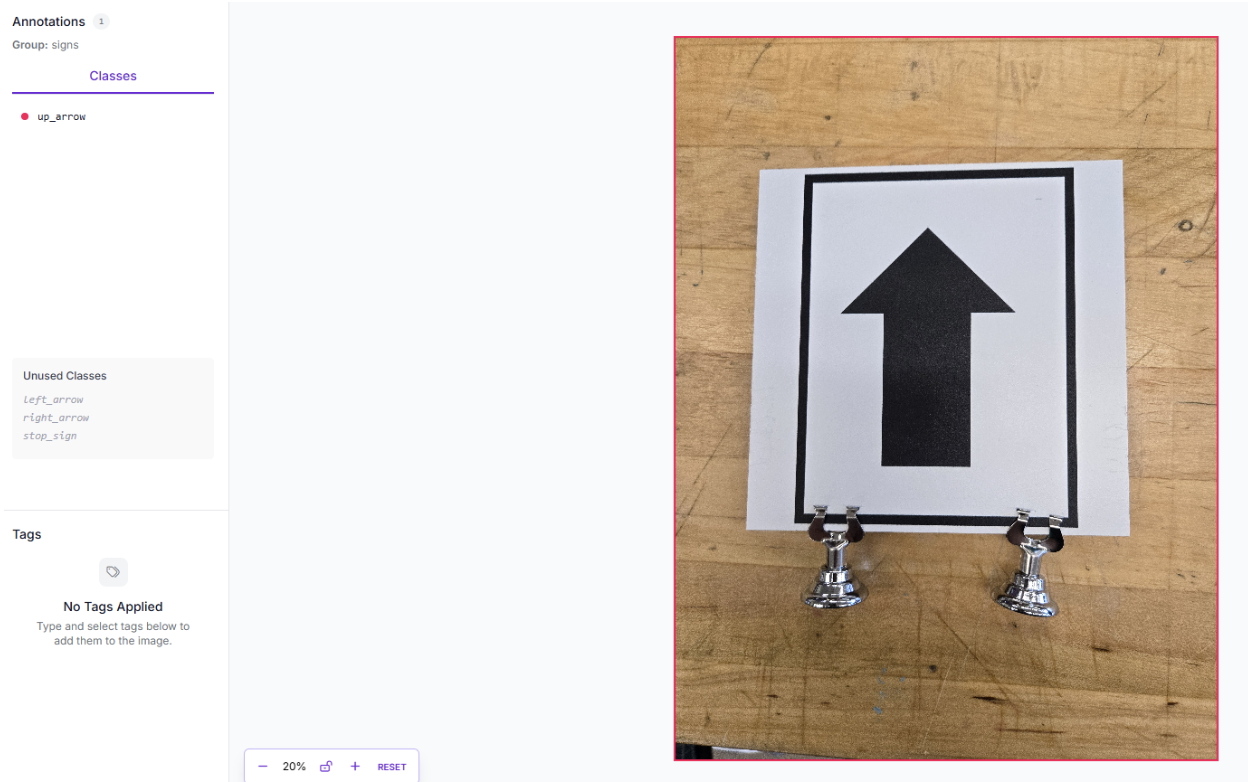
Ideal use cases for robotics:
- Binary Decision Making: "Is the gripper holding an object?" or "Is the workspace clear?"
- Quality Pass/Fail: Whole-image inspection for defects
- State Classification: "Is the door open or closed?"
Recommended models: MetaCLIP
High-Quality Annotation Best Practices for Robotics
High-quality annotations are the difference between a robot that consistently performs its task and one that requires constant human intervention. Poor annotations lead to model "drift," false positives in production, and potentially dangerous robot behavior.
These best practices represent condensed wisdom from thousands of robotics deployments. They're essential engineering requirements for robots operating in the real world.
Core Annotation Principles
Before diving into specific techniques, internalize these fundamental rules that apply to all robotics annotation:
1. Label Every Object Instance
Computer vision models learn by recognizing patterns. If you skip labeling an object in some images but label it in others, the model learns that the object is optional or not always present, introducing false negatives.
Rule: If an object of interest is visible in the frame, label it. Every. Single. Time.
Robotics example: A mobile robot navigating a warehouse must detect all pallets, not just the ones directly in its path. Inconsistently labeled pallets teach the model that some pallets don't matter, leading to collisions.
2. Label the Entire Object
Partial annotations confuse the model about what constitutes a complete object. Your bounding boxes or segmentation masks must include the entirety of the object of interest.
Rule: Capture the full extent of the object, from its leftmost to rightmost pixel, top to bottom.
Robotics example: A robotic gripper trained on partial labels might attempt to grasp only part of a tool, resulting in unstable grasps and dropped objects.
3. Maintain Annotation Consistency Across All Images
Inconsistency is the enemy of machine learning. If annotators use different criteria for the same object class across your dataset, the model receives contradictory training signals.
Rule: Establish clear annotation guidelines and ensure all annotators follow them identically. Document edge cases.
Robotics example: If one annotator labels "damaged parts" only when they're severely broken, while another labels minor scratches, your quality control robot won't know what threshold to use for rejection decisions.
4. Include Negative Examples
Models need to learn what to ignore just as much as what to detect. Images containing none of your target objects are called "negative examples" or "null images."
Rule: 5-15% of your dataset should be images where no target objects are present, left completely unannotated.
Robotics impact: Without negative examples, a bin-picking robot will hallucinate objects in empty bins or attempt to grasp shadows and reflections.
Detailed Best Practices for Robotics
Now, let's explore specific annotation techniques that address the unique challenges of robotics applications.
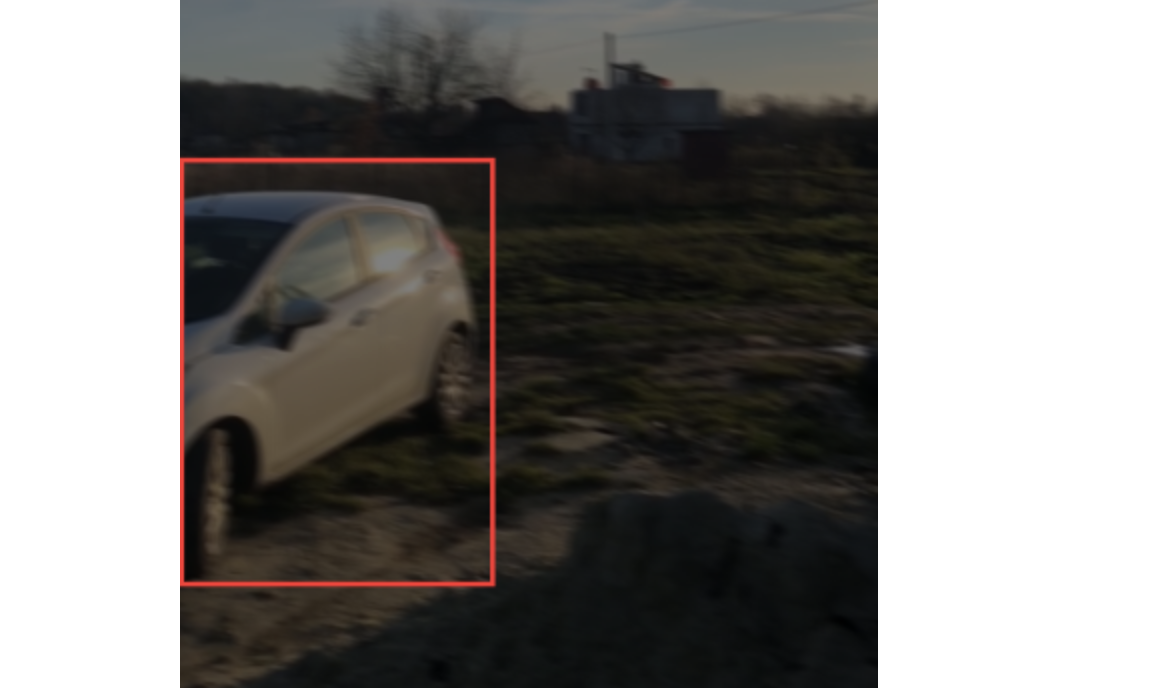
1. Tight Bounding Boxes (Critical for Object Detection)
The Rule: Ensure your bounding boxes touch the outermost pixels of the object with zero wasted space. The edges of the box should align exactly with the visible boundaries of the object.
Why it matters in robotics: In robotics, a loose bounding box creates "background noise" inside the labelled region. This confuses the model about where the object truly ends, and the environment begins. For a mobile robot, this could mean misjudging clearance and colliding with obstacles. For a pick-and-place robot, it could result in the gripper attempting to grasp air instead of the actual object.
How to achieve tight boxes:
- Use Roboflow Annotate's zoom functionality to verify edges at the pixel level
- When in doubt, zoom in at 200-400% to check alignment

- For objects with complex edges, consider using instance segmentation instead
- Train annotators to take the extra 5 seconds per box; it's worth it
2. Consistent Handling of Occlusions
Robots operate in cluttered, dynamic environments where objects constantly hide behind one another. Your annotation strategy for occluded objects must be consistent across your entire dataset.
Two primary approaches:
Approach A: Label Only Visible Portions - Draw bounding boxes or polygons around only the parts of the object you can see.
Approach B: Estimate the Full Object - Draw the bounding box where you believe the full object would be if it weren't occluded. This works well when the occlusion is minor (<30%), and the object's shape is predictable.
Which approach for robotics?
- Use Approach A (visible only) for bin picking and cluttered scenes where multiple objects overlap unpredictably
- Use Approach B (full estimation) for navigation and tracking, where you want the model to maintain object identity even when partially hidden
Critical requirement: Whatever approach you choose, apply it consistently across 100% of your dataset. Mixed strategies confuse the model and degrade performance.
3. Managing Motion Blur
Fast-moving robotic arms, high-speed conveyor belts, and mobile robots in motion all produce motion blur. This is one of the most common challenges in robotics vision.
Decision framework for blurry images:
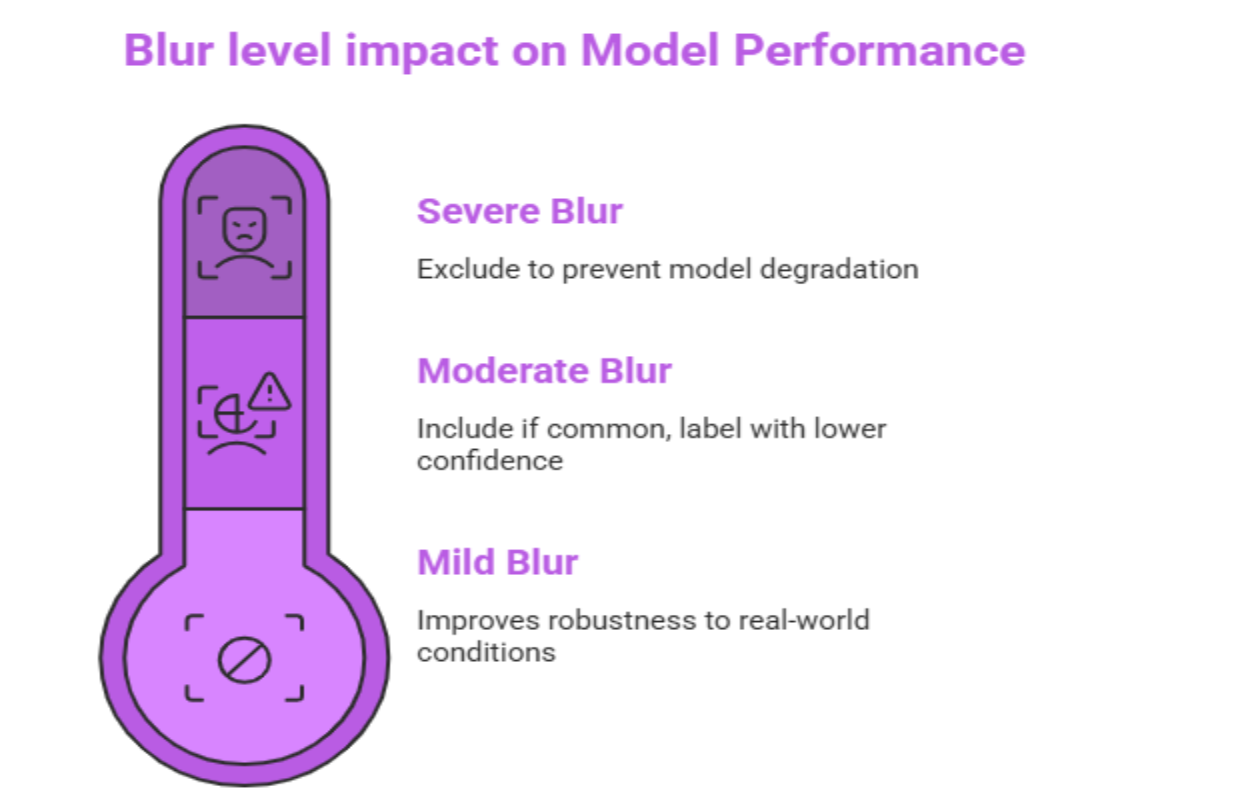
Mild blur (edges still distinguishable): Include and label normally. The model should learn to handle real-world blur.
Moderate blur (edges unclear but object identifiable): Include only if this blur level is common in your deployment environment. Label with lower confidence.
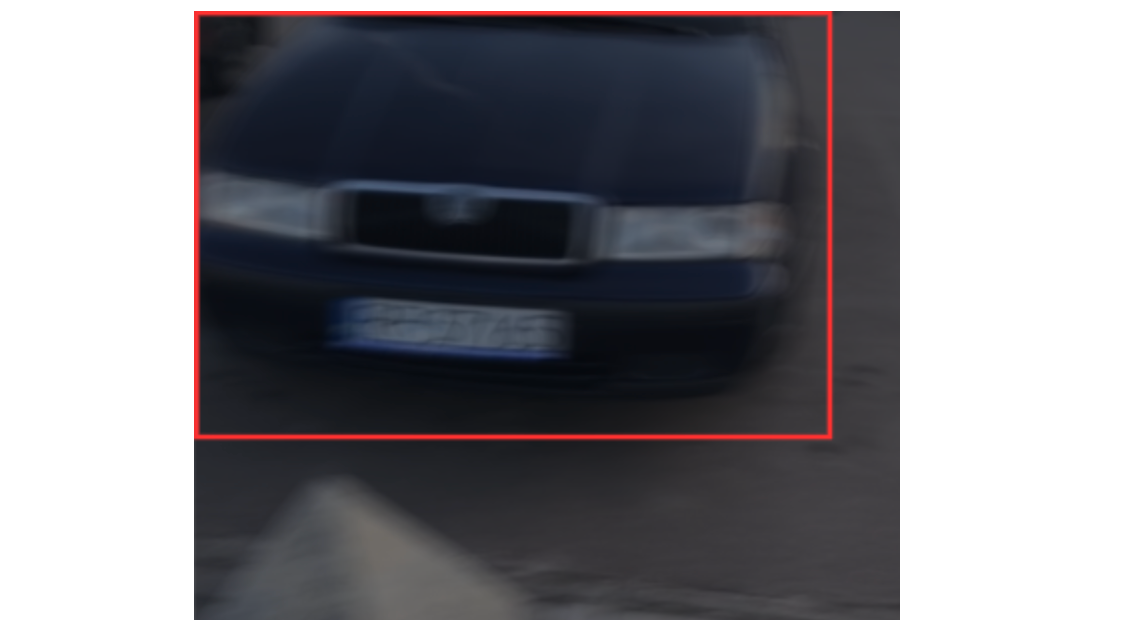
Severe blur (cannot identify object edges as a human): Exclude from the dataset. Including severely degraded images weakens the model's overall confidence scores and leads to false negatives.
Tip: If motion blur is a systemic issue, address it at the data collection stage by increasing camera shutter speed, adding better lighting, or synchronizing image capture with robot motion phases (e.g., capture only when the arm is stationary).
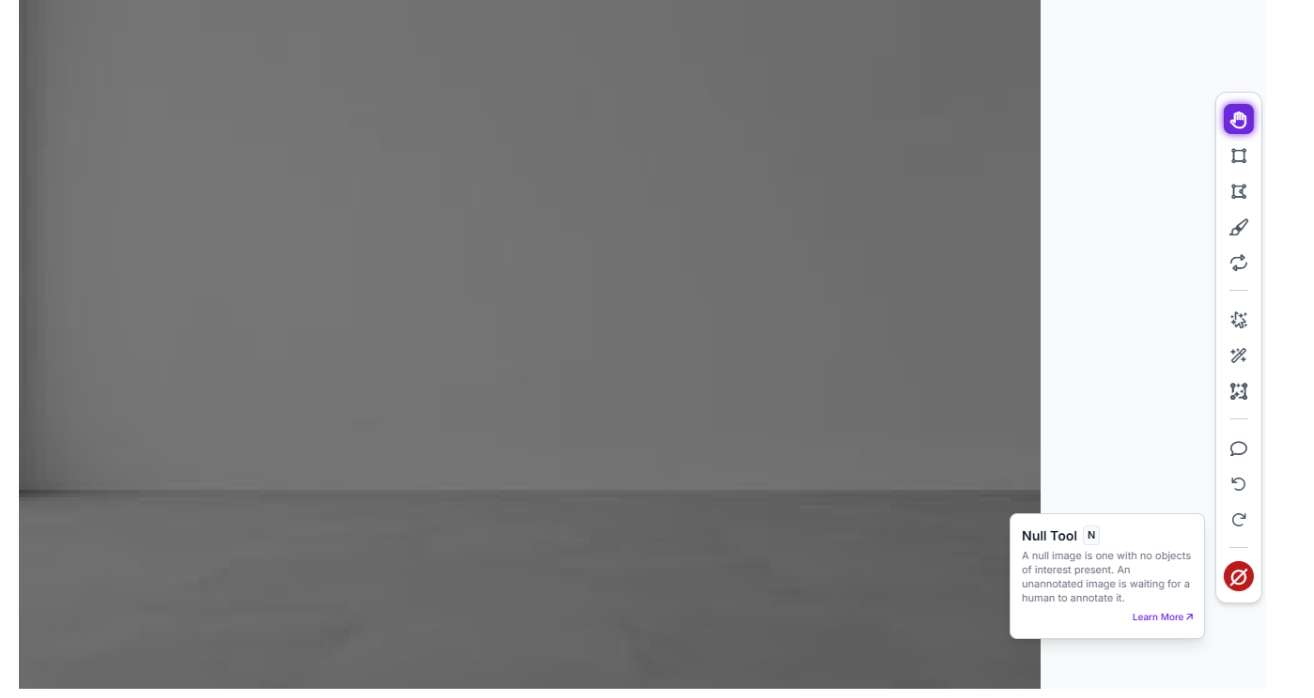
4. Labeling the "Void" (Negative Examples)
One of the most overlooked annotation practices is deliberately including negative examples; images where none of your target objects appear.
Why this matters: Without negative examples, your model will develop a bias toward "seeing" objects even when they're not there. In robotics, this manifests as:
- A bin-picking robot attempting to grasp an empty bin
- A mobile robot "detecting" phantom obstacles, causing unnecessary stops
- A quality control system flagging non-existent defects
How to create negative samples:
- Capture images of your robot's typical environment without the target objects present
- Upload these to Roboflow
- Leave them completely unannotated (no boxes, no labels)
- Include them in your dataset version
How many negatives? Aim for 5-15% of your dataset to be negative examples, depending on how often your robot encounters empty scenes in production.
5. Sub-Pixel Accuracy for Instance Segmentation
When using instance segmentation for robotic grasping or manipulation, your polygon annotations must trace the object's exact contour with sub-pixel precision.
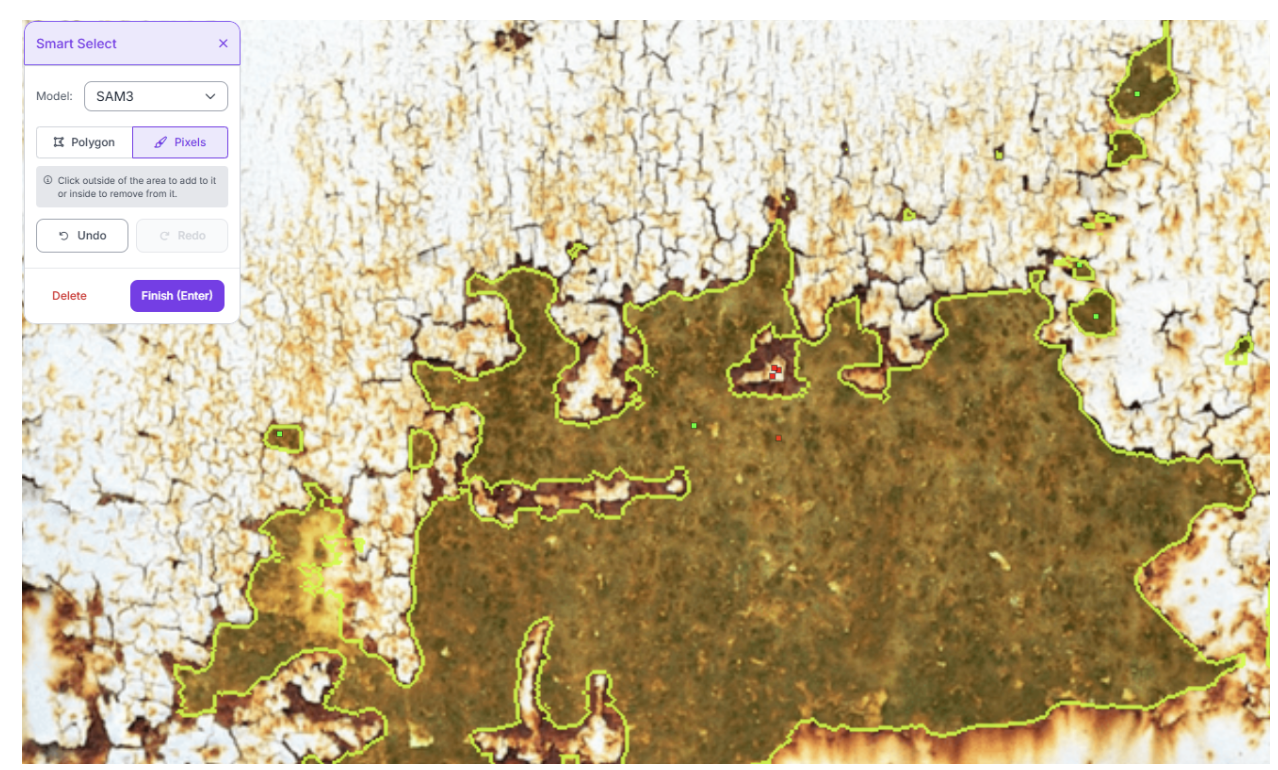
Best practices for precise polygons:
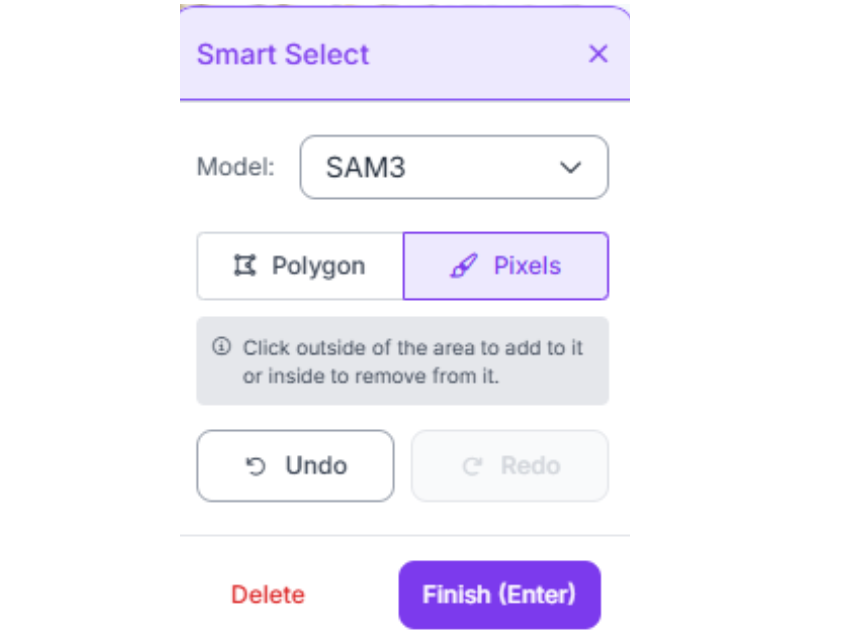
- Use Roboflow's Smart Polygon tool, which leverages Segment Anything (SAM) to automatically snap to object edges
- For complex shapes (cables, deformable materials), place vertices every 10-20 pixels along curves
- For simpler shapes (boxes, cylinders), use the minimum number of vertices needed to accurately represent the shape
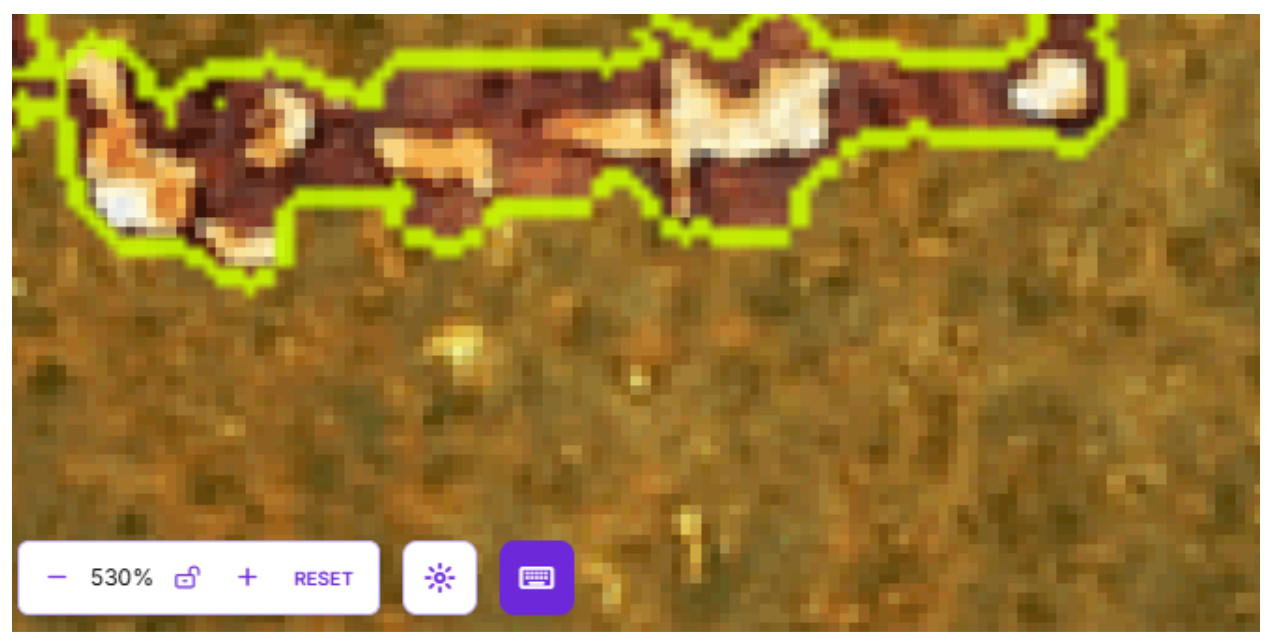
- Zoom in to 300-500% when placing vertices on small objects or fine details
Why it matters: In robotic grasping, the grasp pose is often calculated from the segmentation mask's center of mass or principal axes. Even a 2-3 pixel error can shift the grasp point enough to cause failures, especially on small components.
6. Handling Reflective and Transparent Objects
Robotics often involves handling metallic parts, glass containers, or plastic packaging; all of which create annotation challenges due to reflections, glare, or see-through properties.
Annotation strategy:
- Label the physical object boundary, not the reflection or glare pattern
- For transparent objects (glass, clear plastic), label the object's physical edges even if you can see through them
- Include diverse lighting conditions in your dataset so the model learns to recognize objects across different reflection patterns
- Use polarized camera filters during data collection to reduce extreme glare if possible
7. Multi-Class Consistency and Taxonomy Design
A common mistake in robotics datasets is creating an overly complex or inconsistent class taxonomy.
Problem scenario: You're labelling warehouse items and creating separate classes for "bolt," "screw," "machine screw," and "self-tapping screw." From a distance or in poor lighting, these look nearly identical, causing the model to constantly misclassify between these similar categories.
Solution: Strategic class merging
- If classes look similar from your camera's perspective and don't require different robot actions, merge them into a single broader class (e.g., "fastener" instead of bolt/screw/nut)
- Reserve fine-grained classes only when the robot needs to distinguish between them for different behaviors
- Use Roboflow's Dataset Health Check to identify which classes are frequently confused and candidates for merging
Consistency rule: All annotators must use the exact same criteria for class assignment. Document specific edge cases (e.g., "if the wire is coiled, label as 'wire-coil'; if straight, label as 'wire-straight'") to ensure consistency.
8. Keypoint Placement Precision
For keypoint detection projects (pose estimation, articulation tracking), the exact pixel location of each keypoint is critical.
Best practices:
- Place keypoints on anatomically or mechanically consistent locations (e.g., always at the joint's center of rotation, not randomly on the joint)
- For occluded keypoints, either omit them entirely or mark them as "not visible" if your framework supports it
- Document your keypoint placement rules (e.g., "shoulder point is placed at the geometric center of the shoulder joint bearing")
- Maintain 1-2 pixel accuracy. Use maximum zoom when placing points on small objects
Why it matters: If training a cobot to predict human motion, inconsistent shoulder keypoint placement (sometimes on the front of the shoulder, sometimes on the side) will create noisy predictions and unreliable trajectory forecasts.
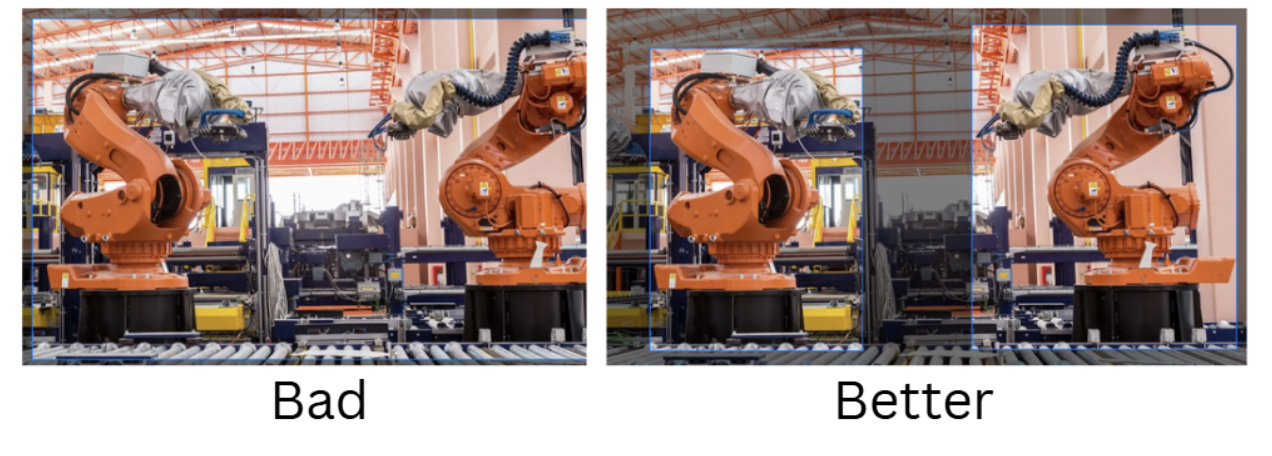
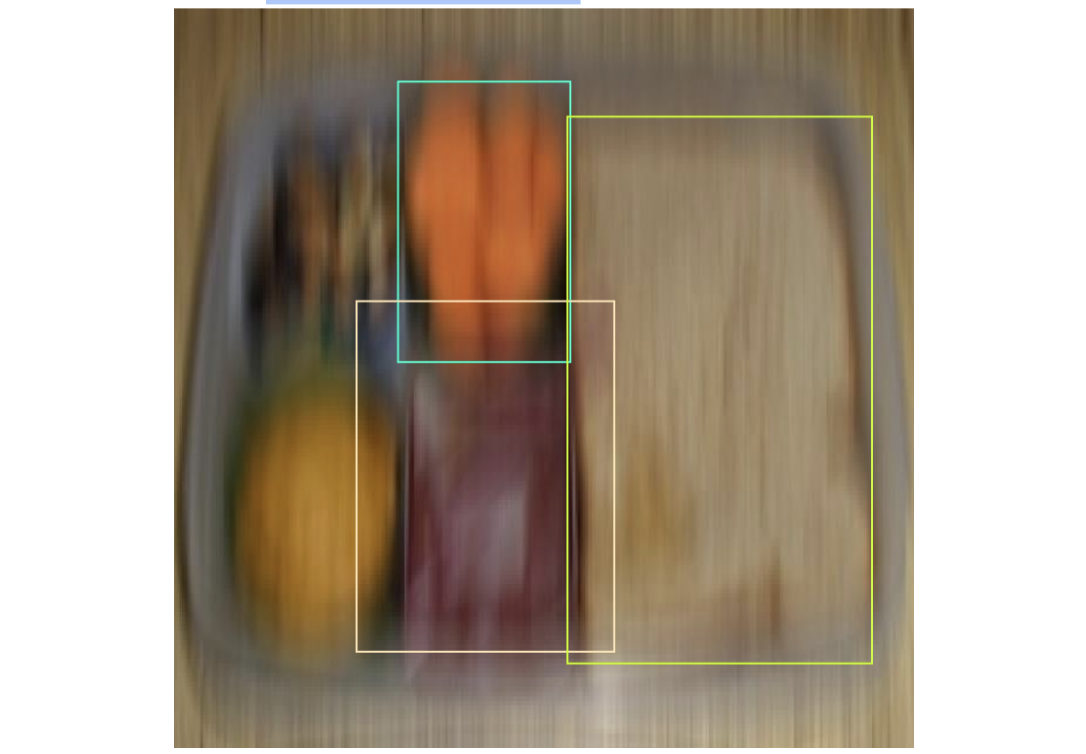
9. Handling Multi-Instance Scenarios
Many robotics applications involve multiple instances of the same object class appearing in a single frame (e.g., dozens of identical parts in a bin, multiple people in a warehouse).

Annotation requirements:
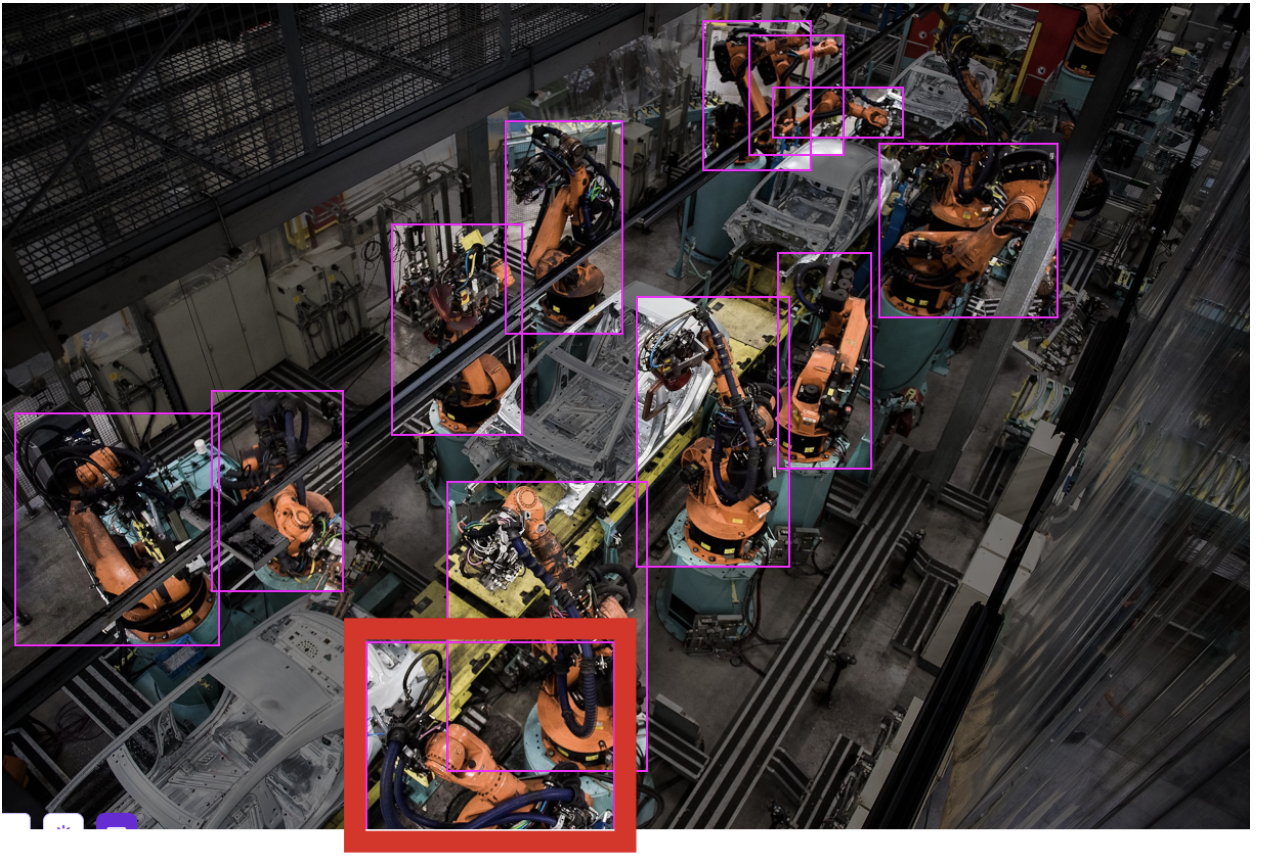
- Label every single instance individually, even if they're partially occluded or at the edge of the frame
- Don't skip instances because they're "too small" or "barely visible". If a human can see it, label it
- Assign unique instance IDs if your tracking application requires maintaining object identity across frames
Common mistake: Labelling only the 5-6 most prominent objects and ignoring smaller or partially visible ones. This teaches the model to ignore small or edge-case objects, which hurts real-world performance.
10. Edge Cases and Corner Scenarios
Robotics datasets must include the unusual situations that robots will inevitably encounter in production, not just the "happy path."
Edge cases to intentionally capture and label:
- Objects at unusual angles or orientations
- Extreme lighting (very bright, very dark, harsh shadows)
- Partial objects (e.g., a part halfway through a door or entering the camera's field of view)
- Damaged or deformed objects
- Objects covered in dust, dirt, or foreign materials
- Camera lens artifacts (dirt spots, condensation)
Allocation strategy: Aim for at least 10-20% of your dataset to represent edge cases. Use active learning to identify which edge cases your current model struggles with, then collect and label more data for those specific scenarios.
Managing Classes and Dataset Quality
Beyond individual annotation precision, dataset-level quality management is essential for robotics applications where safety and reliability are paramount.
Dataset Health Check and Class Balance
Use Roboflow's Dataset Health Check to identify and fix systematic issues before training.
Key metrics to monitor:
1. Class Distribution If your robot encounters "emergency stop button" 1% of the time but "conveyor belt" 90% of the time, your dataset should roughly reflect this distribution, or intentionally oversample the rare but critical class.
Solution for rare critical classes:
- Collect more images of the rare class
- Use data augmentation more aggressively on rare classes
- Apply class weights during training to increase the model's sensitivity to rare classes
2. Annotation Density Check the average number of annotations per image. Very low density (<1.5 annotations/image) might indicate you have too many negative examples or need to label more objects per frame. Very high density (>20 annotations/image) might require instance segmentation instead of object detection for better accuracy.
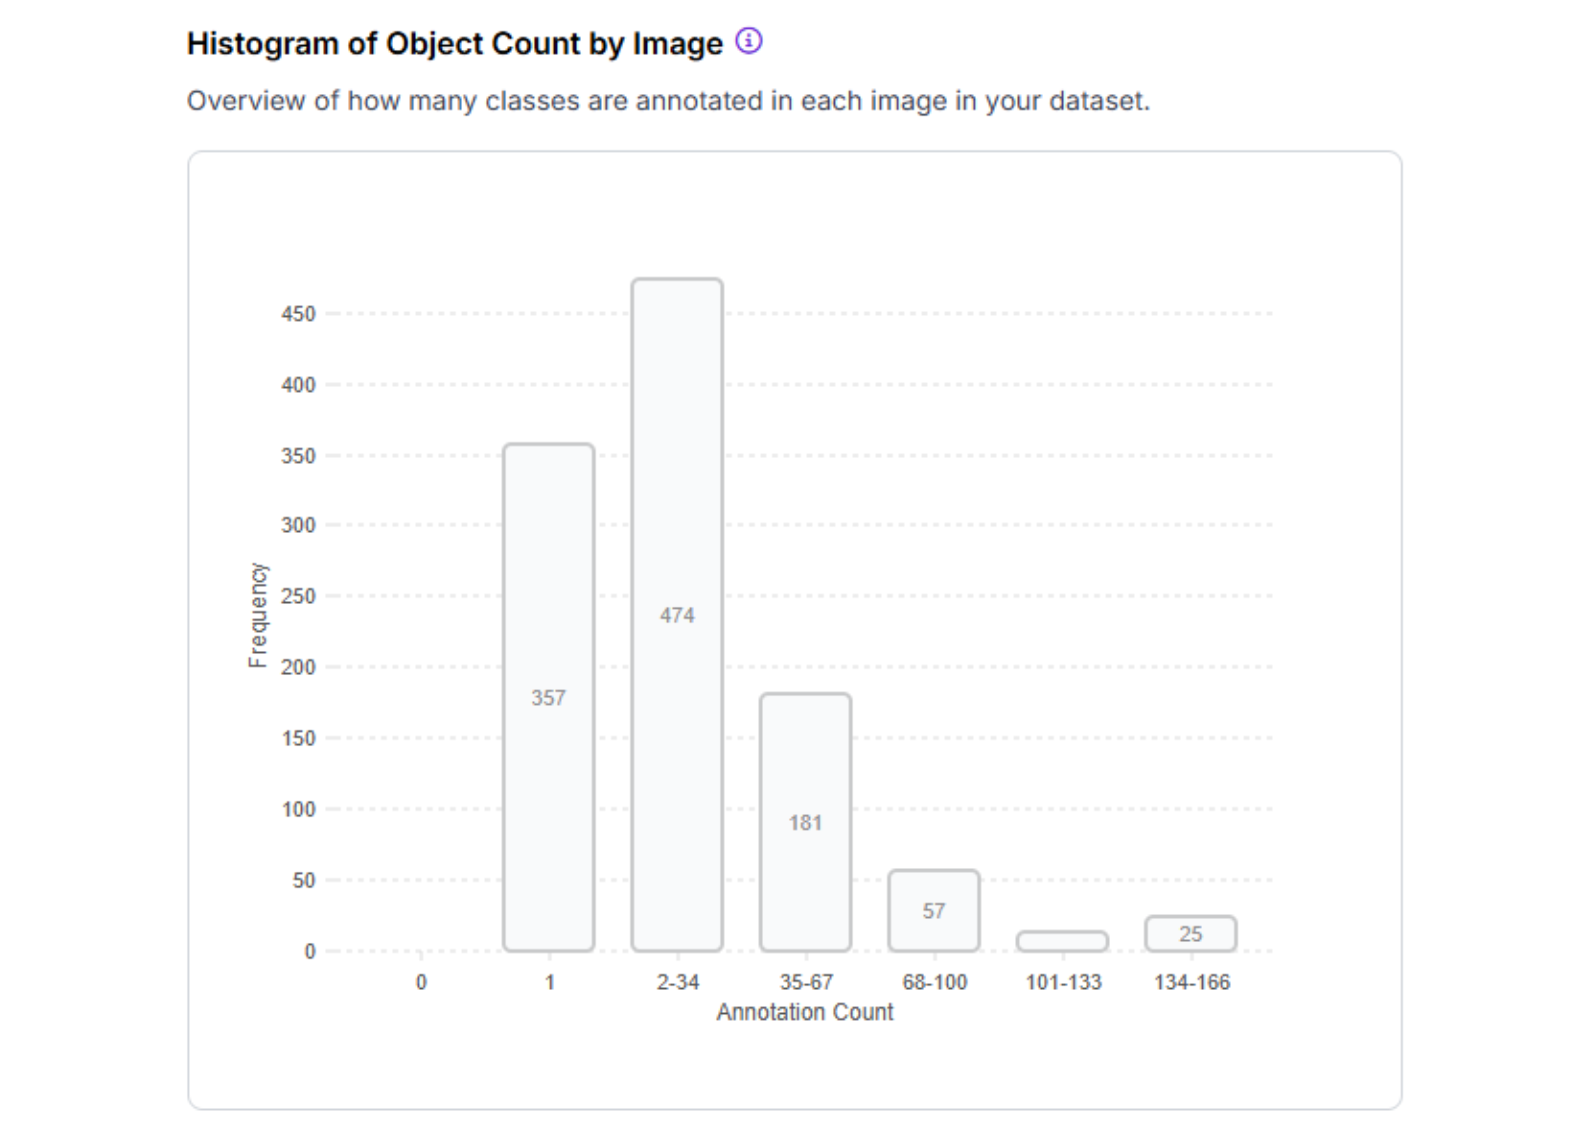
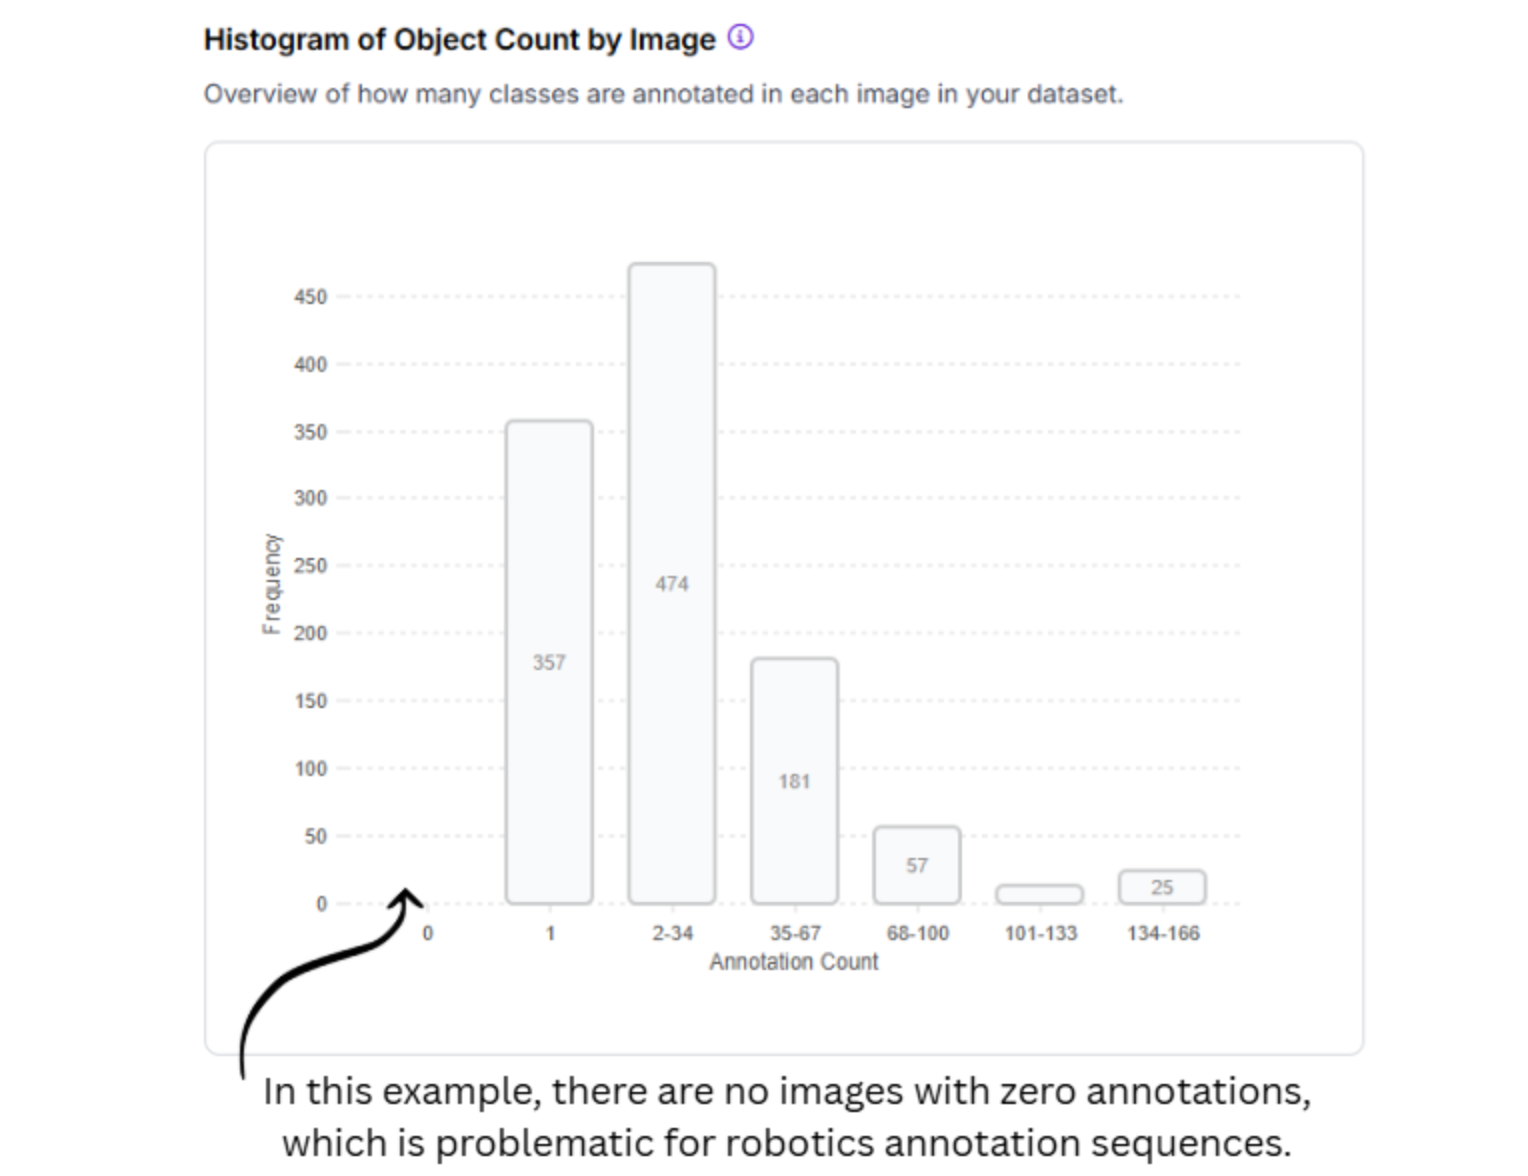
3. Null Images These are images with zero annotations (negative examples). Ensure these make up 5-15% of your dataset, not 40-50%, which would dilute your positive examples.
Annotation Team Coordination
For large-scale robotics projects with multiple annotators:
Establish an annotation guidelines document:
- Screenshot examples of correct vs. incorrect annotations for each class
- Decision trees for ambiguous cases ("if object A is touching object B, label as separate instances")
- Target annotation time per image (helps identify when annotators are rushing or overthinking)
Inter-annotator agreement testing:
- Have 2-3 annotators label the same 50-100 test images independently
- Calculate agreement metrics (e.g., Intersection over Union for bounding boxes)
- Target >85% agreement. If lower, refine guidelines and retrain annotators
Use Label Assist for consistency: Roboflow's Label Assist uses your already-trained model to pre-annotate new images, which annotators then verify and correct. This dramatically improves consistency and reduces manual effort.
Creating Dataset Versions with Preprocessing and Augmentation
Once your images are annotated, you'll create a dataset version with preprocessing and augmentation steps optimized for robotics.
Essential Preprocessing for Robotics
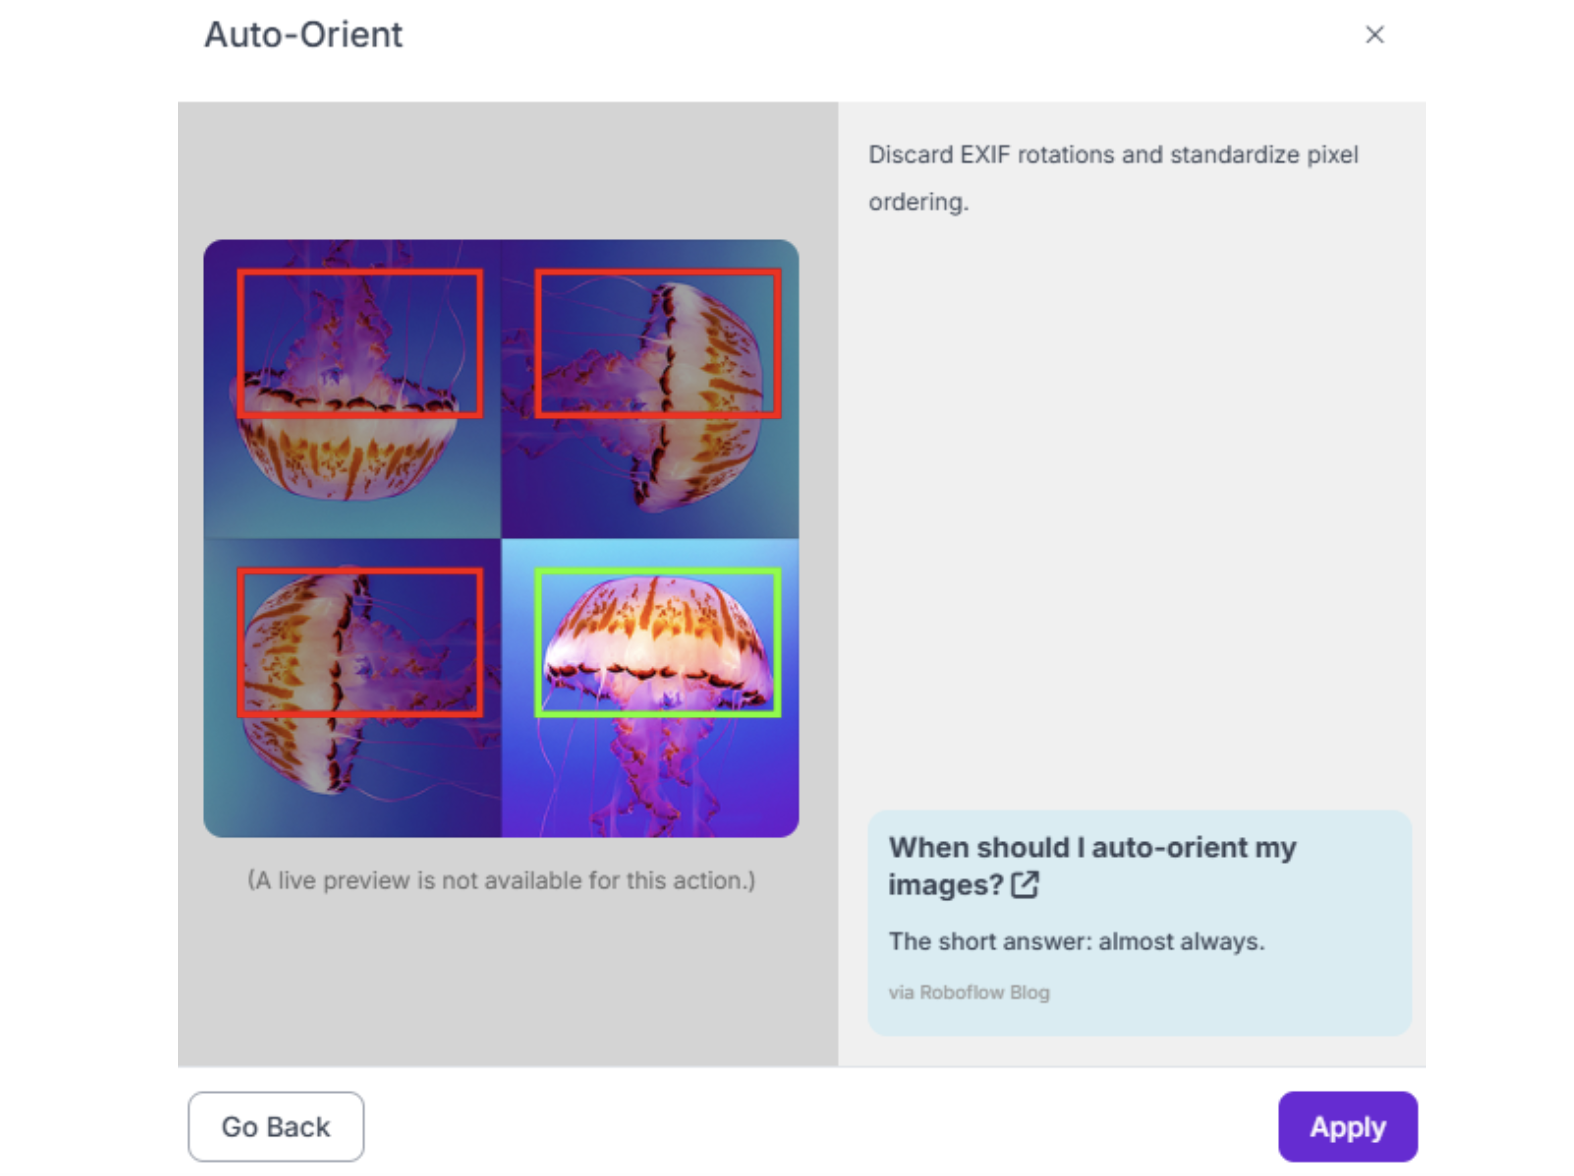
1. Auto-Orient Enable this to automatically correct image rotation based on EXIF data. Critical if your robot's camera orientation varies or if you're collecting data from mobile robots.
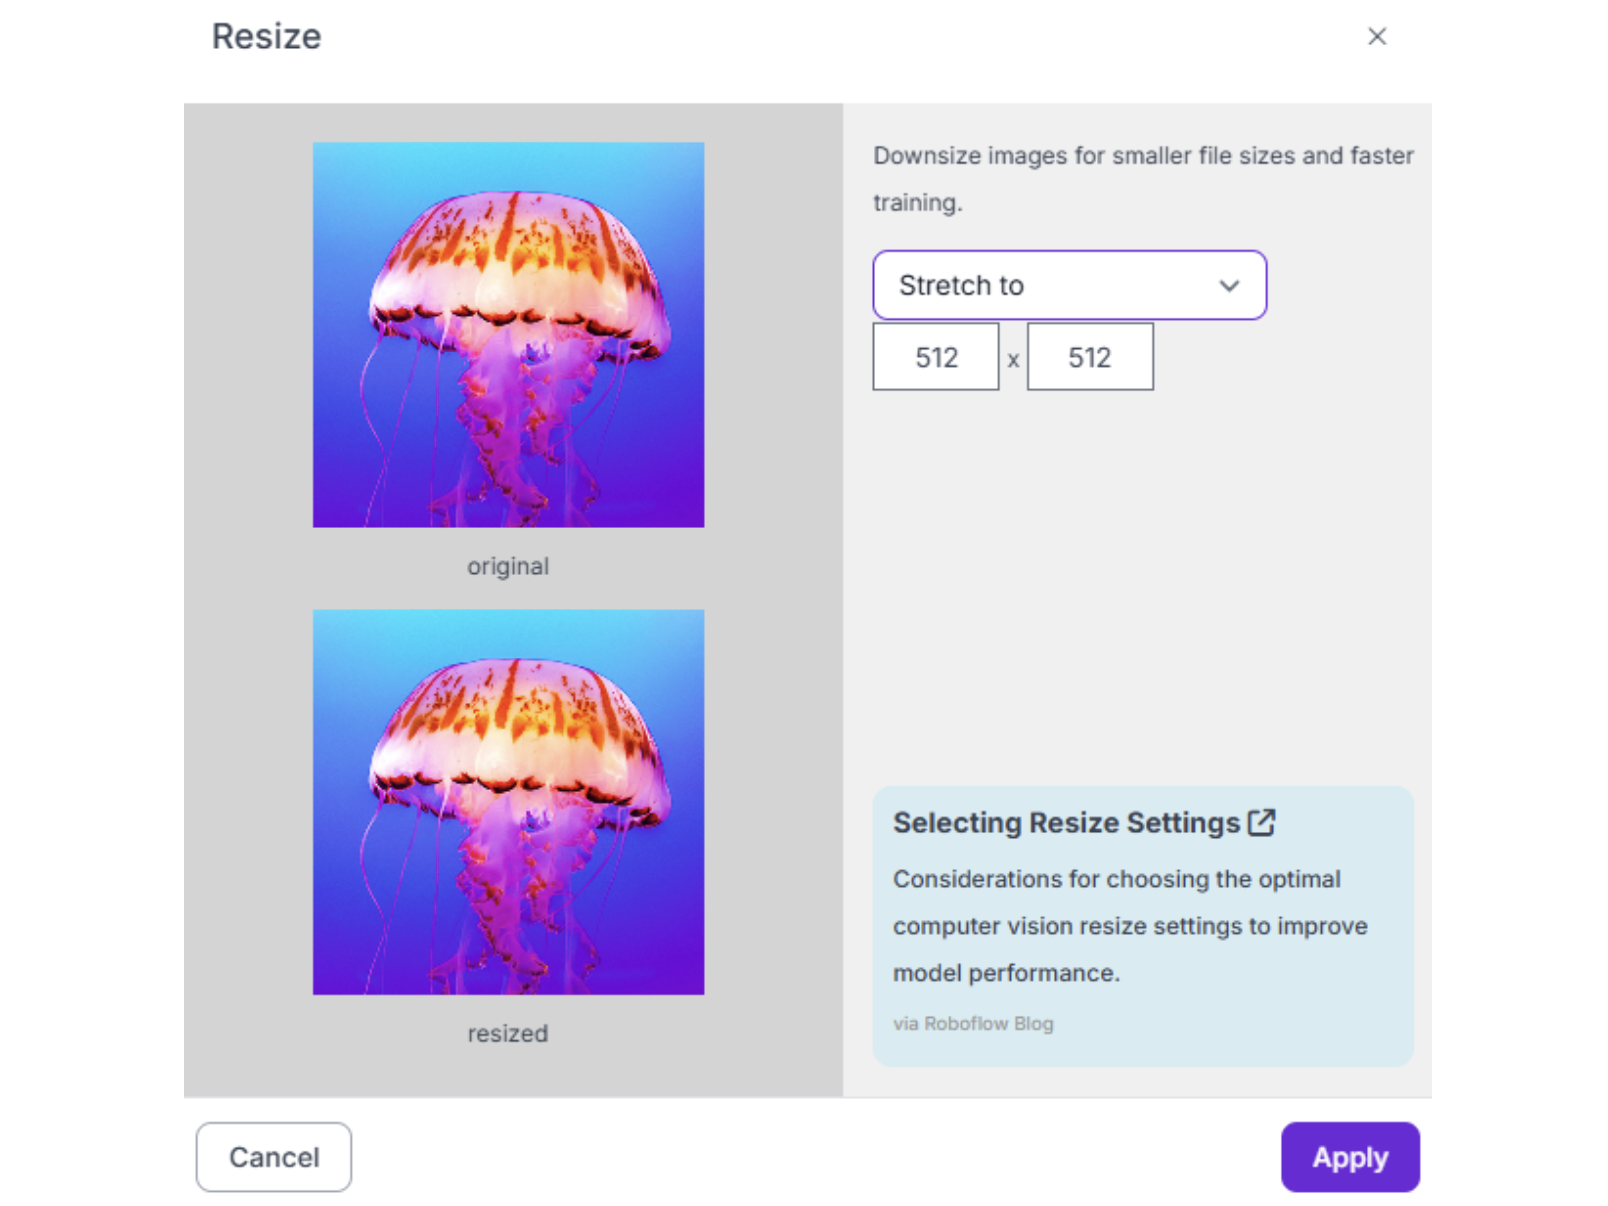
2. Resize Standard practice is 640x640 or 512x512 pixels. This standardizes input sizes for model training while balancing inference speed and detail preservation. For very small components, consider 800x800 or 1024x1024.
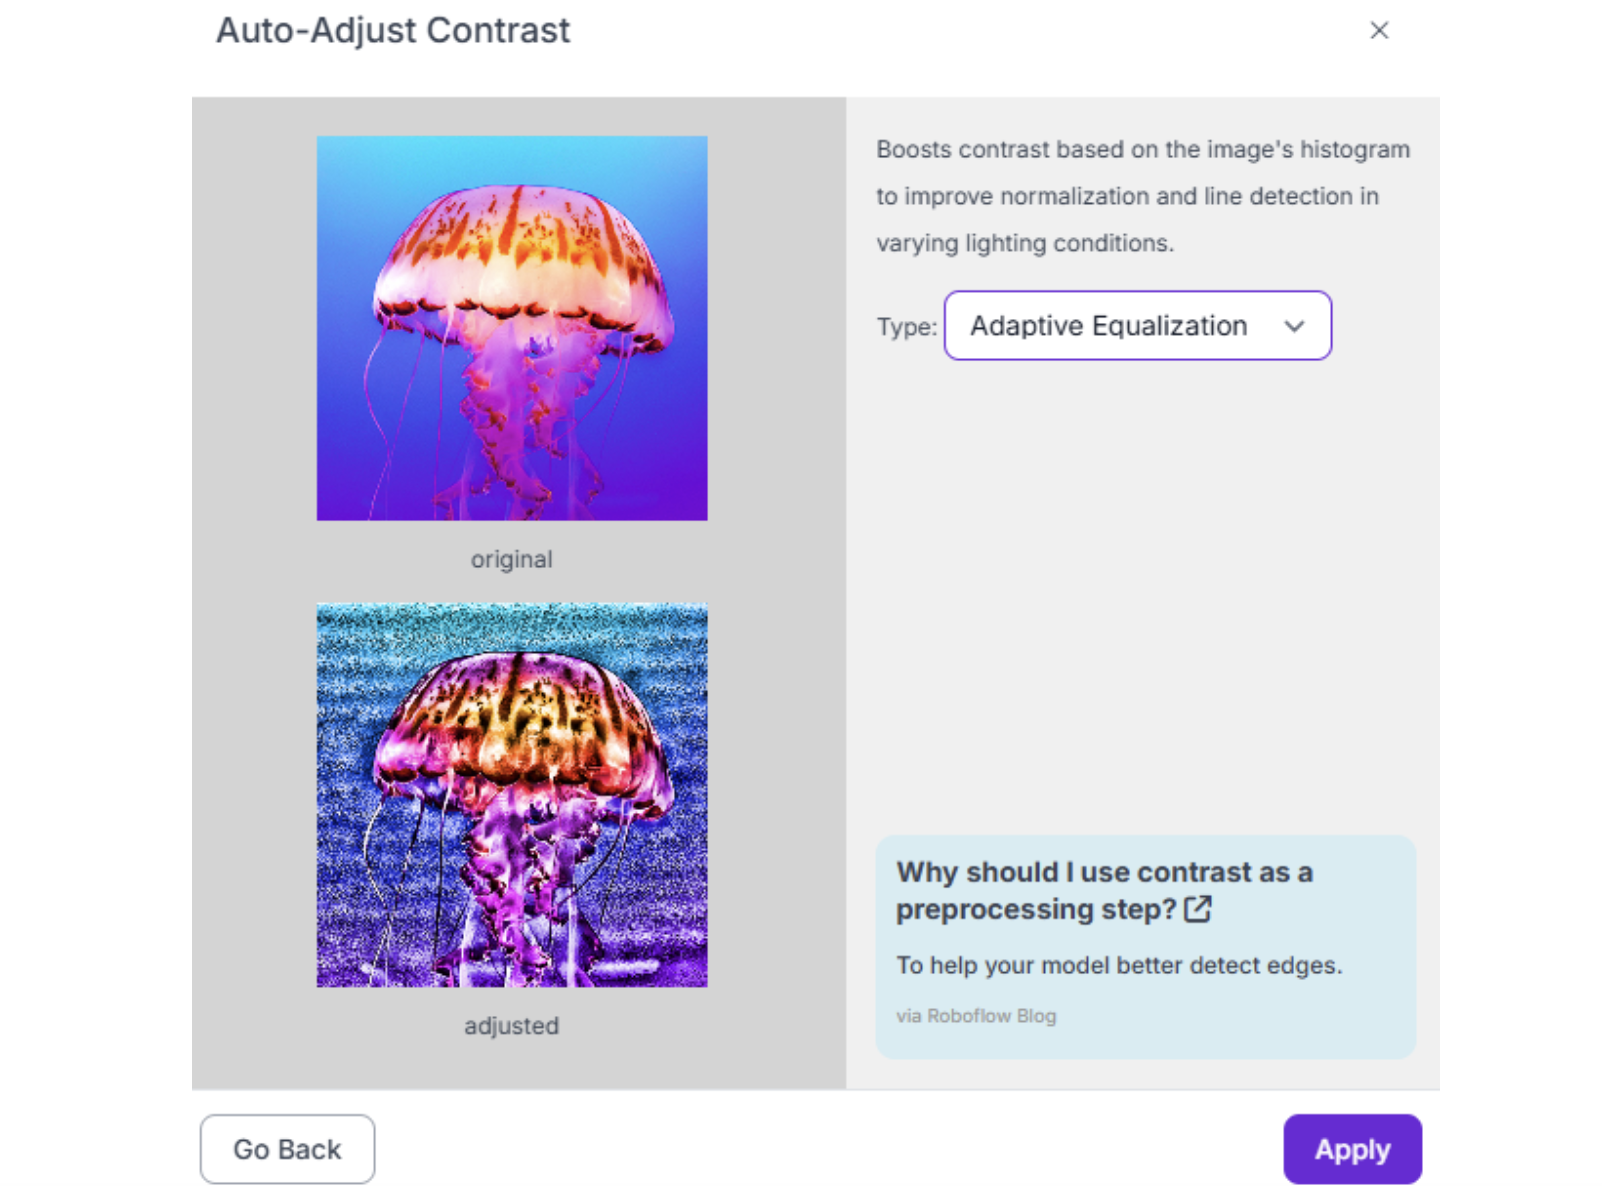
3. Auto-Adjust Contrast Use histogram equalization to handle varying lighting conditions across different factory floors or outdoor environments. Essential for robots that operate in multiple lighting scenarios.
Robotics-Specific Augmentations
Augmentations simulate real-world variability that your robot will encounter. Configure these in Roboflow when generating your dataset version:
Critical augmentations for robotics:
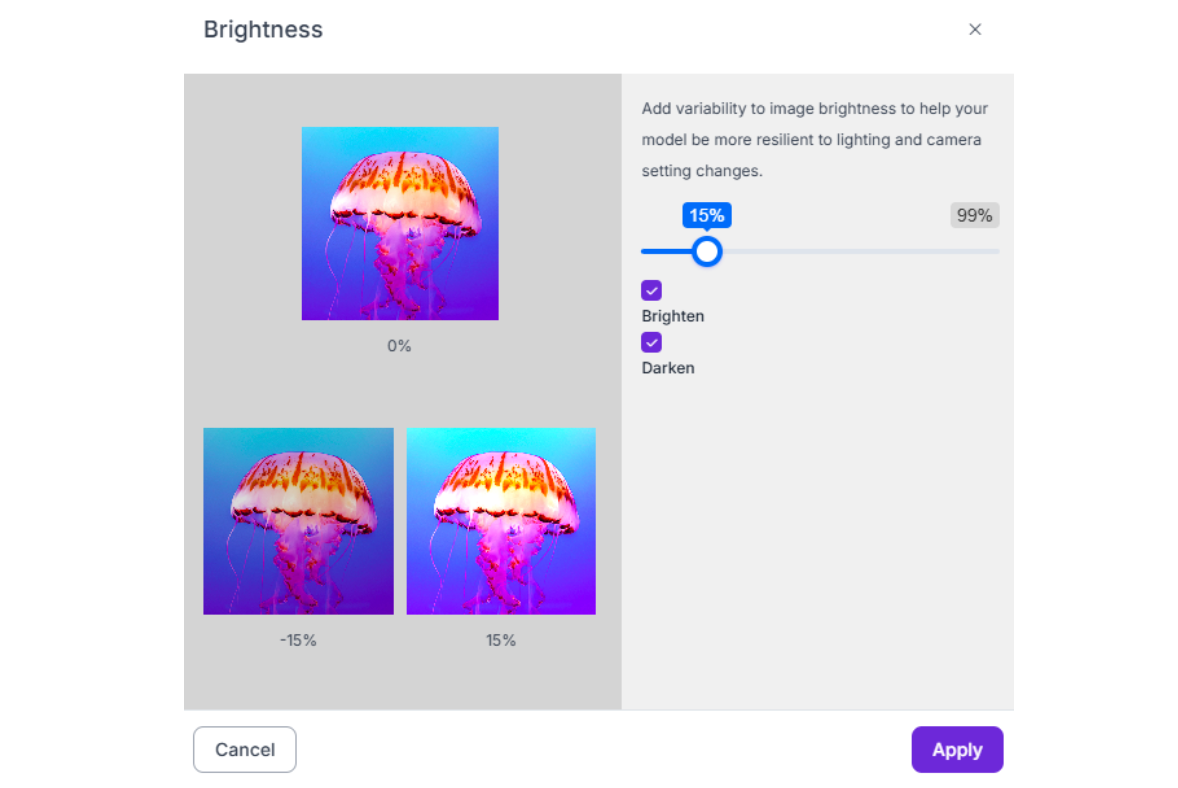
1. Brightness (-15% to +15%) Simulates different times of day for outdoor robots or variations in warehouse lighting.
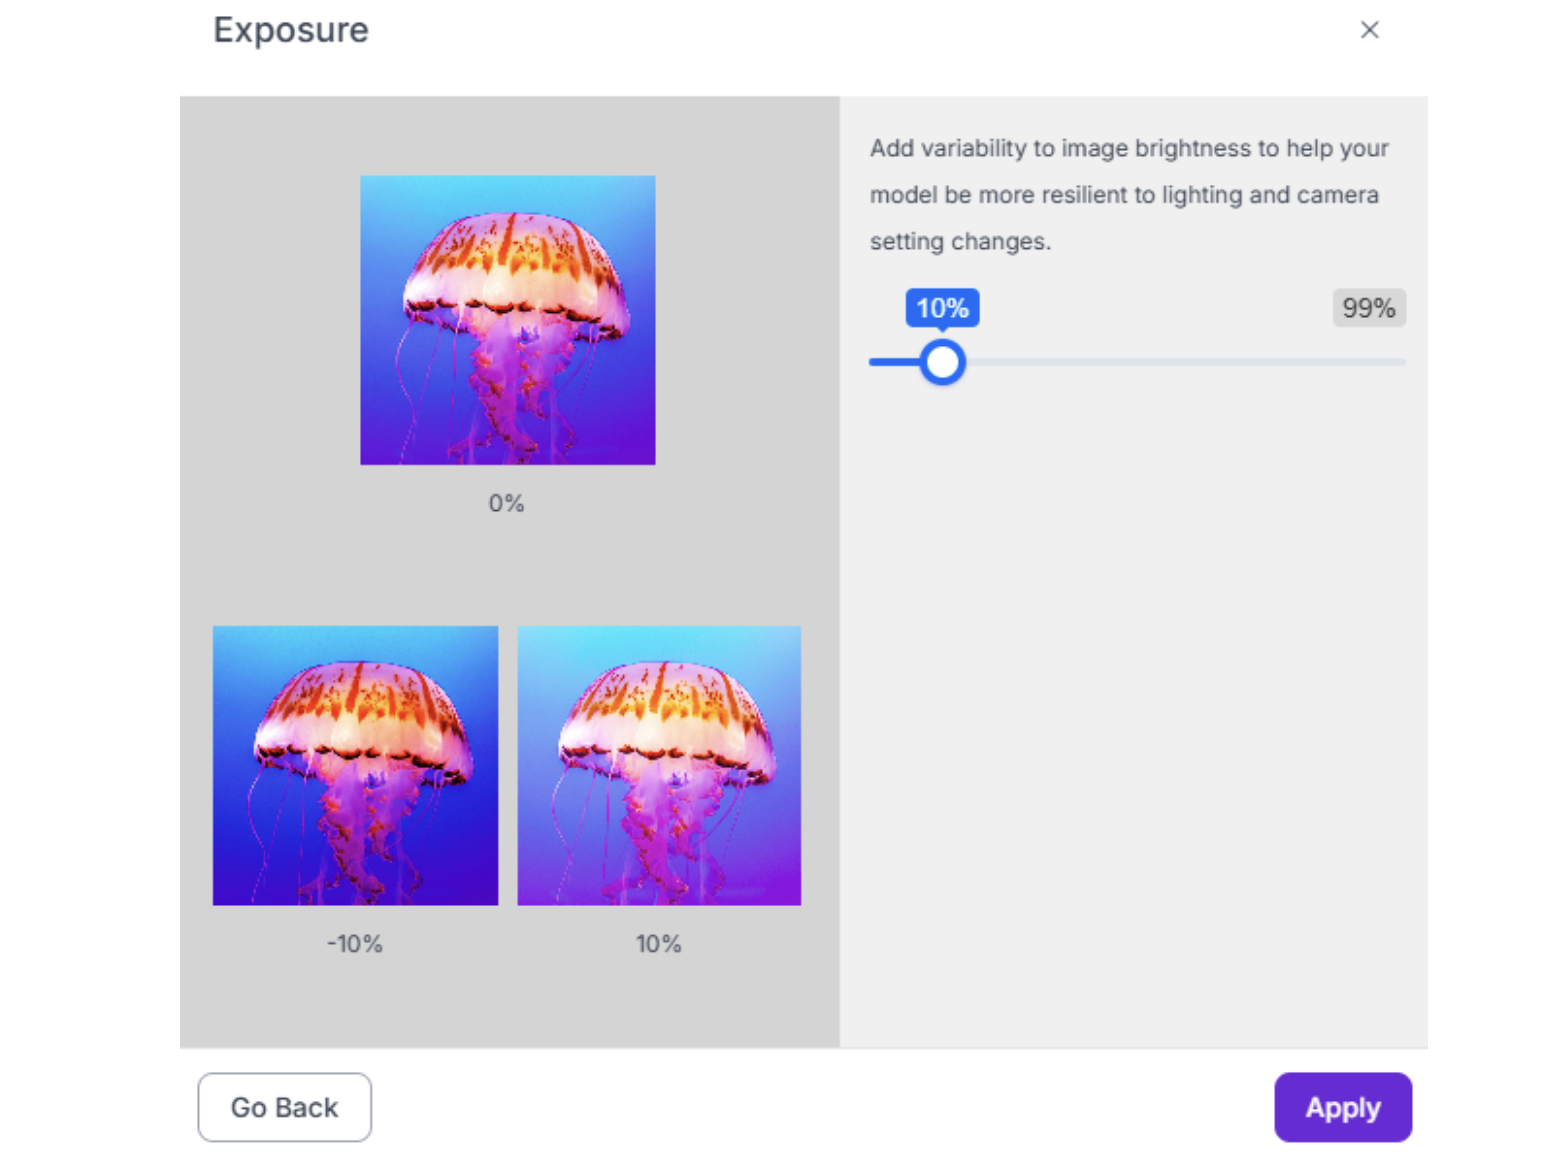
2. Exposure (-15% to +15%) Handles camera auto-exposure changes when the robot moves between bright and dark areas.
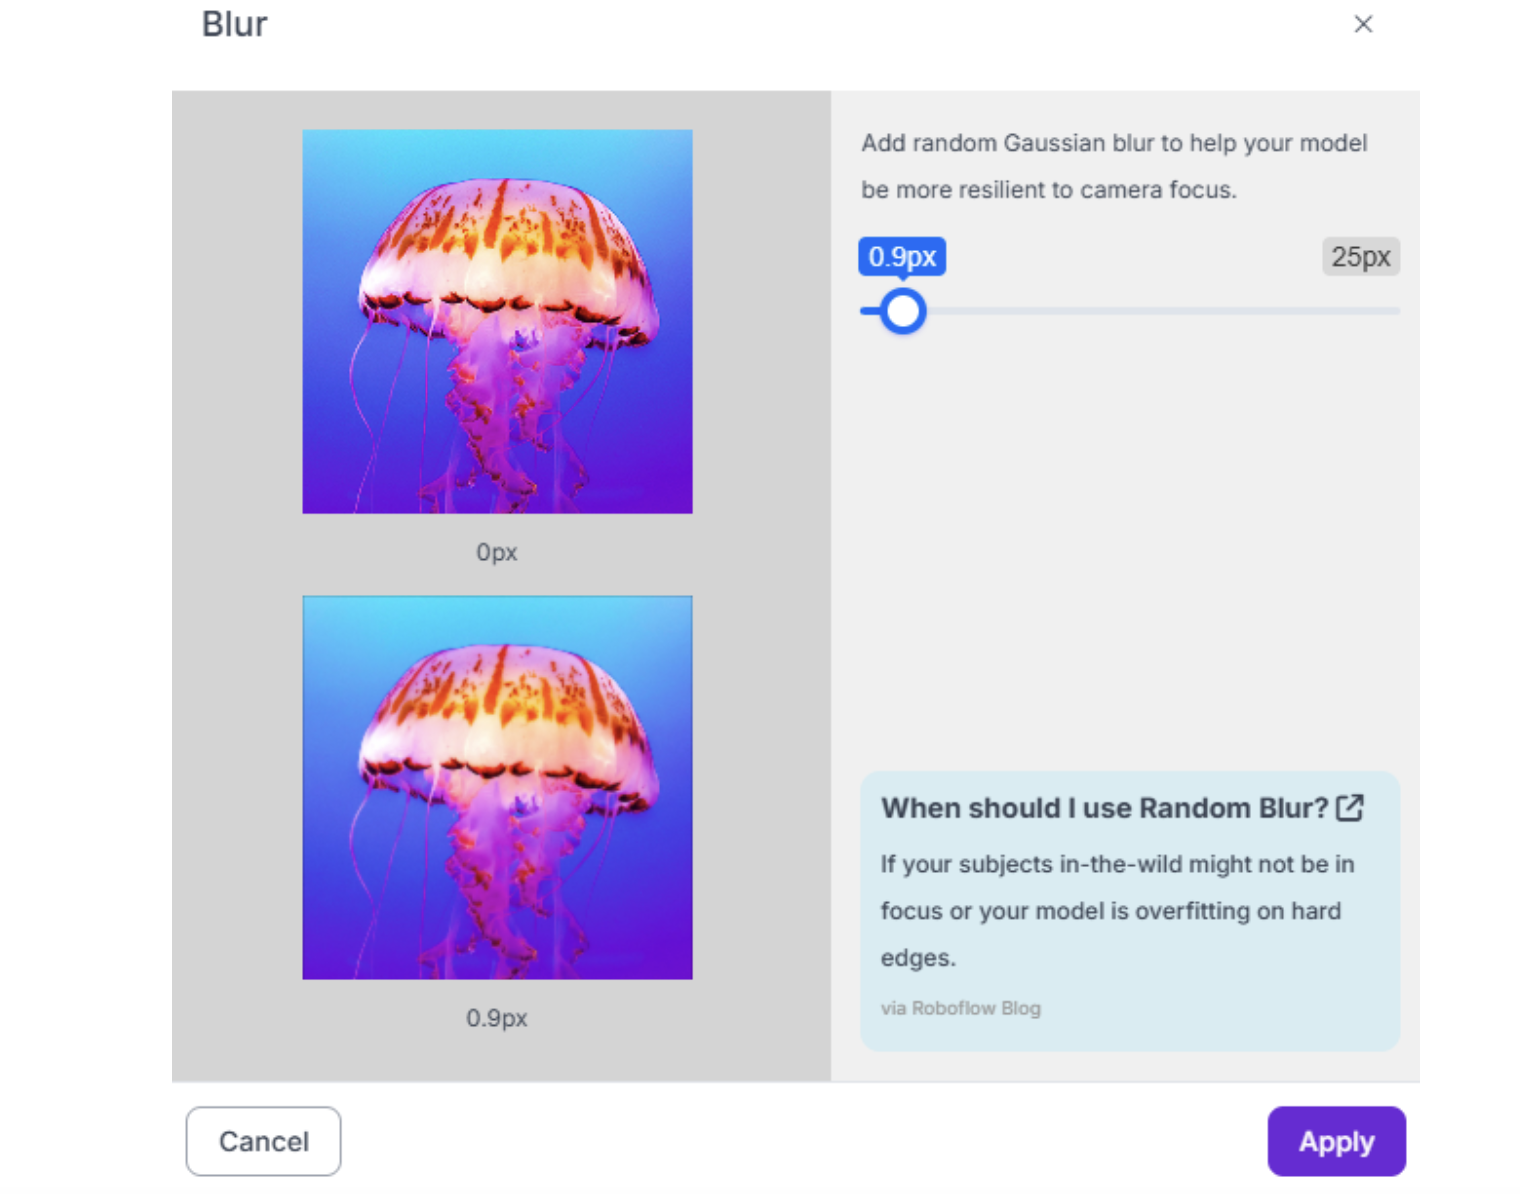
3. Blur (up to 1.0px) Accounts for motion blur from robot or camera movement. Don't exceed 1.5px, or images become unrealistic.
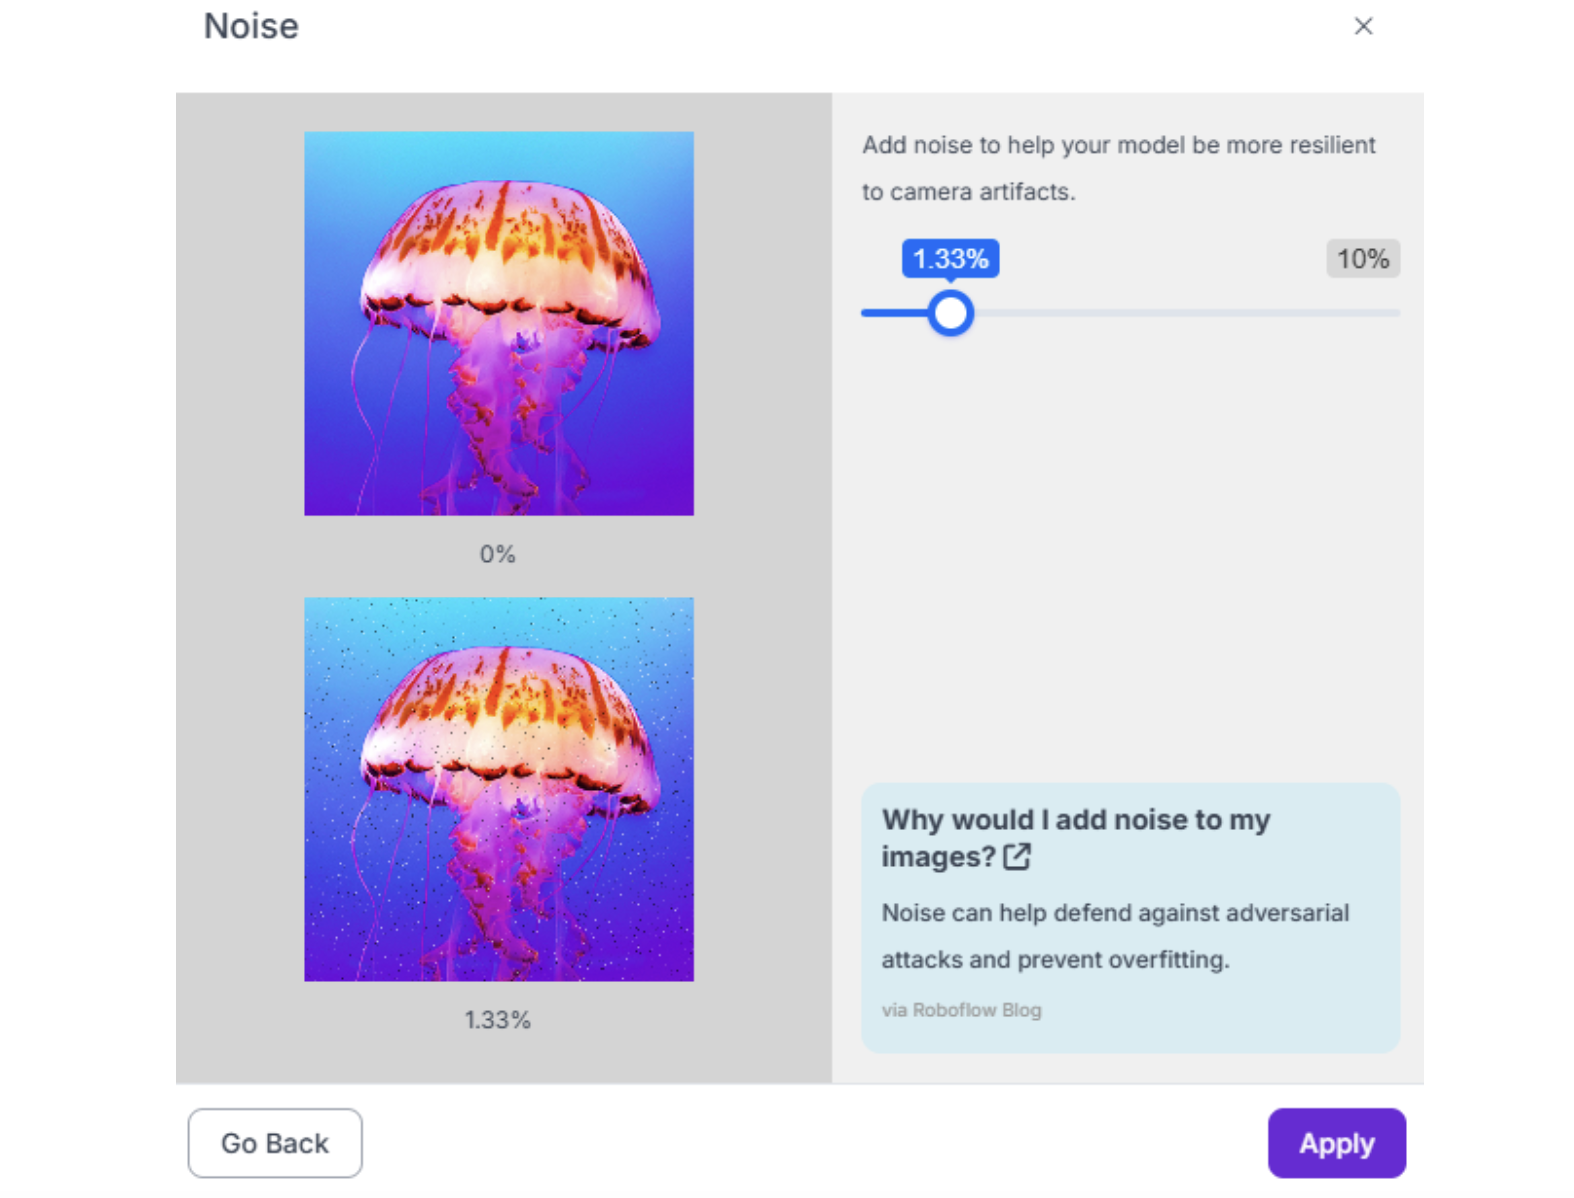
4. Noise (up to 2%) Simulates sensor noise in low-light conditions or older cameras.
5. Rotation (-15° to +15°) Critical for objects that can appear at various orientations. For robots that always see objects from the same angle (fixed overhead camera), limit to ±5°.

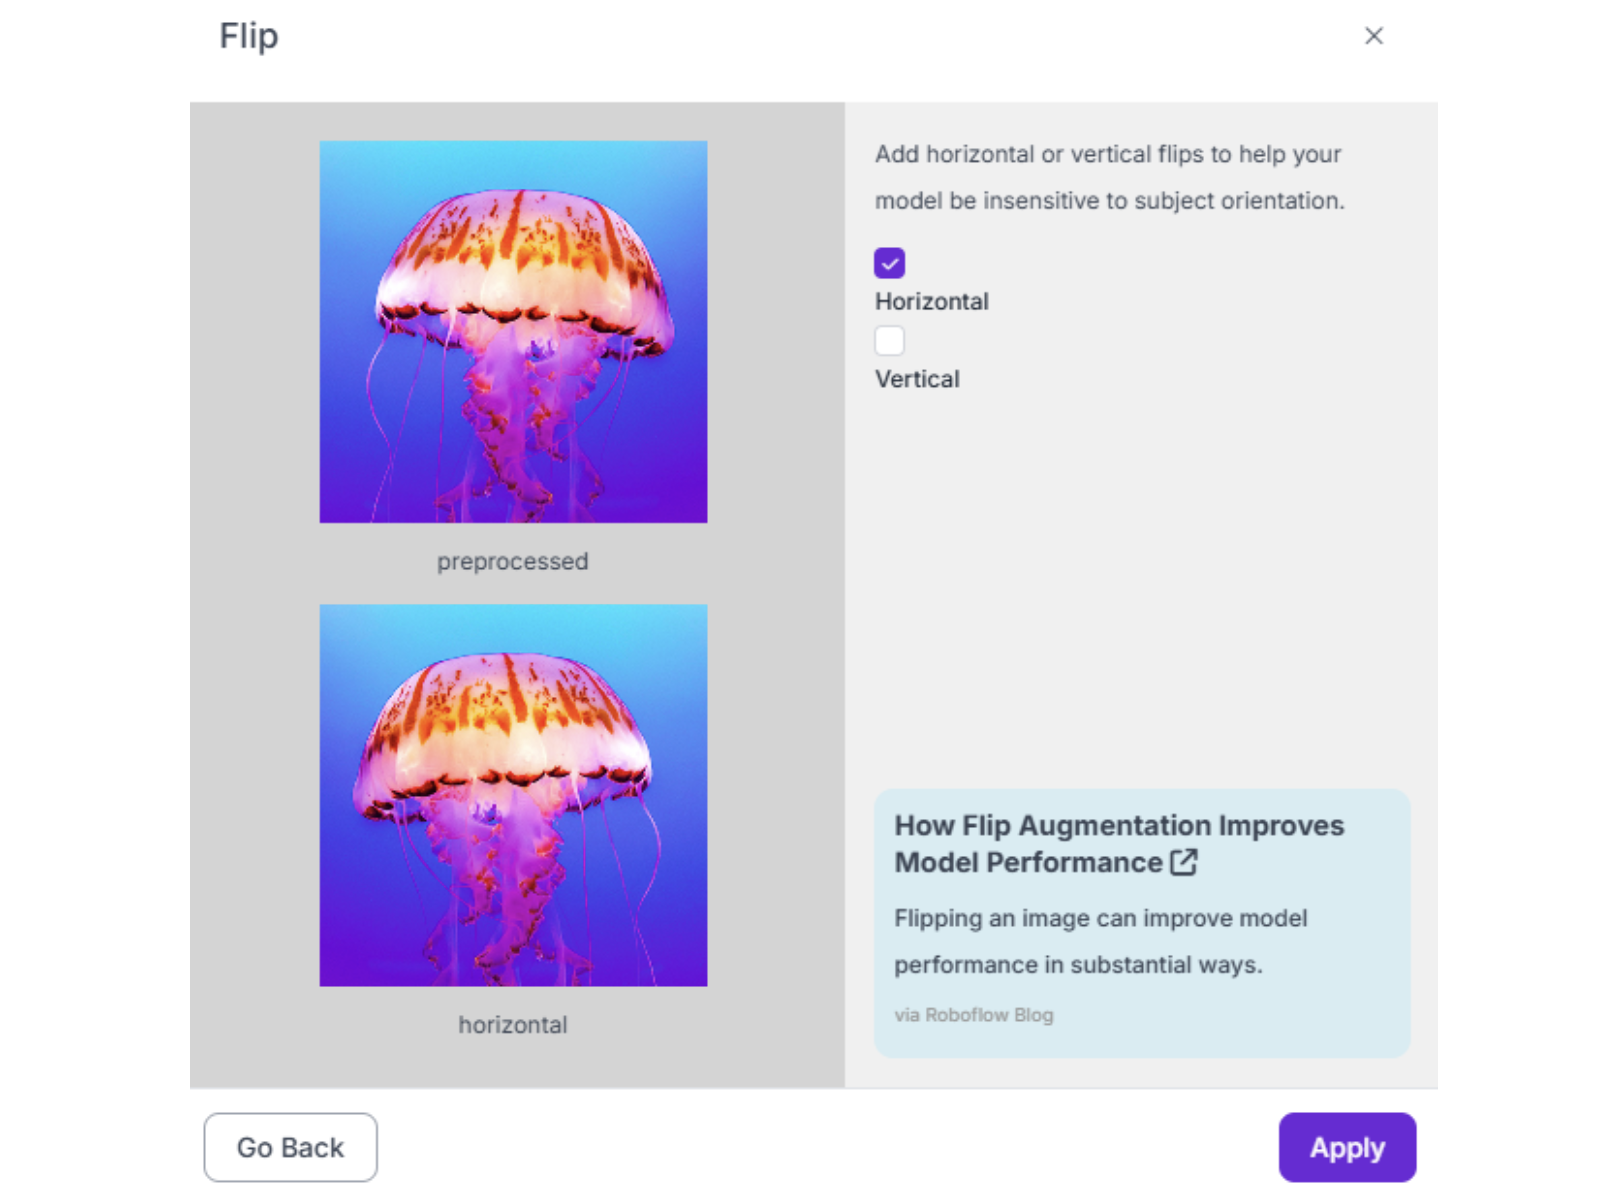
6. Flip (Horizontal only, usually) Useful if objects can appear mirrored (e.g., left-handed vs. right-handed parts). Avoid vertical flip unless objects genuinely appear upside-down.
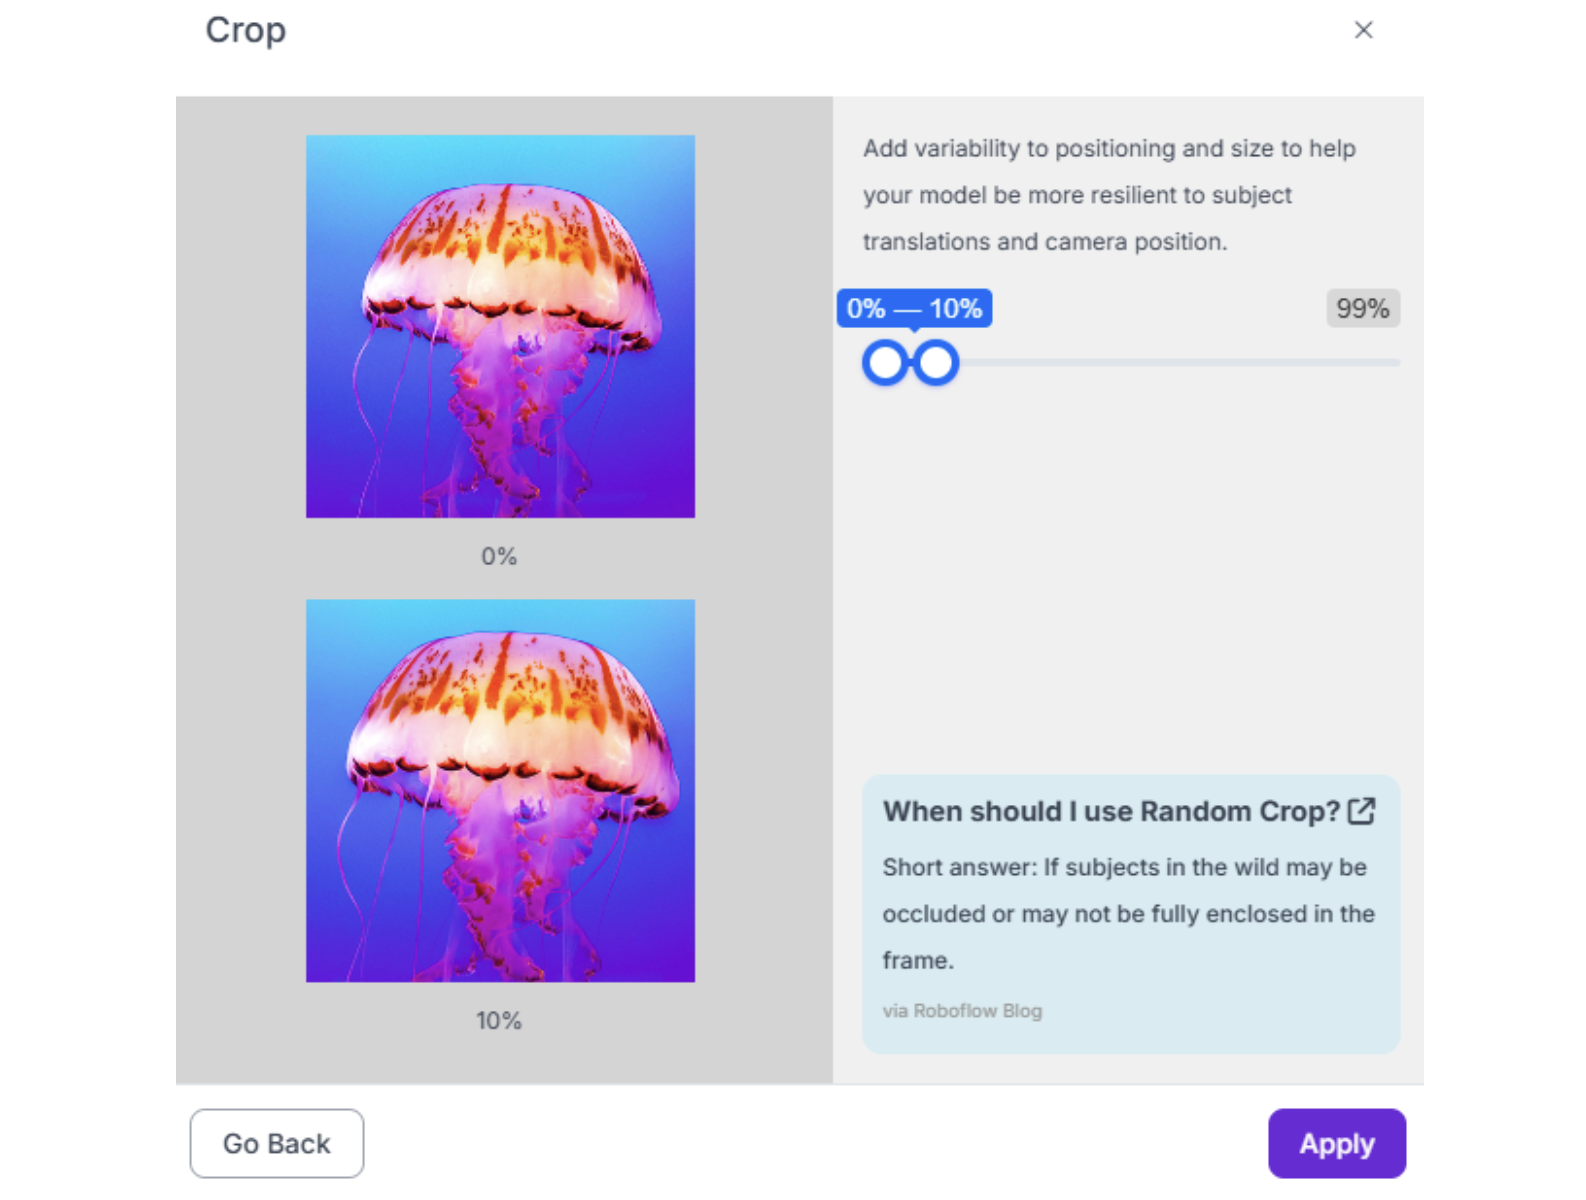
7. Crop (0-10%) Simulates objects at the edge of the camera's field of view.
Warning: Do not over-augment. Start with 3 augmented outputs per training example. More augmentations dilute the dataset with synthetic data and can hurt performance if the synthetic variations don't match real-world conditions.
Image Annotation Best Practices for Robotics Conclusion
Ready to start building your robotics vision system? Sign up for a free Roboflow account today and leverage our RF-DETR and YOLO26 integrations for industry-leading performance. Explore thousands of robotics datasets on Roboflow Universe to accelerate your development, or upload your first dataset and experience the power of professional annotation tools designed specifically for the demands of robotics applications.
Written by Aarnav Shah
Cite this Post
Use the following entry to cite this post in your research:
Contributing Writer. (Feb 13, 2026). Image Annotation Best Practices for Robotics. Roboflow Blog: https://blog.roboflow.com/image-annotation-for-robotics/