
Random rotate data augmentation turns each training image a few degrees so your model learns objects at the angles it will actually see, which lifts accuracy without collecting more data. Use it when your camera angle varies (mobile apps, camera roll), skip it for fixed-orientation objects like signs and text, and apply it in Roboflow with a degree limit while it recomputes every bounding box for you.
Random rotate data augmentation turns each training image a few degrees clockwise or counterclockwise, so your model learns an object at the angles it will actually see rather than only the orientation you happened to capture. It is one of the highest-value augmentations for object detection, and in Roboflow you apply it in a click, with every bounding box recomputed for you. This guide covers what random rotation is, when it helps, when to skip it, and how to add it to a dataset in Roboflow.
What Is Random Rotate Data Augmentation?
Data augmentation creates new training examples from your existing images by applying controlled transformations, which widens the range of situations a model learns from without collecting or labeling more data. Simply put, we introduce additional life-like examples from which our model can learn.
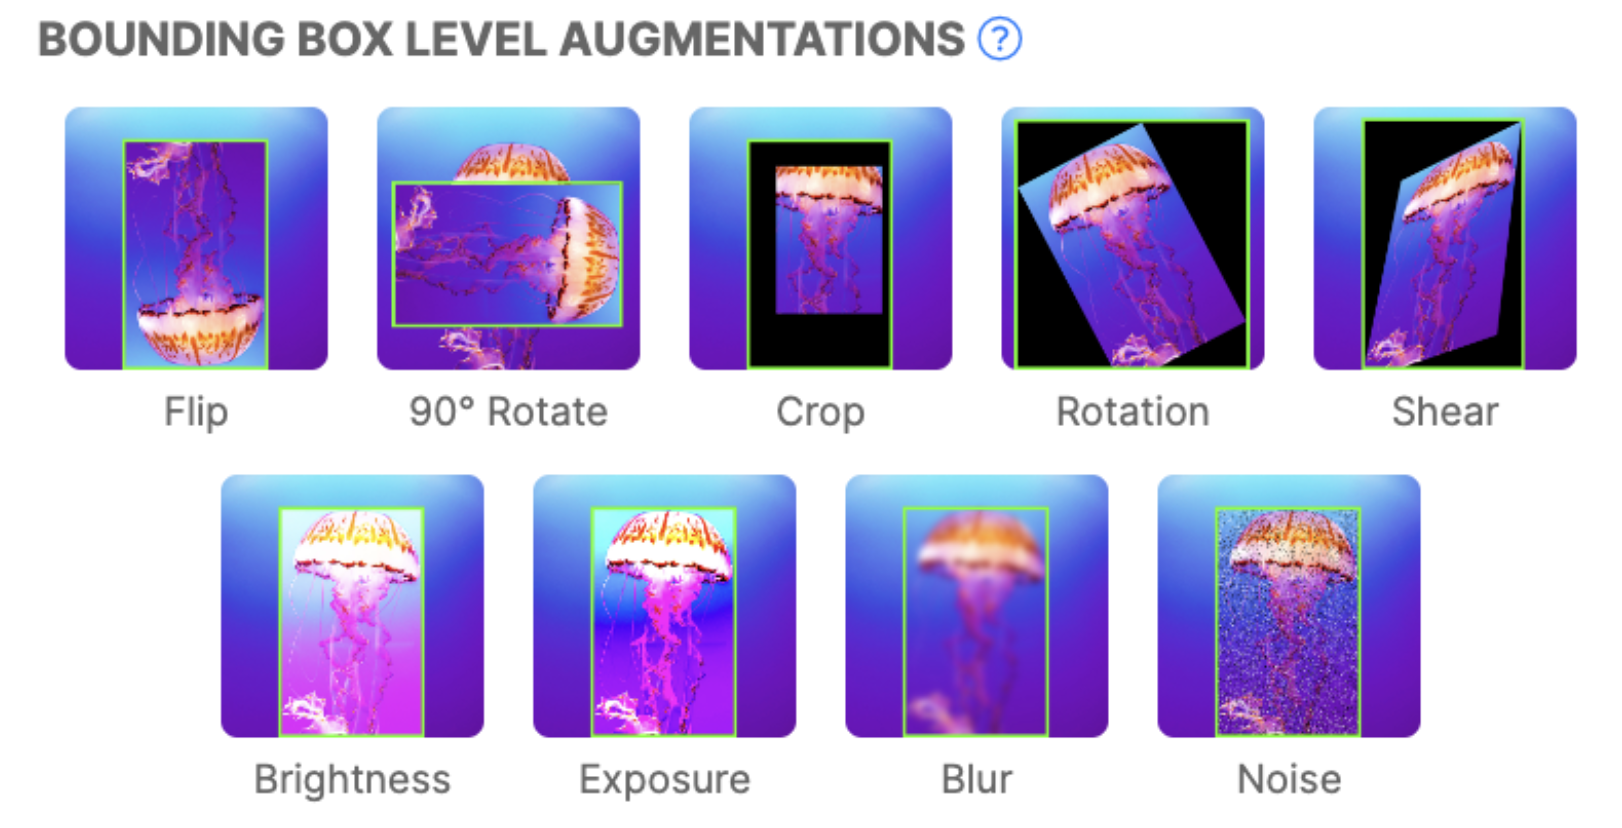
Random rotation is one of those transformations: it rotates a source image by a random amount up to a degree limit you set, changing where the object sits in the frame.
For object detection, the bounding box has to move with the object, so the label is updated to enclose the rotated object. Roboflow's rotation augmentation does exactly this: you choose the maximum degrees, and each generated image is rotated randomly within that range to make the model more resilient to camera roll.

When to Use Random Rotate Augmentation
Random Rotate is a useful augmentation in particular because it changes the angles that objects appear in your dataset during training. Perhaps, during the image collection process, images were only collected with an object horizontally, but in production, the object could be skewed in either direction. Random rotation can improve your model without you having to collect and label more data.
Consider if you were building a mobile app to identify chess pieces. The user may not have their phone perfectly perpendicular to the table where the chess board sets; therefore, chess pieces could appear to be rotated in either direction. In this case, random rotation may be a great choice to simulate what various chess pieces may look like without meticulously capturing every different angle.
Tip: If the camera position is not fixed relative to your subjects (like in a mobile app), random rotation is likely a helpful image augmentation.
Random rotation can also help combat potential overfitting. Even in cases where the camera position is fixed relative to the subjects your model is encountering, random rotation can increase variation to prevent a model from memorizing your training data.
However, like most methods, random rotation is not a silver bullet.
When to Not Use Random Rotate Augmentation
When you perform a data augmentation, it is important to consider everything the augmentation is doing to your images to decide if the augmentation is the right choice for your dataset. In some cases, random rotation may not be the right choice for your dataset.
As a practical note, in order to random rotation an image, note that the image must either have its corners cut off on the top and bottom or have the image increase in size to avoid cropping edges. Note how edges of our chess piece images above are cropped.
Thus, the first reason you should consider not using random rotation is if there is valuable content in the original corners of your images.
Second, after rotation, the image corners are unknown and must be filled with padding. This is the resulting black space we see
Third, you may be a domain setting where objects in the image do not naturally rotate. For example, street signs for a car driving down the road.
Fourth, when the image rotates, the bounding box must as well and the bounding box expands on rotation (unless it is a square). This can be problematic if a lot of your bounding boxes are skinny rectangles because the model will be encouraged to predict much larger objects than it otherwise would. More on this in the implementation.
Ok, you're still convinced!
Let's get cracking on the implementation.
How Rotation Updates Your Bounding Boxes
When an image rotates, each corner of a bounding box rotates around the image center too, so the original axis-aligned box becomes a tilted diamond. Detection labels have to stay axis-aligned, so the new box is the smallest upright rectangle that contains that diamond, which is always a bit larger than the original for anything that is not a perfect square.
Doing this correctly for every annotation in every image, at several random angles, is tedious and error-prone by hand. Applying rotation at the dataset level solves that: Roboflow rotates the image and recomputes every box for you, so your labels stay correct across the whole augmented set.
How to Apply Random Rotate Augmentation in Roboflow
Create a project and get your images labeled, or fork a labeled dataset from Roboflow Universe and label anything new in Roboflow Annotate. Generate a dataset version, and under augmentations add Rotation, setting the maximum degrees to the range of camera roll you expect.
Use the maximum version size to control how many rotated copies each source image produces. Roboflow rotates the images and recomputes every bounding box, then freezes the result into the version.
Best Practices for Rotation Augmentation
Treat augmentation as an experiment, not a fixed recipe. Start with a version that has no augmentation and train a baseline, so you can tell whether rotation actually helps your task.
Keep your validation and test sets clean, which Roboflow does by applying augmentation only to the training split, so your mean average precision (mAP) reflects real, untouched images.
Then add rotation, retrain, and compare against the baseline. If it lifts performance on the angles you care about, keep it; if it does not move the number or hurts, dial back the degrees or drop it.
Combine it with other safe augmentations like flips only when they reflect variation the model will really see.
Does rotation augmentation change my labels?
Yes, for object detection. When the image rotates, the bounding box has to be updated to enclose the object in its new position. Roboflow recomputes every box automatically, so you do not maintain the annotations by hand.
How many degrees of rotation should I use?
Match the range to the camera roll you expect in production. A modest range works for most tasks, and a wider range only makes sense when your real images genuinely arrive at steep angles. Avoid large rotations on datasets with skinny bounding boxes, since the enclosing box grows as it rotates.
Does rotation augmentation help image classification?
Yes. Classification has no bounding boxes to update, so rotation simply exposes the model to the object at more angles, which helps whenever the subject can appear rotated at inference.
Add Random Rotate Augmentation to Your Dataset
You can apply rotation augmentation to your own images today, entirely in the browser, with every bounding box recomputed for you, then train a model on the result. Create a free Roboflow account to build a dataset version and start training.
Further reading:
Cite this Post
Use the following entry to cite this post in your research:
Erik Kokalj. (Feb 24, 2026). Why and How to Implement Random Rotate Data Augmentation. Roboflow Blog: https://blog.roboflow.com/why-and-how-to-implement-random-rotate-data-augmentation/