
The Luxonis OAK-D pairs an RGB camera with stereo depth sensing, which means a custom object detection model deployed to it can report not just what it sees but how far away each object is. This tutorial covers the full pipeline for training a custom MobileNetV2 object detection model and deploying it to the Luxonis OAK-D, a camera that pairs RGB imaging with onboard depth sensing. As well as how to deploy an RF-DETR model.
We are pretty excited about the Luxonis OpenCV AI Kit (OAK-D) device at Roboflow. Our excitement has naturally led us to create another tutorial on how to train and deploy a custom object detection model leveraging Roboflow and DepthAI, to the edge, with depth, faster.
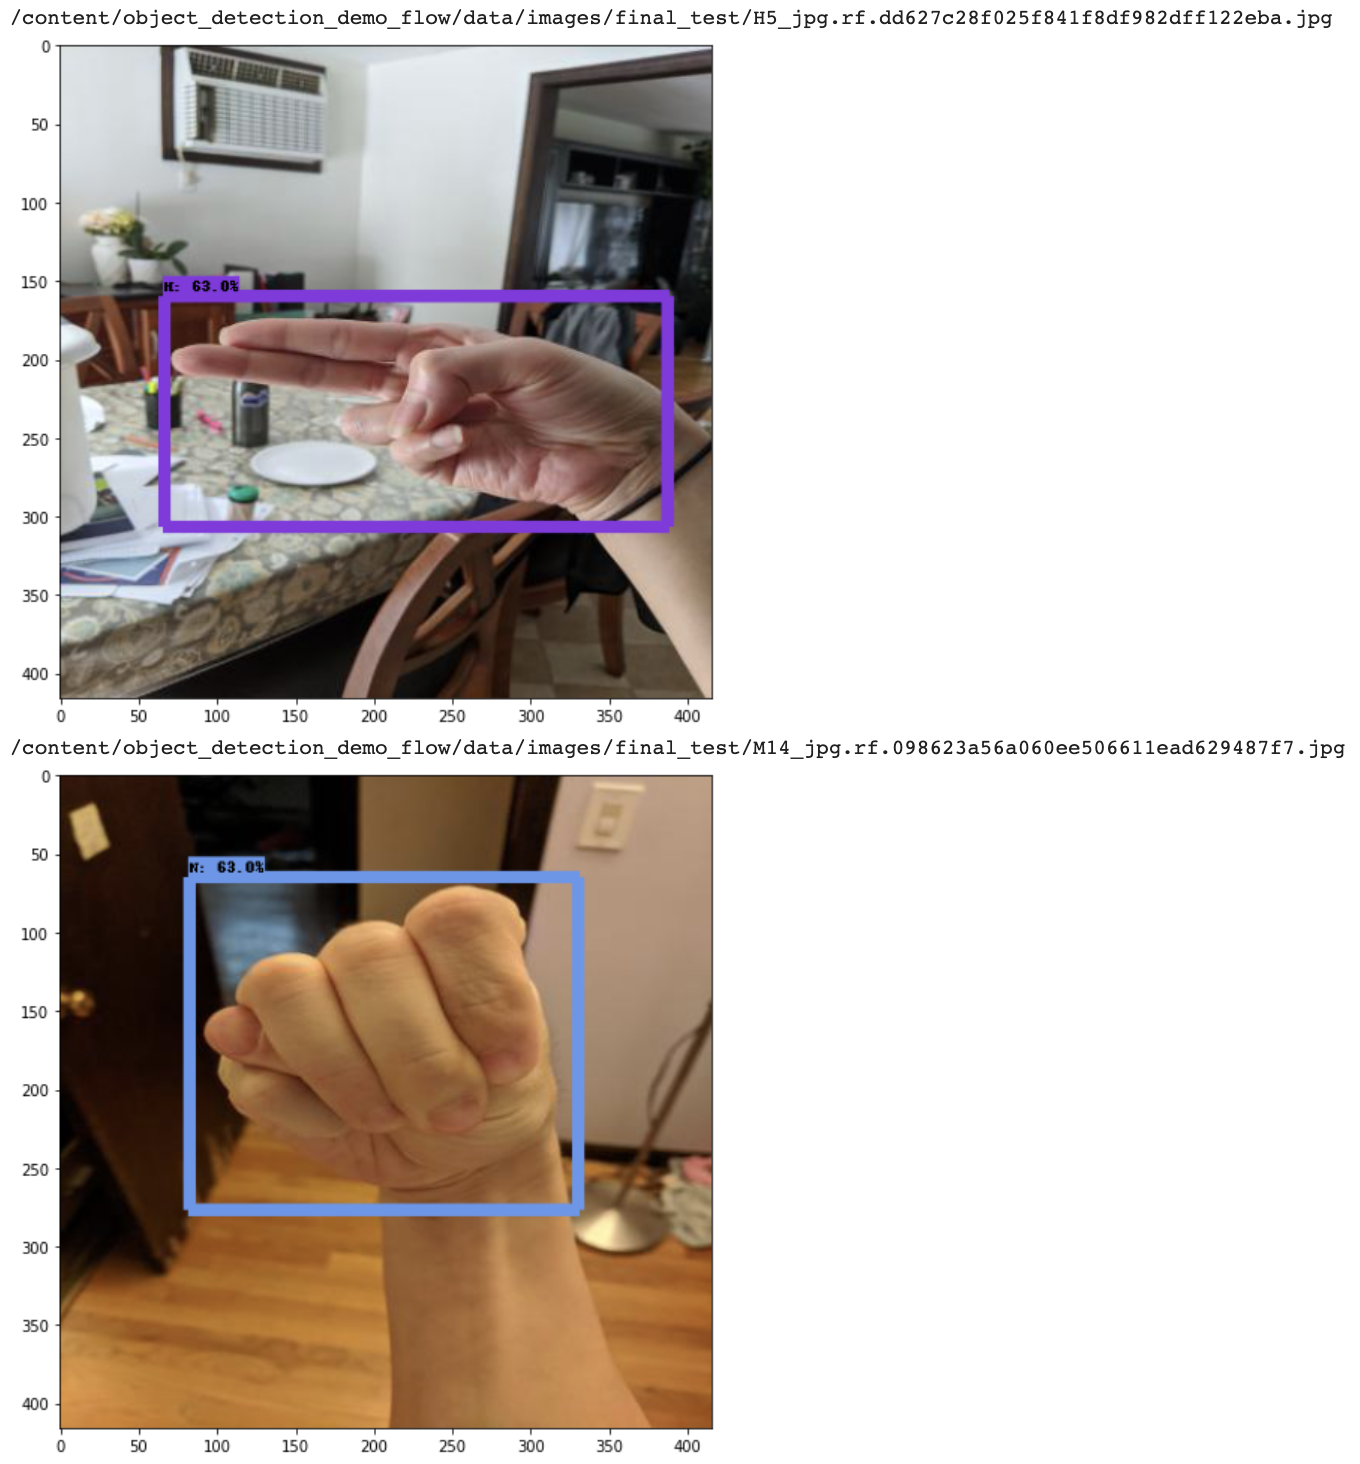
To illustrate the immensely wide open scope of applications this guide opens up, we tackle the task of realtime identification of American sign language.
What Is the Luxonis OAK-D?
The Luxonis OAK-D (OpenCV AI Kit with Depth) is an edge camera that today combines a 4K RGB sensor, a stereo camera pair for depth perception, and an onboard vision processor. Because the depth map is computed on the device, the host machine receives synchronized RGB frames and per-pixel distance measurements without doing any stereo math itself.
That combination makes the OAK family a common choice for robotics, pick-and-place, obstacle avoidance, and any application where knowing an object's position in 3D space matters as much as recognizing it. The family includes the OAK-D, OAK-D-Lite, and OAK-D-PoE, plus the OAK-1 (RGB only, no depth) and the newer OAK4 series, which can run entire vision pipelines standalone with no host computer at all.
How the Pieces Fit Together
A depth-aware detection system has three parts: a camera that produces RGB frames and a depth map, a detection model that finds objects in the RGB frame, and a small amount of logic that reads the depth map at each detection's location. There are two places the model can run:
- On the host machine connected to the OAK-D - The camera streams frames and depth to the host, and the host runs the model. This supports any model, including Roboflow's RF-DETR.
- On the camera itself - The OAK-D's onboard processor can run models compiled for it, which limits your architecture choices, and the OAK4 can run full Roboflow Workflows on-device. Both options are covered later in this post.
Gather and Label Images to Evaluate Depth AI on Luxonis OAK-D
To get started with this guide, you will need labeled images. Object detection labeling involves drawing a box around the object you want to detect and defining a class label for that object. The labeled images will provide supervision for our model to learn from.
If you would like to follow along with the tutorial, you can skip this step and fork the public American Sign Language Training Data.
Install MobileNetV2 Training Environment
Once you have your dataset labeled, it is time to jump into training!
To the Colab Notebook to Deploy Custom Model to OAK-D - we recommend having this up alongside this blog post. You will be able to run the cells in the notebooks sequentially, only changing one line of code for your dataset import.
To start off in this notebook, make a copy in your drive and make sure the GPU Runtime is enabled. Then, we will install dependencies for the TF OD library in the first few cells.
Download Custom Training Data From Roboflow
Whether you choose to fork the public sign language detection dataset, or bring your own, you will want to use Roboflow to get your data in the proper format for training, namely, TFRecord.
Choose data preprocessing and augmentation settings. Hit Generate. Then Donwload and choose Tensorflow TFRecord.
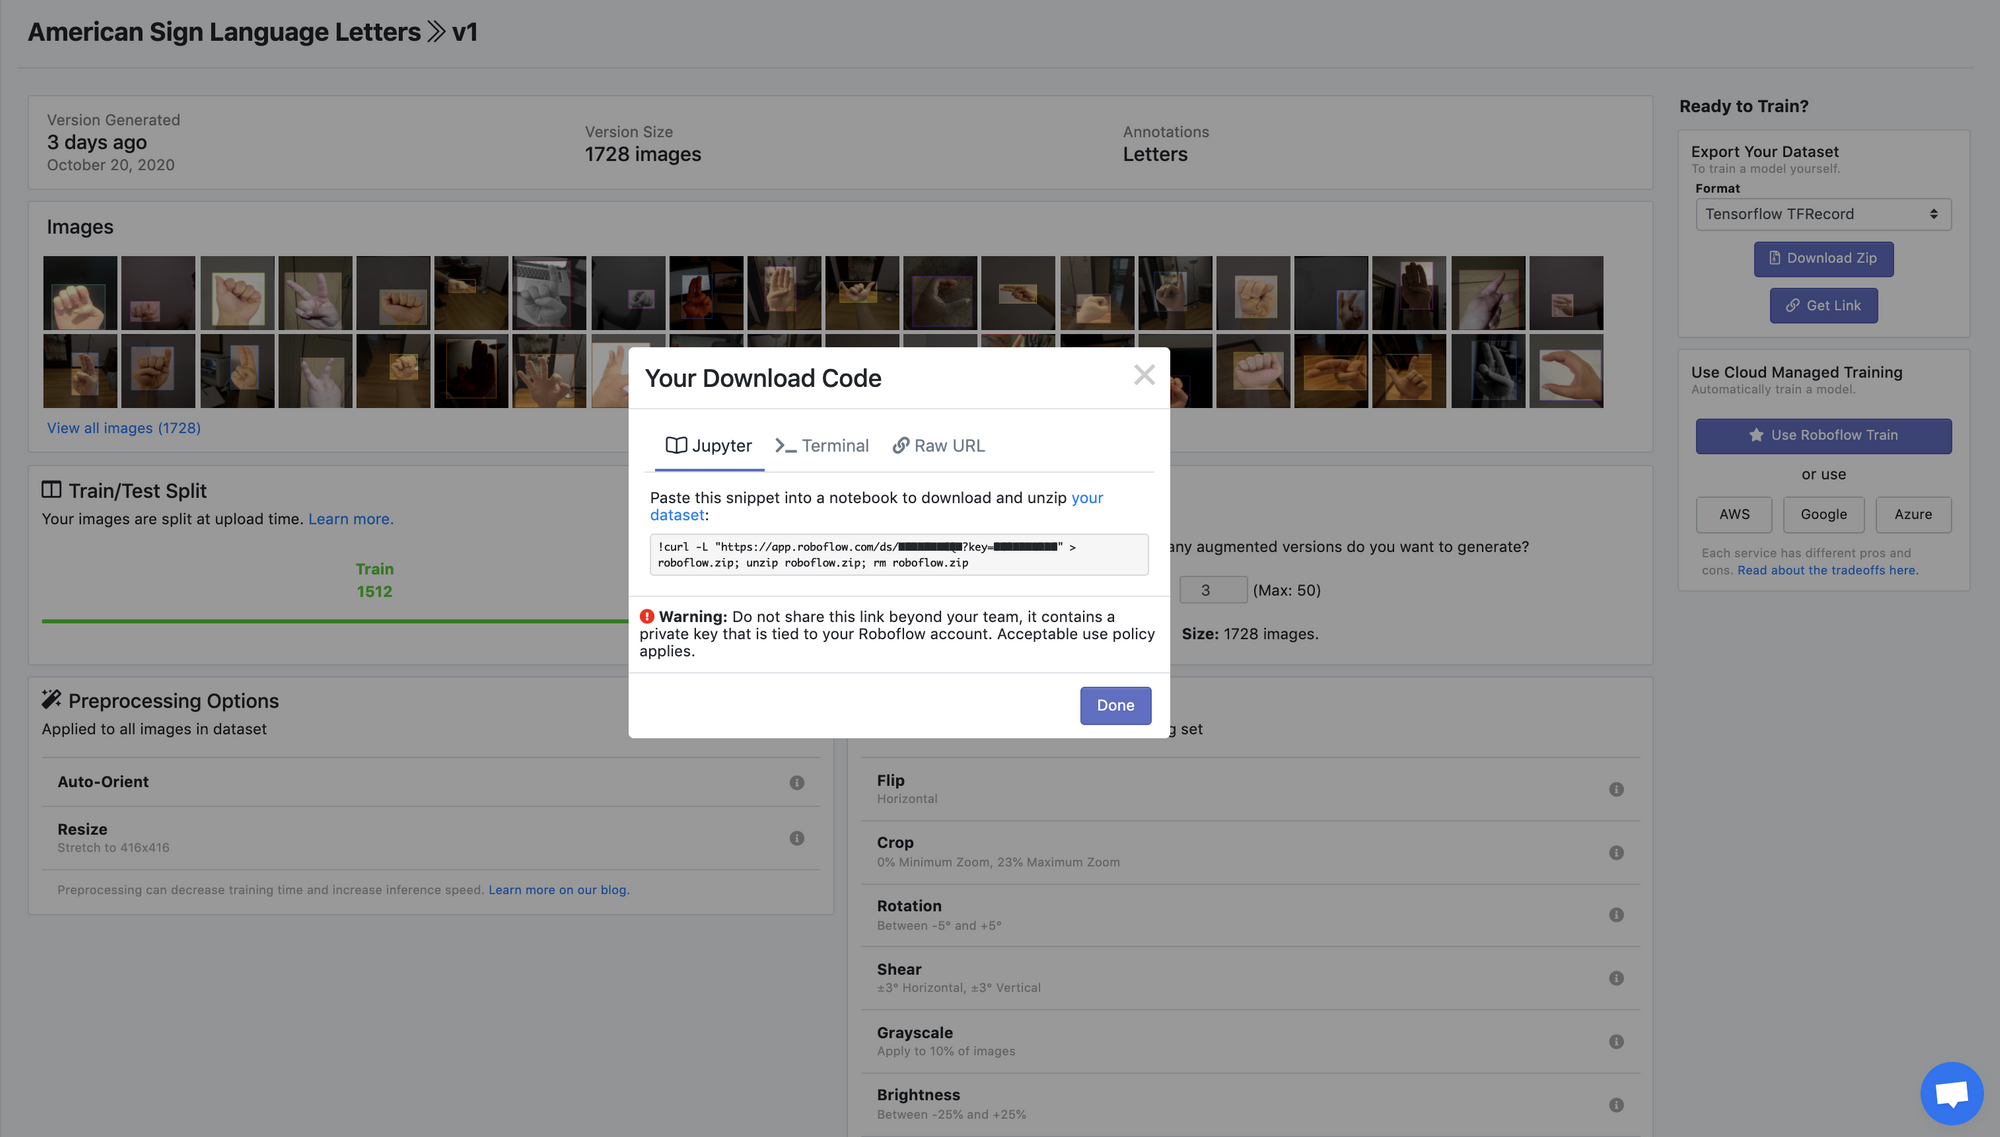
Then we'll paste that download link into the Colab notebook to bring our data in.
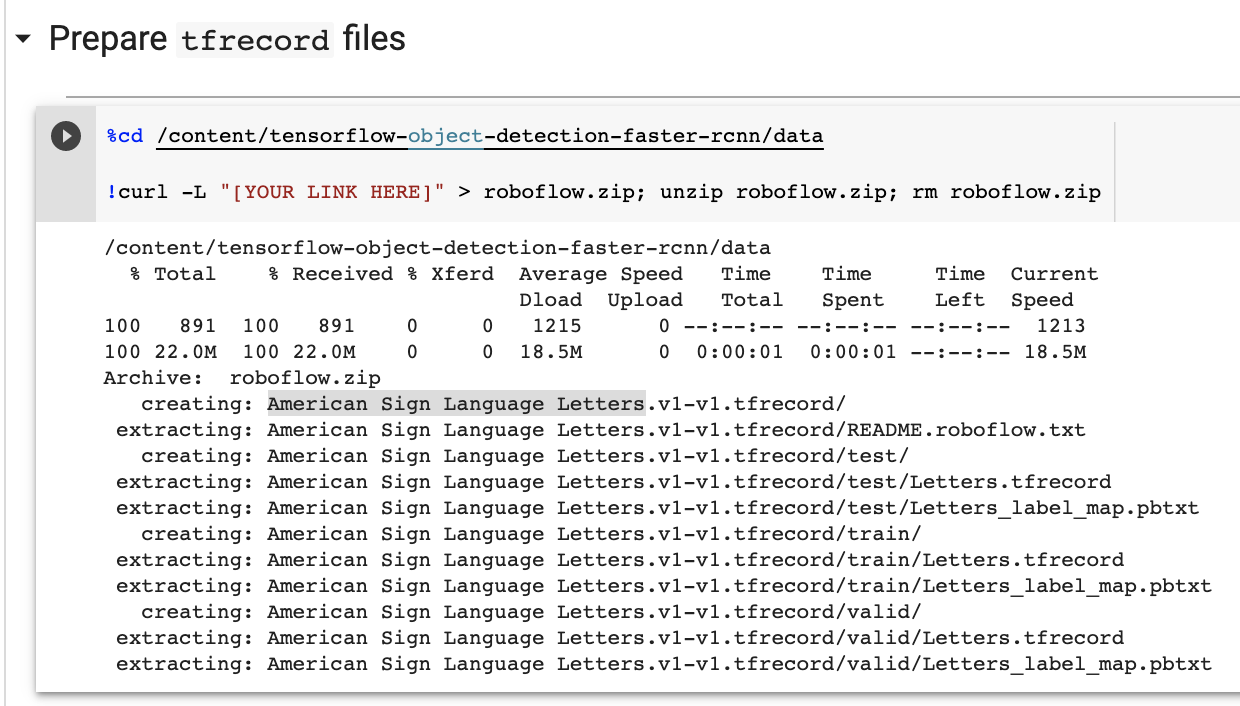
Train Custom MobileNetV2 Object Detection Model
After we have our data in the notebook, we can proceed with training our custom model.
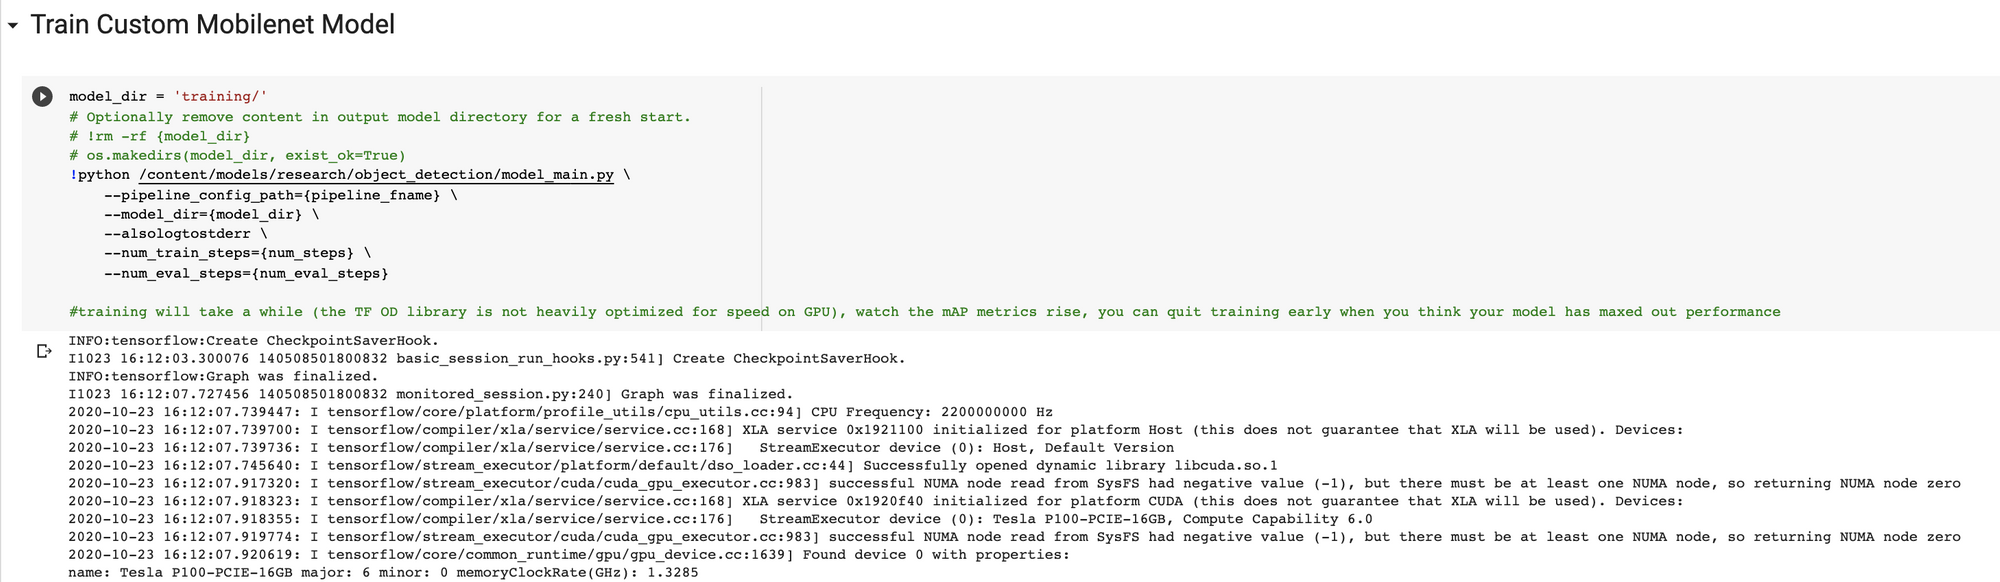
We will first download the pretrained MobileNetV2 weights to start from. Then we'll configure a few parameters in our training configuration file. You can edit these configurations to change based on your datasets needs. Most commonly, you may want to adjust the number of steps your model trains for. More steps takes longer but typically yields a more performant model.
Once the training configuration is defined, we can go ahead and kick off training.
Run Test Inference to Check the Model's Functionality
Before moving on to model conversion, it is wise to check our model's performance on test images. These are images that the model has never seen before.
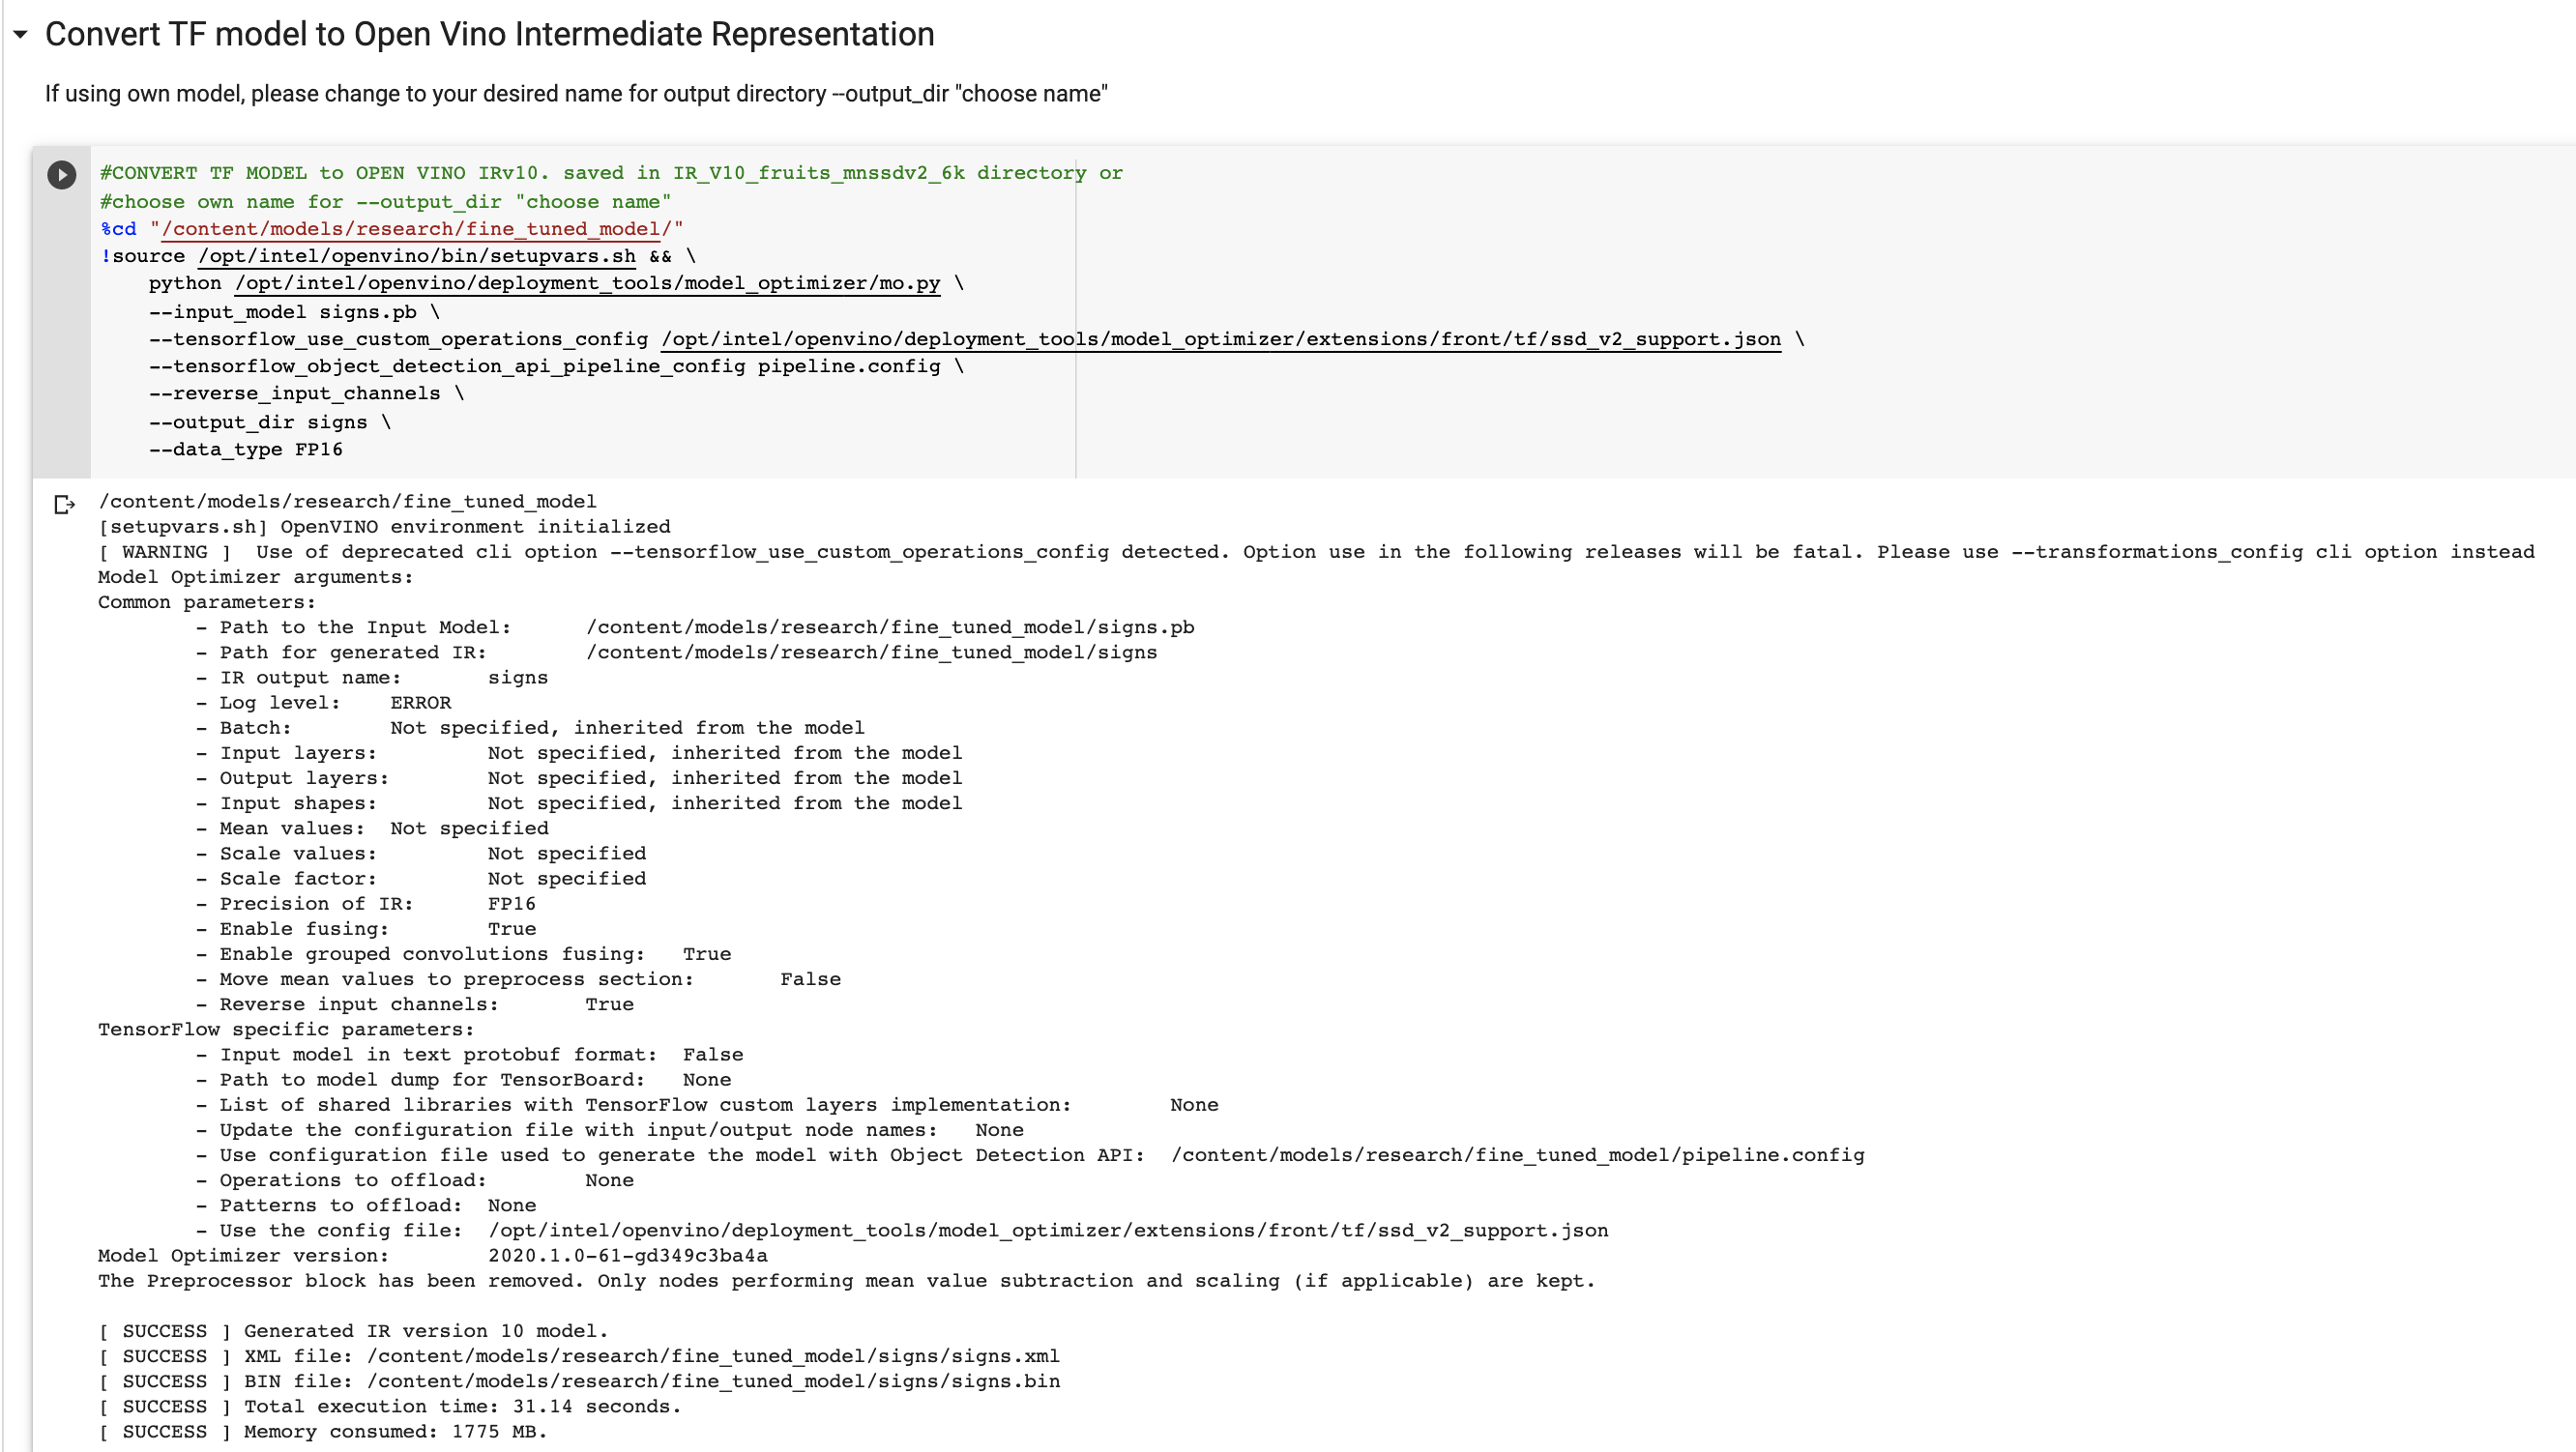
Convert Custom MobileNetV2 TensorFlow Model to OpenVino and DepthAI
Once you are satisfied with your models performance metrics and test inference capabilities it is time to take it live!
Before your model will be usable on the OAK-D Device, you will first need to convert it to a format that is compatible with the DepthAI framework.
The first step is to install OpenVino (Intel's edgeAI framework) and convert your model into an OpenVino Intermediate Representation.
From the OpenVino IR, we then send the model up to DepthAI's API to convert it to a .blob.
Download the .blob and put it somewhere accessible to the machine running your OAK device (AWS S3, USB stick, etc.) . Note: you will need a linux based environment to host the OAK device.
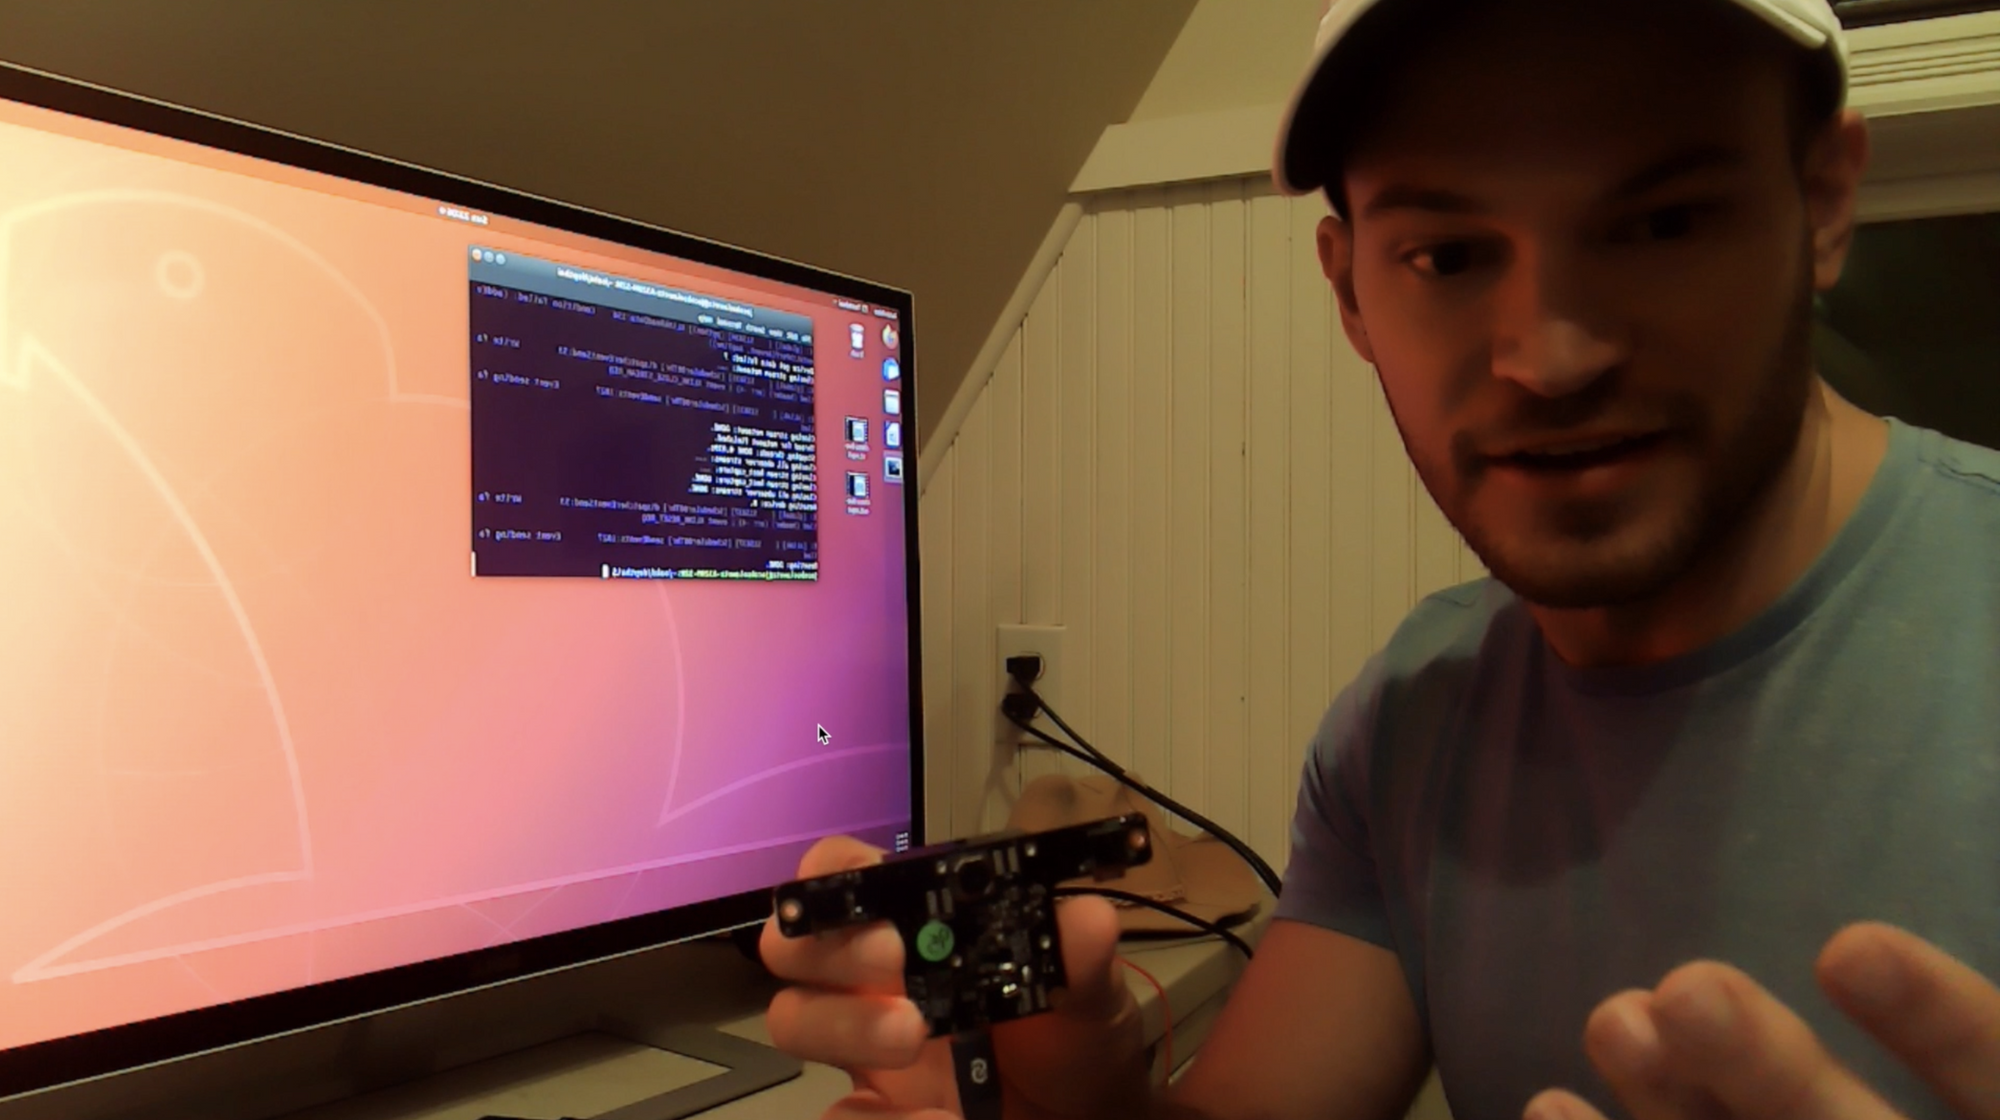
Deploy Our Custom Model to the Luxonis OAK-D
To deploy our custom model on the Luxonis OAK-D, we'll first need to clone the DepthAI repository and install the necessary requirements. Here is the documentation for setting up the DepthAI repo.
Then, you can click in your OAK device and test the following command to see if your installs worked:
python3 depthai_demo.py -dd -cnn mobilenet-ssd
This runs the base mobilenet-sdd model that has been trained on the COCO dataset. To run our model, we'll leverage all the infra around this base model with our own twist.
Within the DepthAI repo, you will see a folder called resources/nn/mobilenet-sdd. To bring in our own model, we'll copy that folder to resources/nn/[your_model] and rename the three files to [your_model] in place of mobilenet-ssd.
Then we copy over our custom models weights in place of what once was mobilenet-sdd.blob. Then we edit the two JSON files, to replace the default class names with our own class list. If you need to double-check the order of your custom class lists, you can check the printout in the Colab notebook when we imported our data. After rewriting this files, we are ready to launch our custom model!
python3 depthai_demo.py -dd -cnn [your-model]
You will see the video stream forming bounding boxes around the objects you trained the model to detect along with a depth measurement of how far away the object is from the camera.
Deploying with RoboflowOak
Alternatively, you can deploy models trained with Roboflow Train to OAK devices with our Python package (roboflowoak): Step-by-Step Deploy Guide. DepthAI and OpenVINO are required on your host device for the package to work.
- roboflowoak (PyPi)
Deploying to Luxonis OAK-D
Congratulations! Through this tutorial, you have learned how to span the long distance from collecting and labeling images to running realtime inference on device with a custom trained model.
We showed how to tackle the problem of identifying American Sign Language in this blog as a demonstration of the wide scope of custom tasks you can apply in your own domain with your dataset.
Good luck and as always, happy training.
Resources, Shoutouts, Related Content
Data
- Custom American Sign Language Training Data - Shoutout to David Lee
- Computer Vision for American Sign Language Blog
Training
- Colab Notebook to Deploy Custom Model to OAK-D - This is the notebook we will be referencing in the tutorial
- Luxonis MobileNetV2 Deploy Notebook - Our notebook is heavily inspired by this notebook by Rares @ Luxonis
- Training a Custom TensorFlow Object Detection Model - Roboflow Blog
- Training Custom TensorFlow2 Object Detection Model - Roboflow Blog
Model Conversion
- Converting MobileNetV2 to OpenVino - Intel OpenVino Docs
Deployment
End to End
Prefer to Deploy RF-DETR?
What You Need
- A free Roboflow account
- A Luxonis OAK-D, OAK-D-Lite, or OAK-D-PoE connected to a host machine (a laptop, an industrial PC, or a single-board computer)
- Python 3 on the host
- Labeled images, or the public dataset below
Step 1: Get a Dataset
I'll again use the American Sign Language Letters dataset, a labeled object detection dataset covering the ASL alphabet. Open the dataset page and fork it into your workspace, annotations included.
To use your own images instead, create an Object Detection project in Roboflow and upload them. Roboflow Annotate speeds labeling with Auto Label and Label Assist, which draft bounding boxes with foundation models so you review annotations instead of drawing every box by hand. Roboflow Universe hosts 200,000+ open datasets if you want to start from existing labeled data for another task.
Step 2: Generate a Dataset Version
From your project, generate a dataset version. Apply auto-orient and resize preprocessing, keep the default train/valid/test split, and add augmentations only after you have a baseline model to compare against. A version is a frozen snapshot, so every training run is reproducible.
Step 3: Train RF-DETR in Roboflow
Click Train Model, select Custom Training, and choose RF-DETR as the architecture, training from the COCO public checkpoint. Training runs on Roboflow's hosted GPUs, so there is nothing to install and no notebook to babysit. Expect 30 to 60 minutes for a dataset of this size.
When training completes, review the metrics: mAP for overall quality, and precision and recall per class. For a signing-letters task, per-class recall matters because visually similar letters (like M and N) are where the model will struggle first. If a class underperforms, add and label more examples of it and train a new version. This mean average precision explainer covers how to read these numbers.
Step 4: Set Up the Host for the OAK-D
On the host machine, install the DepthAI library and Roboflow Inference:
pip install depthai opencv-python inference-cli inference-sdk
inference server start
inference server start launches a local Roboflow Inference server in Docker at http://localhost:9001. Your model weights download and cache locally on first use, so inference runs on the host with no per-call cloud dependency. Verify the OAK-D is detected by running any example from the Luxonis documentation.
Step 5: Run Your Model with Depth
The script below builds a DepthAI pipeline that streams RGB preview frames and a depth map aligned to the color camera, runs each frame through your RF-DETR model on the local Inference server, and reads the depth at the center of every detection:
import os
import cv2
import depthai as dai
from inference_sdk import InferenceHTTPClient

client = InferenceHTTPClient(
    api_url="http://localhost:9001",
    api_key=os.getenv("ROBOFLOW_API_KEY"),
)
MODEL_ID = "your-project/1"  # your Roboflow model ID

pipeline = dai.Pipeline()

cam = pipeline.create(dai.node.ColorCamera)
cam.setPreviewSize(640, 640)
cam.setInterleaved(False)

left = pipeline.create(dai.node.MonoCamera)
right = pipeline.create(dai.node.MonoCamera)
left.setBoardSocket(dai.CameraBoardSocket.CAM_B)
right.setBoardSocket(dai.CameraBoardSocket.CAM_C)

stereo = pipeline.create(dai.node.StereoDepth)
stereo.setDefaultProfilePreset(dai.node.StereoDepth.PresetMode.HIGH_DENSITY)
stereo.setDepthAlign(dai.CameraBoardSocket.CAM_A)
left.out.link(stereo.left)
right.out.link(stereo.right)

xout_rgb = pipeline.create(dai.node.XLinkOut)
xout_rgb.setStreamName("rgb")
cam.preview.link(xout_rgb.input)

xout_depth = pipeline.create(dai.node.XLinkOut)
xout_depth.setStreamName("depth")
stereo.depth.link(xout_depth.input)

with dai.Device(pipeline) as device:
    q_rgb = device.getOutputQueue("rgb", maxSize=4, blocking=False)
    q_depth = device.getOutputQueue("depth", maxSize=4, blocking=False)

    while True:
        frame = q_rgb.get().getCvFrame()
        depth = q_depth.get().getFrame()  # uint16, millimeters

        result = client.infer(frame, model_id=MODEL_ID)

        for p in result["predictions"]:
            x, y = int(p["x"]), int(p["y"])
            dx = int(x * depth.shape[1] / frame.shape[1])
            dy = int(y * depth.shape[0] / frame.shape[0])
            distance_mm = int(depth[dy, dx])

            w, h = int(p["width"]), int(p["height"])
            cv2.rectangle(frame, (x - w // 2, y - h // 2), (x + w // 2, y + h // 2), (0, 255, 255), 2)
            cv2.putText(frame, f"{p['class']} {distance_mm} mm", (x - w // 2, y - h // 2 - 8),
                        cv2.FONT_HERSHEY_SIMPLEX, 0.6, (0, 255, 255), 2)

        cv2.imshow("RF-DETR + depth", frame)
        if cv2.waitKey(1) == ord("q"):
            break
Point the camera at a scene and you will see bounding boxes with class names and a live distance reading on each object. The depth map and preview frame have different resolutions, which is why the script scales the detection center before indexing into the depth array. For smoother distance estimates, average a small window of depth pixels around the center rather than reading a single pixel.
Running On-Device Instead
The host-side pattern above supports any model. If you need inference to run on the camera itself, two options exist:
- The roboflowoak Python package deploys Roboflow-trained models to the OAK's onboard processor and returns predictions with a depth value per detection. The onboard chip only runs architectures compiled for it, which currently means YOLO-family models rather than RF-DETR, so this path trades model choice for host independence.
- The OAK4 runs Roboflow Workflows directly on-device in standalone mode: build a Workflow in the browser, connect with oakctl, and the camera executes the whole pipeline with no host computer. Luxonis publishes a working example you can clone and point at your own Workflow.
Going Further: From Detections to Applications
Once detections with depth are flowing, Roboflow Workflows turns them into an application: chain your model with tracking, zone logic, filtering, and notifications, then run the Workflow on the same local Inference server.
Use Roboflow Agent to Build It for You
If you would rather not assemble the project step by step, Roboflow Agent can do the platform-side work from a plain-text description. Describe your goal in a sentence or two, for example:
Build me an object detection project for American Sign Language letters.
Fork the public ASL Letters dataset, train an RF-DETR model on it, and
create a Workflow that runs the model on a video stream and returns
predictions I can consume from a local Inference server.
The Agent forks the dataset, kicks off training, and assembles the Workflow, and you review each step in the chat instead of clicking through the interface. It is the fastest path from idea to a deployed model when the task is standard.
The OAK-D side of this tutorial stays the same: the DepthAI script in Step 5 connects to whatever model or Workflow the Agent produced, and the depth logic is unchanged.
Why RF-DETR for Custom Object Detection?
RF-DETR is Roboflow's transformer-based real-time detection architecture. It fine-tunes quickly from COCO-pretrained checkpoints, adapts well to small custom datasets through its DINOv2 backbone, and leads real-time models on RF100-VL, the benchmark measuring transfer to real-world domains.
It is also released under a commercially permissive license, so the model you train here can ship in a product without licensing friction. Training in Roboflow adds hosted GPUs, versioned datasets, and a one-step path from trained weights to the same deployment used in this tutorial.
Can RF-DETR run directly on the OAK-D?
No. The OAK-D's onboard vision processor runs models compiled specifically for it, and transformer architectures such as RF-DETR are not supported on that chip. Run RF-DETR on the host machine as shown above, or use an OAK4, which runs full Roboflow Workflows on-device.
How do I get the distance to a detected object?
The OAK-D computes a per-pixel depth map from its stereo camera pair. Align the depth map to the color camera, scale your detection's center coordinates to the depth map's resolution, and read the value, which is distance in millimeters.
Can I still train and deploy a MobileNetV2 model to the OAK-D?
The DepthAI framework accepts any model compiled to its blob format, including MobileNetV2 SSD, so the path exists for legacy pipelines. For a new project, training RF-DETR in Roboflow and running it on the host is faster to set up, more accurate on custom data, and avoids the TensorFlow-to-OpenVINO-to-blob conversion chain entirely.
Which OAK devices does the Roboflow deployment support?
The roboflowoak package supports the OAK-D, OAK-D-Lite, OAK-D-PoE, and OAK-1 (without depth). The host-side pattern in this tutorial works with any OAK device DepthAI supports, and the OAK4 additionally runs Roboflow Workflows standalone.
Does the host machine matter for speed?
Yes. With host-side inference, frame rate depends on the host's hardware. A laptop CPU handles a Nano or Small RF-DETR model in real time; a GPU host or an edge box like a Jetson raises throughput for larger models or multiple cameras.
Get Started
Train your model in the browser, start the local Inference server, and your OAK-D becomes a depth-aware detection system. Create a free Roboflow account to get started.
Cite this Post
Use the following entry to cite this post in your research:
Jacob Solawetz. (May 1, 2026). Luxonis OAK-D: Deploy a Custom Object Detection Model with Depth. Roboflow Blog: https://blog.roboflow.com/luxonis-oak-d-custom-model/