
Running an object detection model on a Jetson Nano can do more than visualize bounding boxes: this tutorial shows how to add custom Python logic that counts stacked cardboard boxes, triggers an automated email alert when a stack exceeds a safe height, and optionally runs inference locally using Roboflow Inference in a Docker container for lower latency. The same pattern applies to any event-driven computer vision application in logistics, manufacturing, or inventory management where a detected condition needs to kick off a downstream action.
In this tutorial, we'll show you how to use object detection to identify specific configurations within an image to trigger email notifications. This setup demonstrates how you can easily integrate Roboflow with custom actions and code at the same time.
Our example will focus on stacking boxes to highlight how you could use computer vision in logistics, shipping, retail, manufacturing, packaging, inventory management, and more.
Choosing a Use Case and Dataset
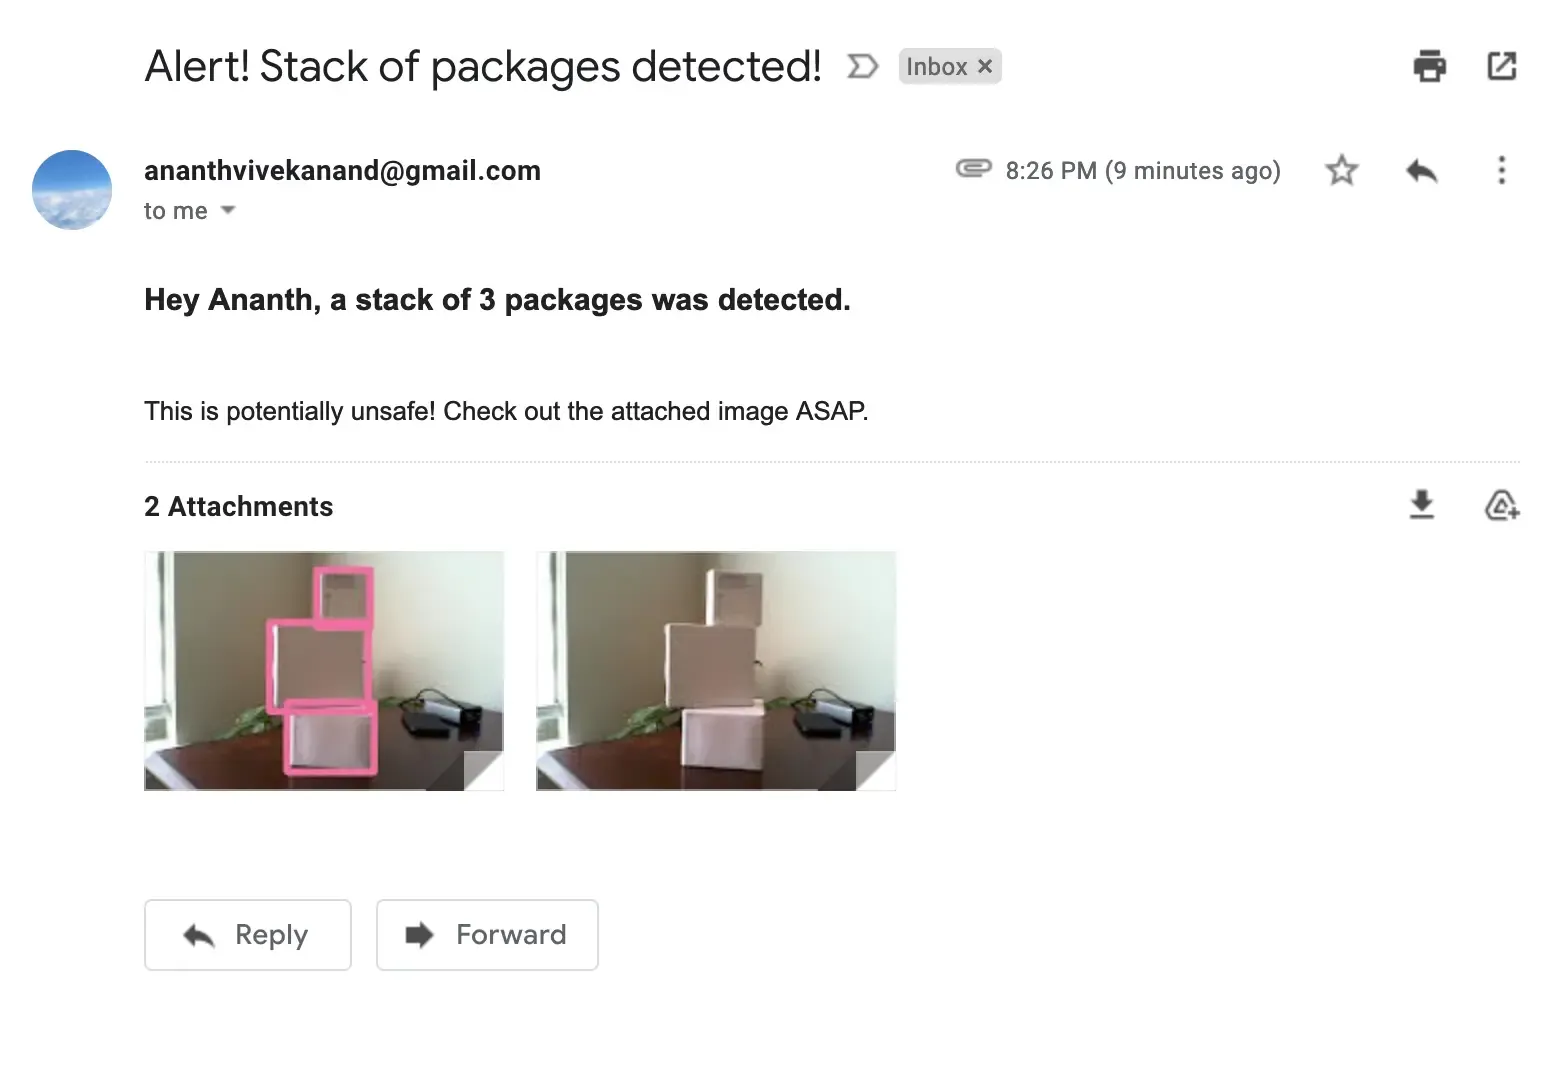
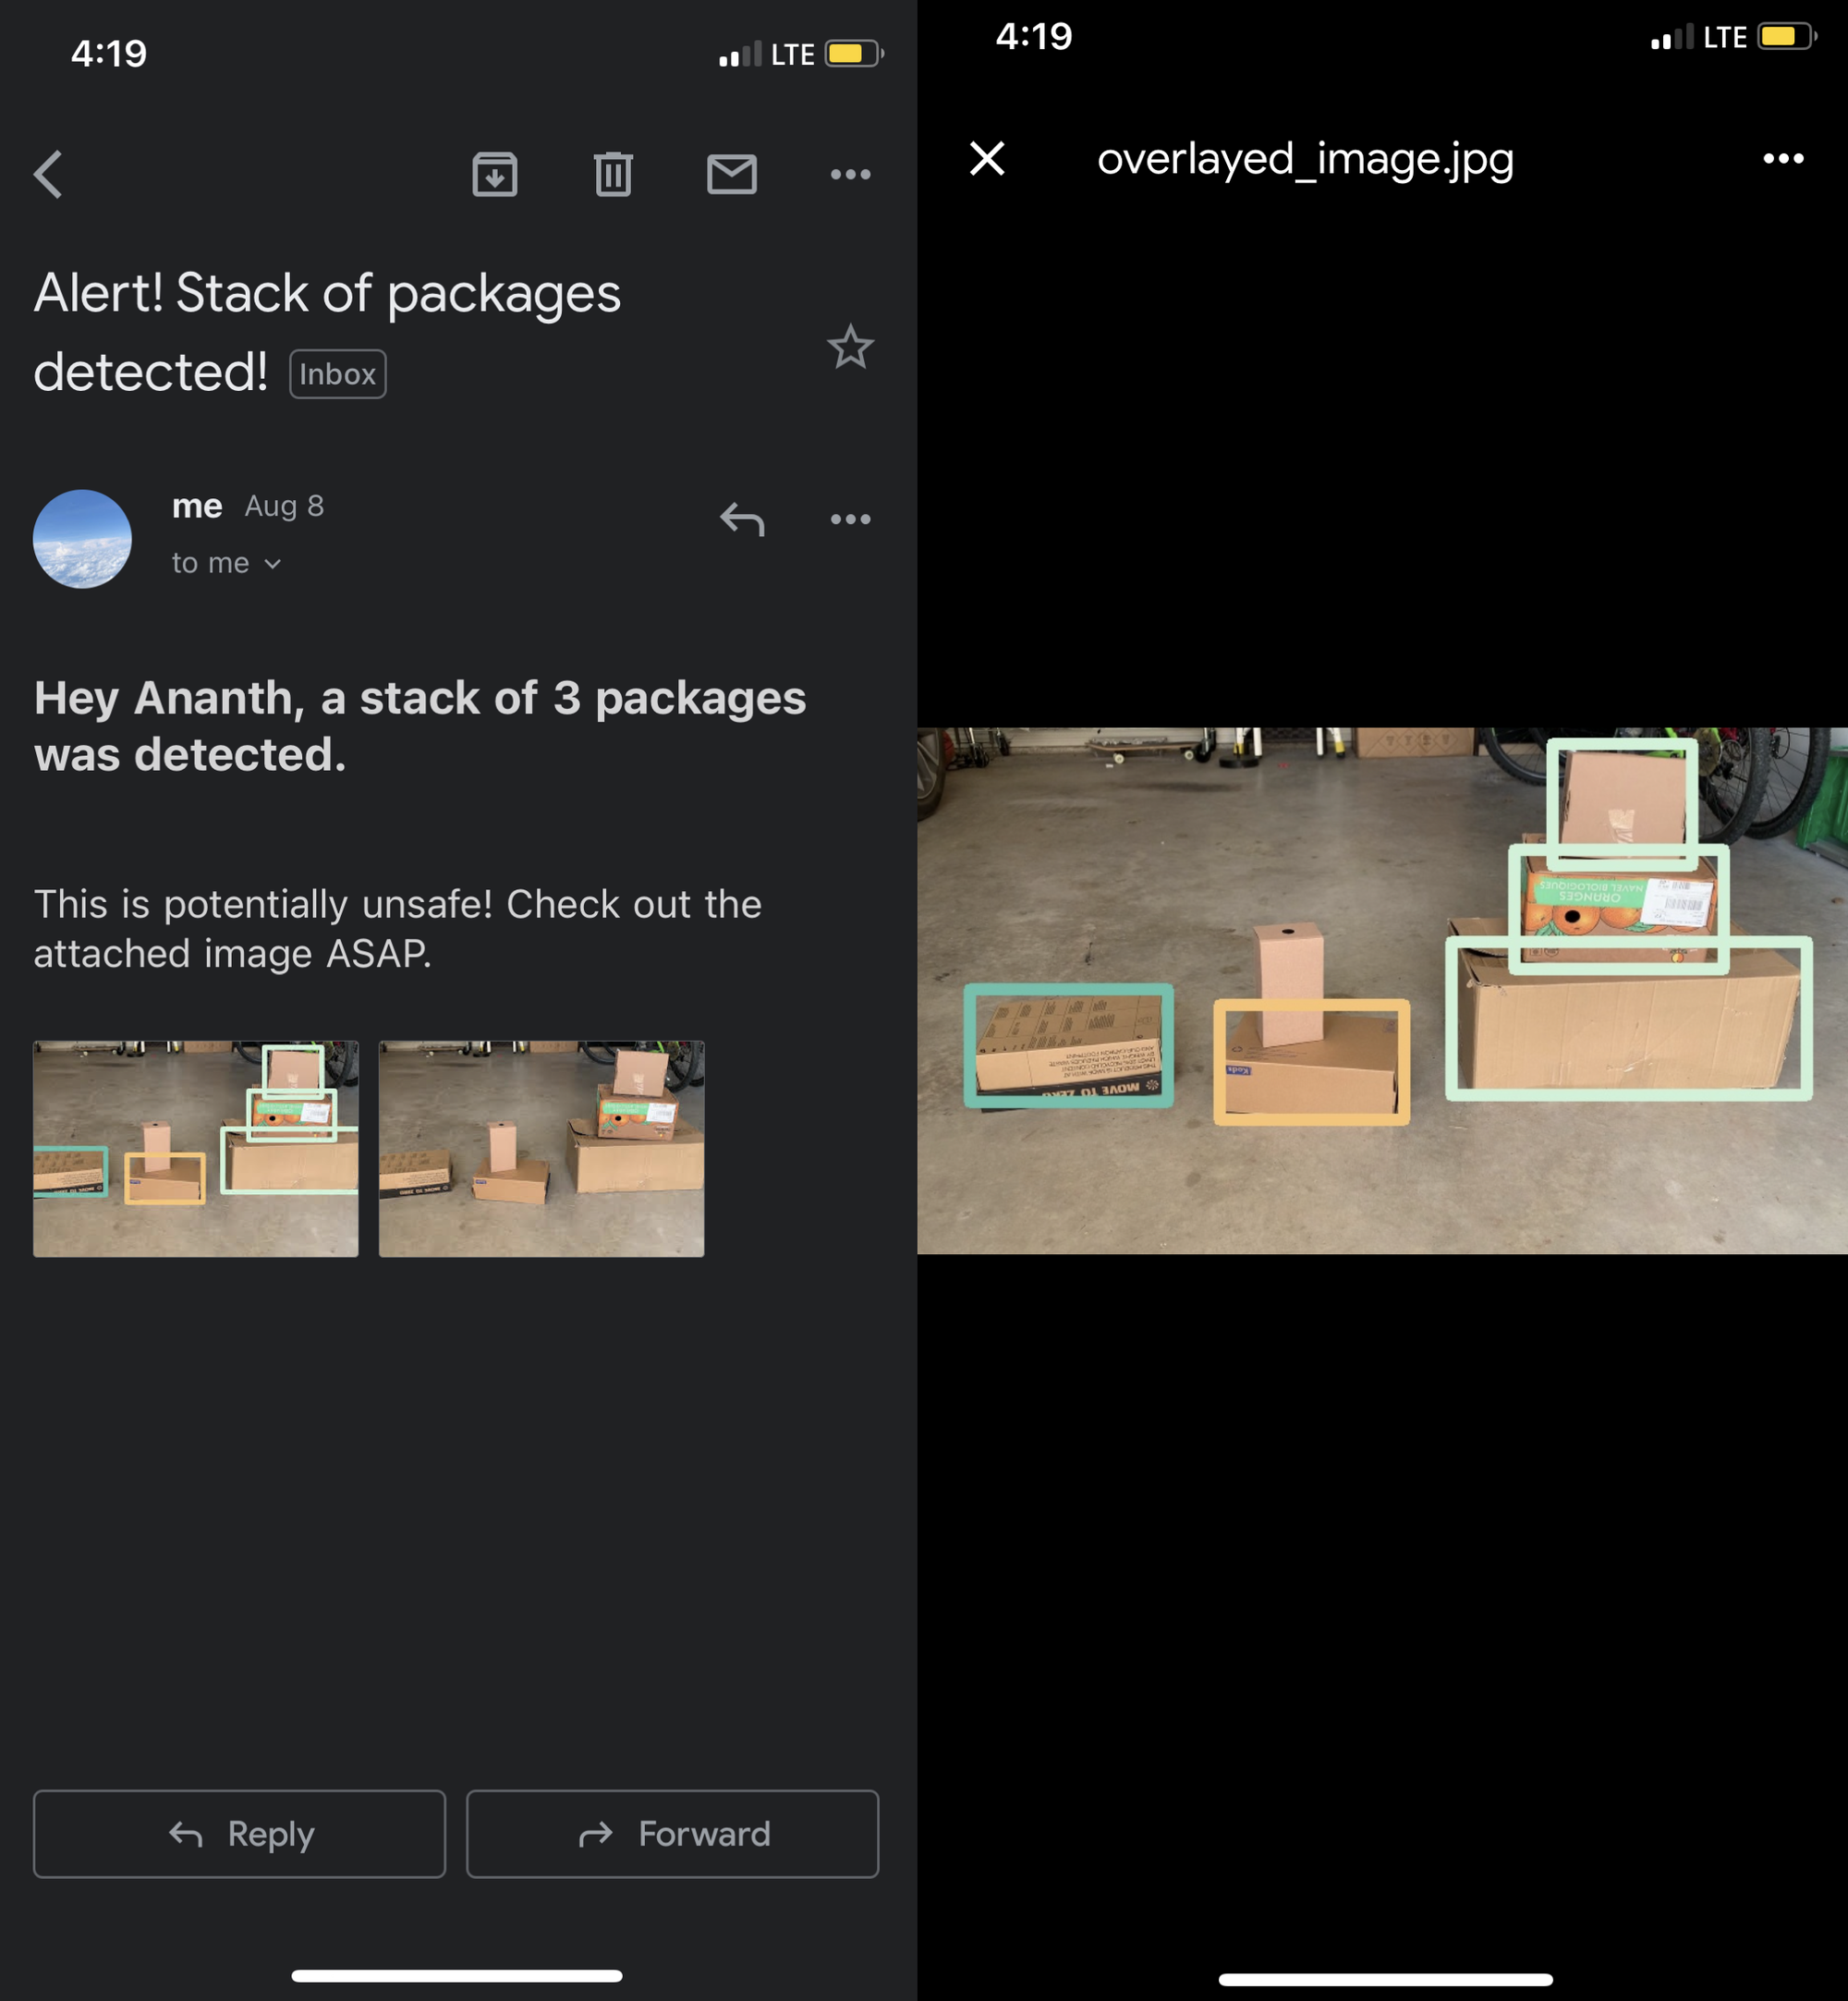
First, we'll identify our use-case. In this tutorial, we'll be focusing on the safety of stacking cardboard boxes. We want to receive an email notification if our Jetson Nano sees 3 or more boxes stacked on top of each other, since that could be a safety hazard.
Your application or use-case could be anything. In the past, developers have used Roboflow for microbiology research to auto-piloting drones. If you're looking for ideas, feel free to check out Roboflow Universe, a hub for thousands of datasets and models.
Next, we'll find a model from Universe to use or train our own. On Roboflow Universe, we found this packages dataset that already has a trained model. Alternatively, we could've easily uploaded our own data, created a dataset, and one-click trained a model on Roboflow's end-to-end platform.
On Roboflow Universe, we can drag-and-drop images to try out trained models. Looks like the model we found is fairly accurate!
Custom Python Actions for Computer Vision
Roboflow makes using models as easy as an API call. We'll be building off a snippet from our API snippets repository, which has boilerplate code for Python, Javascript, Go, Java, and more.
You can find the modified code we'll be referring to here. (insert once uploaded)
- Change the specified camera on line 31 if necessary – a built-in webcam is usually index 0.
- Ask the API to return JSON responses by changing
"&format=image"to"&format=json"on Line 27. - Write a function called
process_predsthat identifies stacks and how many boxes are in each stack. It does this by simply comparing the coordinates of each detected box, and whether one appears to be "on top" of another. - Since we told the API not to return an image, we'll use
opencvto draw bounding rectangles over each detected box so we can still visualize our predictions. - Add a file called
action.pythat defines a function calledexecute_trigger, which contains the custom code that we want to execute when the Jetson Nano sees 3 or more packages stacked on top of each other. Using a library calledsimplegmail, it'll send an email to a specified email address. The function also saves the image that the Jetson Nano is seeing, and attaches that file to the email. This is only 11 lines of Python!
import cv2
from simplegmail import Gmail
import json

gmail = Gmail() # will open a browser window to ask you to log in and authenticate

with open('roboflow_config.json') as f:
    params = json.load(f)['simplegmail_config']

# Defines a custom action to be taken when enough boxes are stacked.
# We'll be sending an email with a photo of the stacked items.
def execute_trigger(overlayed_image, raw_image):
    cv2.imwrite("overlayed_image.jpg", overlayed_image)
    cv2.imwrite("raw_image.jpg", raw_image)
    print("Image successfully saved! Attempting to send email.")

    message = gmail.send_message(**params)
The 11 lines of our custom Python code for sending an email notification! (in action.py)
At the end of the clip, we can see "Image successfully saved! Attempting to send email."
Use the Code to Build Your Own Applications
If you'd like to try it out, feel free to copy my code from here. In roboflow_config.json, specify your model, API key, and the details of each notification email (such as sender, receiver, and HTML content). You can find the model ID and your API key on the "Deploy" page on the Roboflow Universe page for a model or within your project if you trained your own.
Next, set up simplegmail by following the instructions here – you'll need to log into Google Cloud Console, create a project, and create a file called client_secret.json with your Google API key. Keep that file in the same directory as main.py and action.py.
Setting up a Jetson Nano for Roboflow Deploy
Instead of using Roboflow's Hosted API, we can also run inference on-device with our Jetson Nano. This is optional, but you may want to run inference locally for lower latency and to take advantage of the Jetson's GPU acceleration. Roboflow distributes an easy Docker container to take care of all the dependencies and keep our code as simple as an API call.
# pull the container
sudo docker pull roboflow/inference-server:jetson

# Run it while passing through the Jetson's GPU
sudo docker run --net=host --gpus all roboflow/inference-server:jetson
Then, on line 23, we can point our requests at our local container instead of the hosted API by changing "https://detect.roboflow.com/" to "http://127.0.0.1:9001/".
Make sure to transfer the Python code to the Jetson, install dependencies using pip, and plug in a camera. Let's run main.py!
Running main.py on our Jetson Nano.
For a deeper dive into using the Jetson Nano, check out this video:
Cite this Post
Use the following entry to cite this post in your research:
Ananth Vivekanand. (Aug 8, 2022). How to Use Object Detection to Trigger Automated Email Alerts. Roboflow Blog: https://blog.roboflow.com/object-detection-jetson-nano-python/