
This tutorial trains a YOLOv8 keypoint detection model on a custom dataset of glue stick images, labeling two key points (cap and bottom) using Roboflow Annotate, then writing Python logic to calculate the angular orientation of each stick. The same approach applies to industrial assembly line checks, robotic arm envelope measurement, or human pose estimation, where angles between detected key points encode meaningful state about the object.
Keypoint detection, also referred to as “pose estimation” when used for humans or animals, enables you to identify specific points on an image.
For example, you can identify the orientation of a part on an assembly line with keypoint detection. This functionality could be used to ensure the orientation of the part is correct before moving to the next step in the assembly process. You could use keypoint detection to identify key points on a robotic arm, for use in measuring the envelope of the device. Finally, a common use case is human pose estimation, useful in exercise applications or factory workstation ergonomics.
In this guide, we are going to walk through how to train an YOLOv8 keypoint detection model on a custom dataset. We will train a model to identify key points of a glue stick, then use these points to calculate the orientation of a glue stick in an image. To train our model, we will:
- Install the required dependencies.
- Create keypoint annotations in Roboflow.
- Generate a dataset for use in training.
- Train a YOLOv8 keypoint detection model in a notebook.
- Write logic to calculate the orientation of an object.
Without further ado, let’s get started!
Step #1: Install Dependencies
We will use the ultralytics package to train a YOLOv8 model. YOLOv8 is part of the ultralytics package. We will also use the roboflow Python package to download our dataset after labeling keypoints on our images.
To install these dependencies, run the following command:
pip install roboflow "ultralytics<=8.3.40"With the required dependencies installed, we are ready to start labeling data.
Step #2: Label Data
To train a keypoint detection model, you need to label keypoints on an image. These keypoints map to specific points on an image. For our model, we will label images of glue sticks with two key points: the cap and the bottom of the stick. To label data, we will use Roboflow for keypoint data labeling.
You can download the glue stick dataset we are using in this guide from Roboflow Universe. Alternatively, you can use your own data.
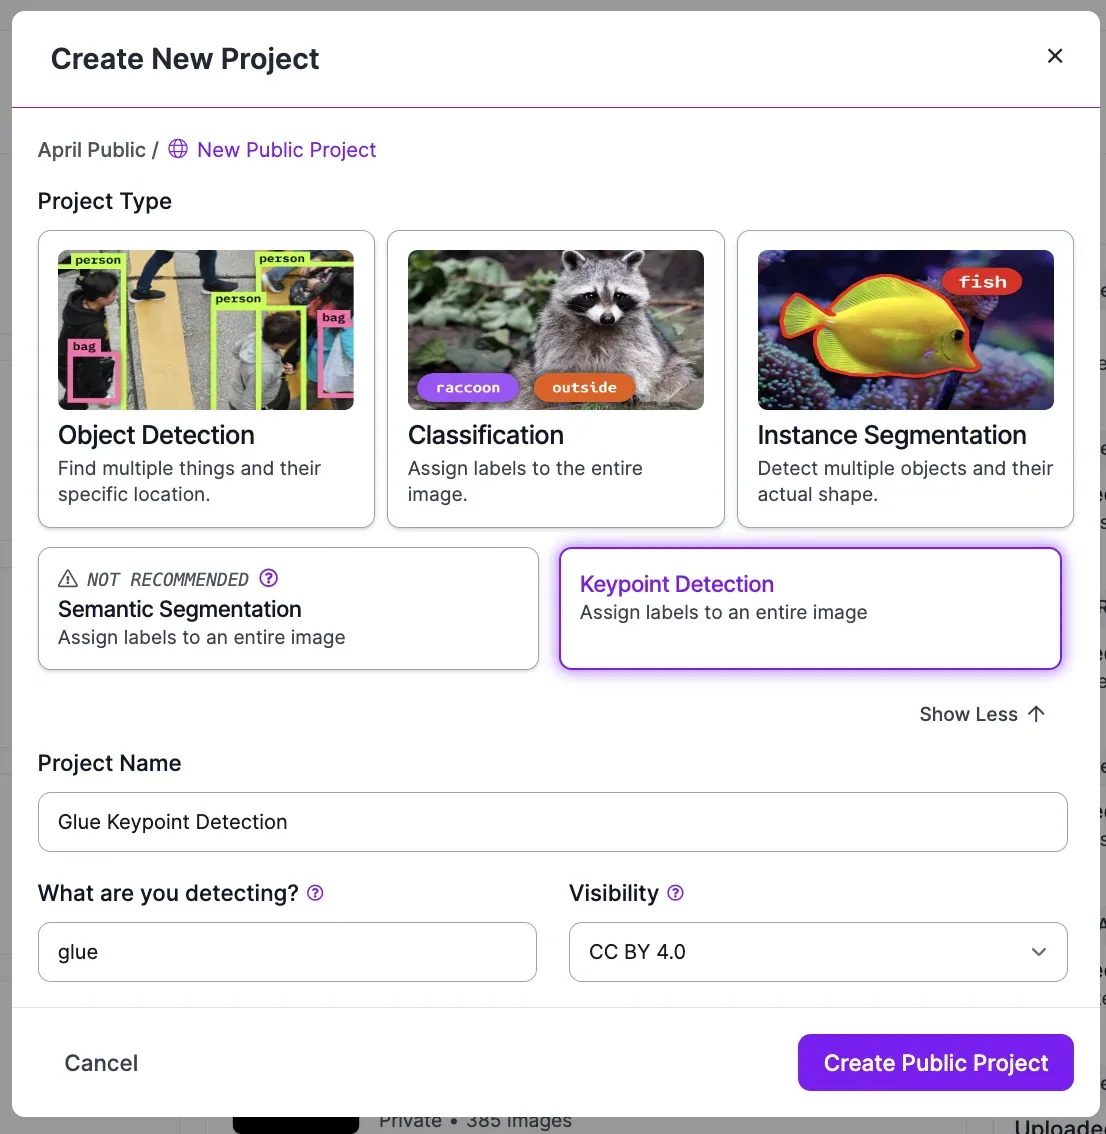
Create a free Roboflow account. After you have created your account, go to the Roboflow dashboard and click “Create New Project”.
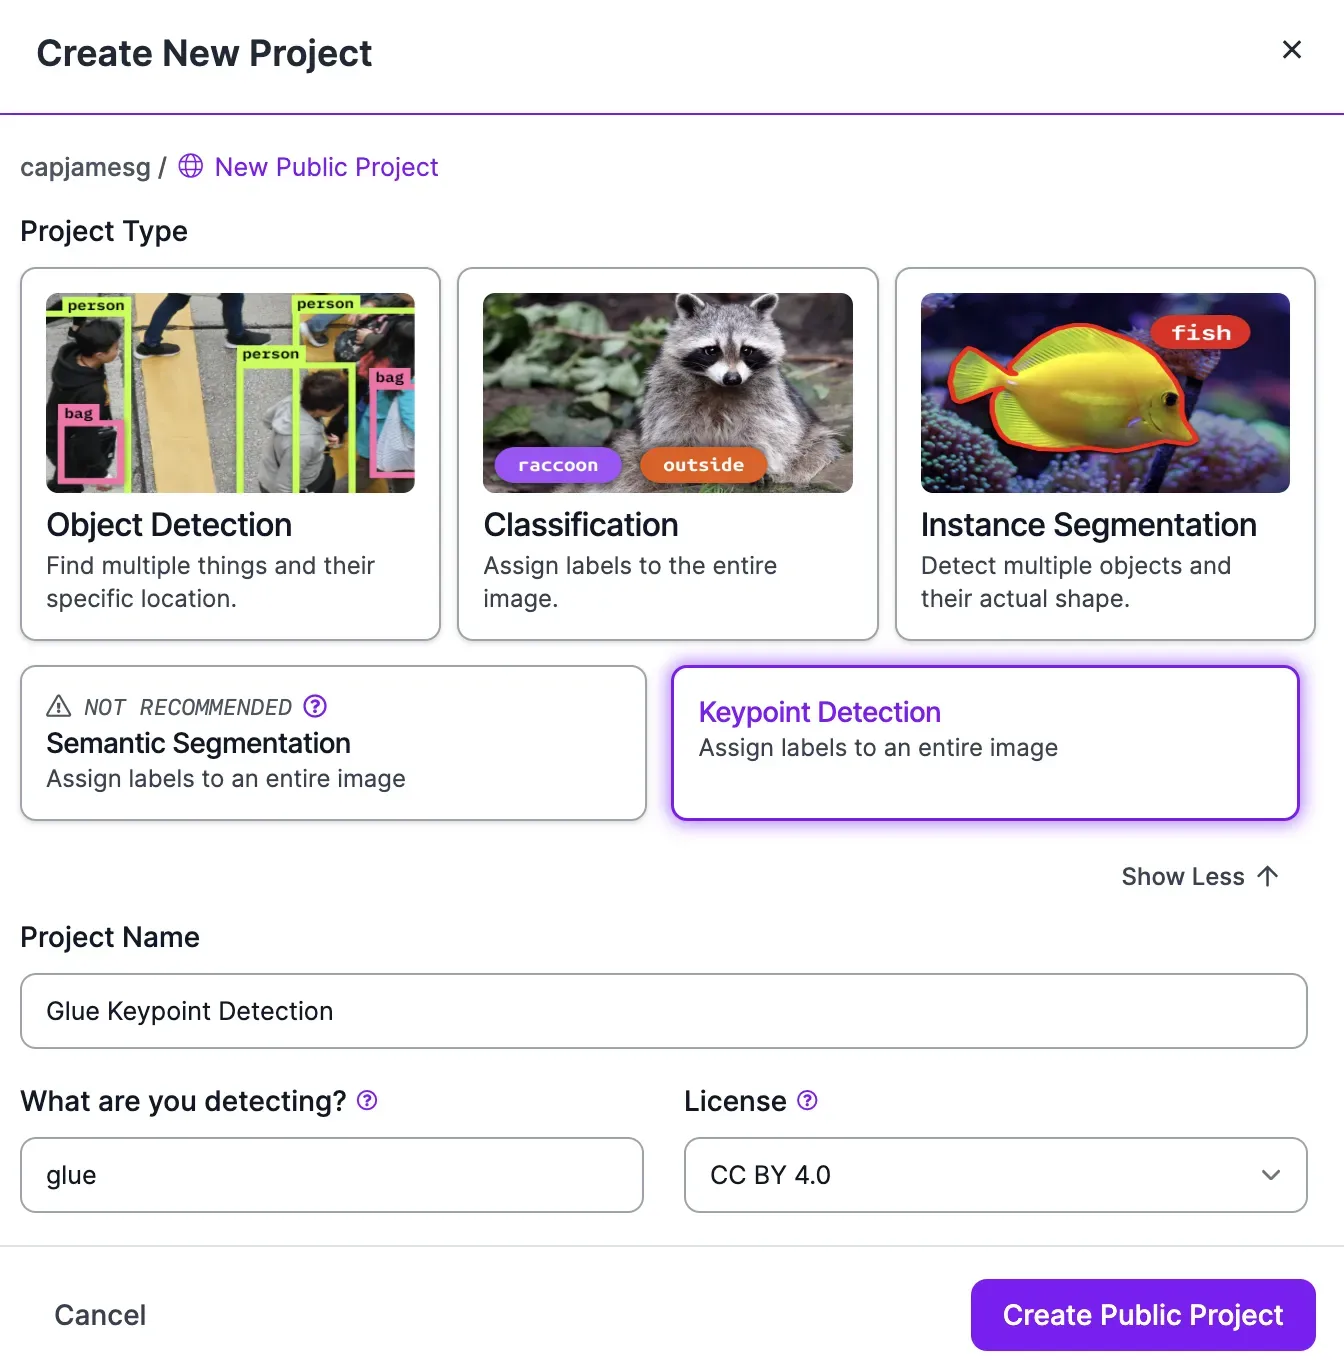
We want to create a keypoint detection model. To do so, click “See more” in the “Project type” section of the pop up and click “Keypoint detection”. Then, you can set a project name and choose a license for your project. You only need to set a license if the data associated with your project is public, which is the case for free plans whose data is available in Roboflow Universe.
Once you have created a project, you can start uploading images. To upload images, drag them into the Roboflow application. If you already have keypoint annotations in the COCO keypoint format, you can upload them with your images.
Once you have selected images to upload, click “Save and Continue” to upload them to Roboflow.
Next, we need to set a skeleton for each class we want to identify. You can do so from the Roboflow class management page. Click “Classes” in the Roboflow sidebar. Then, add all of the classes that you want to use in training your model.

For this guide, we will train our model to identify one class: a glue stick. Once you add a class, a window will appear in which you need to define a skeleton. This skeleton defines what points you need to label for each object. To add a point to a skeleton, click anywhere in the grid on the page. Once you click a point, you can specify a name for the point.
Once you have defined a skeleton, click “Save”. Repeat this process for every class that you want to label. Now that you have a skeleton, you can start annotating images.
Click “Annotate” in the Roboflow sidebar to see all images that you need to annotate. Select an image. You will be taken to the Roboflow Annotate interface with which you can annotate key points on your images.
To annotate an object, click the keypoint annotation tool in the right sidebar. Then, click and drag around an object you want to label. You will be asked to choose a class name. Then, you can drag the key points in the box to match the location of each point in your image.
If a keypoint is occluded, right click the keypoint and click “Mark as occluded”.
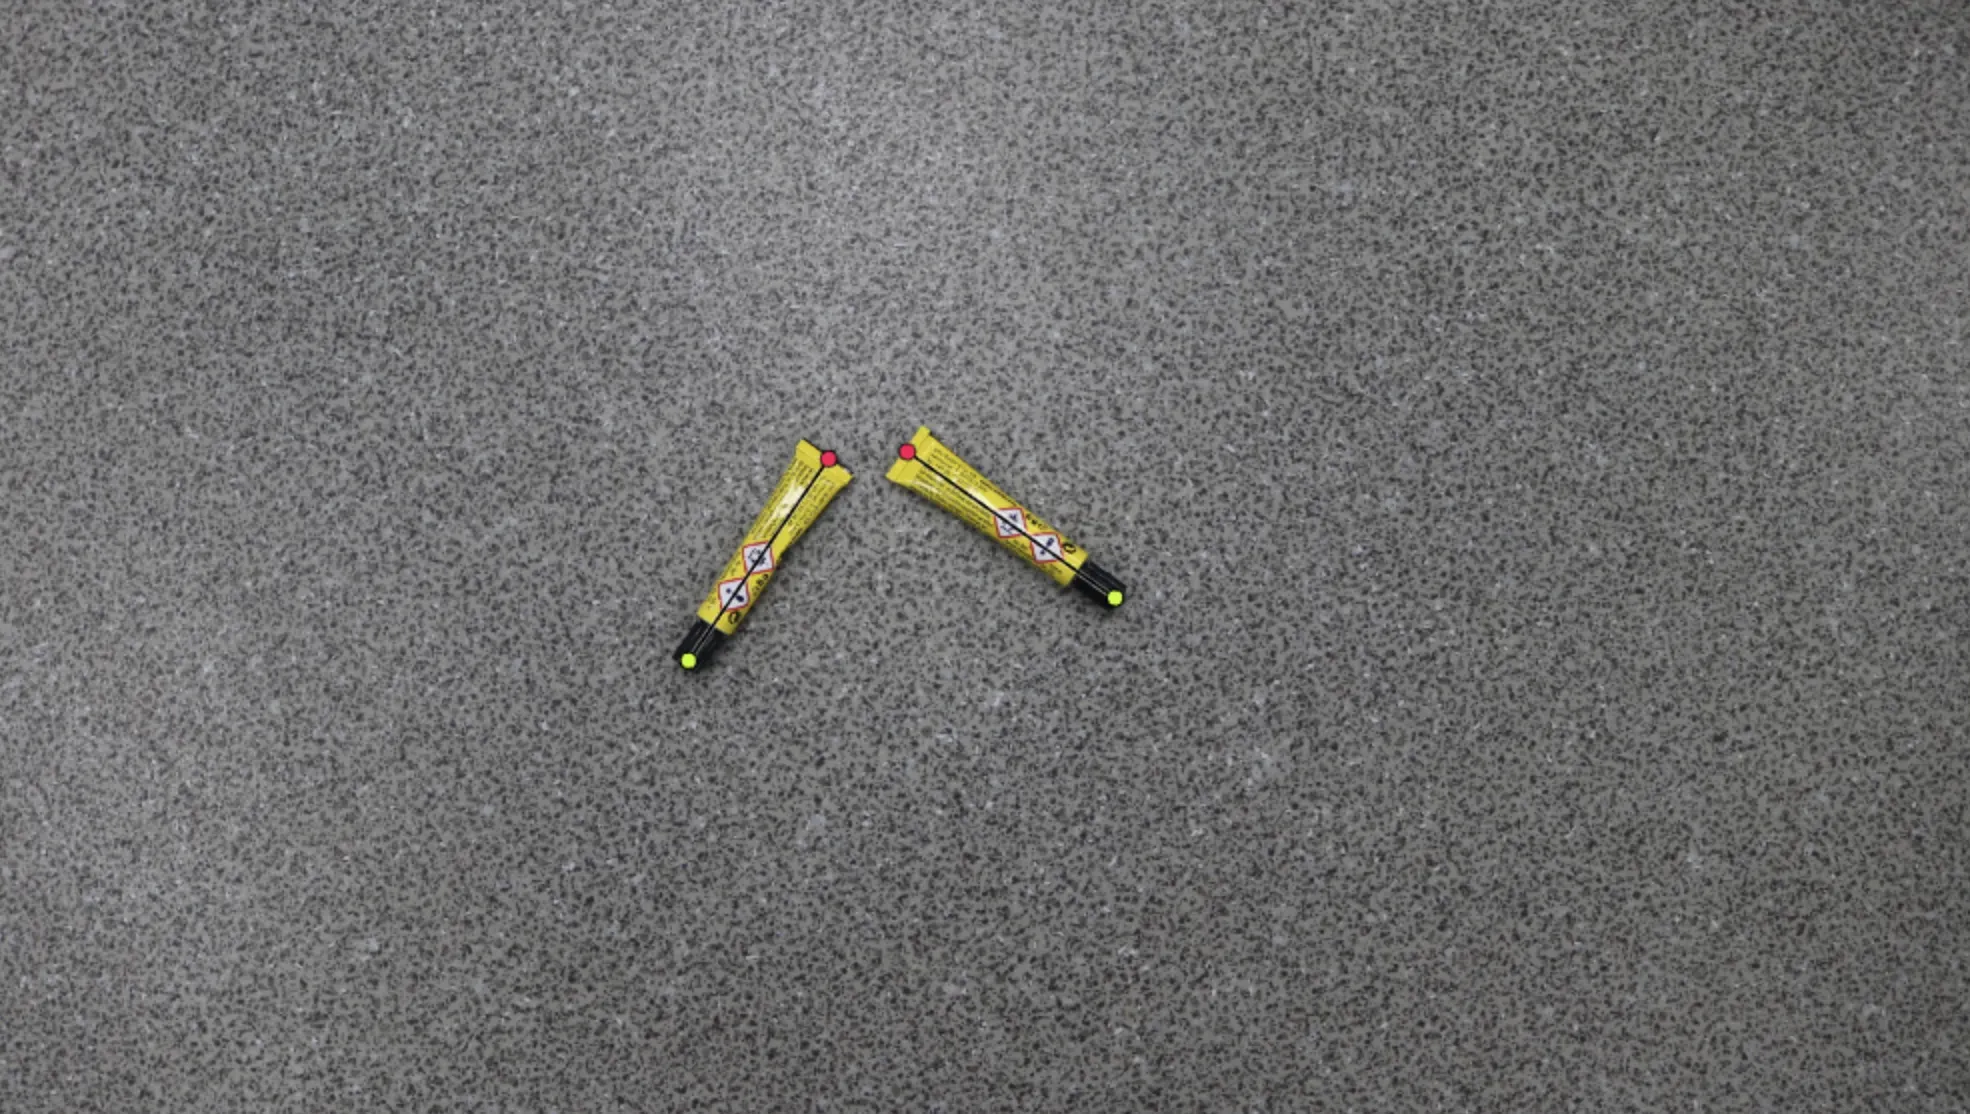
For this guide, we need to annotate two points: the top of the glue stick (where the black cap is), and the bottom of the glue stick (where the perforation is at the bottom of the stick).
Here is an example of a fully annotated image:
Step #3: Generate a Dataset
Once you have annotated the images in Roboflow, you can generate a dataset. At this stage, you can apply preprocessing steps and augmentations to your images. Preprocessing and augmentation can help improve model performance.
Click “Generate” in the left sidebar of the Roboflow dashboard to generate a dataset.
For training your first model version, we recommend leaving the preprocessing steps as the default value in the Roboflow dashboard. We don’t recommend adding augmentations for your first model version. This is because it is helpful to have an understanding of how your model performs on your data to which you can compare the results from experiments with augmentations later.
To learn more about preprocessing and augmentation, refer to our preprocessing and augmentation guide.
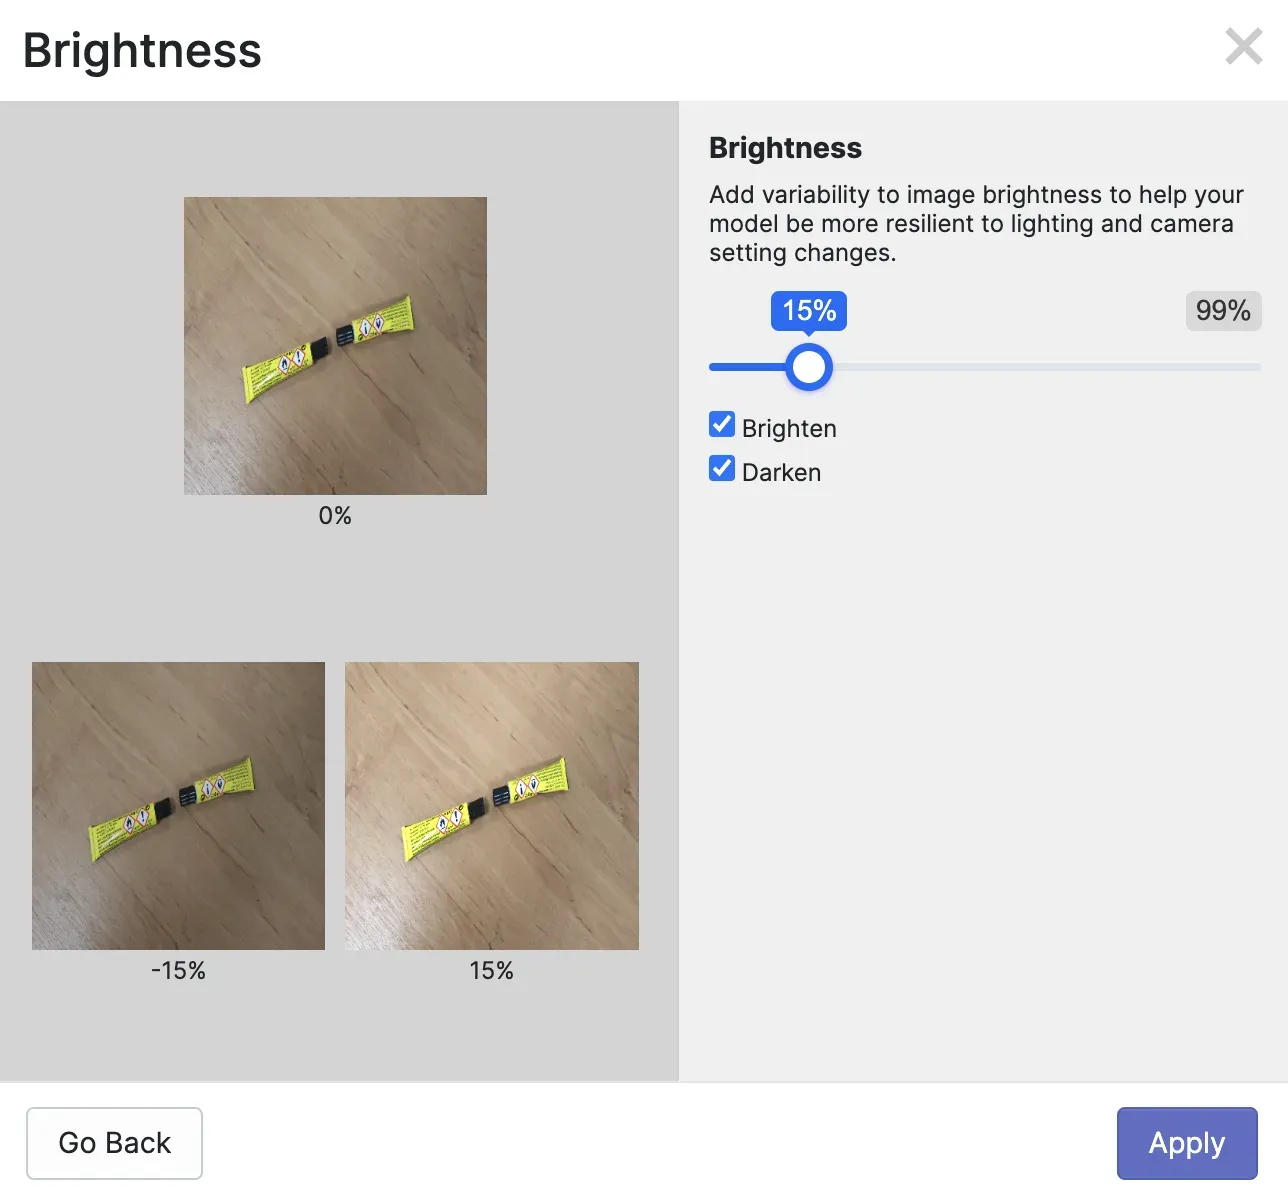
When you add augmentations, a preview will appear so you can see what an augmentation will look like on your dataset. Here is a preview of a brightness augmentation applied to our glue stick dataset:
To generate a dataset, click “Generate” at the bottom of the page. Your dataset will be generated. The amount of time this takes will depend on the number of images in your dataset and the number of augmented images that will be generated.
Once you have generated a dataset, the dataset will be available in Roboflow. You can train your model in Roboflow or you can download your dataset to train a YOLOv8 keypoint detection model on your own device.
Step #4: Train a YOLOv8 Keypoint Detection Model
Now that we have a dataset, we can train our keypoint detection model. First, we need to download our dataset. We can do so using the following code:
!pip install roboflow

from roboflow import Roboflow
rf = Roboflow(api_key="N7MTpQadXU3Tr0pjiHKZ")
project = rf.workspace("capjamesg").project("glue-keypoint-detection")
dataset = project.version(1).download("yolov5")
Above, replace the model ID and version with the model ID and version on your dataset page in the Roboflow dashboard. Learn how to retrieve your model ID and version.
We can now train our model. We will train our model from the COCO keypoint checkpoint. This is recommended for most training jobs. To train your model, add the following code:
from ultralytics import YOLO
model = YOLO('yolov8n-pose.pt')

results = model.train(data=./'path/to/coco8-pose.yaml', epochs=100, imgsz=640)
Replace “./'path/to/coco8-pose.yaml’ with the location of the YAML file in the dataset you downloaded from Roboflow.
When you run this code, your model will be trained for 100 epochs. The amount of time the training process takes will depend on how many images are in your dataset and the hardware on the machine you are using to train your model.
Once you have trained your model, you can load your model and run inference on an image:
from ultralytics import YOLO

model = YOLO('path/to/best.pt')

results = model(“image.png”)

print(results)
Let’s run our model on the following image that contains a glue stick. The "results" variable contains the following:
image 1/1 /content/datasets/Glue-Keypoint-Detection-1/test/images/IMG_4854_JPG.rf.db4d27601abf39708fcc2844695084d2.jpg: 640x640 1 glue, 50.3ms
Speed: 7.0ms preprocess, 50.3ms inference, 3.4ms postprocess per image at shape (1, 3, 640, 640)
ultralytics.engine.results.Keypoints object with attributes:

conf: tensor([[0.9489, 0.9854]], device='cuda:0')
data: tensor([[[230.2223, 167.3215,   0.9489],
         [126.4275, 192.6703,   0.9854]]], device='cuda:0')
has_visible: True
orig_shape: (640, 640)
shape: torch.Size([1, 2, 3])
xy: tensor([[[230.2223, 167.3215],
         [126.4275, 192.6703]]], device='cuda:0')
xyn: tensor([[[0.3597, 0.2614],
         [0.1975, 0.3010]]], device='cuda:0')
We can plot our keypoints on an image using the following code (in Google Colab):
from PIL import Image

r = results[0]
im_array = r.plot()  # plot a BGR numpy array of predictions
im = Image.fromarray(im_array[..., ::-1])  # RGB PIL image
display(im)
Here is the output from our model:
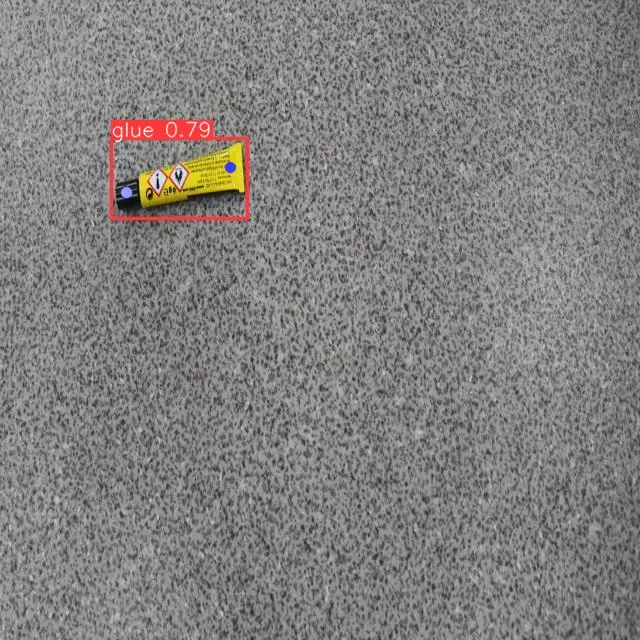
Our model successfully identified the location of the glue stick.
Step #5: Evaluate Object Orientation
In this scenario, we are using keypoint detection to determine whether an object is oriented correctly. “Correct” means that the tip is pointing upward. We can calculate this using the two key points our model was trained to identify: the cap of the glue stick and the bottom of the stick.
If the cap is at a 0 degree angle to the bottom of the stick, we know that the object is oriented properly. We will have a 10 degree tolerance to ensure our logic does not fail if a glue stick is slightly askew. If the cap is at any other angle to the bottom (i.e 75 degrees, 180 degrees), we know the object is not positioned correctly.
To implement this logic, we can use the following code:
import math

def check_angle_within_tolerance(xy, tolerance_degrees=5):
    p1, p2 = xy[0]

    dx = p2[0] - p1[0]
    dy = p2[1] - p1[1]

    angle_degrees = math.degrees(math.atan2(abs(dy), abs(dx))) if dx != 0 else 90

    return abs(angle_degrees - 0) <= tolerance_degrees

is_within_tolerance = check_angle_within_tolerance(results[0].keypoints.xy)
is_within_tolerance
This code calculates the angle between the “top” and “bottom” key points. If the angle is between 355 and 10 degrees, we assume our glue stick is positioned correctly.
Let’s run our code on the image from earlier. Our code returns:
FalseOur code successfully determines that the glue stick is not positioned correctly since it is askew rather than upright within our tolerance.
Conclusion
You can use YOLOv8 to train a custom keypoint detection model to detect key points on an image.
In this guide, we annotated a dataset of glue stick images. We then trained a custom keypoint detection model to identify the top and bottom of each glue stick. Finally, we wrote custom logic to evaluate the degree to which the points related.
The logic you write will depend on your application. For example, for human pose detection you may need to calculate multiple angles between different points for use in evaluating if a pose matches a specified pose (i.e. a yoga pose).
Cite this Post
Use the following entry to cite this post in your research:
James Gallagher. (Jan 10, 2024). How to Train a Custom YOLOv8 Pose Estimation Model. Roboflow Blog: https://blog.roboflow.com/train-a-custom-yolov8-pose-estimation-model/